Getting Started
Restaurant App - Admin Panel
- Uploaded Date: 16-February-2025
- Project: Restaurant App
- Author: Acnoo
Thank you for purchasing our product. If you have any questions that are beyond the scope of this documentation file, please feel free to email us via our user page contact form or directly to email.
Requirements
- PHP >= 8.2
- Ctype PHP Extension
- cURL PHP Extension
- DOM PHP Extension
- Fileinfo PHP Extension
- Filter PHP Extension
- Hash PHP Extension
- Mbstring PHP Extension
- OpenSSL PHP Extension
- PCRE PHP Extension
- PDO PHP Extension
- Session PHP Extension
- Tokenizer PHP Extension
- XML PHP Extension
For more information about deployment see the Laravel documentation here https://laravel.com/docs/10.x/deployment
Download Project from Envato
After successfully purchase Restaurant App, download the project from Envato download page
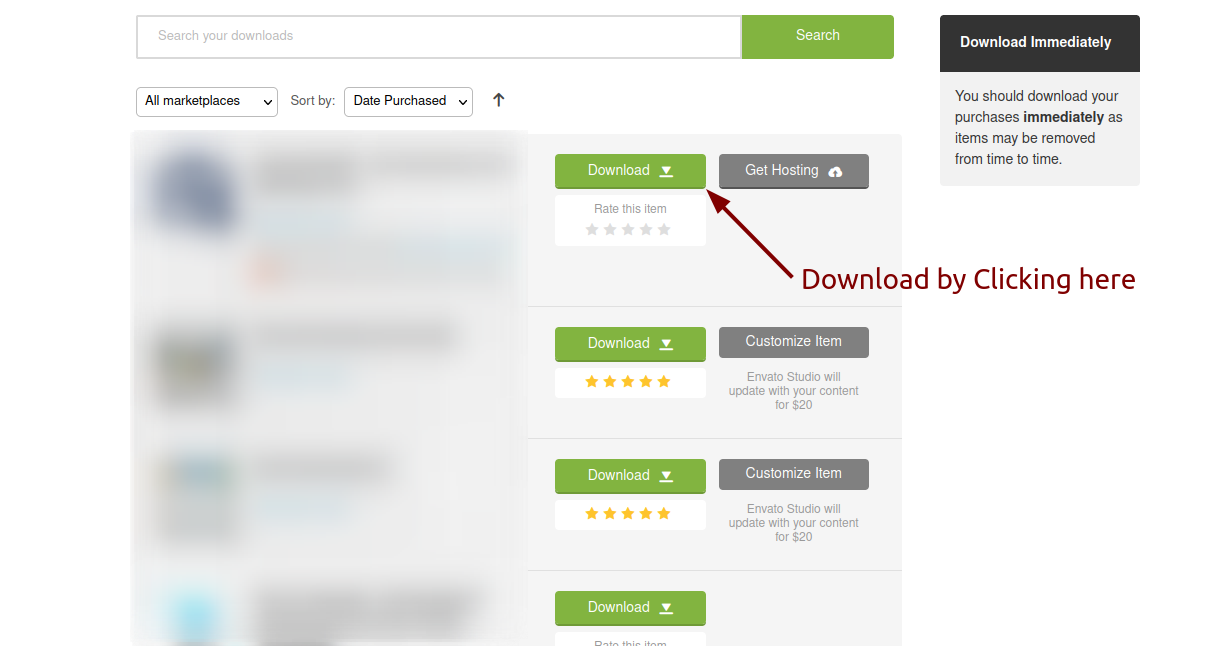
Extract the downloaded file. You will have another zip file named Super-Admin.zip containing the main project's files and a documentation folder. You are reading this documentation, that means you already have theme both.
Creating Database
Before installing, you will need to create a new database. If you already know how to do this or have already created one, skip to the next step.
Note: Please use empty database. In most cases you should be able to create a database from your cpanel.
Login to your cPanel by entering this in your browser url
yourdomian.com/cpanel
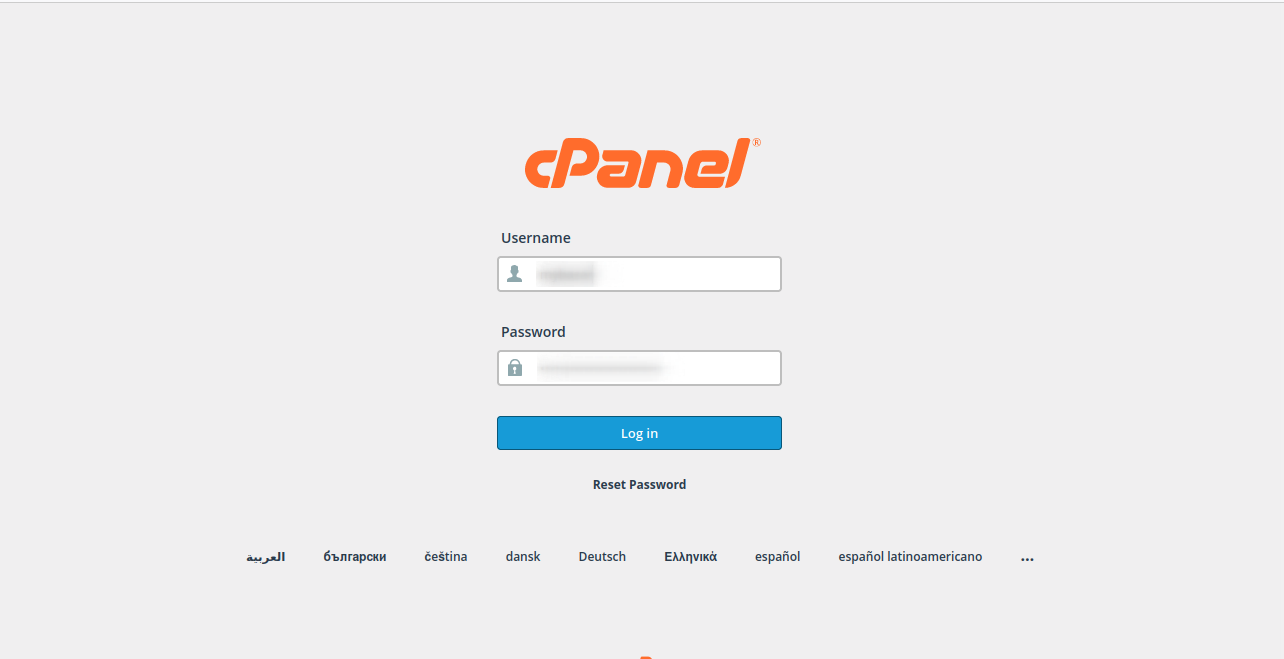
Step: 1
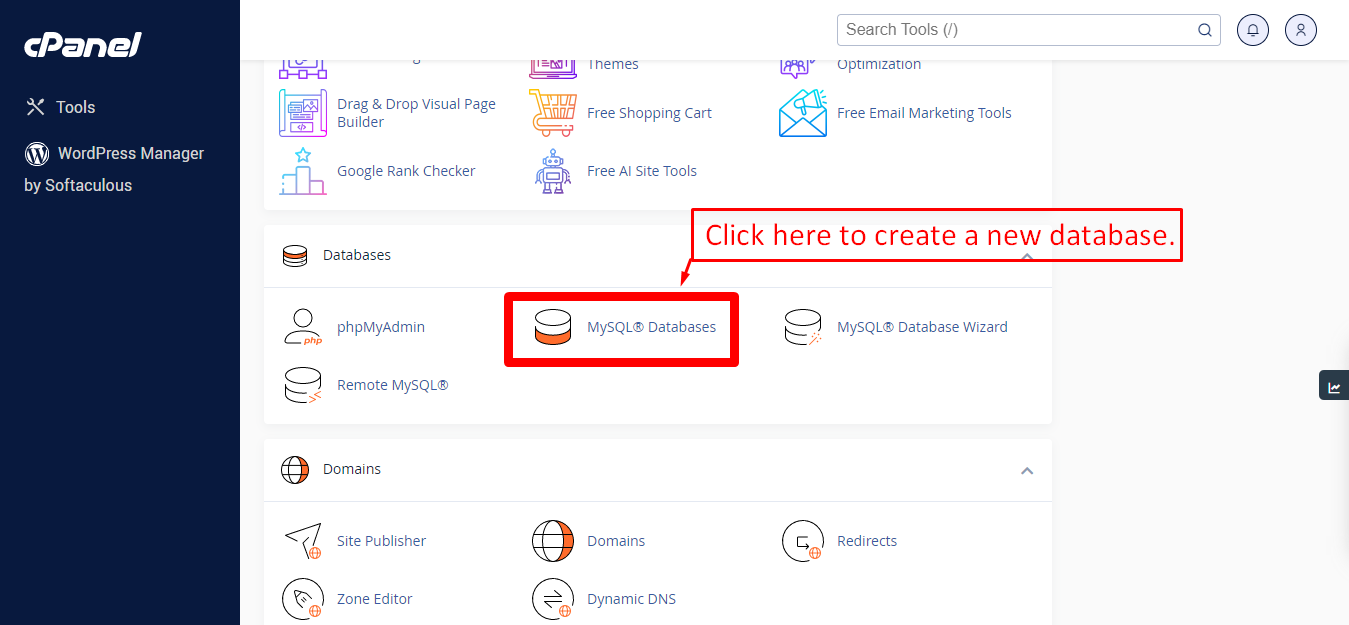
Step: 2
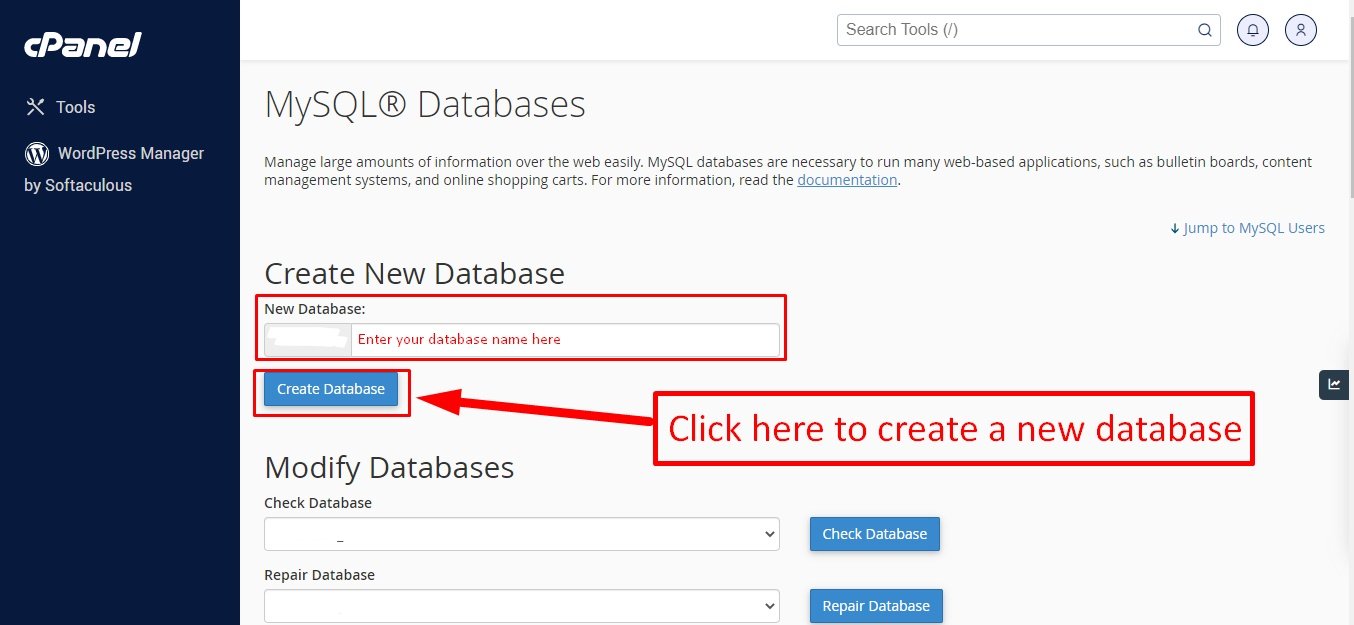
Step: 3
Now you need to create a new user. On the same page go to create a new database user
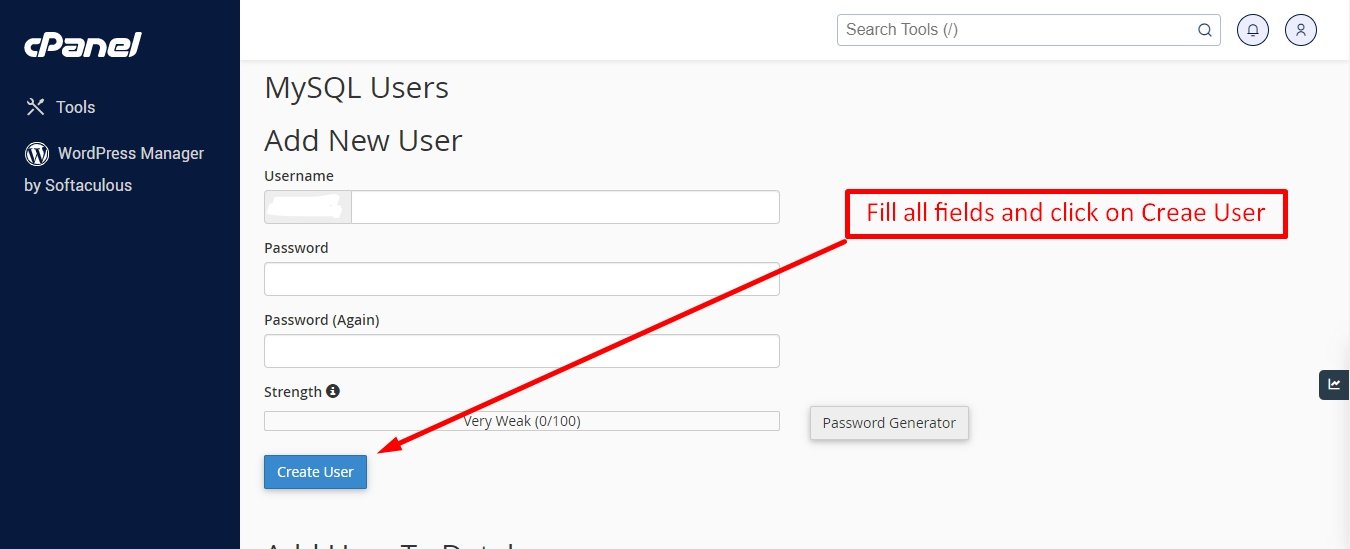
Step: 4
Now add the user to the database
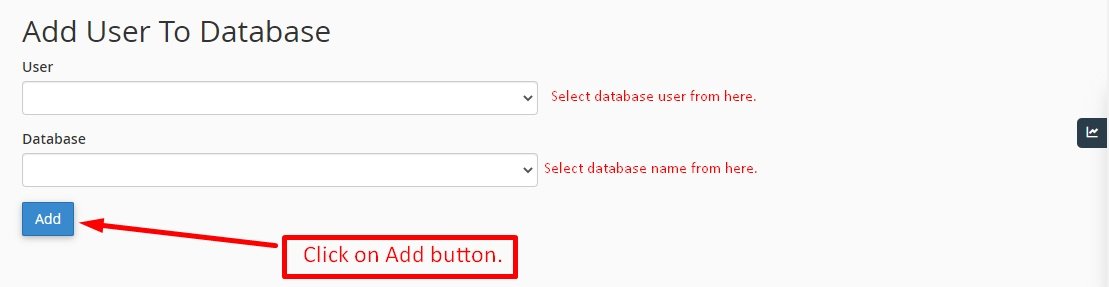
Step: 5
And select full permissions on the database to that user
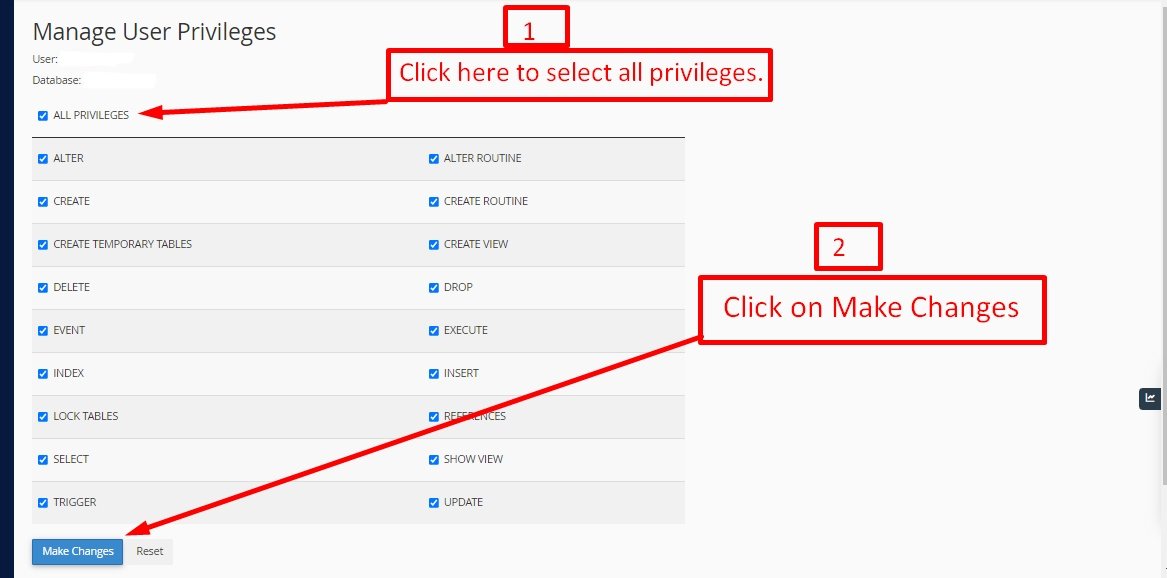
Uploading Files
On some operating systems, the dotfiles are hidden by default. Before starting to upload the files, please make sure your file explorer has the option to view hidden files turned on.
After creating a database, Upload the Super-Admin.zip file on the web root folder of your domain. This folder is generally called public_html, html, or example.com, but depending on your server's configuration, it might be named differently.
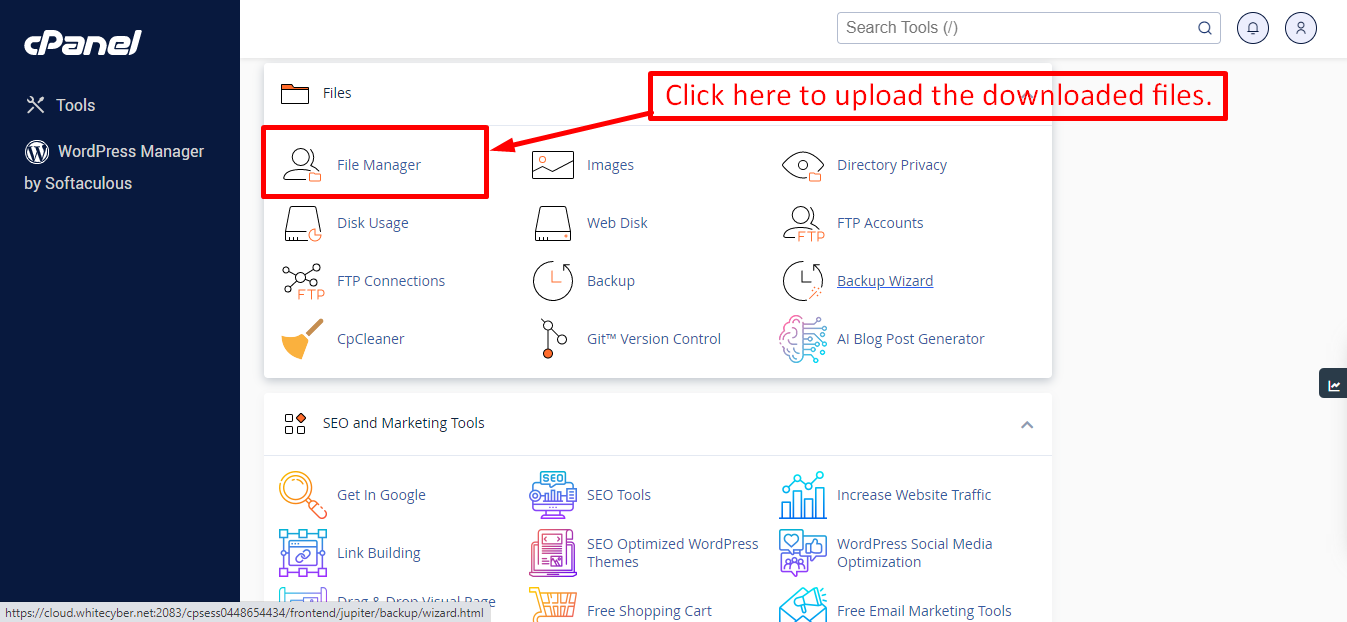
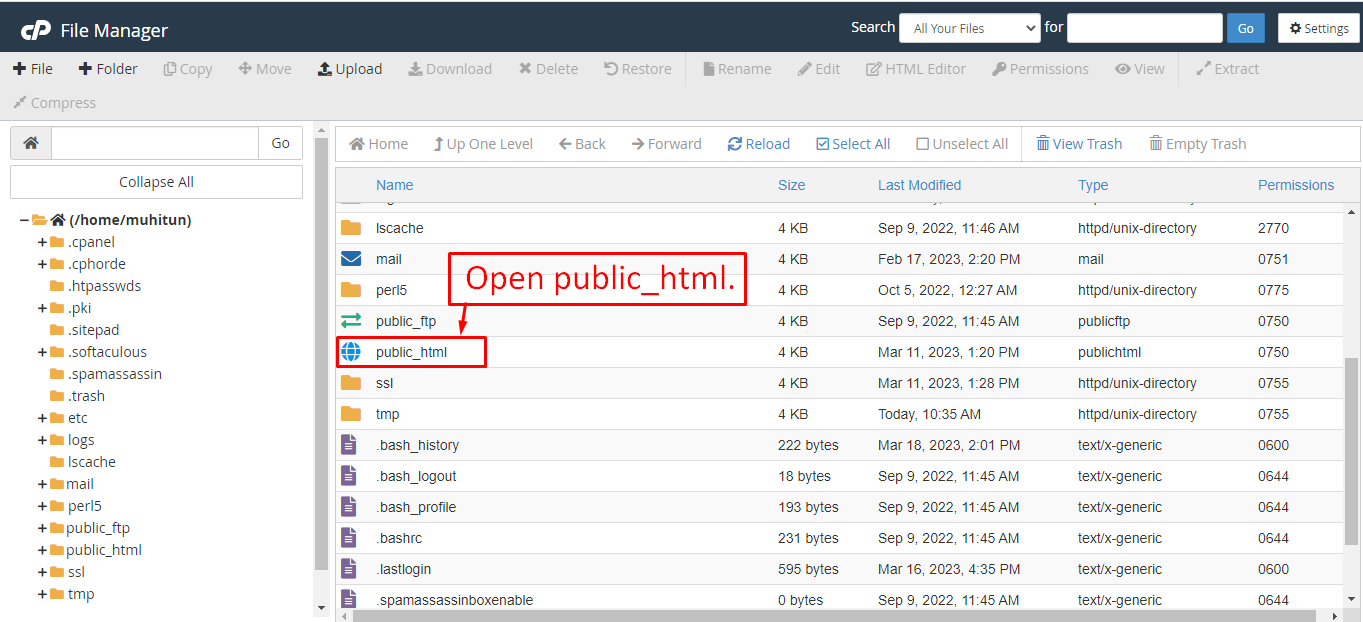
After that in the public_html directory upload the downloaded file.
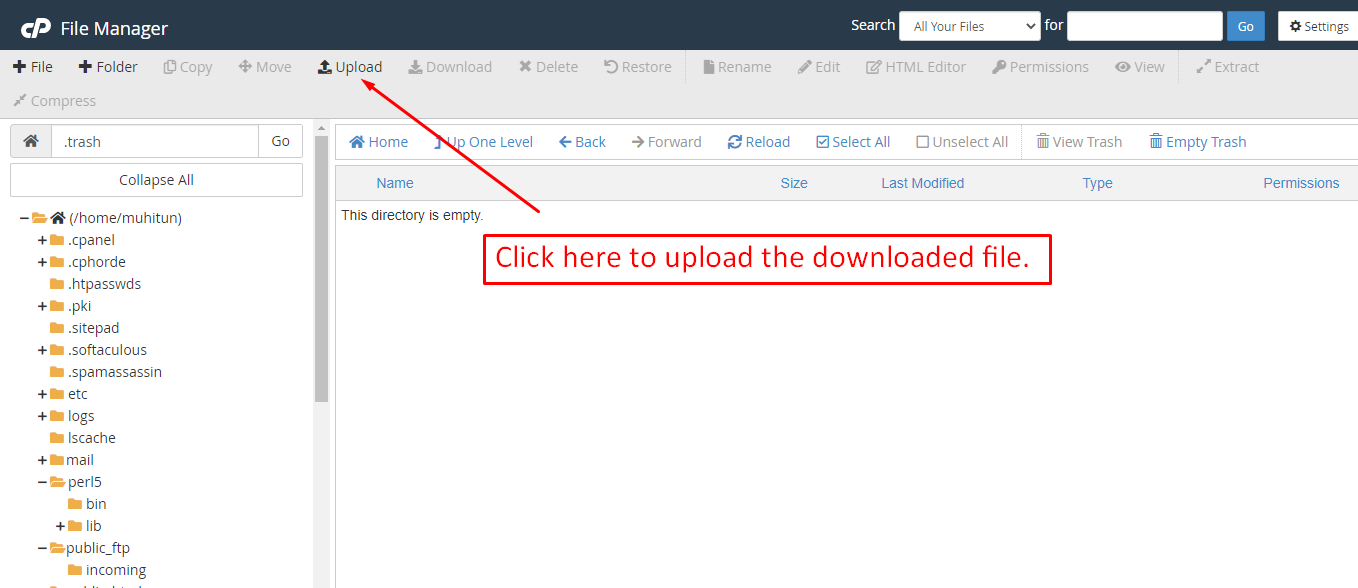
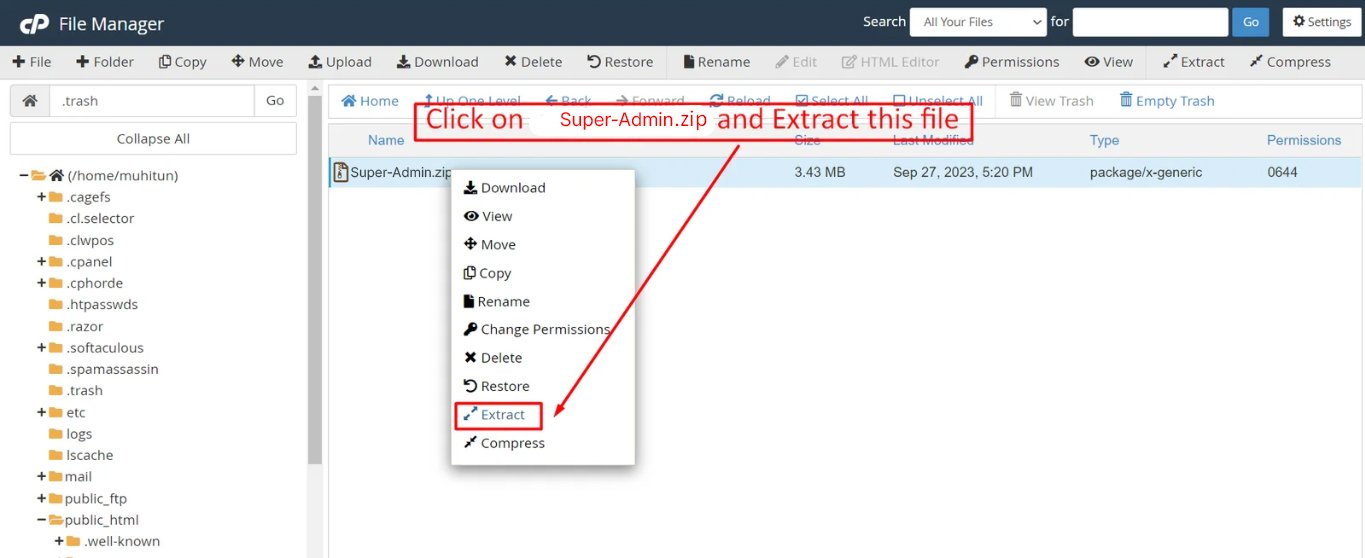
Note: Important Make sure that you have .env file in your folder.
Note: Make sure that .htaccess file got copied properly from the download to your server.
Installation Wizard
Go to your website address, then you'll see an installation wizard. To open the installer. Visit
yourdomain.com/install
Now the installer will show up.The First screen will be Welcome Screen
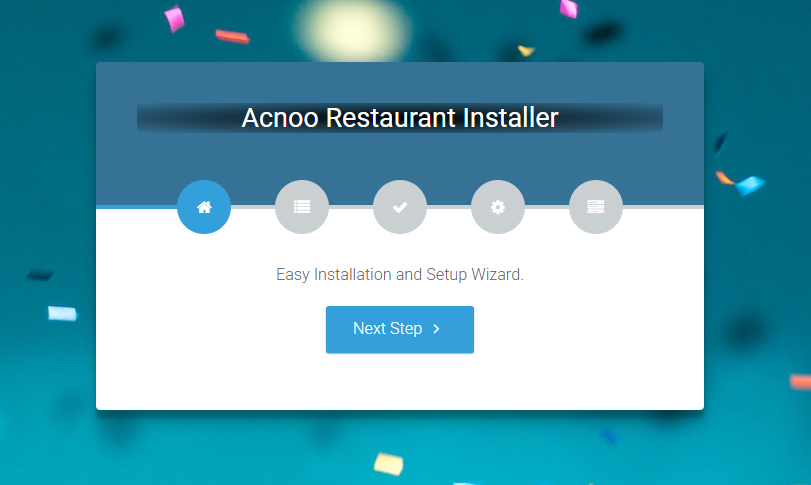
Note : If you are not able to access the website by accessing yourdomain.com/install, but you are able to access it via yourdomain.com/index.php/install, this means that you probably don't have Apache mod_rewrite installed and enabled.
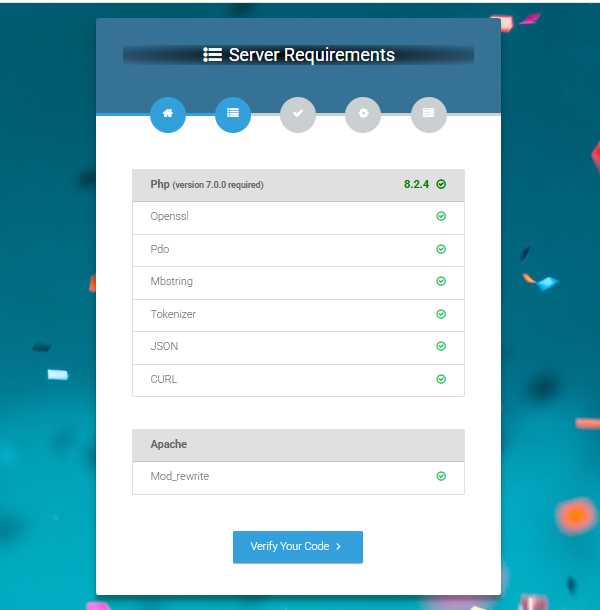
Server Requirements
After clicking on "Check requirement" button, you will be redirected to System Requirements step during the installation wizard, System Requirements.
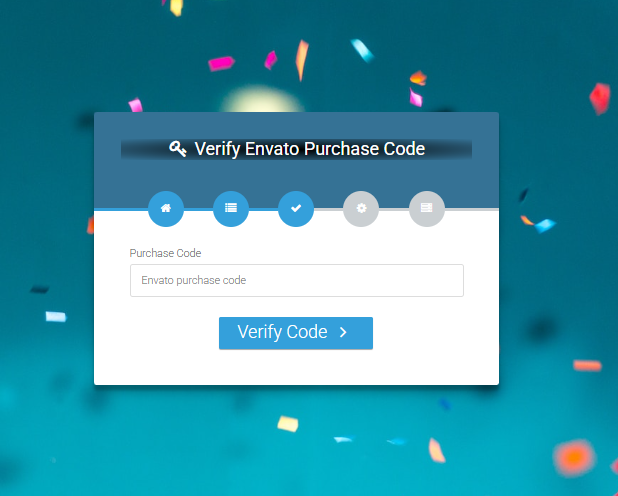
Verify Code
Here enter your Envato Purchase Code to proceed.
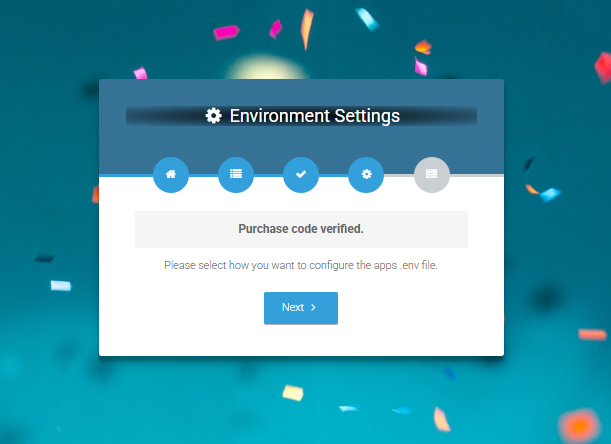
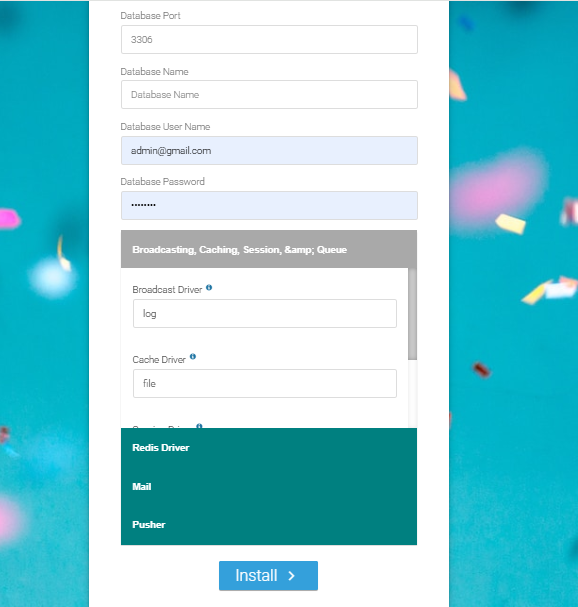
Database/Environment Setting
If your code is verified, simply click 'Next' to proceed to the next step.
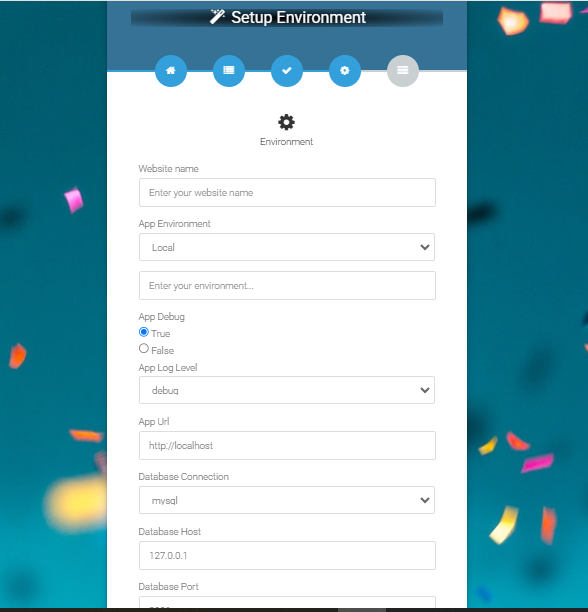
Please enter your database credentials and click 'Install' to continue.
Exit
The last step is exit step.
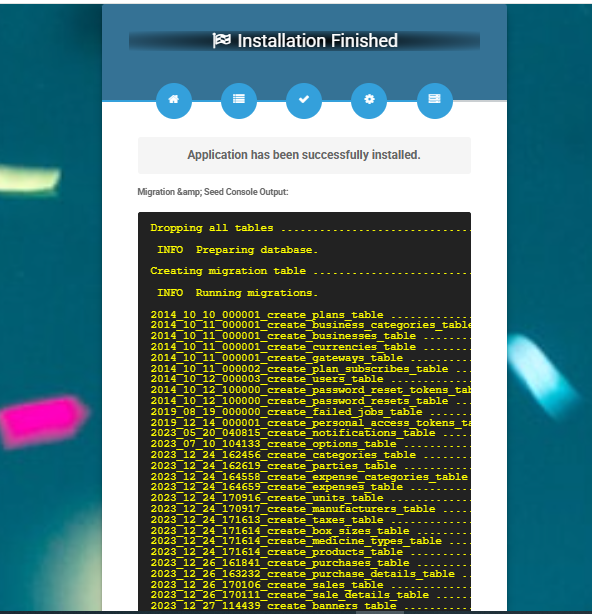
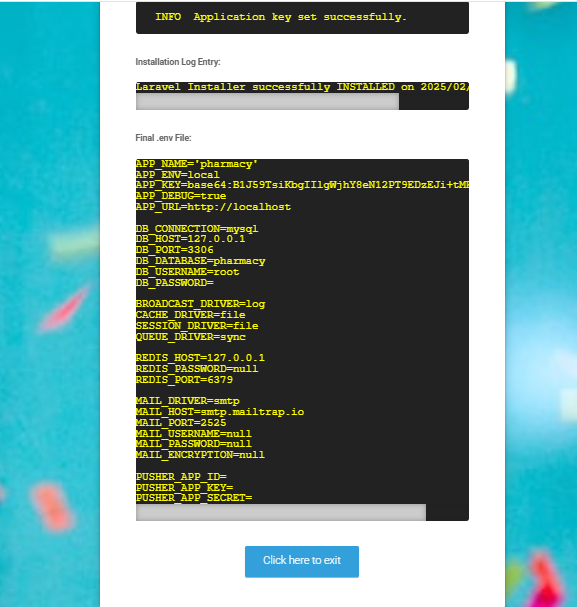
Congratulations you have successfully installed this project on your server. 😀
Default Password
You can login using several methods depending on your role.
Super Admin
superadmin@acnoo.com
superadmin
Restaurant
restaurant@acnoo.com
123456
Kitchen
kitchen@acnoo.com
123456
Chef
chef@acnoo.com
123456
Waiter
waiter@acnoo.com
123456
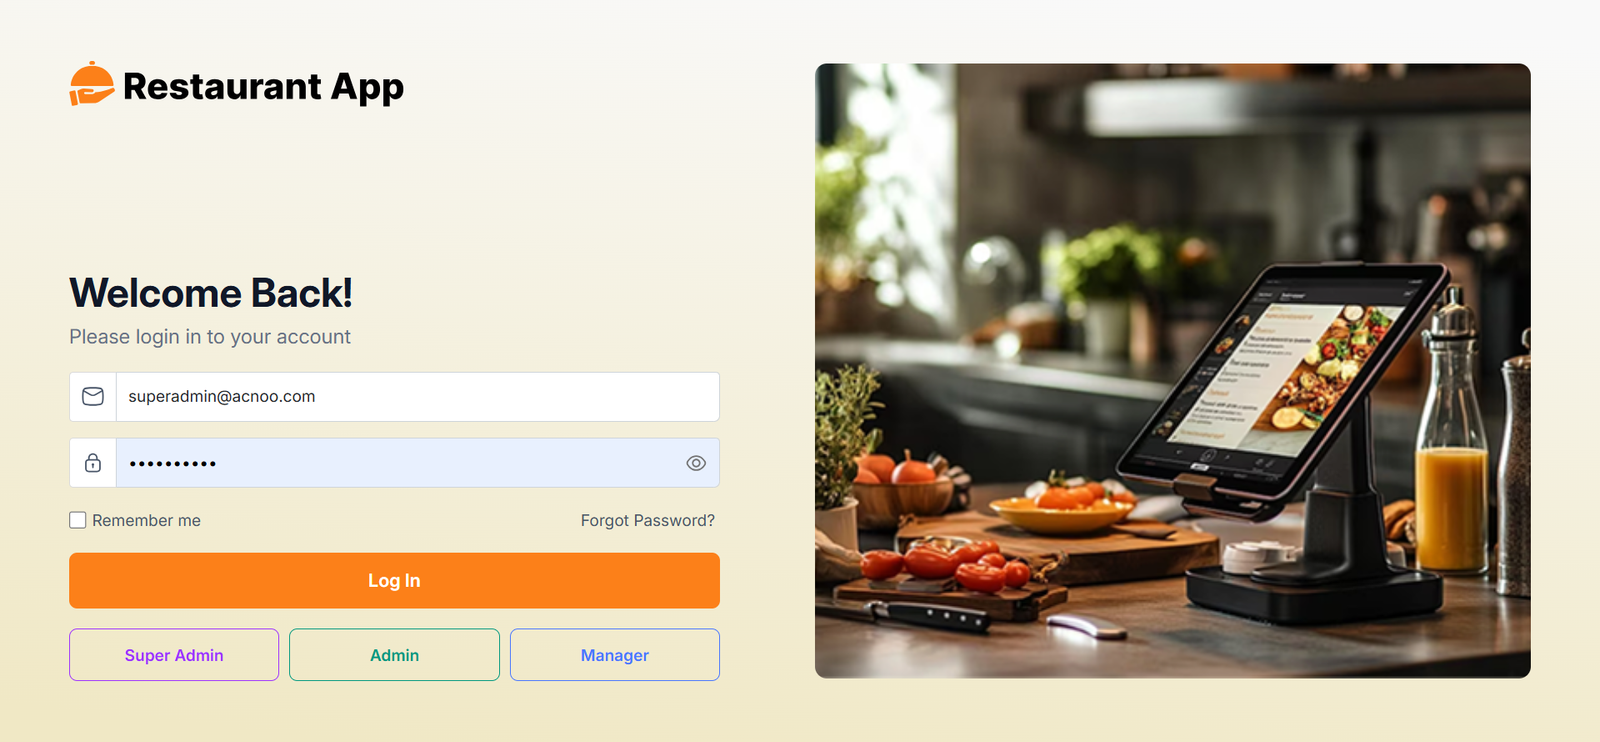
In this project, different modules are assigned based on user roles: Super Admin, Admin, Manager. Each role has distinct responsibilities tailored to their specific tasks and permissions. Below, we will discuss how each user role operates within the system.
Dashboard
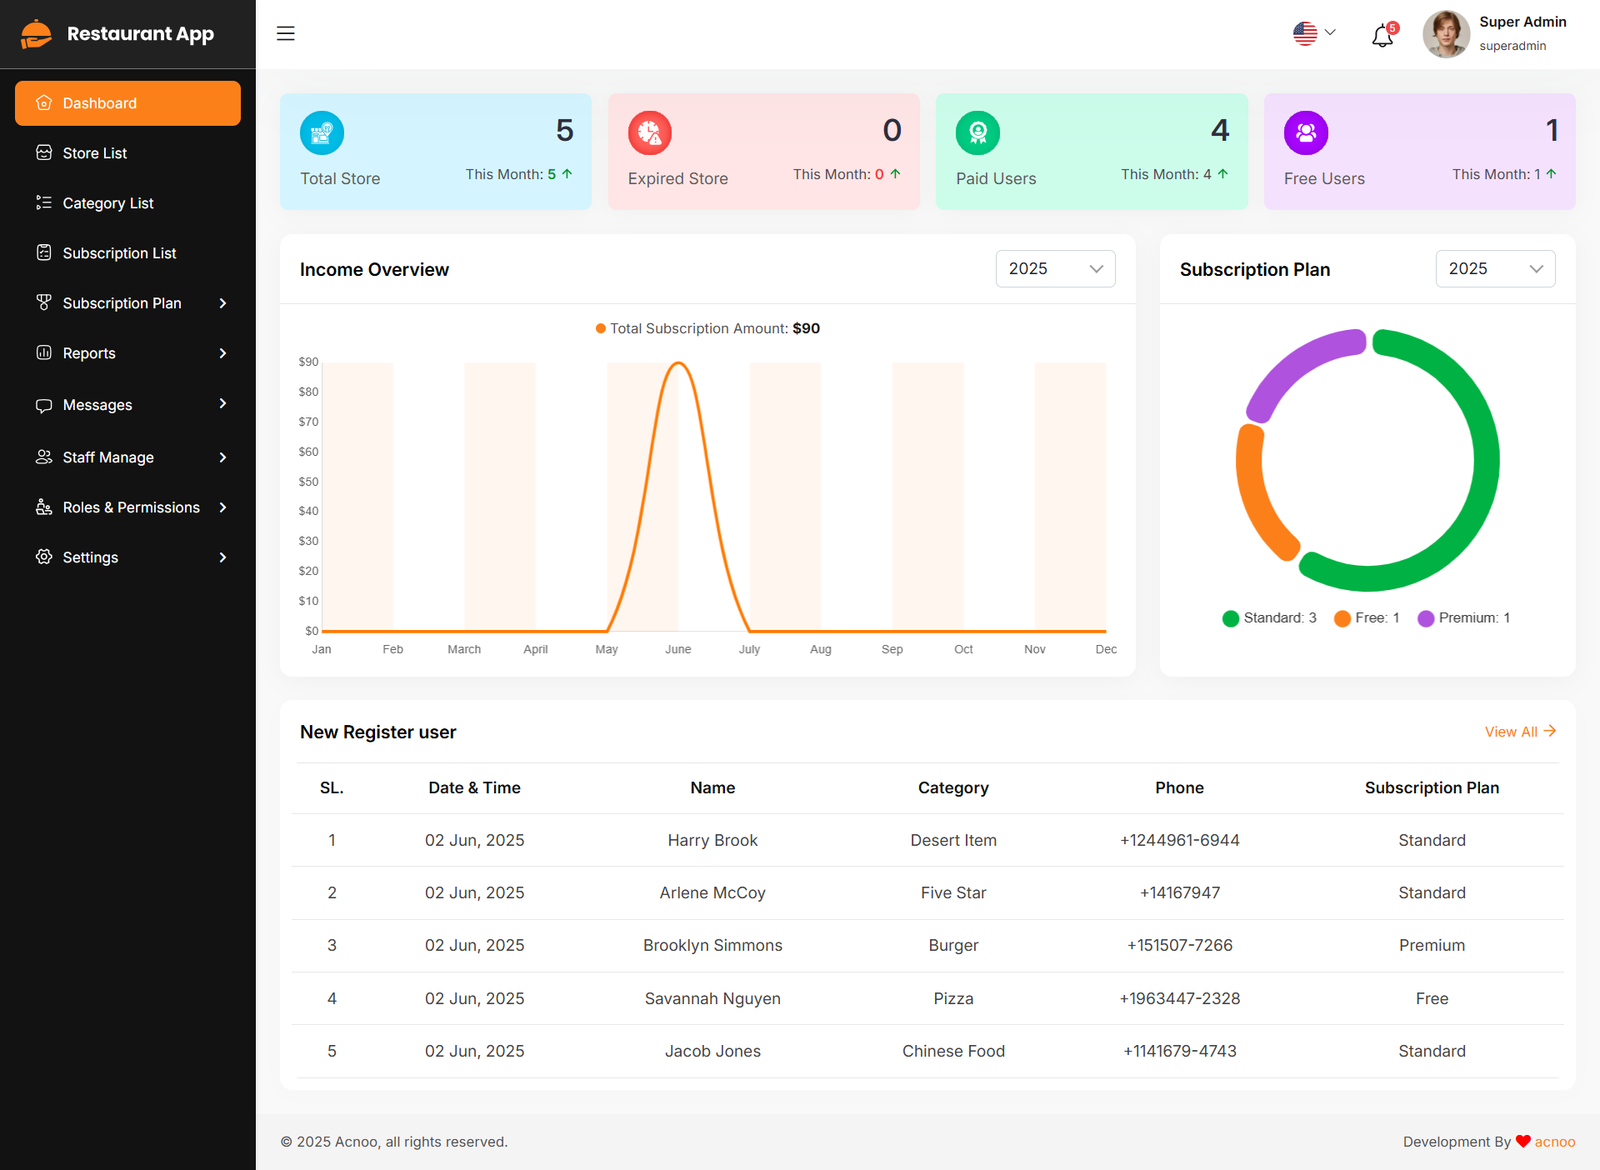
The Acoo Restaurant Admin Dashboard provides an intuitive interface for administrators to manage various aspects of the platform. It includes metrics on total Store, expired store, Paid Users, Free Users, subscription plan, income overview, and new register user.
Store List
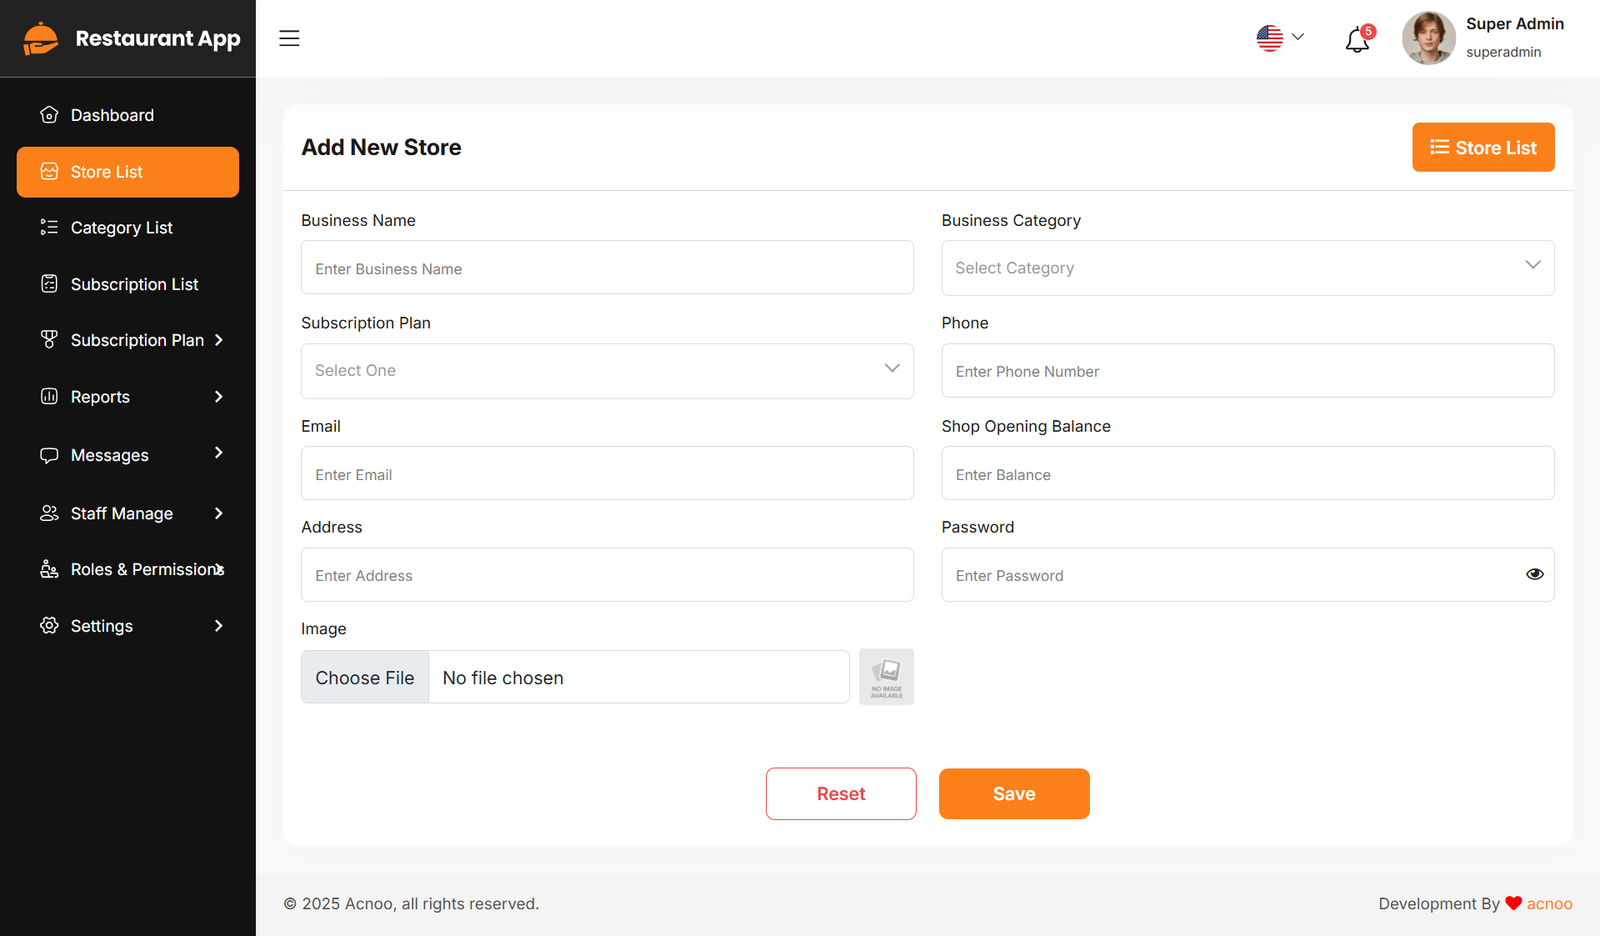
This appears to be a screenshot of a business list page. Business list functionalities typically allow users to collect and organize information about businesses. By clicking the "View" button, you can see the details of each business. You can also create a new business by clicking the "Add Store" button. Below, we'll describe how you can create a new store.
Upgrade Plan
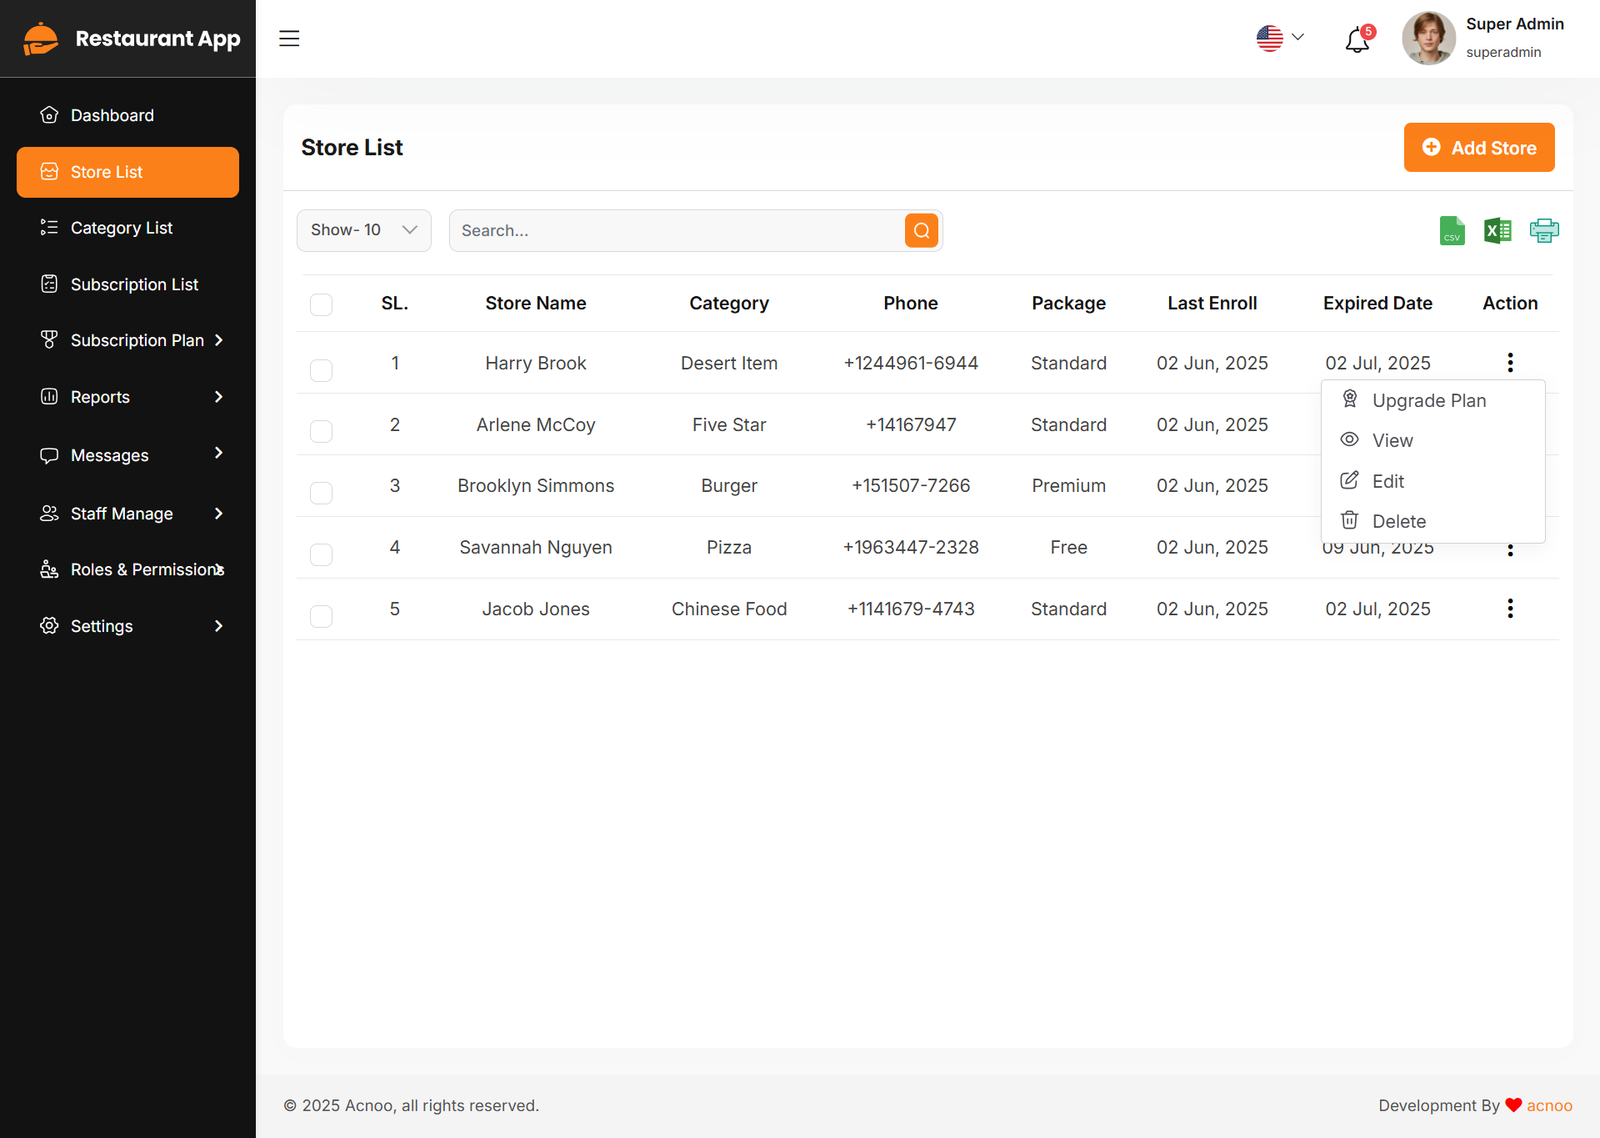
If you need to upgrade the plan for any business, click on the "Upgrade Plan" button. You will likely see a popup for this. Here, you can update the plan, gateway, price, and notes. When you select a plan, the price input field will automatically fill in according to the selected plan, but you can also change the price manually. If desired, you can add a note by filling in the notes input field.
Add New Store
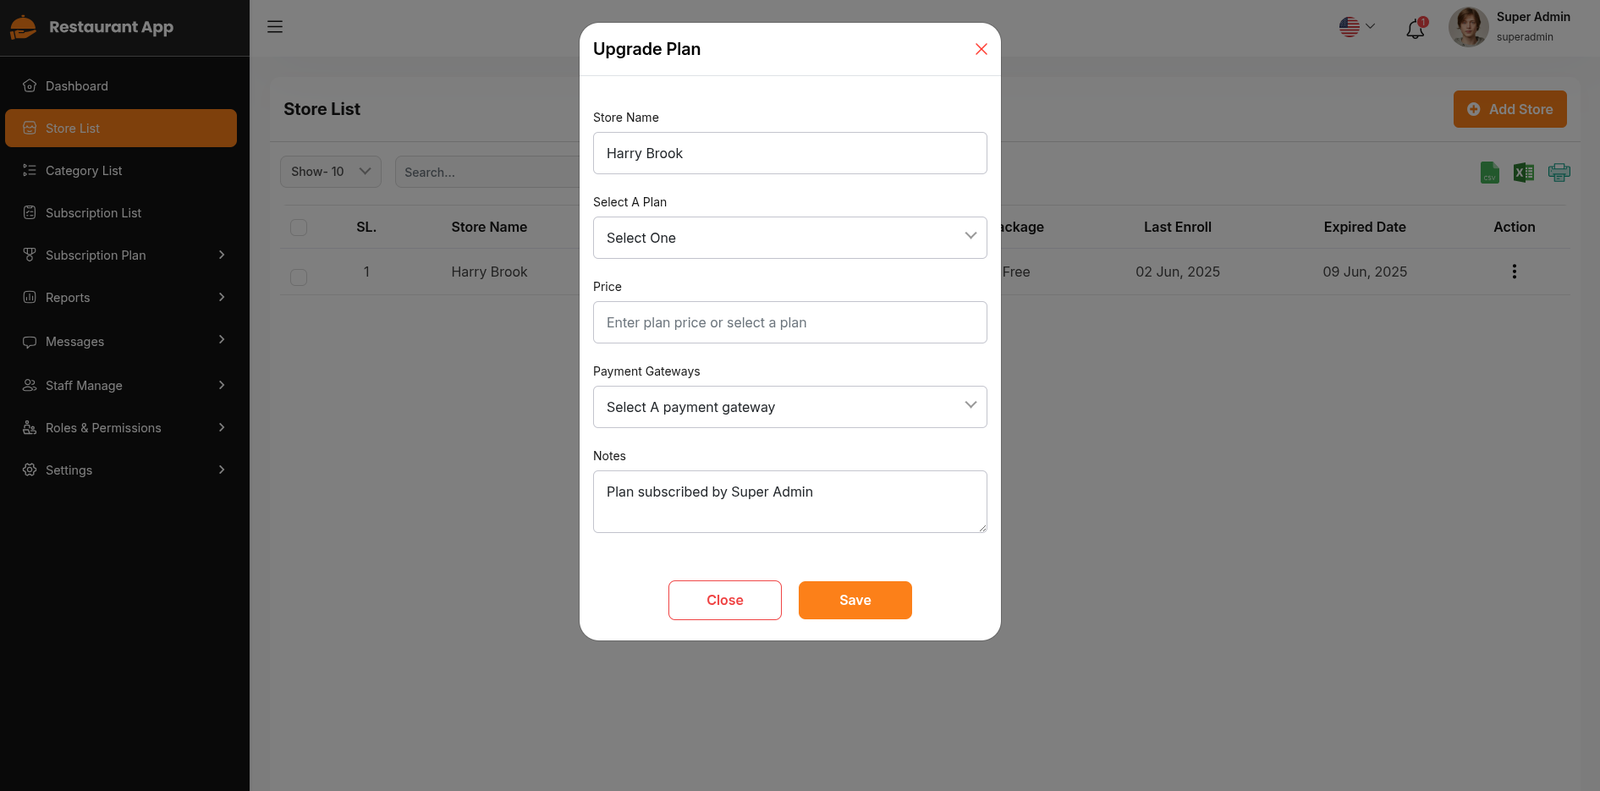
By clicking on the "Add Store" button, you can create a new business. You will need to fill in the necessary fields. Here is the screenshot of the create business page.
Business Category List
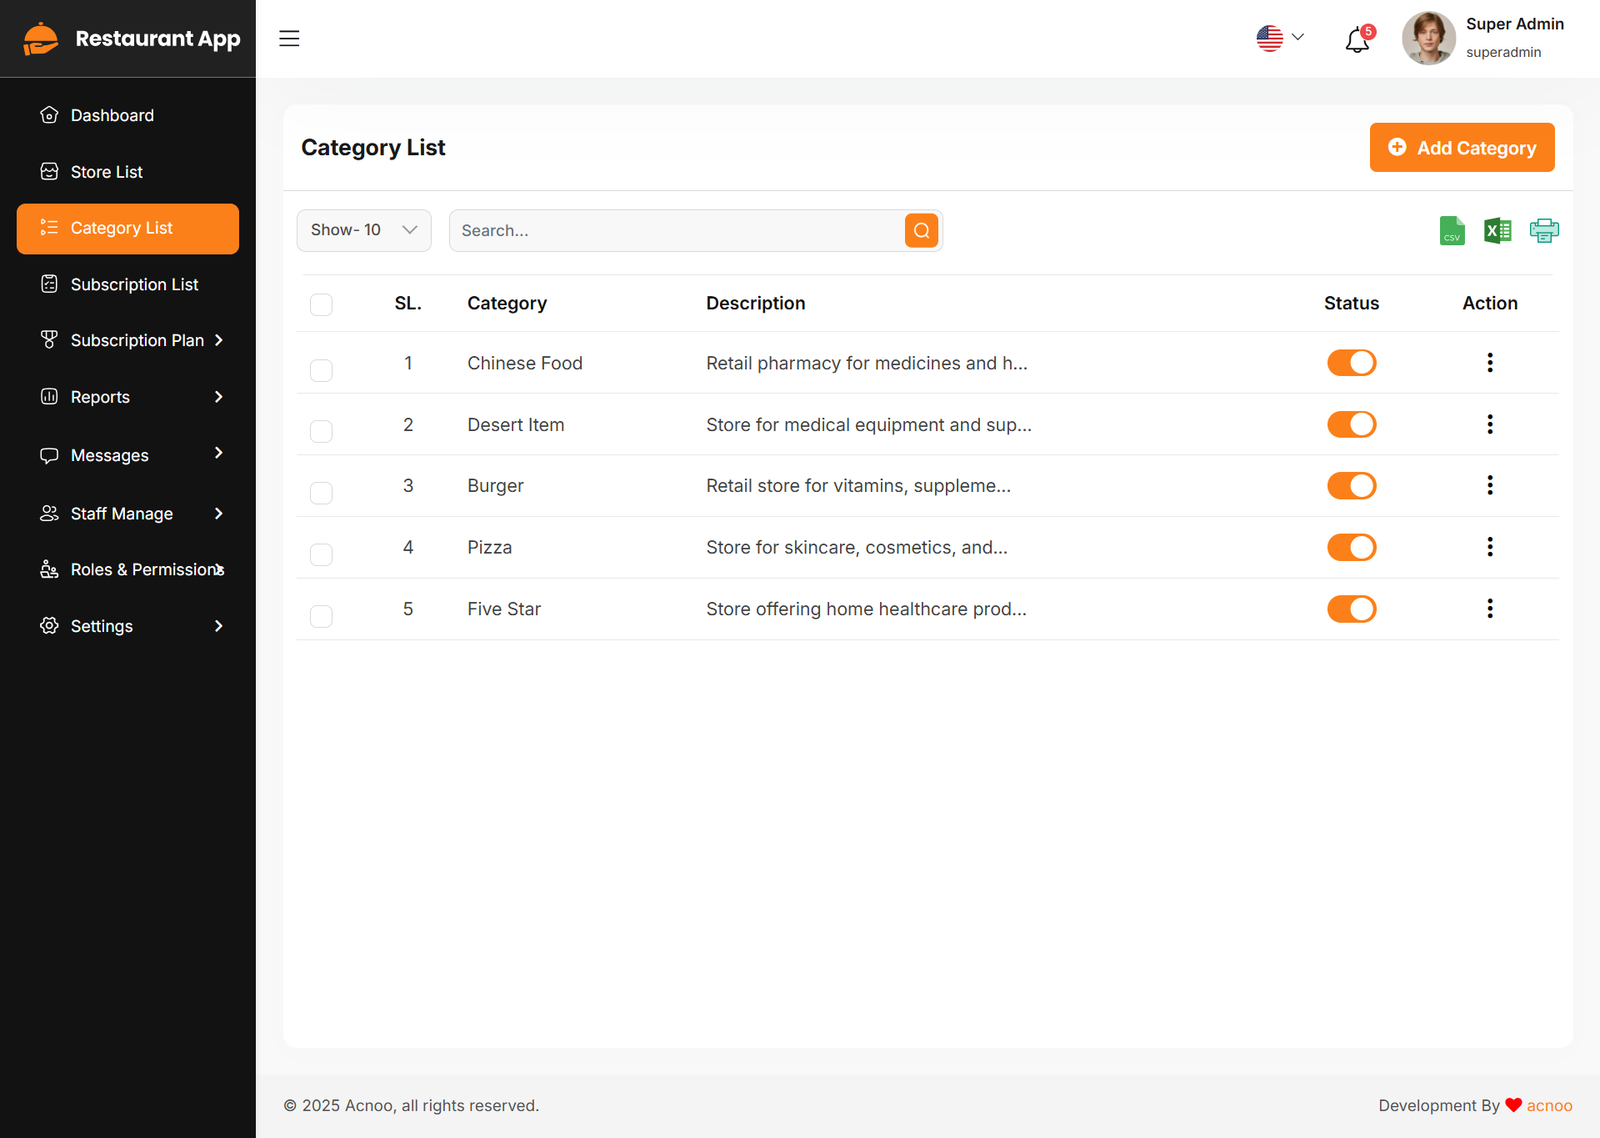
This appears to be a screenshot of a business categories list. Here, you can filter business categories, as well as edit, delete, or multi-delete them. There is also an "Add New Category" button for adding new business categories. To add a new business category, fill in the necessary fields. You need to enter the business name, and the description field is optional. You can also update the status from this page.
Add New Category
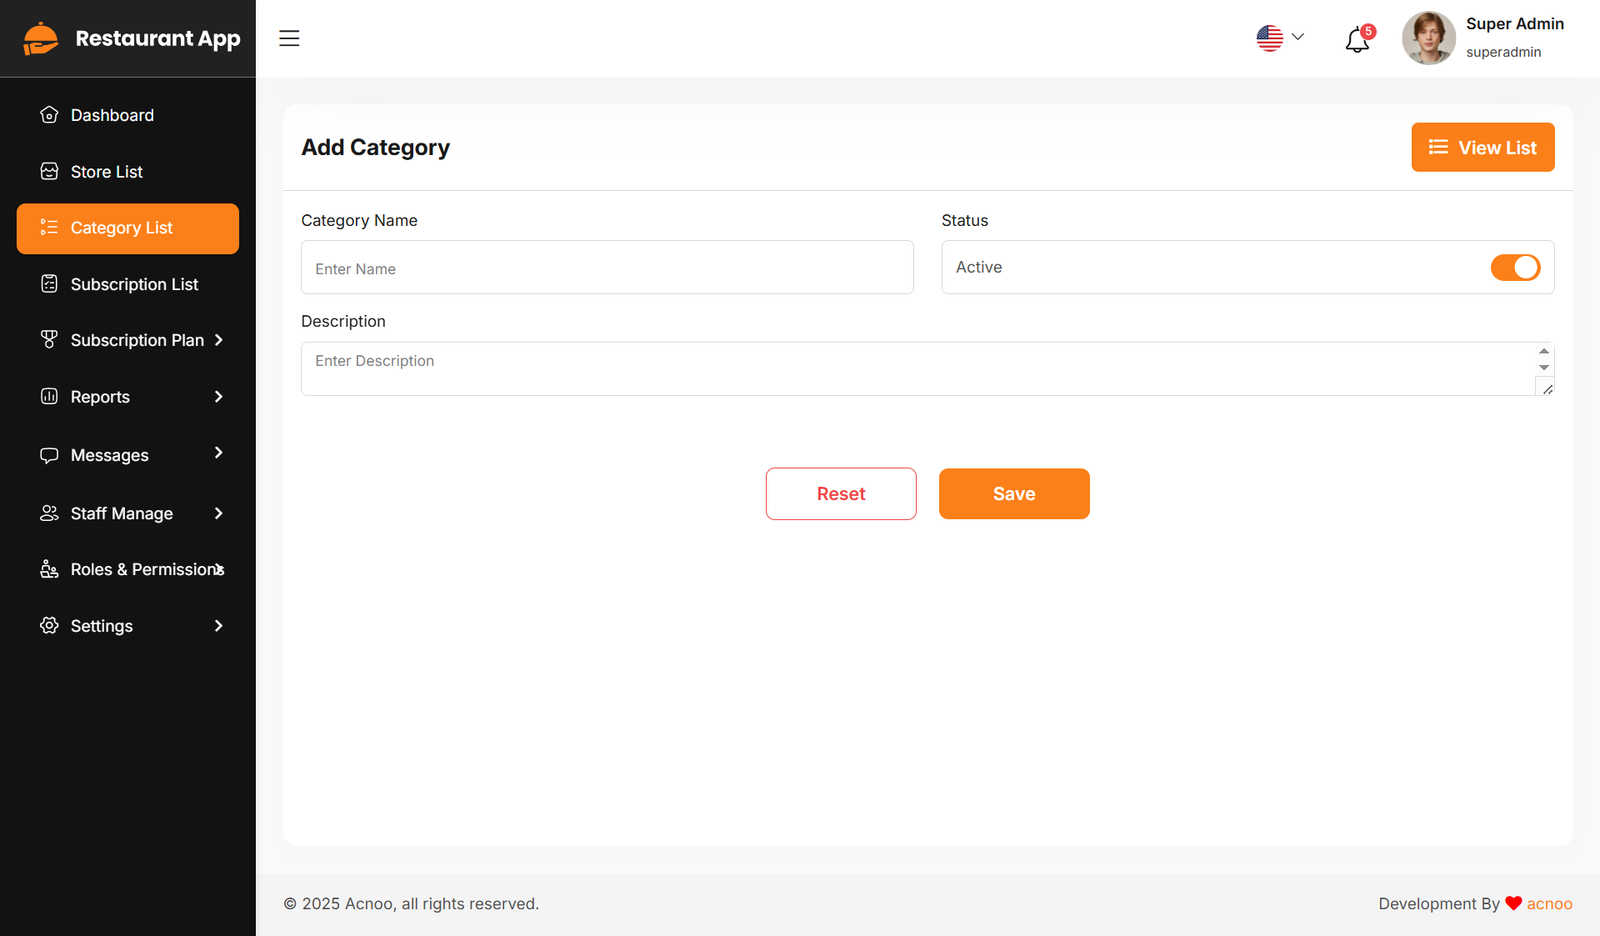
This section outlines the procedure for adding new business categories within the Restaurant App system. Business categories are used to classify and organize different types of businesses listed in the system.
Subscription List
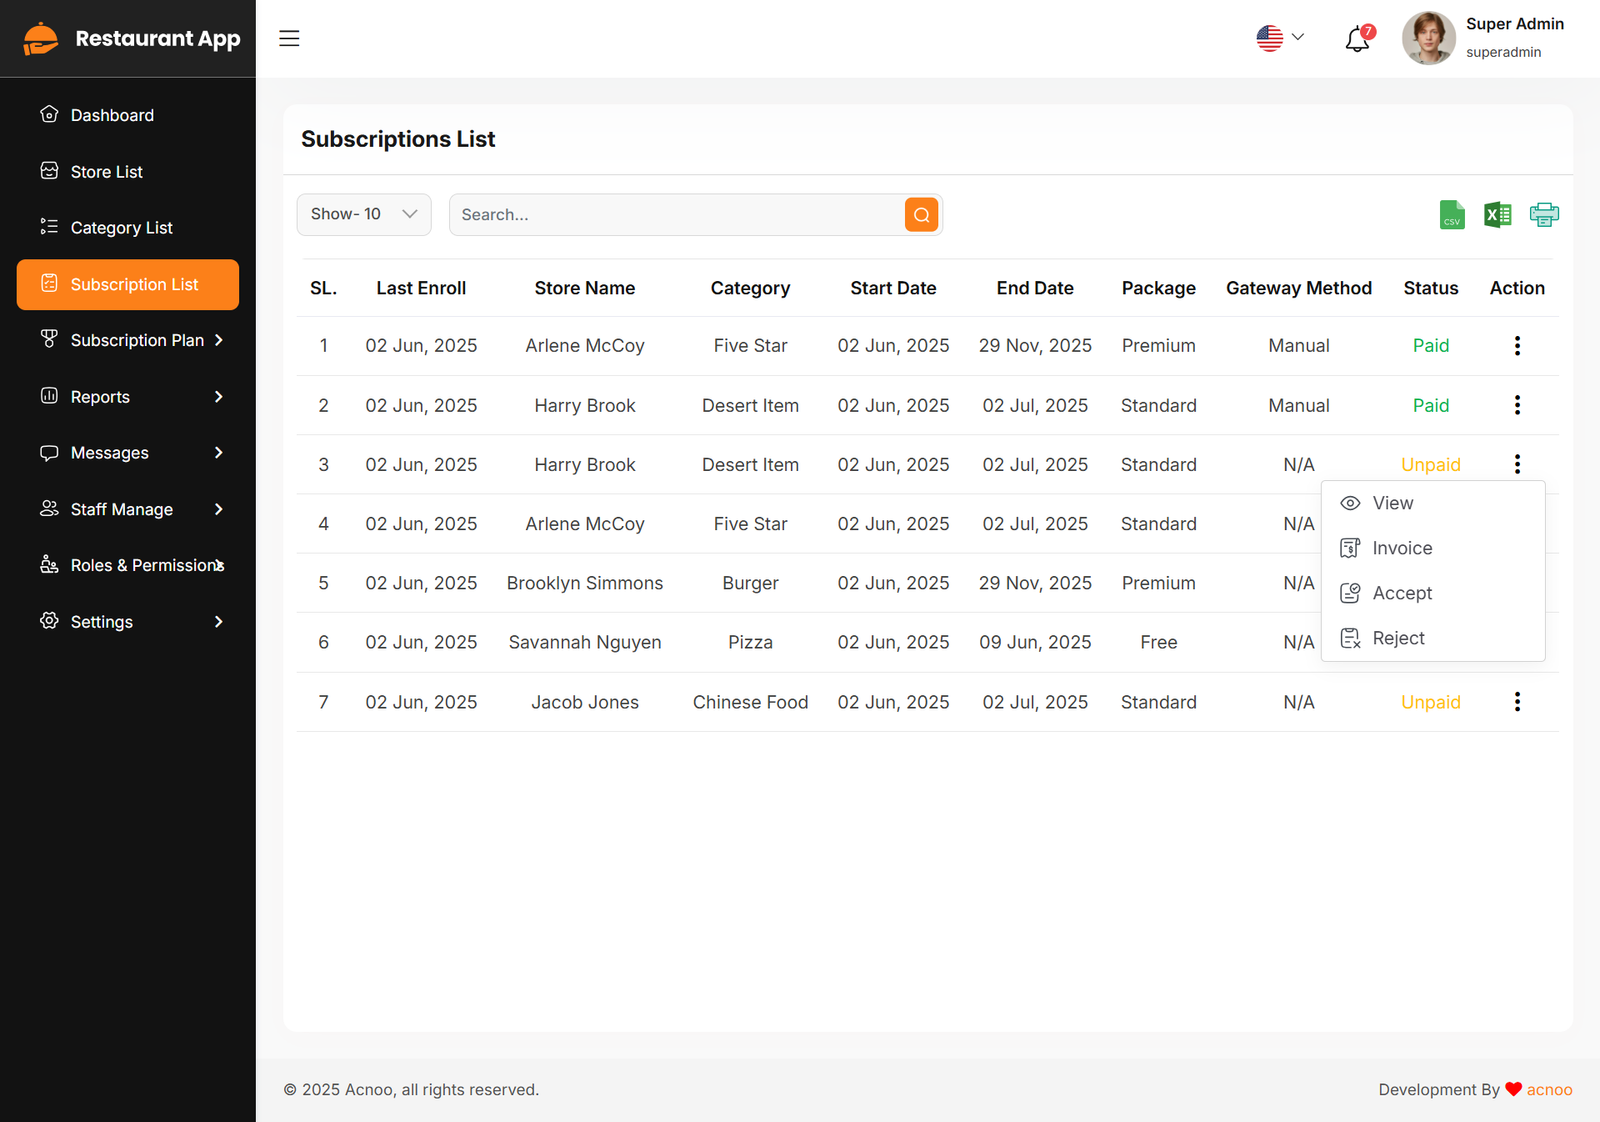
The Subscription list section allows users to track their current subscriptions.In the action column, clicking on the three dots (...) will display options to mark as "Accept" or "Reject." Clicking either option will allow you to change the status accordingly.Provides access to the invoice associated with the subscription.
Plan List
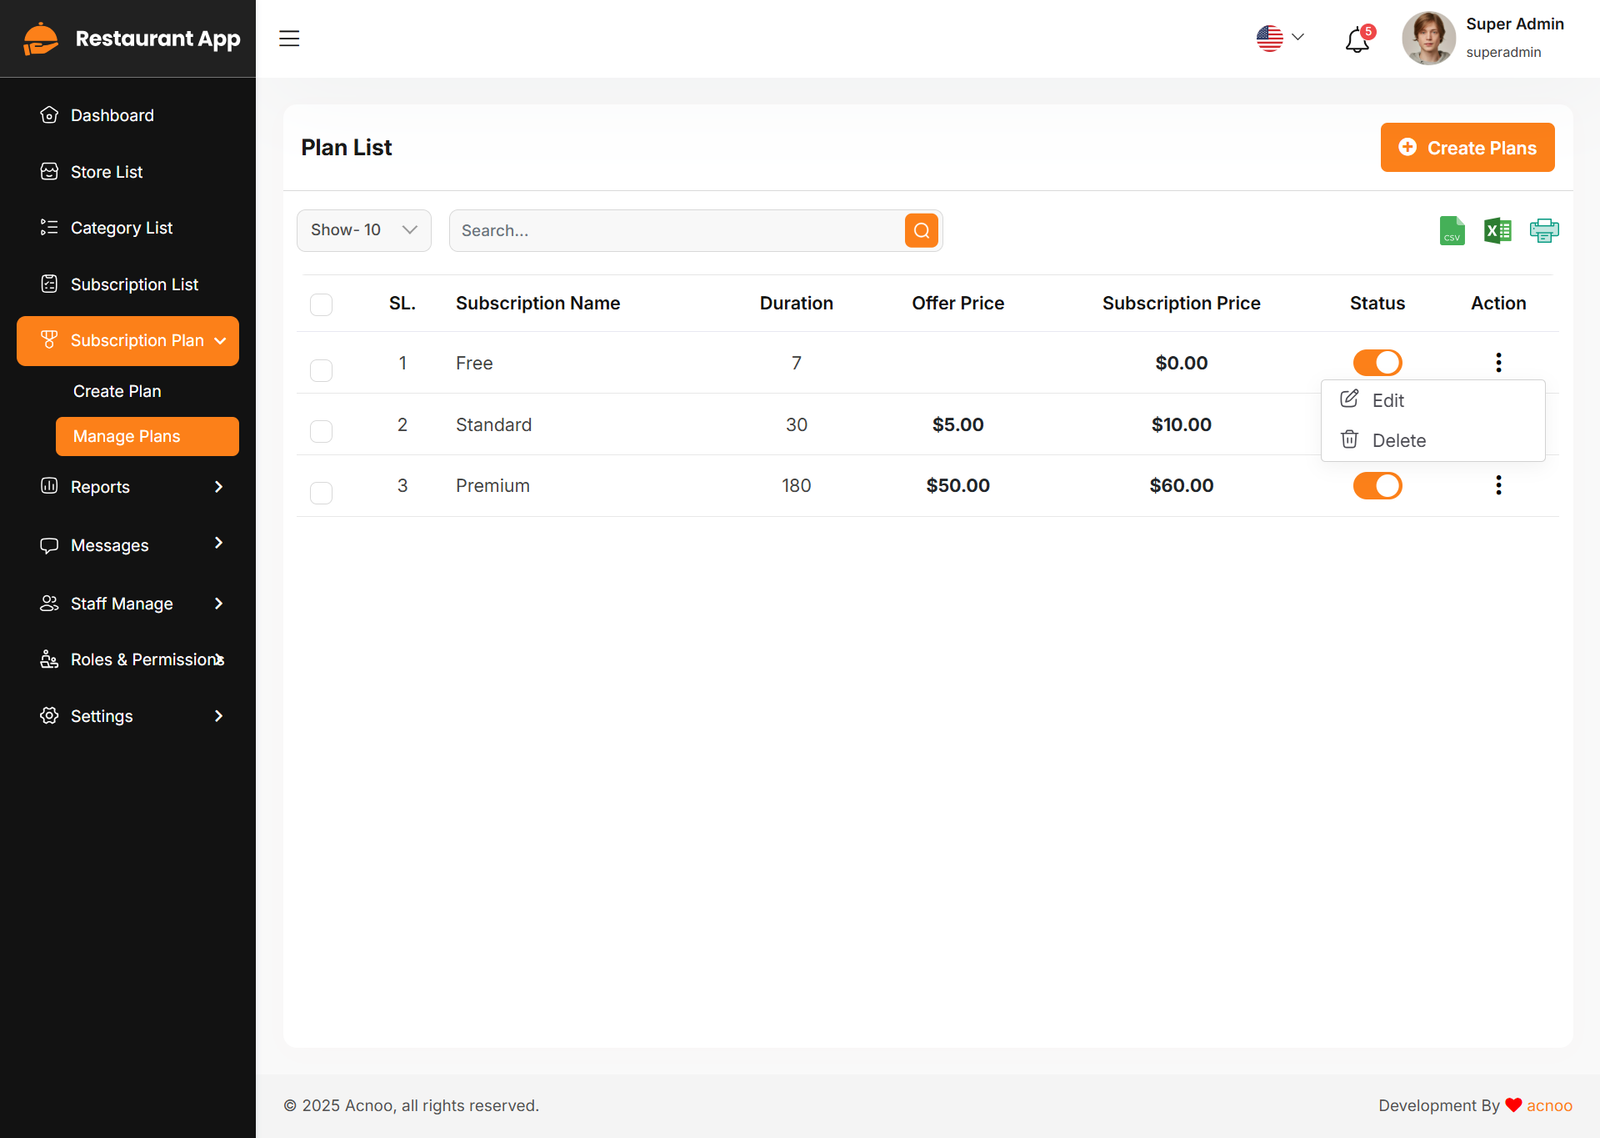
Here, you can view a list of available plans with filtering options. You can also change the plan status from this page. Additionally, options to view, edit, delete, and multi-delete plans are available.
Add New Plan
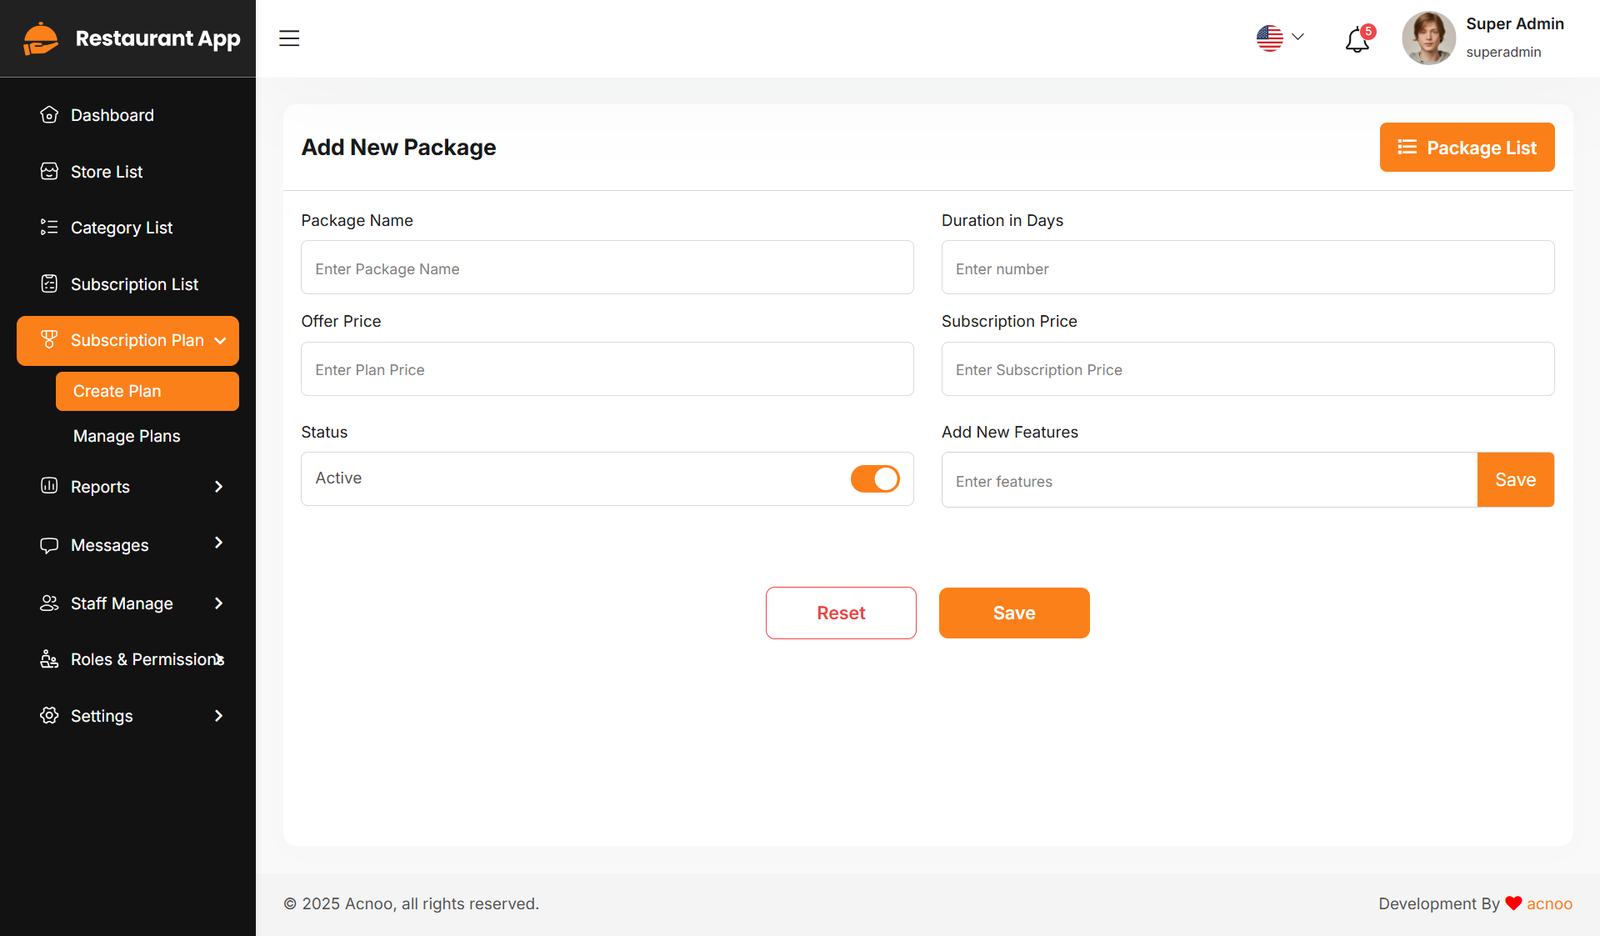
Here, you have the option to create a plan according to your preferences. You can also add multiple features using the "Add New Feature" input field. Once you have completed filling out the form, simply click the "Save" button.
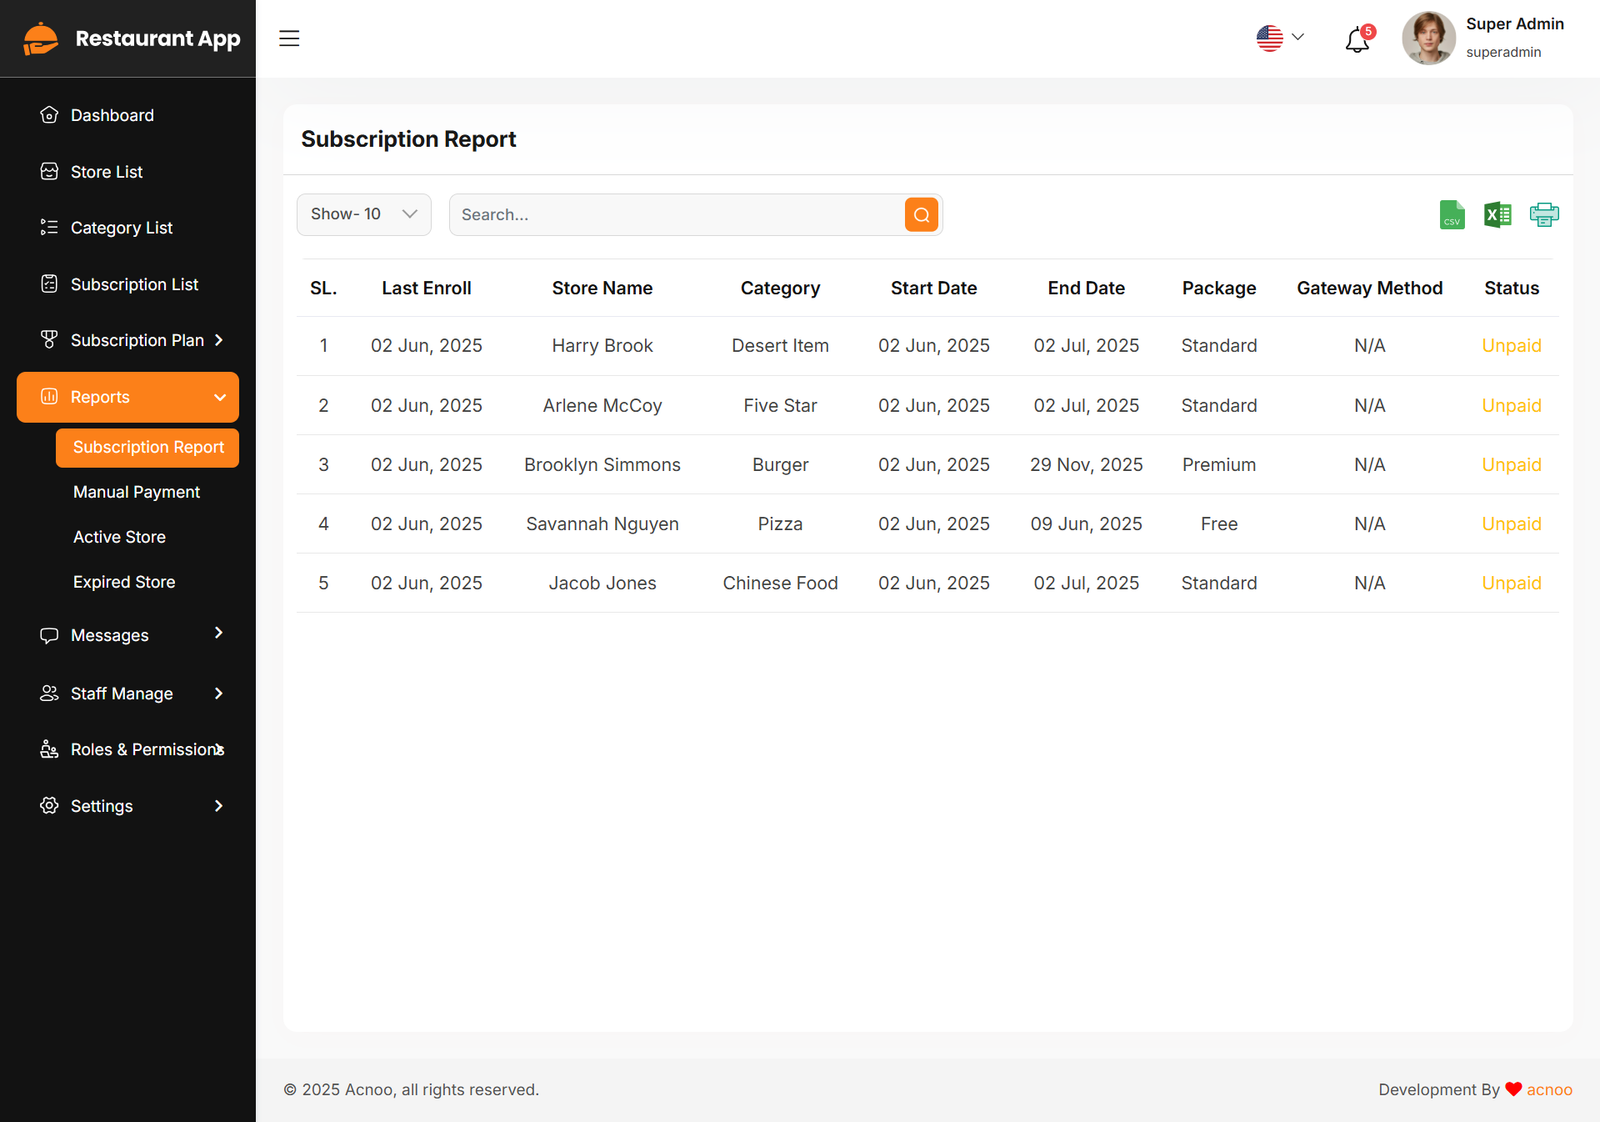
Subscription List
The Subscription reports section allows users to track their current subscriptions.So from here user can search,Filter and also can download excel,csv and print from here.This all can do from here.
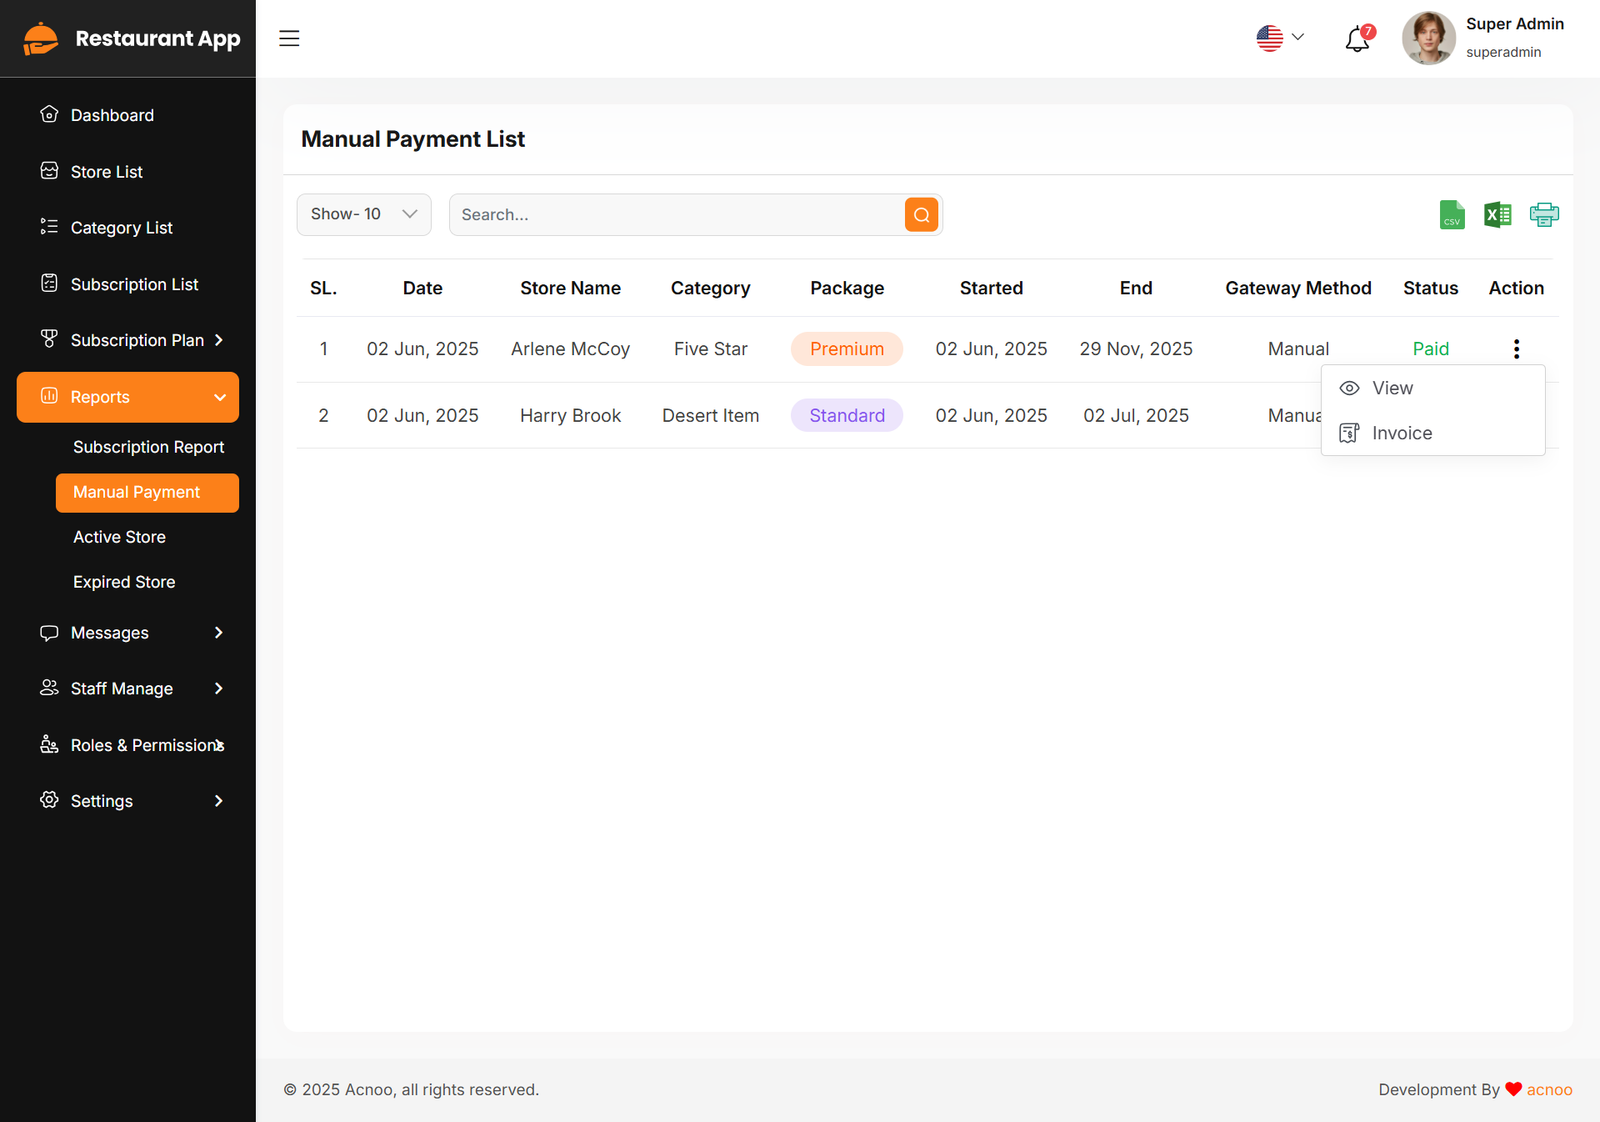
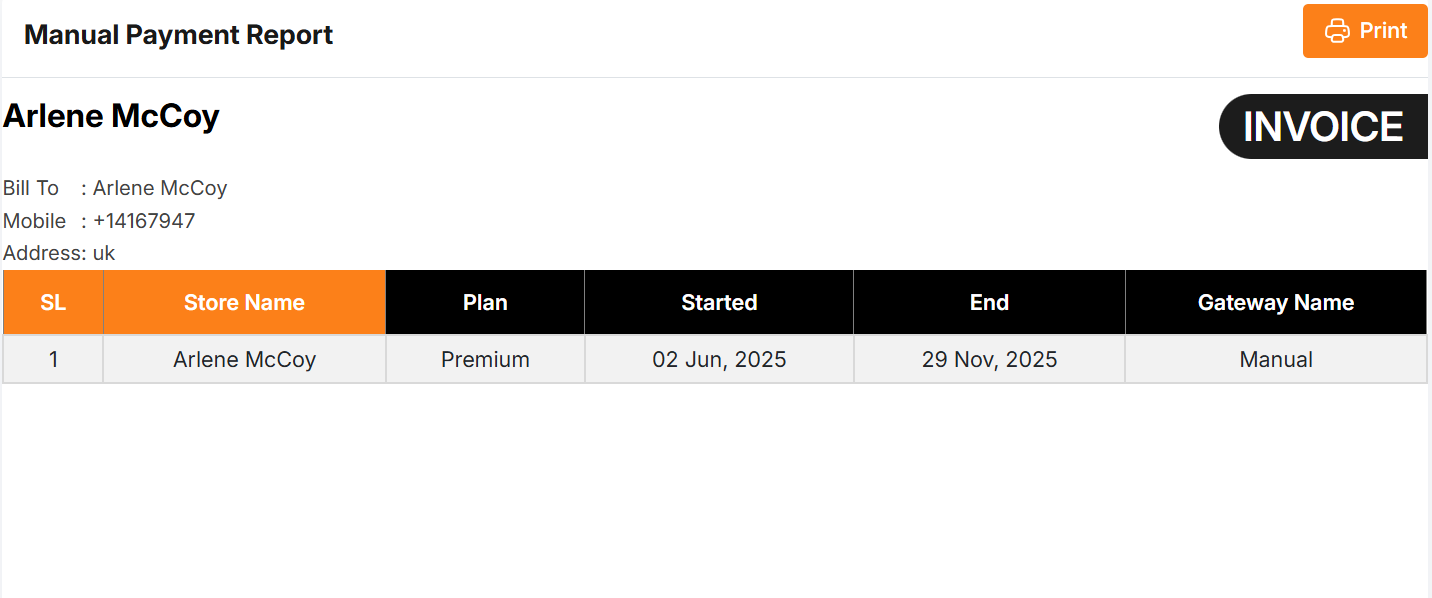
Manual Payment List
The Manual Payment List provides a comprehensive view of all manual payment requests, including details about the store, subscription plan, payment status, and available actions. This list is essential for tracking and processing payments made outside the automated system.
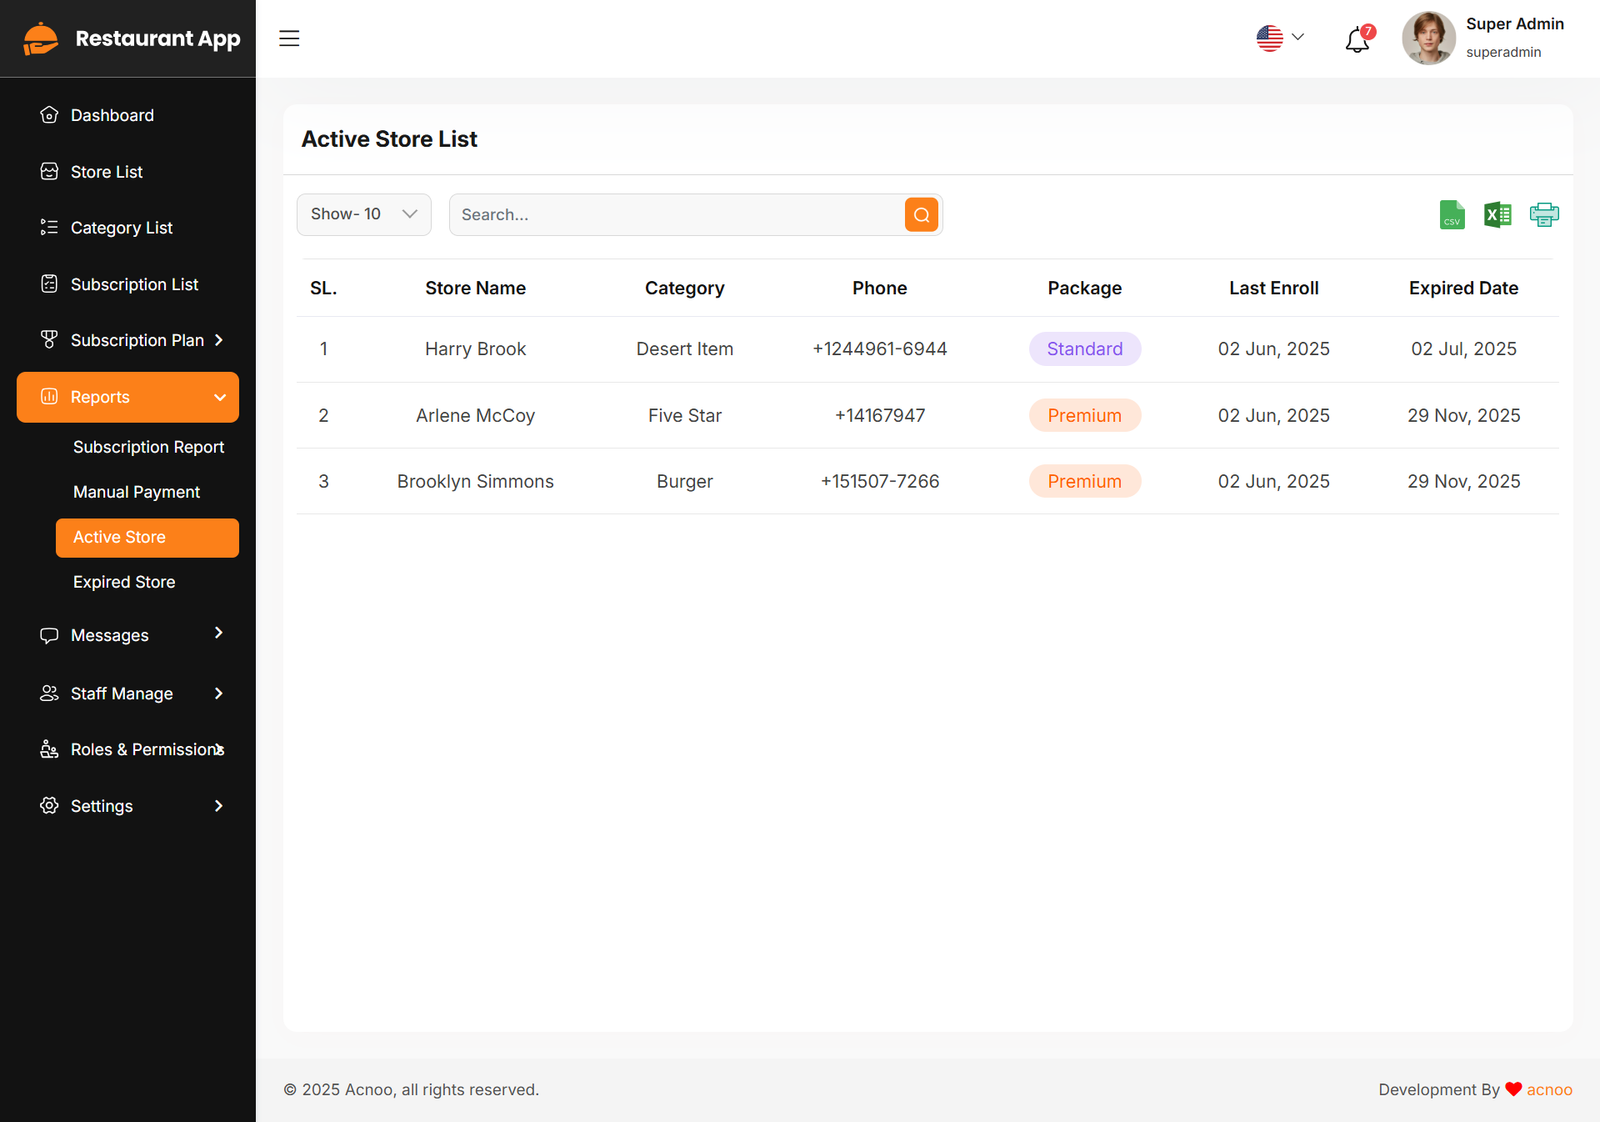
Active Store List
The Active Store List page is designed to provide a streamlined view of all active stores. Users can search, filter, and export store information while keeping track of enrollment and expiration dates. With intuitive navigation and dynamic data management, this page enhances administrative efficiency within the Restaurant App system.
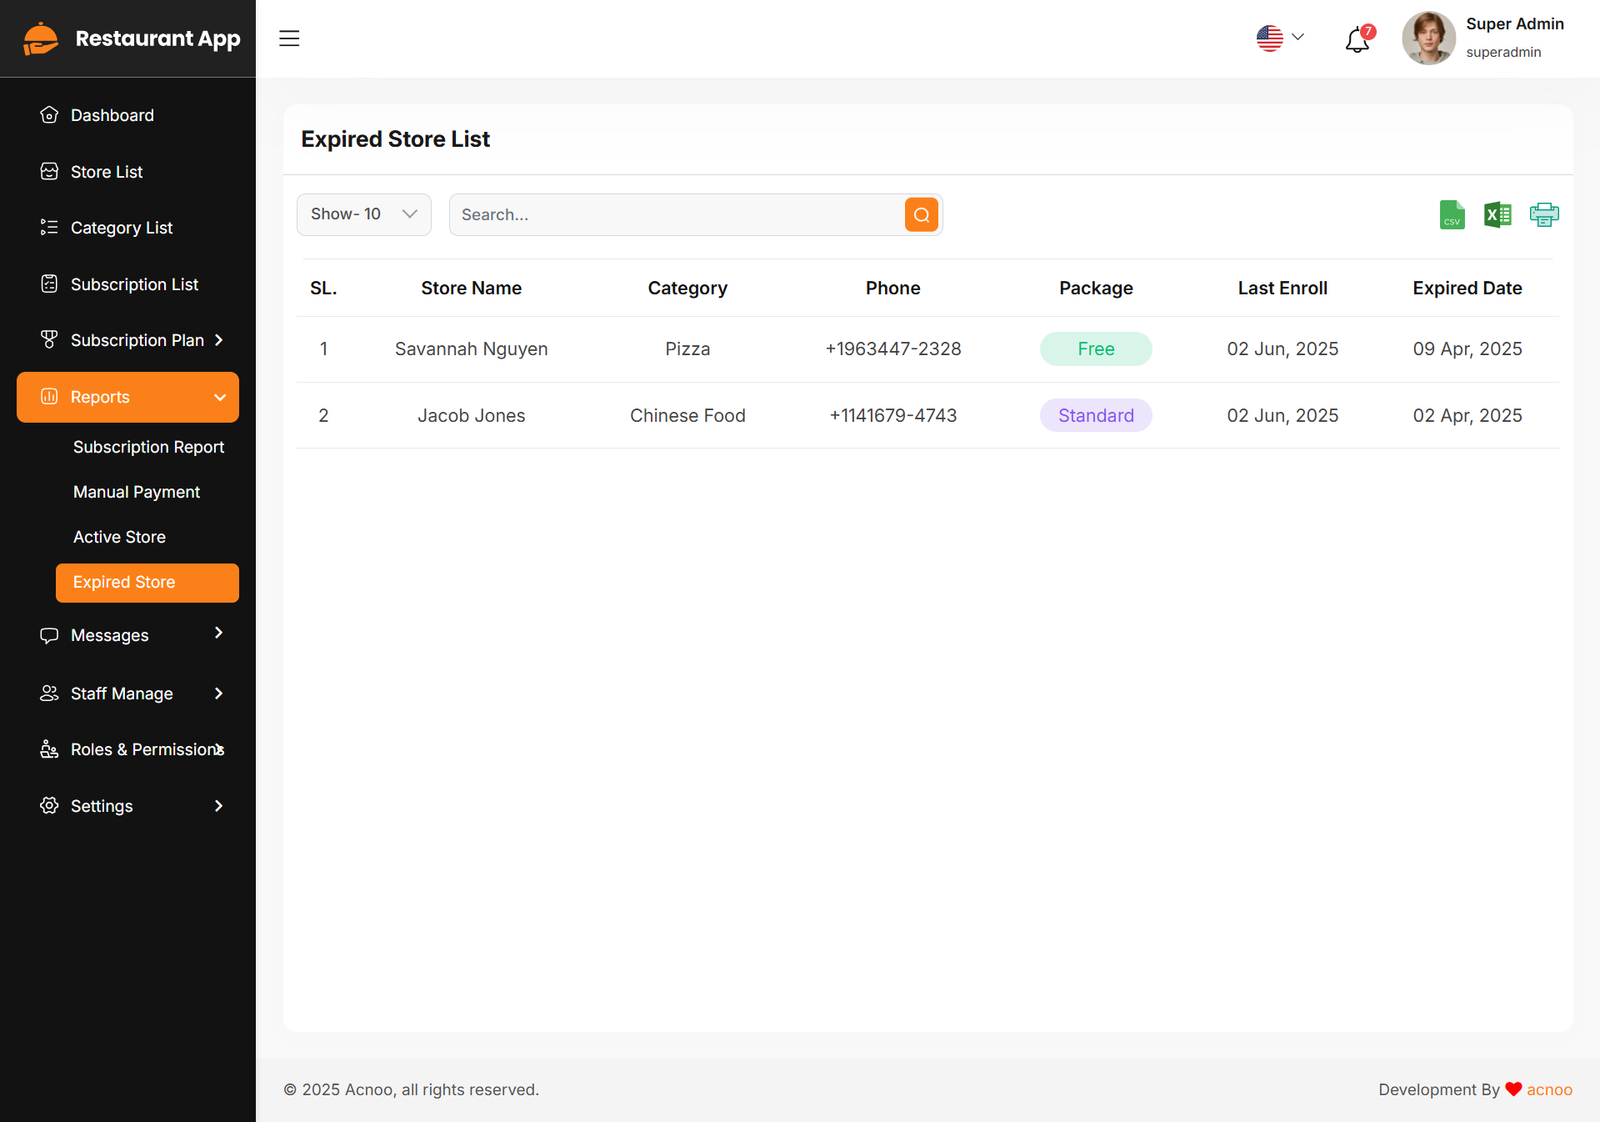
Expired Store List
The "Expired Store List" page displays a list of stores whose subscriptions have expired. This allows administrators to easily identify and manage stores that need renewal or follow-up. The page is part of the "Reports" section of the Restaurant App system.
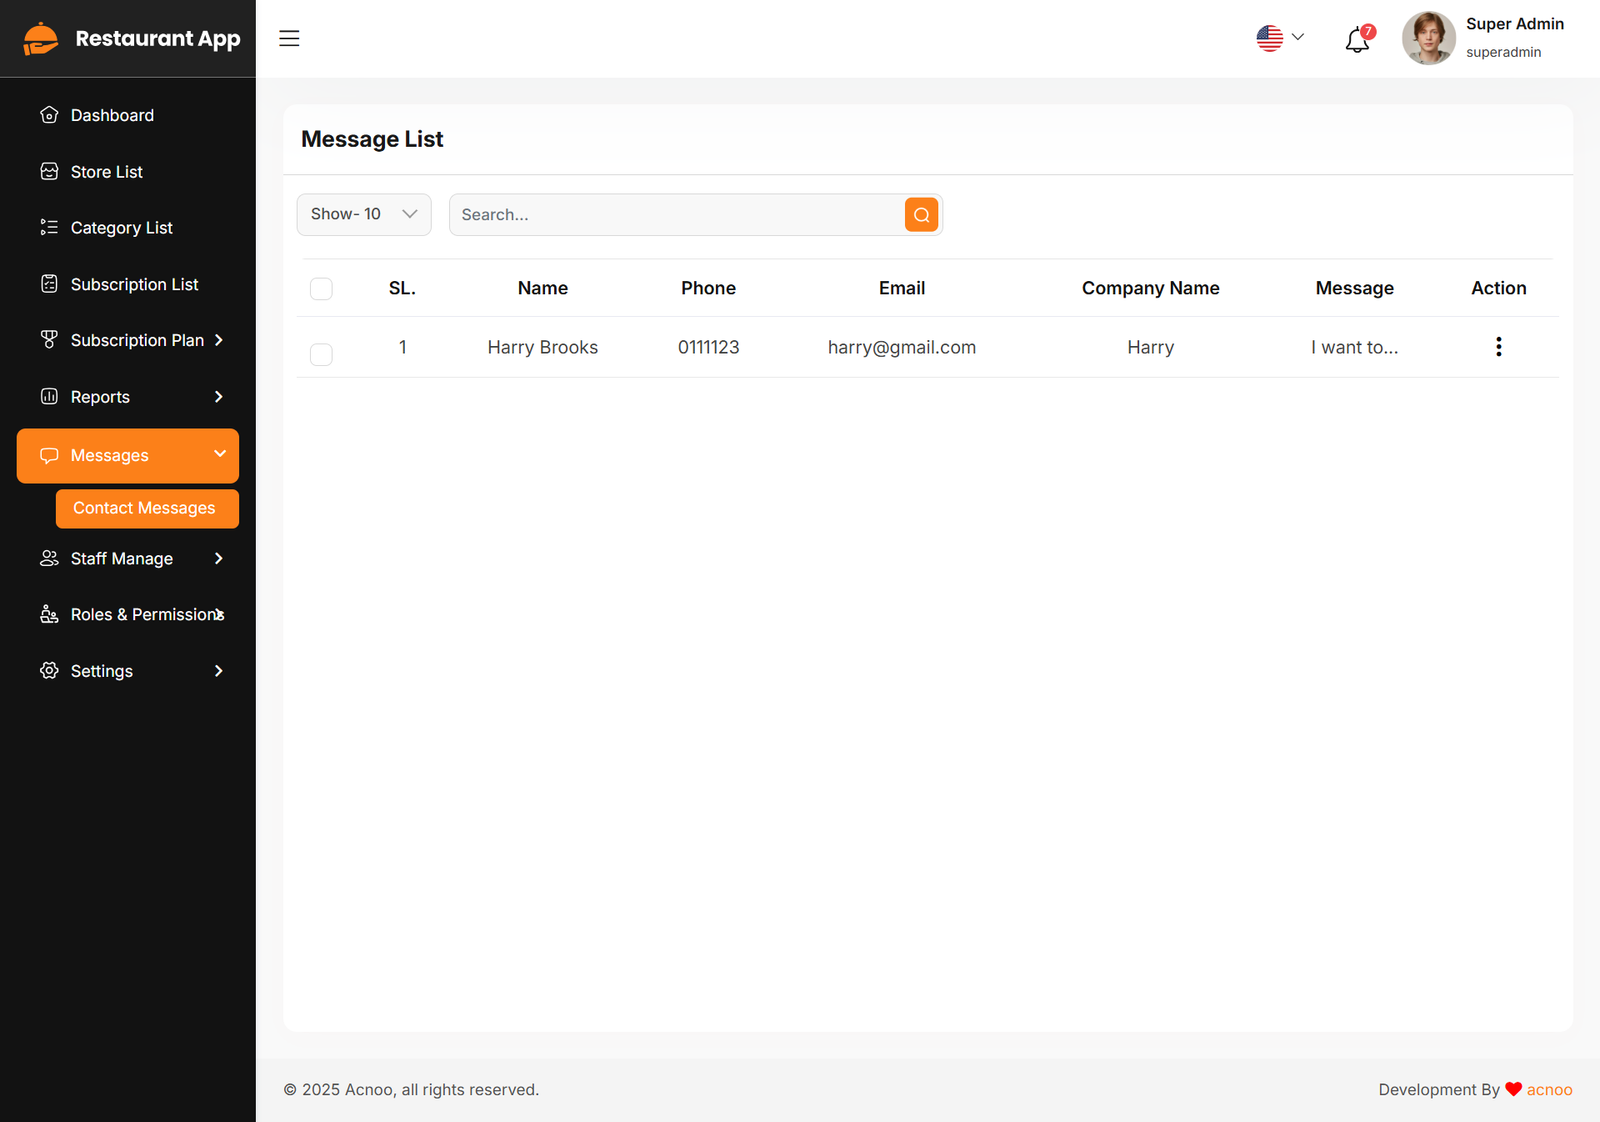
Message List
Here, you can view the list of messages along with a search filter. Additionally, you can delete individual entries or perform multi-delete operations.
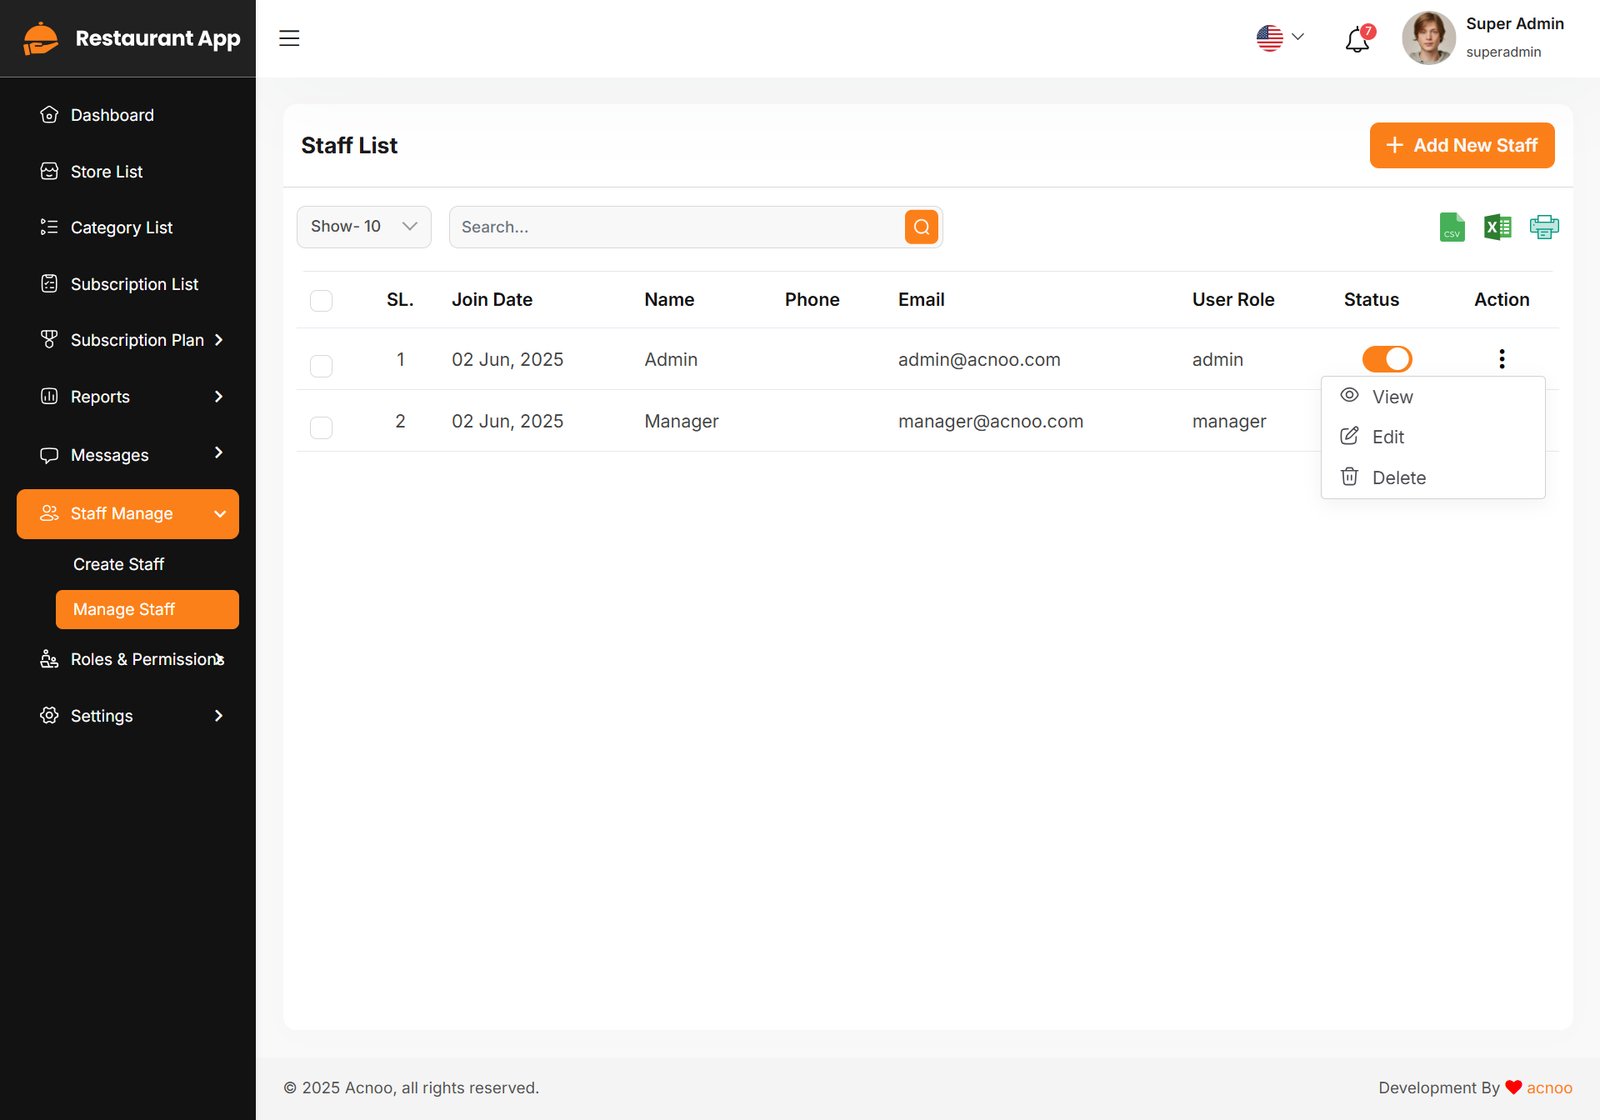
Staff List
Here, you can view the list of staff members along with a search filter. Additionally, you have the option to edit, delete individual entries, and perform multi-delete operations.
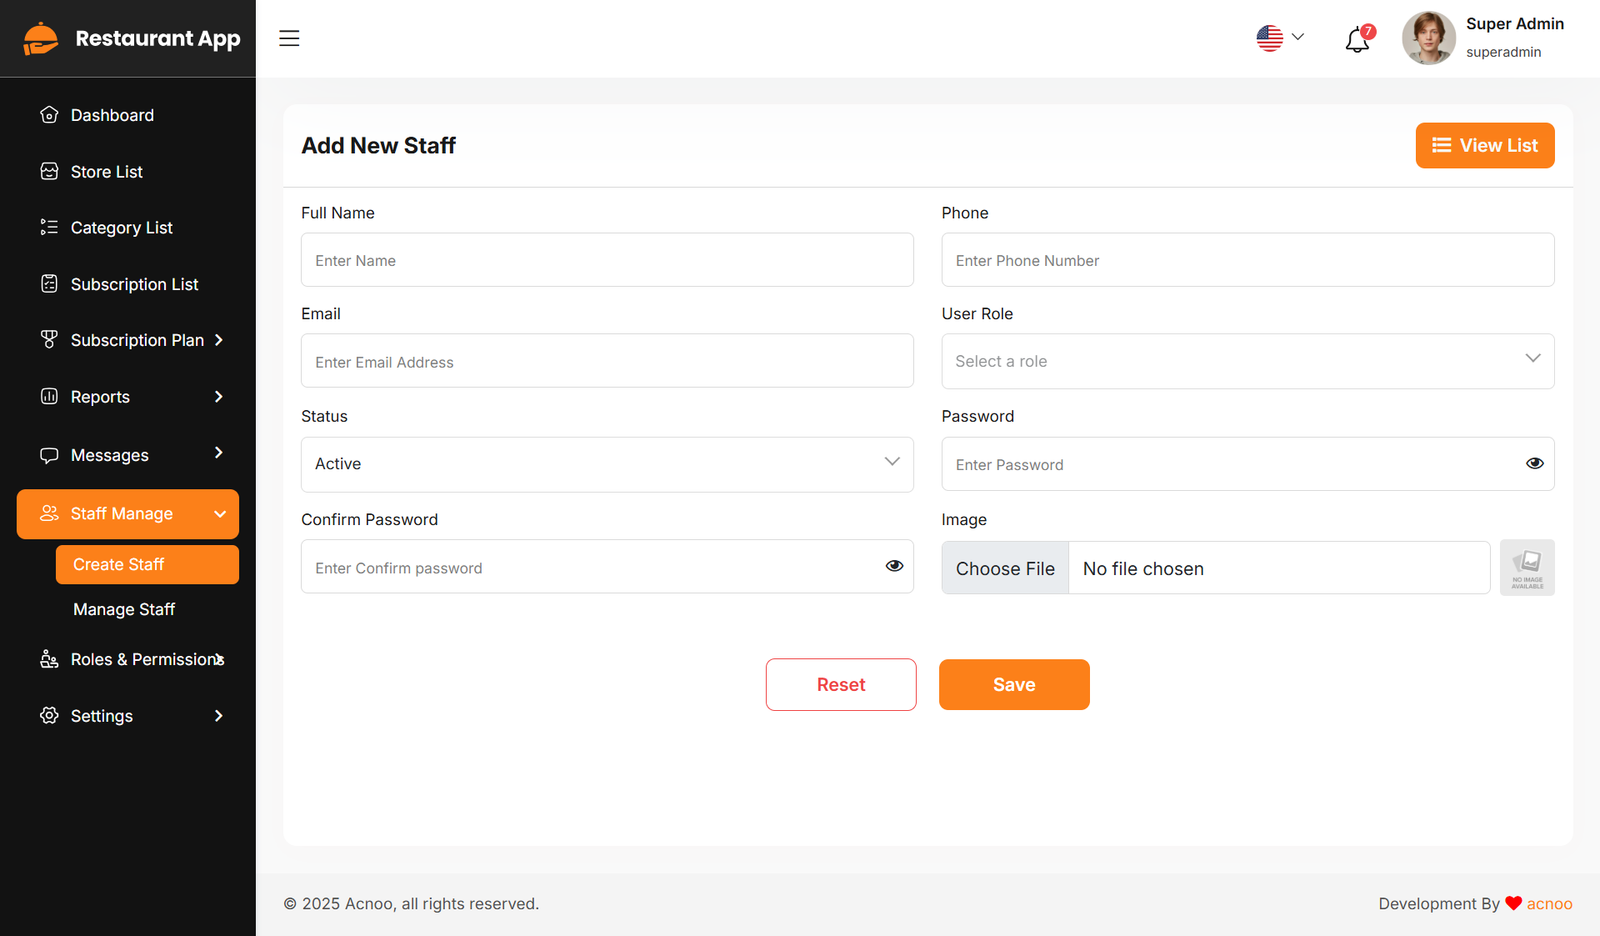
Add New Staff
You can create a staff member here by completing the necessary fields.
Roles & Permissions
In this section, you have the ability to define roles and allocate specific permissions to different users as needed.
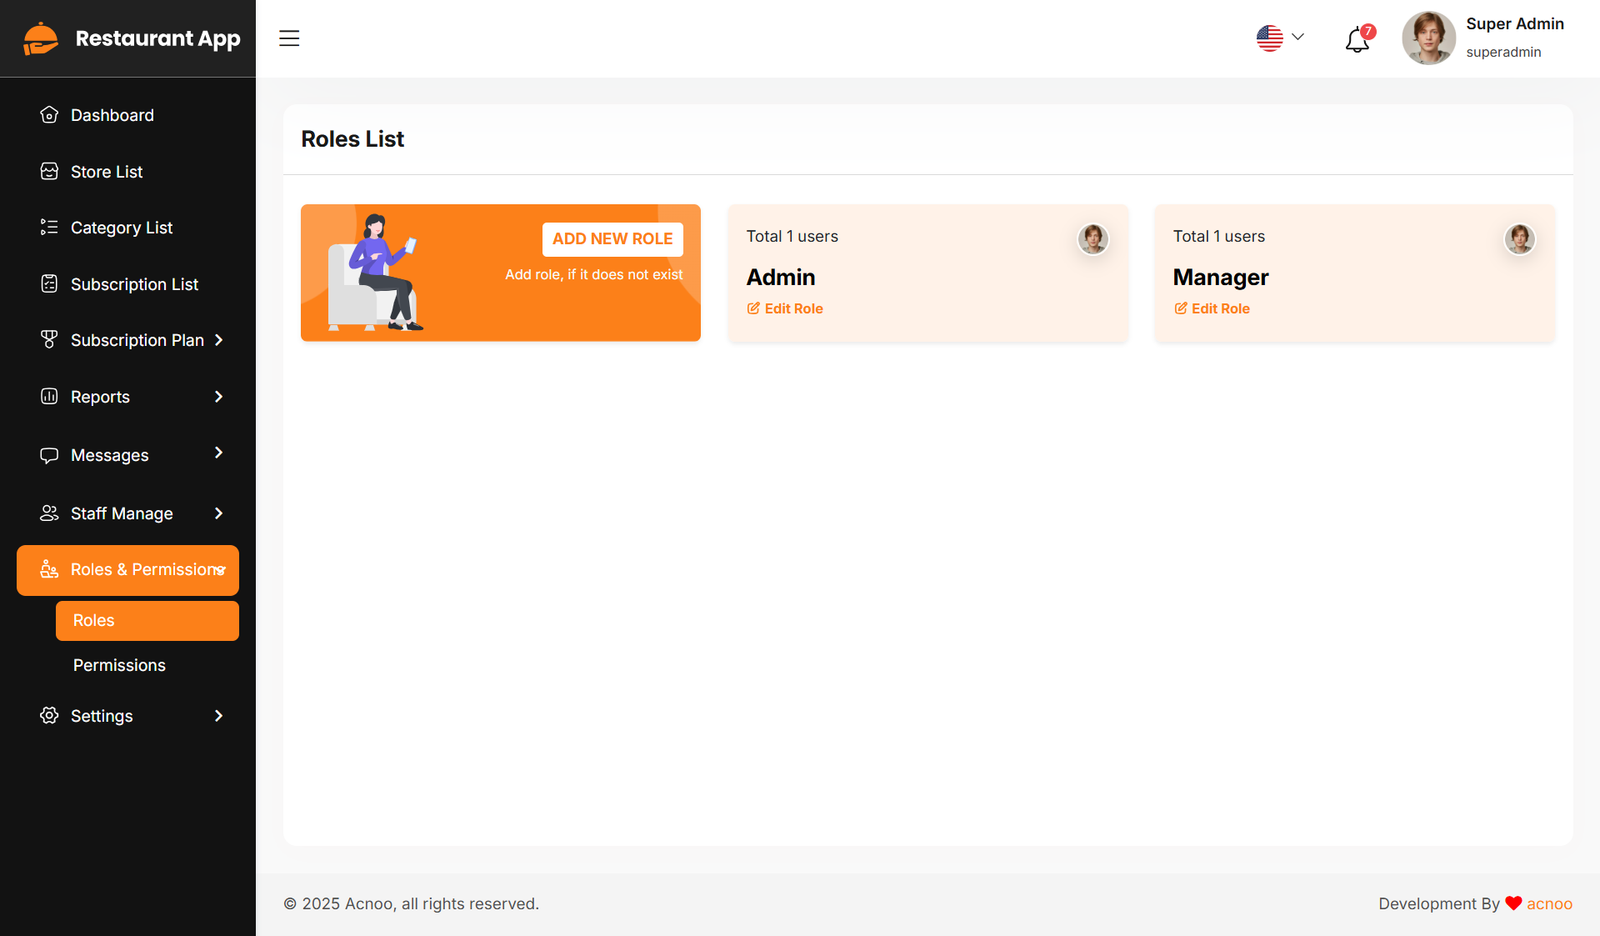
Roles
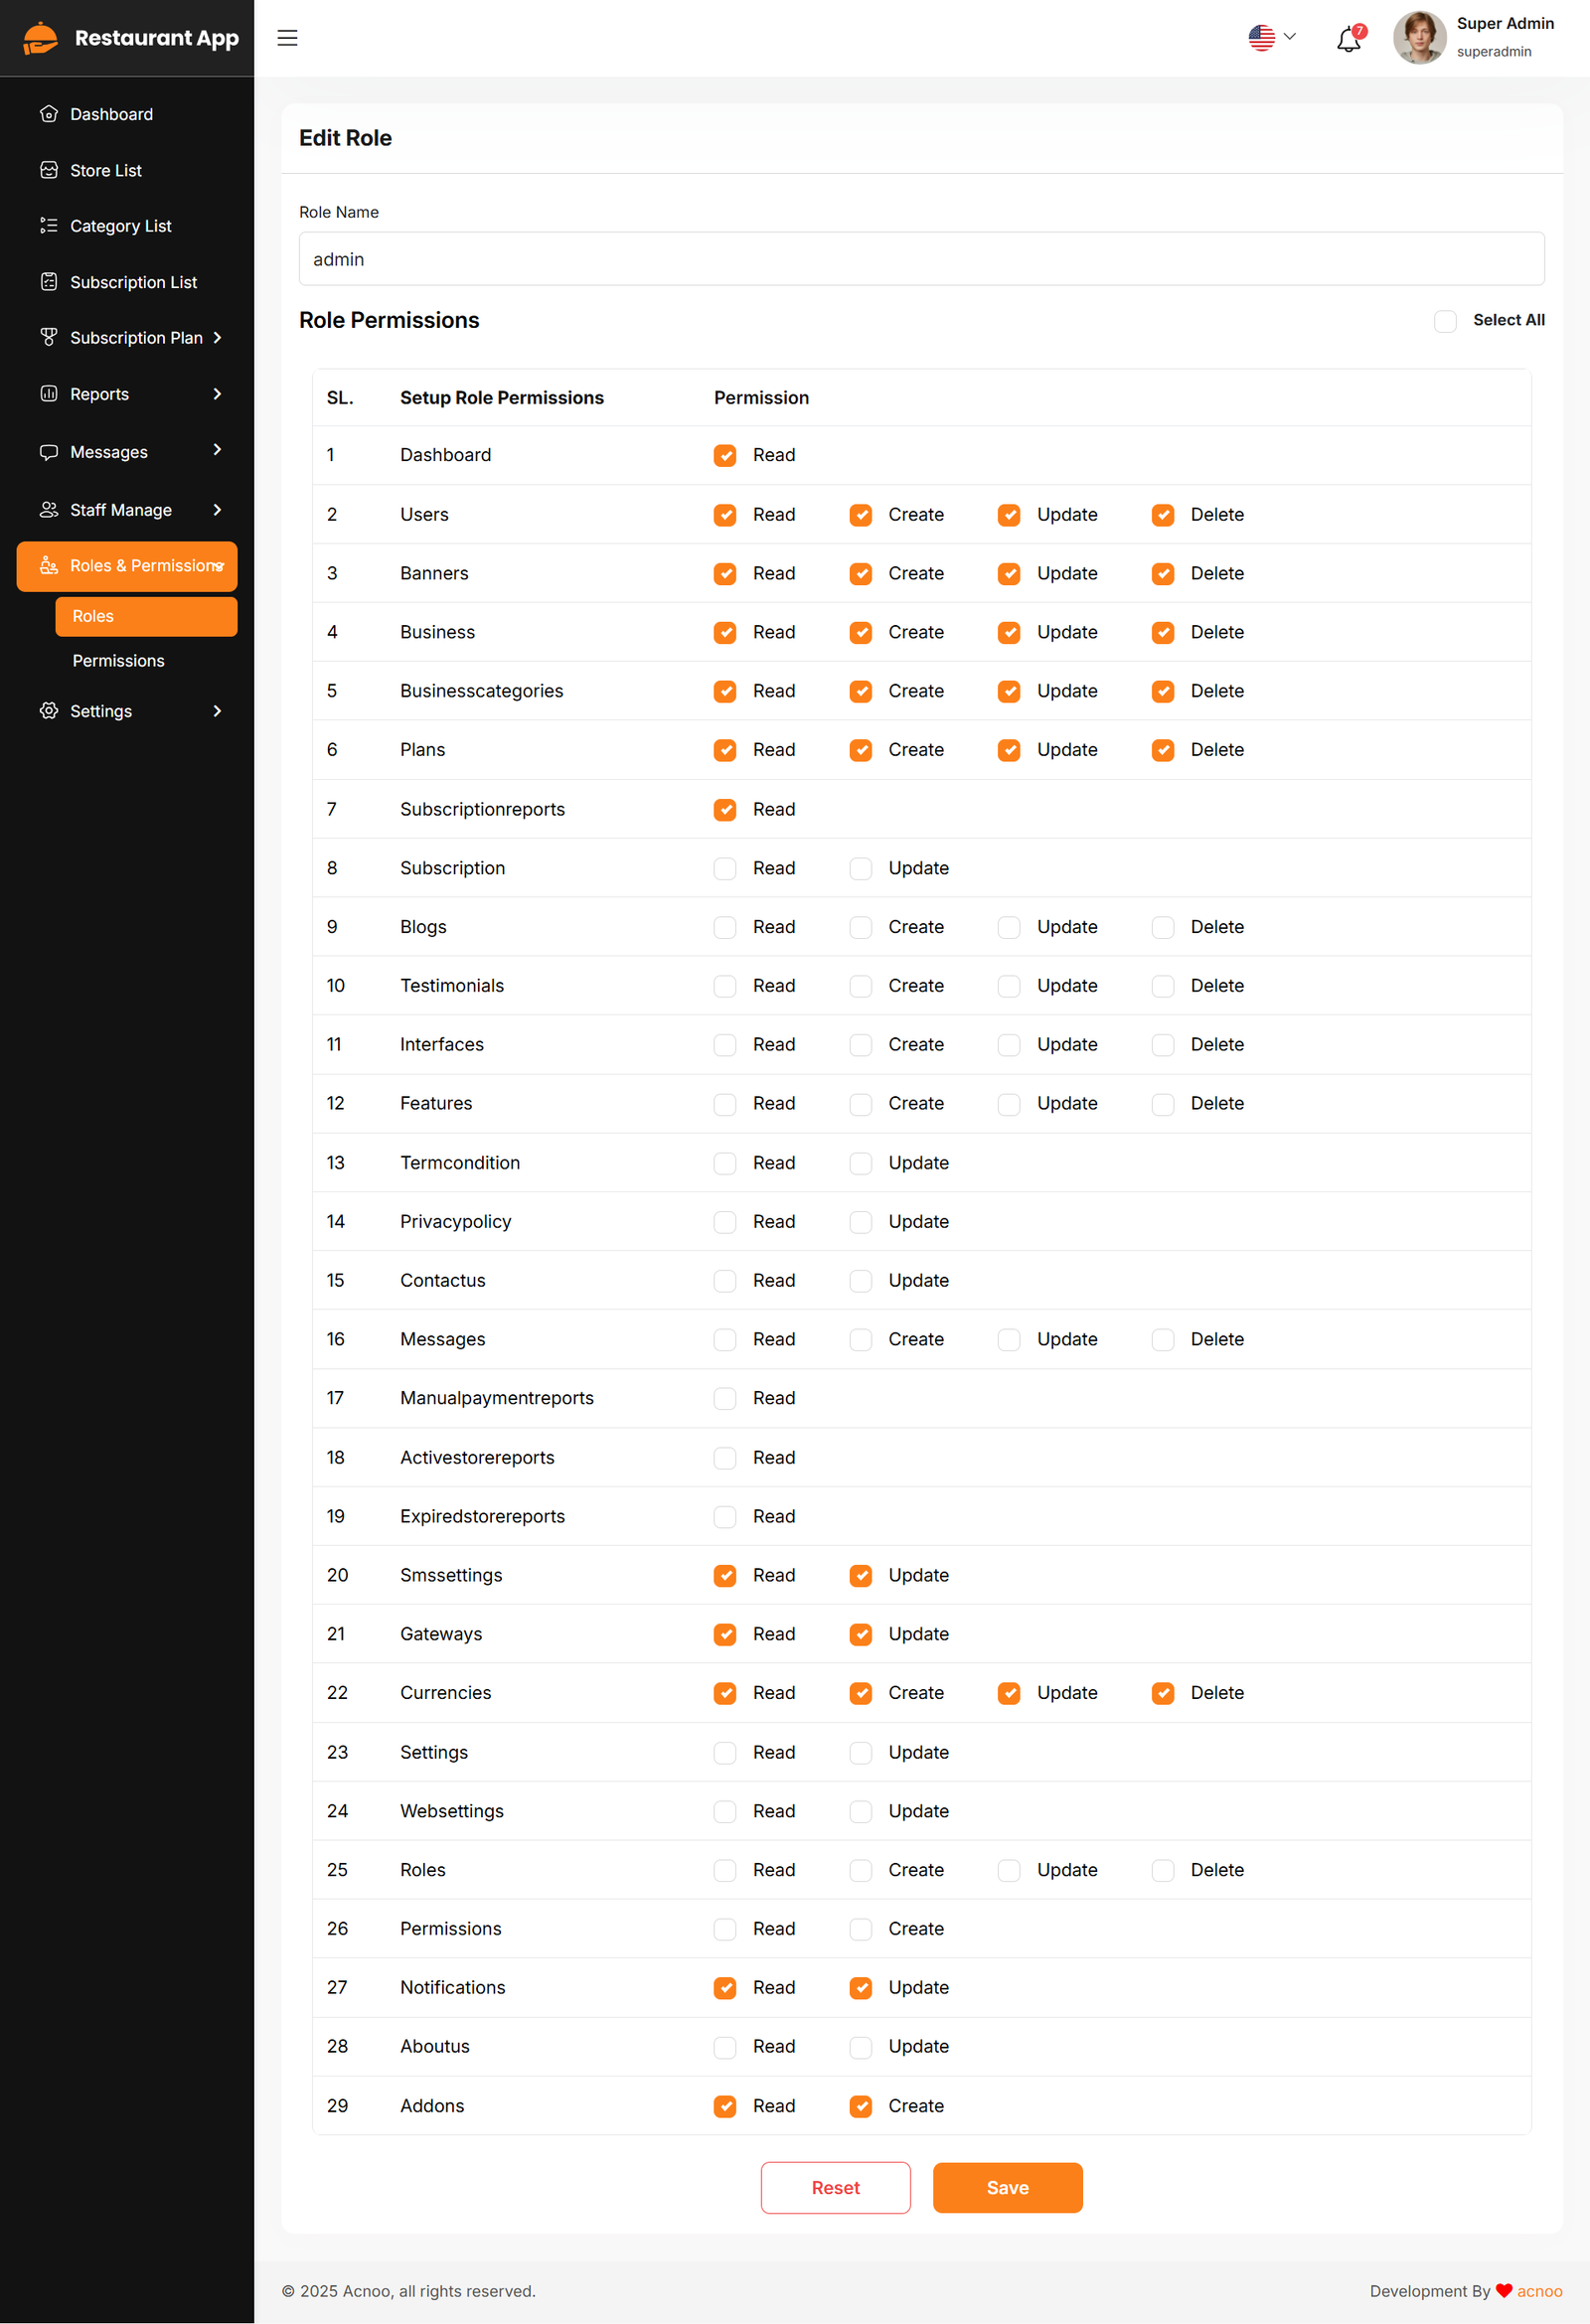
In this section, you have the capability to create new roles and update existing ones. When updating roles, you can configure their specific role permissions, granting or restricting access to various features and functionalities as required. This allows you to tailor user roles to your organizational needs and security requirements.
Permissions
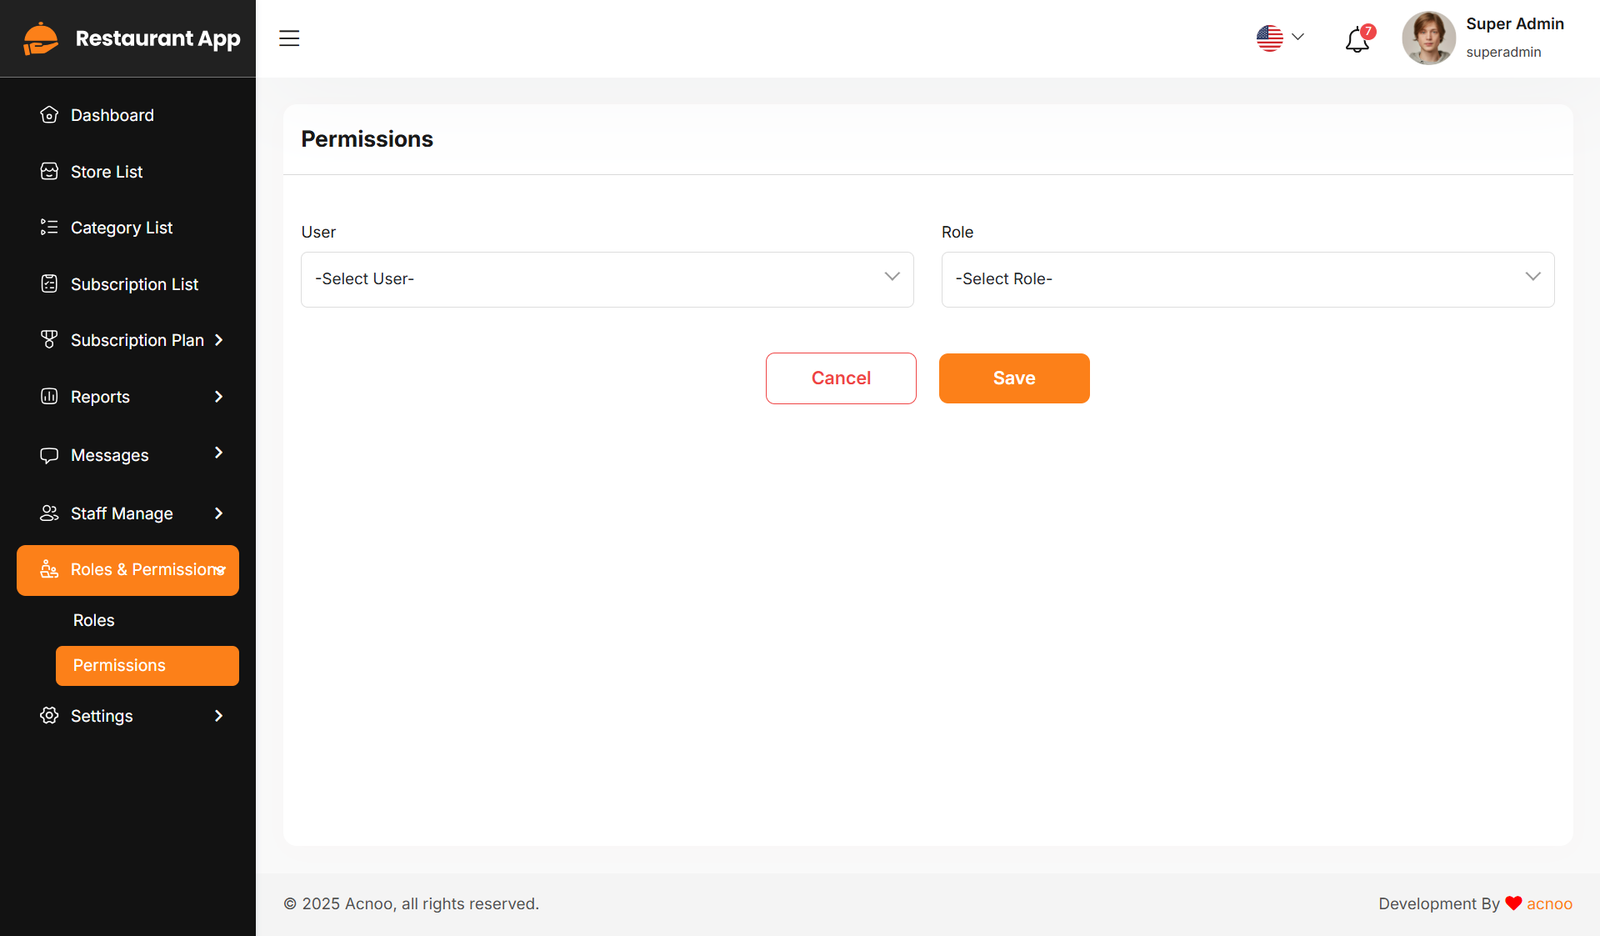
In this section, you have the capability to set role-specific permissions, allowing you to fine-tune and control access rights for each role according to your organization's needs and security requirements.
Setting
In the Setting section, you have the capability to configure the fundamental aspects or core elements of this project.
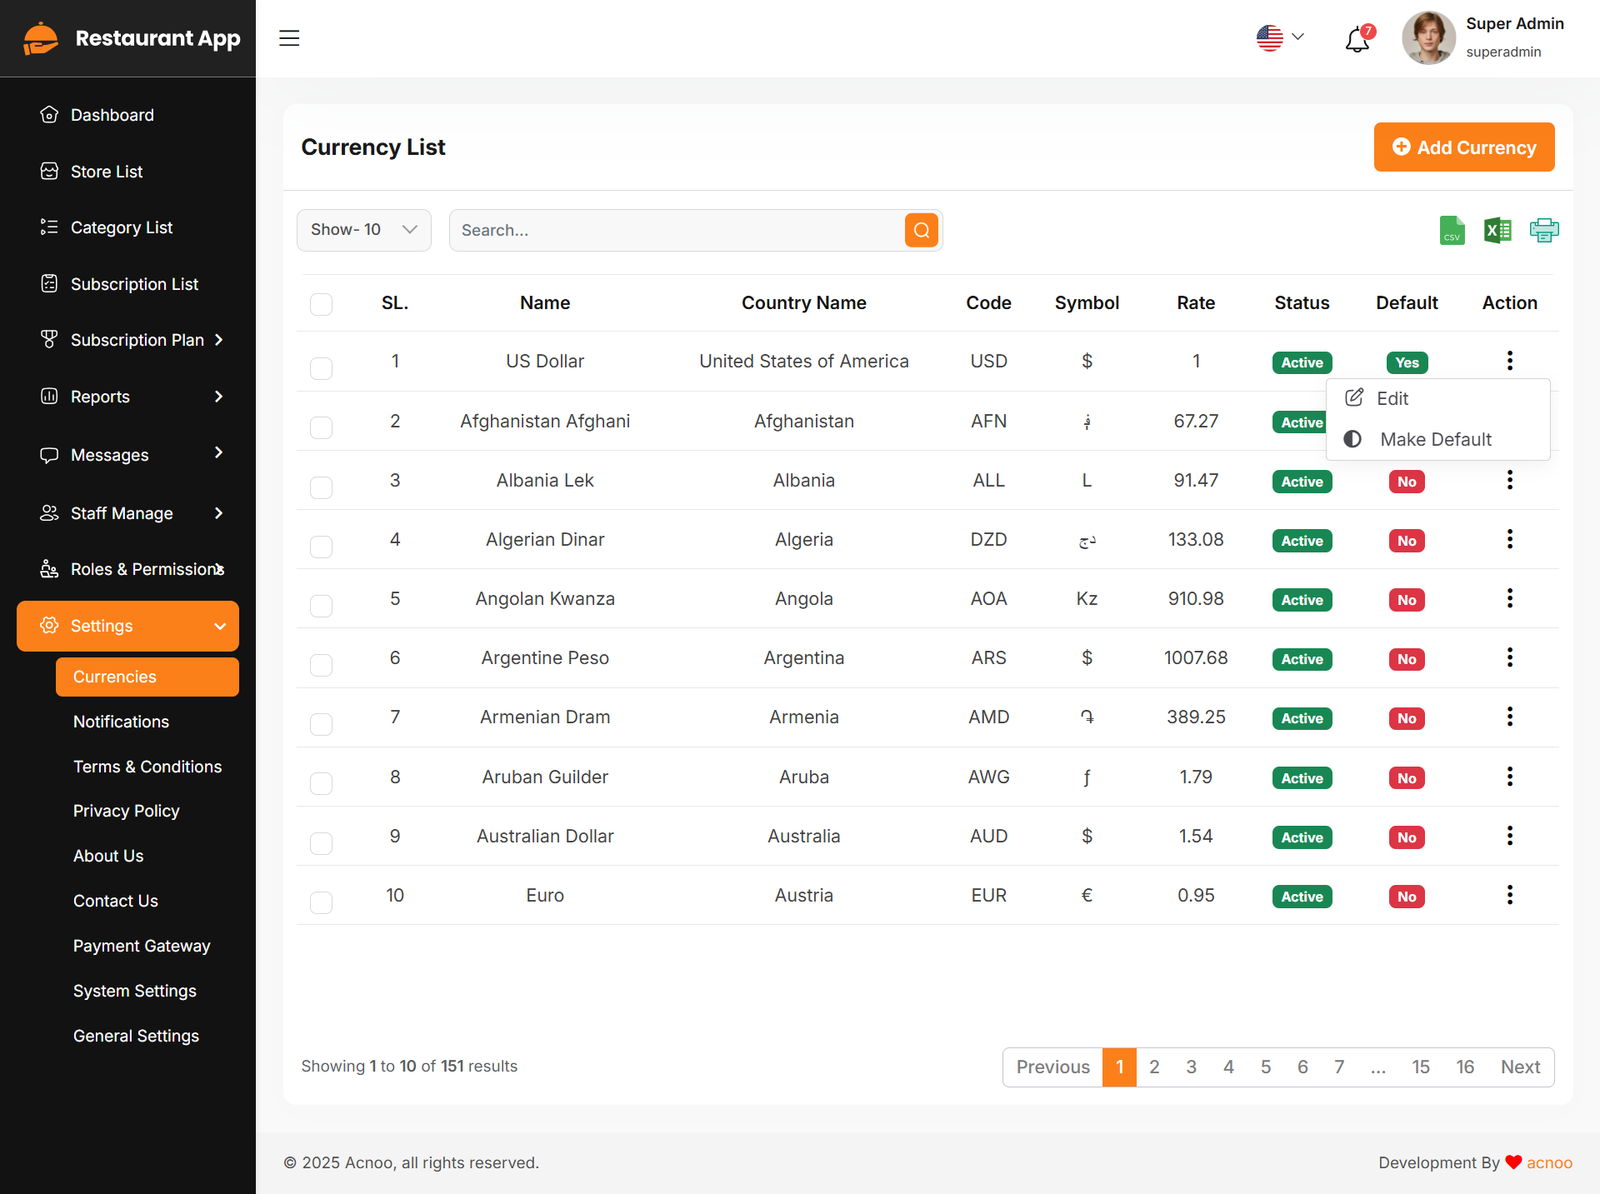
Currency list
Here, you can view a list of currencies with filtering options. Additionally, there is an option to edit currencies, and you can also set a default currency.
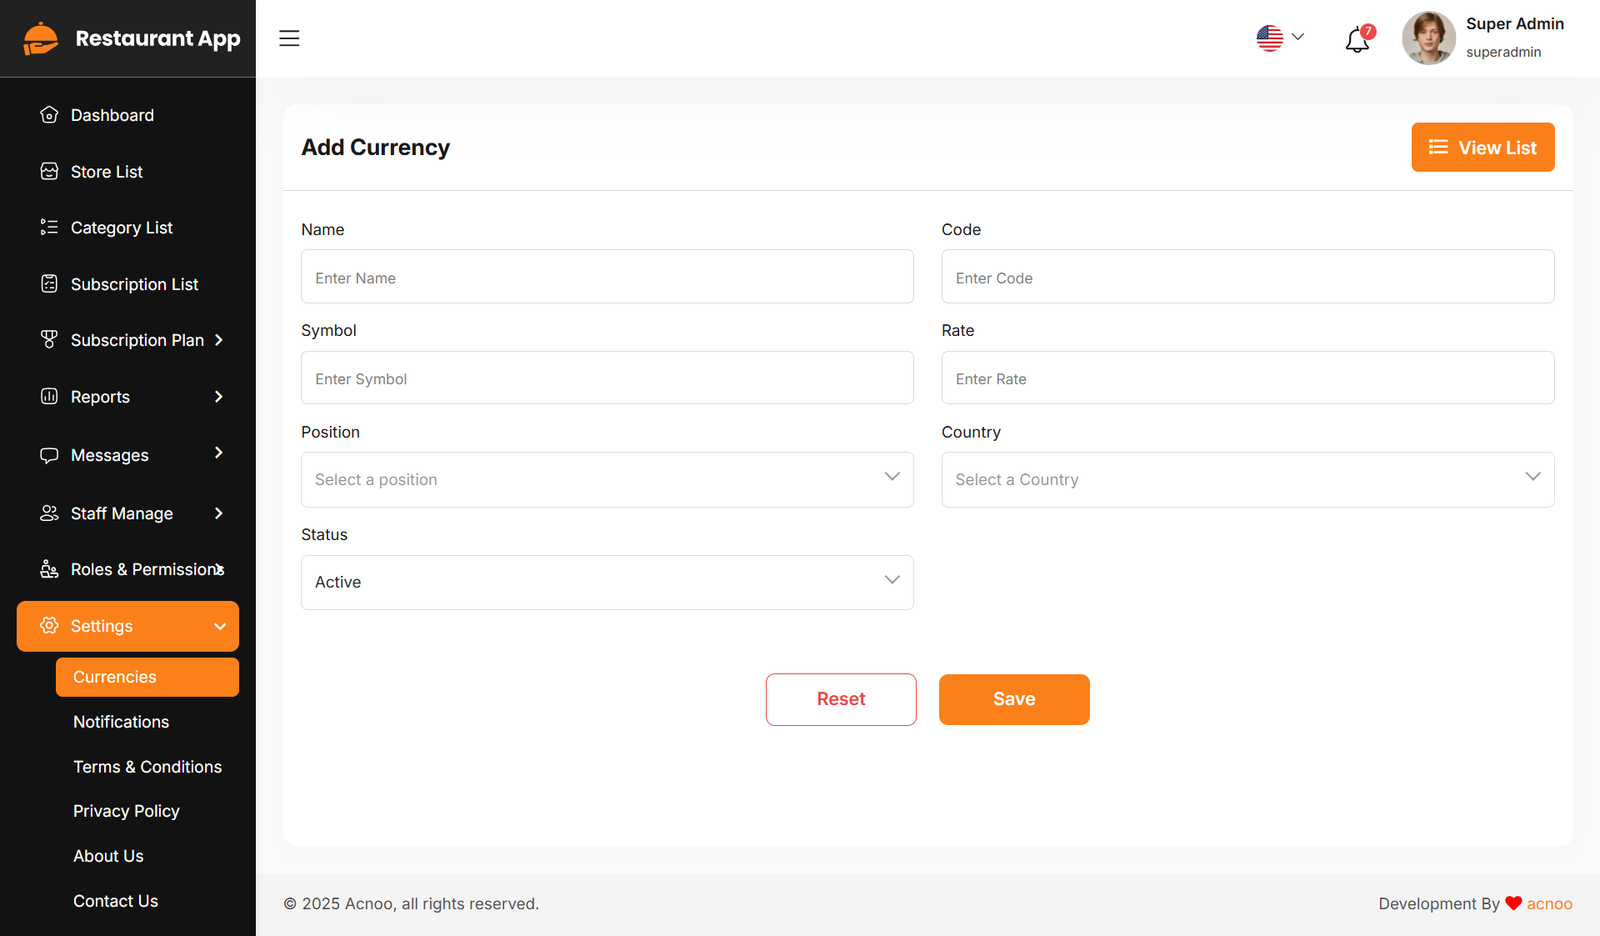
Create Currency
You have the option to include currency from this location.
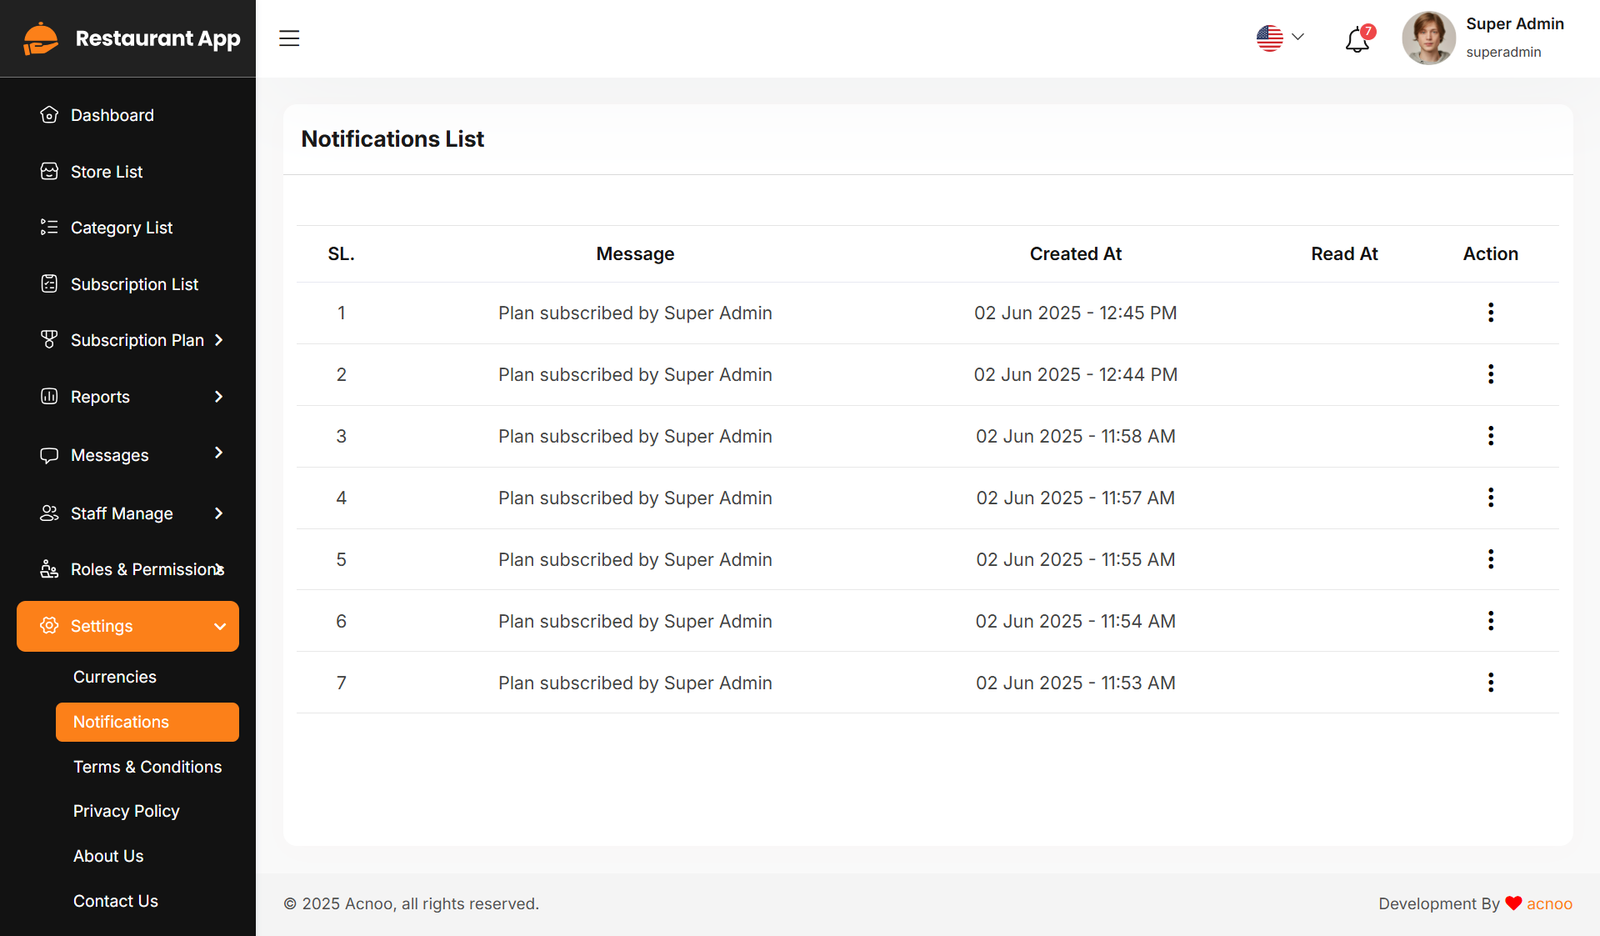
Notification
Here, you can view a list of various notifications. You also have the option to filter these notifications based on available criteria.In each list, clicking the "View" button allows you to see detailed information.
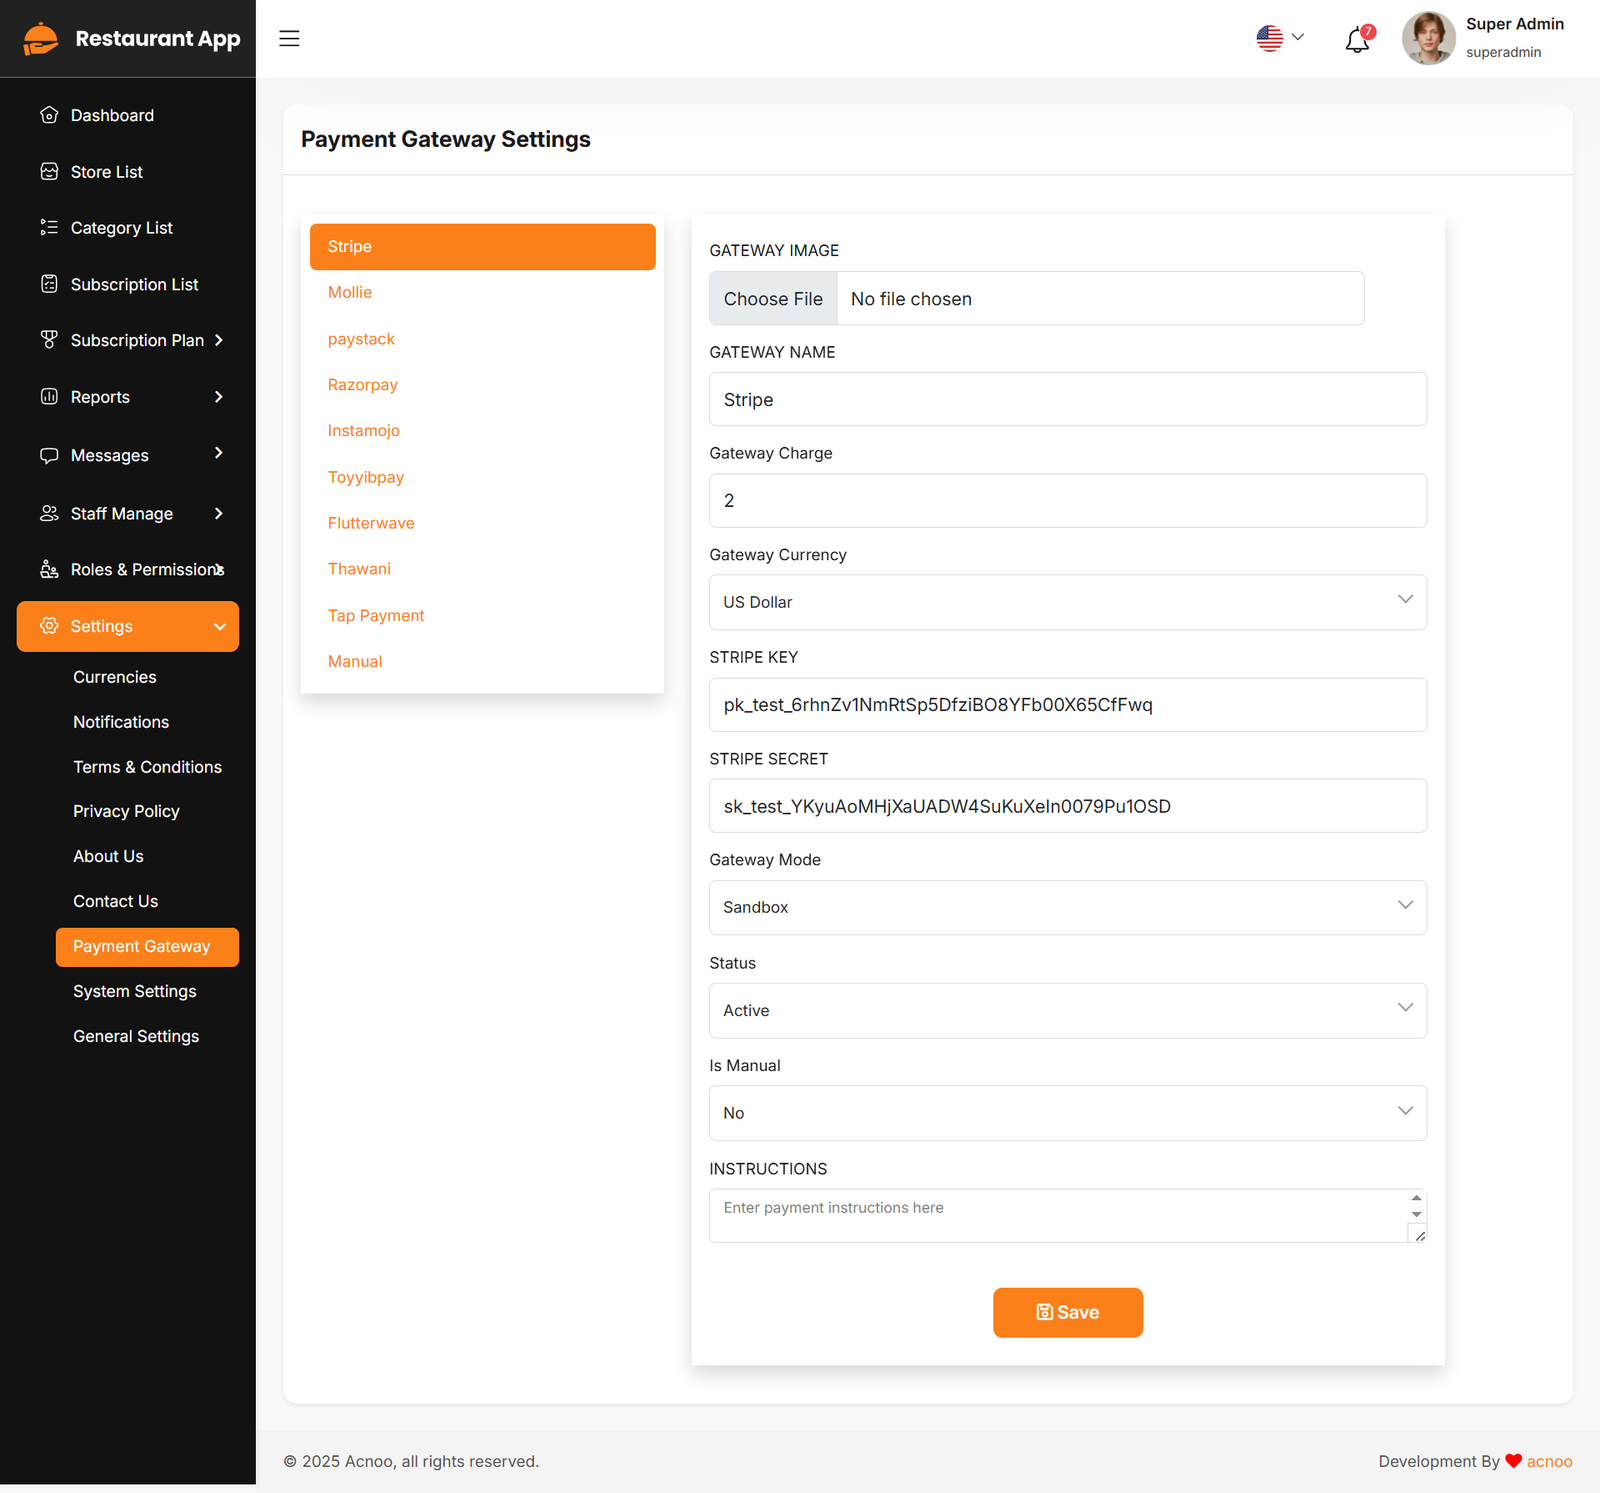
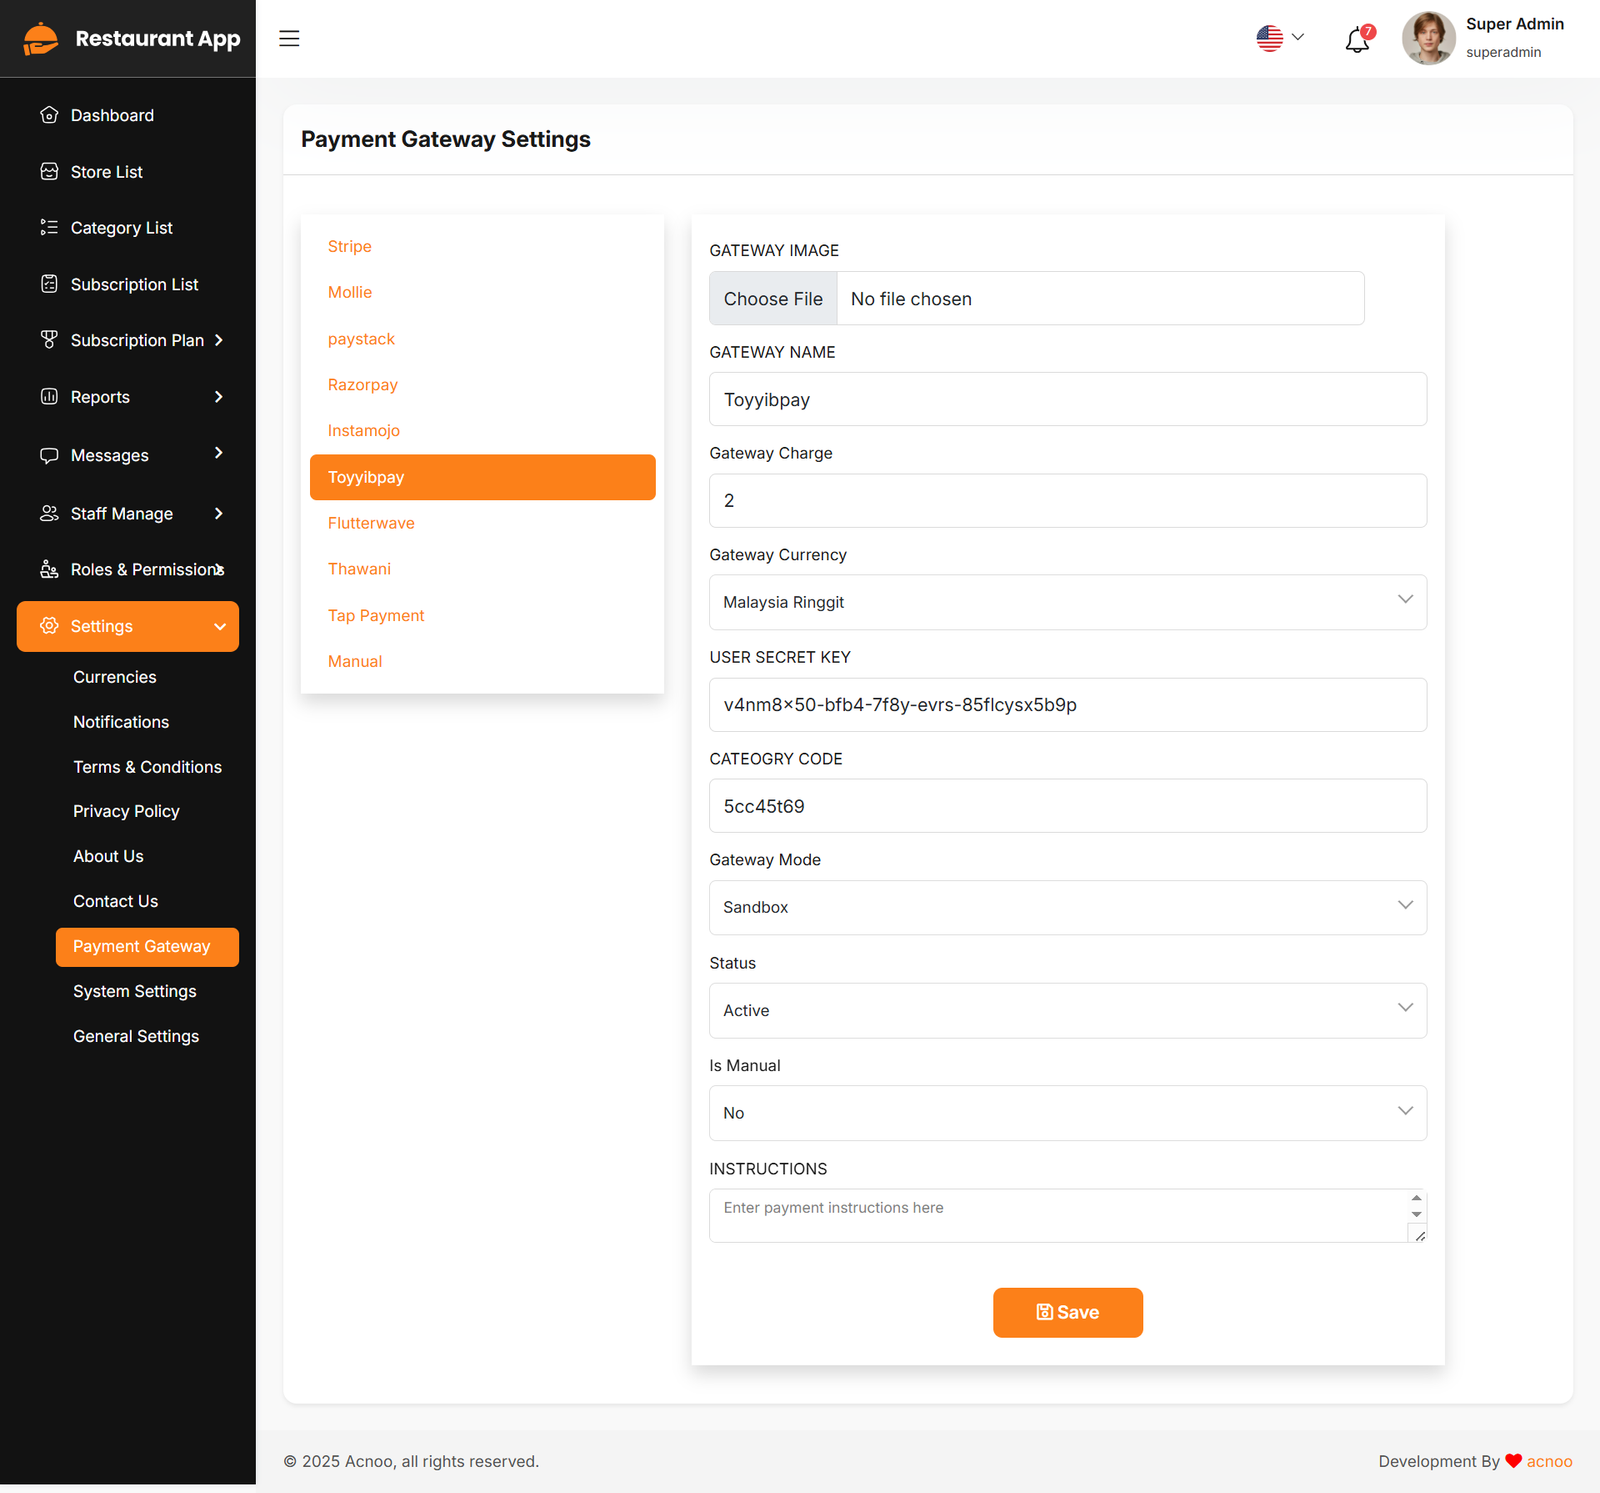
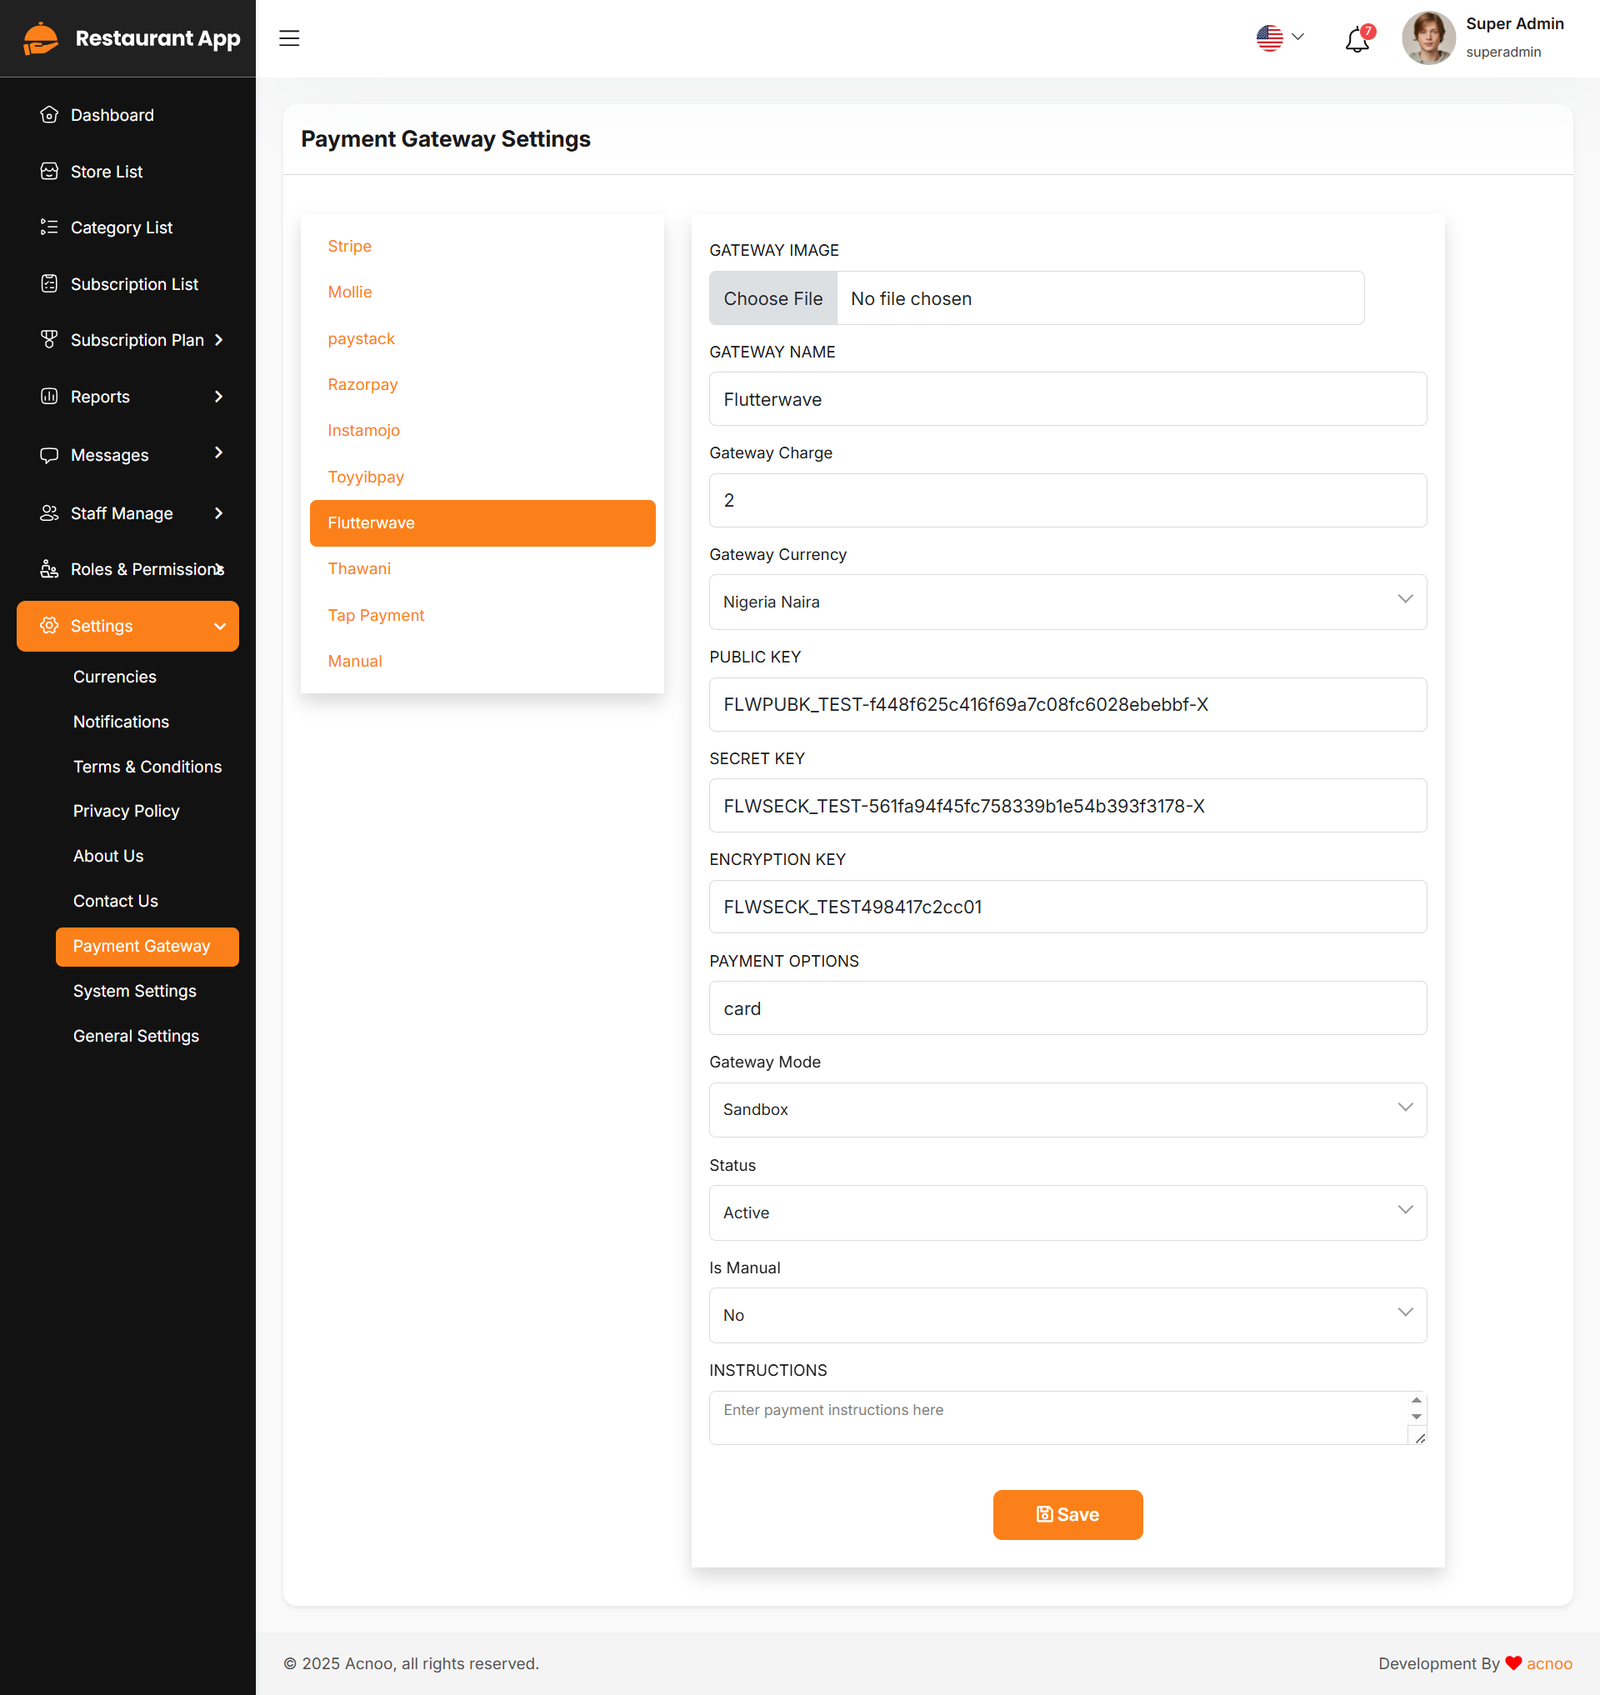
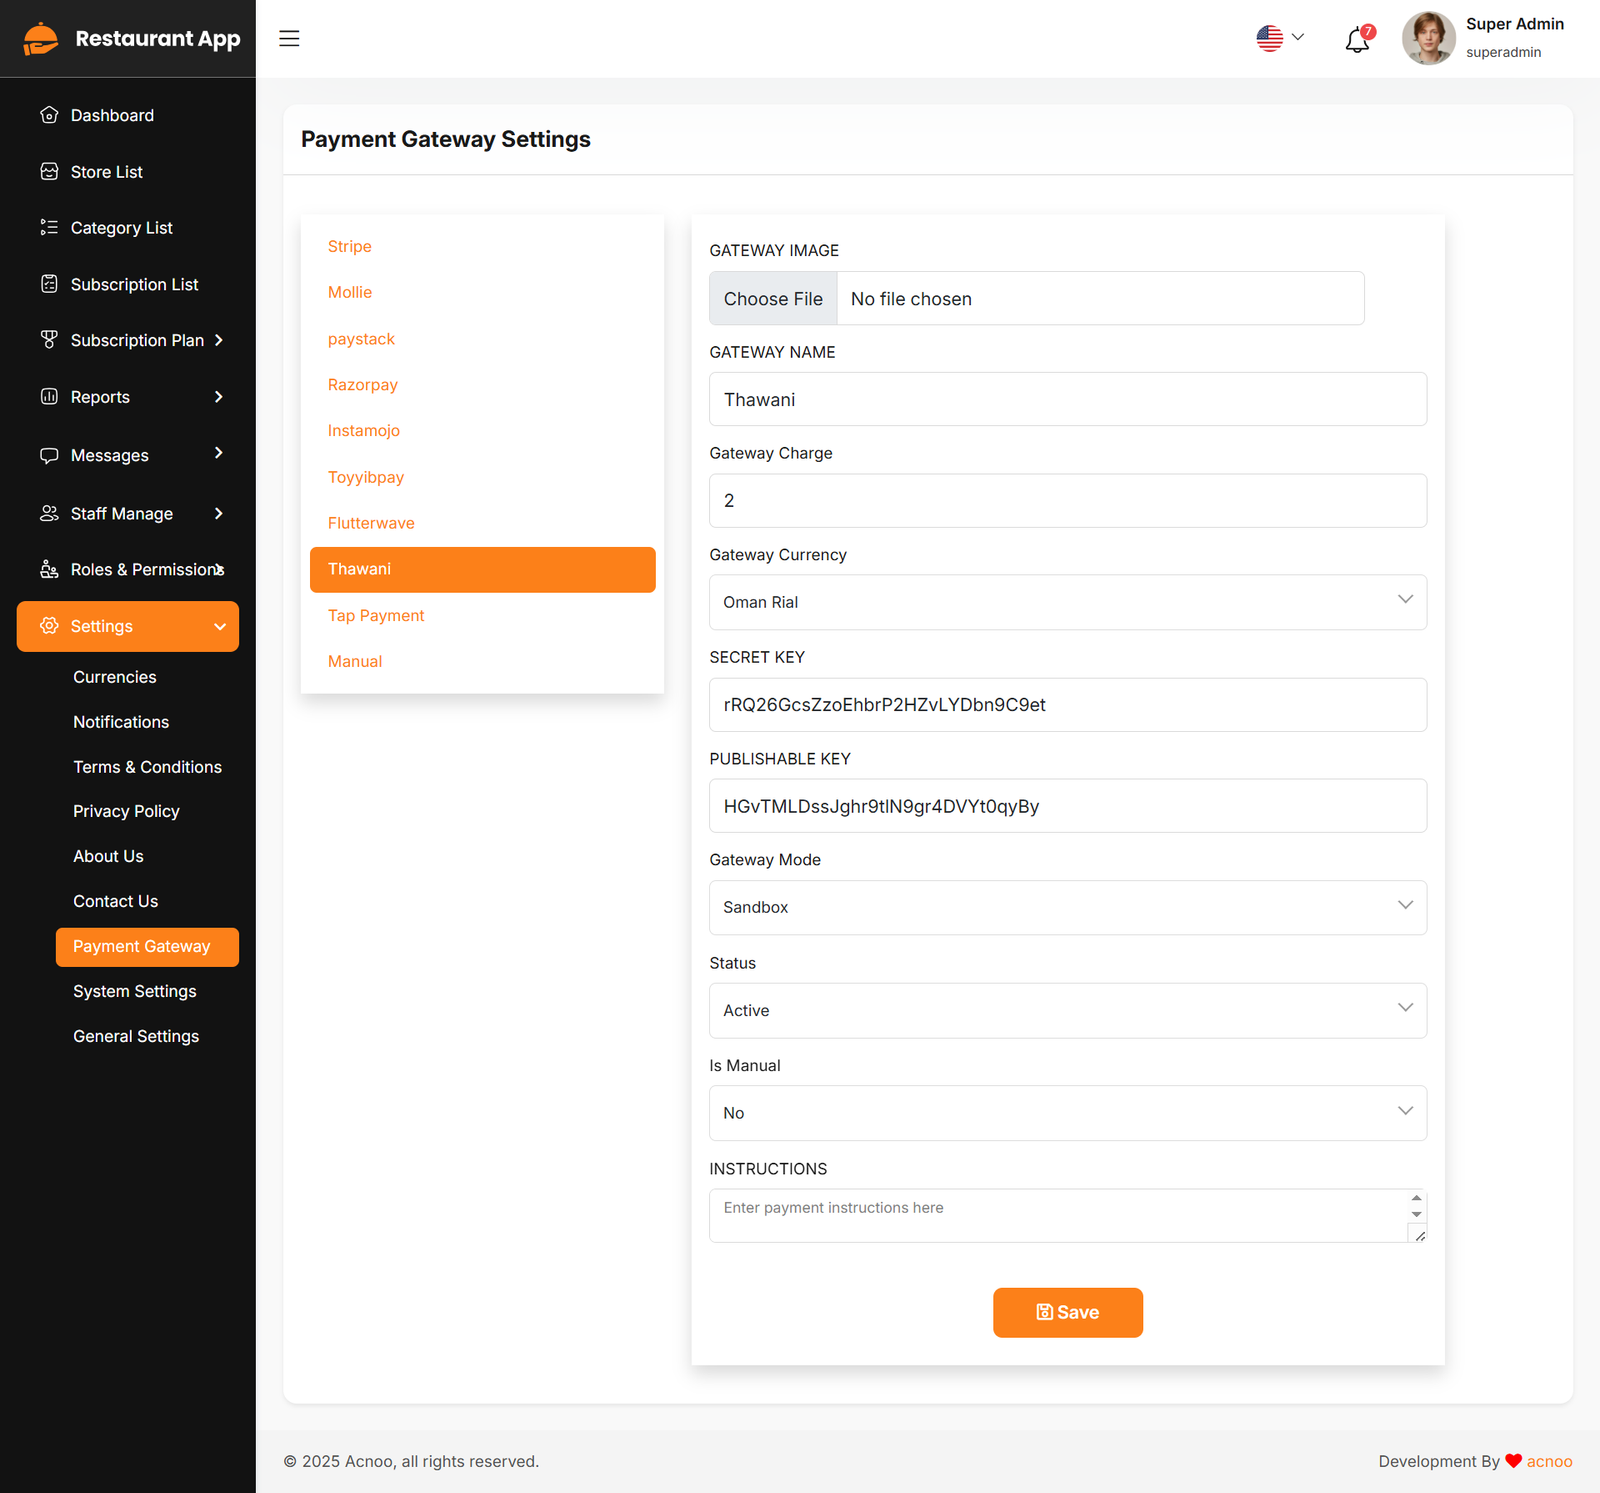
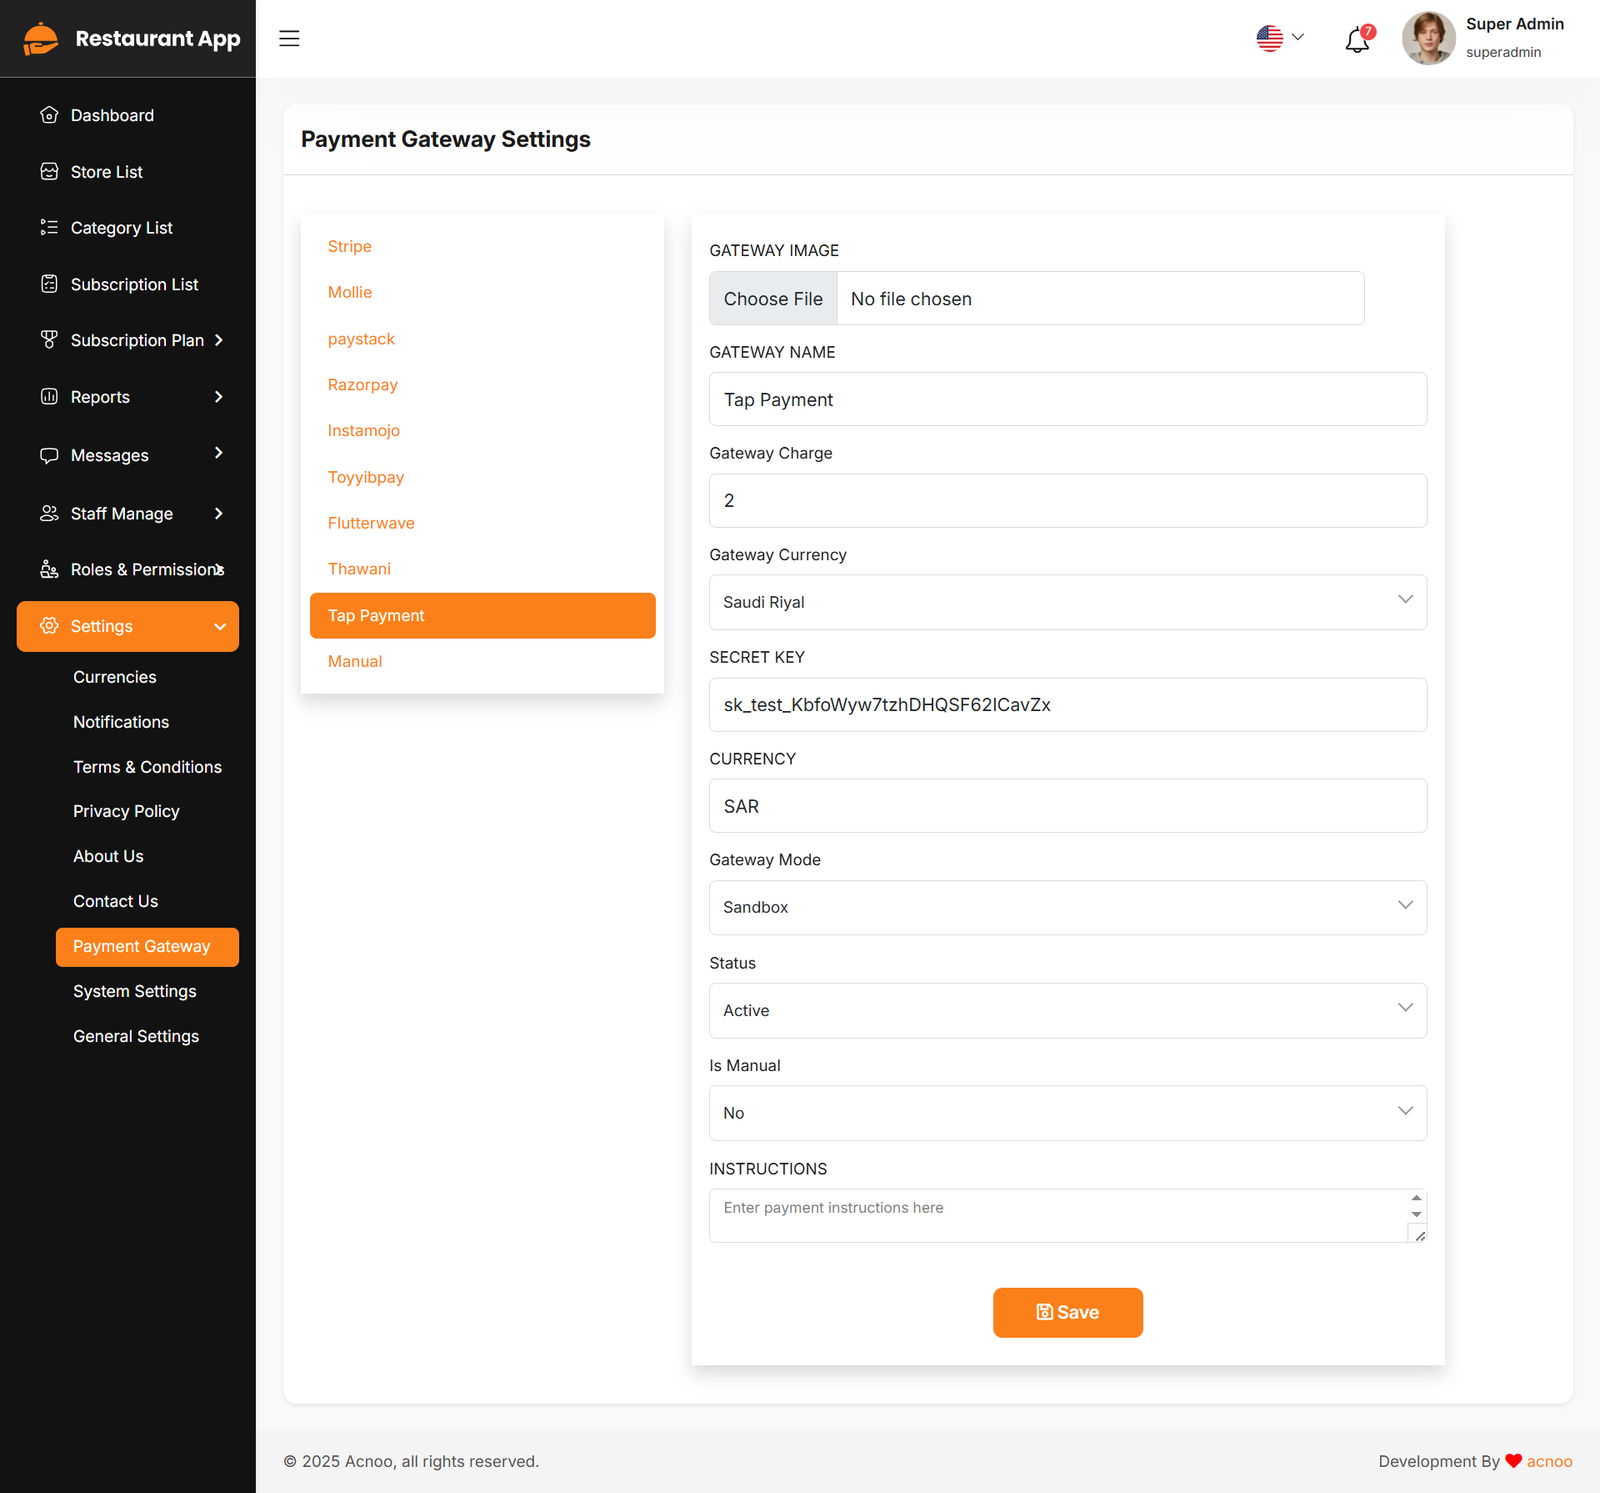
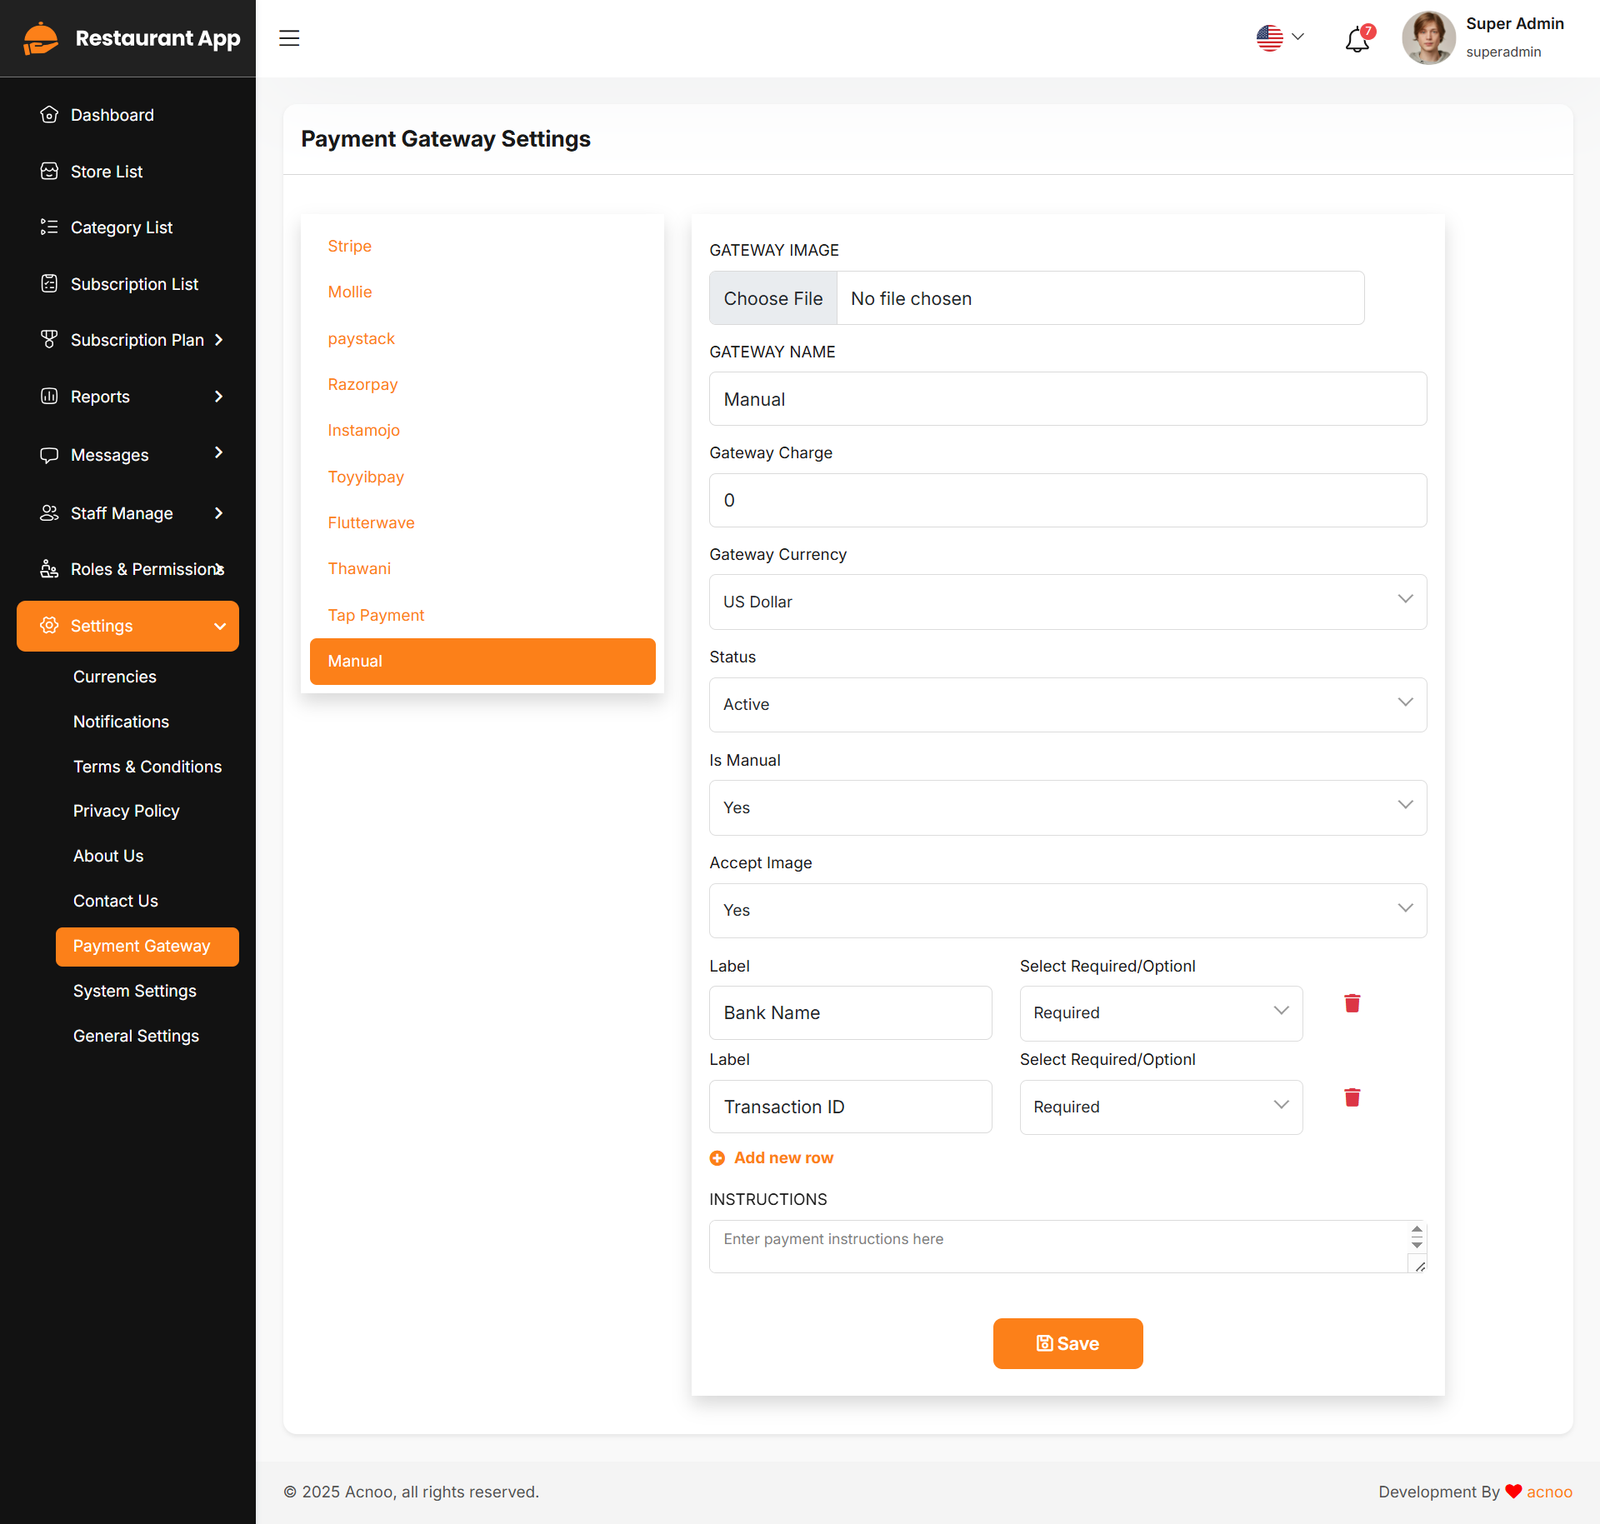
Payment Gateway Settings
Here, you can modify various payment gateways like Stripe, PayPal, SSLCommerz, manual and many others options.
Stripe
Mobile
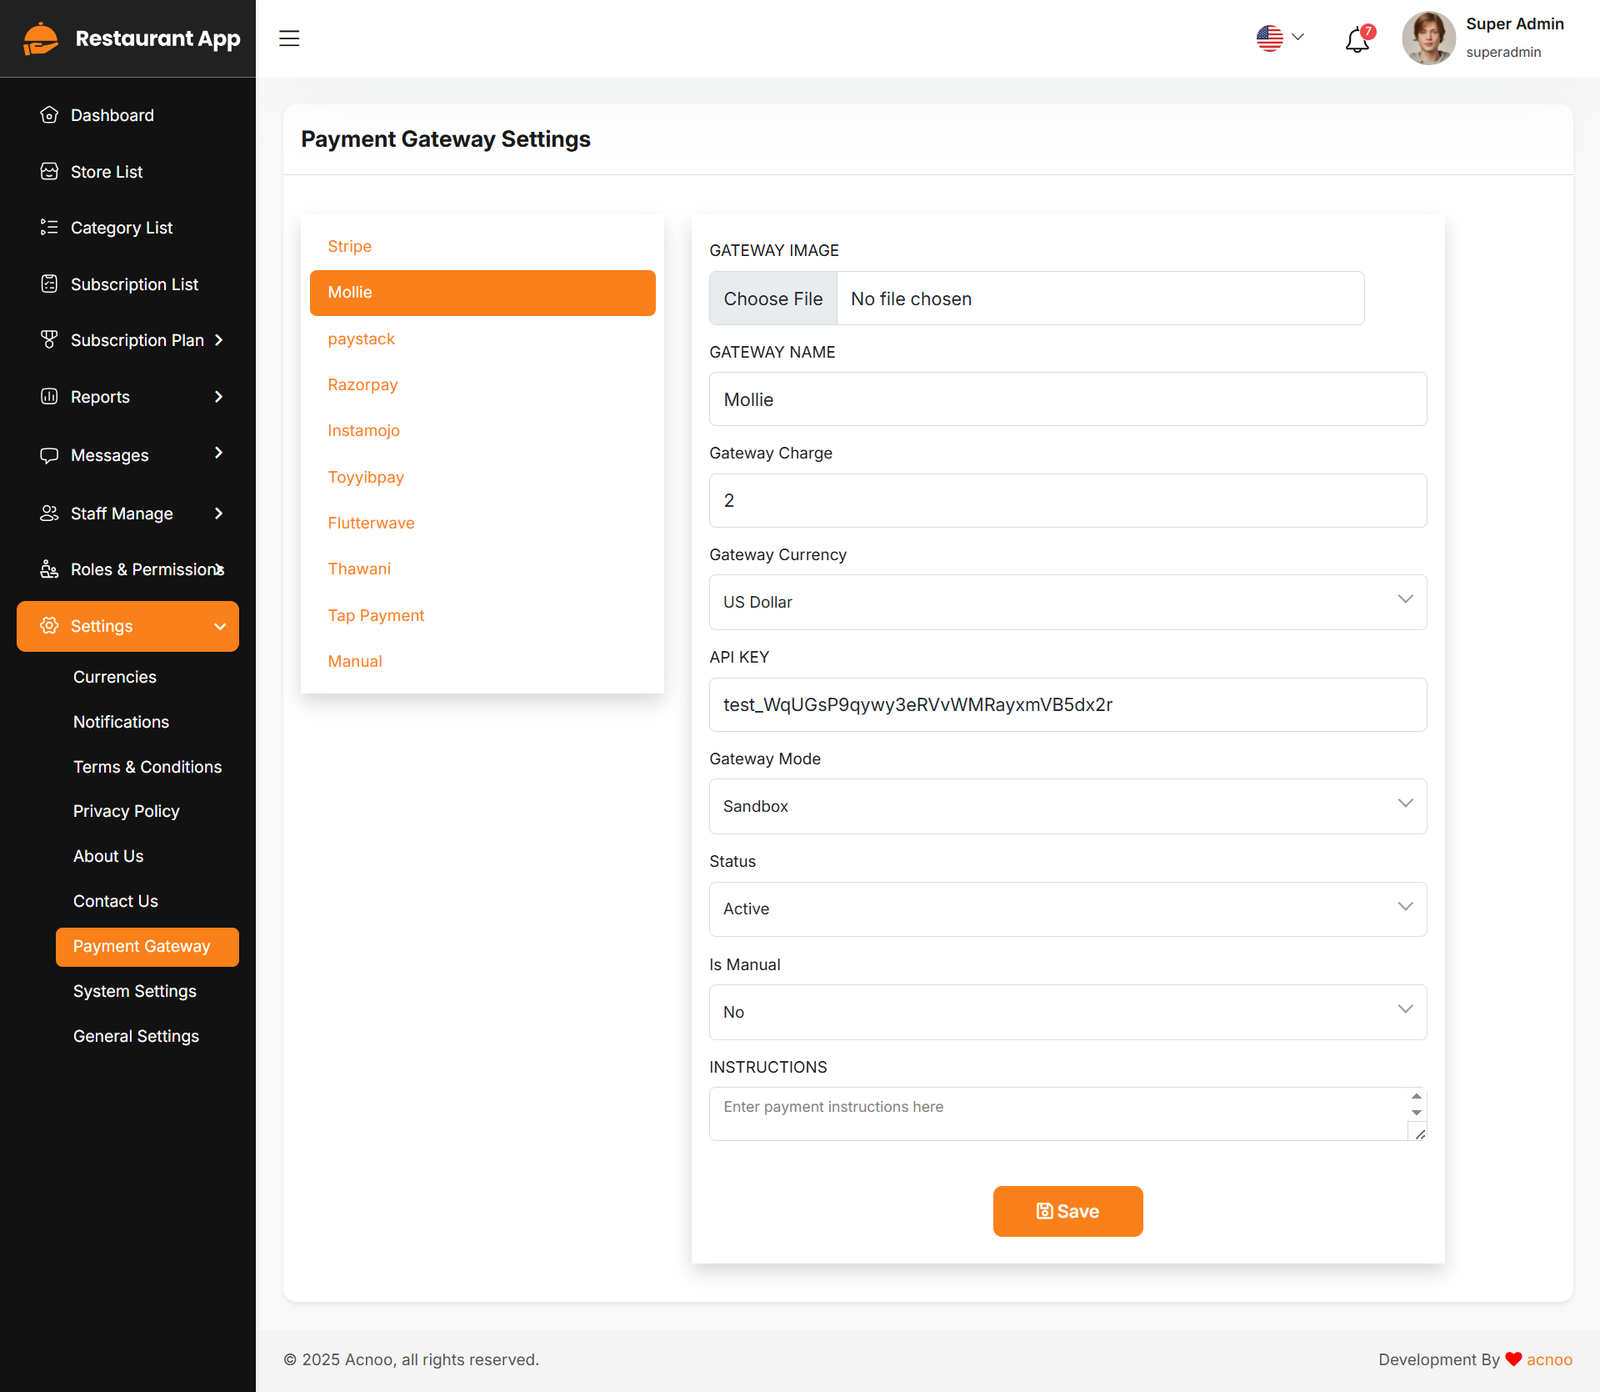
Paystack
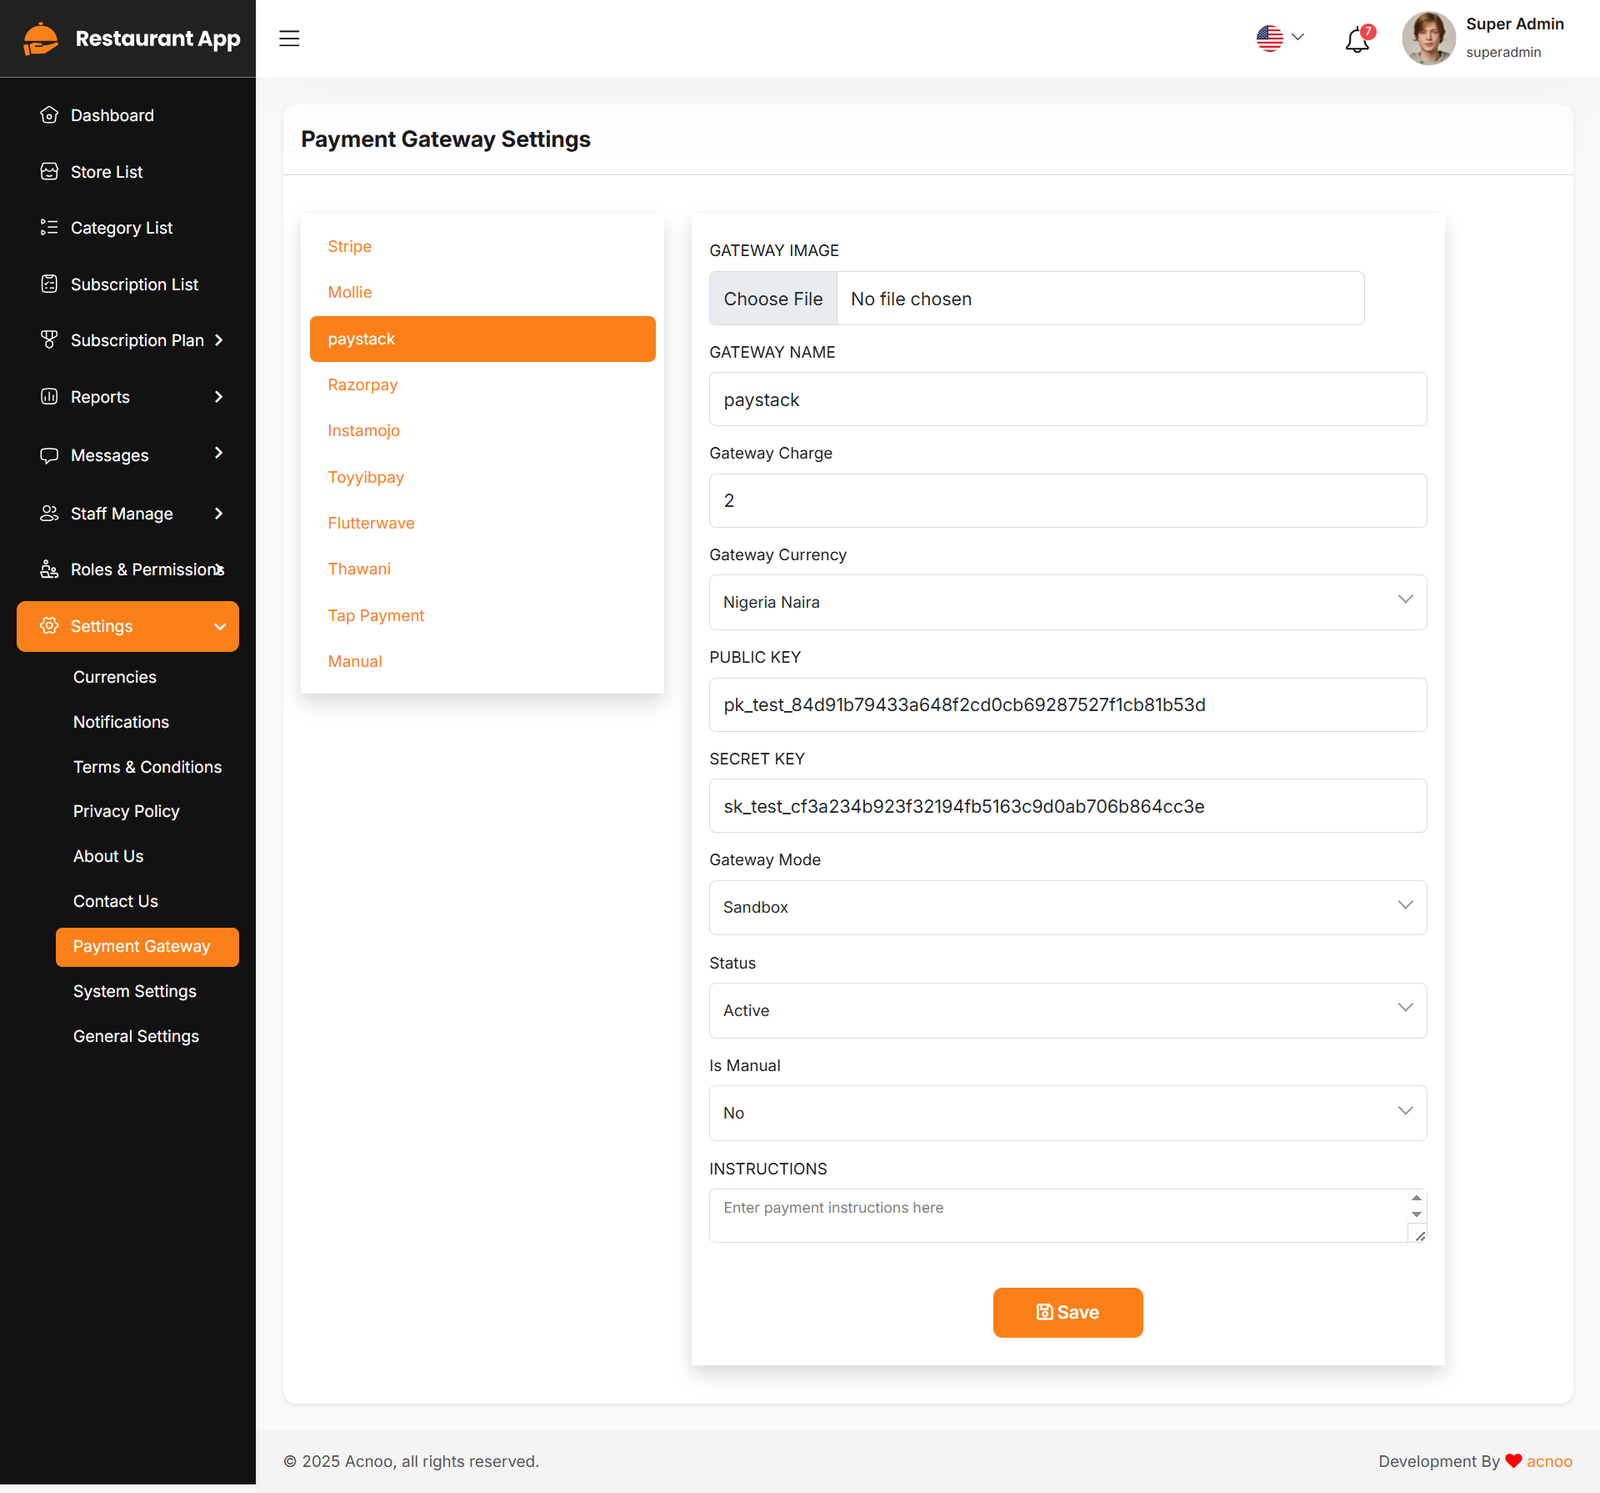
Razorpay
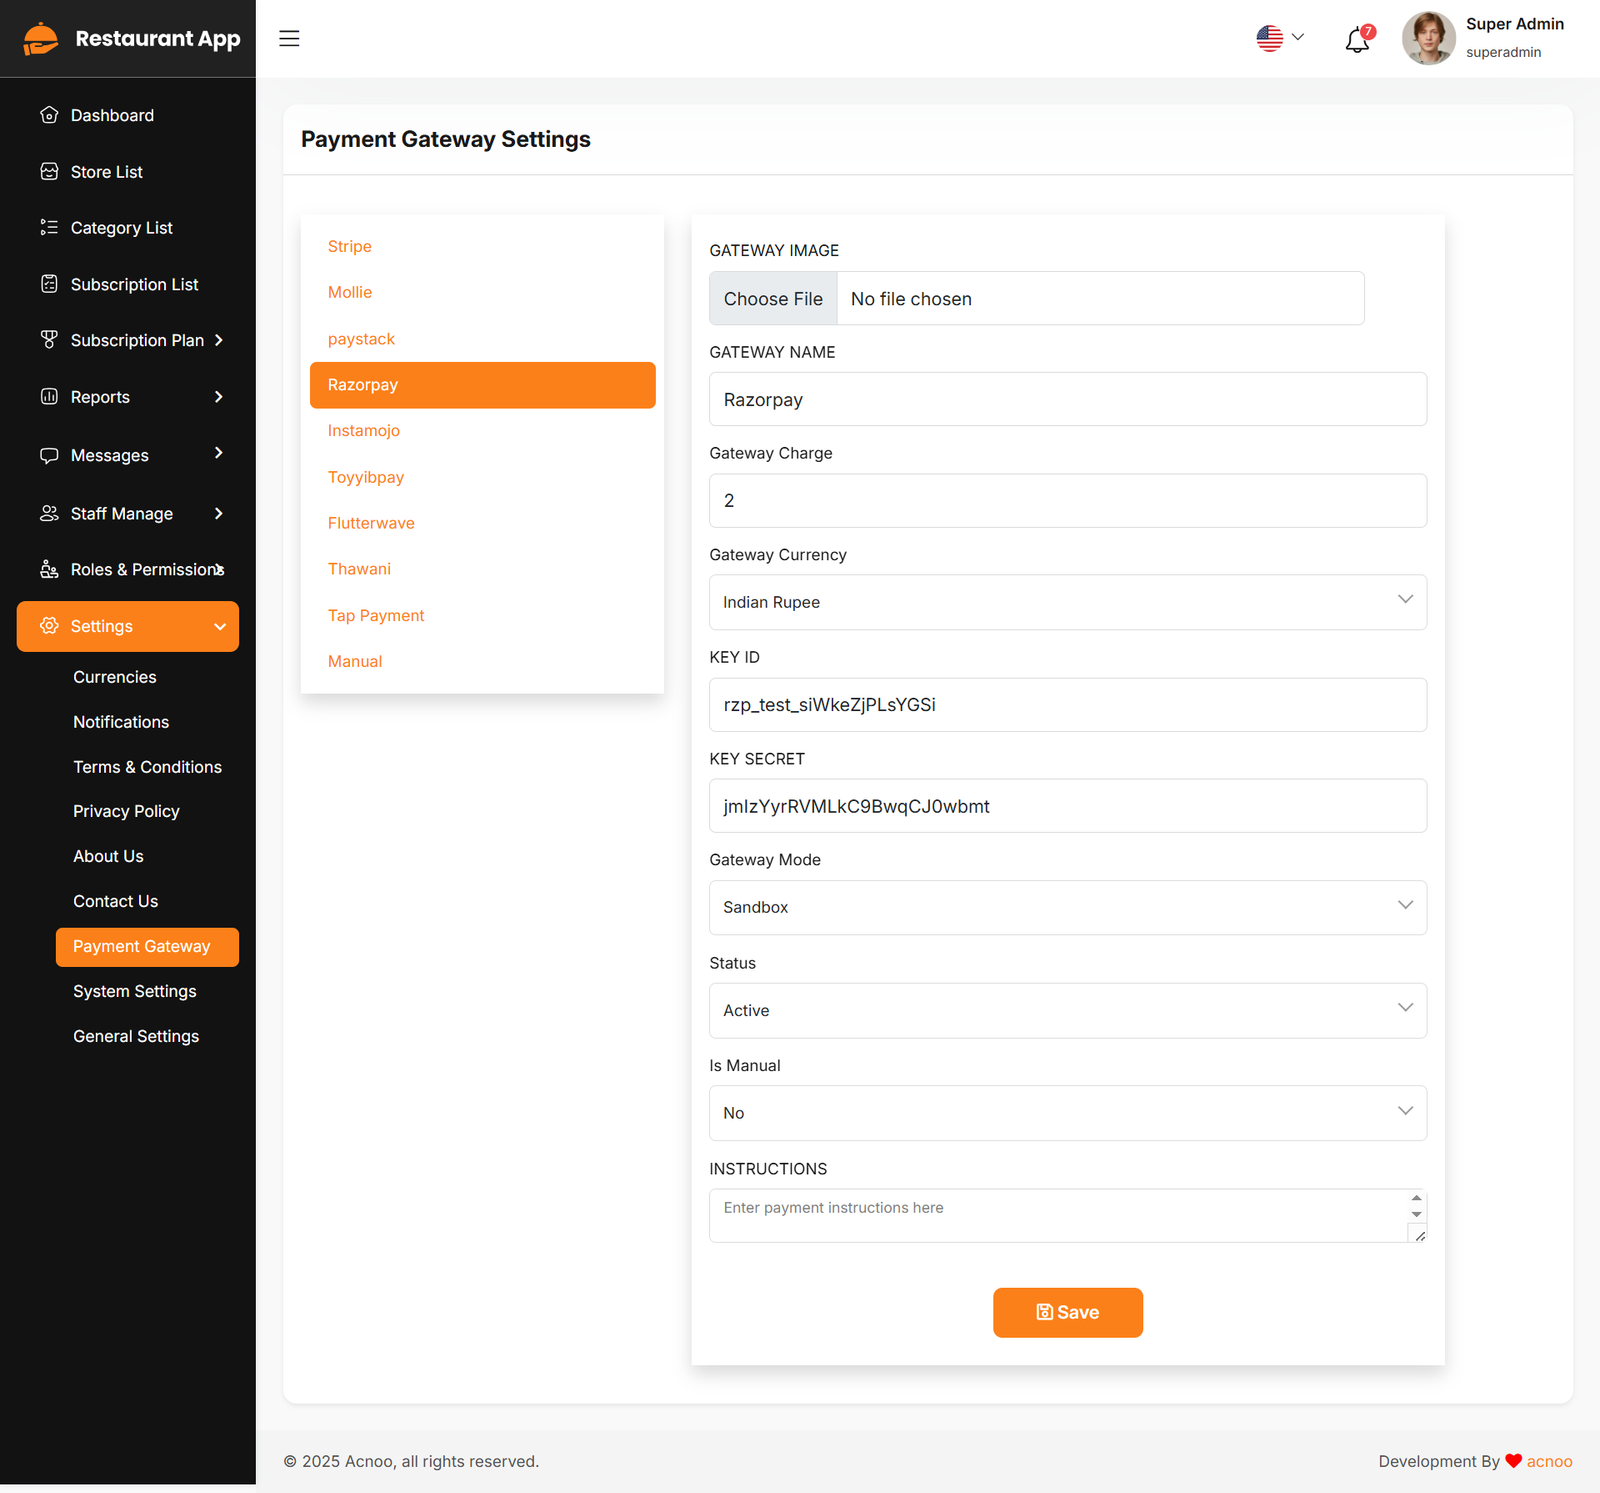
Instamojo
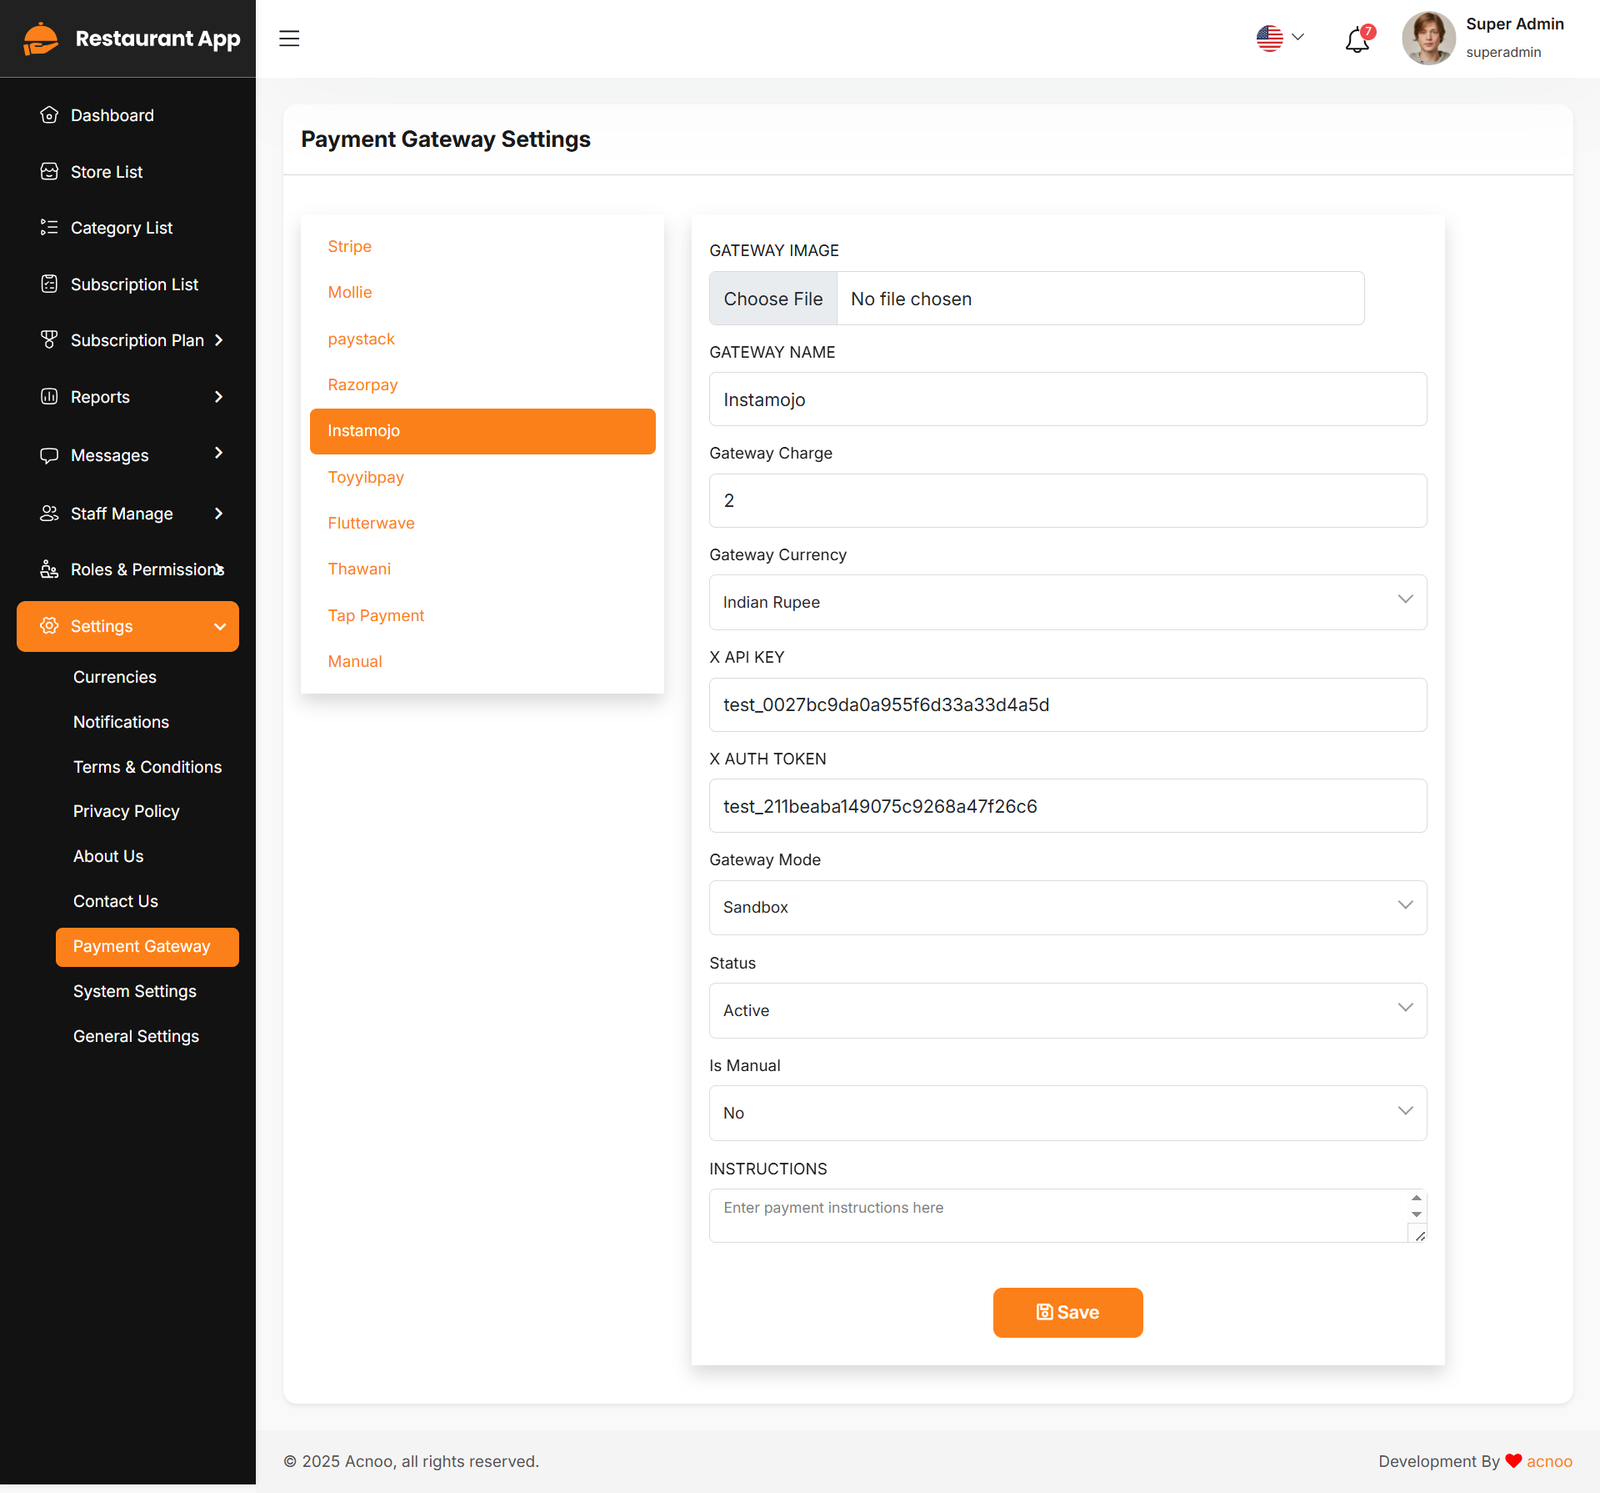
Toyyibpay
Flutter Wave
Thawani
Tap Payment
Manual
System Settings
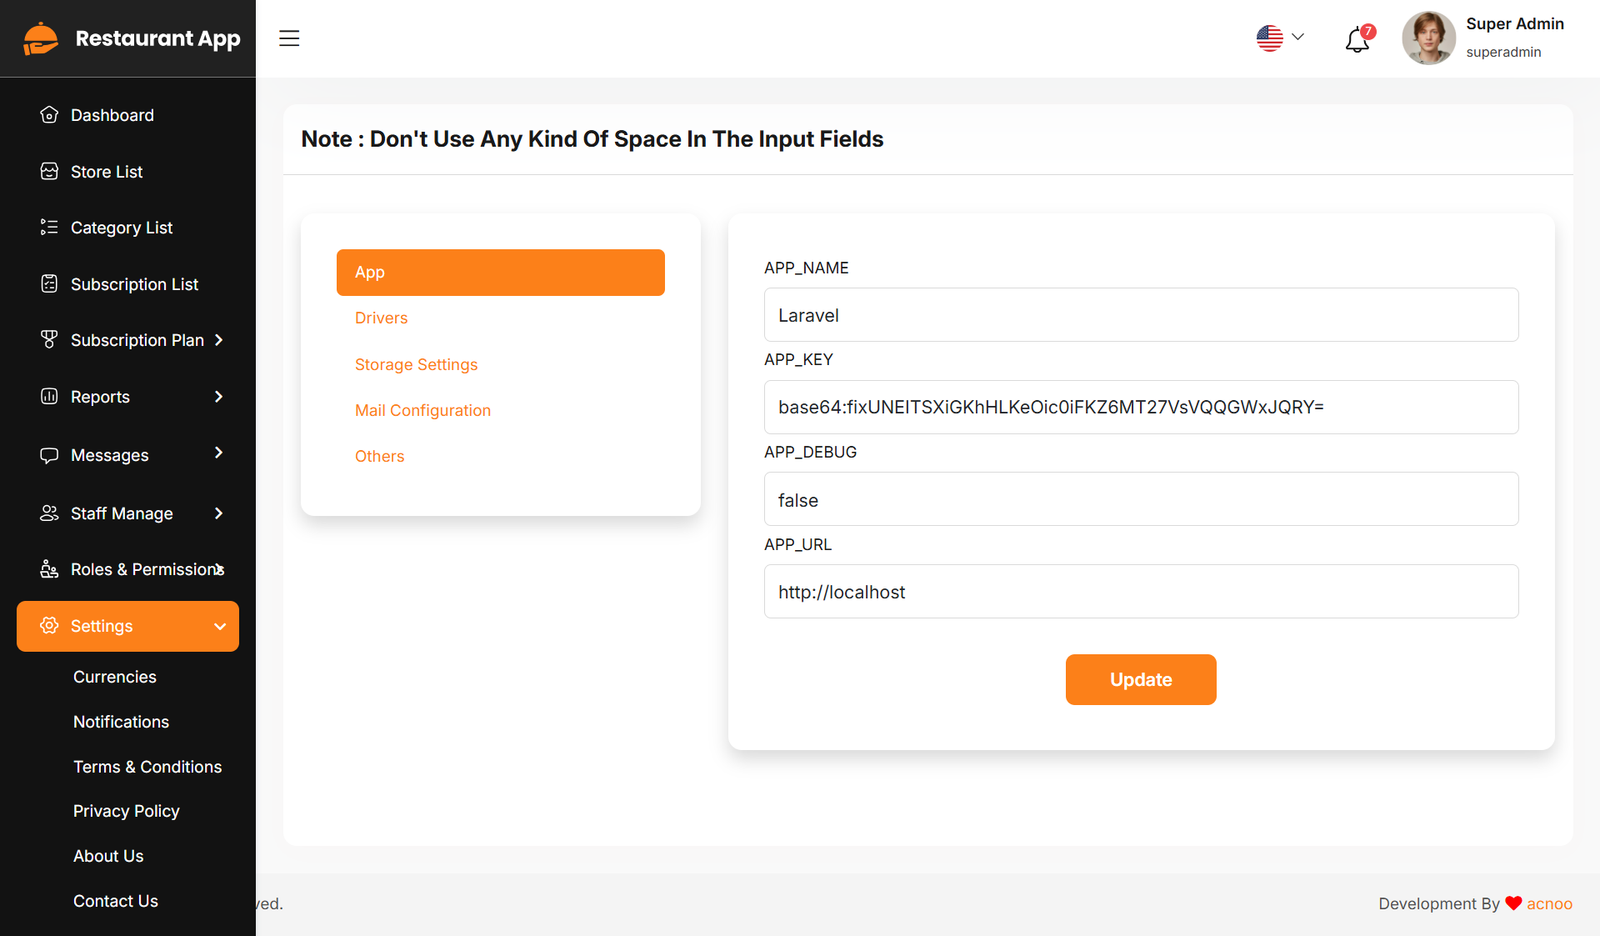
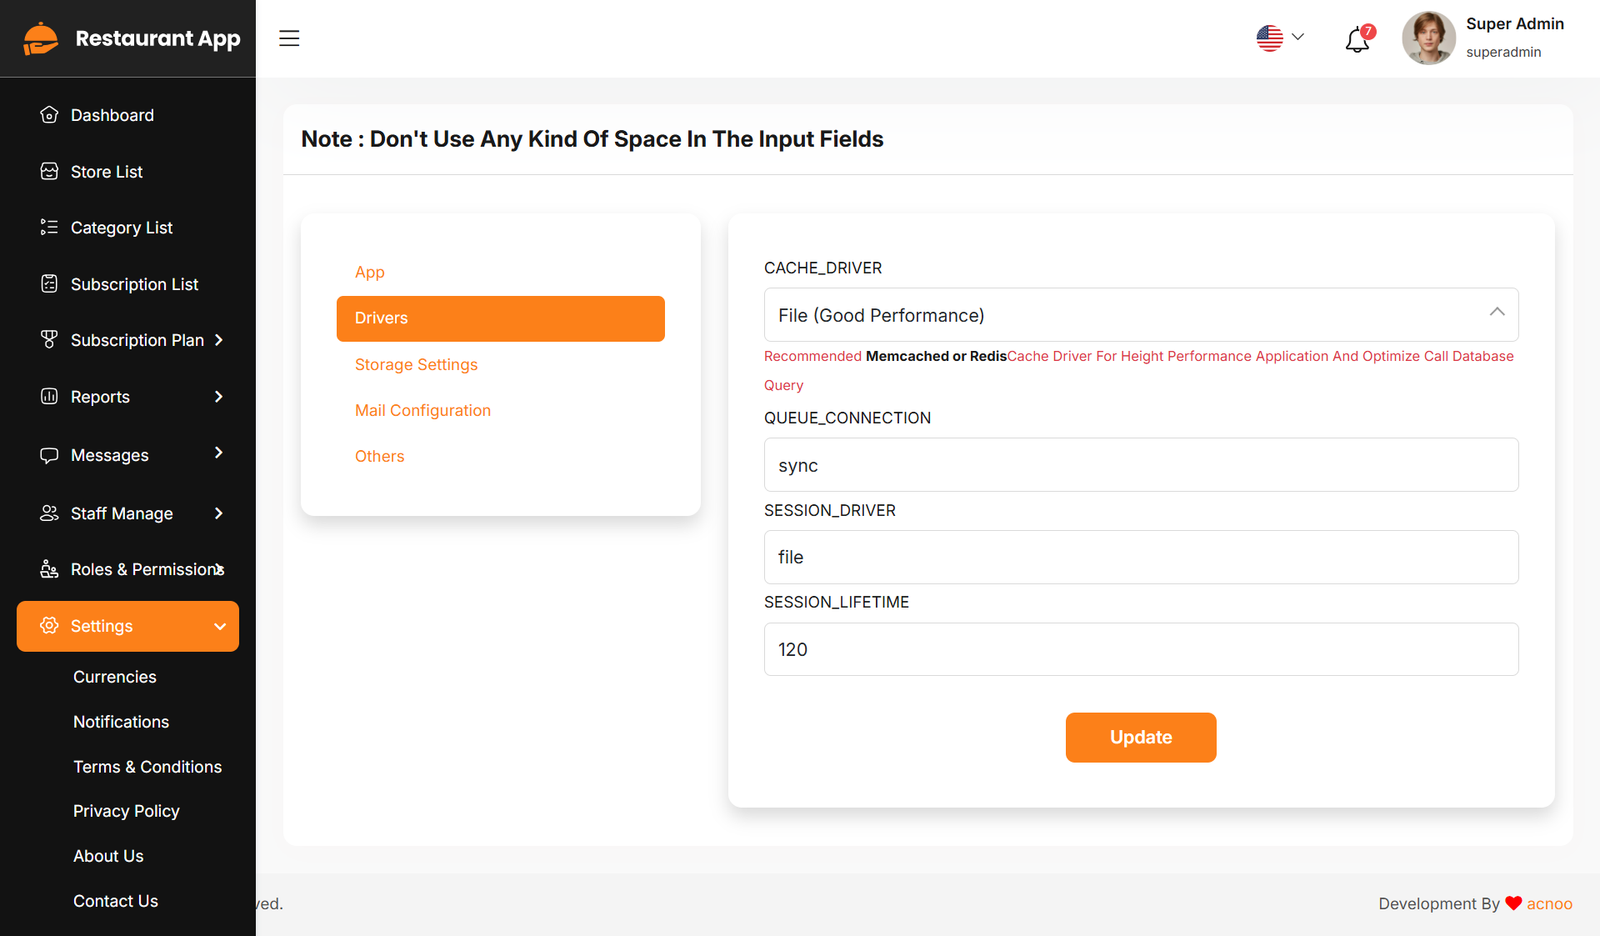
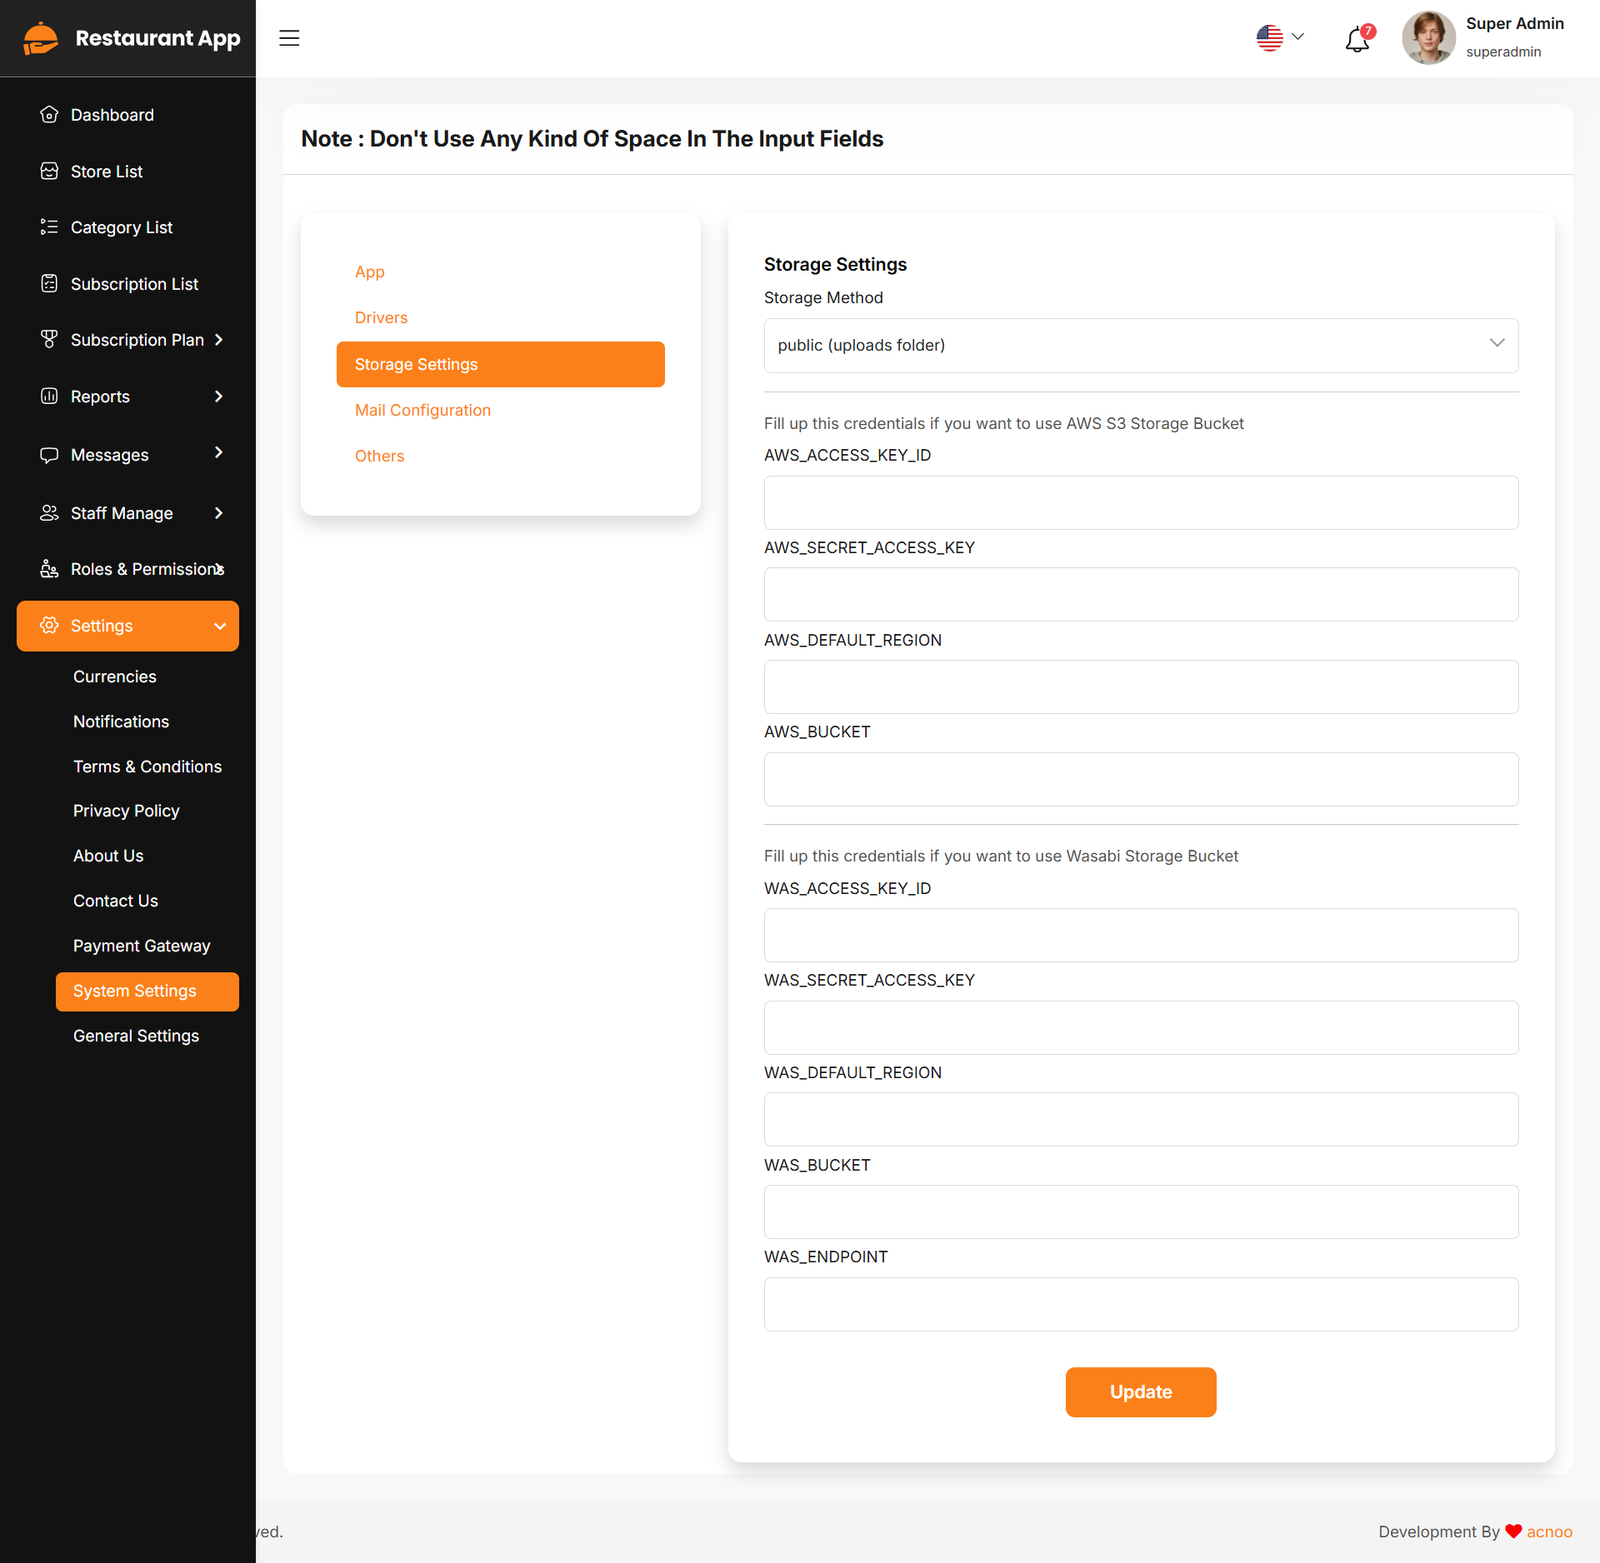
In this section, you can configure various backend settings for the project, including application setup, driver configurations, mail settings, storage configurations, and other essential components. It's crucial to handle these configurations with care as they impact the functionality and security of the system.
App
Drivers
Storage Settings
Mail Configuration
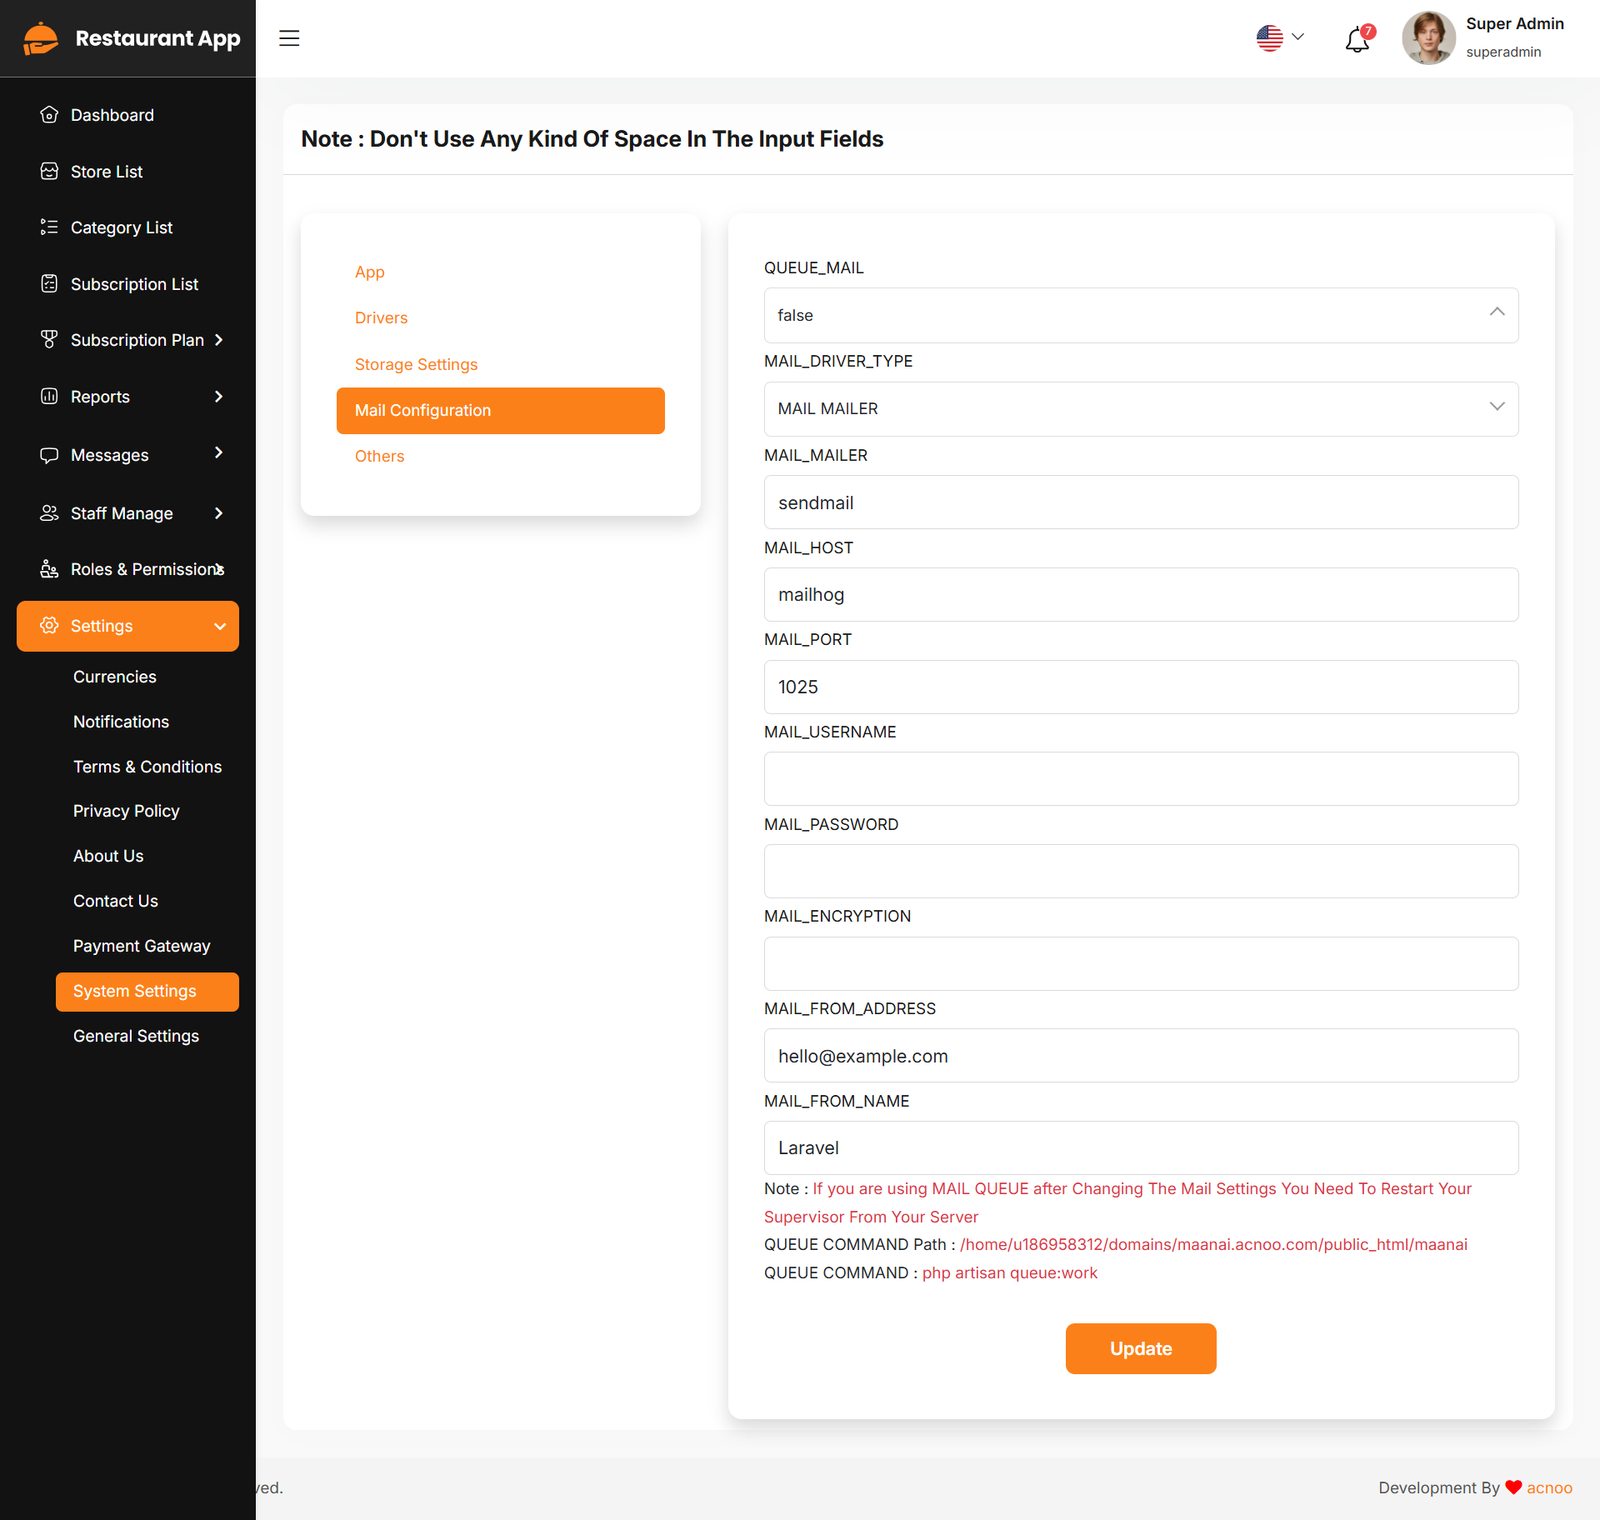
Note: Please note that if you change QUEUE_MAIL from false to true, you need to run the following command: php artisan queue:work. Remember: The command path should be: /home/u186958312/domains/yourdomain.com/public_html. Make sure you're in the correct path.
Note: If you're not familiar with running the command, there's another option. Simply visit yourdomain.com/queue-work and it will be executed automatically.
Note: If you select QUEUE_MAIL as true but do not run the command or visit the URL, email functionality will not work properly.
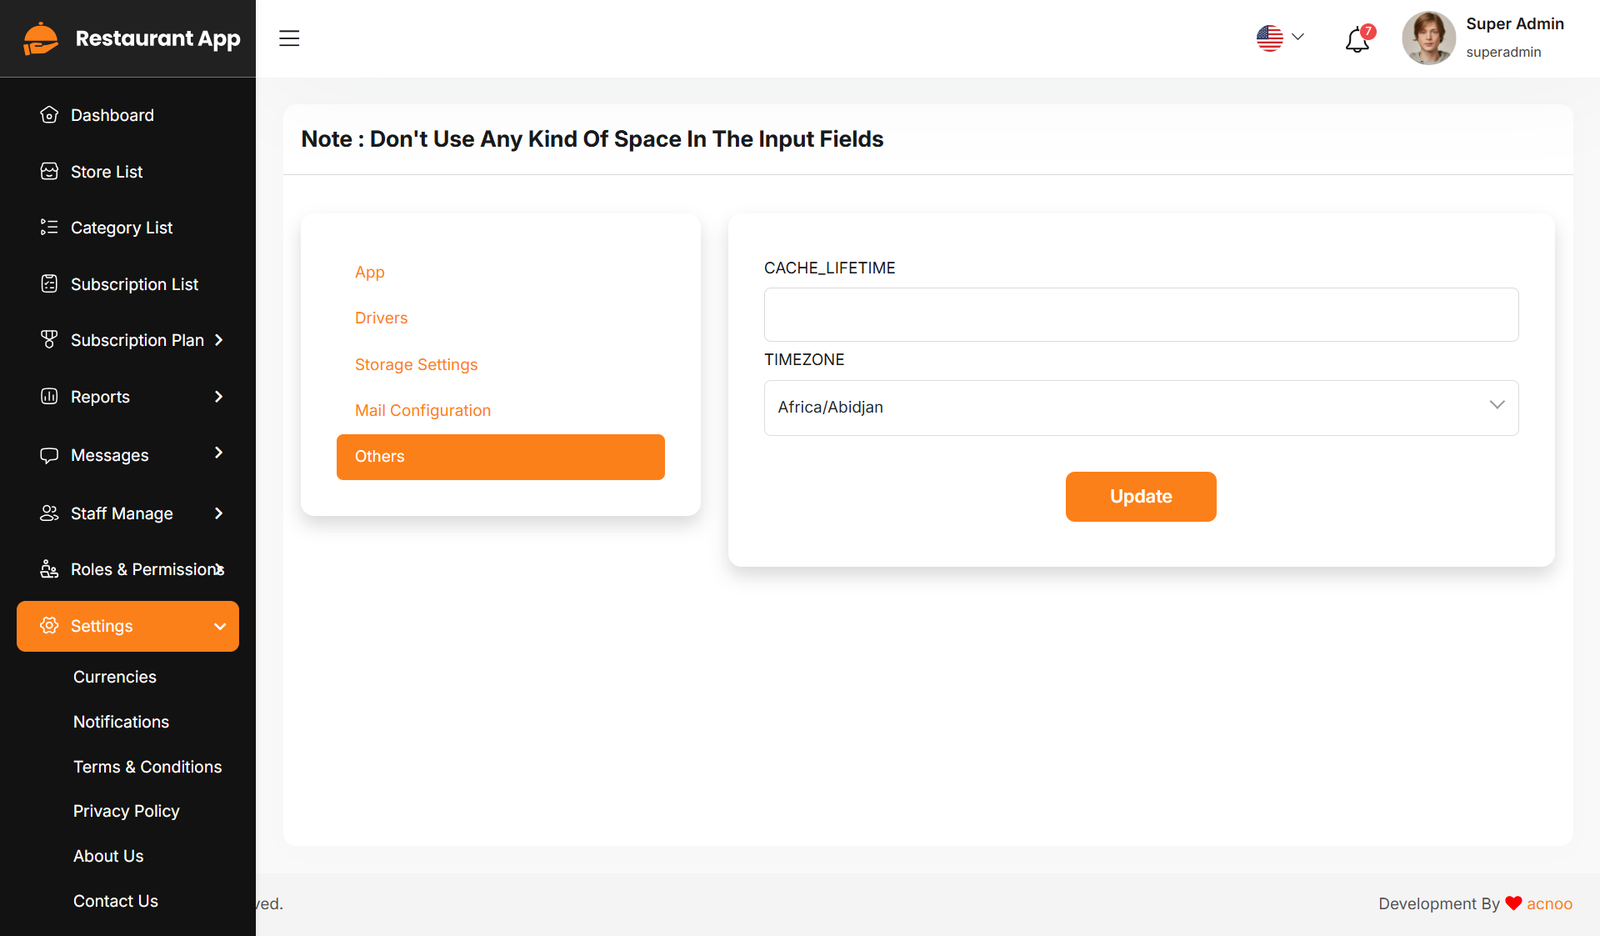
Others
General Settings
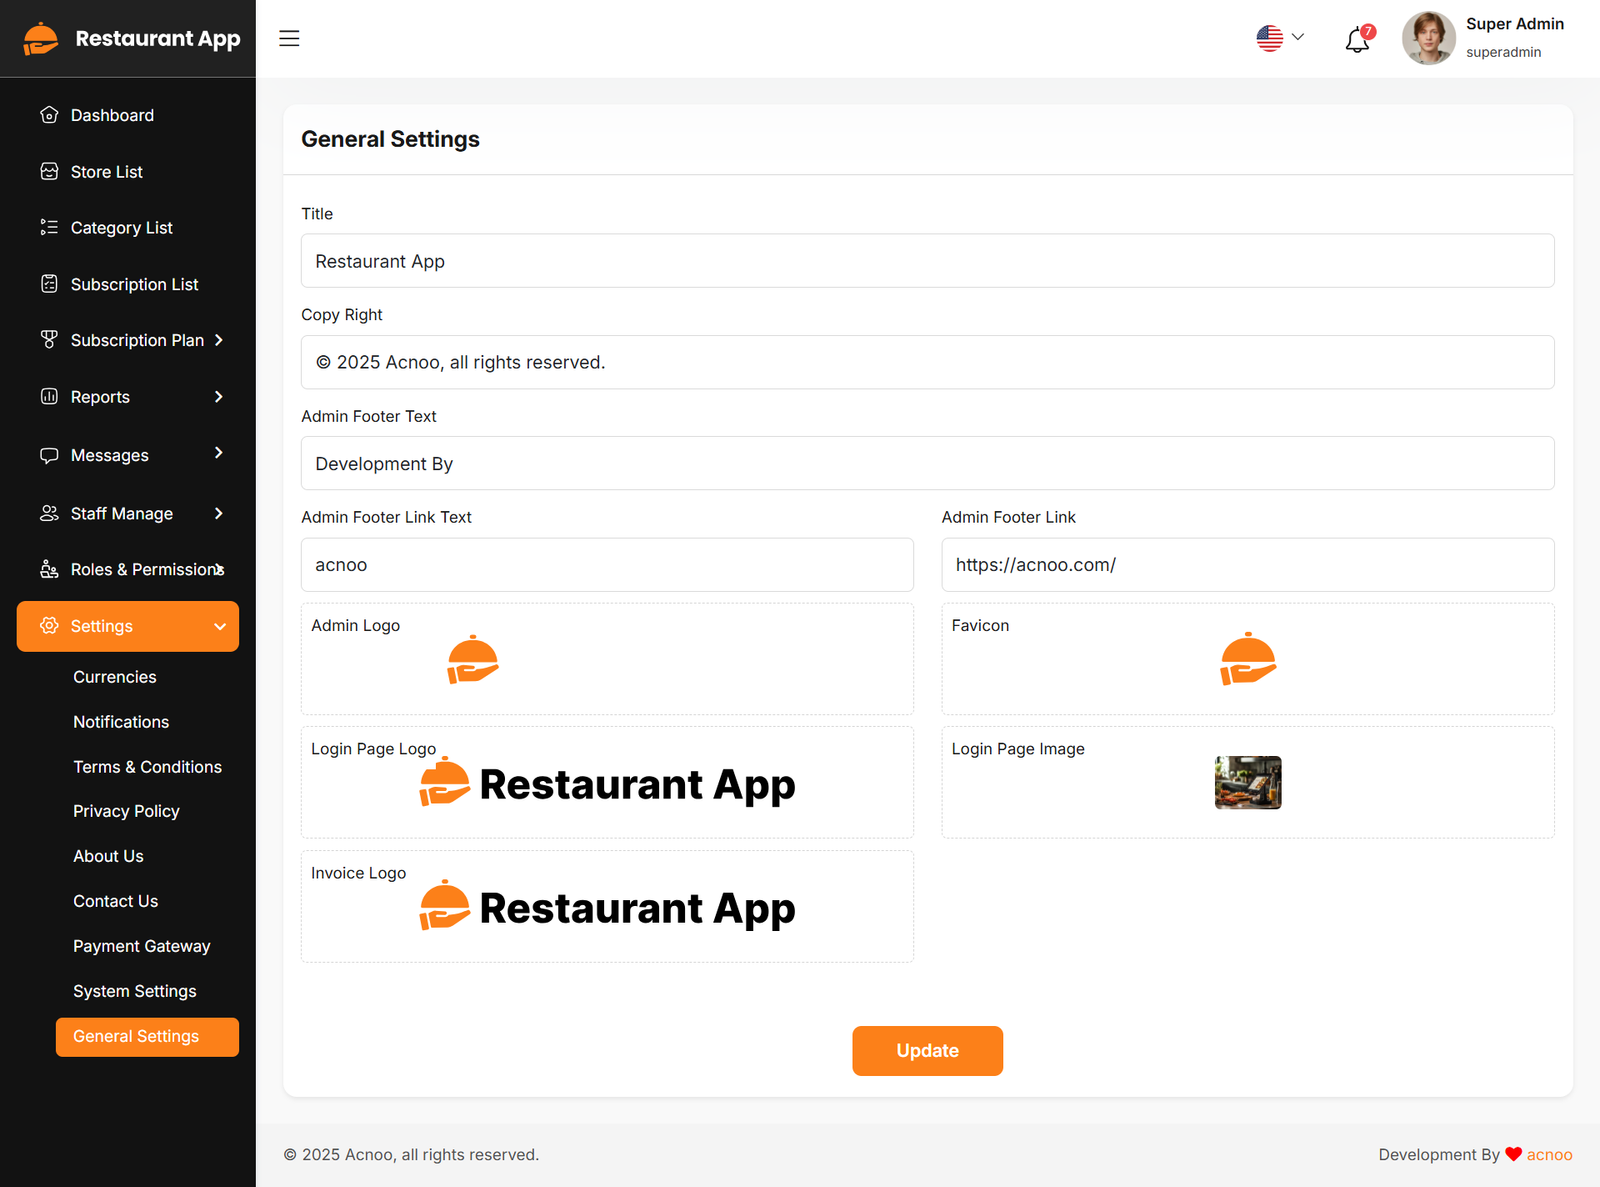
You have the capability to modify the general project information.
Mail Configuration / SMTP Setup
Cpanel
To create and configure an SMTP email account using cPanel, follow below steps:
Step 1: Log in to cPanel
Step 2: Create an Email Account
1. In cPanel, go to "Email Accounts".
2. Click “Create”.
3. Fill in:
a. Username: e.g., info, test, or hr
b. Domain: Select the correct domain (if multiple are available)
c. Password: Set a strong password or use the generator
4. Click Create.
📌 This creates an email like test@yourdomain.com
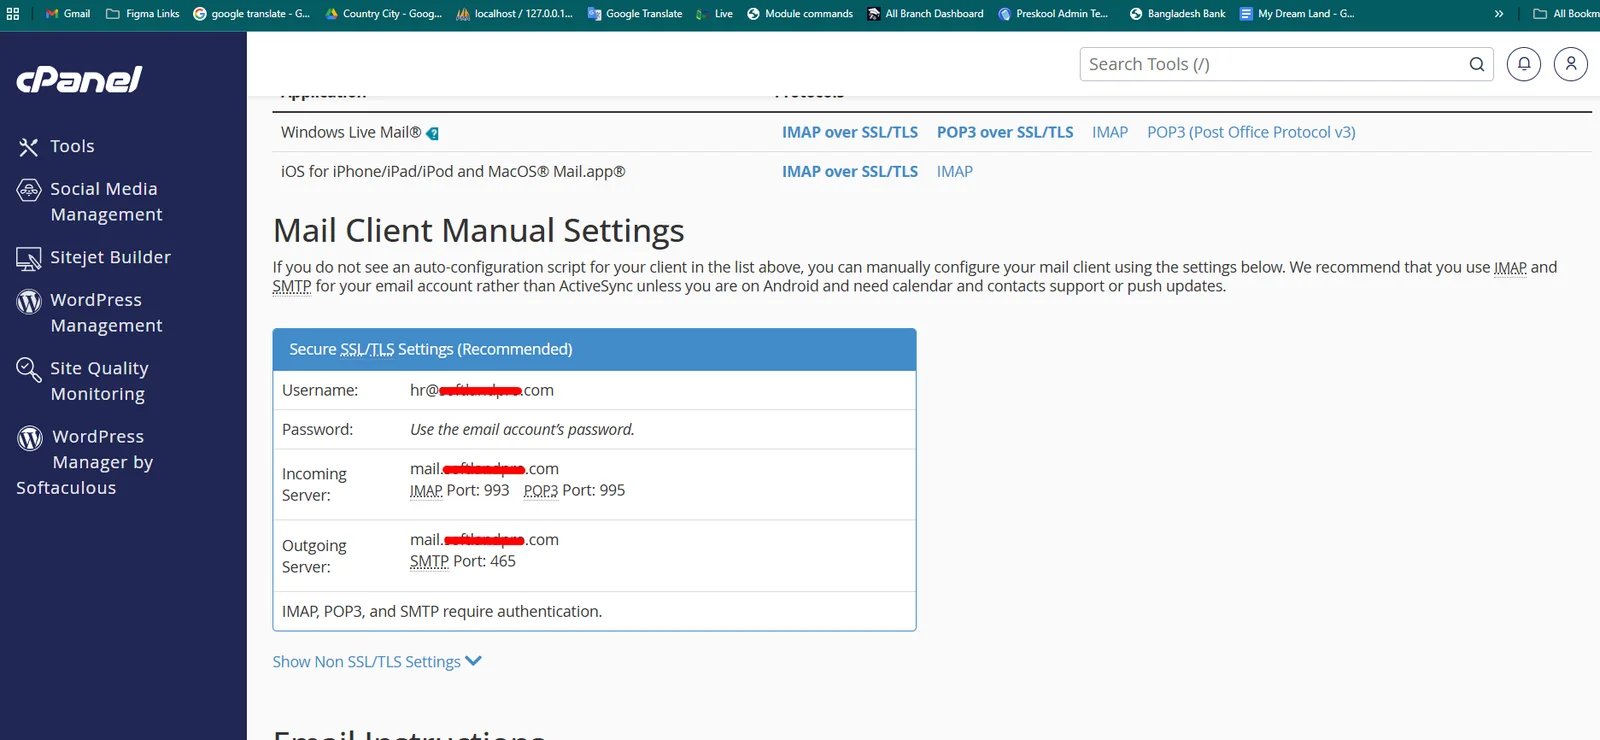
Step 3: Get SMTP Settings
Once the email is created:
1. Go to "Email Accounts" again.
2. Find your new email and click “Connect Devices”.
3. You’ll see the SMTP settings under the Mail Client Manual Settings section like below image:
Example:
| Input | Value |
|---|---|
| QUEUE_MAIL | Select true / false, (If you select true, you need to run the following command: php artisan queue:work on server) |
| MAIL_DRIVER_TYPE | Select MAIL MAILER / MAIL DRIVER |
| MAIL_DRIVER |
Use sendmail if your server has a local mail server installed (like Postfix
or Exim).
Use smtp when sending emails through an external mail service (like Gmail, Mailgun, or your hosting provider's SMTP server). |
| MAIL_HOST | mail.yourdomain.com |
| MAIL_PORT | 587 |
| MAIL_USERNAME | test@yourdomain.com |
| MAIL_PASSWORD | The one you set |
| MAIL_ENCRYPTION | tls |
| MAIL_FROM_ADDRESS | yourmail@gmail.com |
| MAIL_FROM_NAME | Your project/app name |
Set the values to System Settings → Mail Configuration
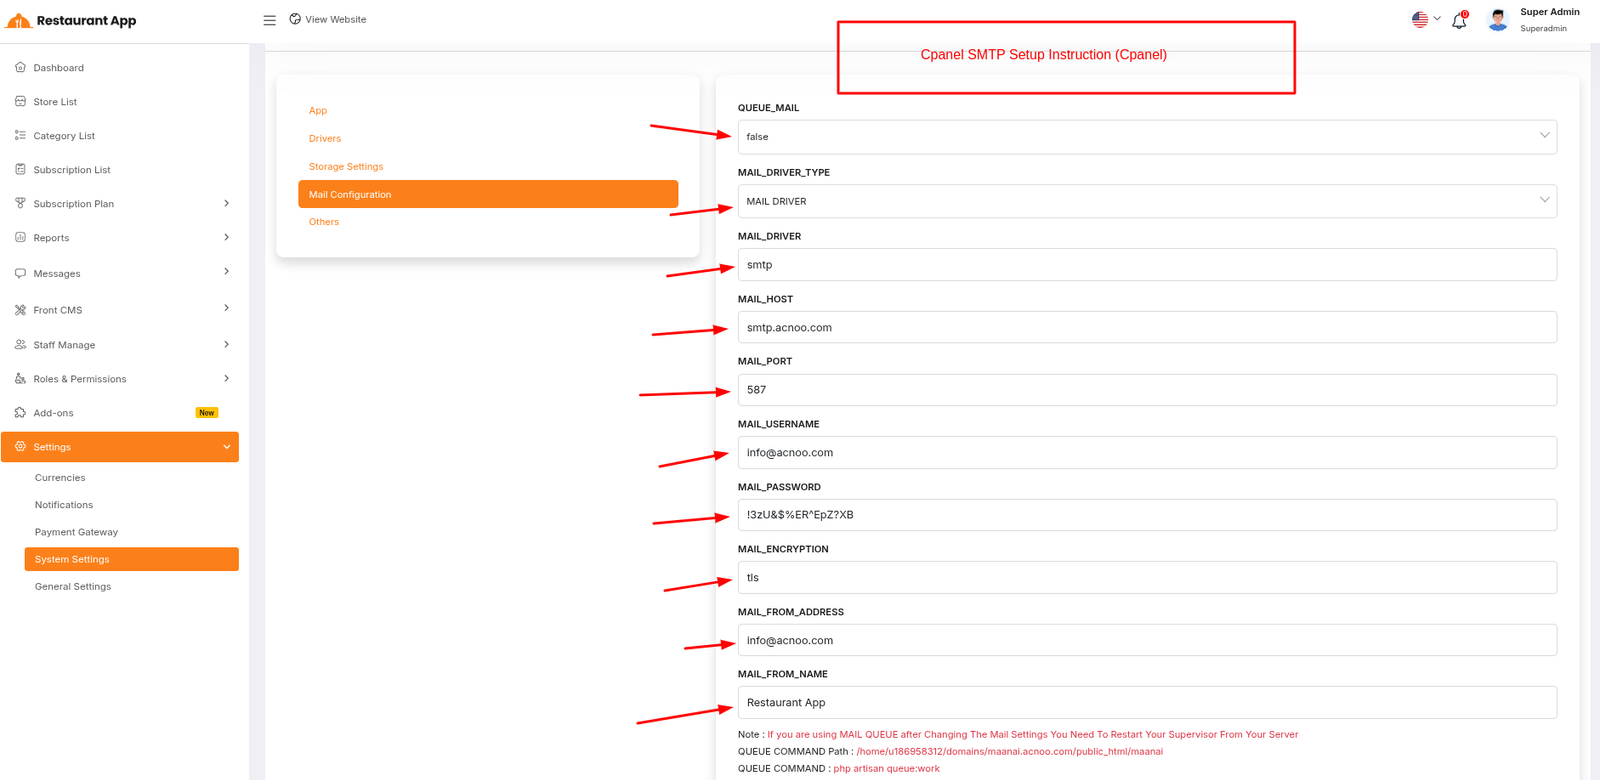
If you want to know more details please follow their, Official documentation. Here is also a youtube video link for reference.
Hostinger Panel
To create and configure an SMTP email account using hostinger, follow below steps:
Step 1: Log In to Hostinger hPanel https://hpanel.hostinger.com
Step 2: Create an Email Account
1. Go to Emails from the top menu.
2. Select your domain name.
3. Click "Create New Email Account".
4. Fill in:
a. Email address (e.g., info, test, or hr)
b. Password
5. Click "Create".
📌 This creates an email like test@yourdomain.com
Step 3: Get SMTP Settings
1. After creating the email, go back to the Email Accounts section.
2. Find your email and click “Connect App & Devices” or “Set Up Devices”.
3. Look for the Manual Configuration or SMTP Settings.
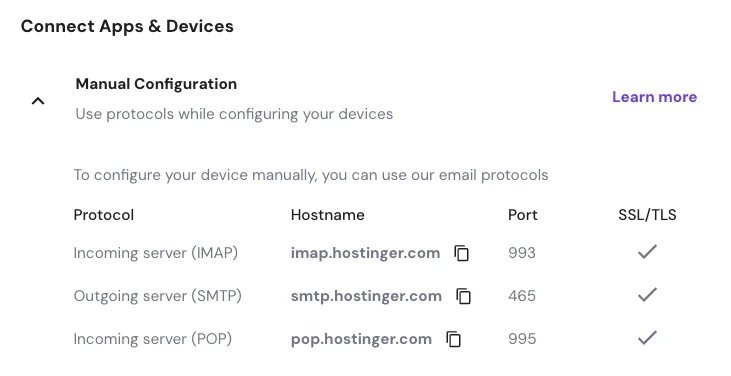
Example:
| Input | Value |
|---|---|
| QUEUE_MAIL | Select true / false, (If you select true, you need to run the following command: php artisan queue:work on server) |
| MAIL_DRIVER_TYPE | Select MAIL MAILER / MAIL DRIVER |
| MAIL_DRIVER |
Use sendmail if your server has a local mail server installed (like Postfix
or Exim).
Use smtp when sending emails through an external mail service (like Gmail, Mailgun, or your hosting provider's SMTP server). |
| MAIL_HOST | mail.yourdomain.com |
| MAIL_PORT | 465 |
| MAIL_USERNAME | test@yourdomain.com |
| MAIL_PASSWORD | The one you set |
| MAIL_ENCRYPTION | ssl |
| MAIL_FROM_ADDRESS | yourmail@gmail.com |
| MAIL_FROM_NAME | Your project/app name |
Set the values to System Settings → Mail Configuration
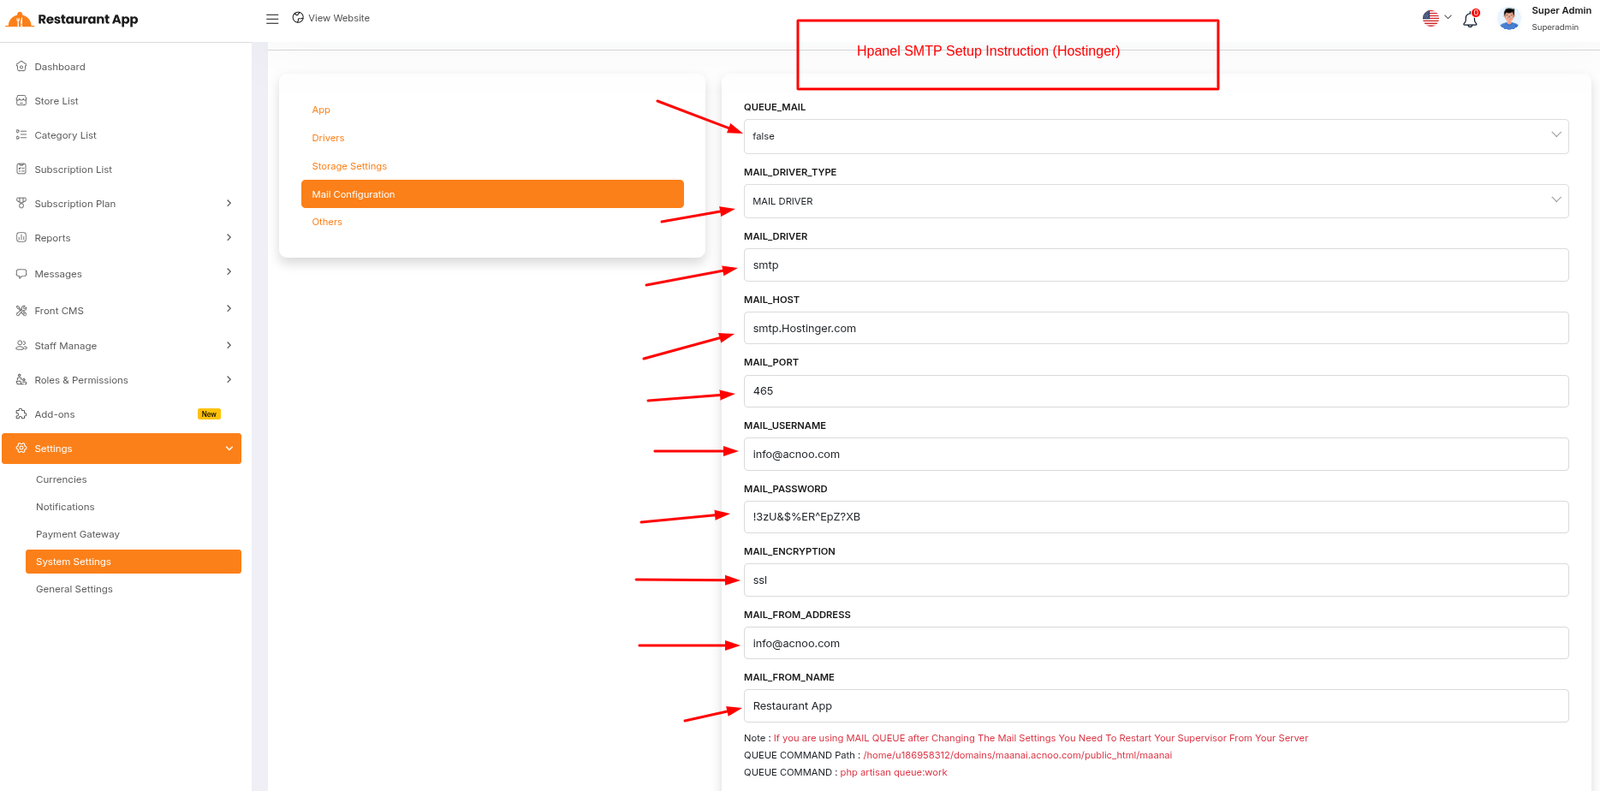
If you want to know more details please follow their, Official documentation. Here is also a youtube video link for reference.
Note: Please note that if you change QUEUE_MAIL from false to true,
you need to run the following command: php artisan queue:work.
Remember: The command path should be:
/home/u186958312/domains/yourdomain.com/public_html. Make sure you're in the
correct path.
Note: If you're not familiar with running the command, there's
another option. Simply visit yourdomain.com/queue-work and it will be executed
automatically.
Note: If you select QUEUE_MAIL as true but do not run the command or visit the URL, email functionality will not work properly.
Gmail
To create and configure an SMTP email account using Gmail, follow below steps:
Step 1: Enable 2-Step Verification on Google Account
1. Go to https://myaccount.google.com
2. Click "Security" from the left menu.
3. Under "Signing in to Google", enable 2-Step Verification.
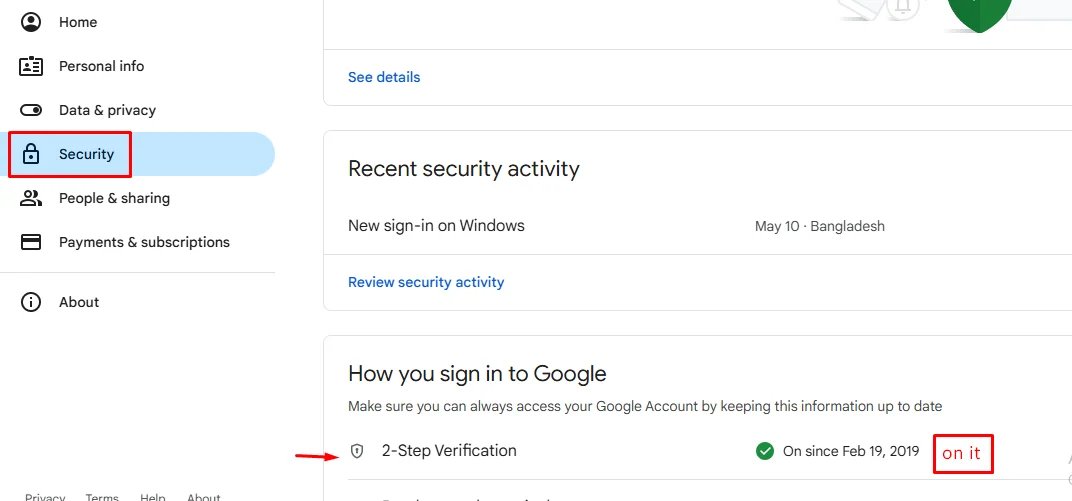
4. Complete the setup with your phone or other options.
Step 2: Create an App Password
After enabling 2-Step Verification:
1. Visit: https://myaccount.google.com/apppasswords
2. Sign in if asked.
3. Under "Select the app", choose Other (Custom name).
4. Give it a name like "SMTP App" and click Generate.
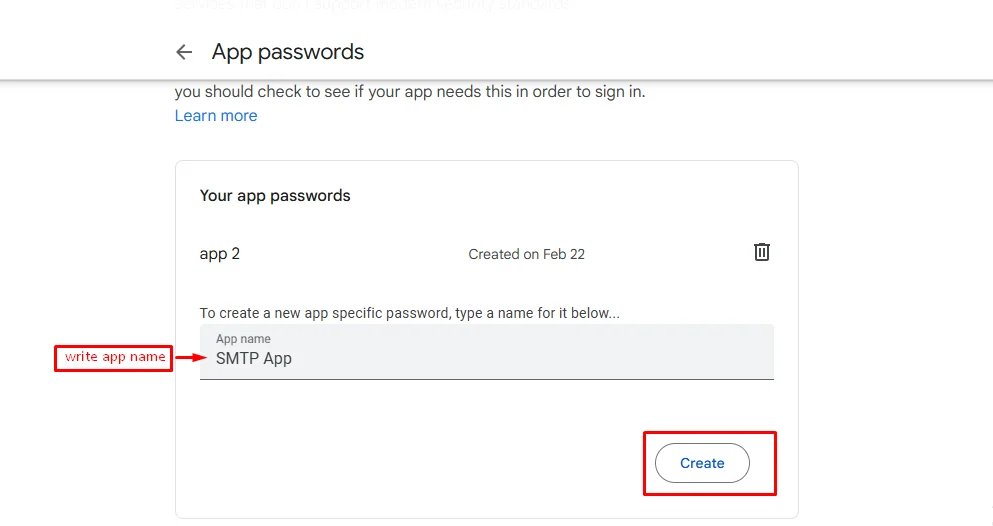
5. Google will show you a 16-character password — copy it. You’ll use this as your SMTP password
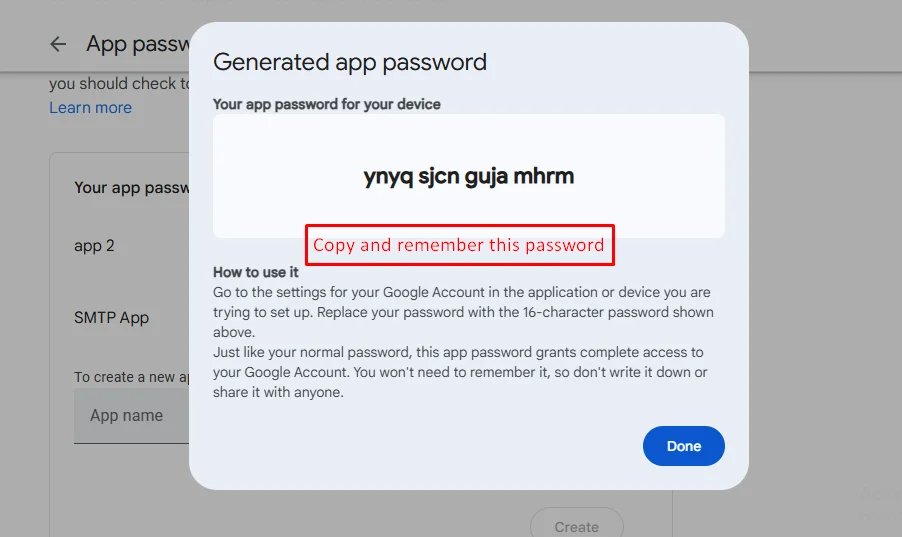
Example:
| Input | Value |
|---|---|
| QUEUE_MAIL | Select true / false, (If you select true, you need to run the following command: php artisan queue:work on server) |
| MAIL_DRIVER_TYPE | Select MAIL MAILER / MAIL DRIVER |
| MAIL_DRIVER | smtp |
| MAIL_HOST | smtp.gmail.com |
| MAIL_PORT | 587 |
| MAIL_USERNAME | your_email@gmail.com |
| MAIL_PASSWORD | your_app_password |
| MAIL_ENCRYPTION | tls |
| MAIL_FROM_ADDRESS | your_email@gmail.com |
| MAIL_FROM_NAME | Your project/app name |
Set the values to System Settings → Mail Configuration
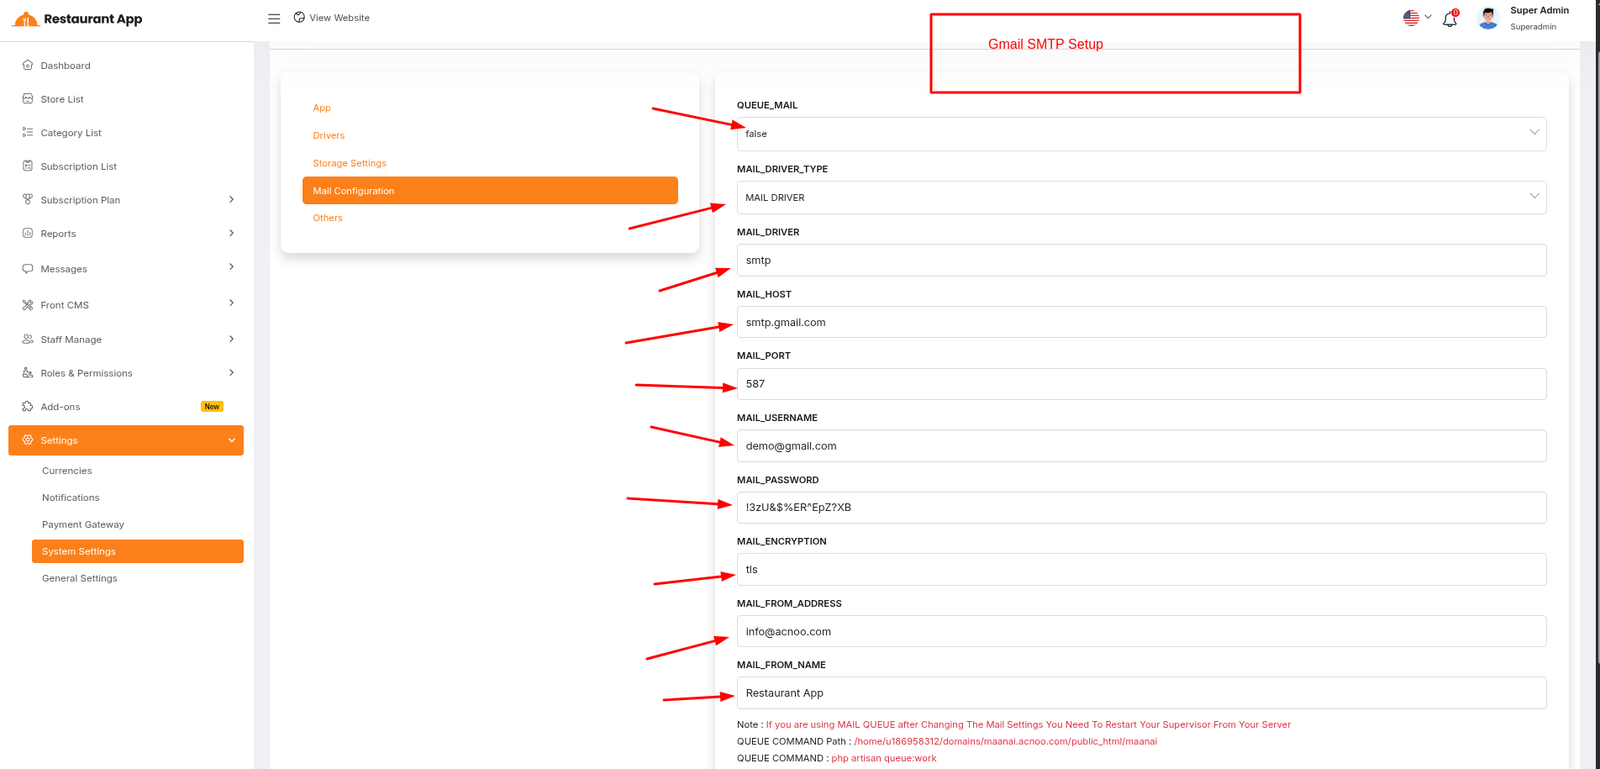
If you want to know more details please follow their, Official documentation. Here is also a youtube video link for reference.
Others
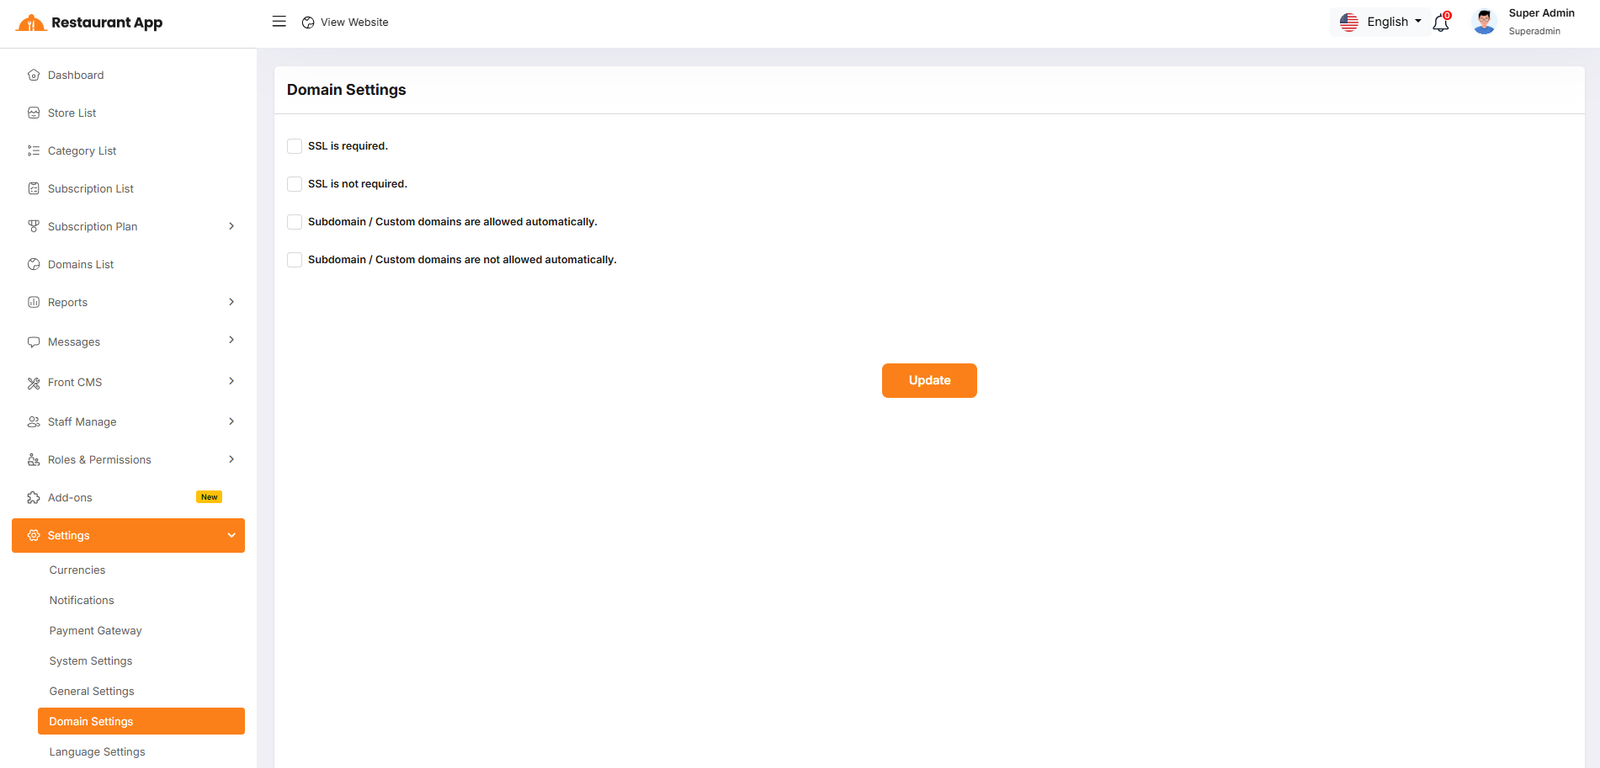
Domain Settings
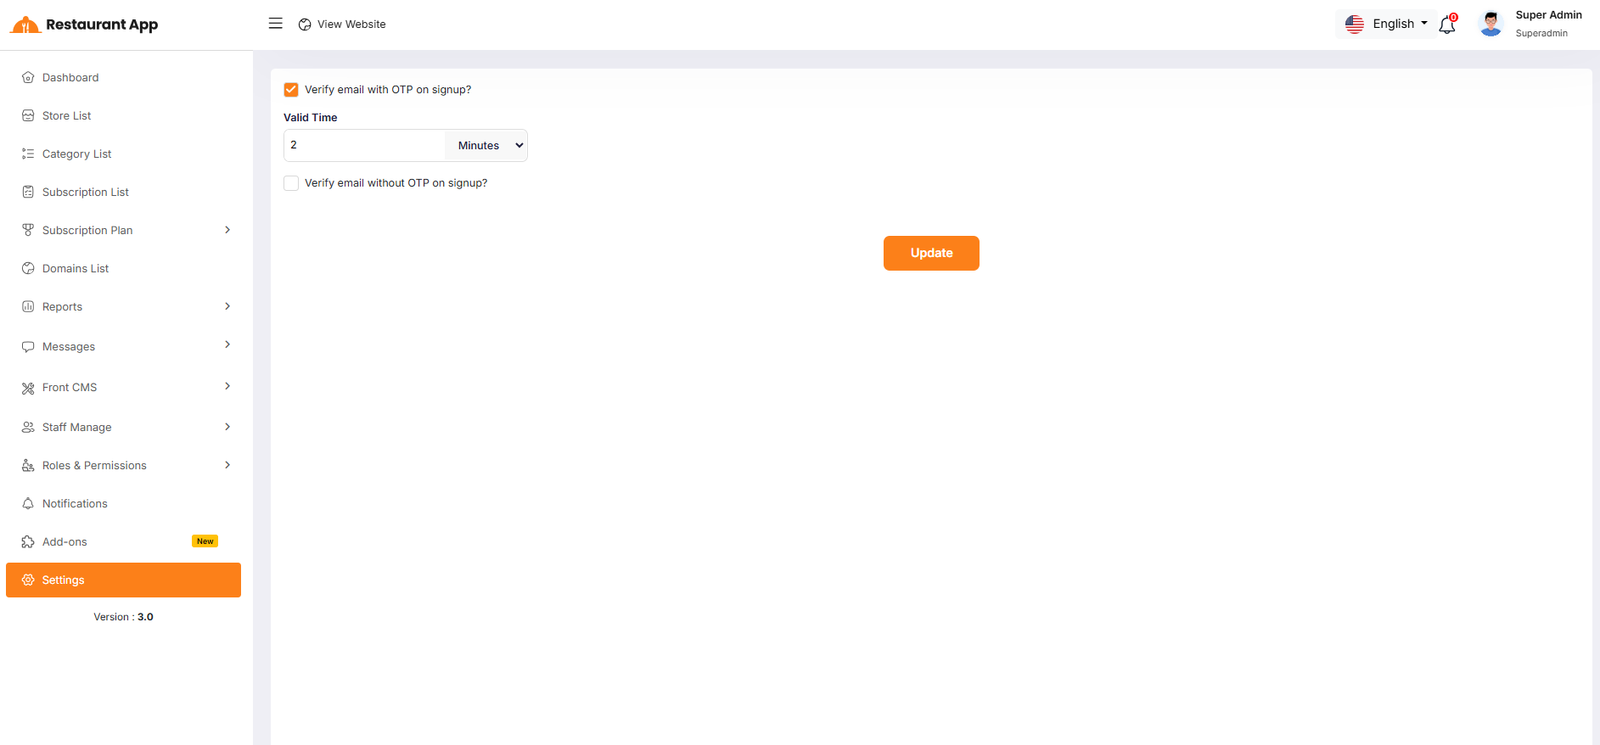
This guide outlines the configuration options available within the Domain Settings section of the Restaurant App admin panel. These settings control the security protocols and automation rules for how subdomains and custom domains interact with the platform.
User Sign Up
- Email Verification Configure if users must Verify email with OTP on signup to ensure high security, or Verify email without OTP on signup for a faster onboarding experience.
- OTP Valid Time Set the specific duration (in minutes) that a One-Time Password (OTP) remains active before it expires for user verification.
Language Settings
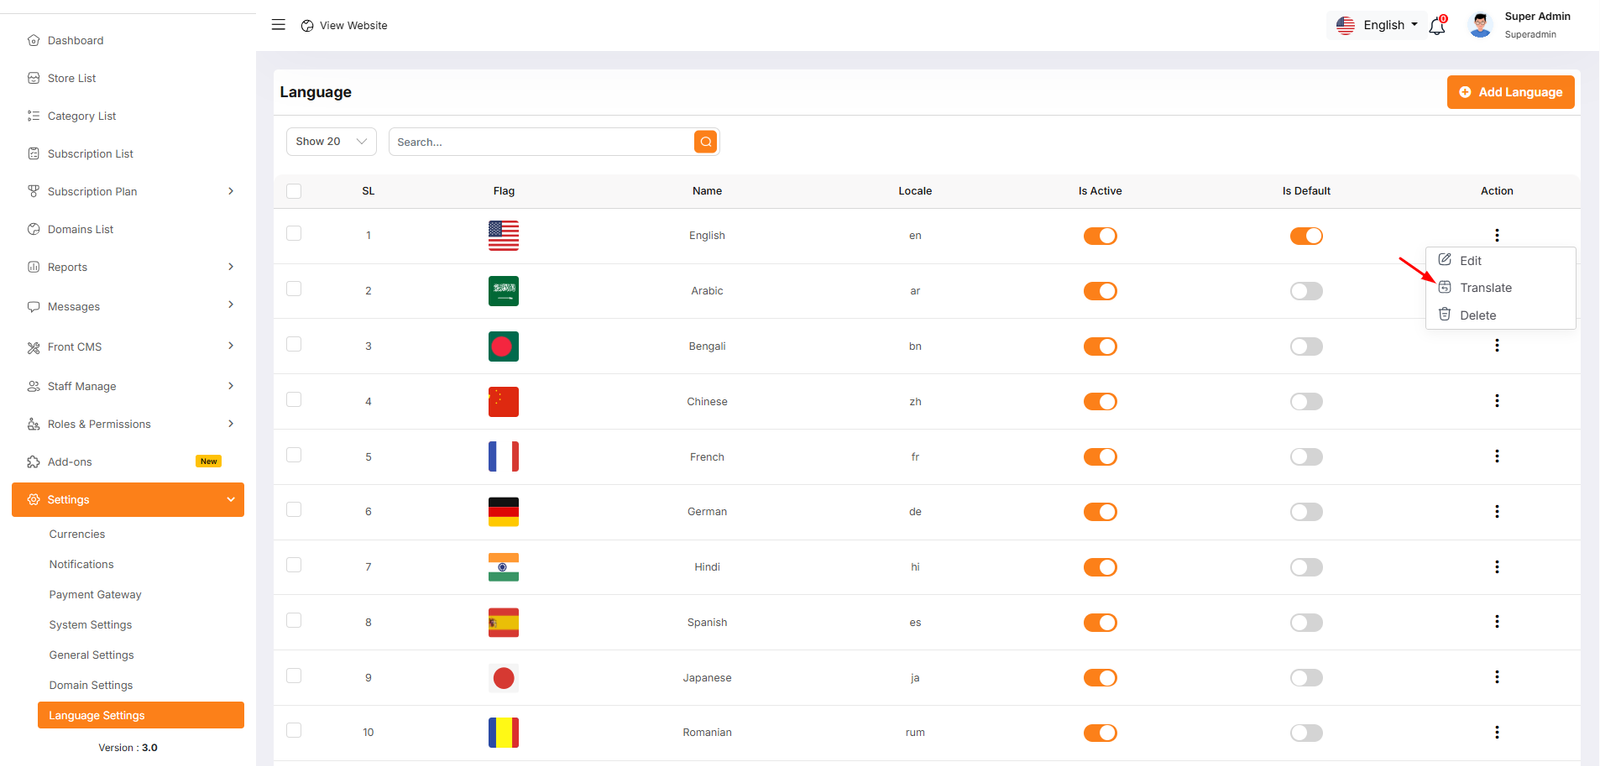
1. Adding a New Language
To register a new regional support option in the system, click the + Add Language button. You will be required to configure the following fields:
- Name: The display name of the language as it will appear to users (e.g., "Spanish" or "French").
- Locale: The standard ISO code used by the system for identification (e.g., "es" for Spanish, "fr" for French).
- Is Active Toggle: Determines if the language is currently selectable by users on the storefront.
- Is Default Toggle: Sets this specific language as the primary, pre-selected option for all first-time visitors.
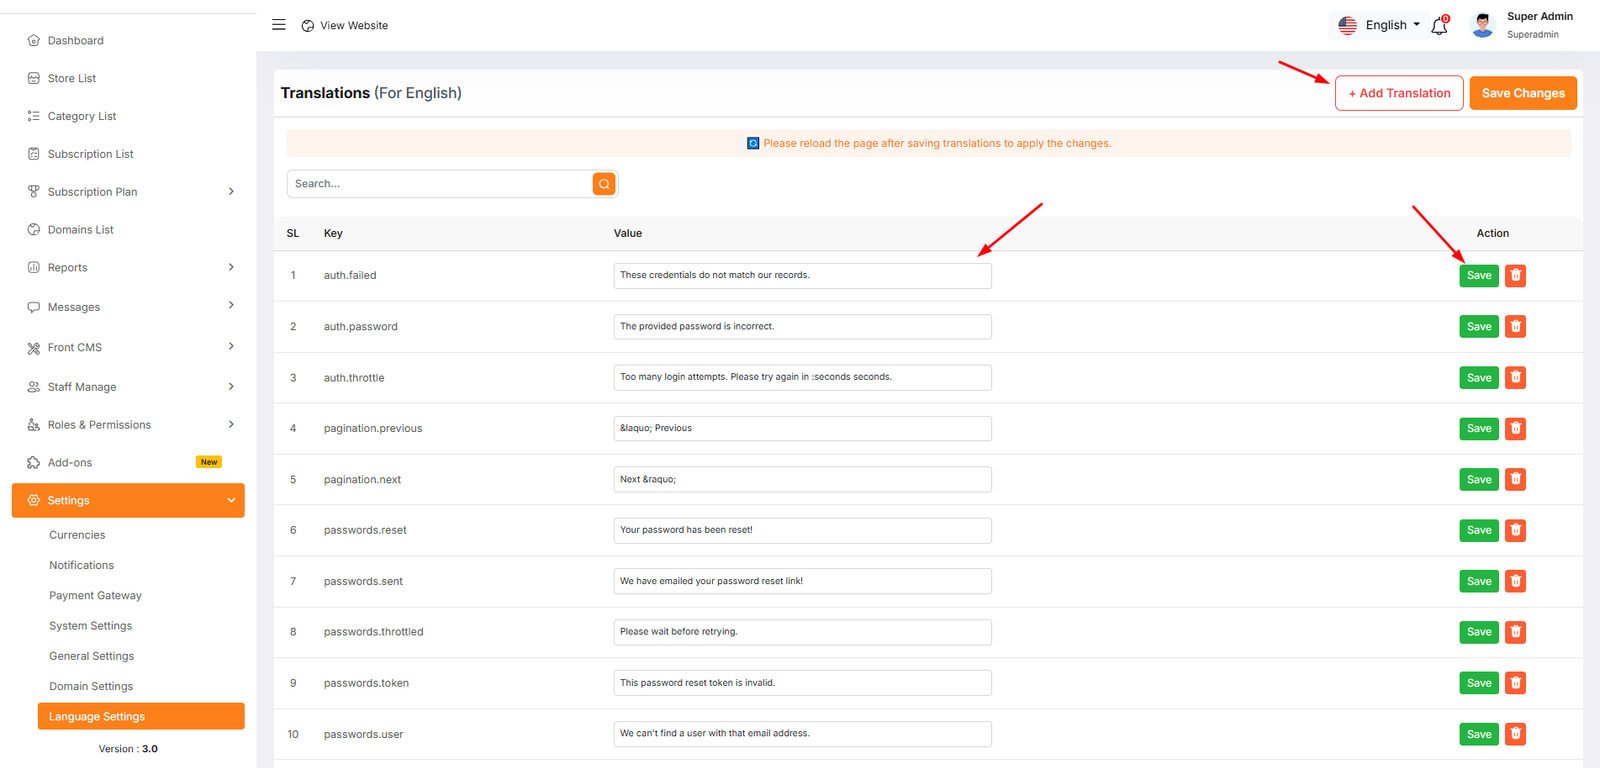
2. Managing Translations
After a language is added, you must map system "Keys" to the correct "Values" for that region.
The Translation Table
| Component | Description |
|---|---|
| Key | The internal system identifier (e.g., auth.failed or password.reset). |
| Value | The editable text that users will actually see on the screen. |
| Search Bar | Used to filter and find specific phrases quickly without scrolling. |
Management Actions
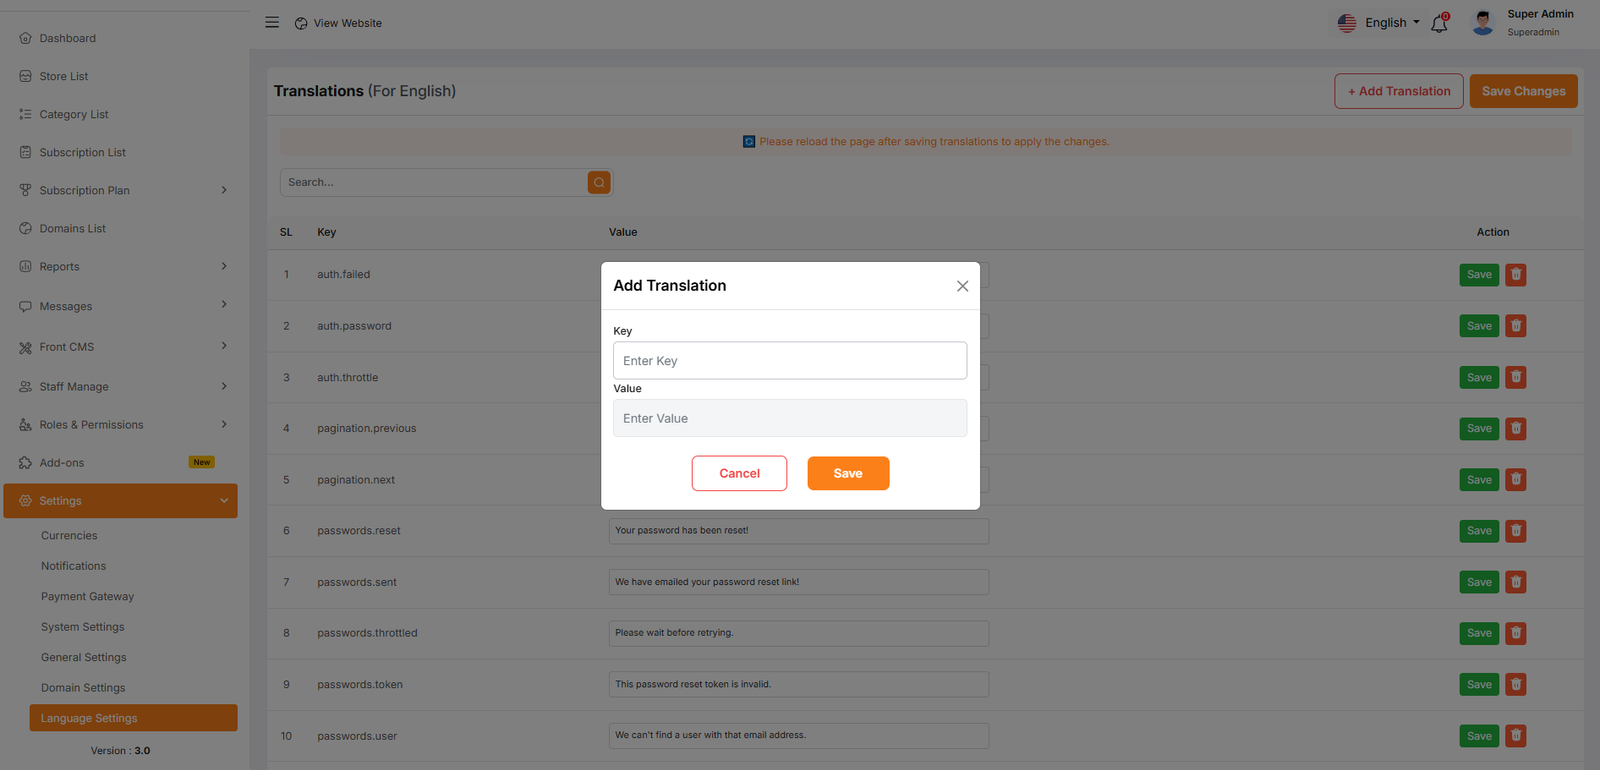
- + Add Translation: Adds a new key-value pair if a specific system string is missing from the list.
- Save Button: An individual button next to each entry to save changes for that specific row.
- Save Changes (Global): The orange button at the top right that saves all edits made across the entire page at once.
Admin Change Logs & Update Guide
Note: Before updating to the new version, please ensure you have a database and full project backup, and that your project is already updated to the latest version. This is extremely important!
Version: 3.7 ( 13 July 2026 )
- Implemented comprehensive multi-branch management across all relevant modules.
- Enhanced role and permission management with branch-specific access control.
- Introduced branch-wise product stock and out-of-stock management.
- Added restaurant operating hours and scheduling management.
- Implemented takeaway order processing functionality.
- Enabled table-based order placement without immediate payment.
- Enhanced subscription plan upgrades with module-based feature activation.
- Improved overall application security and performance.
- Refined UI/UX for a more intuitive user experience.
- Resolved various bugs and stability issues.
- Introduced comprehensive multi-branch management with branch switching, overview dashboard, and branch-wise access control.
- Redesigned subscription plans with dynamic features, module-based access, and branch limit support.
- Implemented OTP-less signup with automatic login.
- Enhanced role, permission, and module-based access control.
- Added branch-wise revenue, sales, purchases, stock, and employee reporting.
- Introduced country/state selection and branch management APIs.
- Added new branch, country/state, and analytics models with reusable widgets.
- Improved UI/UX across navigation, dashboard, dropdowns, switches, and branch management.
- Refactored user, subscription, and permission architecture for improved maintainability and performance.
- Upgraded Flutter SDK, dependencies, and Android build system to Kotlin DSL.
- Expanded localization with branch-related translations across all supported languages.
- Improved application security, performance, and overall code quality.
- Resolved various bugs and enhanced system stability.
Mobile App Change Logs
Note: Please replace the following folders:
✔app
✔config
✔database
✔lang
✔public/assets
✔resources
✔routes
After replacing them, visit yourdomain.com/update to install the new version and
please don't forget to reload hard your browser. Without visiting the URL and reloading
hard, your project will not function correctly, so ensure you complete this step.
Note: If you face any issues with the update, please contactus.
Version: 3.6 ( 10 June 2026 )
- Improved sidebar layout, navigation, and functionality.
- Added Loyalty Point Configuration for cashback and purchase-based rewards.
- Added Specific Item Loyalty Configuration for product-wise reward tracking.
- Integrated loyalty point rewards into the sales/POS process.
- Redesigned table management interface for improved usability
- Added direct table-based order access with order update functionality
- Implemented table transfer/movement feature
- Enhanced QR code management with regenerate QR functionality
- Updated purchase unit and cart calculations based on inventory management.
- Fixed UI/UX design issues and improved responsiveness.
- Resolved minor bugs and enhanced overall system stability.
- Inventory addon added
- Replaced legacy inventory system with a full-featured Inventory Management module (categories, items, units, stock, recipes, search, pagination, and quick-add support).
- Implemented Loyalty Point & Cashback system with sales integration and automatic reward calculation during checkout.
- Enhanced printer module with dynamic thermal invoice formatting, configurable margins, and full localization support.
- Added granular permission-based access control across inventory and stock management modules.
- Improved UI/UX with better form handling, debounced search, dropdown standardization, and enhanced validation rules.
- Refactored architecture by renaming core models, removing legacy modules, and standardizing repository structure.
- Upgraded localization system (slang v4.14), reorganized i18n structure, and expanded multi-language support.
- Upgraded Flutter SDK and dependencies with improved stability, overrides, and configuration enhancements.
- Fixed cashback logic, invoice preview inconsistencies, and improved loyalty and unit price calculations.
- Removed deprecated modules and fully migrated ingredient, stock, and unit systems into the new inventory architecture.
Mobile App Change Logs
Note: Please replace the following folders:
✔app
✔config
✔database
✔lang
✔public/assets
✔routes
After replacing them, visit yourdomain.com/update to install the new version and
please don't forget to reload hard your browser. Without visiting the URL and reloading
hard, your project will not function correctly, so ensure you complete this step.
Note: If you face any issues with the update, please contactus.
Version: 3.5 ( 13 May 2026 )
- License verification updated.
- System update architecture improved.
Note: Please replace the following folders:
✔app
After replacing them, visit yourdomain.com/update to install the new version.
Note: If you face any issues with the update, please contactus.
Version: 3.4 ( 15 March 2026 )
- Added language support for the Cash Register Addon
- Added role and permission configuration
- Fixed several minor bugs
Note: Please replace the following folders:
✔app
✔config
✔lang
✔public/assets
✔routes
After replacing them, visit yourdomain.com/update to install the new version and
please don't forget to reload hard your browser. Without visiting the URL and reloading
hard, your project will not function correctly, so ensure you complete this step.
Note: If you face any issues with the update, please contactus.
Version: 3.3 ( 05 March 2026 )
- Language issue fixed
- OTP issue fixed
- codecanyon product ID issue fixed
- App Thermal invoice White space issue fixed
- FCM token optional from signup and login
Mobile App Change Logs
Note: Please replace the following folders:
✔app
✔resources
✔routes
After replacing them, visit yourdomain.com/update to install the new version and
please don't forget to reload hard your browser. Without visiting the URL and reloading
hard, your project will not function correctly, so ensure you complete this step.
Note: If you face any issues with the update, please contactus.
Version: 3.2 ( 26 February 2026 )
- Added Kitchen module with dedicated section support
- Updated and optimized KOT listing functionality
- Implemented dynamic language localization with user-level configuration support
- Resolved multiple UI/UX design inconsistencies
- Fixed various minor bugs and performance issues
- HRM (Human Resource Management) module added
- Kitchen Management module added
- Internationalization (i18n) support added for HRM and Kitchen modules
- Module status checking added for conditional feature display
- ImageResolver added for unified PDF image handling
- Role-based permission system added across HRM and Kitchen modules
- Flutter SDK updated to 3.41.2
- All dependencies updated to latest stable versions
- Deprecated code migrated for Flutter SDK compatibility
- State management consolidated and provider auto-dispose fixed
- Date parsing enhanced across all modules
- Linter warnings fixed and unused code removed
- Search and filter modal unified across HRM views
- Keyboard bottom whitespace issue fixed
- Form validation enhanced across all forms
Mobile App Change Logs
New Features
Improvements
Note: Please replace the following folders:
✔app
✔database
✔lang
✔public/assets
✔resources
✔routes
After replacing them, visit yourdomain.com/update to install the new version and
please don't forget to reload hard your browser. Without visiting the URL and reloading
hard, your project will not function correctly, so ensure you complete this step.
Note: If you face any issues with the update, please contactus.
Version: 3.1 ( 05 January 2026 )
- Language localization has been updated.
- RTL support has been updated.
- Kitchen role has been added.
- Some design issues have been fixed.
- Minor bugs have been fixed.
Note: Please replace the following folders:
✔ app
✔ config
✔ lang
✔ public → assets
( No need to replace the entire public folder; just update assets folder inside it )
✔ resources
✔ routes
After replacing them, visit yourdomain.com/update to install the new version and
please don't forget to reload hard your browser (ctrl + shift + r). Without visiting the URL and reloading
hard, your project will not function correctly, so ensure you complete this step.
Note: please ensure you are on the latest version (3.0). If you are not, please follow the instructions below. Once complete, your system will automatically update to both version 3.0 and the subsequent version 3.1. Thank you.
Note: Please replace the following folders:
✔app
✔config
✔lang
✔database/migrations
✔ public → assets
( No need to replace the entire public folder; just update assets folder inside it )
✔public/firebase-messaging-sw.js
✔resources
✔routes
✔storage/app/firebase/firebase-adminsdk.json
✔vendor
✔composer.json
After replacing them, visit yourdomain.com/update to install the new version and
please don't forget to reload hard your browser. Without visiting the URL and reloading
hard, your project will not function correctly, so ensure you complete this step.
Note: If you face any issues with the update, please contact us.
Note: Before updating to the new version, please ensure you have a database and full project backup, and that your project is already updated to the latest version. This is extremely important!
Version: 3.0 ( 27 January 2026 )
- Kitchen/Chef module added
- KOT list and their actions like single item ready or KOT status
- Direct printing of the KOT
- Cancellation of a KOT
- KOT report added
- All KOT actions are controlled by user permissions
- Options to filter by food item type (Veg/Non-Veg) and KOT order status via a user-friendly bottom modal sheet
- Push notification added
- Direct capabilities to generate and print KOT order reports in PDF format
- Tap on any KOT order to view its detailed information in a modal
- Many section bug fixed
- Upgraded Flutter SDK to v3.38.7 (latest) and updated all project dependencies
Note: Please replace the following folders:
✔app
✔config
✔database/migrations
✔ public → assets
( No need to replace the entire public folder; just update assets folder inside it )
✔public/firebase-messaging-sw.js
✔resources
✔routes
✔storage/app/firebase/firebase-adminsdk.json
✔vendor
✔composer.json
After replacing them, visit yourdomain.com/update to install the new version and
please don't forget to reload hard your browser. Without visiting the URL and reloading
hard, your project will not function correctly, so ensure you complete this step.
Note: If you face any issues with the update, please contact us.
Version: 2.3 ( 07 October 2025 )
- Added Restaurant Add-on
- User Roll issue fixed
- Fixed some design issue
- Gateway status issue fixed
- Fixed hugeicons version issue
- Fixed Customer Delivery Address issue
- Updated Models to match api responses
- Project updated to Flutter SDK 3.35.4.
- Dependency cleanup and updated KOT invoice ticket design.
Note: Please replace the following folders:
✔app
✔database
✔routes
✔public/assets
After replacing them, visit yourdomain.com/update to install the new version and
please don't forget to reload hard your browser. Without visiting the URL and reloading
hard, your project will not function correctly, so ensure you complete this step.
Note: If you face any issues with the update, please contact us.
Version: 2.2 ( 24 August 2025 )
- User Role and Permission added
- Fixed invoice number sequencing issue
- Some minor issue fixed
Note: Please replace the following folders: app, database, and routes. After replacing them, visit yourdomain.com/update to install the new version and please don't forget to reload hard your browser. Without visiting the URL and reloading hard, your project will not function correctly, so ensure you complete this step.
Note: If you face any issues with the update, please contact us.
Version: 2.1 ( 05 August 2025 )
- Added Modifier Group
- Added Item Modifier
- Assign Modifiers and Variations to Items
- Sales & KOT System Update
- Quotation Added
Note: Please replace the following folders: app, database, and routes. After replacing them, visit yourdomain.com/update to install the new version and please don't forget to reload hard your browser. Without visiting the URL and reloading hard, your project will not function correctly, so ensure you complete this step.
Note: If you face any issues with the update, please contact us.
Restaurant Web Add-on: Setup and Installation
Note: This is a web add-on. You need to purchase this add-on and ensure that you’ve already purchased and installed the main Restaurant system. If you haven’t, click here to purchase the Restaurant system. Here you will get Restaurant.zip file.
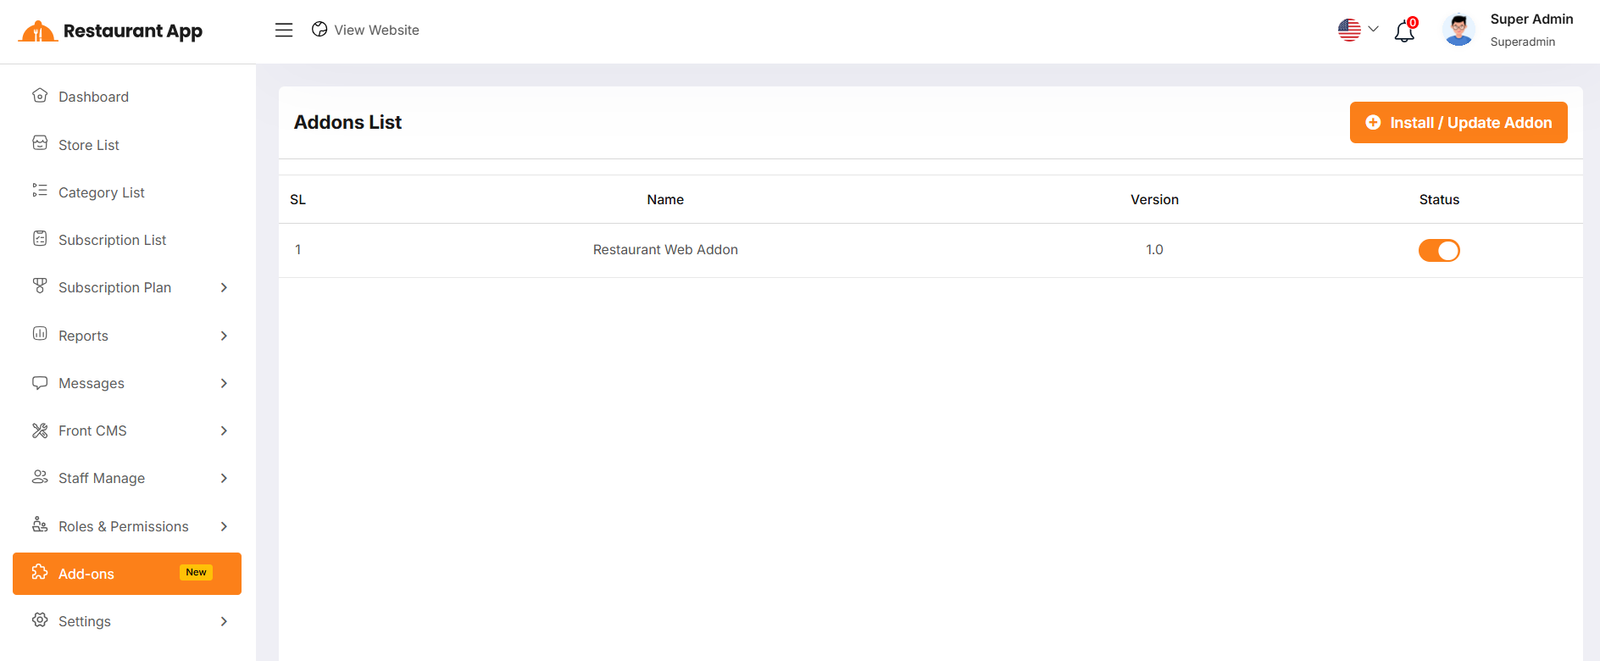
Addon List
In the Admin Panel, you will see the Addon list. You can activate or deactivate an addon by changing its status.
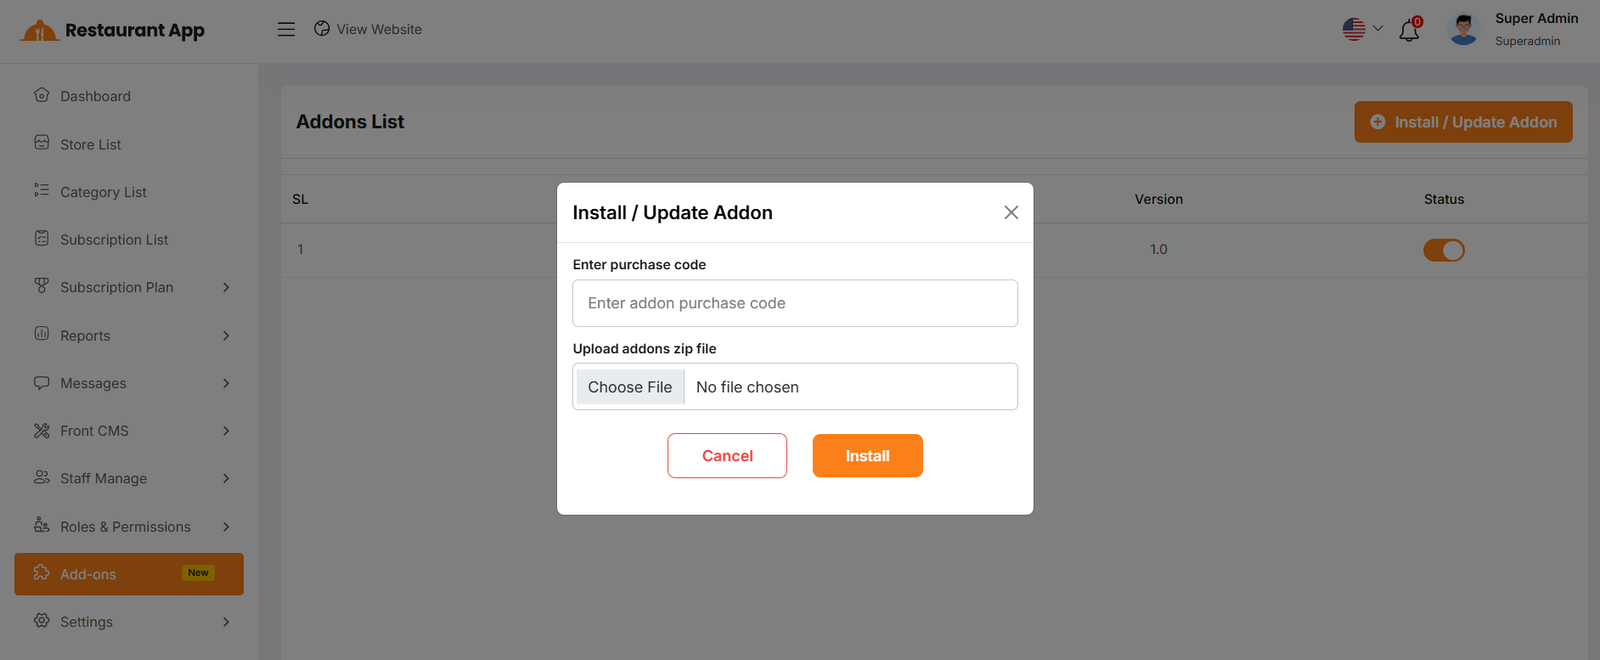
Install / Update Addon
To enter the purchase code and upload a file, you can install/update the Addon.
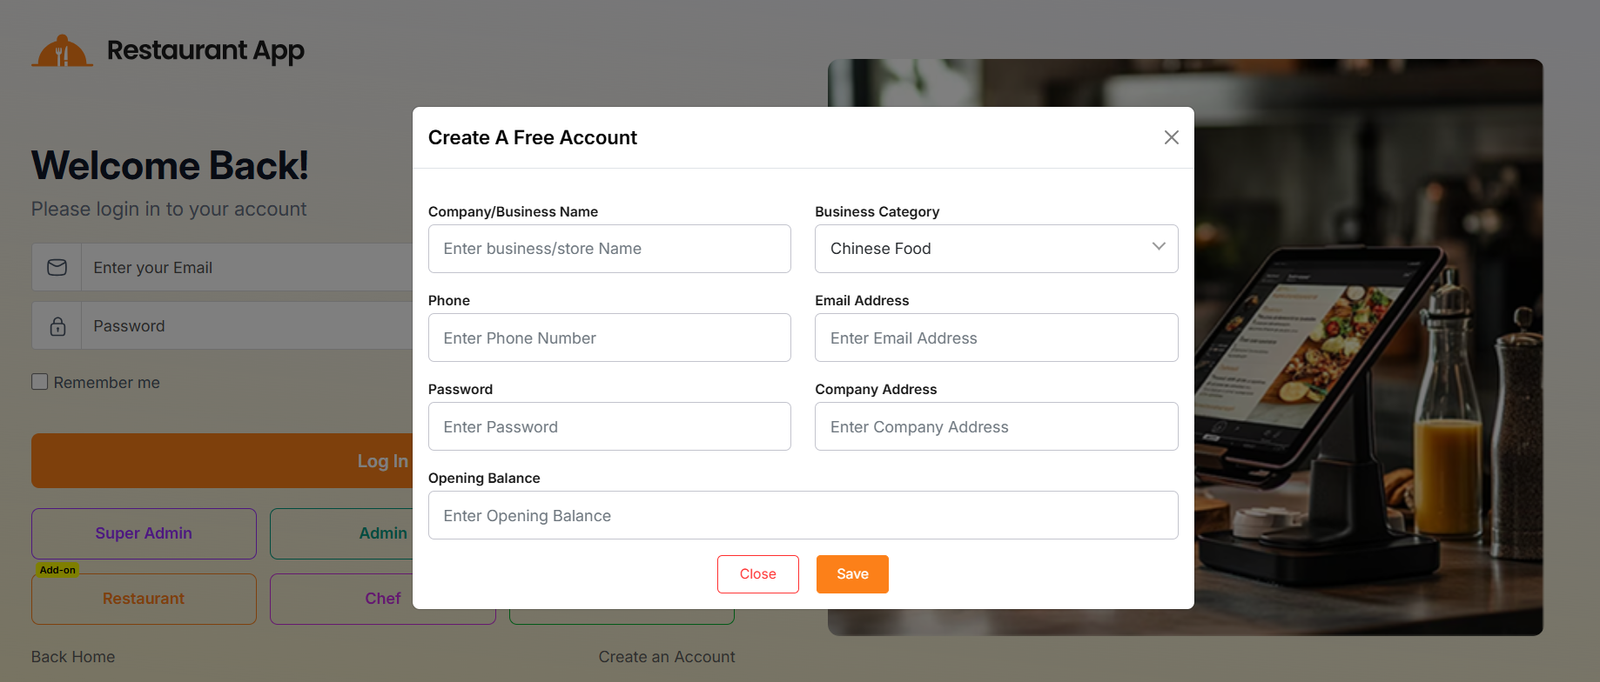
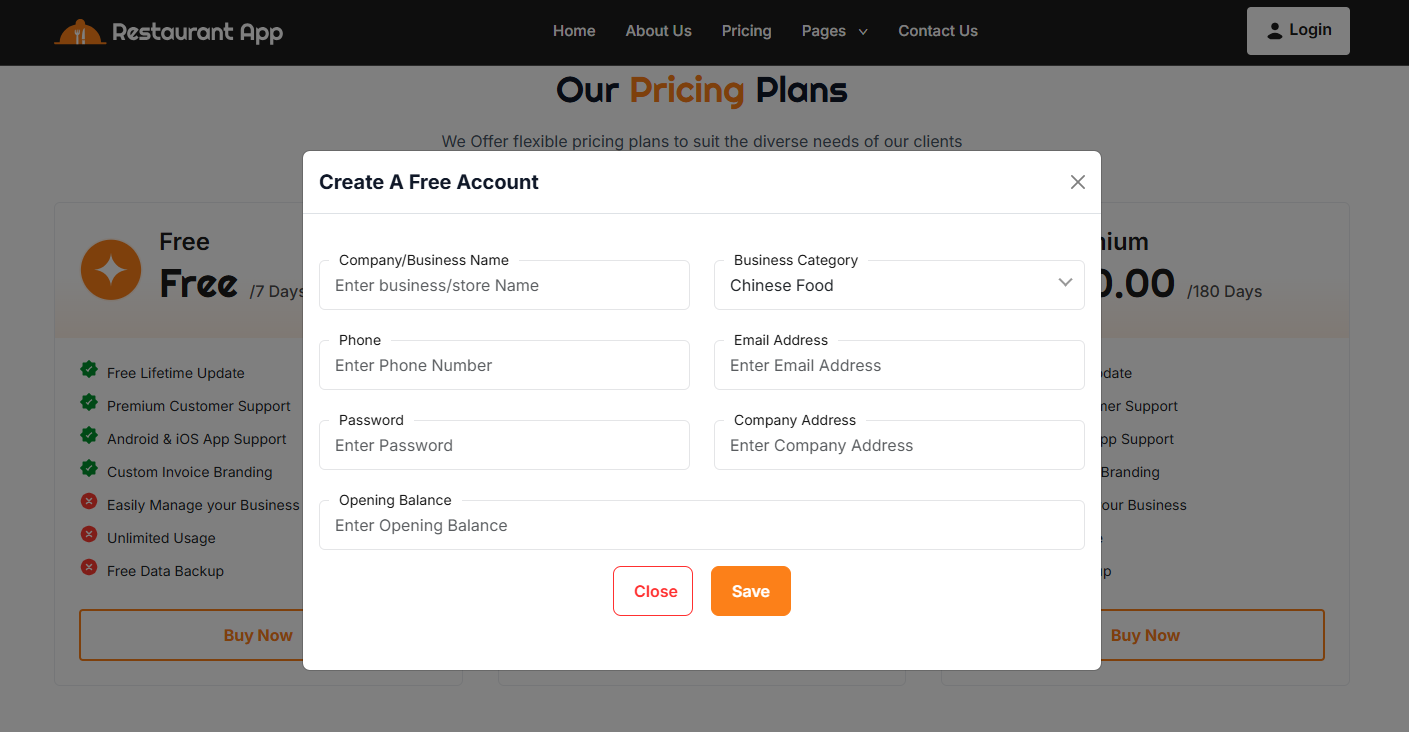
Sign Up
By clicking "Create an account", a modal will open where you can fill in your details such as business name, category, phone number, email, password, company address, and opening balance.
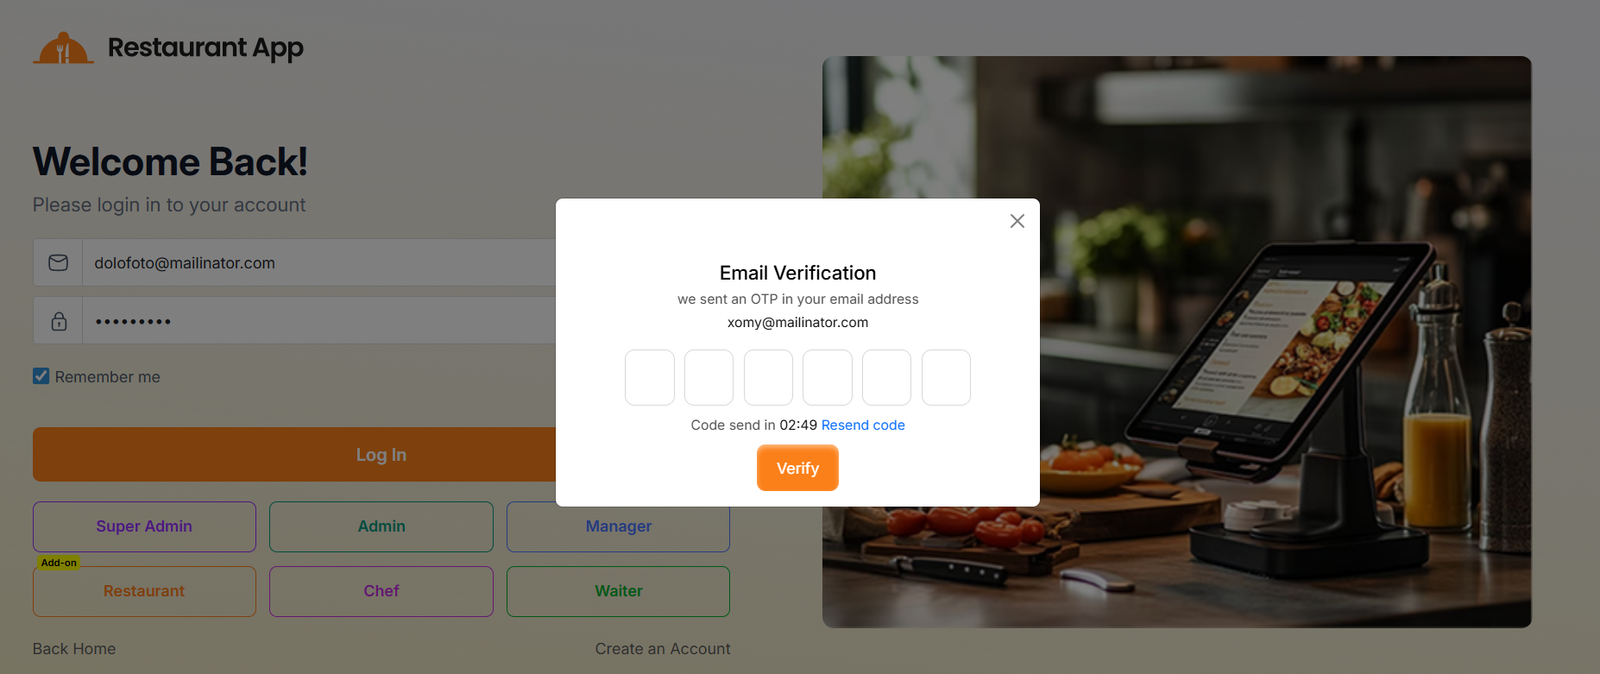
After submitting the form, a verification modal will appear where you need to enter the code sent to your email.
Once the OTP is verified, you will be redirected to the "Restaurant" Dashboard.
You can also "Create an account" in the same way by clicking "Buy Now" from the pricing plans section.
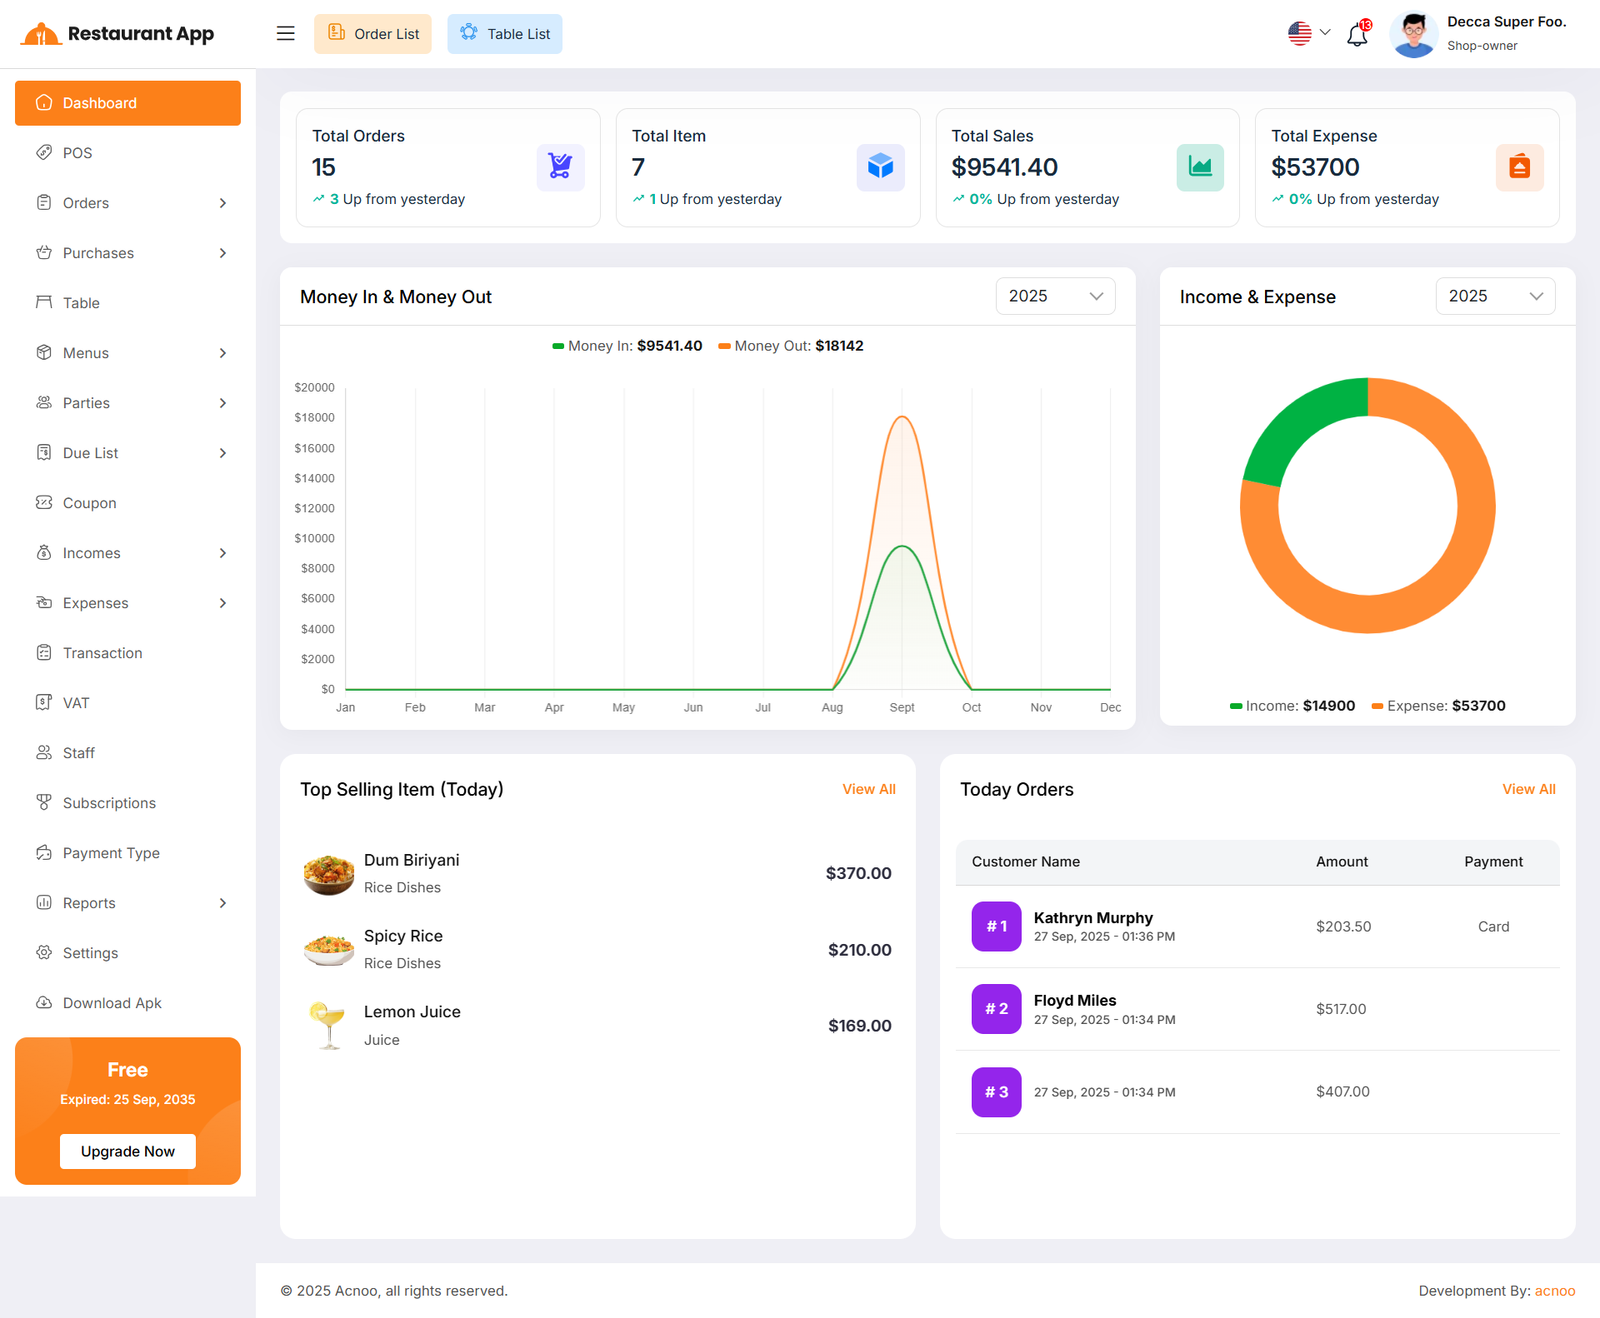
Dashboard
This is the Addon dashboard page, where key project information is presented.
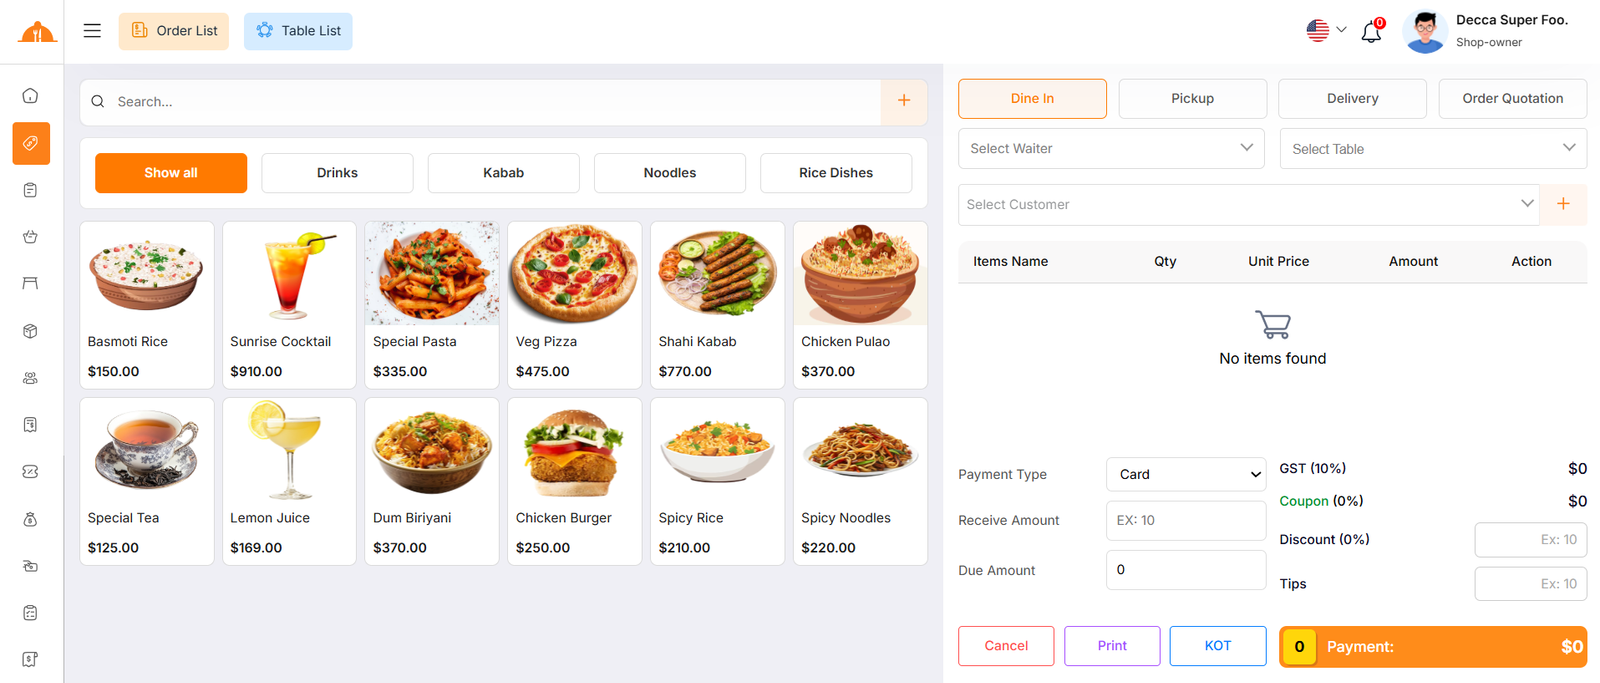
Create Order
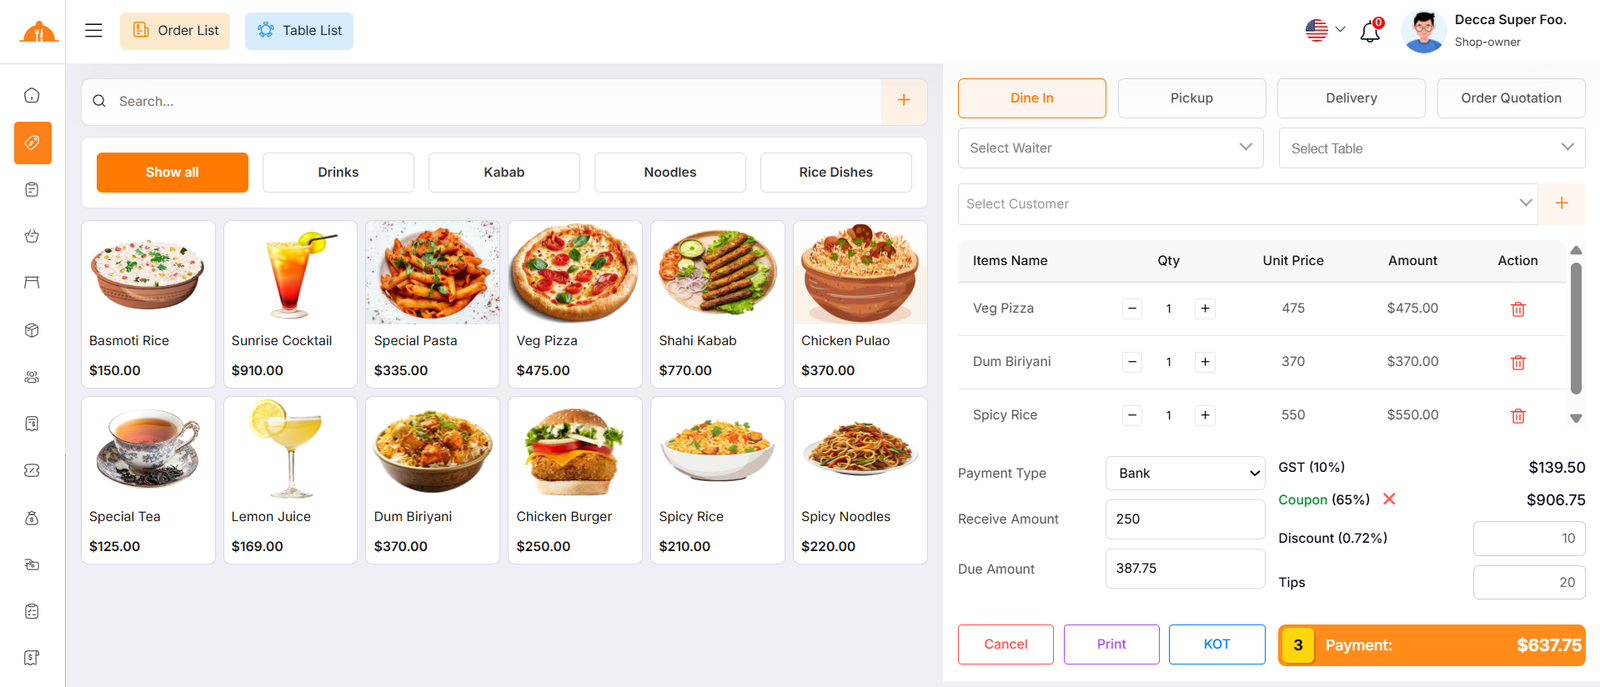
By clicking on "POS", you can create a new order. There are four sales types available: Dine-in, Pickup, Delivery, and Quotation. If you select Quotation, it will be saved in the quotation list, while the other types will be saved in the order list. Additionally, you can select Kitchen Order Ticket (KOT). In this case, the order status will remain Pending, and once the food is prepared, the status will change to Completed. You can also assign a Customer, Waiter, and Table while creating the order.
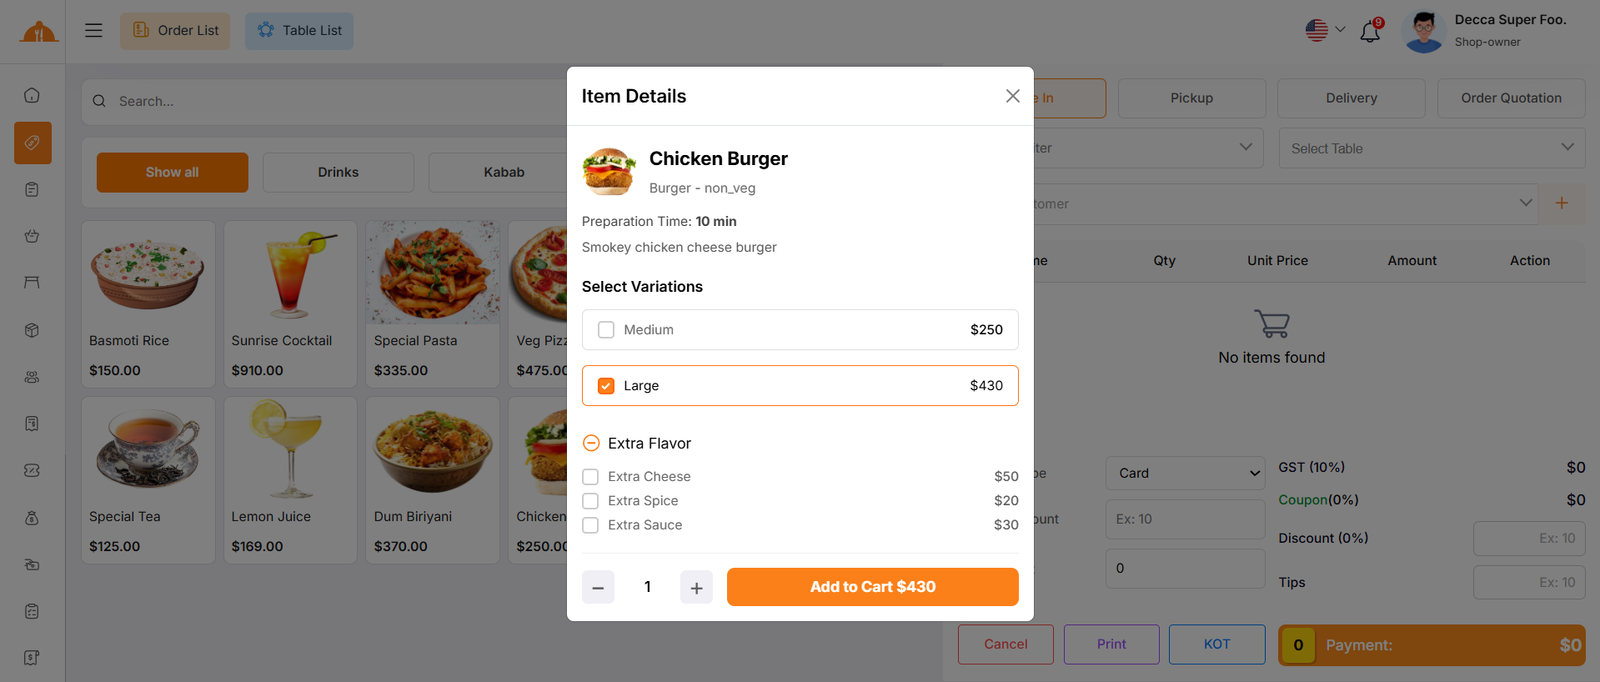
Select Item
Next, you need to select an item for the order. You can search by item name & also create item by clicking plus button
or filter items by category to easily find the item you need.
When you click on an item, if it has a variation price or modifiers with options,
a modal will open where you can choose your preferred variation and modifier before adding it to the cart.
If the item does not have any variation or modifier, it will be added to the cart automatically.
Add to Cart & Store Order
You can adjust the quantity using the plus or minus buttons, or directly enter a value to update the quantity.
To remove a product from the cart, simply click the red delete button.
Below, you will see the subtotal of all items. You can also add VAT, Coupon or a
discount to the subtotal. After the calculations, the total amount will be displayed. Next,
you can enter the received amount. If the received amount is greater than the total amount,
the remaining balance will be shown in the "Change Amount" field. If the received amount is
less, the "Due Amount" field will display the difference. If you want to remove all items
from the list, click the cancel button. Once everything is correct, click the "Payment" button to
complete the order.
Order List
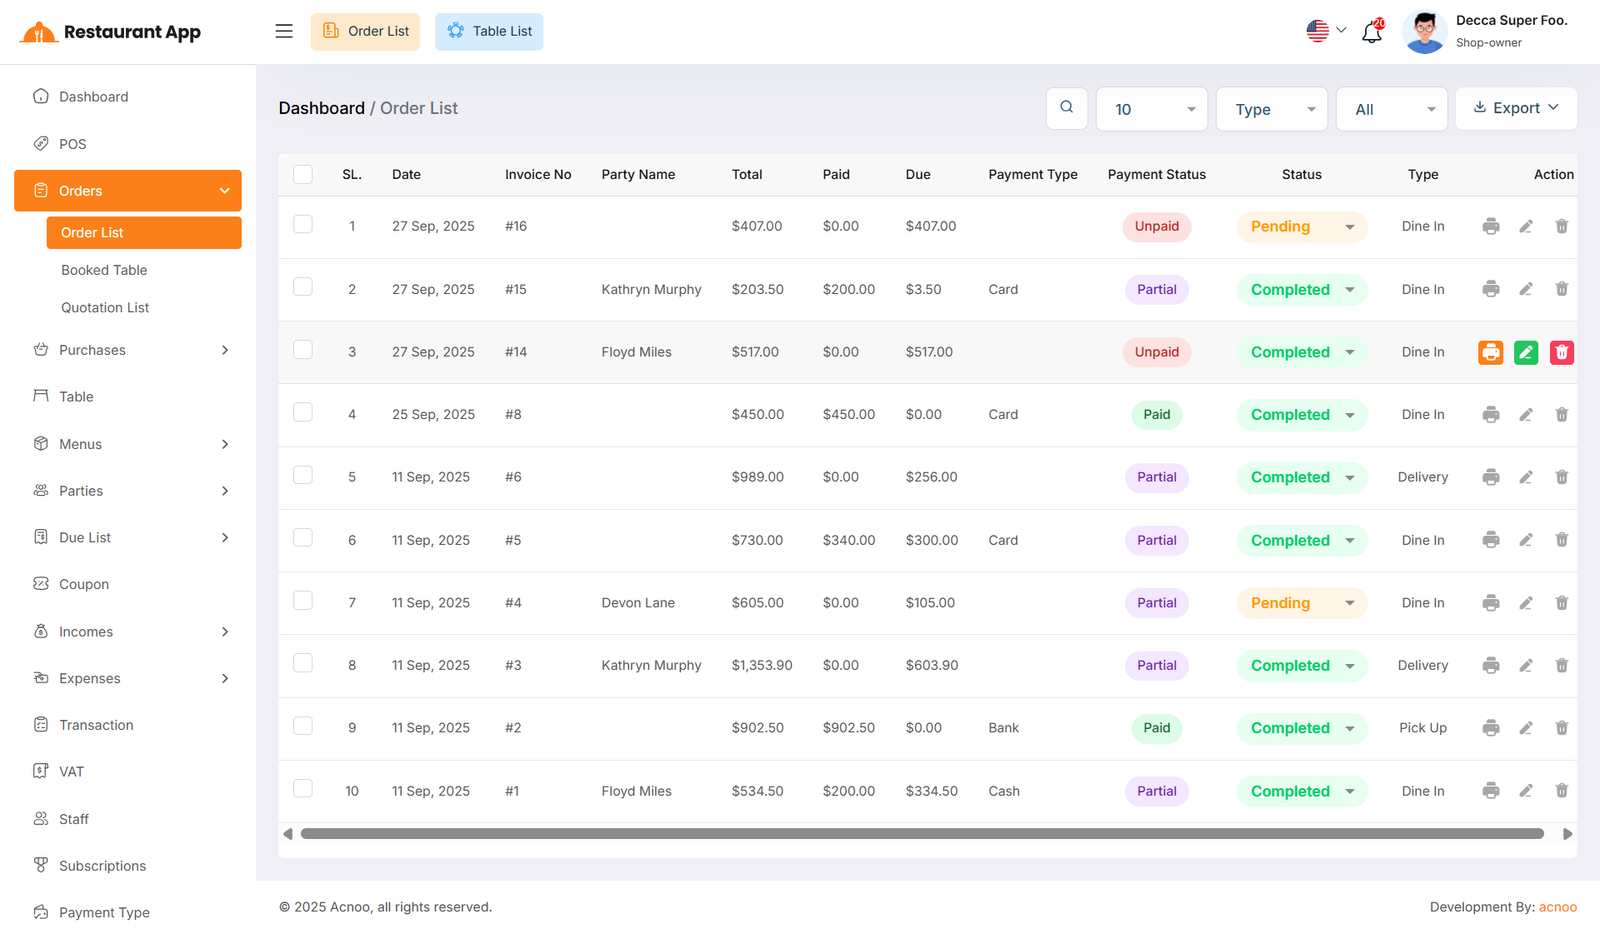
This appears to be a screenshot of the Order list page, where you can filter data using the search function. Additionally, you can view invoices, as well as edit, delete, or use the multi-delete option and exported as Excel, CSV and PDF. Also you can update the KOT order status.
Booked Table List
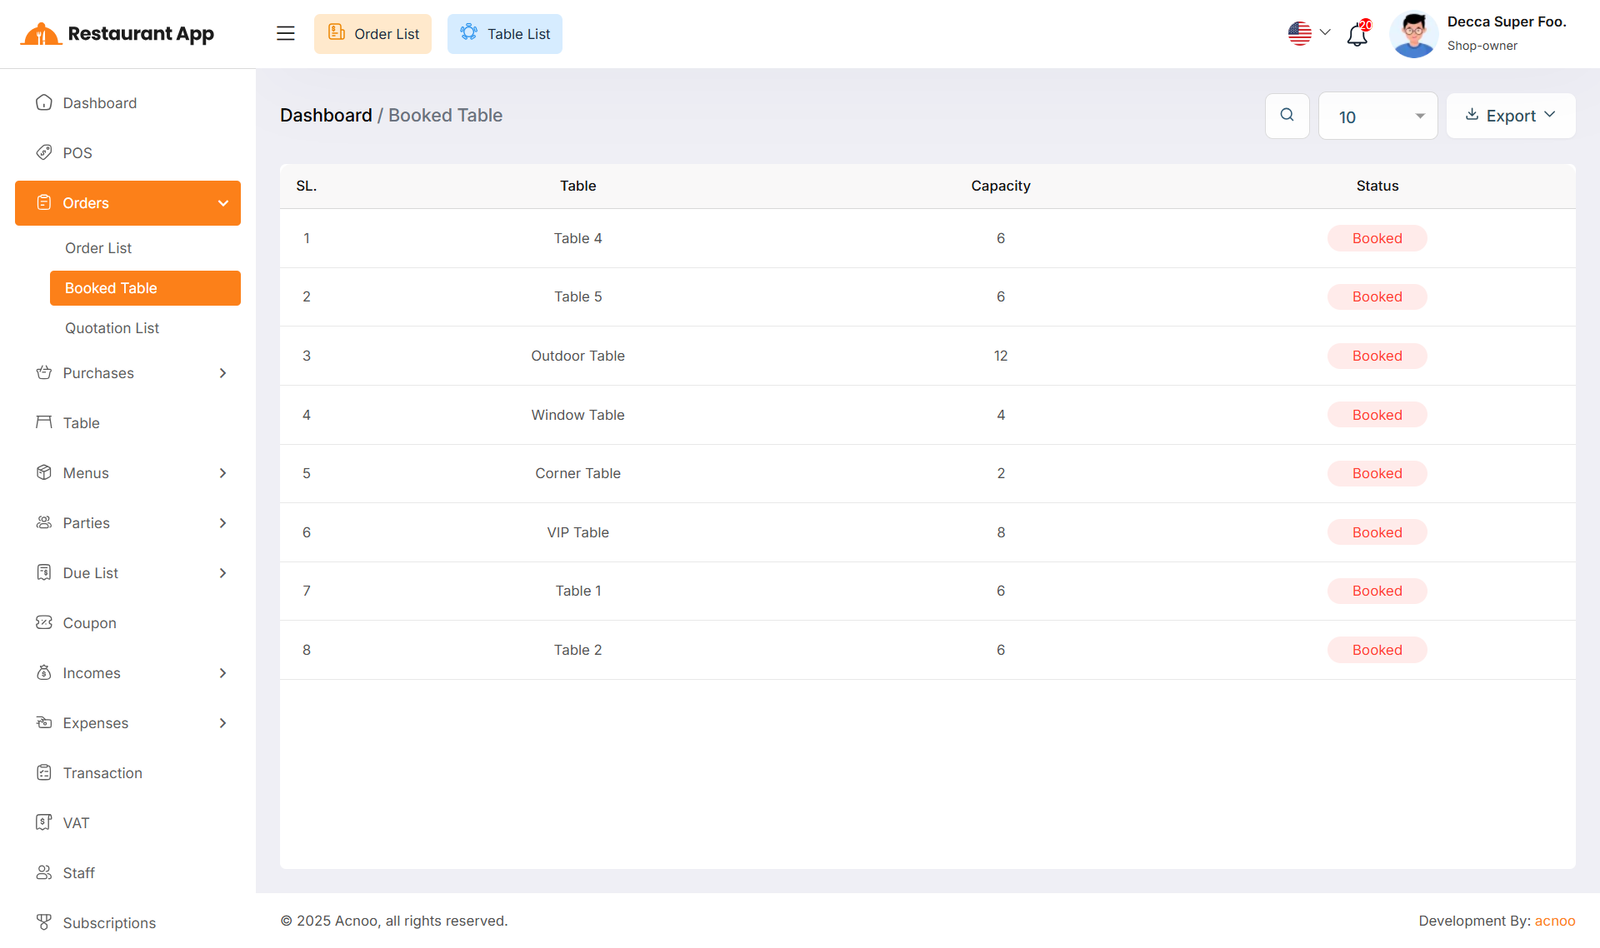
This appears to be a screenshot of the Booked Table list page, where you can filter data using the search function. Additionally, you can see the "Status" and exported as Excel, CSV and PDF.
Quotation List
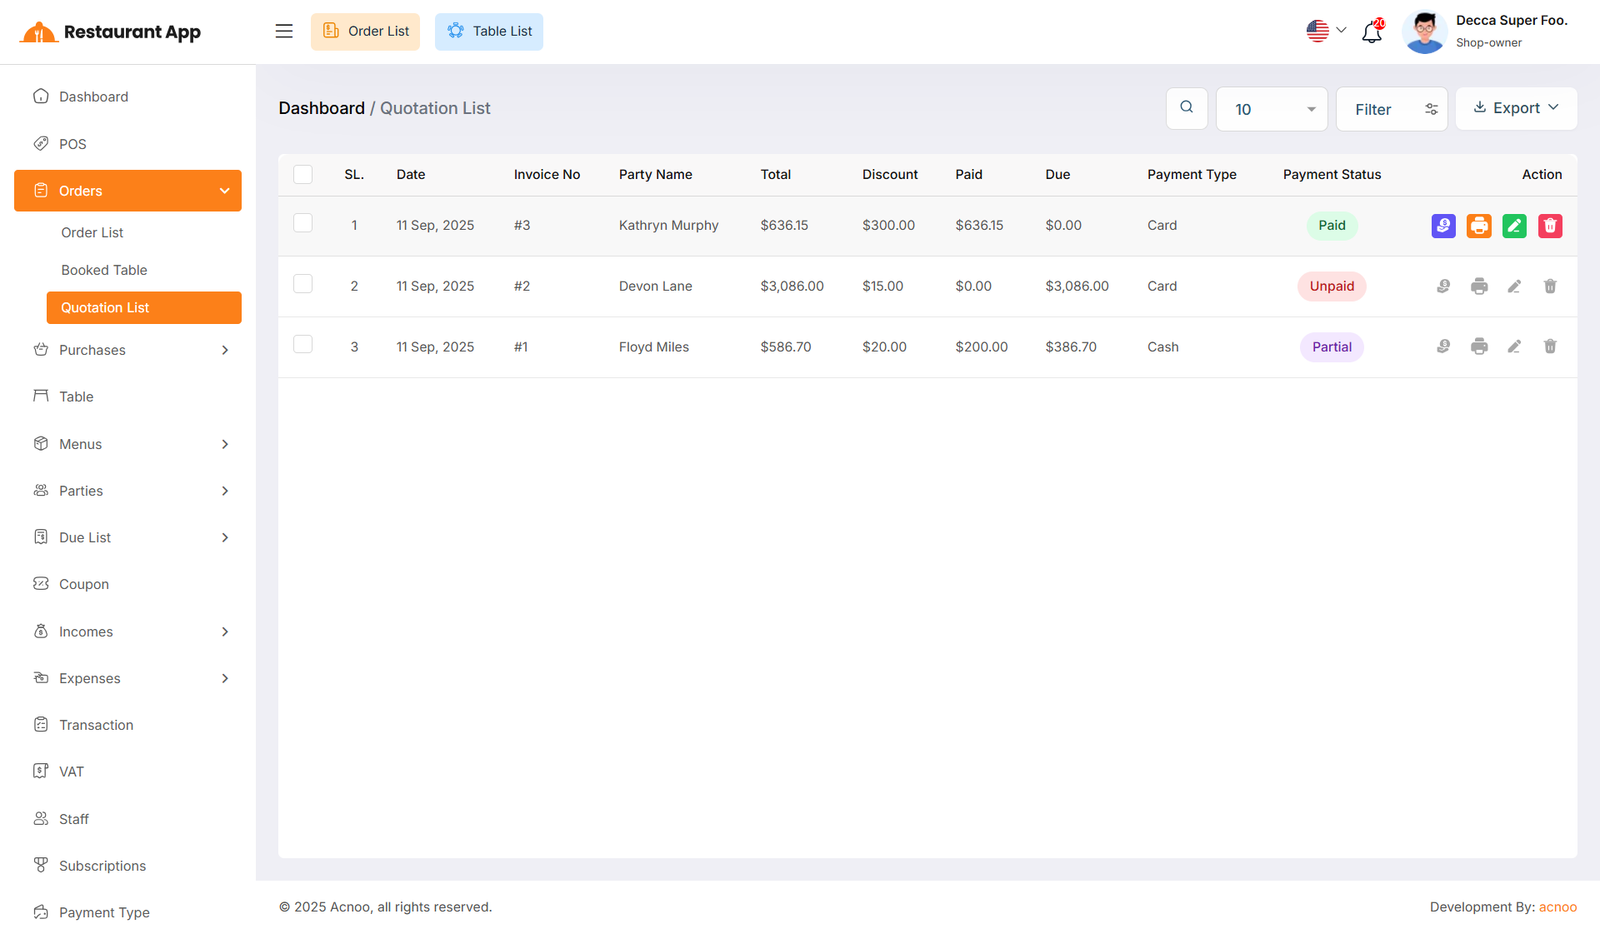
If you select the "Quotation" type while creating an order, it will appear in the Quotations list.
Quotations give you a complete overview of the order, making the process much easier.
Additionally, you can view quotation invoices, as well as edit, delete, or use the multi-delete option and exported as Excel, CSV and PDF.
Another useful feature is that you can easily convert any quotation into an actual order whenever needed.
All Kitchen
The Kitchens module is designed to streamline restaurant operations by separating food preparation into logical units (e.g., Non-Veg Kitchen, Veg Kitchen). This ensures that orders are routed to the correct staff and inventory is managed efficiently.
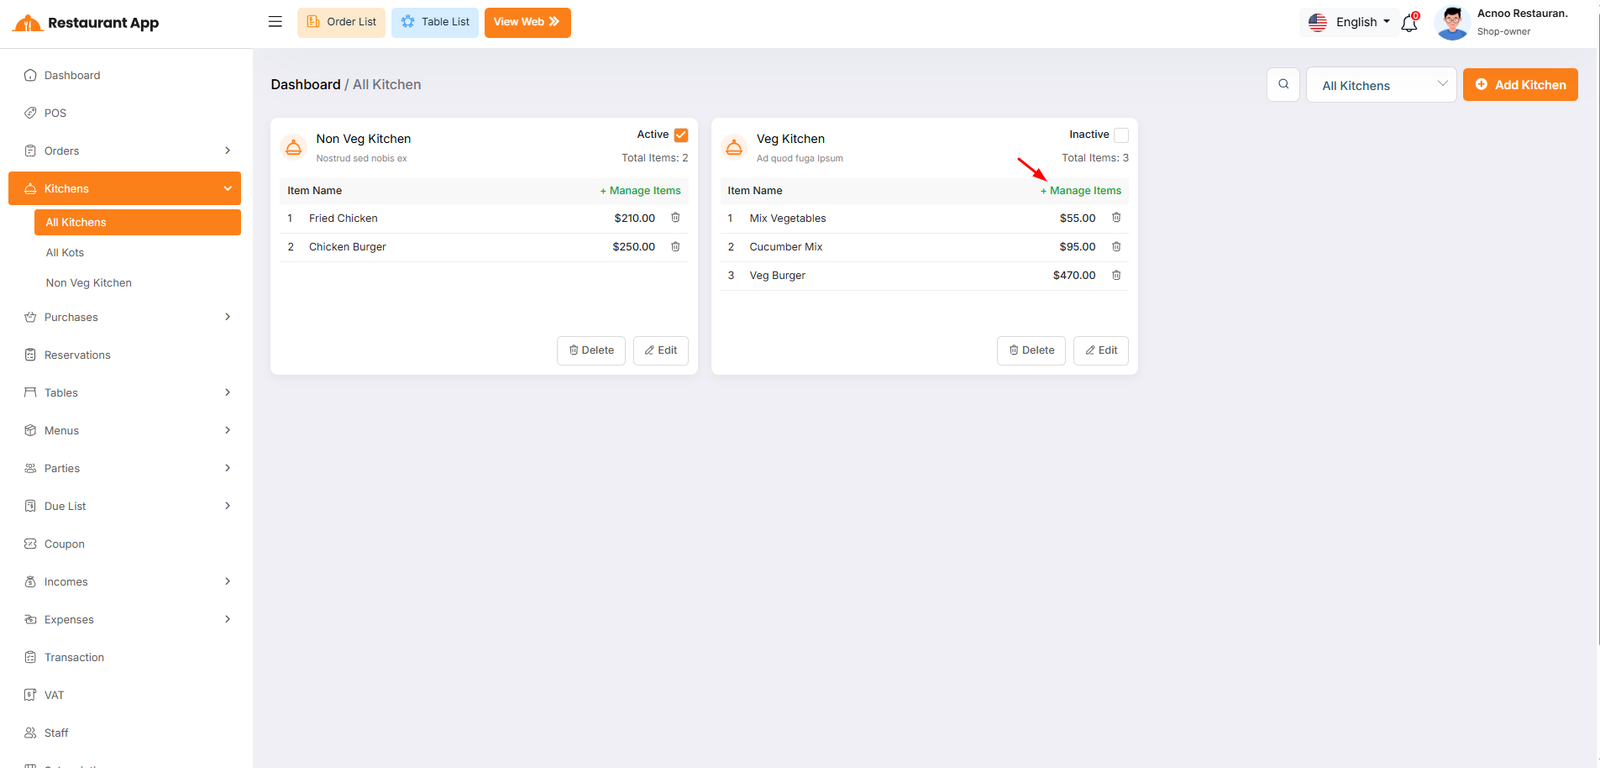
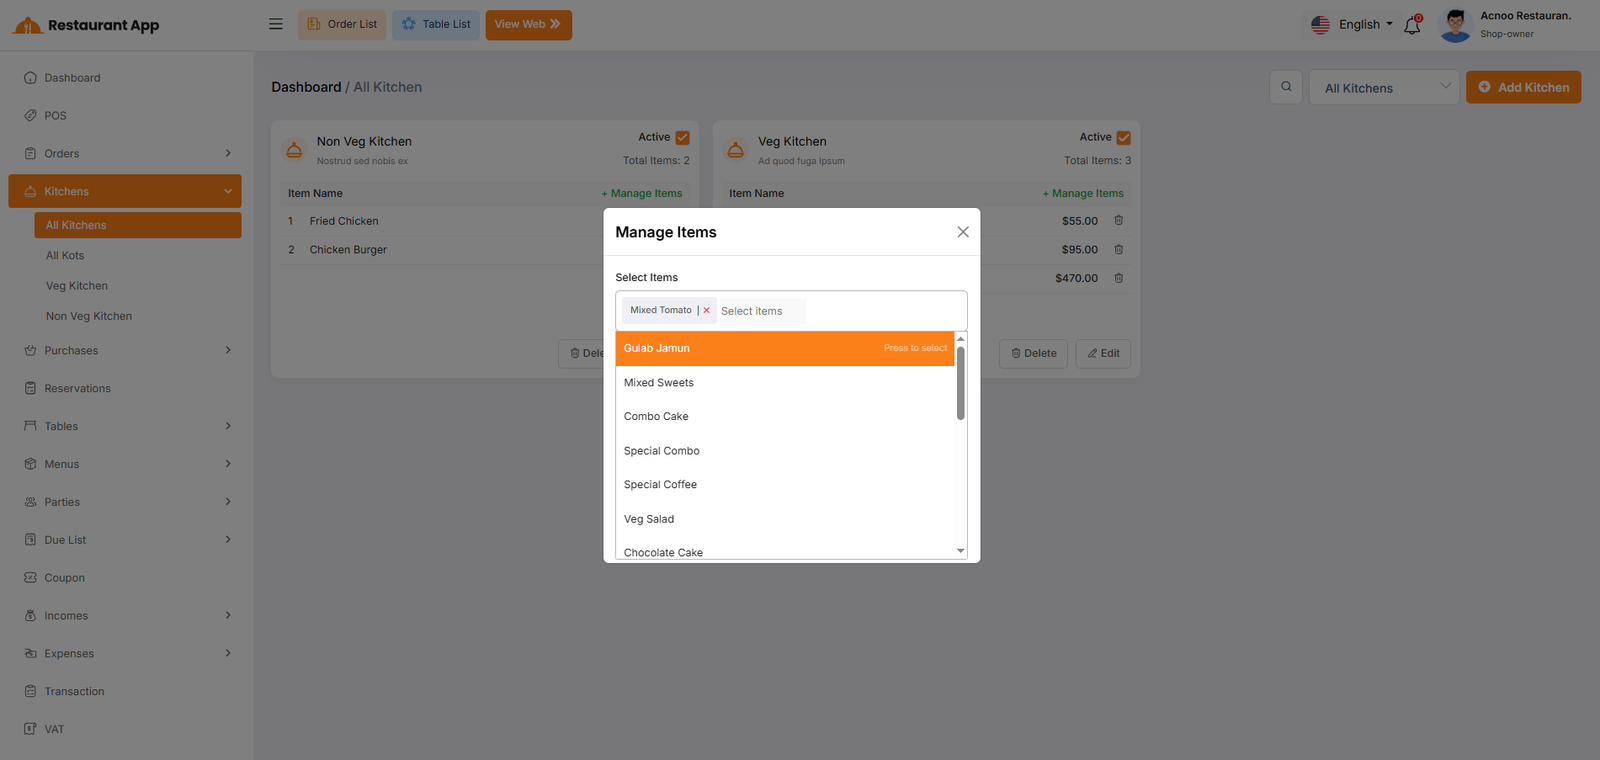
Manage Items
Operational Segmentation: It allows a restaurant to split food preparation into specific stations, such as a "Veg Kitchen" and a "Non-Veg Kitchen". Order Routing: By assigning items to specific kitchens, the system ensures that when an order is placed, the ticket is sent to the correct preparation area. Status Control: Owners can quickly toggle a kitchen to "Inactive" if a station is closed for the day, preventing orders from being routed there.
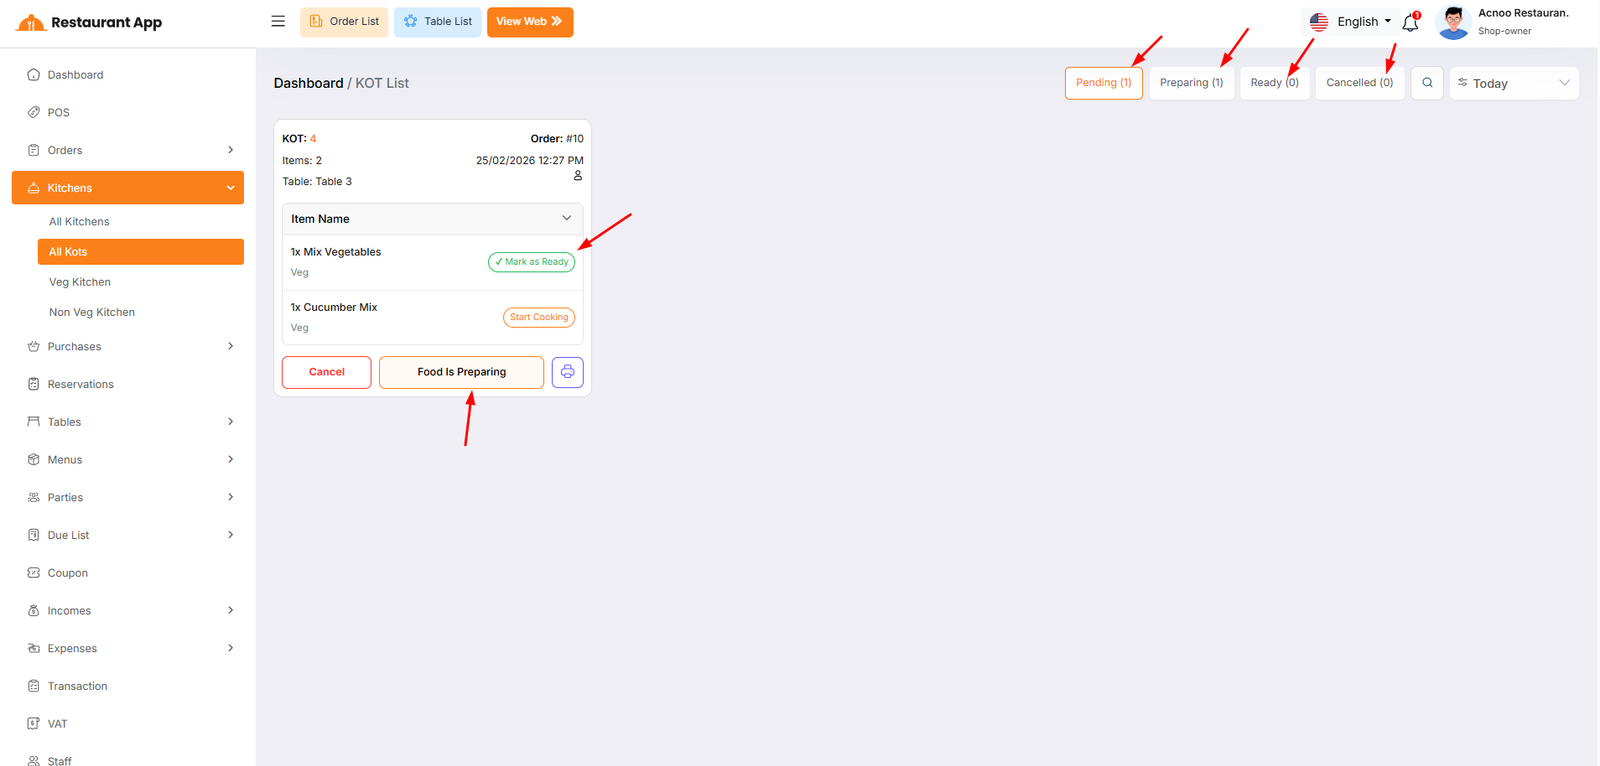
All KOTS
The KOT List page is the central hub for kitchen staff and management to track, manage, and fulfill food and beverage orders. This interface ensures a seamless flow from the point of sale to the kitchen and finally to the customer.
Start Cooking Moves an individual item from "Pending" to "Preparing" status.
Mark as Ready Signals that a specific item is finished and ready for the server.
Food Is Preparing Updates the status of the entire KOT card to the "Preparing" stage.
Cancel Immediately halts the order and moves it to the "Cancelled" tab.
Print (Icon) Generates a physical kitchen ticket for the chefs.
Create Purchase
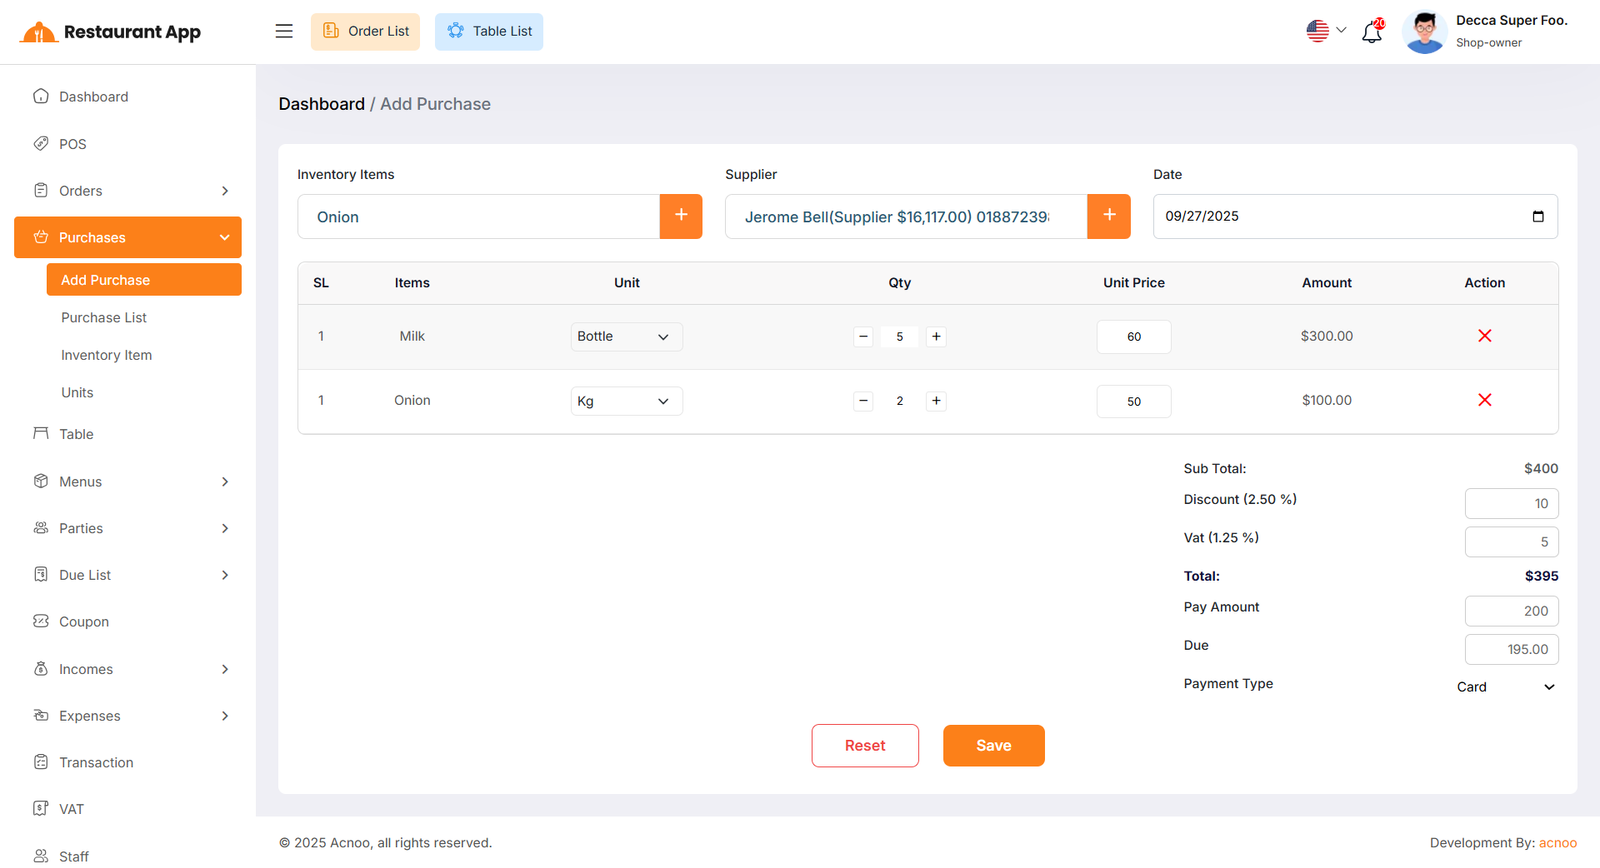
By clicking on "Add Purchase", you can create a new purchase. First, select a supplier, then choose an inventory item for the purchase. Additionally, you can create new items and suppliers instantly by clicking the plus (+) button next to the item and supplier fields.
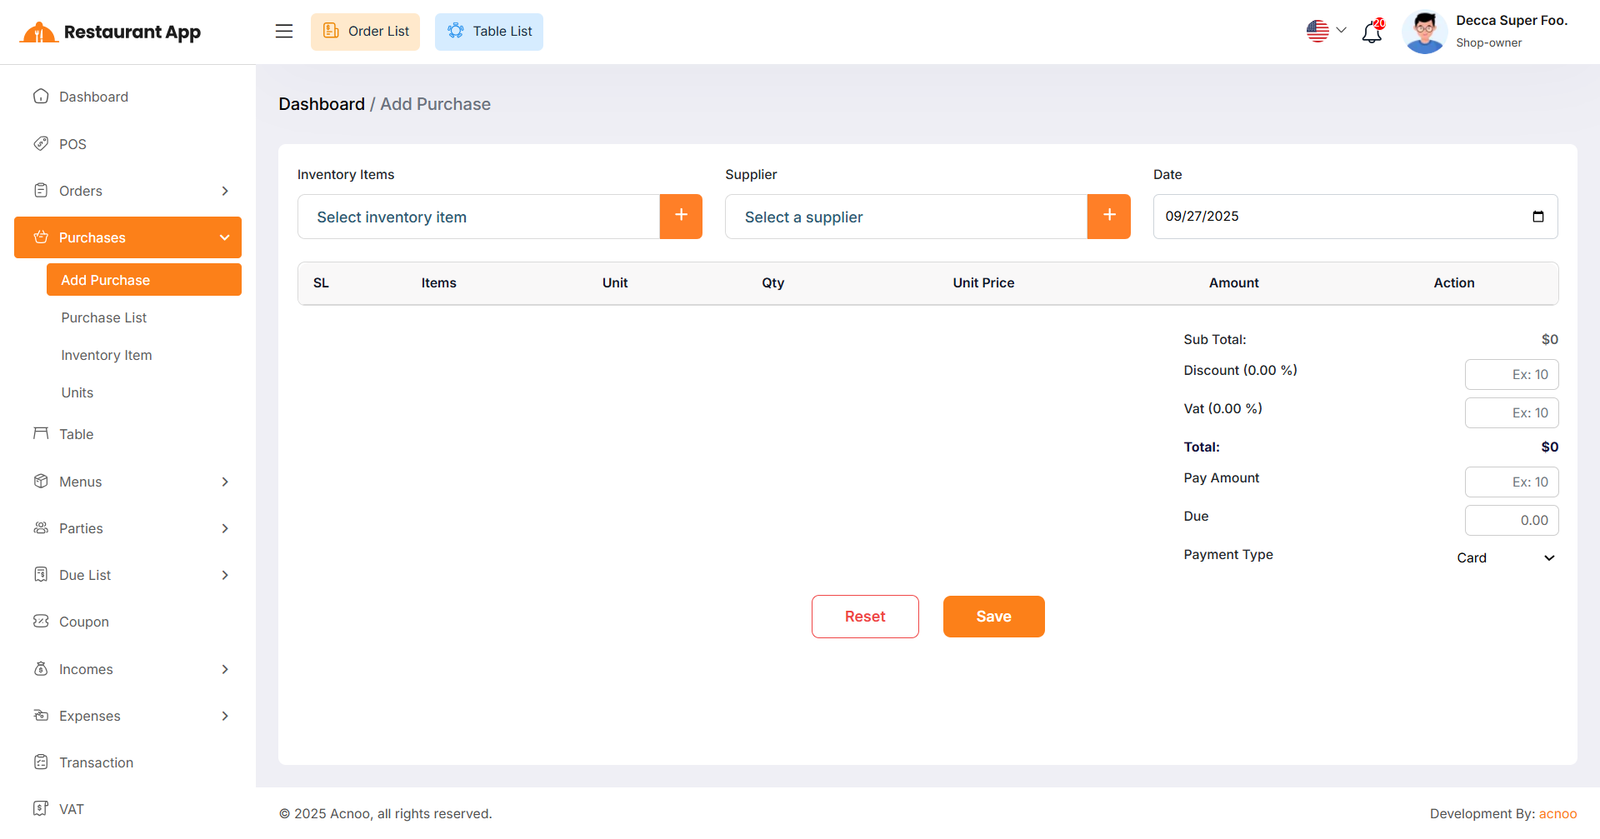
Add to Cart & Store Purchase
Next, select an item for the purchase. Once selected, the item will automatically appear in the cart list.
You can adjust the quantity using the plus or minus buttons, or update it directly by entering a value.
To remove an item from the cart, click the red cross button.
Below, you will see the subtotal of all items. You can also apply a discount to the subtotal.
After the calculation, the total amount will be displayed. Next, enter the "Pay Amount".
If the Pay Amount is less than the total, the difference will be shown in the "Due" field.
If you want to remove all items from the list, click the reset button.
Once everything is correct, click the save button to complete the purchase.
Purchase List
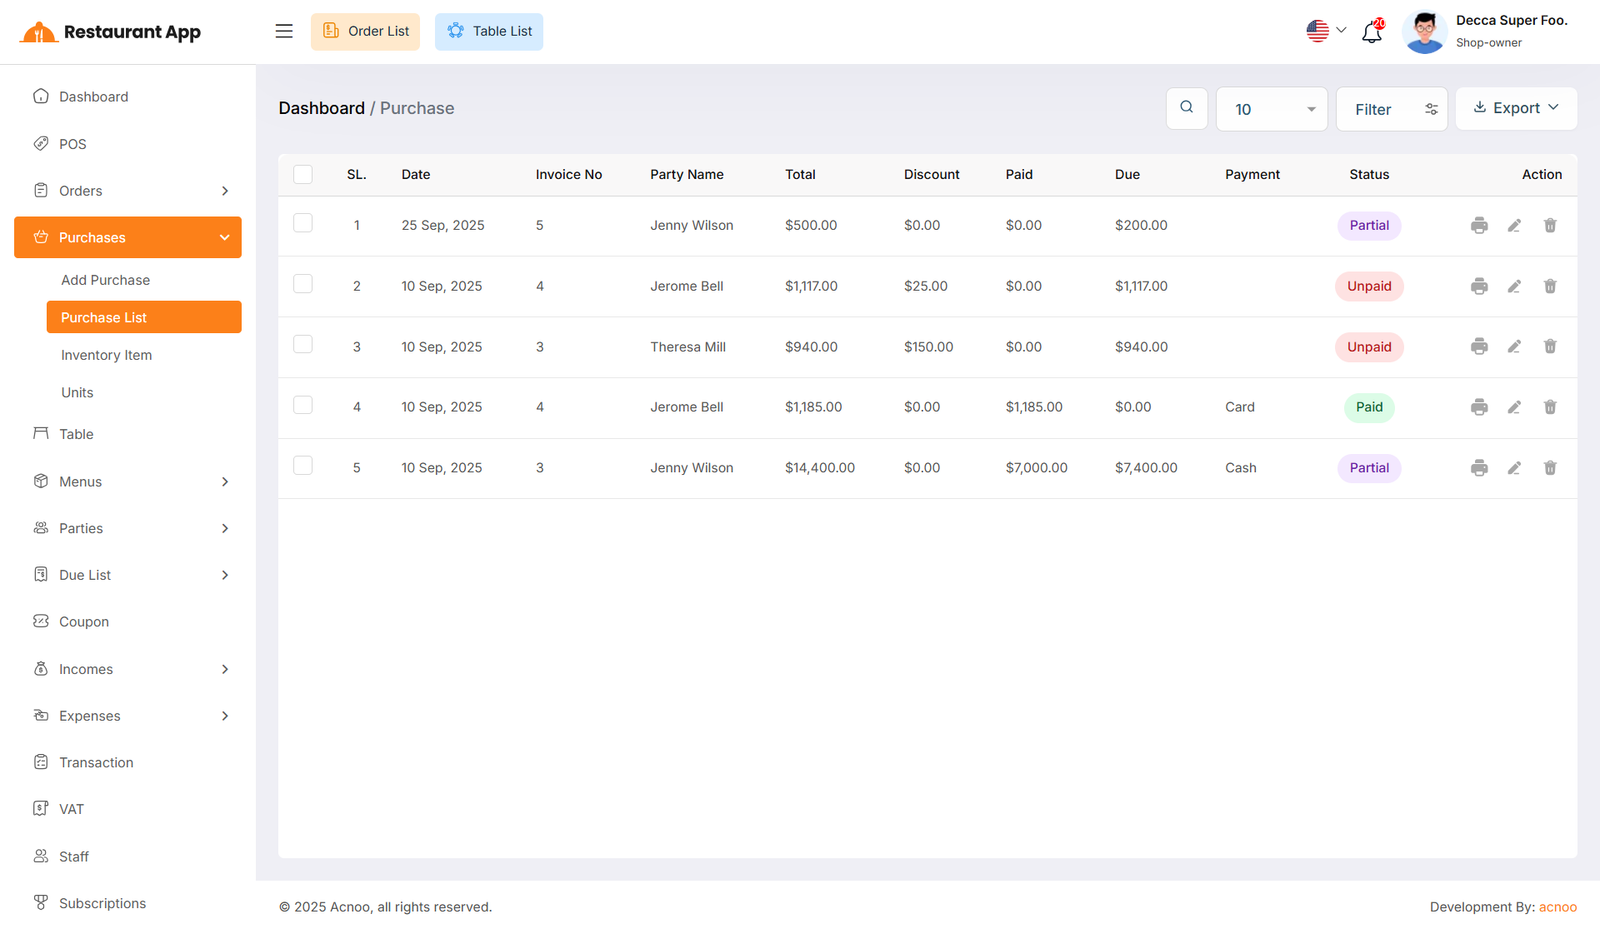
This appears to be a screenshot of the Purchase list page, where you can filter data using the search function. Additionally, you can view invoices, as well as edit, delete, or use the multi-delete option exported as Excel, CSV, and PDF.
Inventory Item List
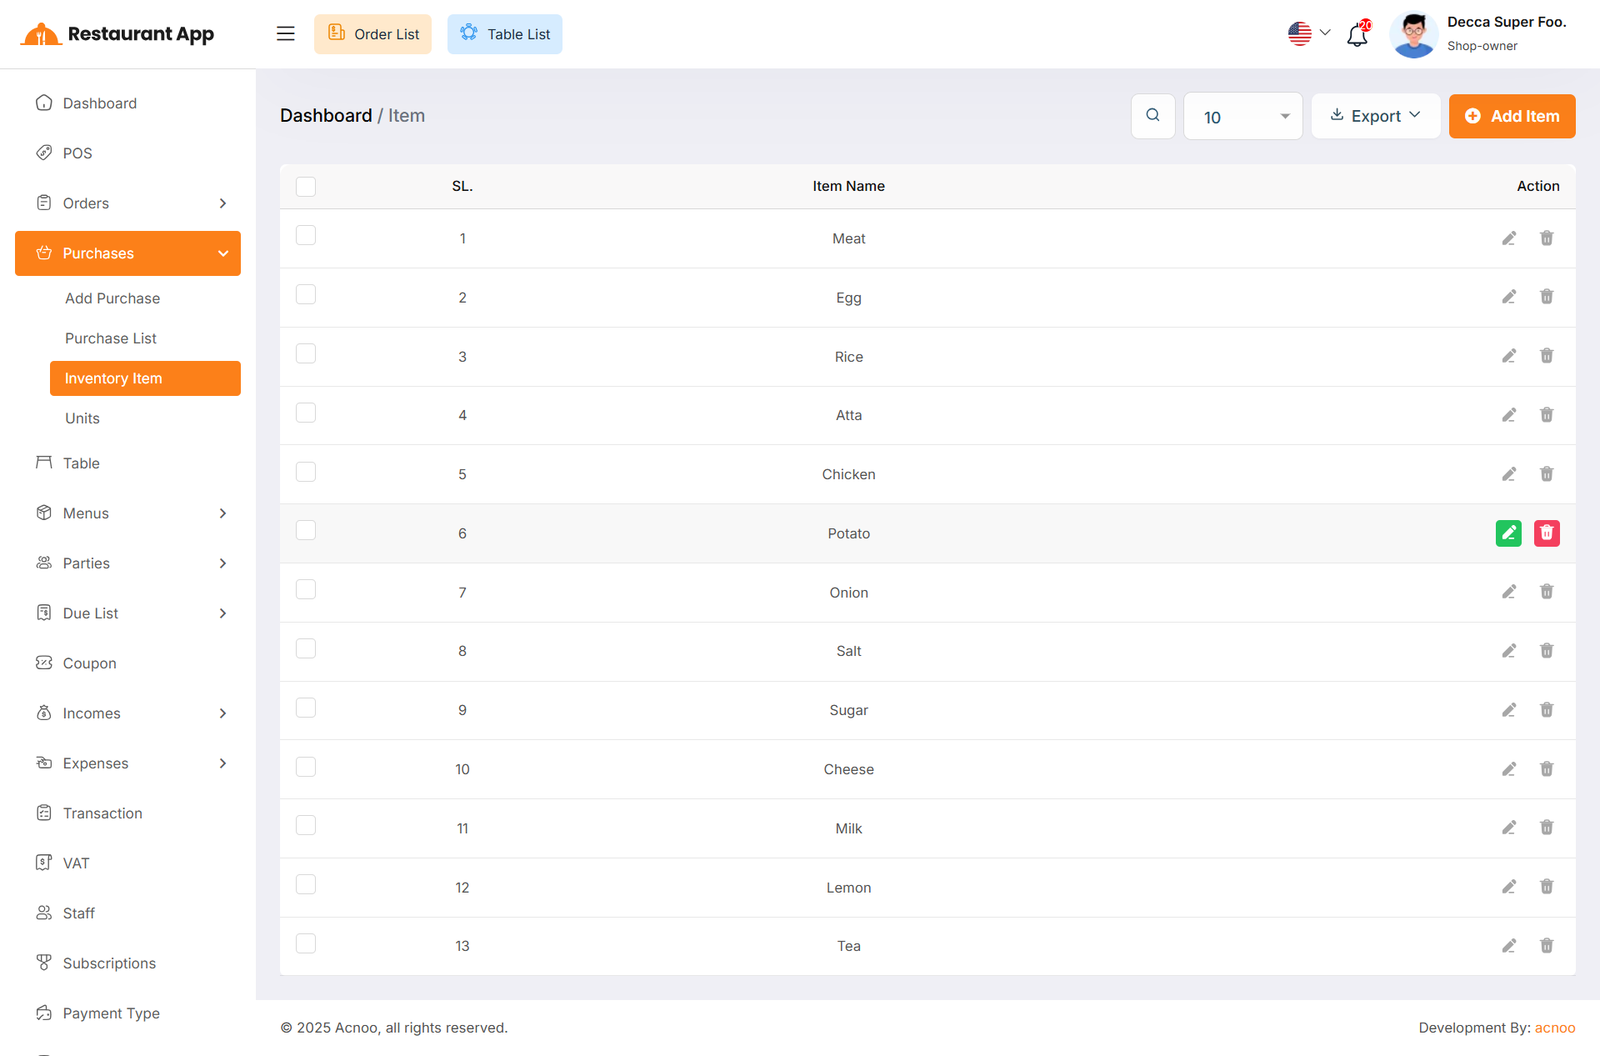
This appears to be a screenshot of the Inventory Item list page, where you can filter
data using the search function. Additionally, you can edit, delete, or use the multi-delete option exported as Excel, CSV and PDF.
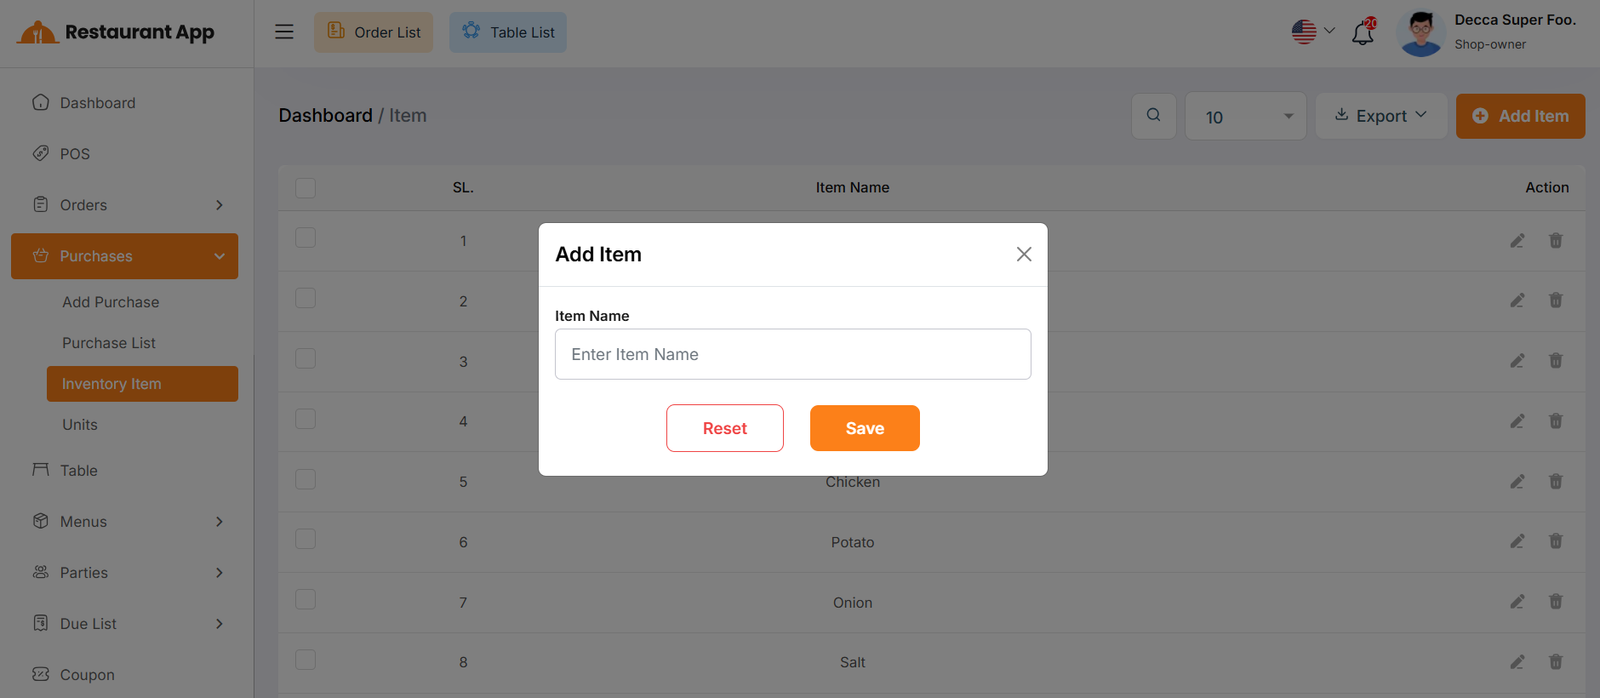
By clicking on the "Add Item" button, you can easily create a new inventory item by filling name field.
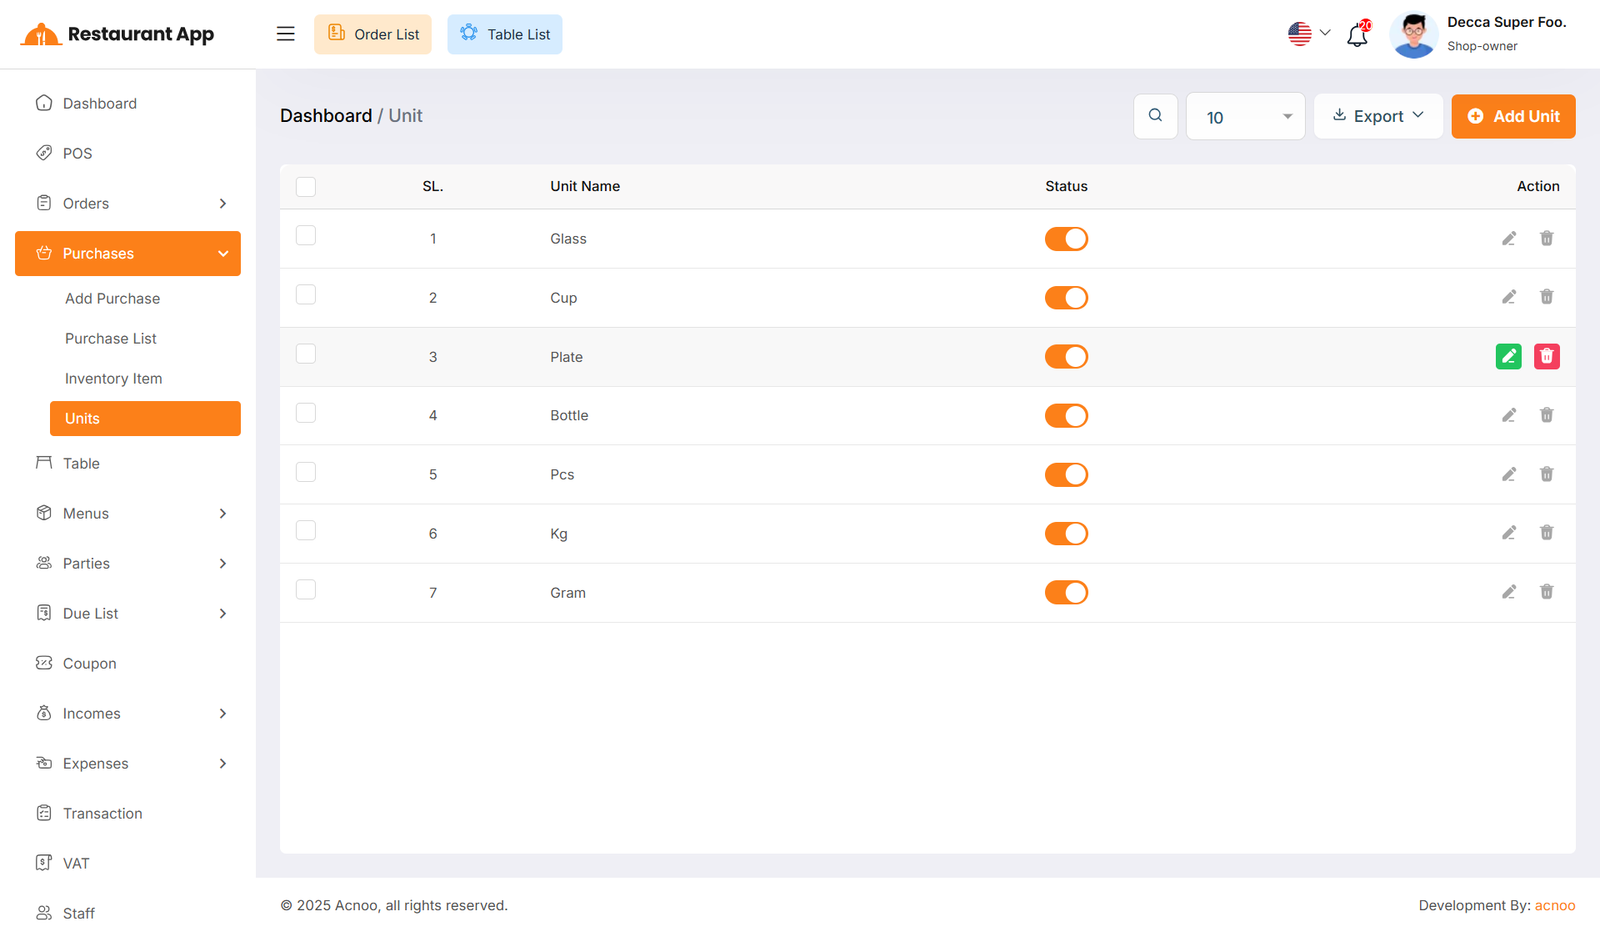
Unit List
This appears to be a screenshot of the Unit list page, where you can filter
data using the search function. Additionally, you can edit, delete, or use the multi-delete option exported as Excel, CSV and PDF.
By using the "Status Toggle", you can show or hide the unit during the purchase process.
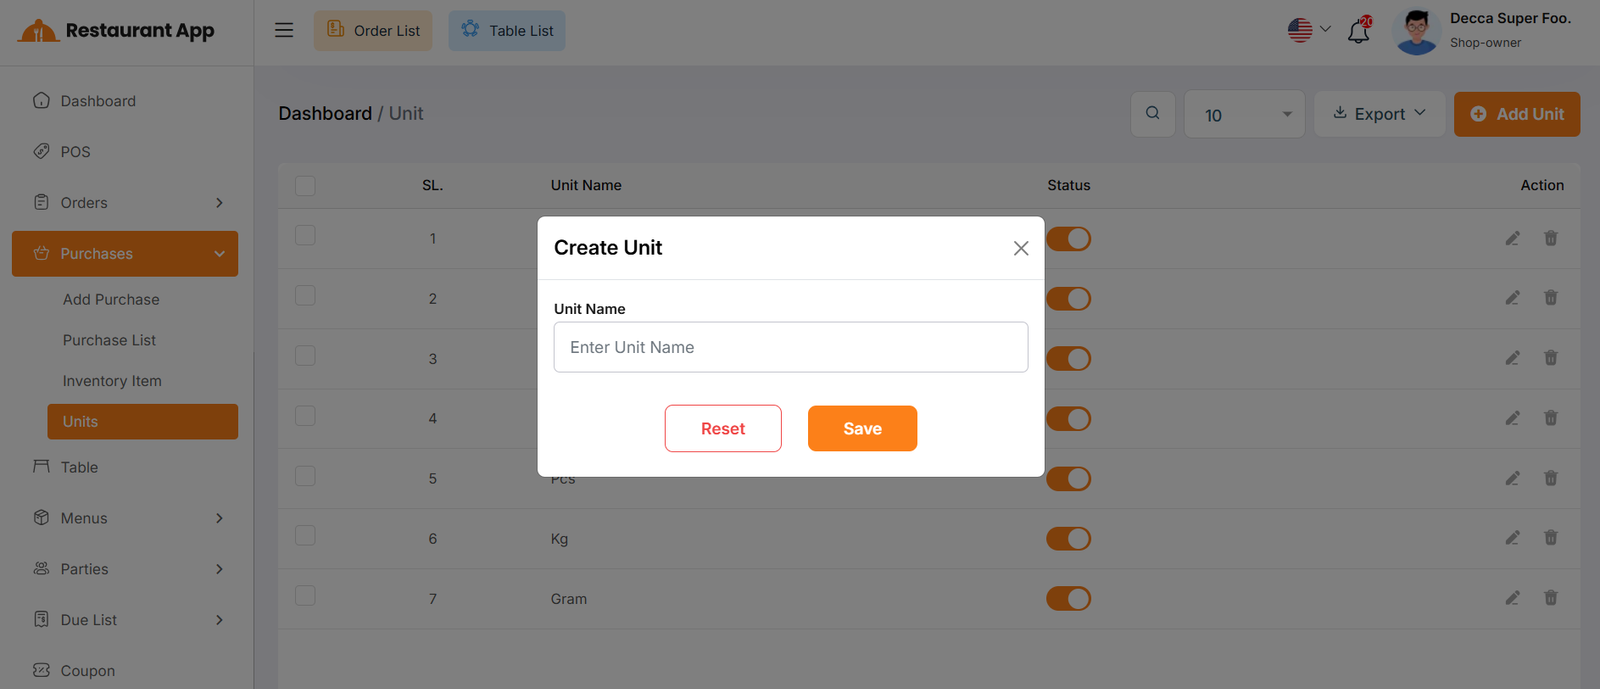
By clicking on the "Add Unit" button, you can easily create a new unit item by filling name field.
Reservation List
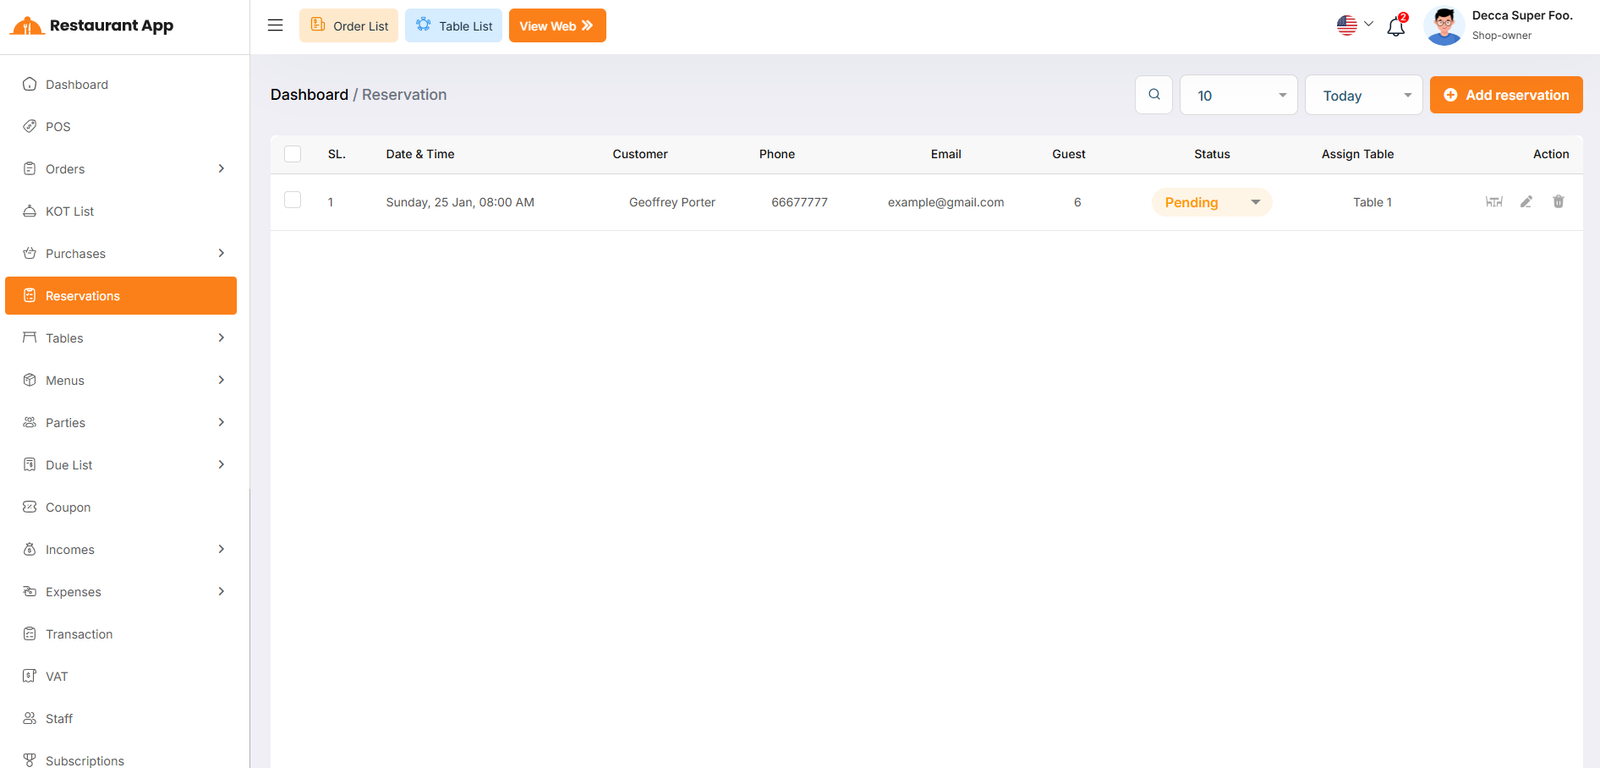
The Reservations page allows restaurant management to organize bookings, assign seating, and track guest details to ensure a smooth dining experience.
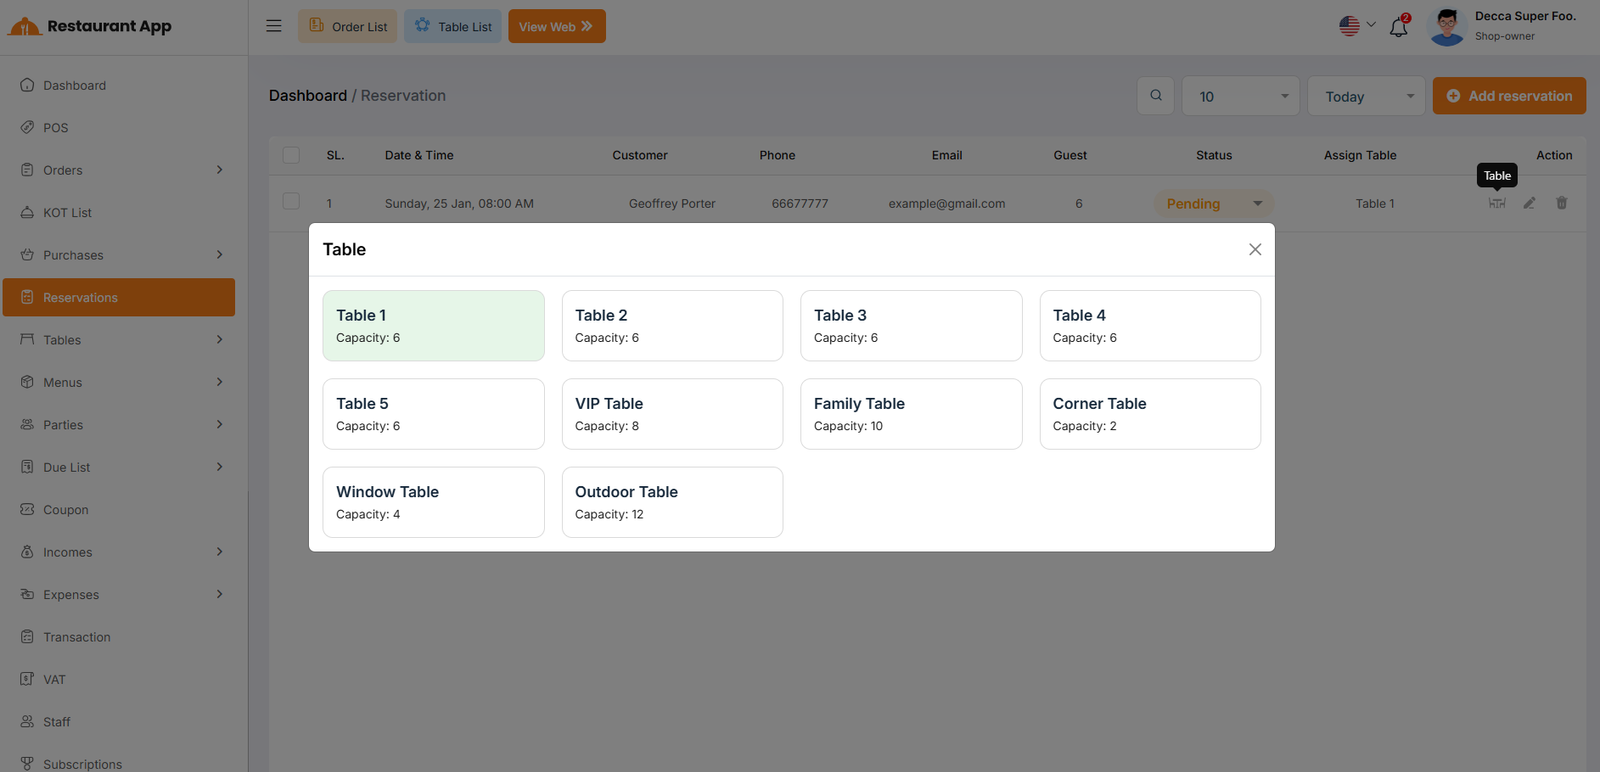
When clicking the Table icon, a pop-up menu appears to help you visualize and select available seating:
Table Variety Choose from various sections such as the VIP Table, Family Table, Outdoor Table, or Window Table.
Capacity Indicators Each table card displays its maximum capacity (e.g., "Capacity: 10") to ensure it fits the guest count.
Selection Status Highlighted cards (in green) indicate the currently assigned table for that specific reservation.
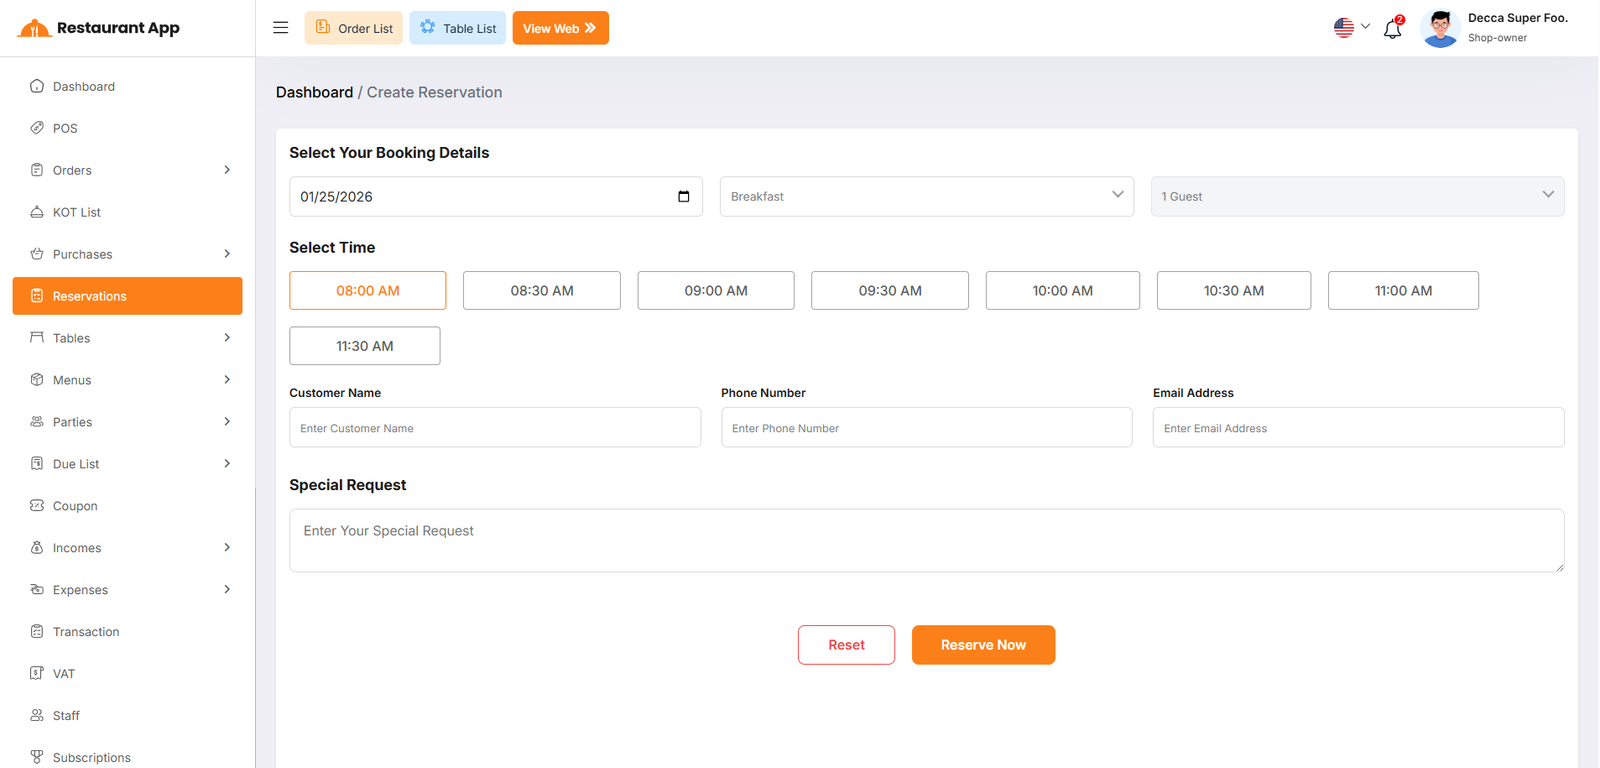
Reservation Create
Booking Details Staff can select the calendar date, meal period (e.g., Breakfast), and the total number of guests.
Time Selection Displays available time slots in 30-minute intervals (e.g., 08:00 AM to 11:30 AM) for precise scheduling.
Customer Information Fields for entering the Customer Name, Phone Number, and Email Address.
Special Request A text area for noting specific guest needs, such as high chairs, allergies, or anniversary celebrations.
Action Buttons Use "Reset" to clear the form or "Reserve Now" to finalize the booking.
Tables
The Tables module manages physical dining tables, live occupancy, QR codes for guest ordering, and POS sales tied to each table. It includes three parts: Areas, Tables, and QR Codes.
Areas
Areas group tables into physical zones such as Rooftop, North Corner, or VIP Section. This helps manage large floor plans and organize the table layout.
Area List
- SL — Serial number for each area.
- Name — The area name (e.g., "Rooftop", "North Corner").
- Tables — Total number of tables assigned to that area.
- Action — Edit or delete the area.
Filters & Tools
- Search areas by name.
- Set per-page display to 10, 25, 50, or 100.
- Export the list as PDF, CSV, or Excel.
- Select multiple areas via checkbox for bulk delete.
Add Area — Click "Add Area" to open a modal. Enter the area Name and click Save. Click Reset to clear the input.
Edit Area — Click the pencil icon to open a modal. Update the area name and click Save, or click Cancel to close without saving.
Delete — Click the trash icon to remove an area permanently.
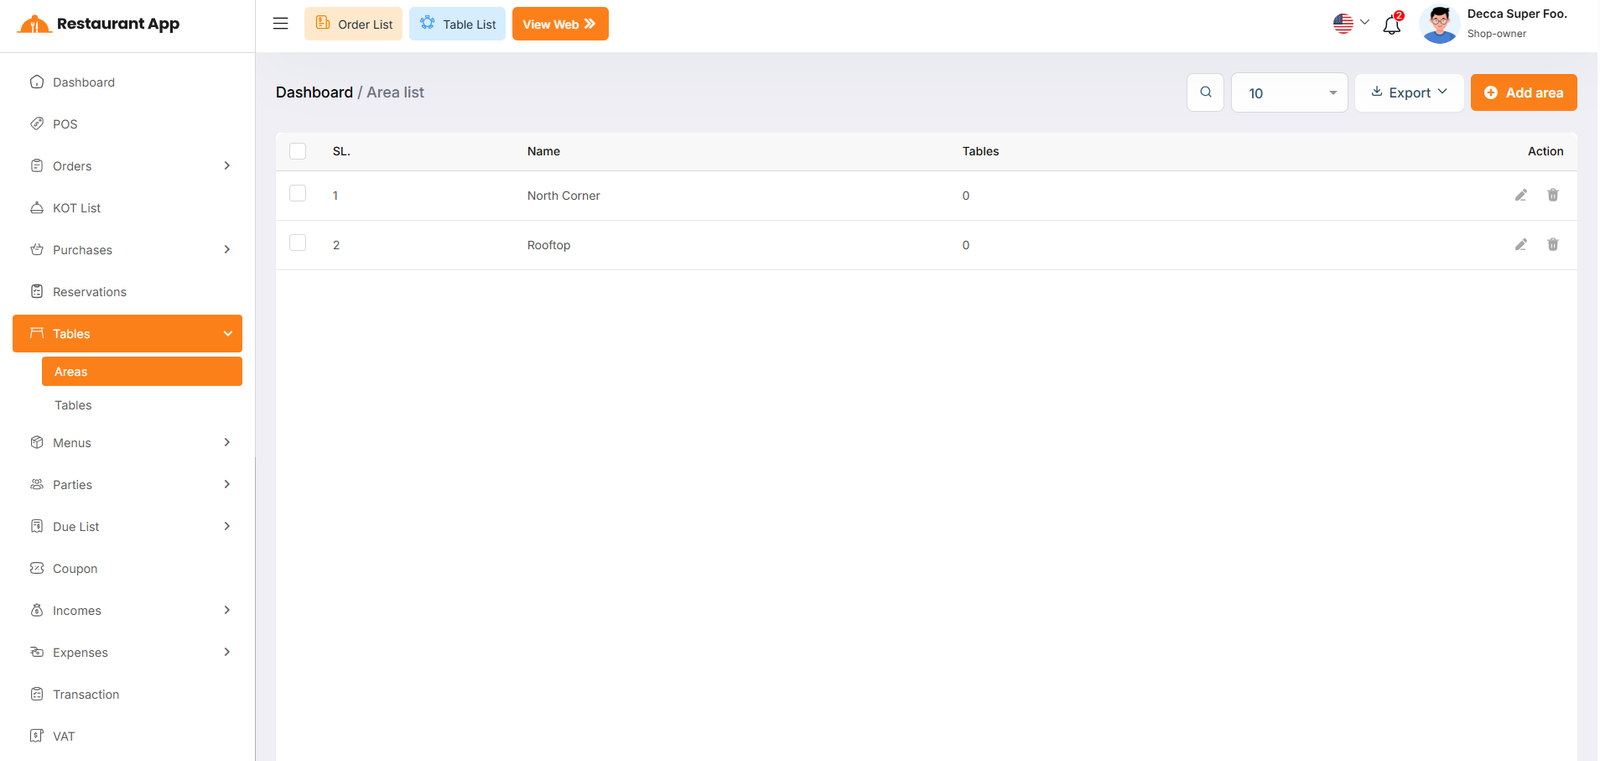
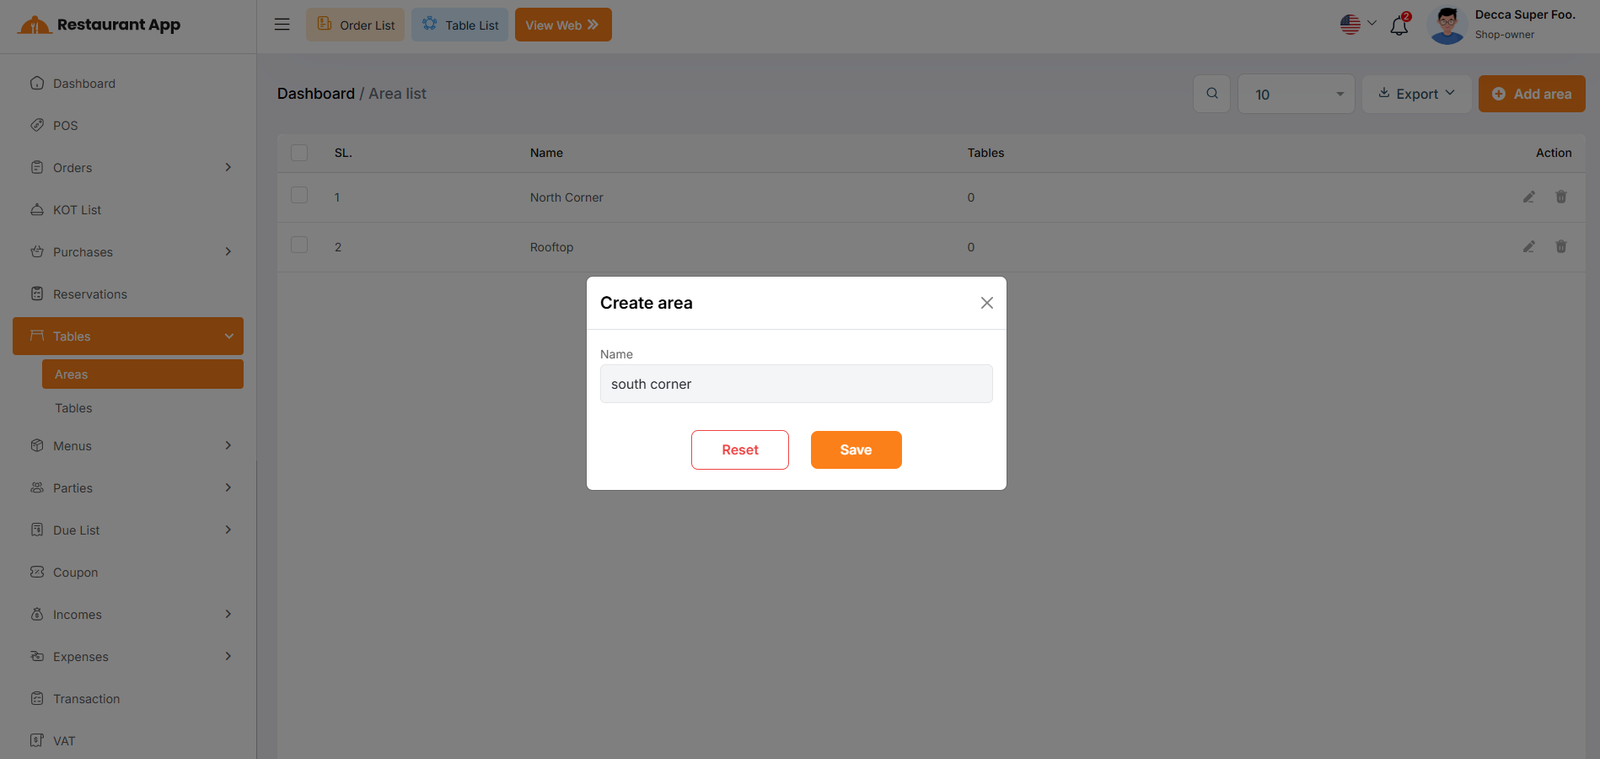
Table List
The Table List page displays every table as a visual card. Each card shows the table name, capacity, real-time status, number of ordered items, elapsed time, and current sale amount.
Status Types
- Available — The table is free and ready for guests.
- KOT — A kitchen order ticket is active and the order is being prepared.
- Occupied — The table has an active sale in progress.
Open a Sale — Click any table card (except the action icons or checkbox) to open the table sale page. This loads the POS interface for that table where you can add items, update status, and process payment.
Filters & Tools
- Search by table name or capacity.
- Filter by status: Booked or Available.
- Click area tabs to filter by dining zone.
- Set per-page display to 20, 50, or 100.
- Export the list as PDF, CSV, or Excel.
- Select multiple tables via checkbox for bulk delete.
Card Actions
- Edit (pencil icon) — Opens a modal to update name, capacity, area, and booking status.
- Delete — Removes the table permanently.
Add Table — Click "Add Table" to open a modal. Enter the table Name, Capacity, and select an Area, then click Save.
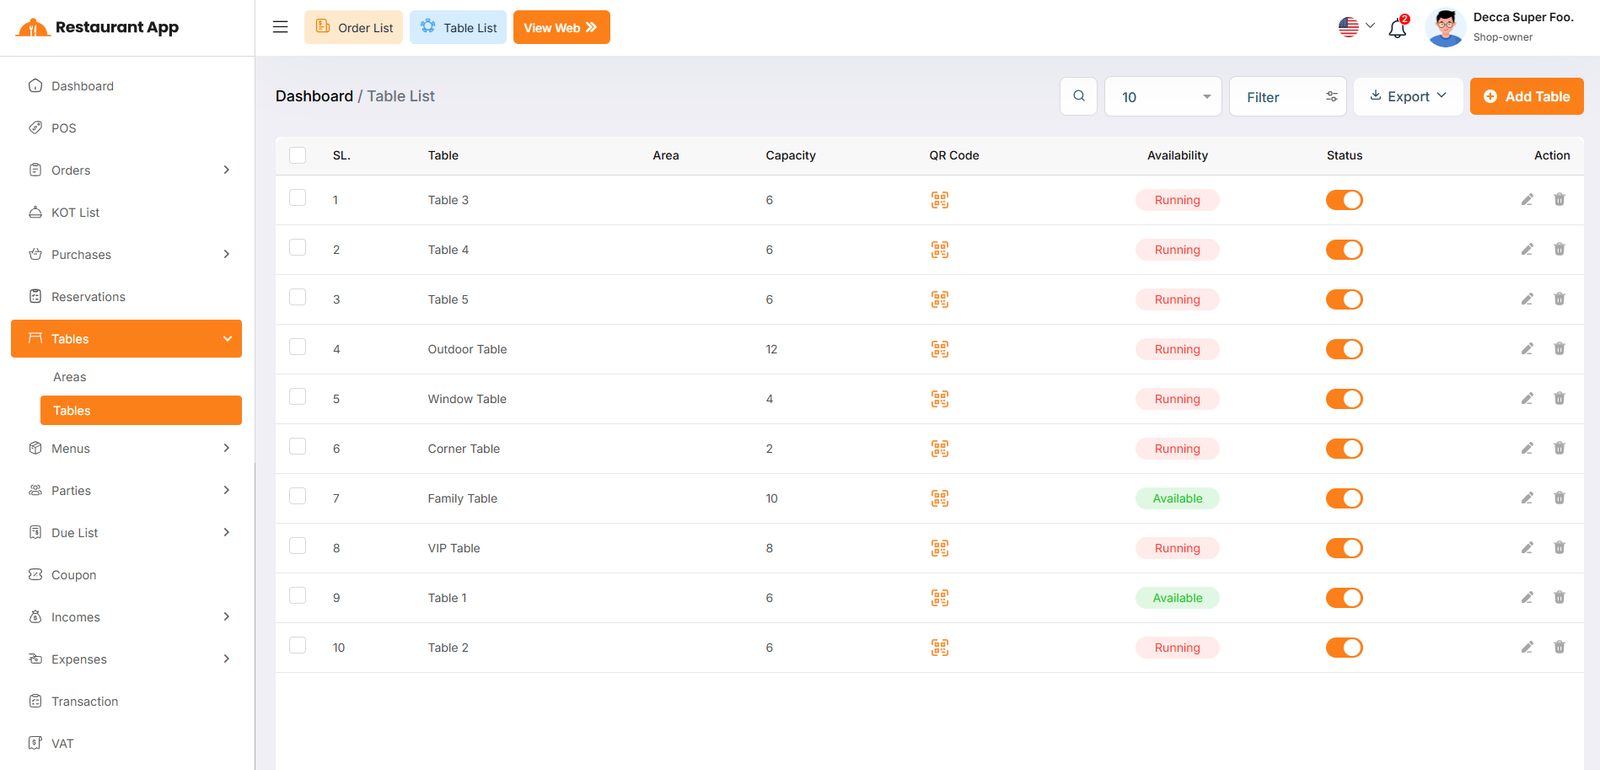
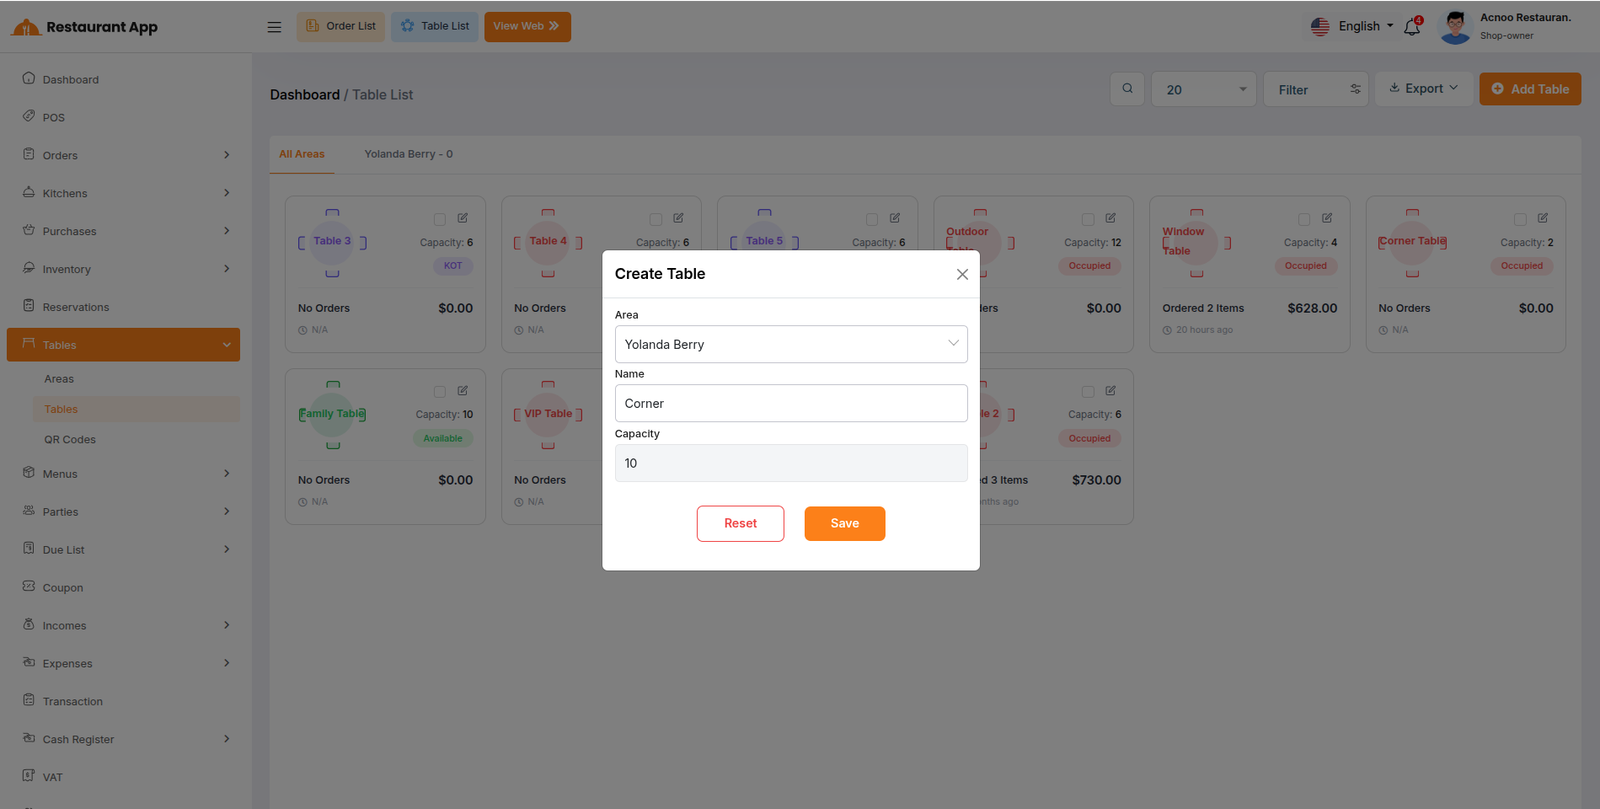
Table Sale (POS)
When you click a table, the system opens the table sale page. This is the point-of-sale interface for managing orders tied to that table.
Order Header
- Order ID and elapsed time since the order started.
- Status Stepper — Visual progress bar showing stages such as Pending, Preparing, Ready, Served, and Completed. Click "Move To [Next Status]" to advance the order.
Table & Guest Info
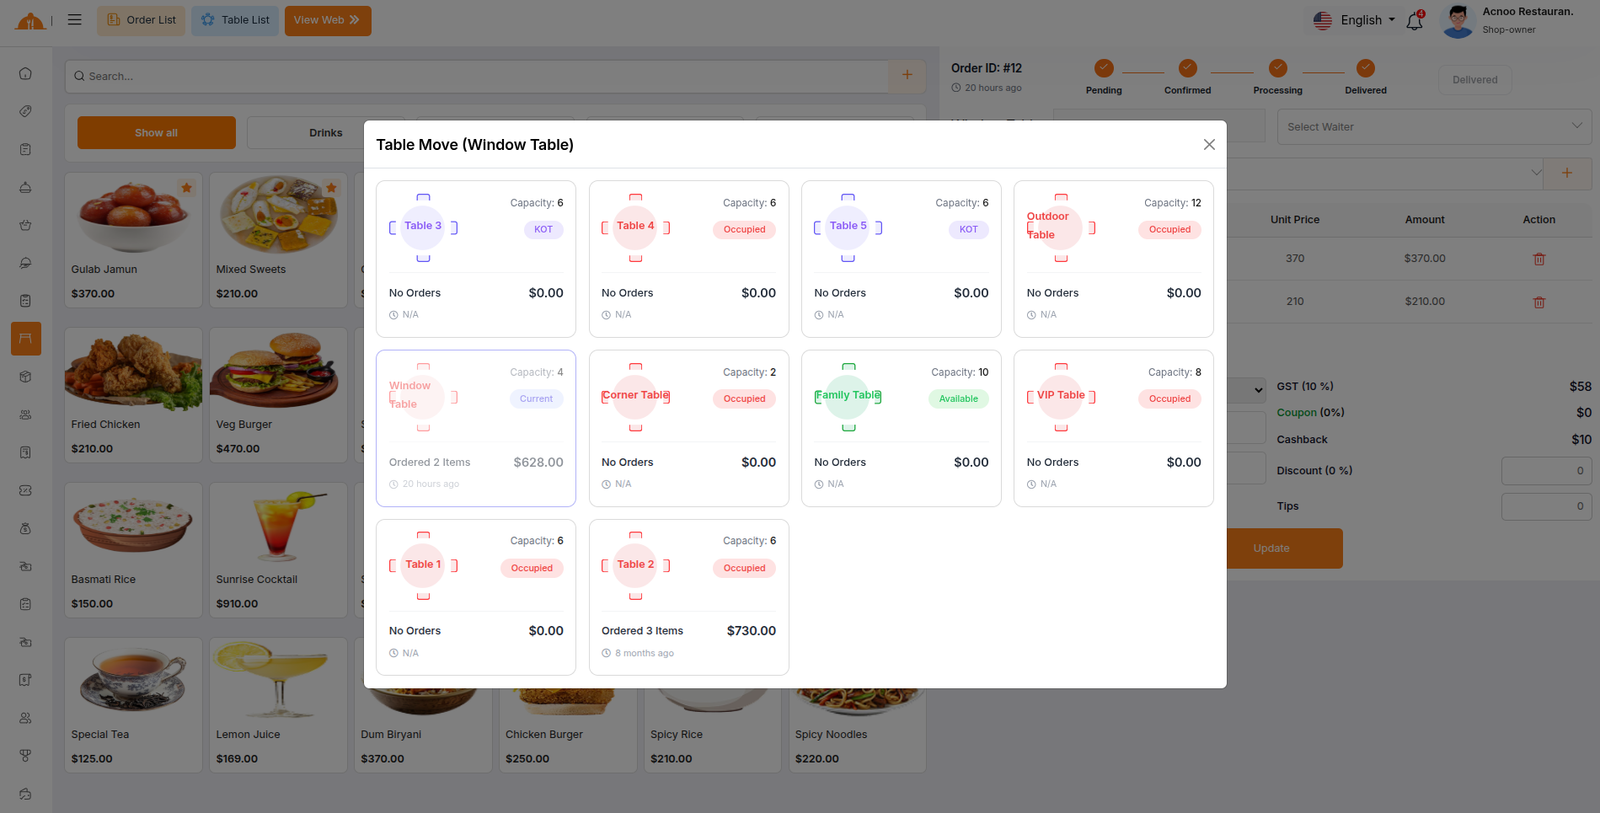
- Table Name — Displays the current table. A "Table Move" button lets you transfer the active order to another table instantly.
- Waiter — Select a staff member from the dropdown.
- Customer — Choose an existing customer or add a new one via the plus icon.
Adding Items
- Use the search box to find products by name.
- Click a category button in the horizontal carousel to filter products.
- Click any product card to add it to the cart. If the product has variations, a modal will appear to choose options.
- Click the plus (+) button next to the search box to create a new product on the fly.
Cart & Payment
- The cart table lists Item Name, Qty, Unit Price, Amount, and an Action column to remove items.
- Payment Type — Choose from configured payment methods.
- Receive Amount — Enter cash received; the system auto-calculates Change Amount and Due Amount.
- VAT — Applied automatically if configured.
- Coupon — Click the coupon label to apply a discount code.
- Cashback — Auto-calculated loyalty cashback if enabled.
- Discount — Enter a manual discount amount or percentage.
- Tips — Add a tip value.
Click "Update" to save all changes to the sale.
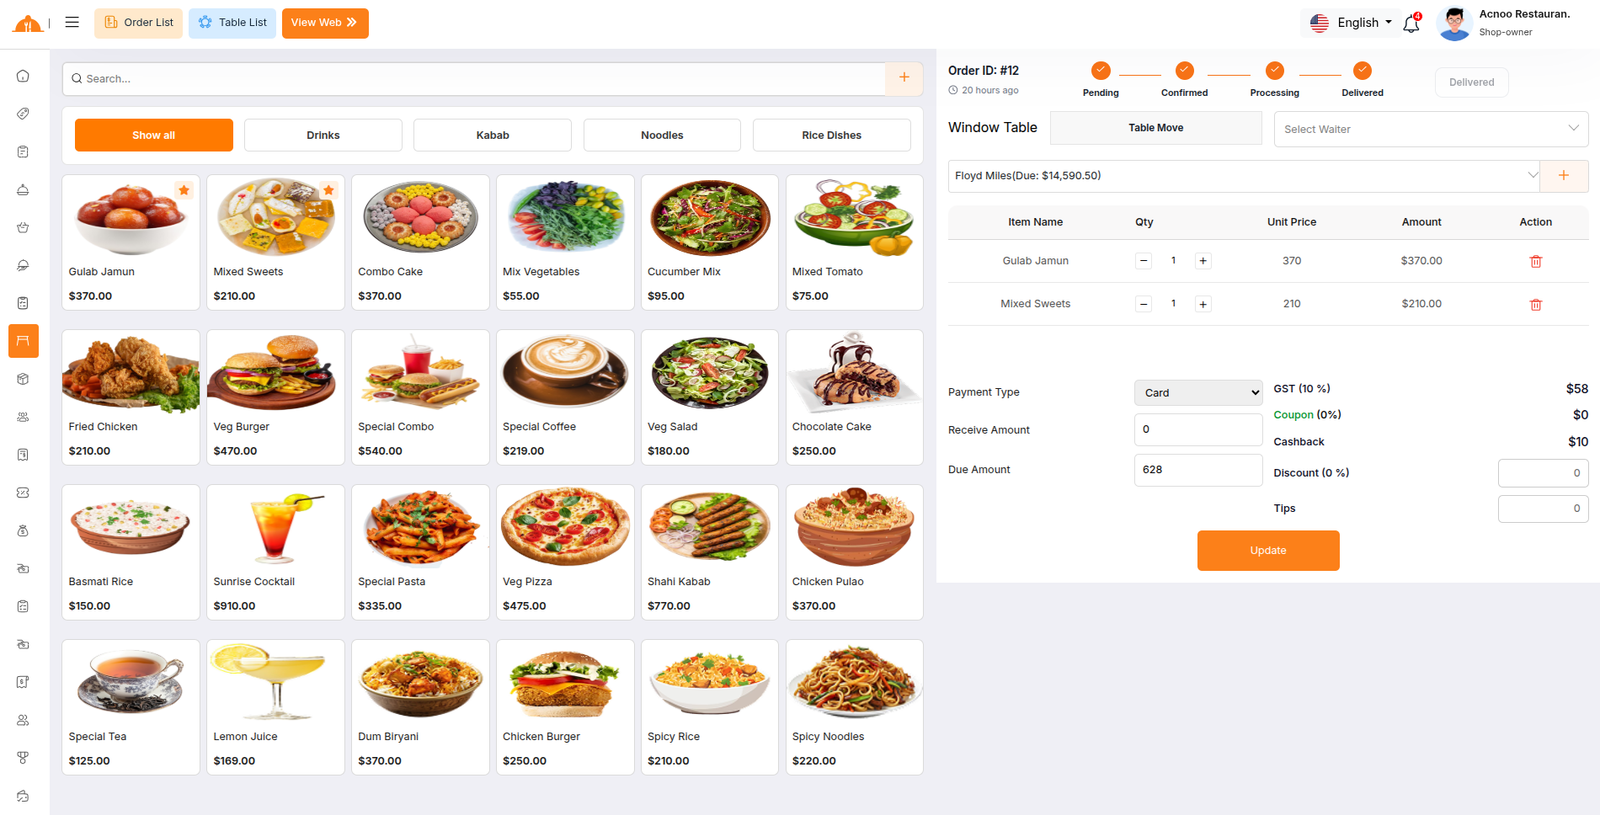
Table Move
Inside the sale page, click "Table Move" next to the table name. A modal opens showing all tables in the same card layout. The current table is marked "Current" and cannot be selected. Click any other table to move the entire active order there. The page refreshes automatically with the new table name.
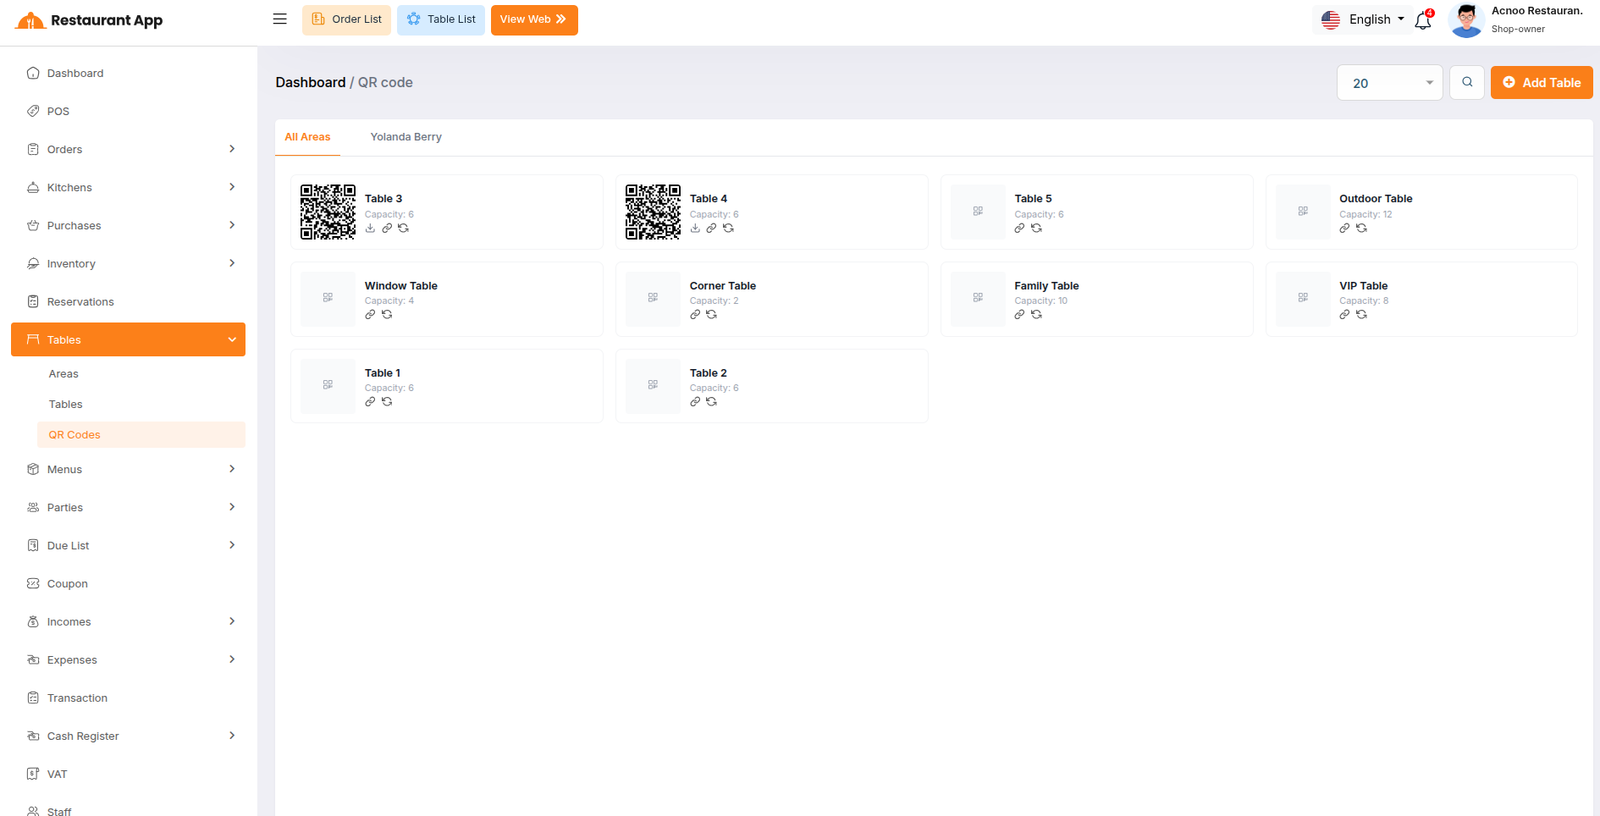
QR Codes
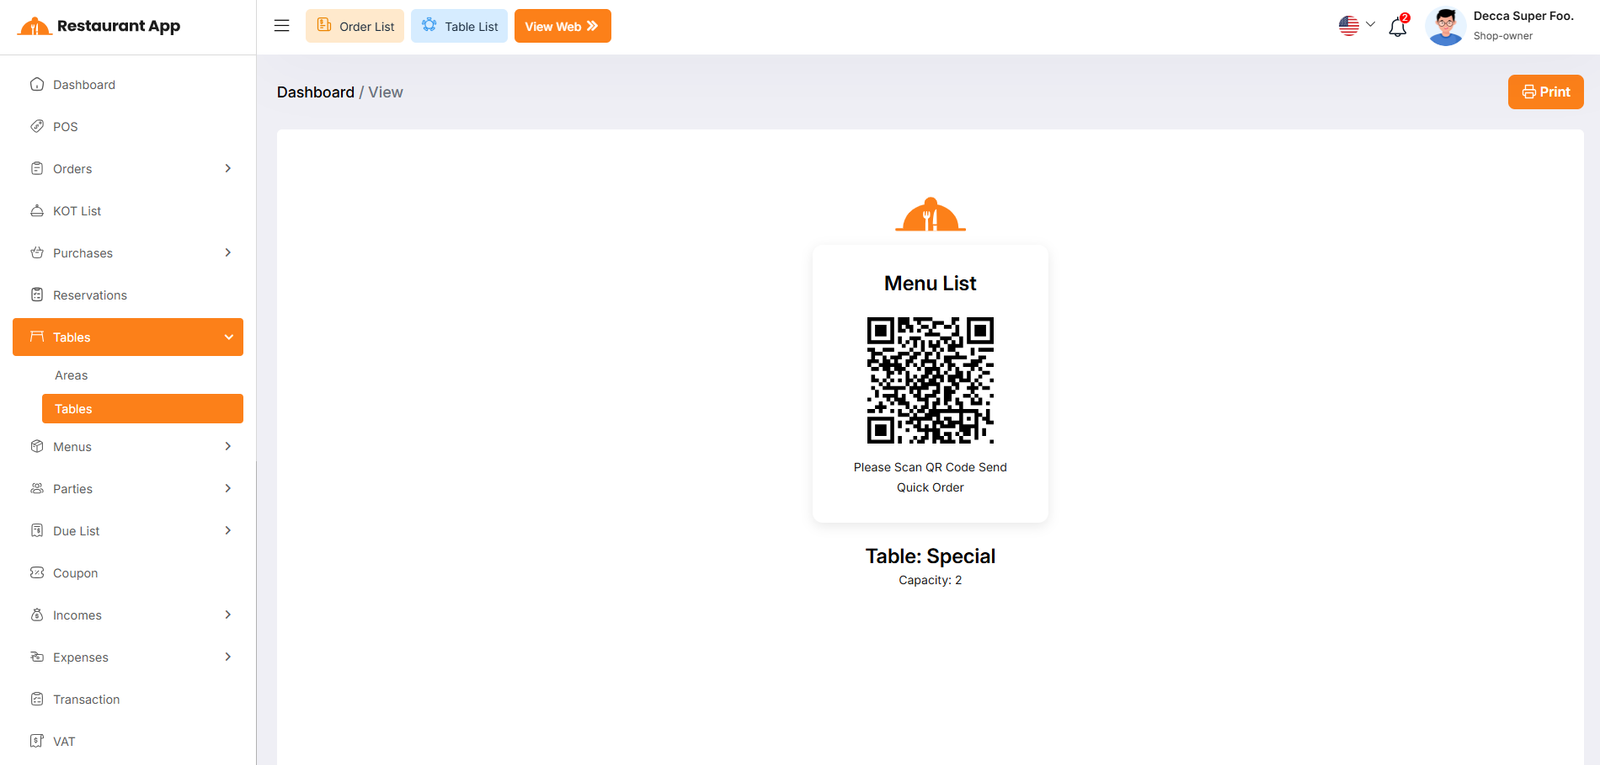
The QR Codes page is a separate view under the Tables menu. It lists every table with its scannable QR code so guests can open the digital menu and place orders directly.
QR Card Details
- Generated QR image (or a placeholder if not yet created).
- Table name and capacity.
Actions
- Download — Saves the QR code as a branded PDF.
- View — Opens the public table ordering URL in a new tab.
- Re-Generate — Creates a fresh QR code for the table.
Filtering — Search by name or capacity, switch between area tabs, and set per-page count.
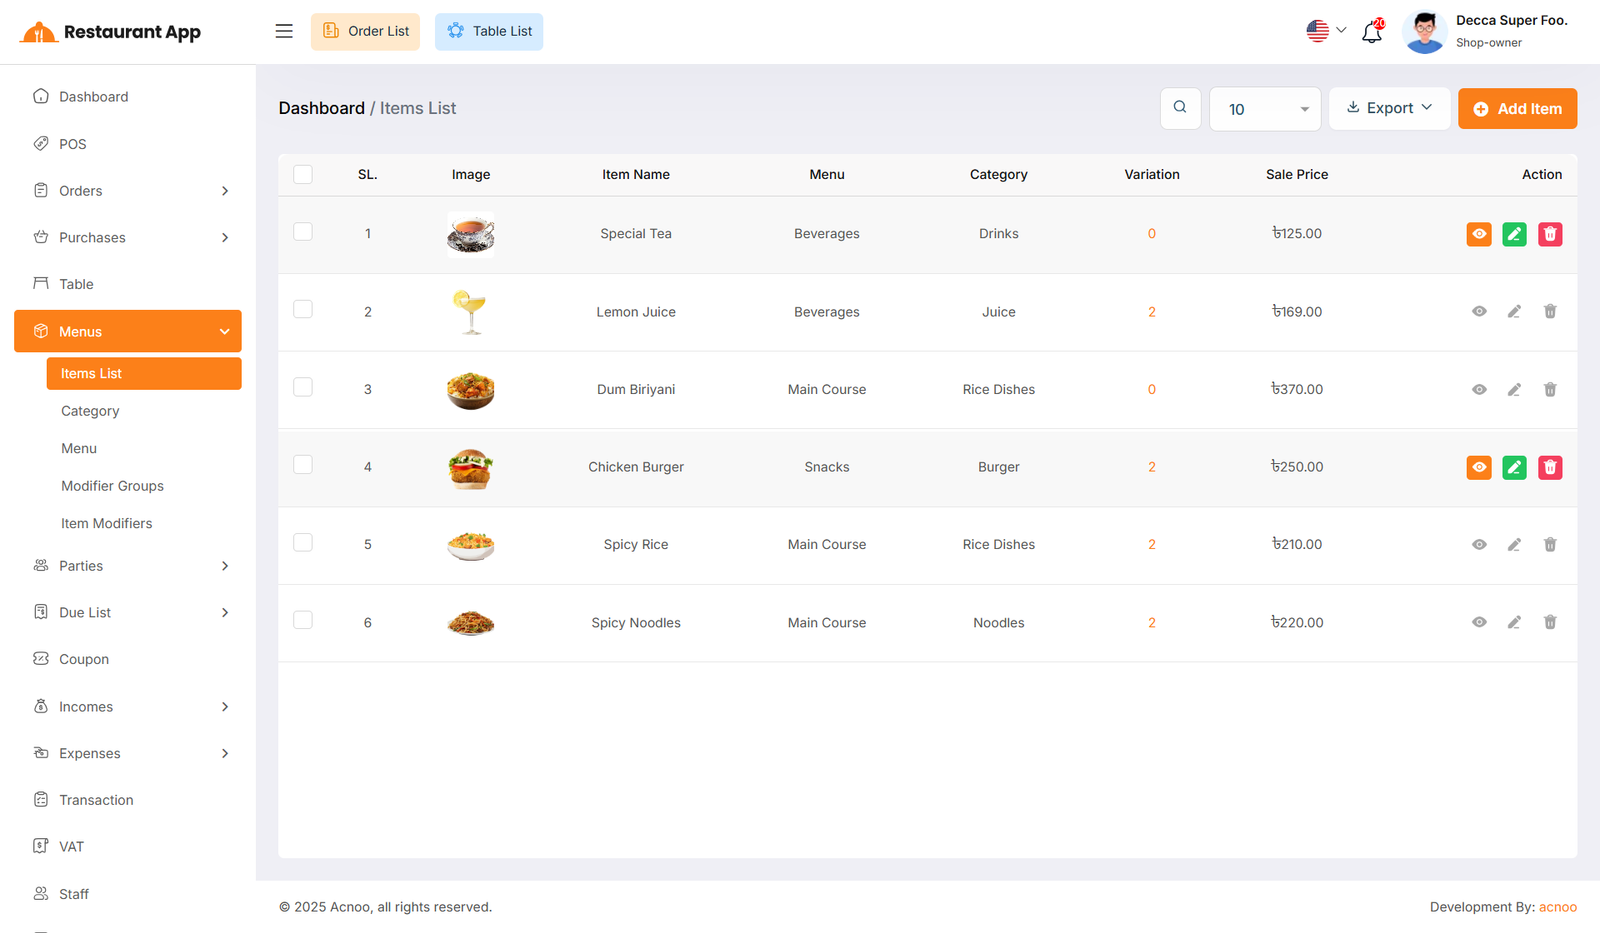
Item List
Here, you can view the item list with filtering options available. The list can be exported as Excel, CSV and PDF. By clicking the "View" button, you can see details in a pop-up window. Additionally, you can edit, delete, or perform multi-delete actions. Furthermore, clicking on the variation number will open a new modal where you can view the item's variation name and price details.
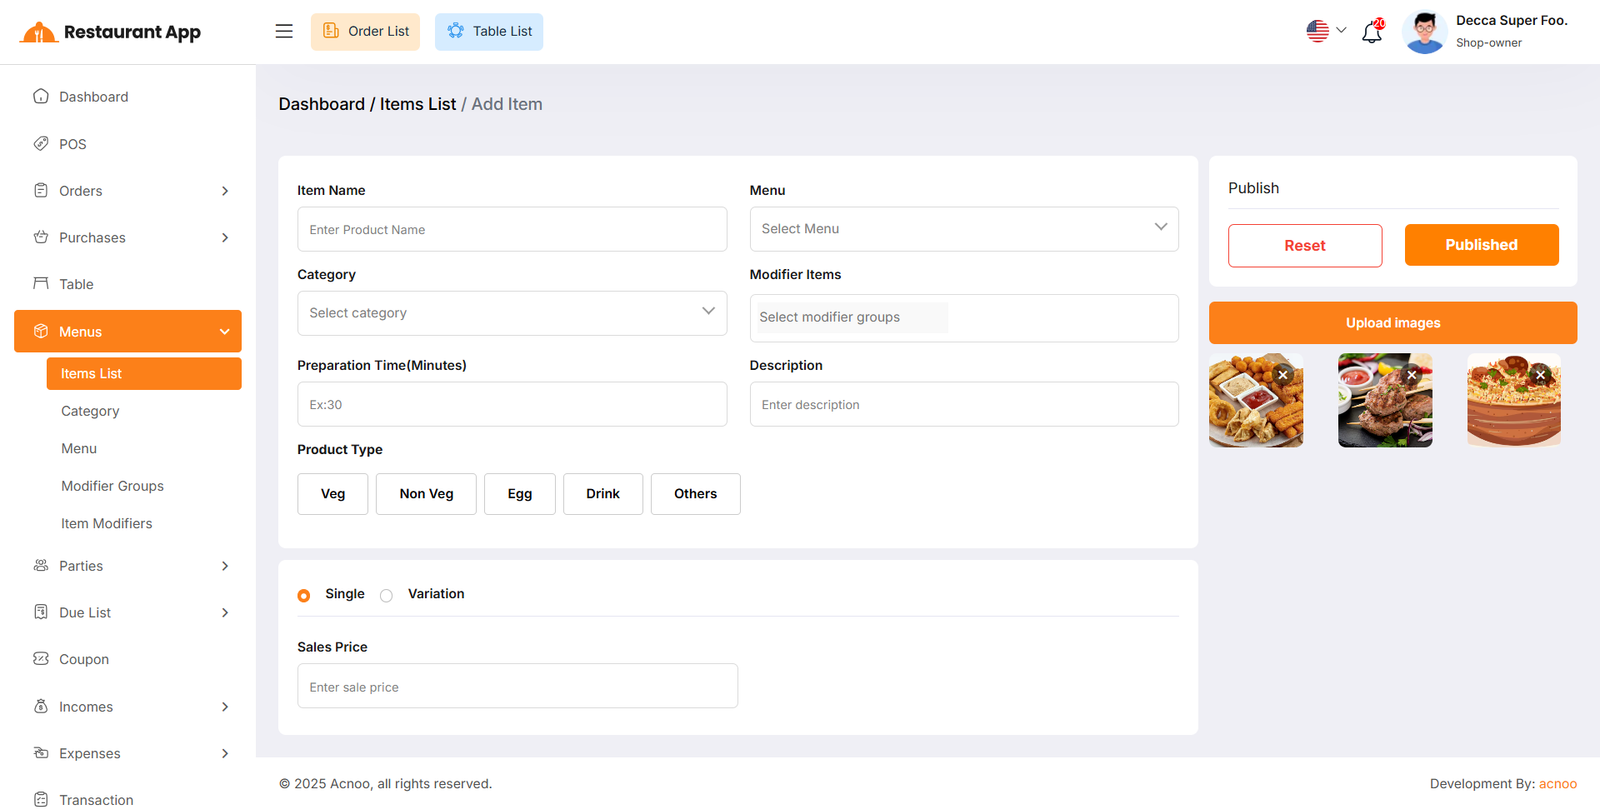
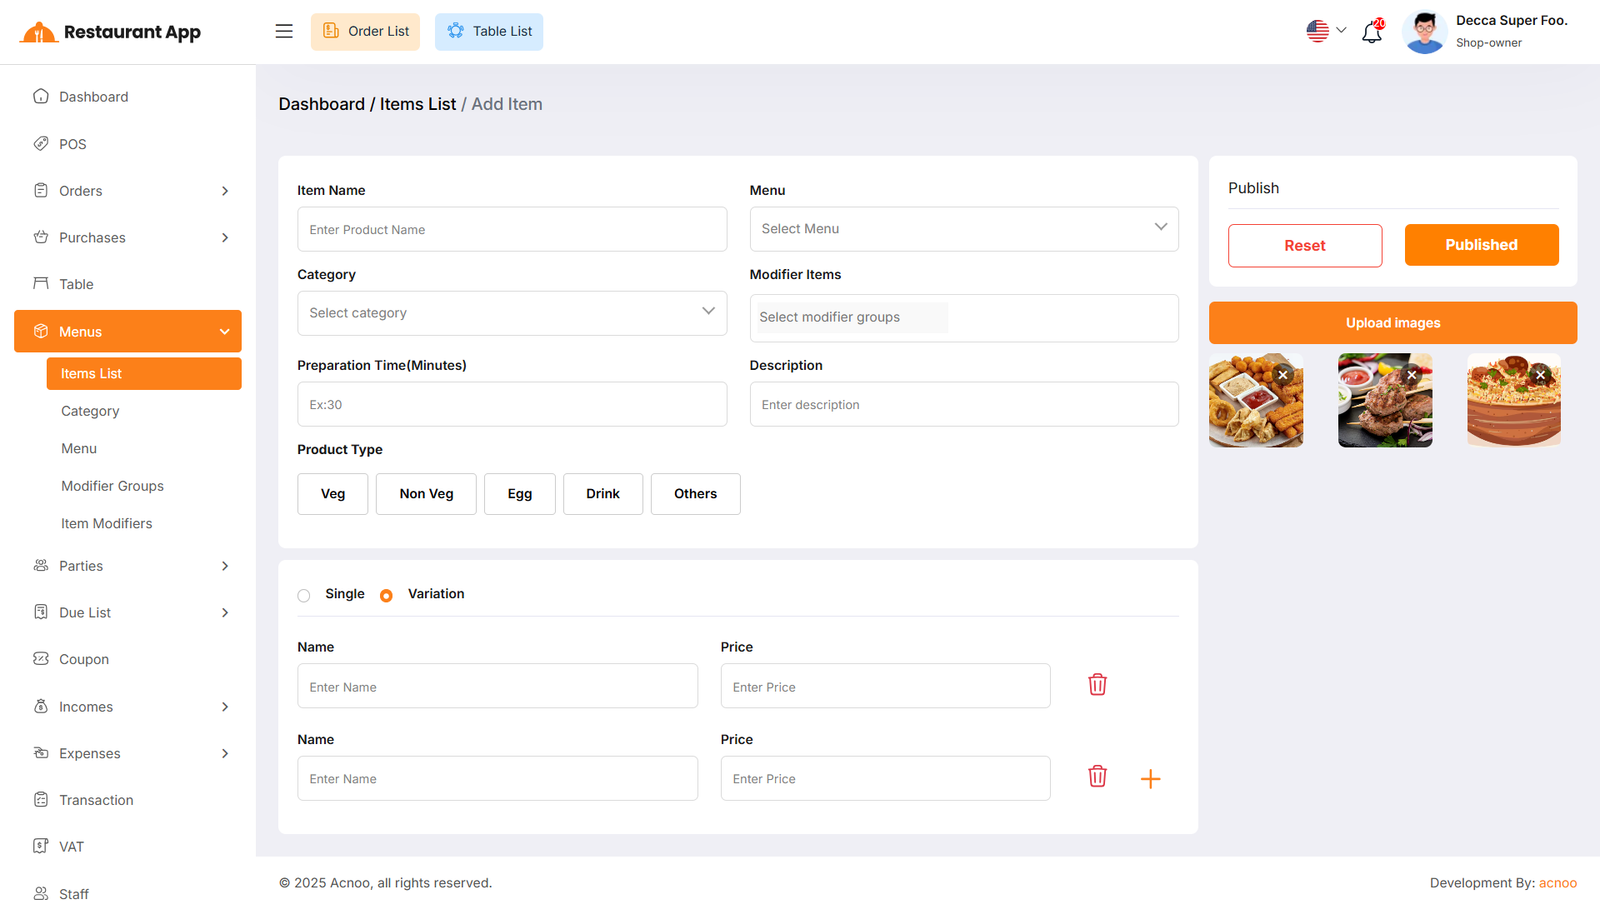
Create Item
You can create an item by filling some fields such as name, menu, category, product type, etc.
In addition, you can choose the product type as either "Single" or "Variation" and provide the corresponding name and price.
You may also upload multiple images by clicking "Upload Images" button for the item, but only the first image will be displayed on the index and sales pages.
Please make sure to enter the product price carefully.
If everything is correct, click the "Publish" button to save the item. Otherwise, click the "Reset" button to clear all fields.
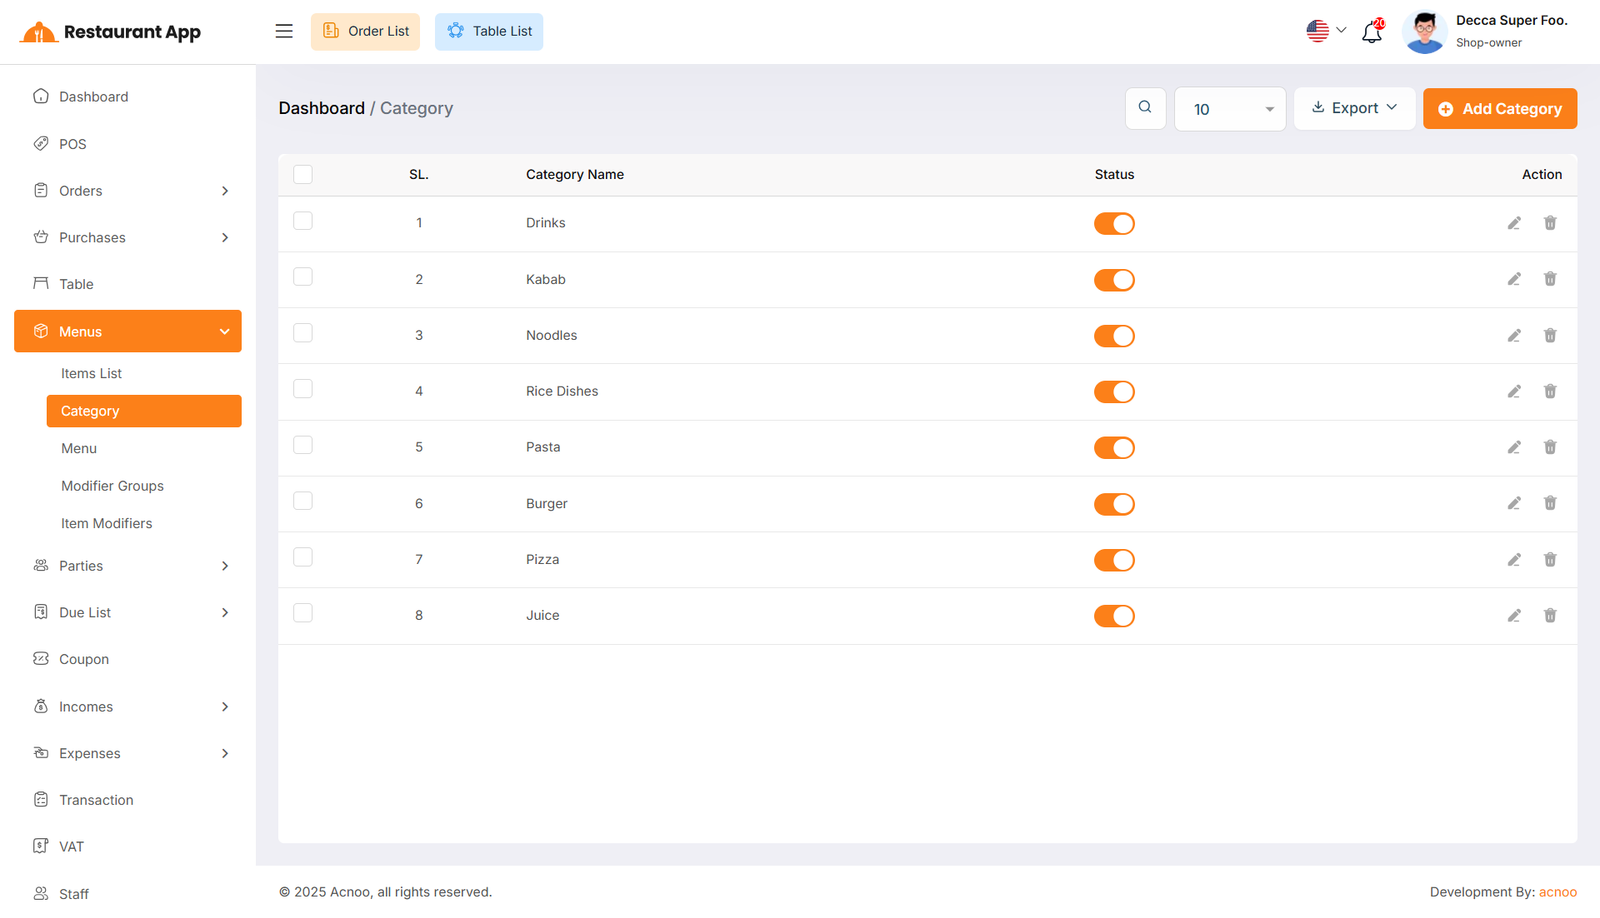
Category List
Here, you can view the category list with filtering options available. The list
can be exported as Excel, CSV and PDF. Additionally, you can edit, delete, or
perform multi-delete actions.
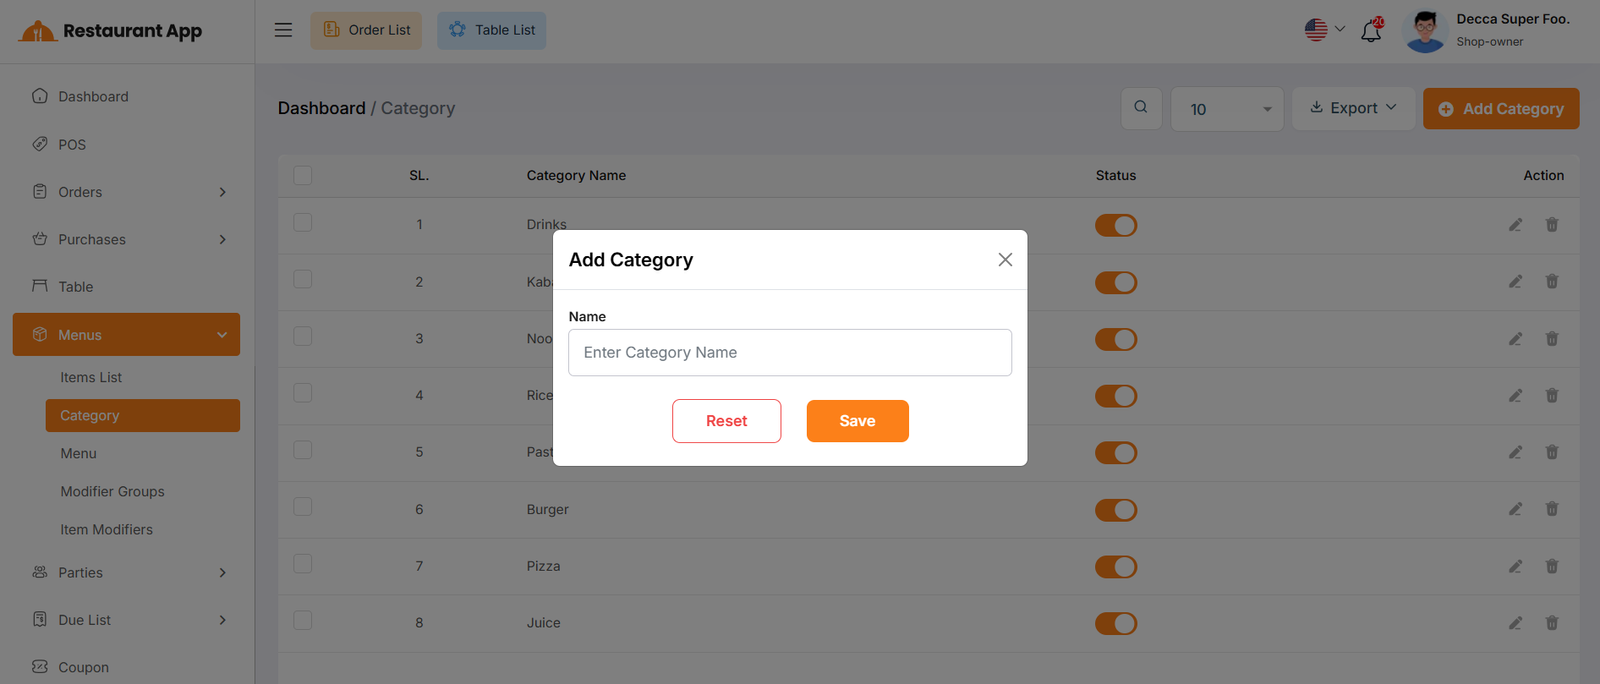
By clicking on the "Add Category" button, you can easily create a new category.
Menu List
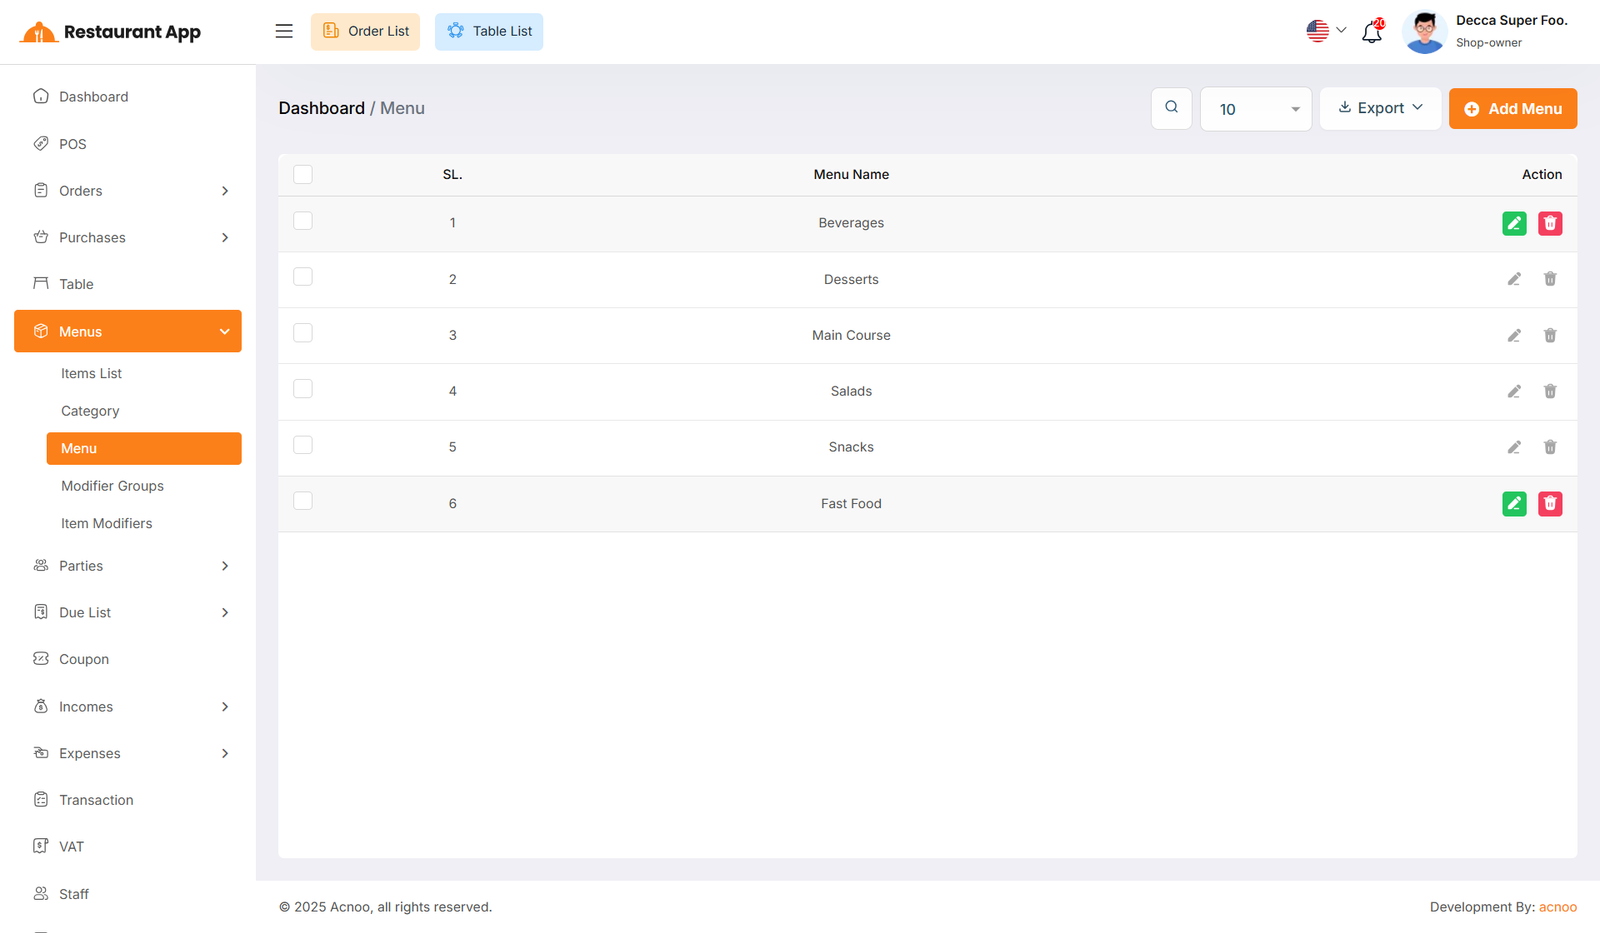
Here, you can view the menu list with filtering options available. The list
can be exported as Excel, CSV and PDF. Additionally, you can edit, delete, or
perform multi-delete actions.
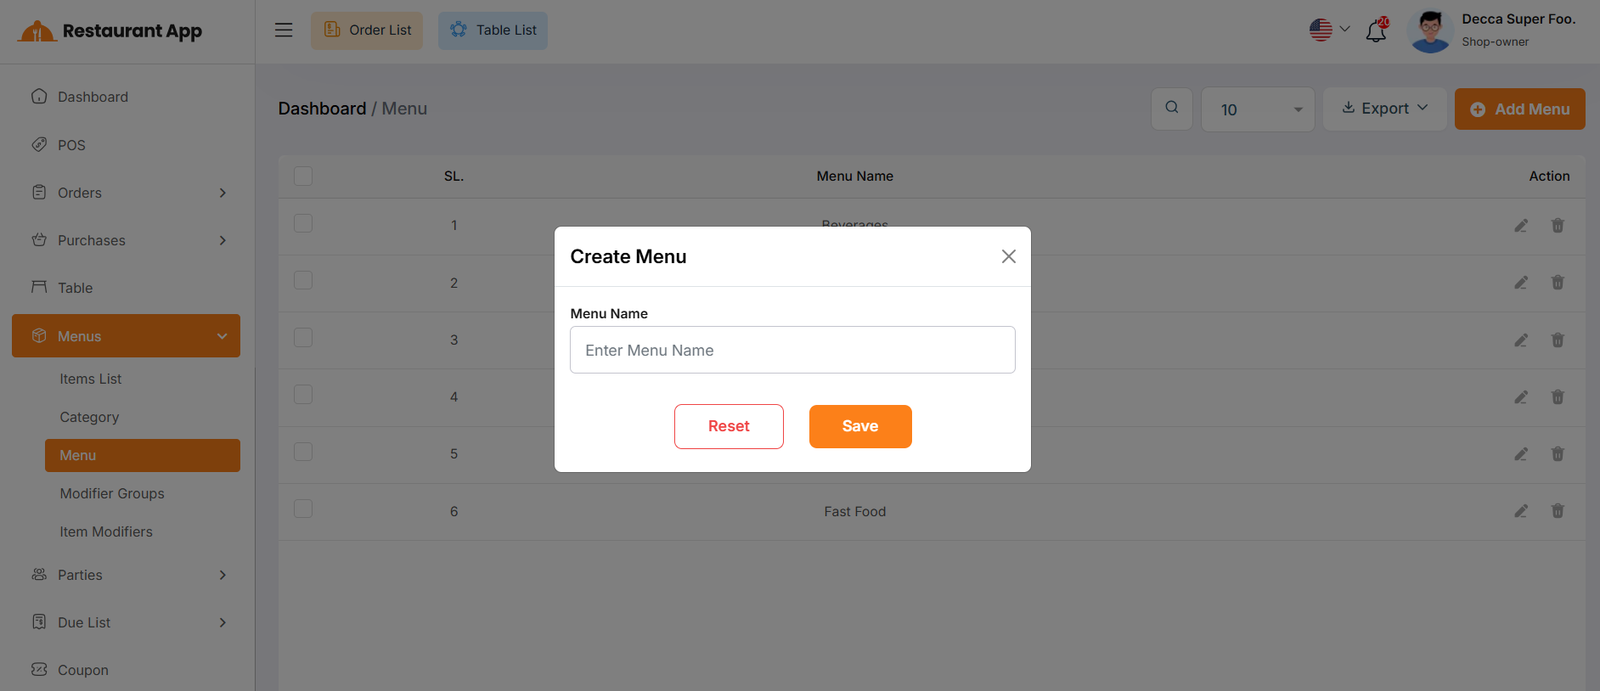
By clicking on the "Add Menu" button, you can easily create a new menu.
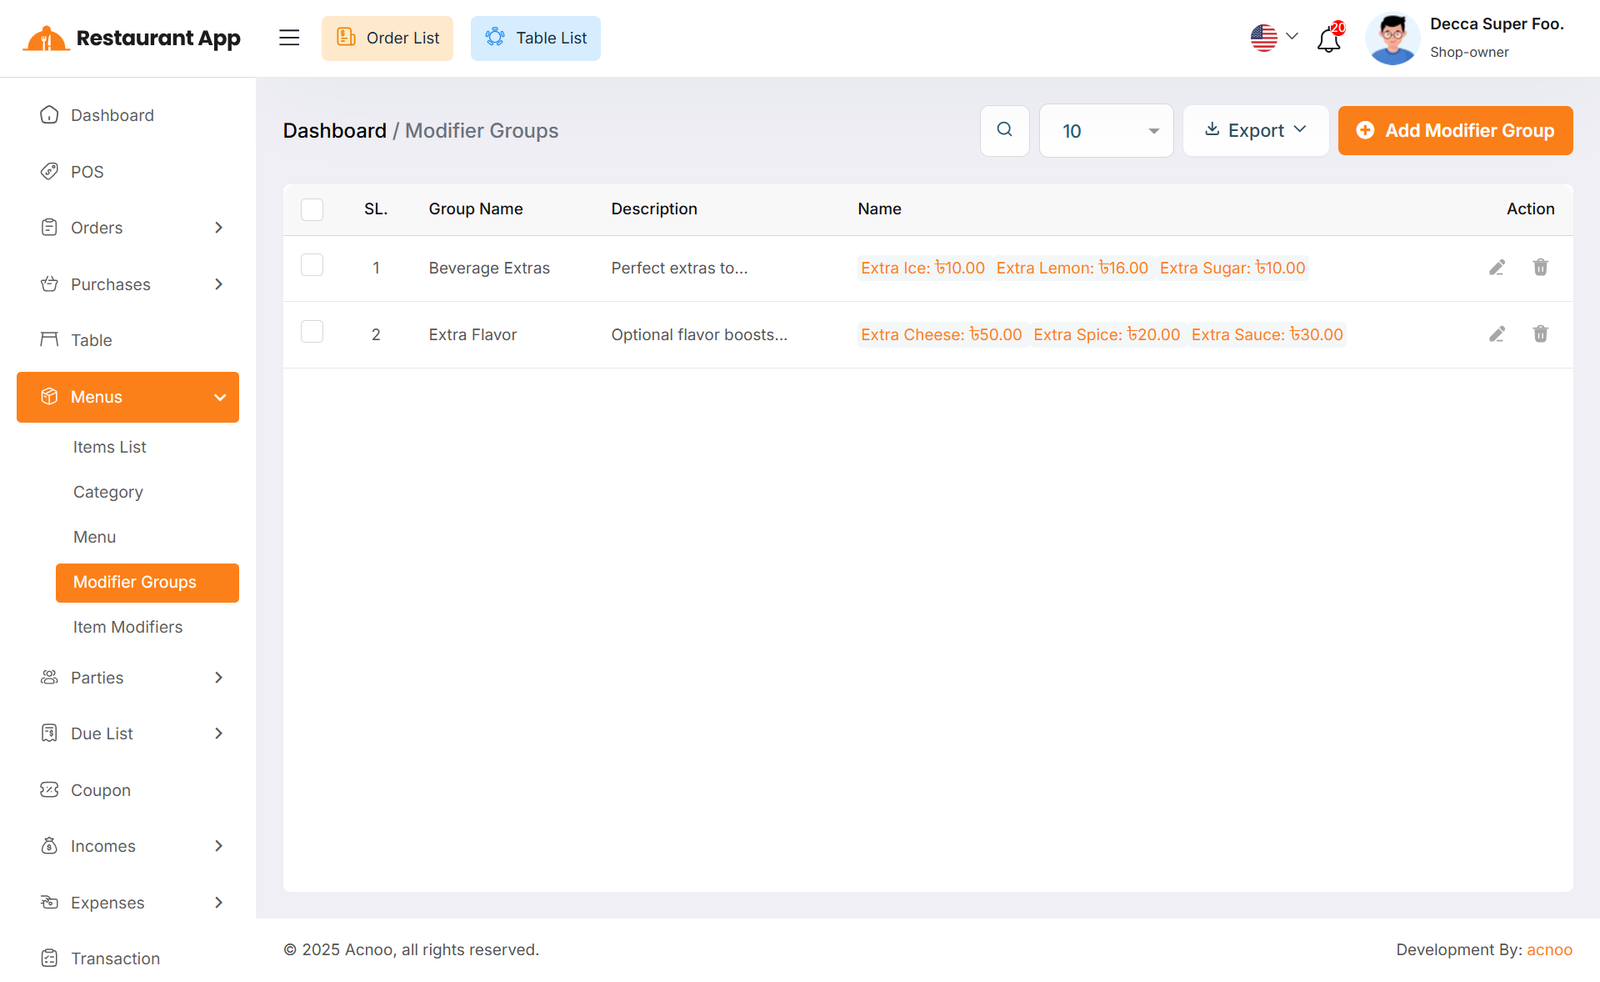
Modifier Group List
Here, you can view the Modifier Group list with filtering options available. The list can be exported as Excel, CSV and PDF. Additionally, you can edit, delete, or perform multi-delete actions.
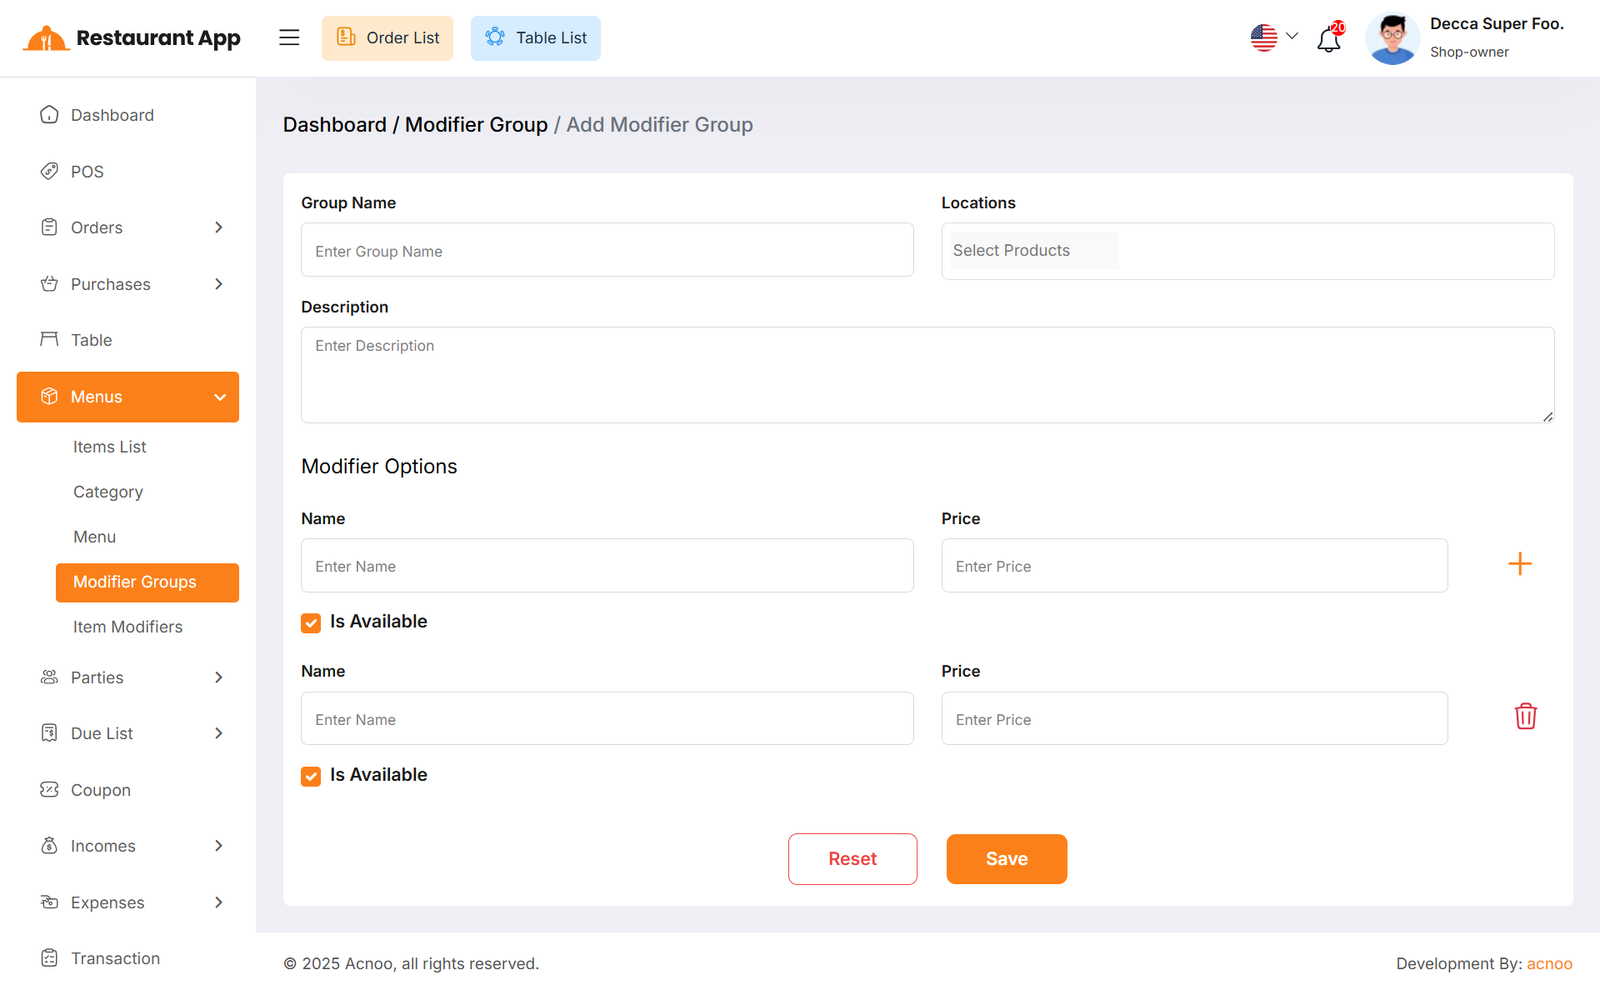
Create Modifier Group
By clicking on the "Add Modifier Group" button, you can easily create a new modifier group by filling in fields such as (name, locations, description, modifier option name, and price). You can add dynamic modifier option fields by clicking the plus (+) button and then enter the name and price. If you no longer need a dynamic field or if there are too many, you can remove it by clicking the red delete button. Additionally, if the "Is Available" option is checked, the modifier option will appear during the sale process. If it is not checked, the option will not be available.
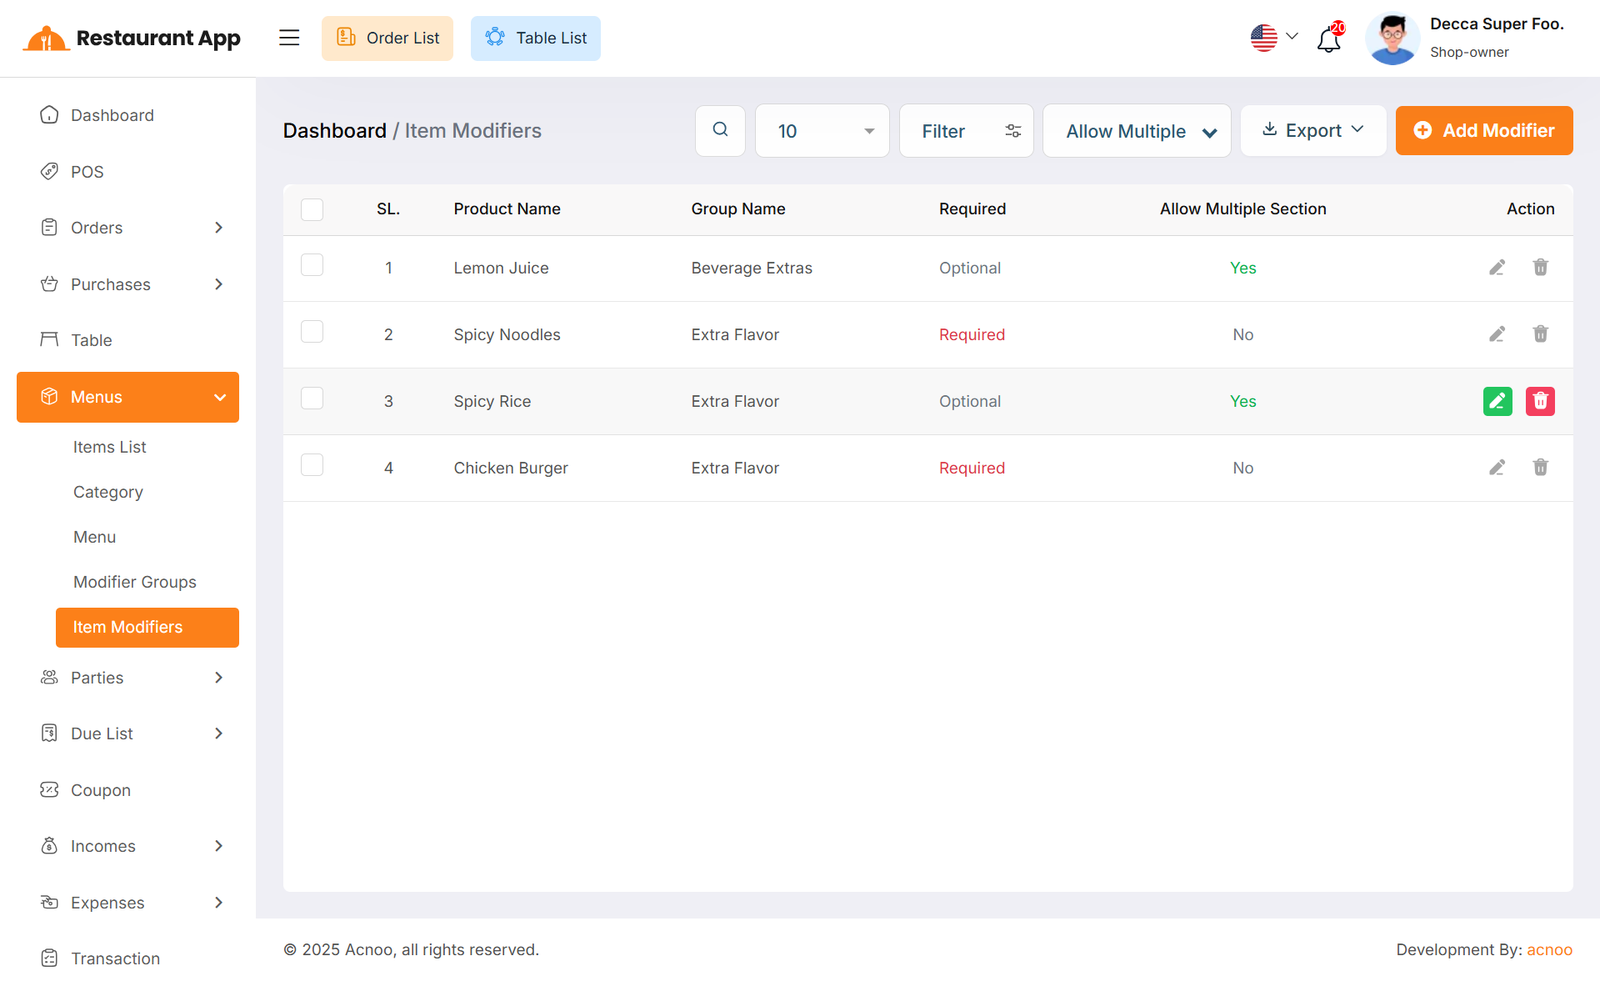
Item Modifier
Here, you can view the modifier list with filtering options available. The list
can be exported as Excel, CSV and PDF. Additionally, you can edit, delete, or
perform multi-delete actions.
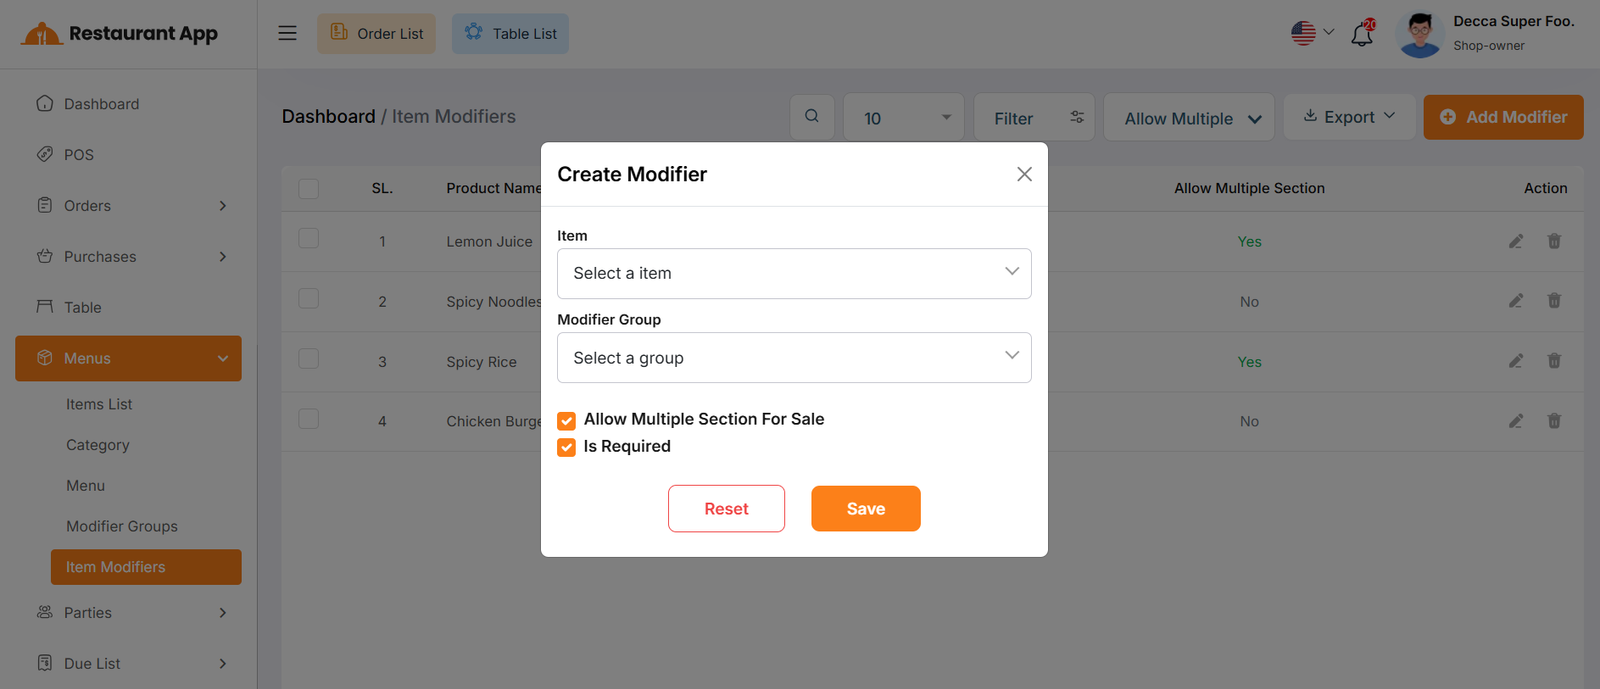
By clicking on the "Add Modifier" button, you can easily create a new modifier after select item & modifier group.
If you check the "Allow Multiple Selection For Sale" option while creating a modifier, then during the item sale, customers will be able to select multiple modifier options. If this option is not checked, only one option can be selected.
Additionally, if you check the "Is Required" option, customers will not be able to add the item to the cart without selecting a modifier option. If this option is not checked, customers can add the item to the cart without selecting any modifier options.
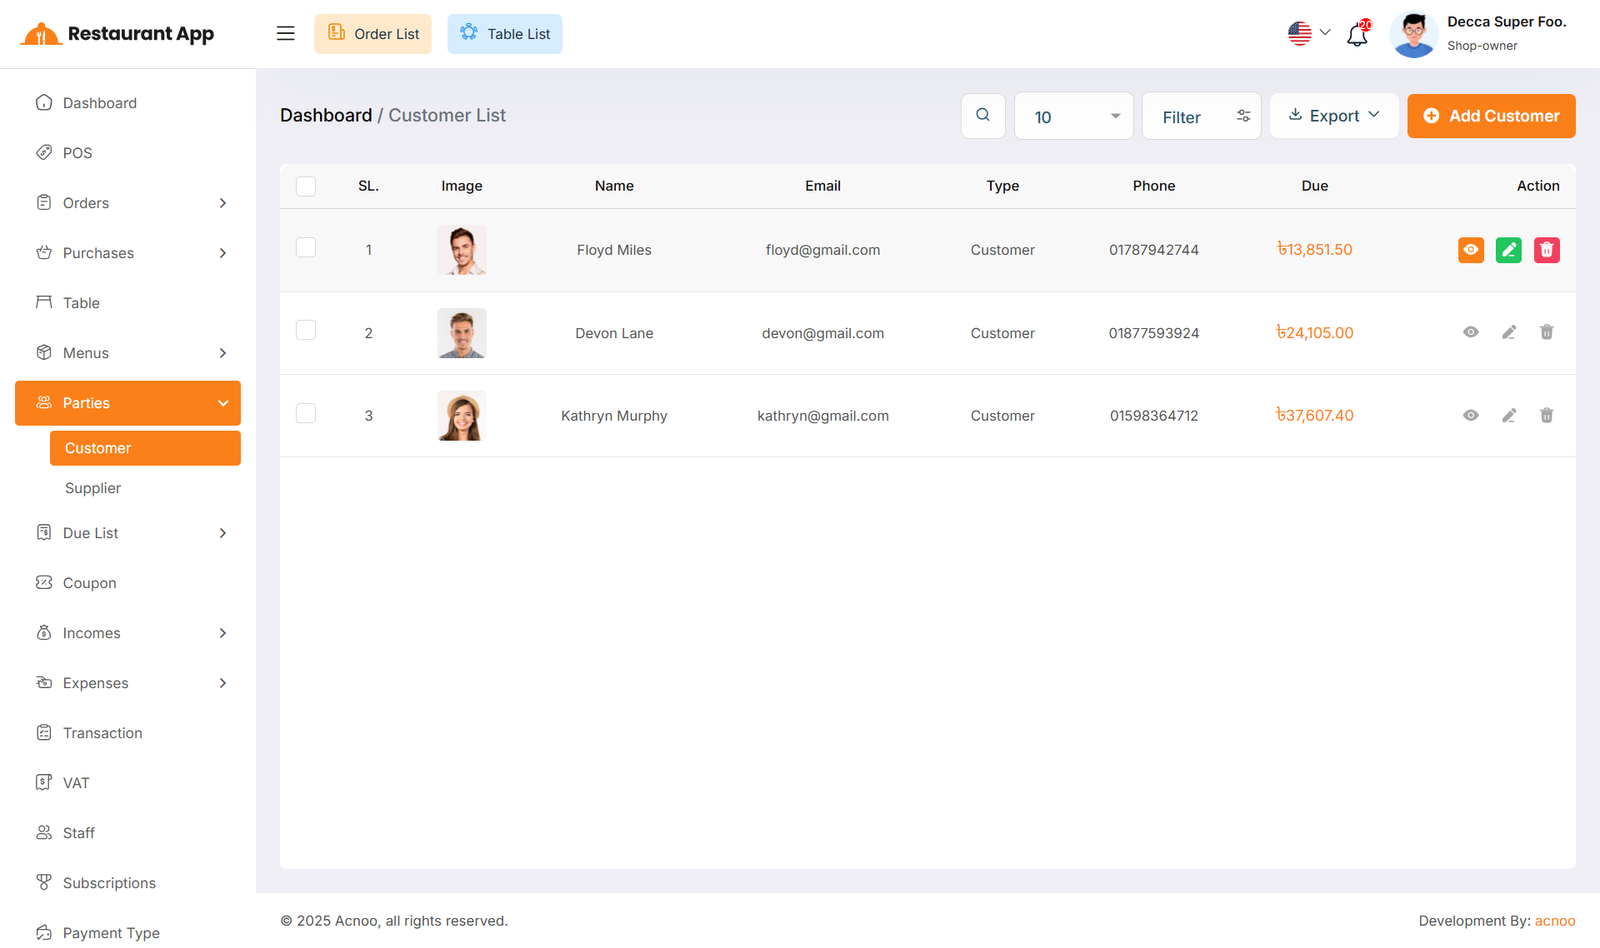
Customer List
Here, you can view the customer list with a search filter. Additionally, you have the option to view, edit, delete, or use the multi-delete function and exported as Excel, CSV and PDF.
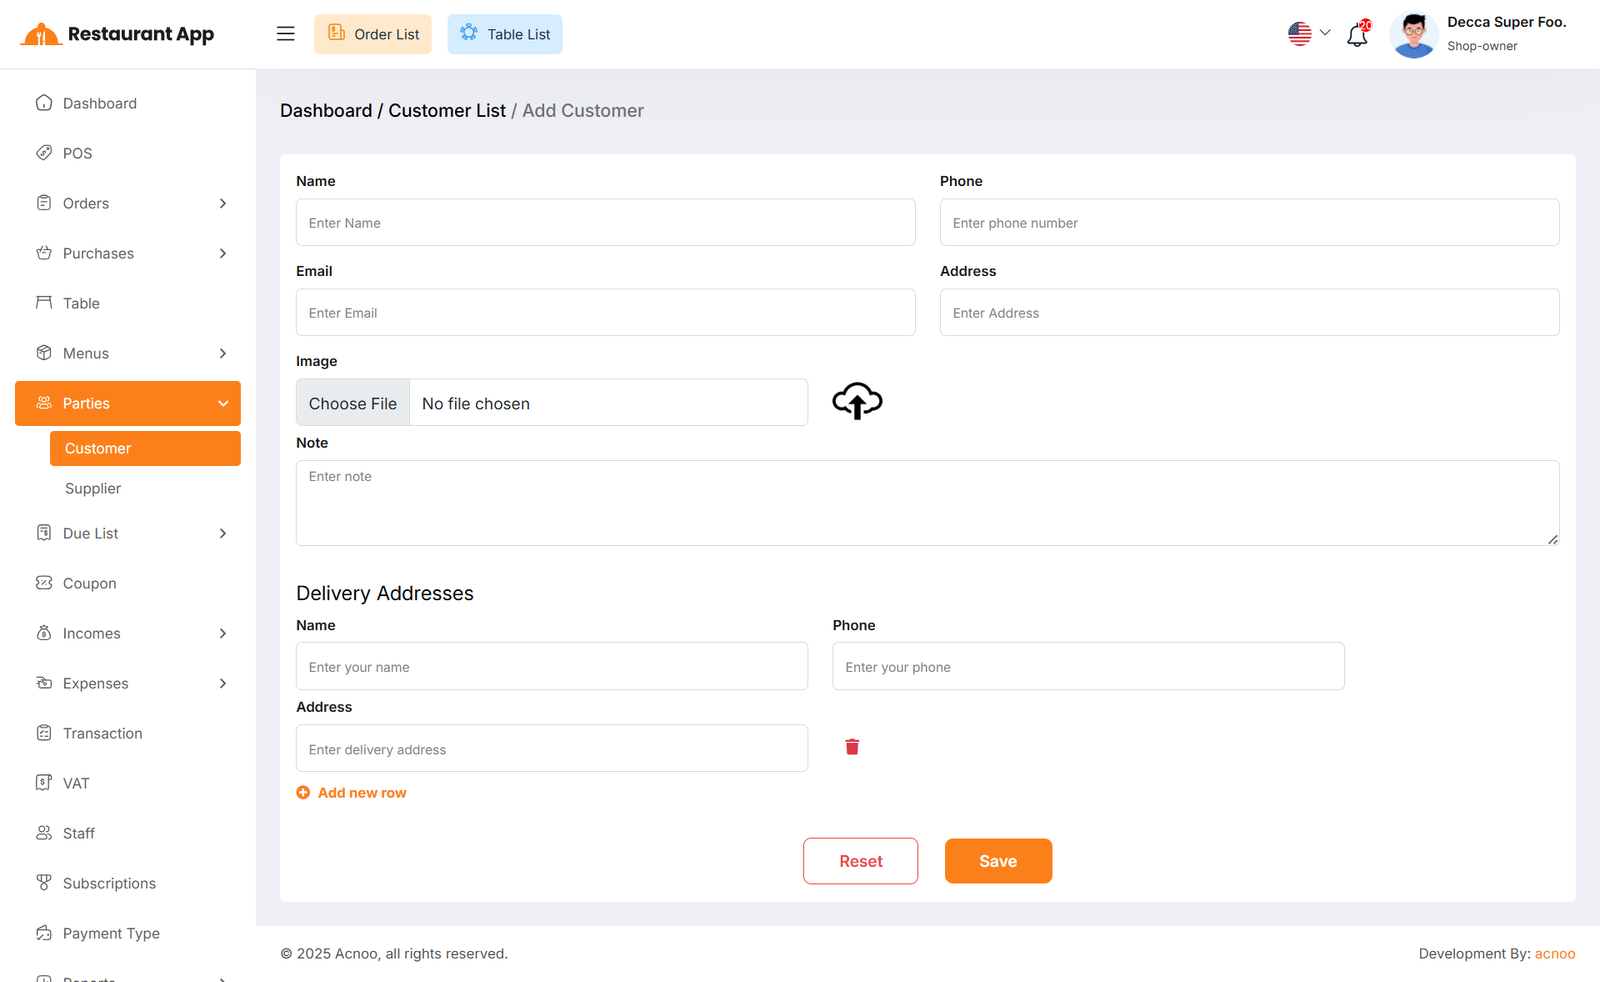
Create Customer
You can create a customer by filling out the required fields. Additionally, by clicking on the "Add new row" button, you can dynamically add fields for name, phone, and address. If you don’t need a dynamic field or if too many have been added, you can remove them by clicking the red "Delete" icon.
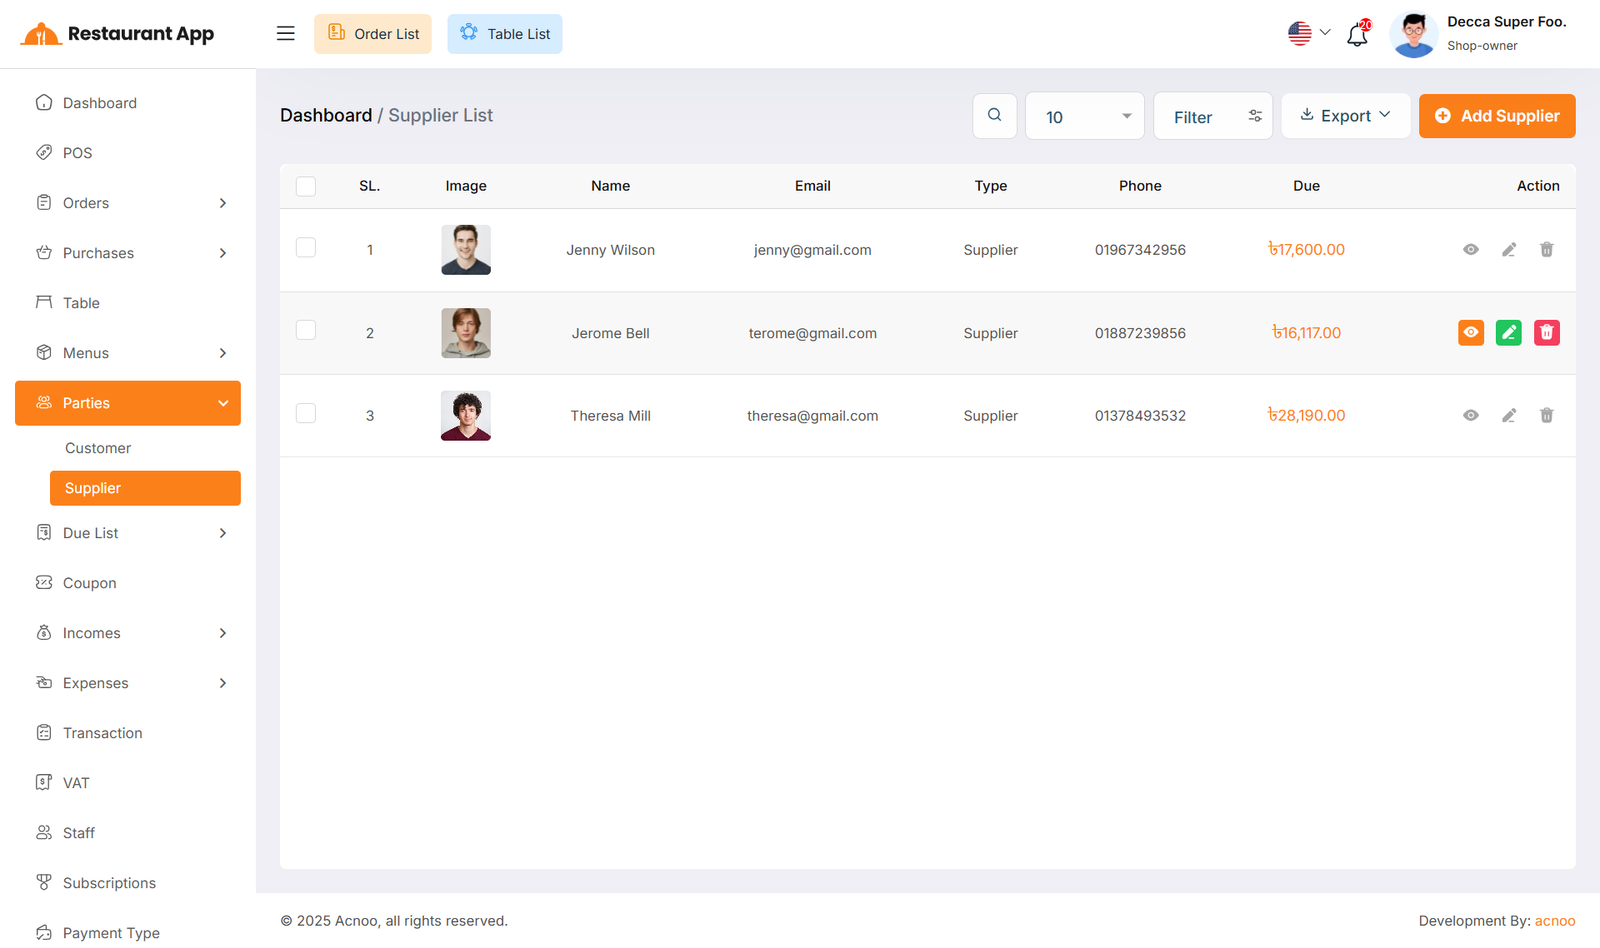
Supplier List
Here, you can view the supplier list with a search filter. Additionally, you have the option to view, edit, delete, or use the multi-delete function and exported as Excel, CSV and PDF.
Create Supplier
You can create a Supplier by filling out the required fields. Additionally, you can add an initial opening to be stored.
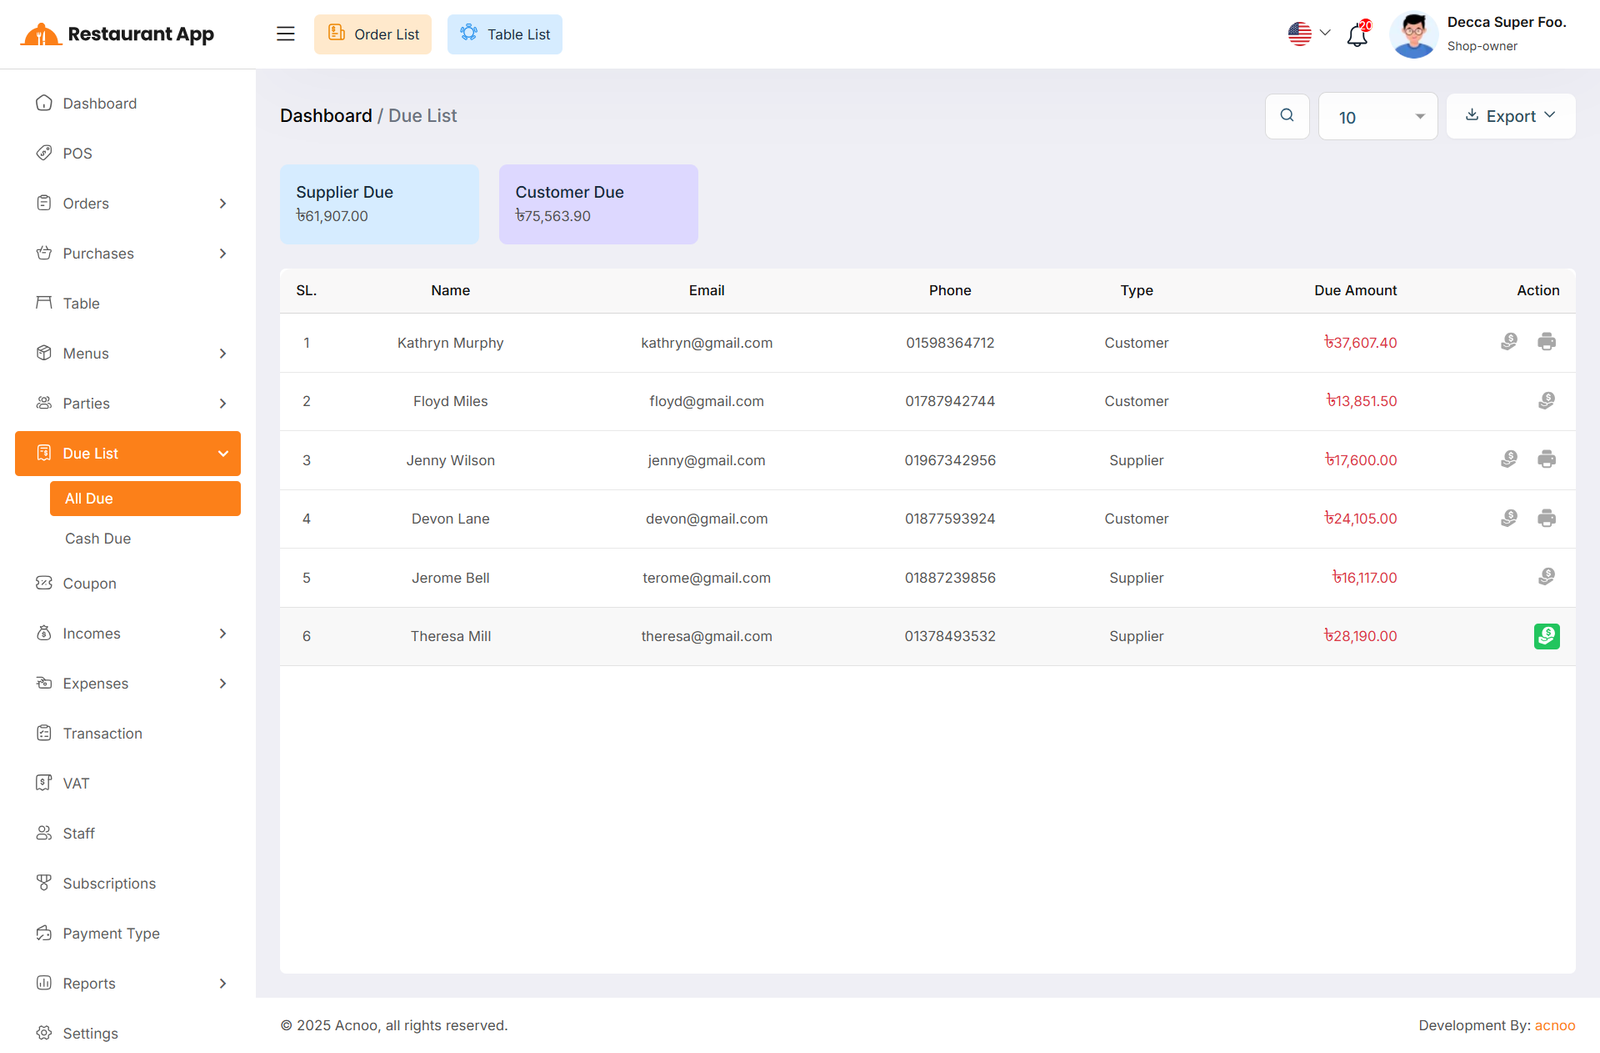
All Due
Here, you can view the list of all dues associated with Customers and Suppliers.
Additionally, you can filter and export the data, as well as view invoices and collect due amounts directly from this page.
If a due amount has already been collected, you will only be able to view the invoice; otherwise, you can't see "Invoice" icon.
In addition, you can also view the Total Suppliers and Customers Due at the top.
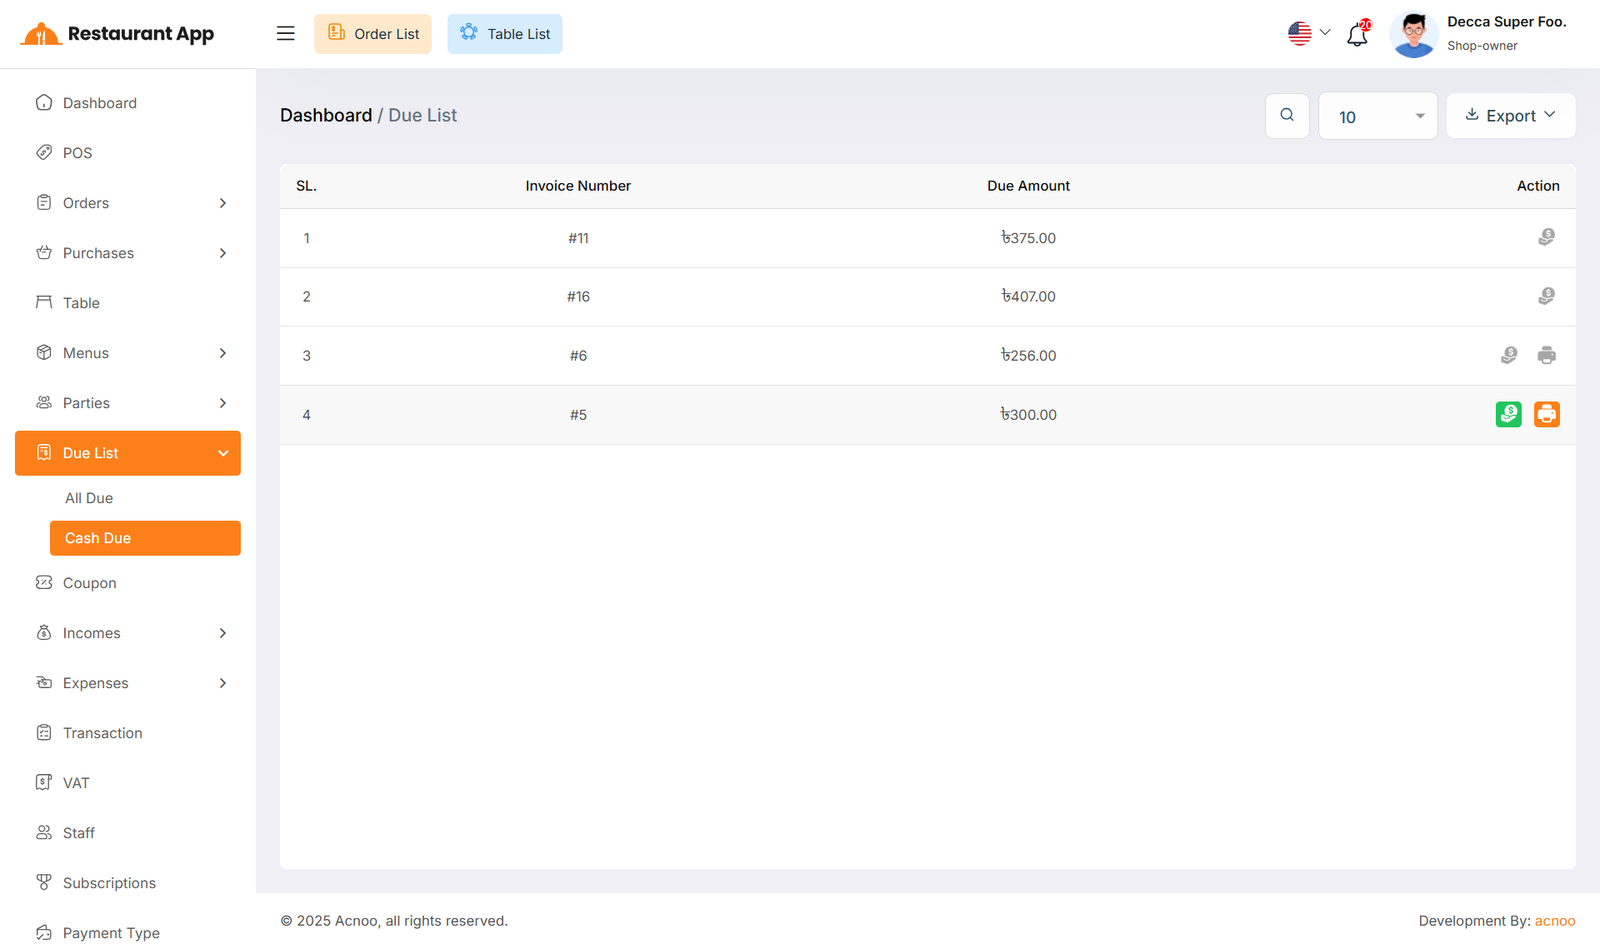
Cash Due
Here, you can view the list of all dues that do not have any associated Customers or Suppliers. Additionally, you can filter and export the data, as well as view invoices and collect due amounts directly from this page. If a due amount has already been collected, you will only be able to view the invoice; otherwise, you can't see "Invoice" icon.
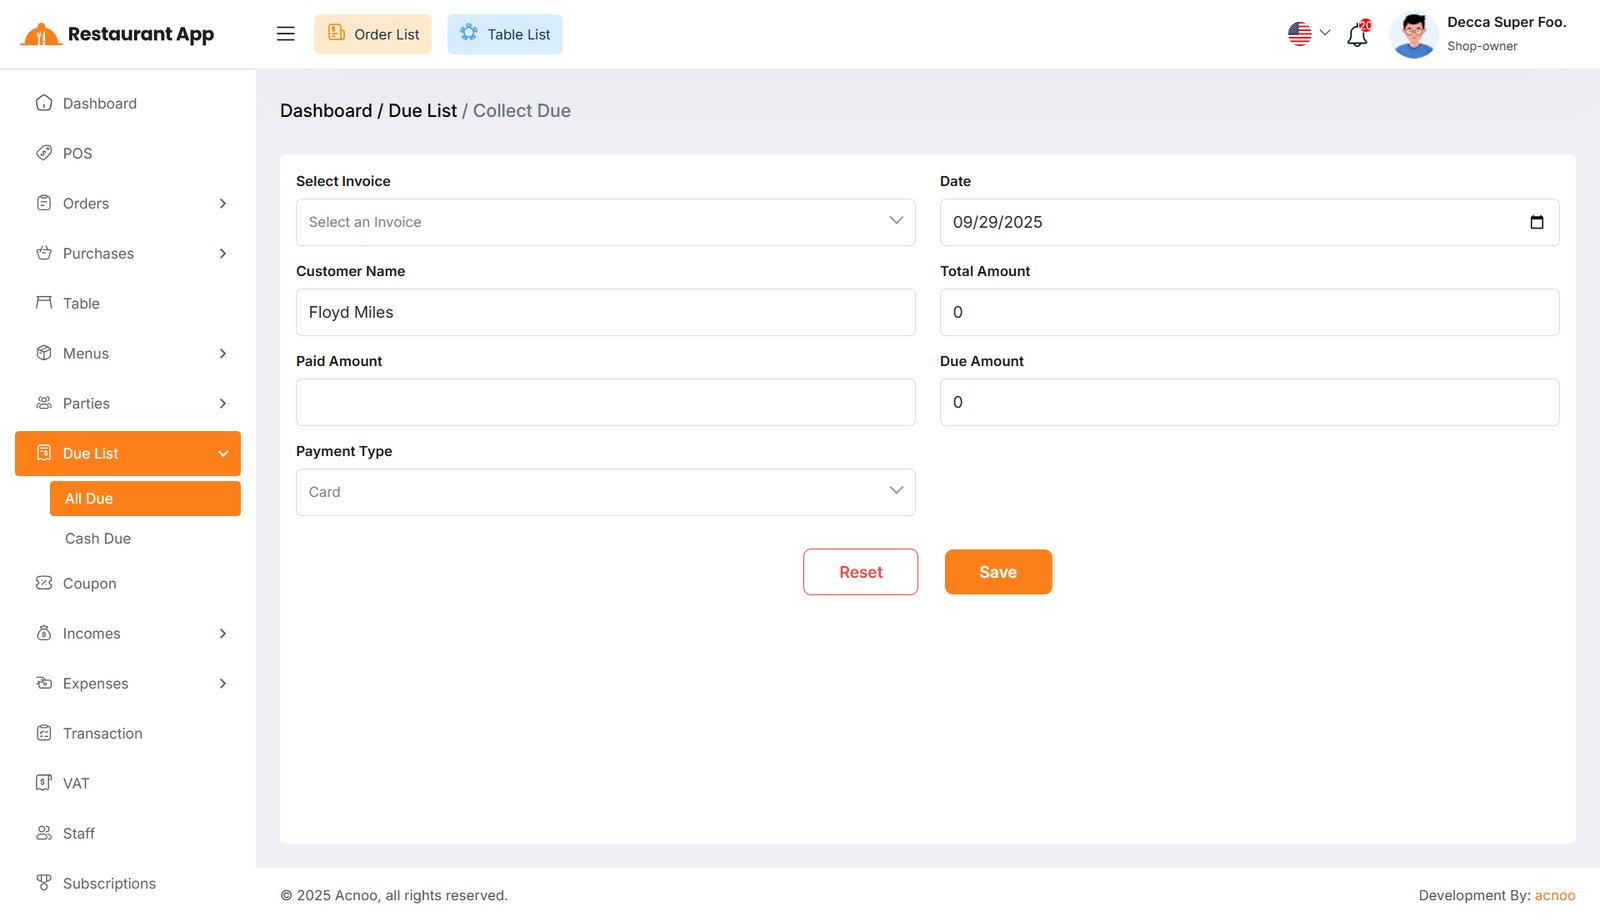
Collect Due
When you click "Collect Invoice", this page will appear. Here, you can collect the due amount either by invoice or without an invoice if there is any initial due.
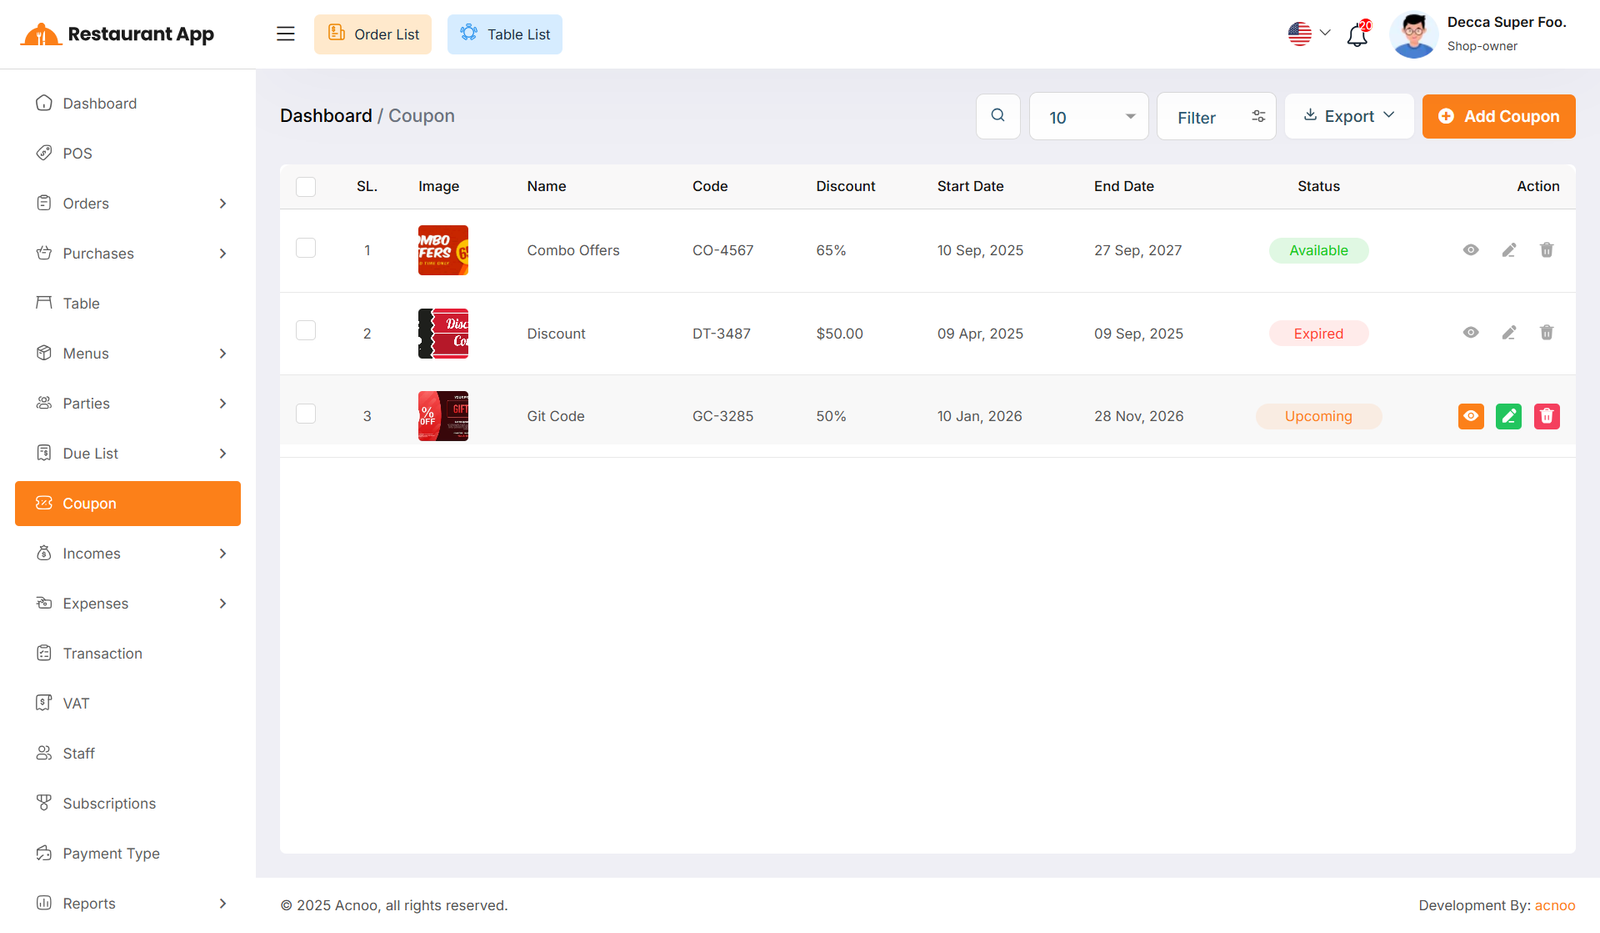
Coupon List
Here, you can view the Coupon list with a search filter. Additionally, you have the option to edit, delete, or use the multi-delete function and exported as Excel, CSV and PDF.
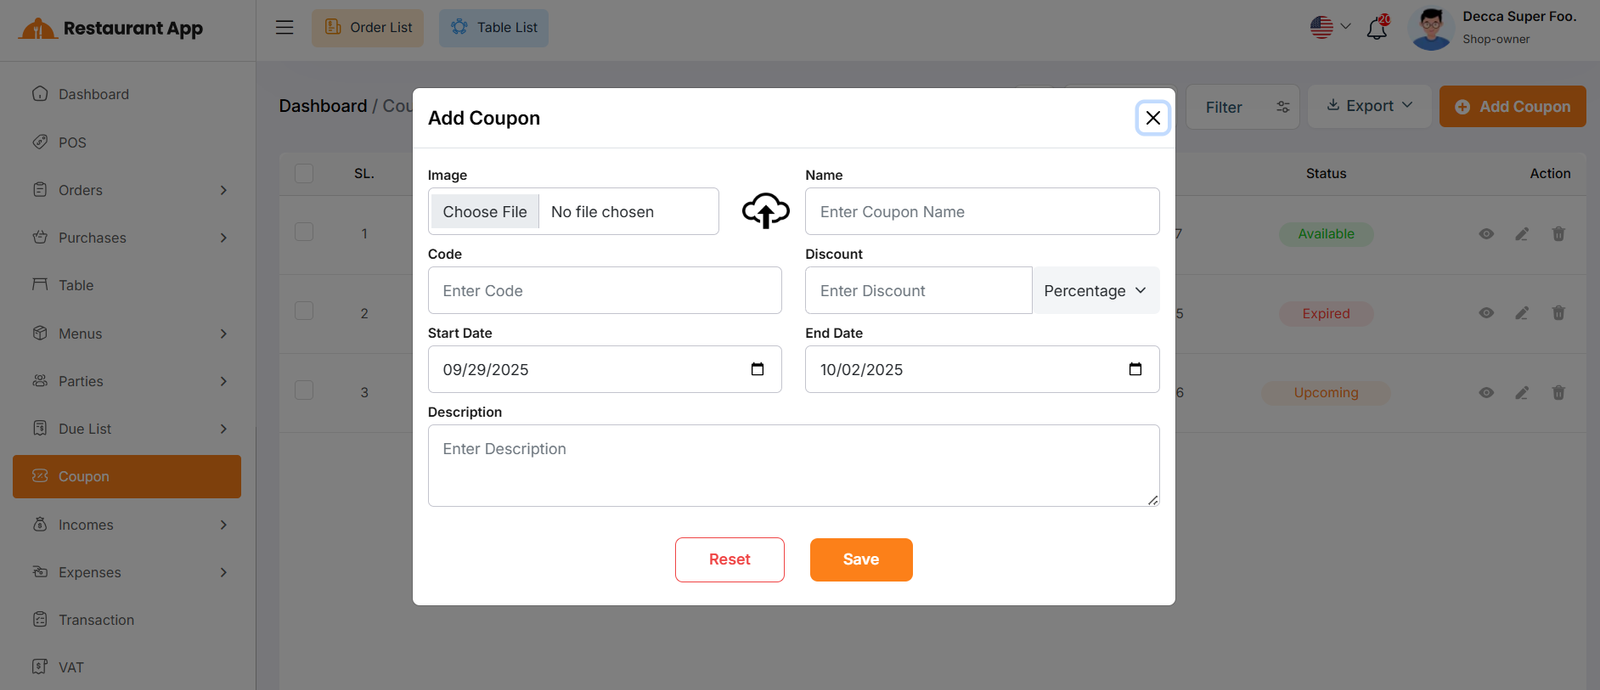
Create Coupon
You can create an coupon by filling out the required fields.Here You can also select discount type and discount.
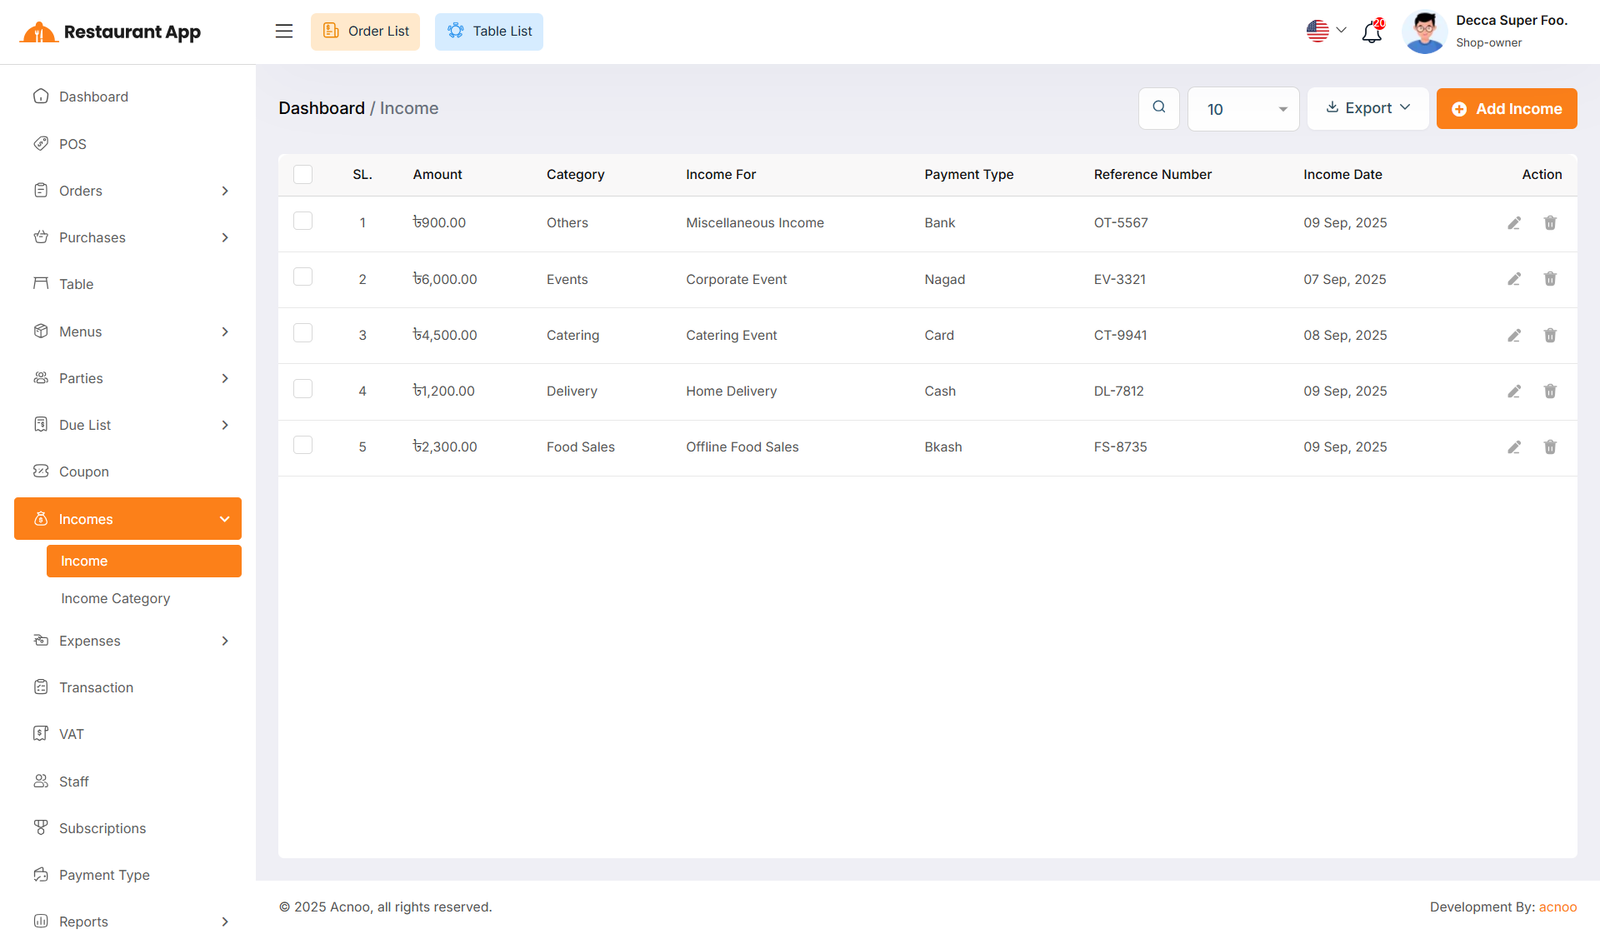
Income List
Here, you can view the Income list with a search filter. Additionally, you have the option to edit, delete, or use the multi-delete function and exported as Excel, CSV and PDF.
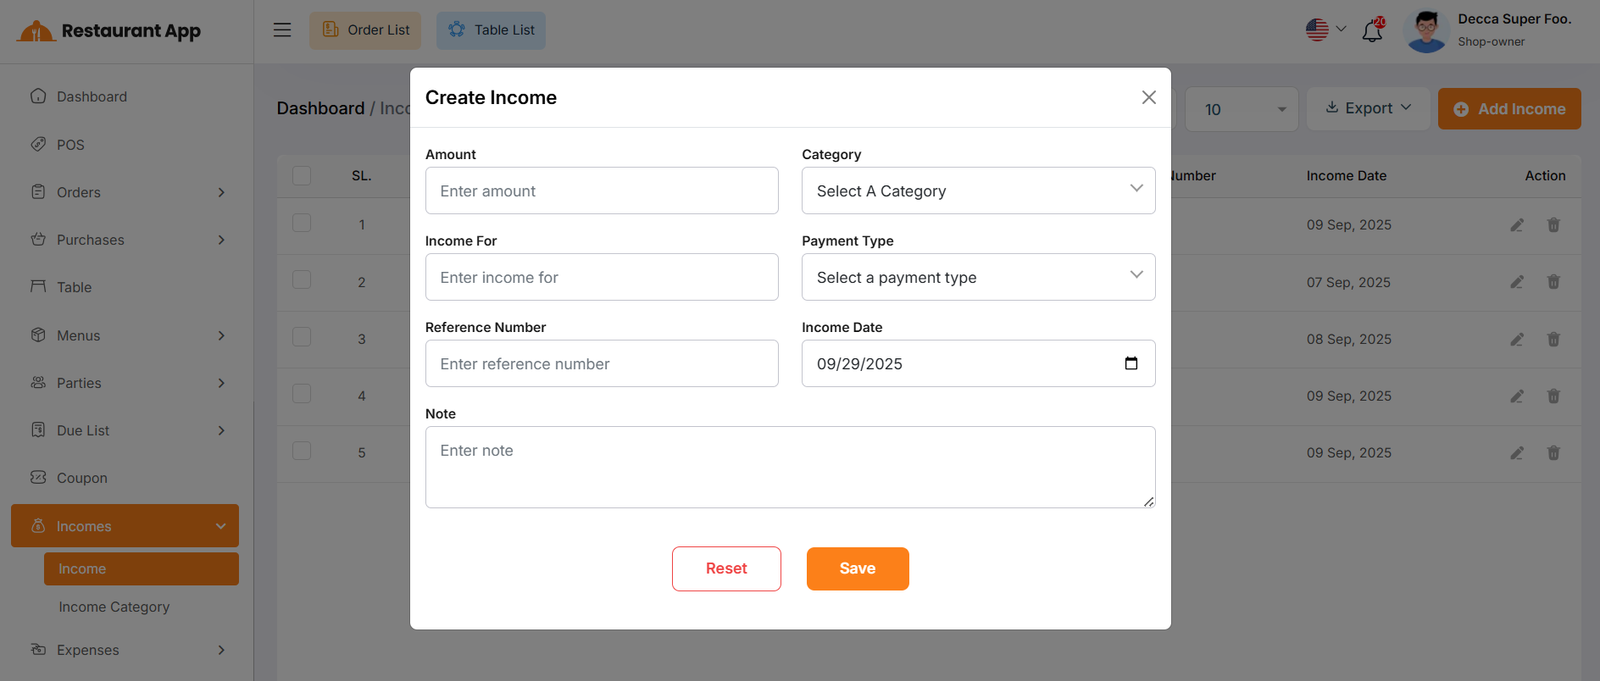
Create Income
You can create an income by filling out the required fields.Here You can also select category and payment type.
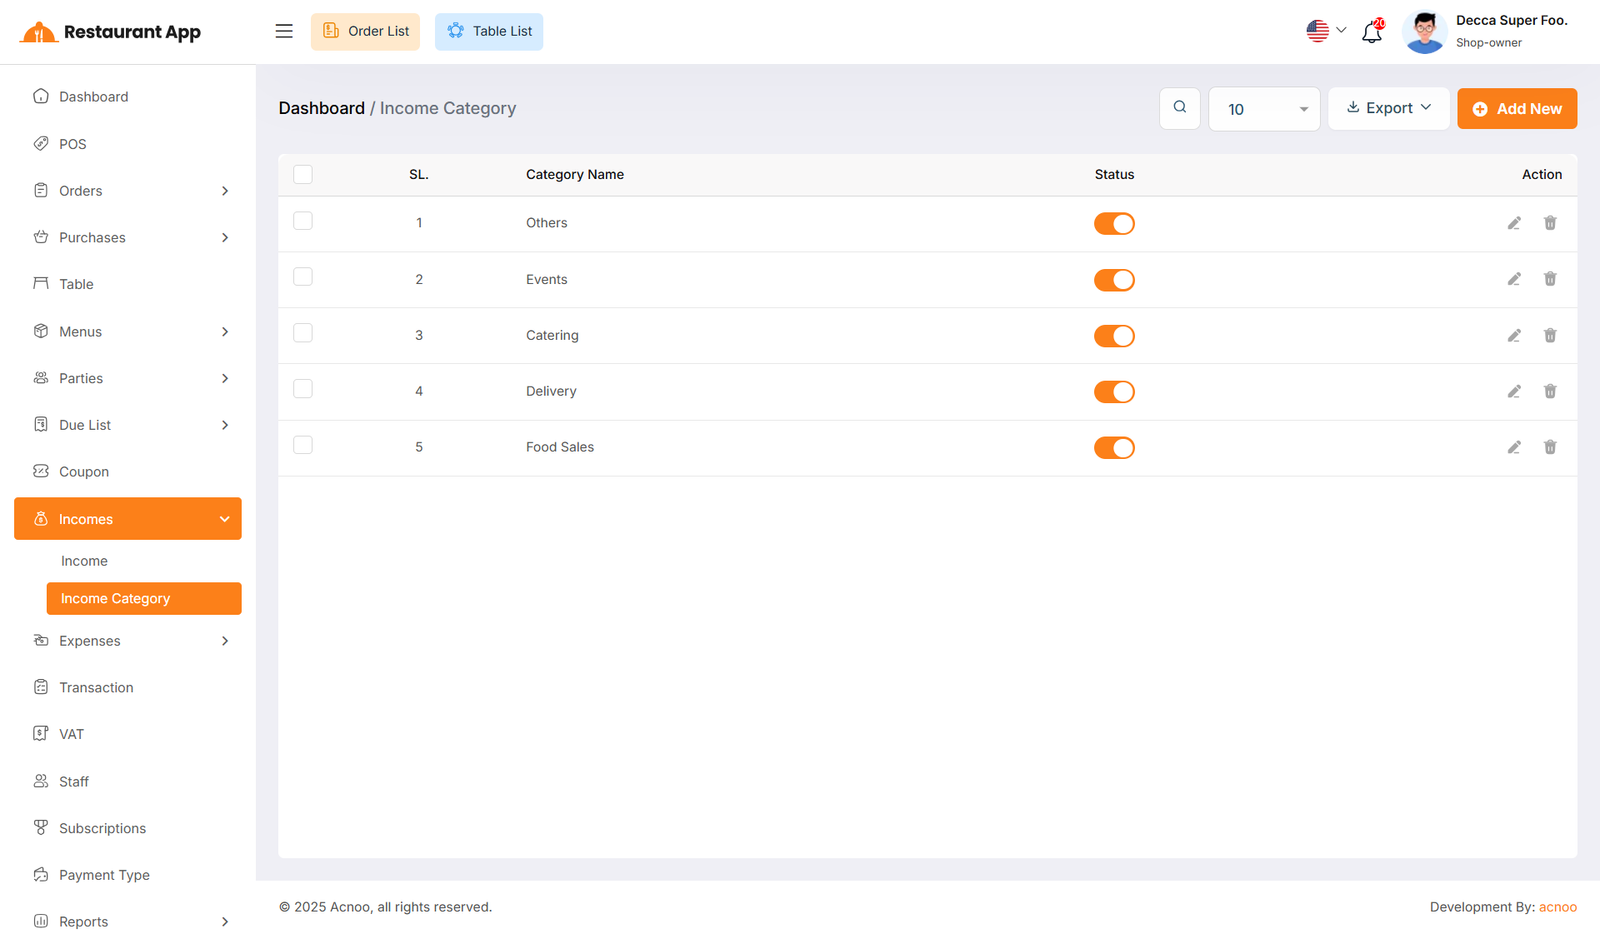
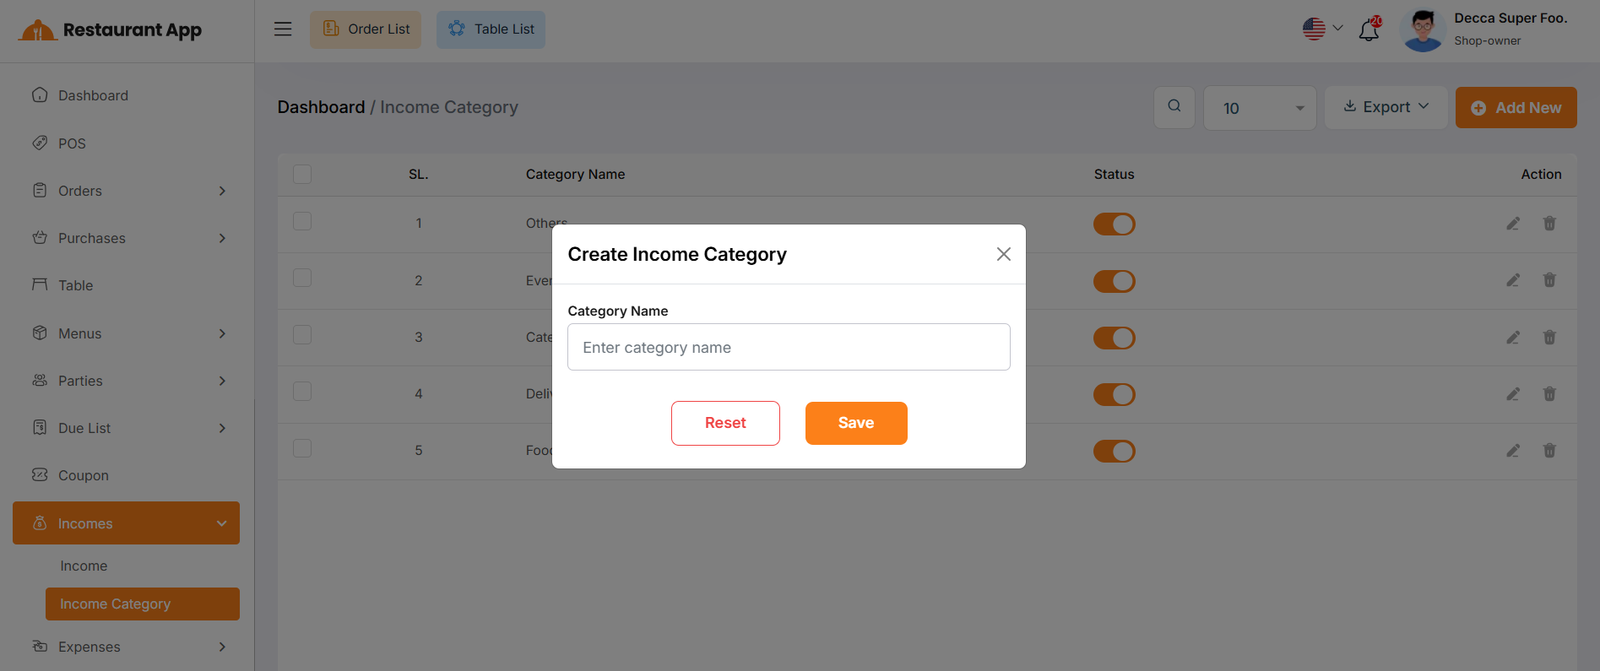
Income Category
Here, you can view the Income Category with a search filter. Additionally, you have the option to edit, delete, or use the multi-delete function and exported as Excel, CSV and PDF. Just put category name for create Income Category
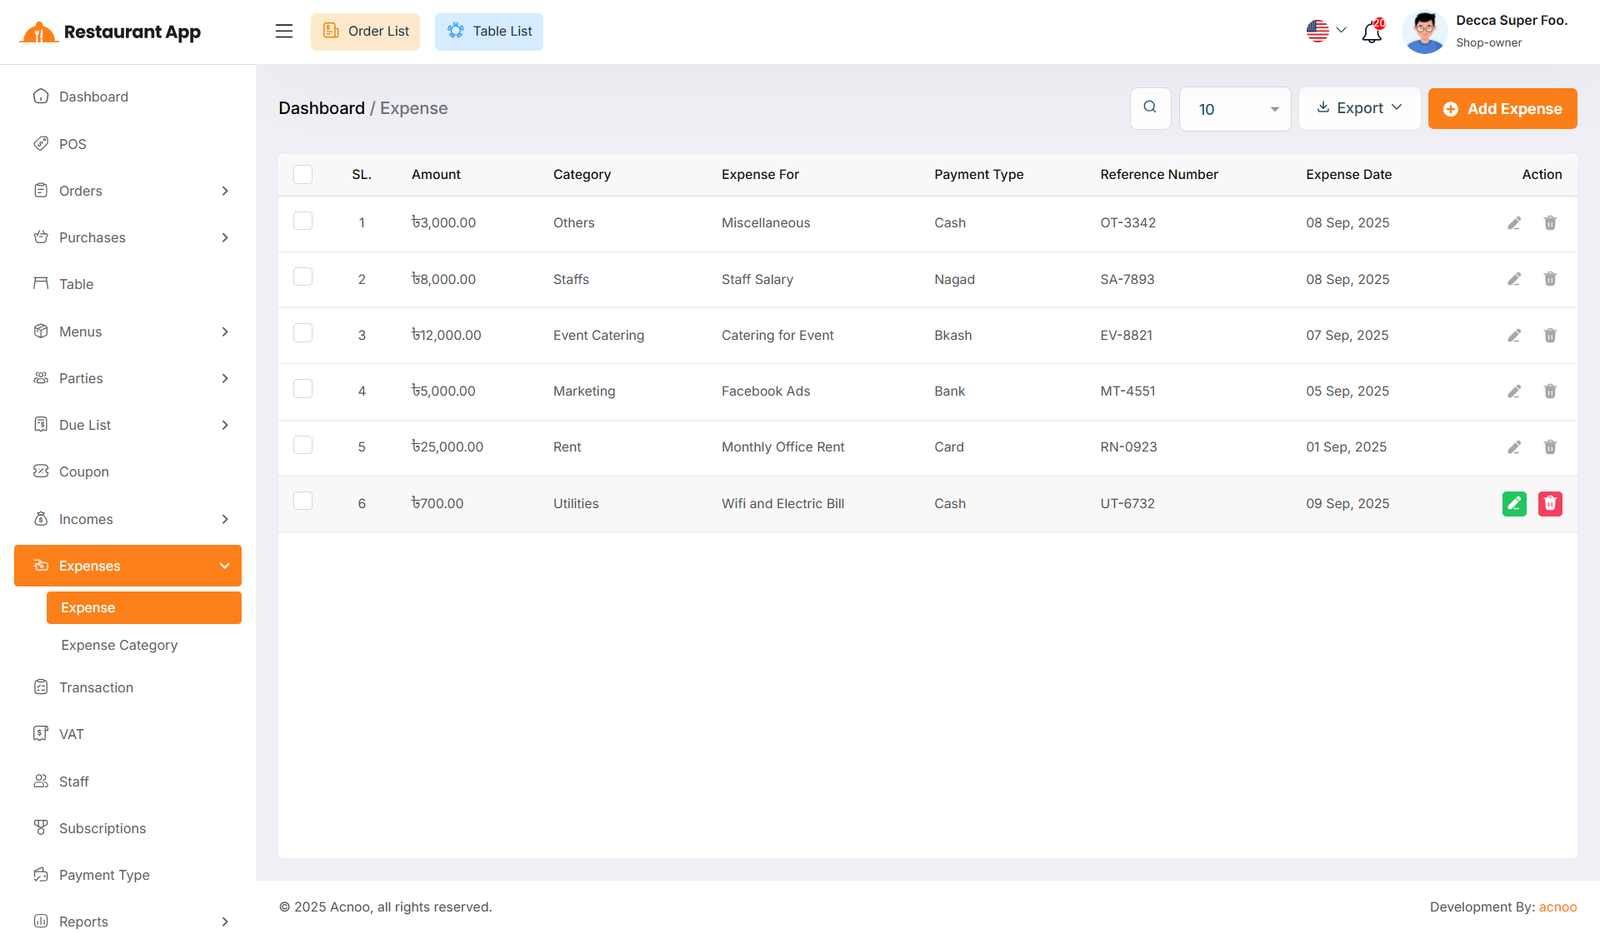
Expense List
Here, you can view the Expense list with a search filter. Additionally, you have the option to edit, delete, or use the multi-delete function and exported as Excel, CSV and PDF.
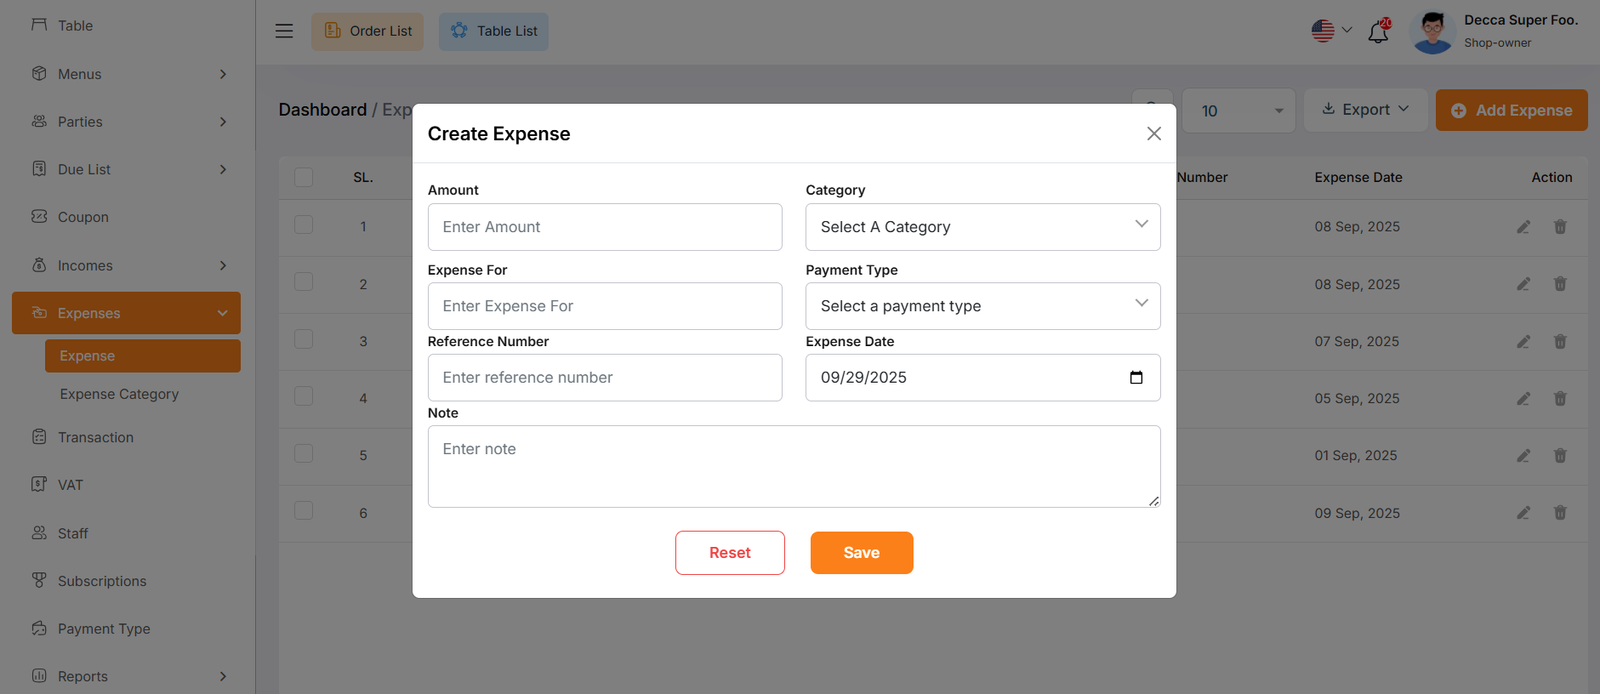
Create Expense
You can create an expense by filling out the required fields.Here You can also select category and payment type.
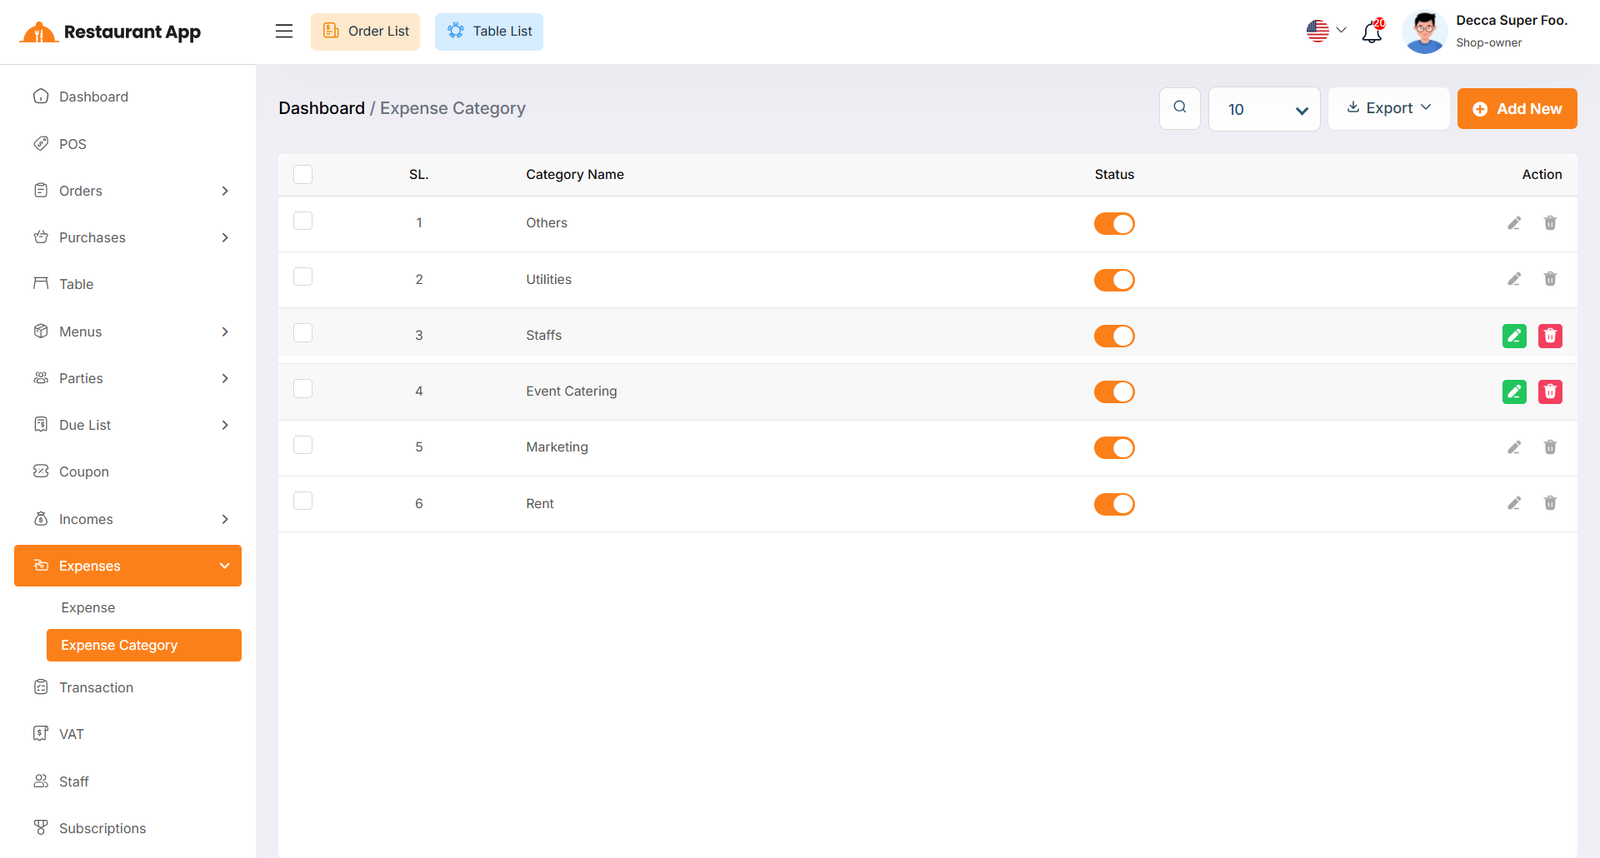
Expense Category
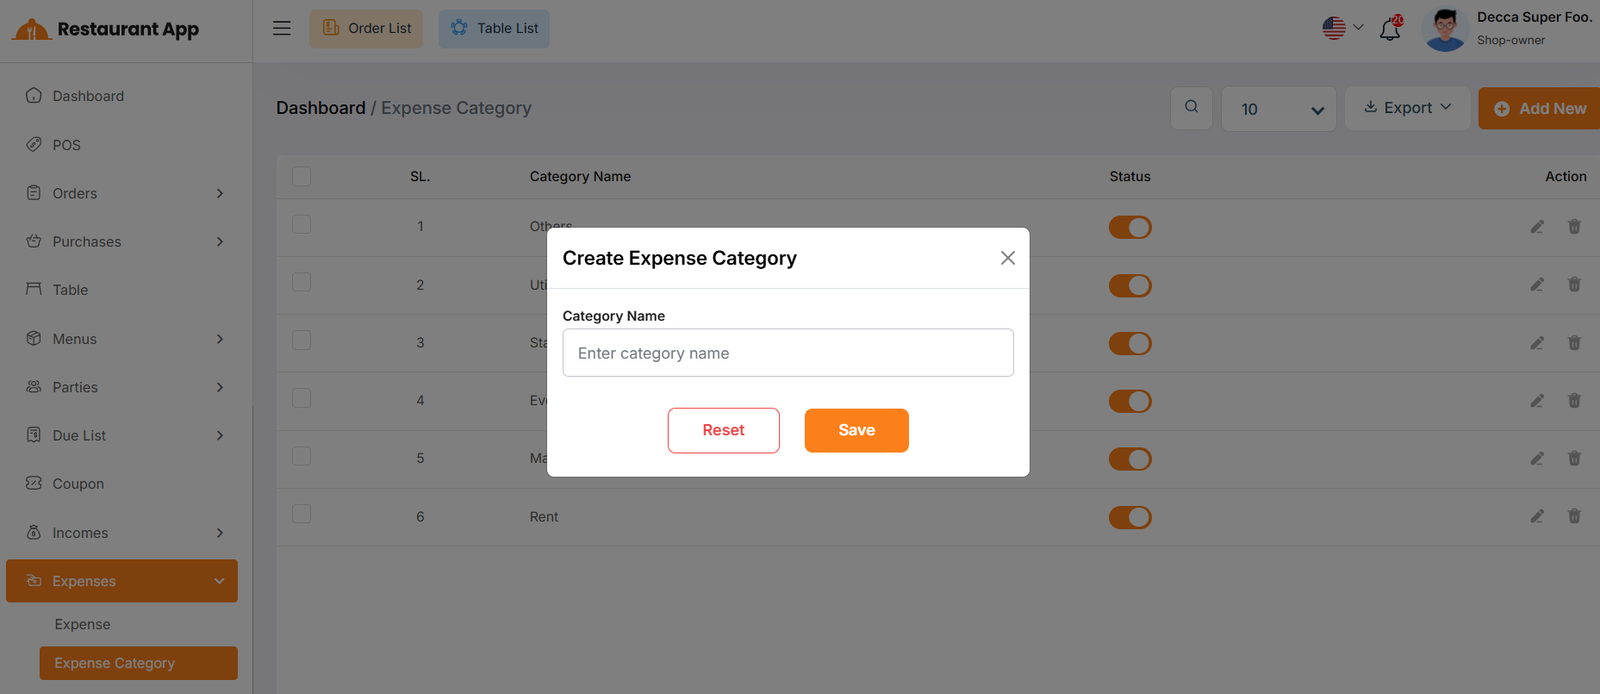
Here, you can view the Expense Category with a search filter. Additionally, you have the option to edit, delete, or use the multi-delete function and exported as Excel, CSV and PDF. Just put category name for create Expense Category
Transaction List
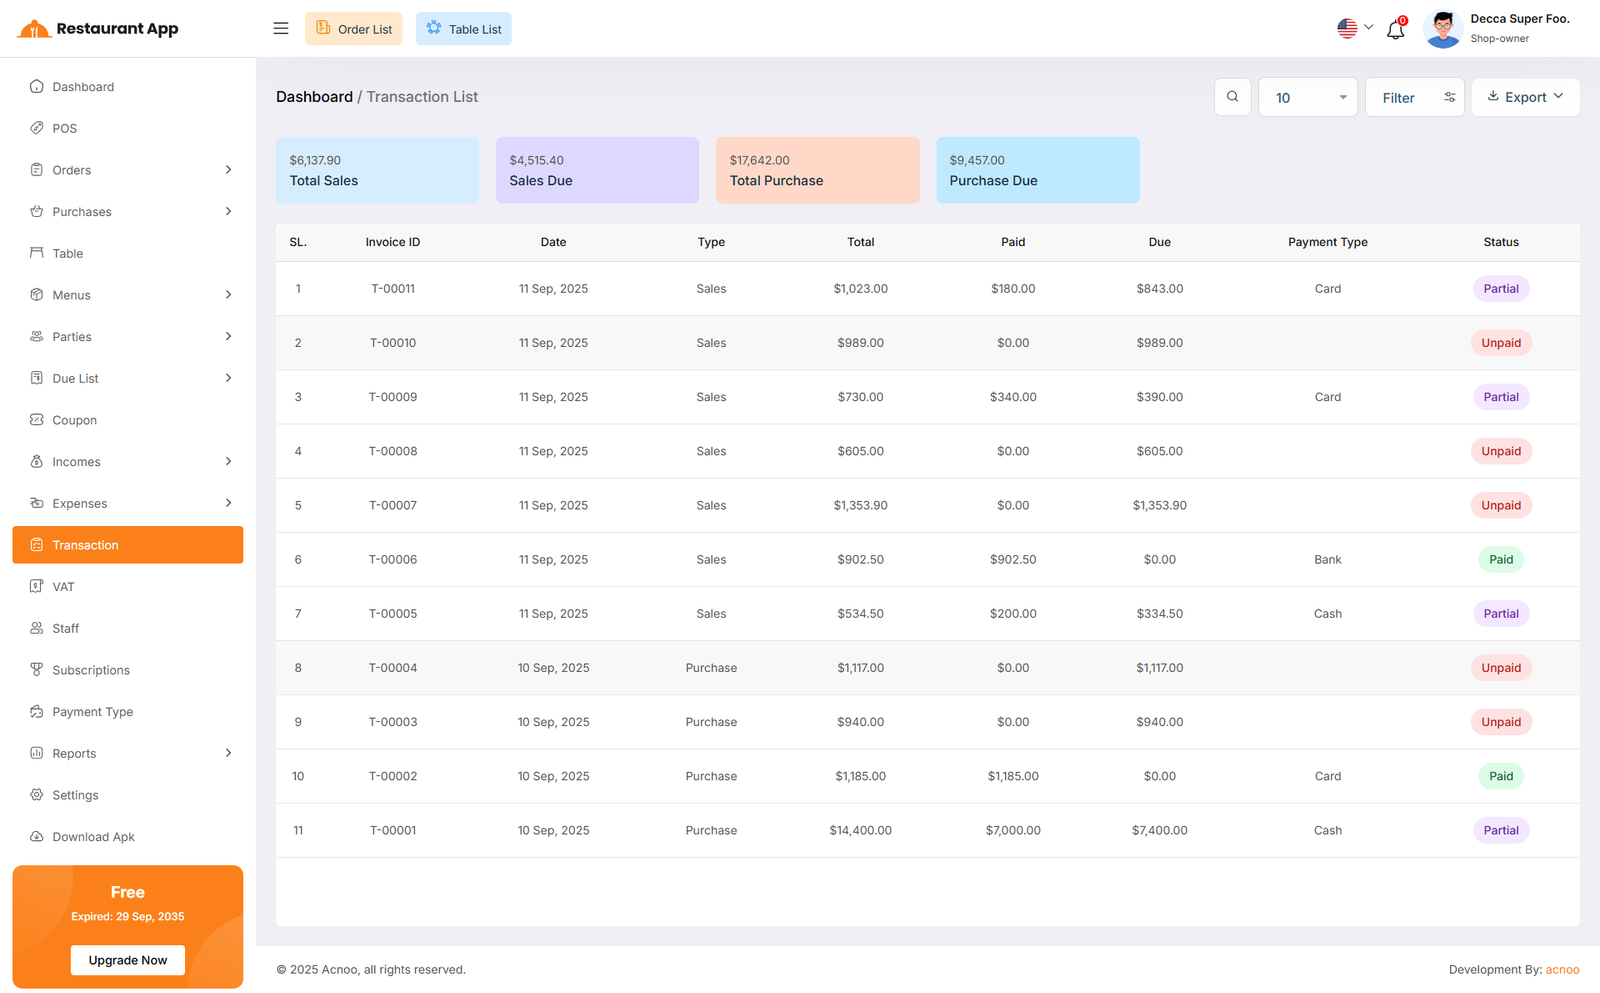
Here, you can view the Transaction list with a search filter. Additionally, you have the option to exported as Excel, CSV and PDF. In addition, you can also view the Total Sales, Sales Due, Total Purchase and Purchase Due at the top.
Vat Setting
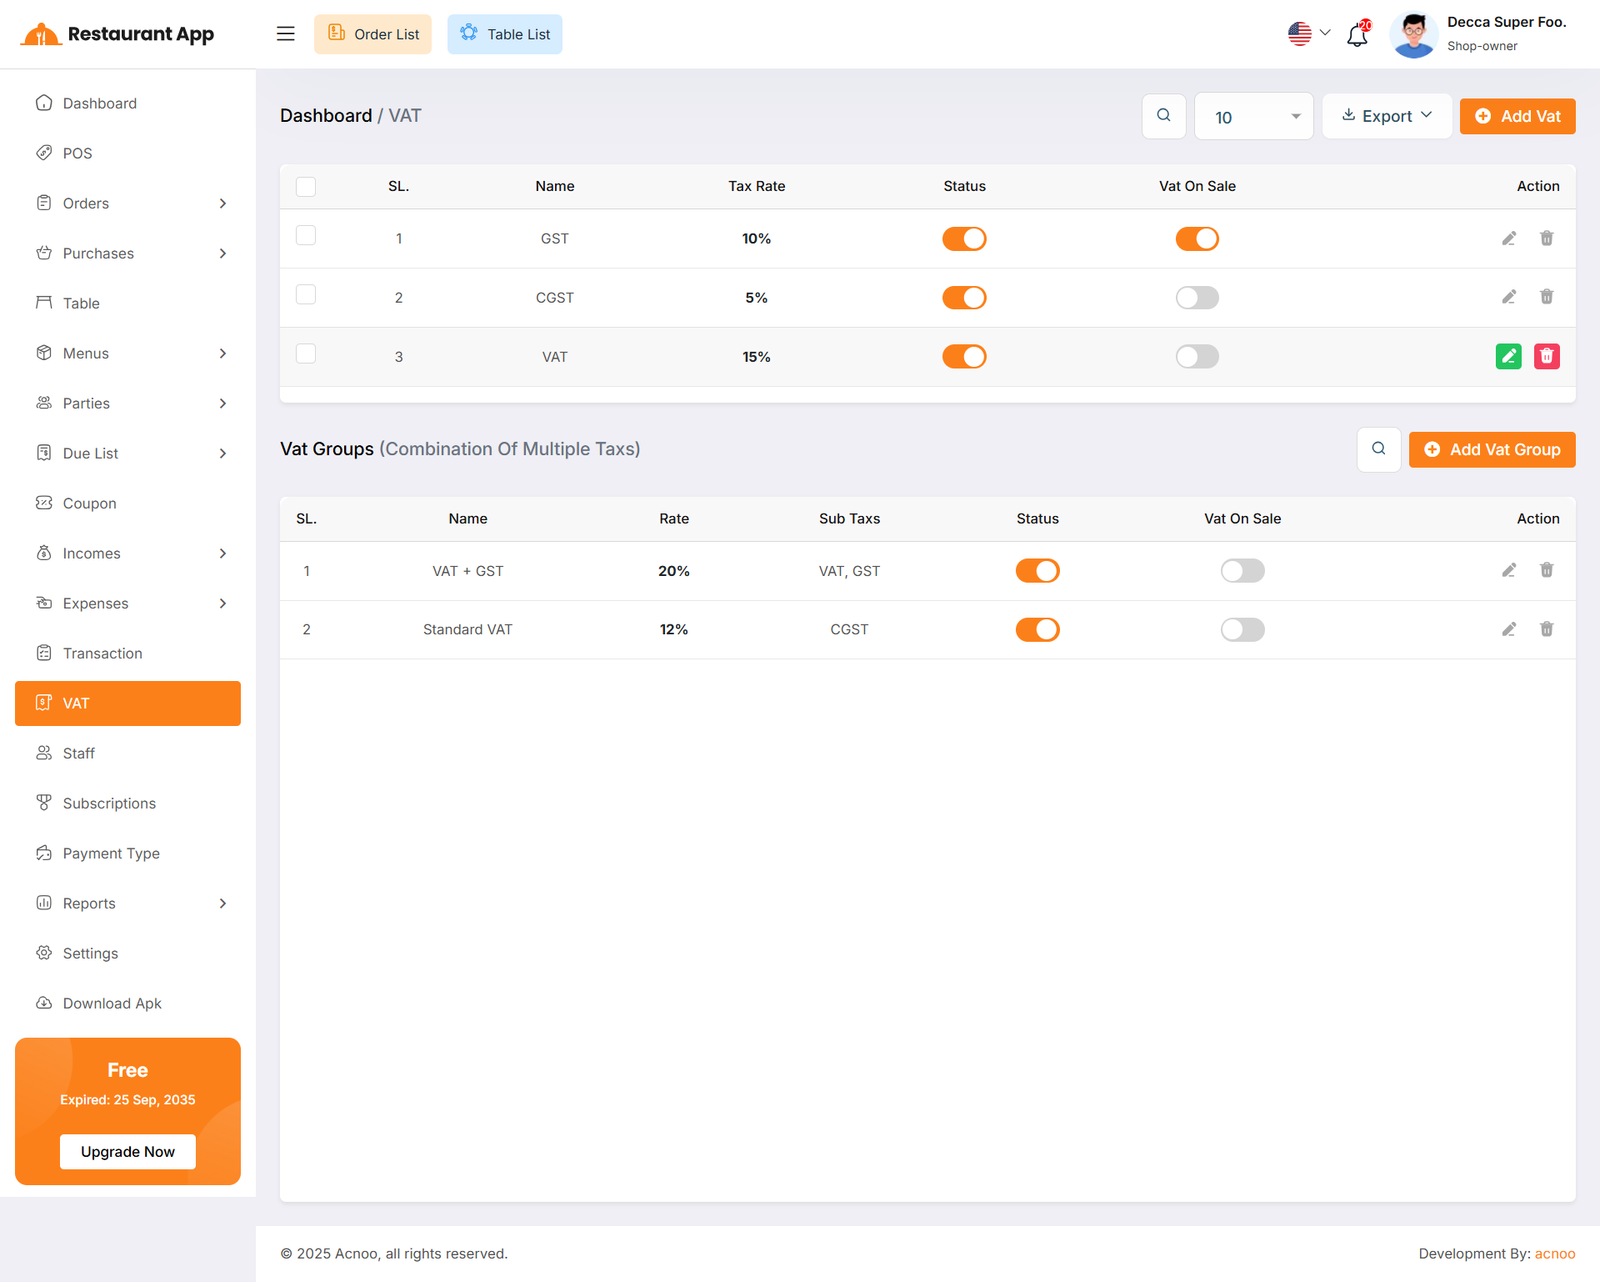
Here, you can view VAT settings and VAT groups. Two tables are available: one for the list of VAT rates and another for the list of VAT groups. You can exported VAT as Excel, CSV and PDF and apply filtering separately in both tables. Additionally, you can use the VAT On Sale toggle to activate any VAT during item sales. When one VAT is activated, all other VATs will be automatically deactivated.
Create Vat
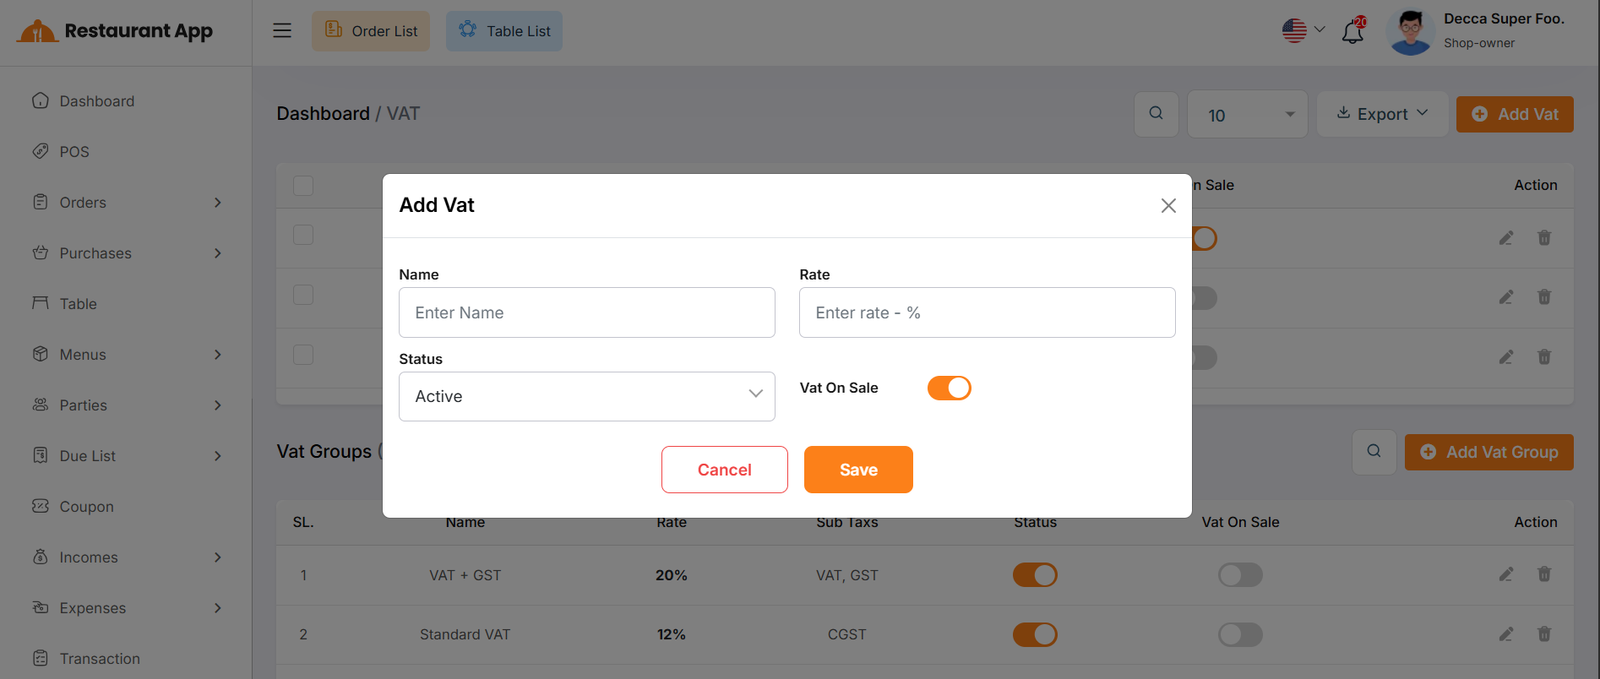
By clicking the Add VAT button, a modal will appear. Fill in the required input fields and then click the Save button to add a new VAT entry.
Create Vat Group
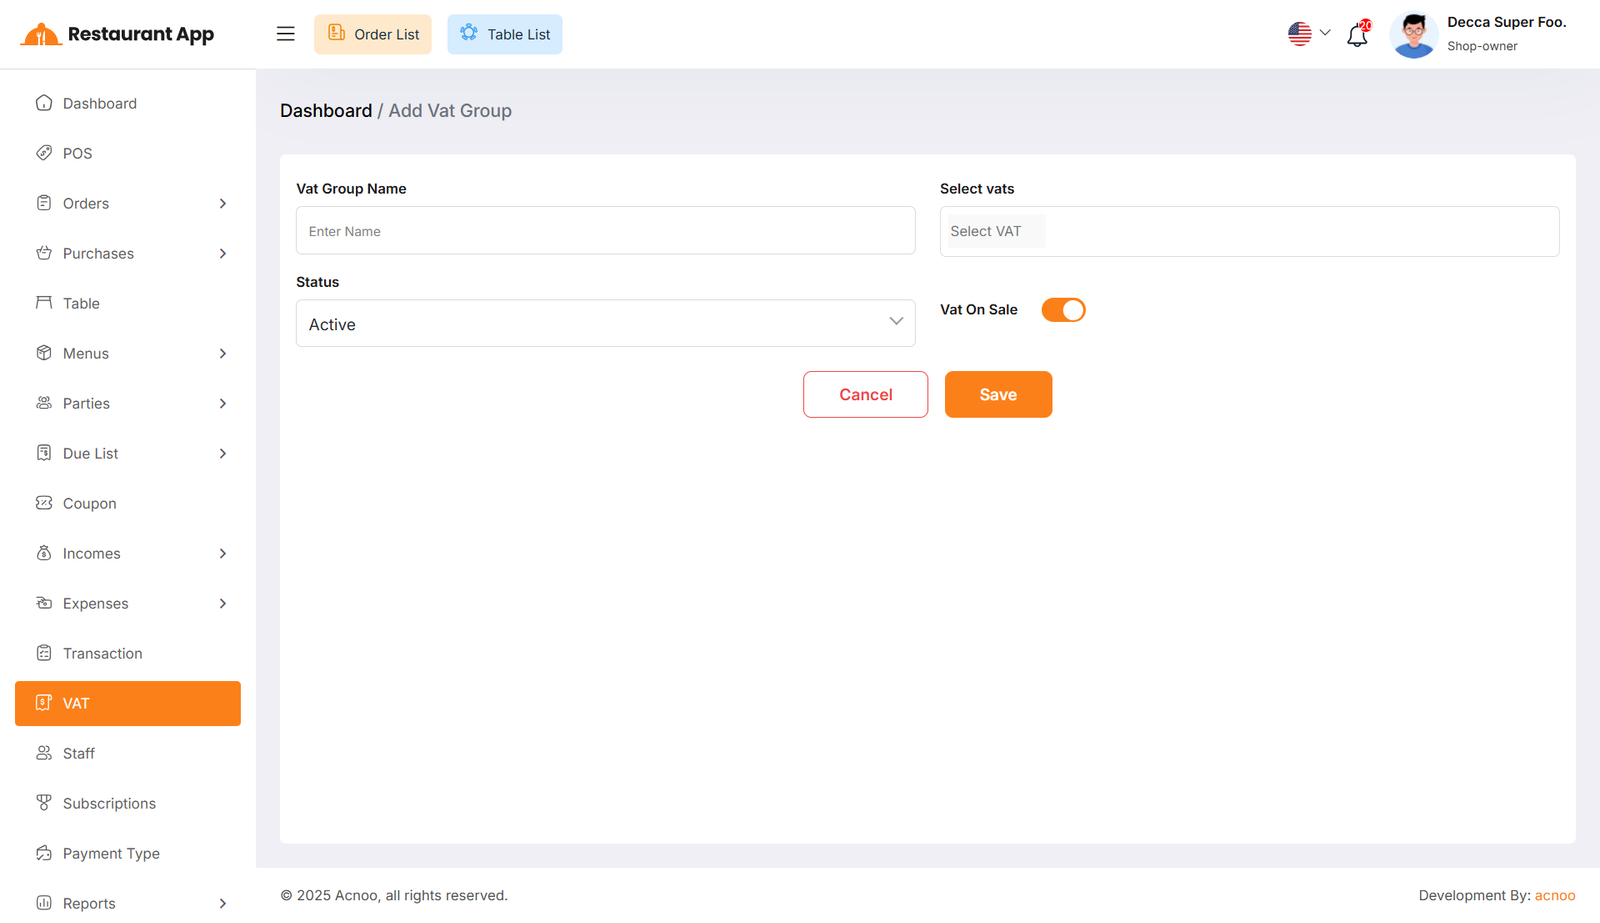
By clicking the Add New button, you will be redirected to the VAT Group creation page. Fill in the required input fields and then click the Save button to add a new VAT group.
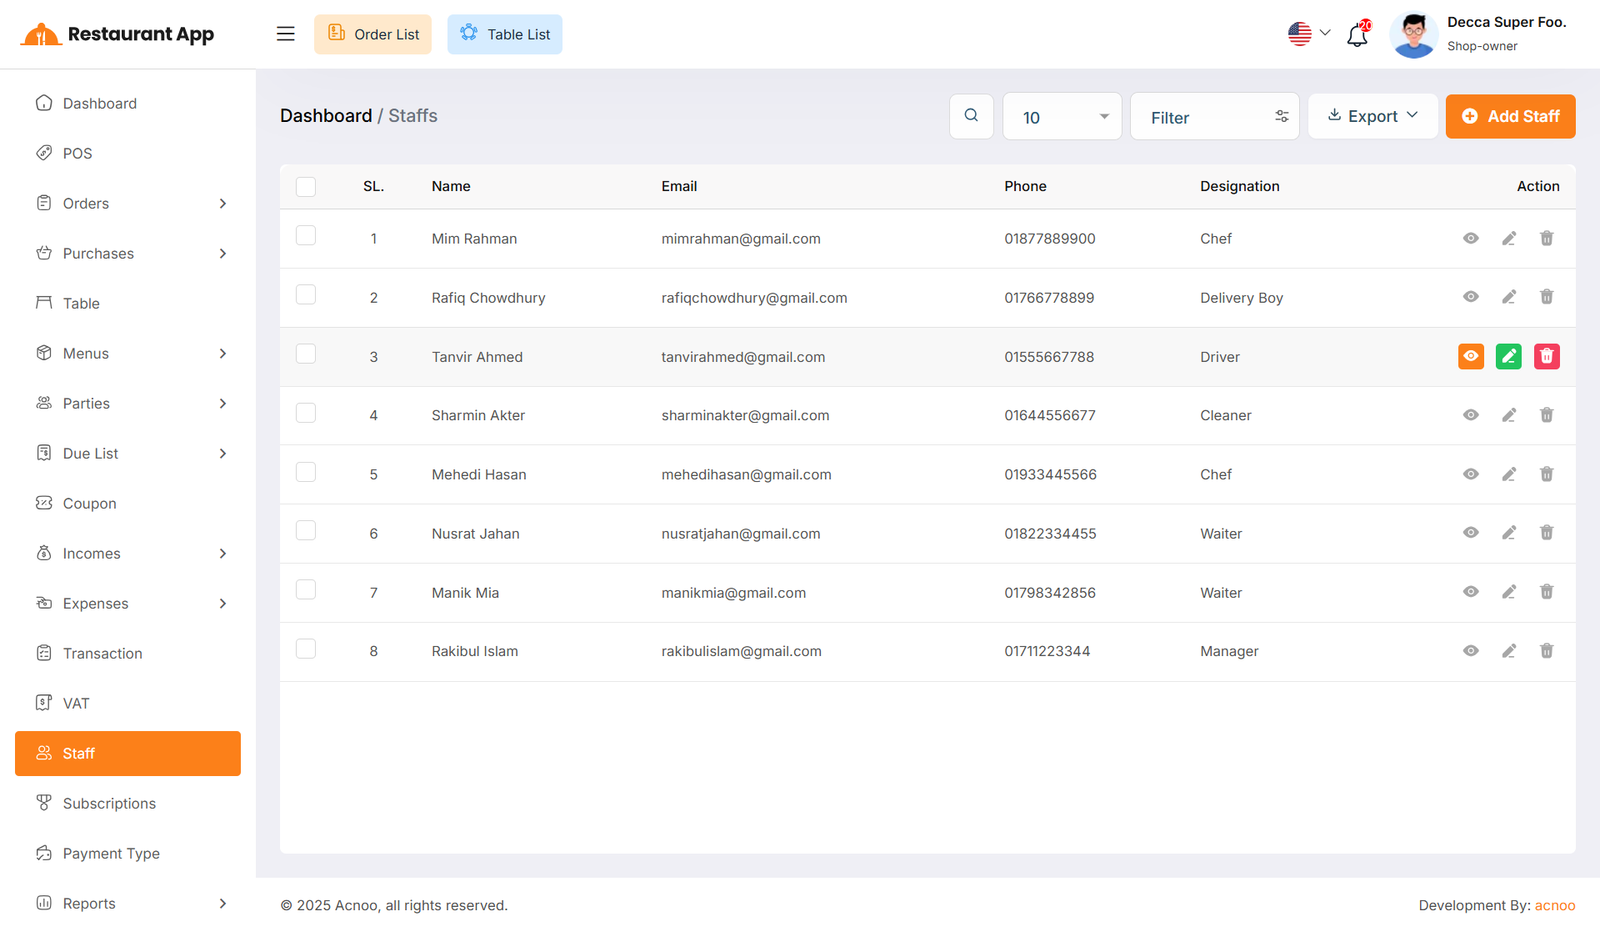
Staff List
Here, you can view the Staff list with a search filter. Additionally, you have the option to edit, delete, or use the multi-delete function and exported as Excel, CSV and PDF.
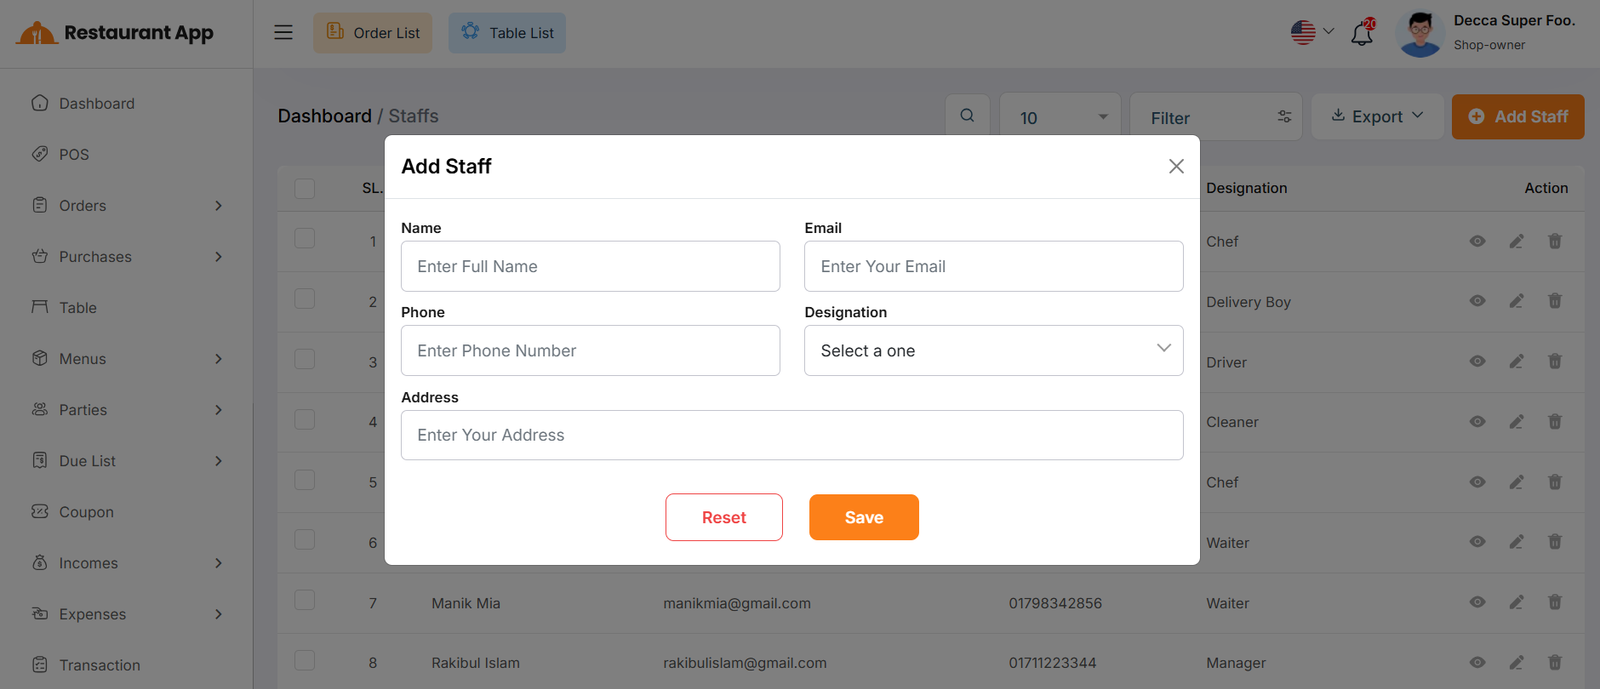
Create Staff
You can create a staff by filling out the required input fields and then click the Save button to add a new Staff.
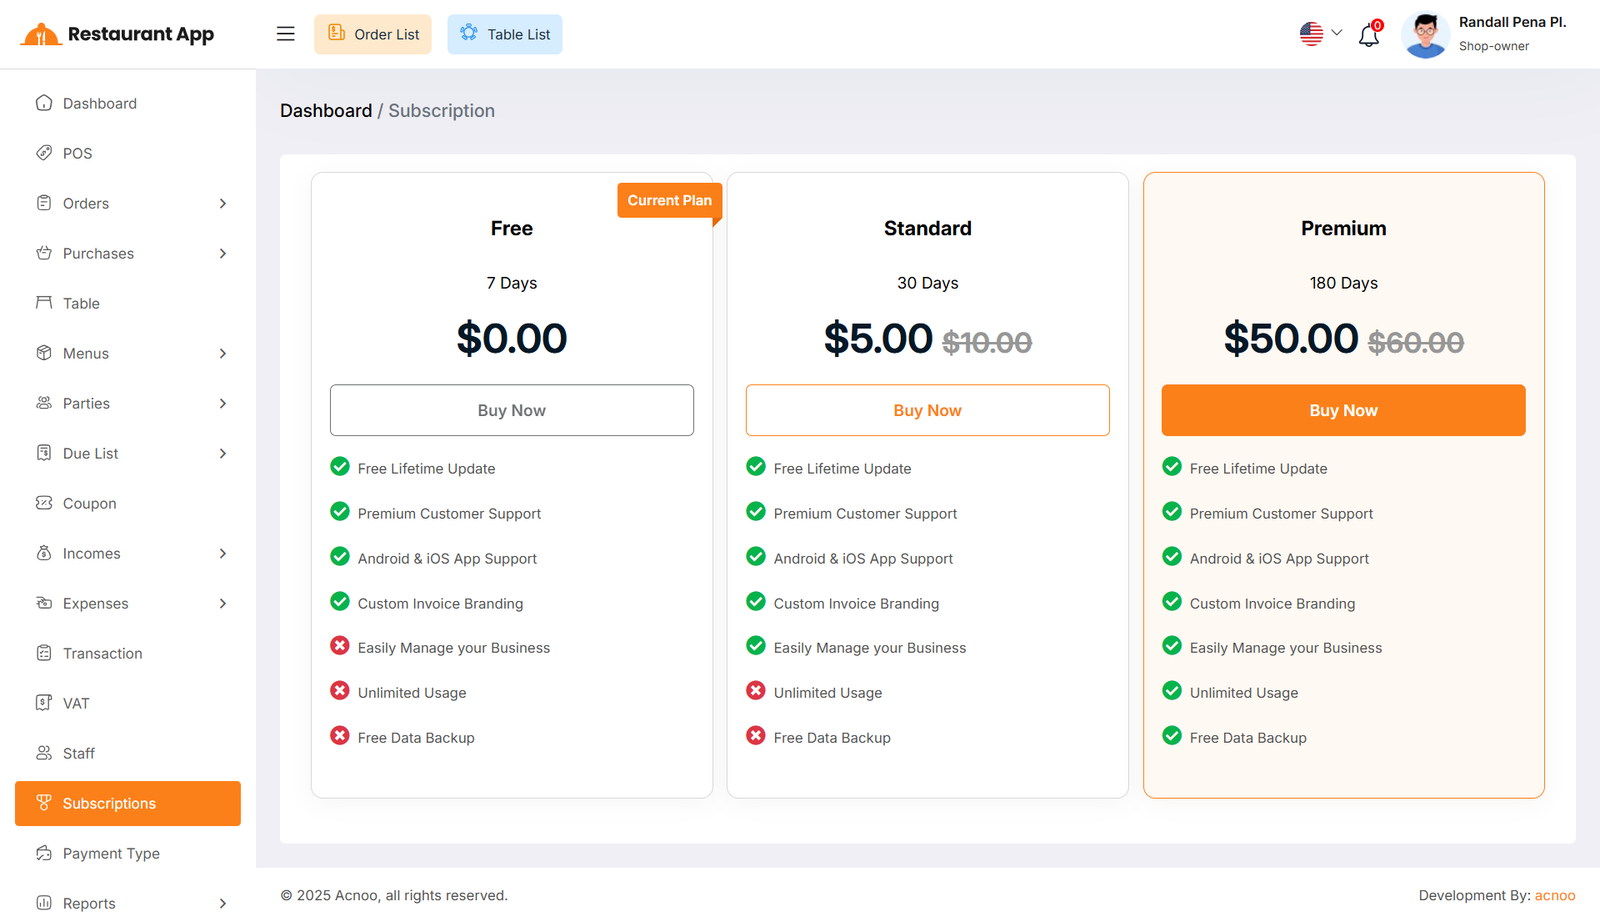
Subscriptions
Here, you can view your current plan status along with all other available plans. You can also upgrade your plan from this page.
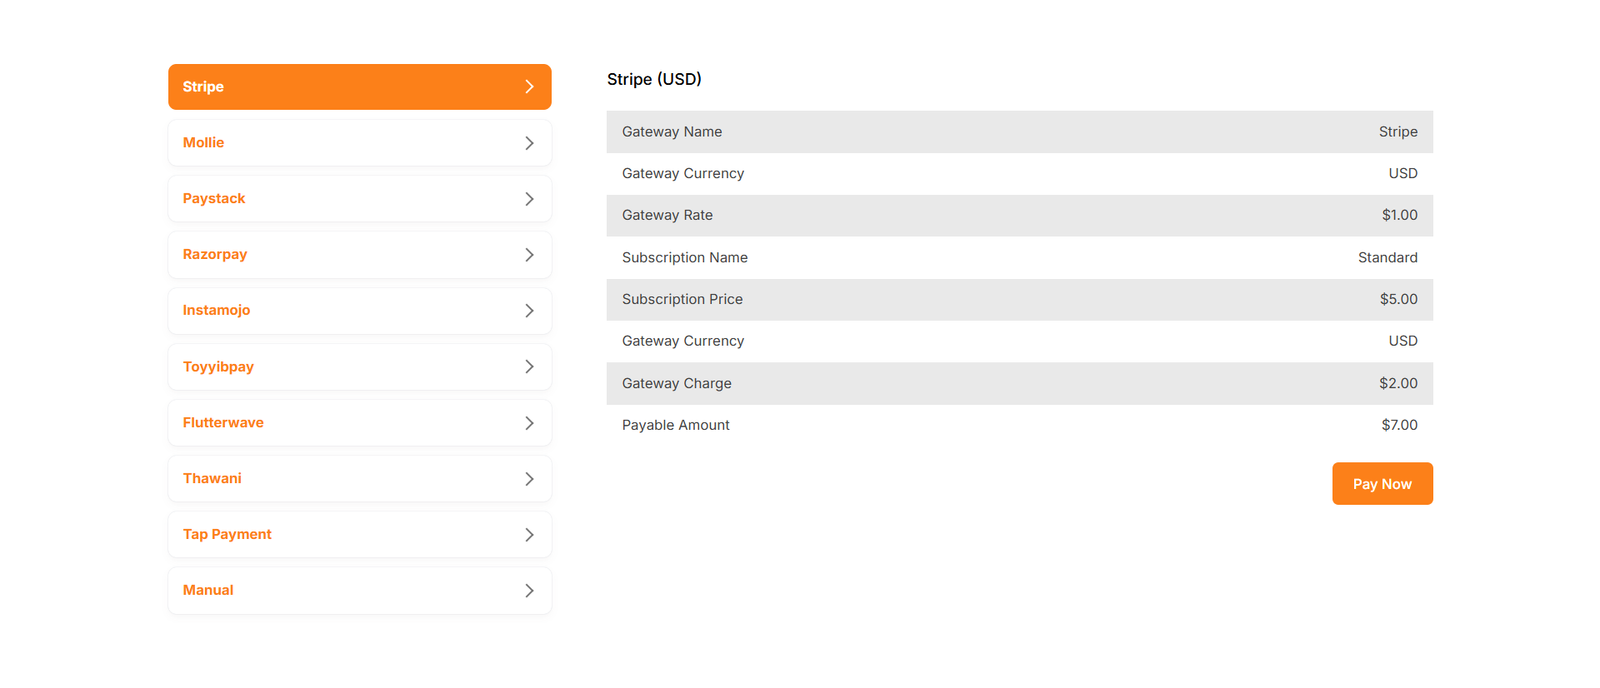
Payment
After choosing your desired plan, just click to view the available payment options. Once you complete your payment, you can upgrade your plan.
Payment Type List
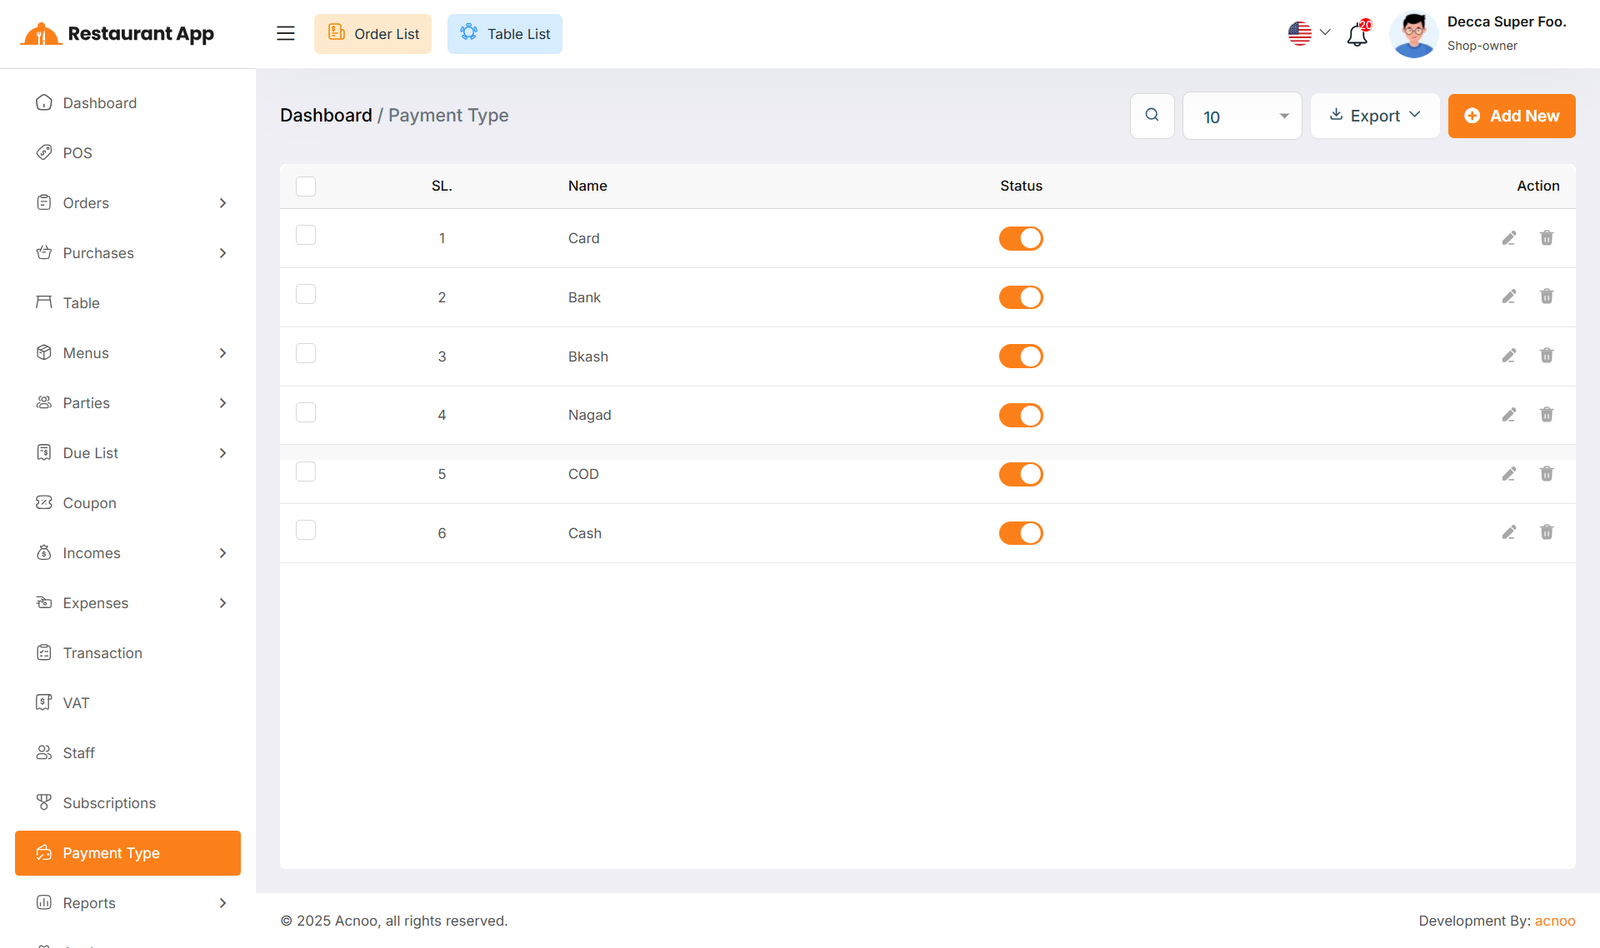
Here, you can view the Payment Type list with a search filter. Additionally, you have the option to edit, delete, or use the multi-delete function and exported as Excel, CSV and PDF. You can also update the status (Active or Inactive) by toggling the switch.
Create Payment Type
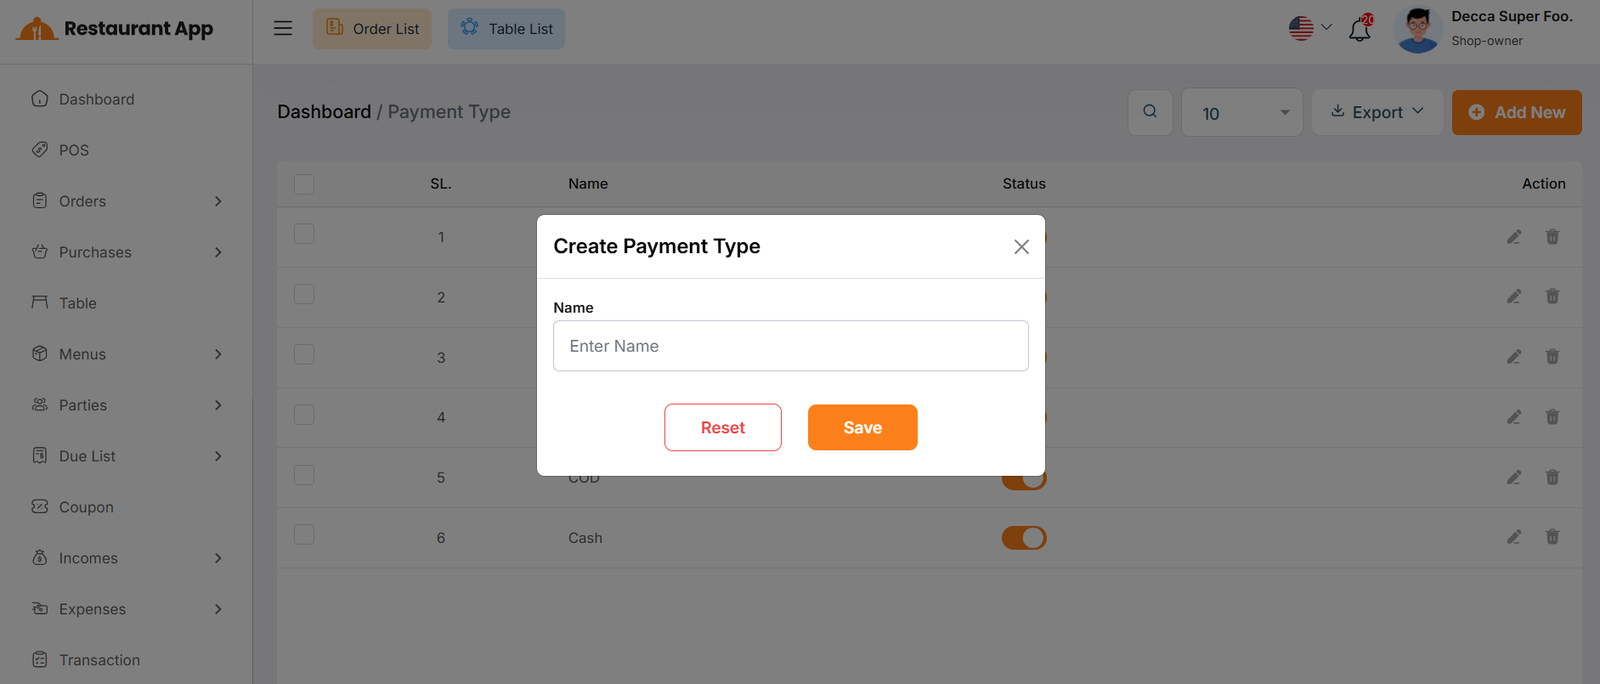
You can create a payment type by filling out the fields and then click the Save button to add a new Payment Type.
Manage Pages
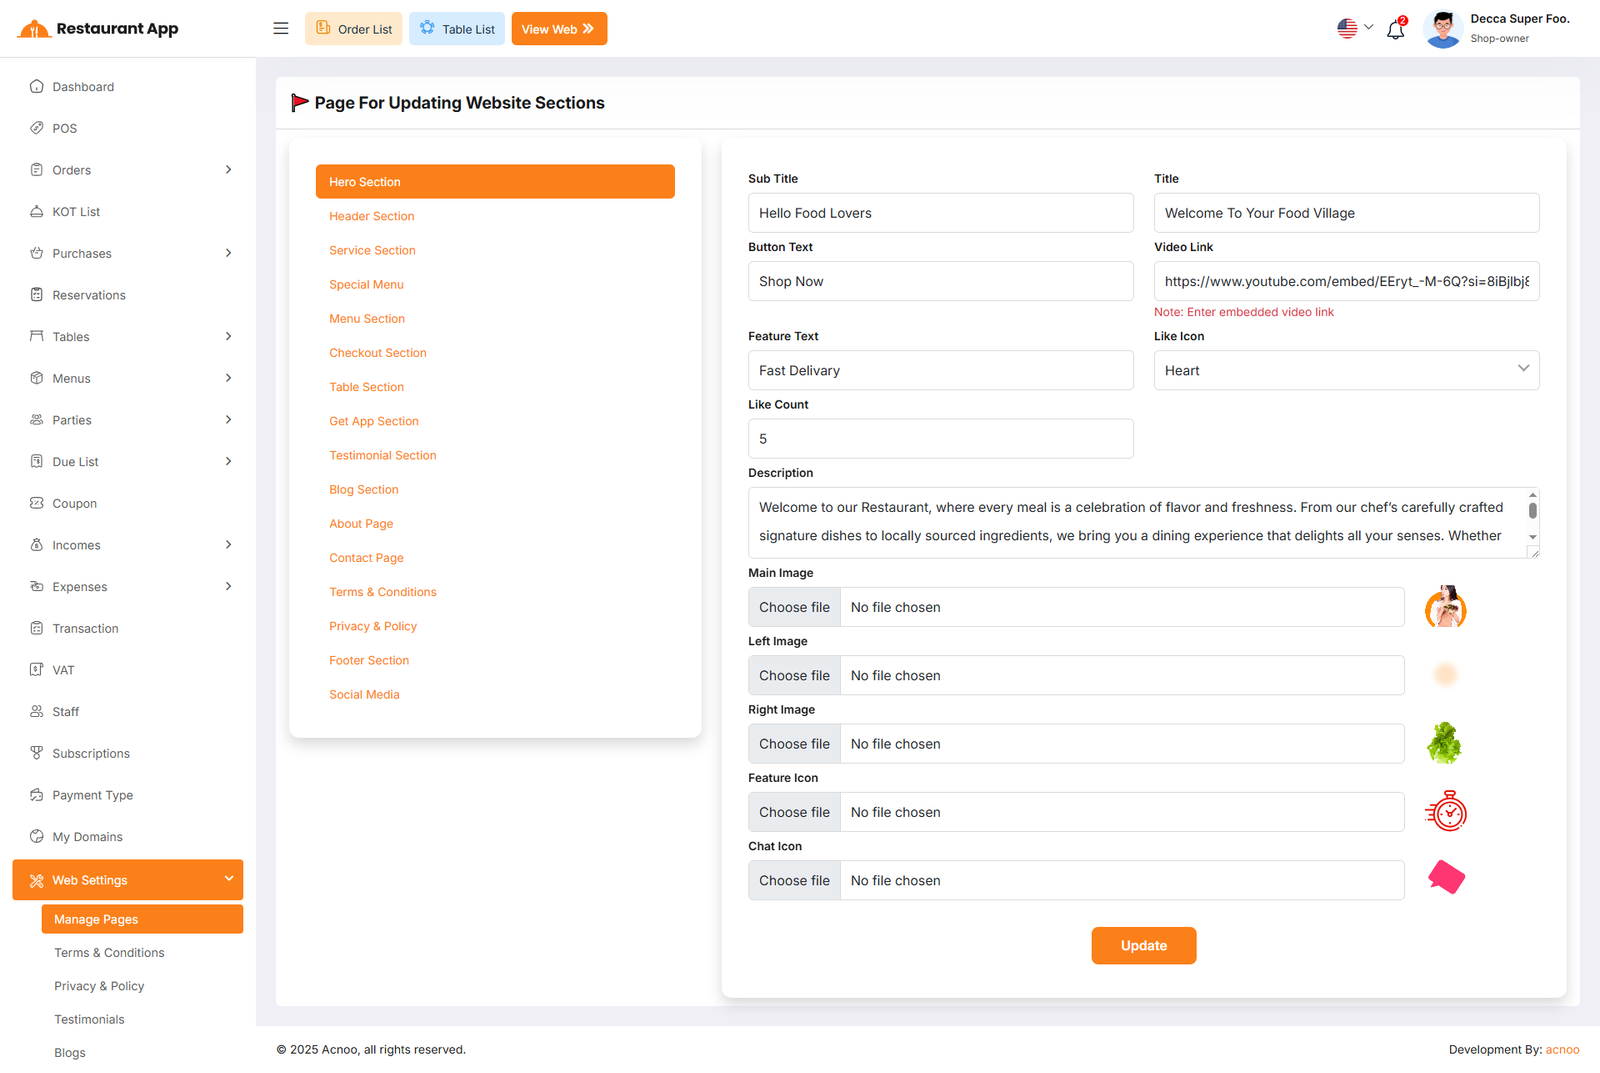
The Manage Pages section under Web Settings provides a comprehensive Content Management System (CMS) for the restaurant's online storefront. It allows administrators to update text, images, and links for every section of the website without requiring technical coding knowledge.
The left-hand sidebar lists all editable modules of the online store. Clicking a section updates the main form on the right.Hero Section The first part of the website users see, containing the main greeting and featured call-to-action.
Informational Pages Includes detailed content areas such as the About Page, Contact Page, Terms & Conditions, and Privacy Policy.
Fulfillment Sections Content blocks related to Service (delivery/pickup), Menu previews, Table information, and Mobile App promotion.
Engagement Sections Areas for social proof and dynamic content, including Testimonials, Blog posts, and Social Media links.
Term and Conditions
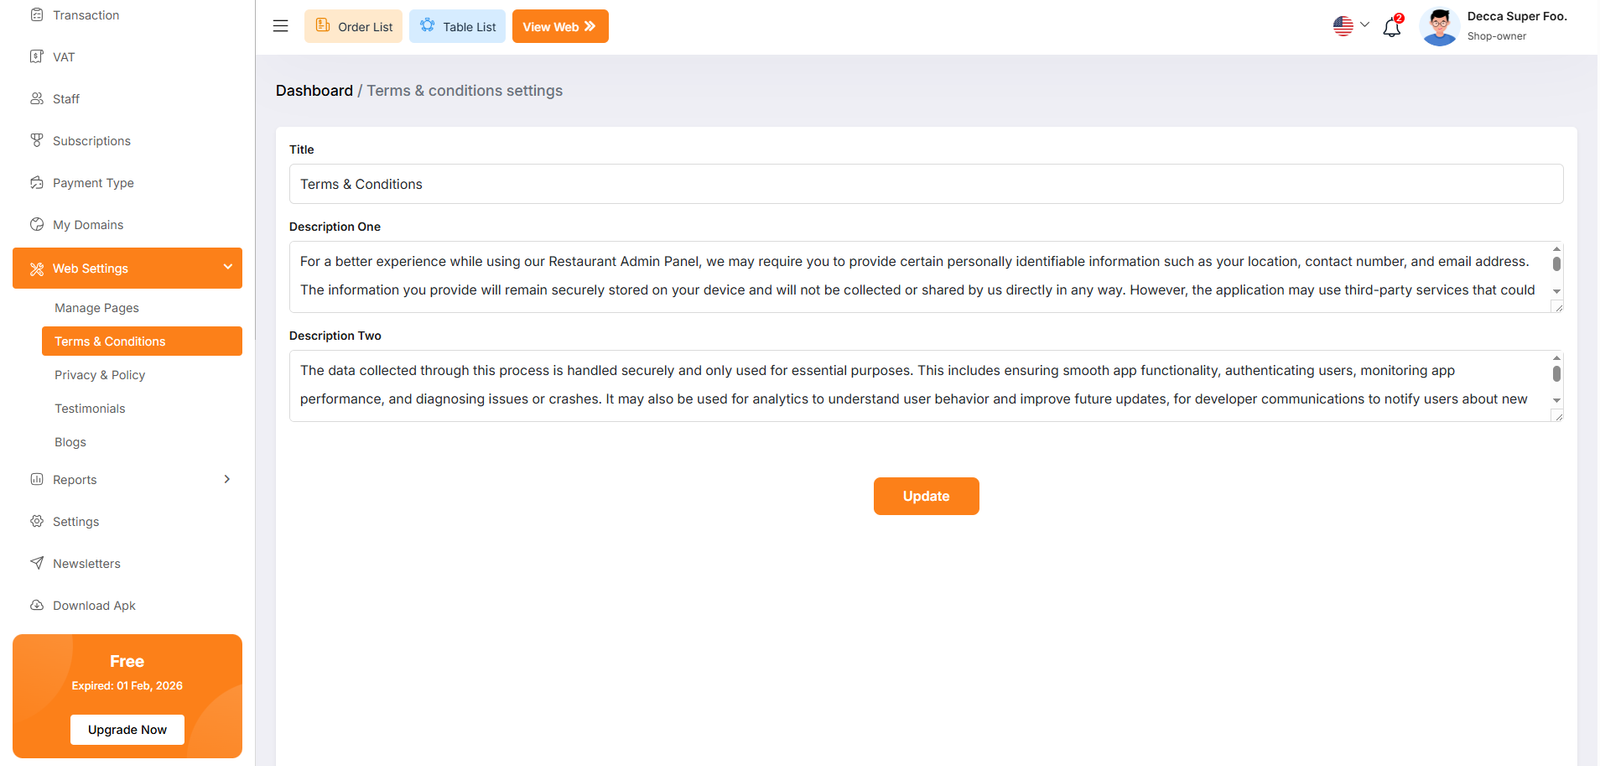
The Terms & Conditions Settings page, located under the Web Settings menu, allows administrators to define the legal framework and usage policies for the restaurant’s digital platforms. This content is vital for establishing transparency regarding user data, app functionality, and service agreements.
Privacy and Policy
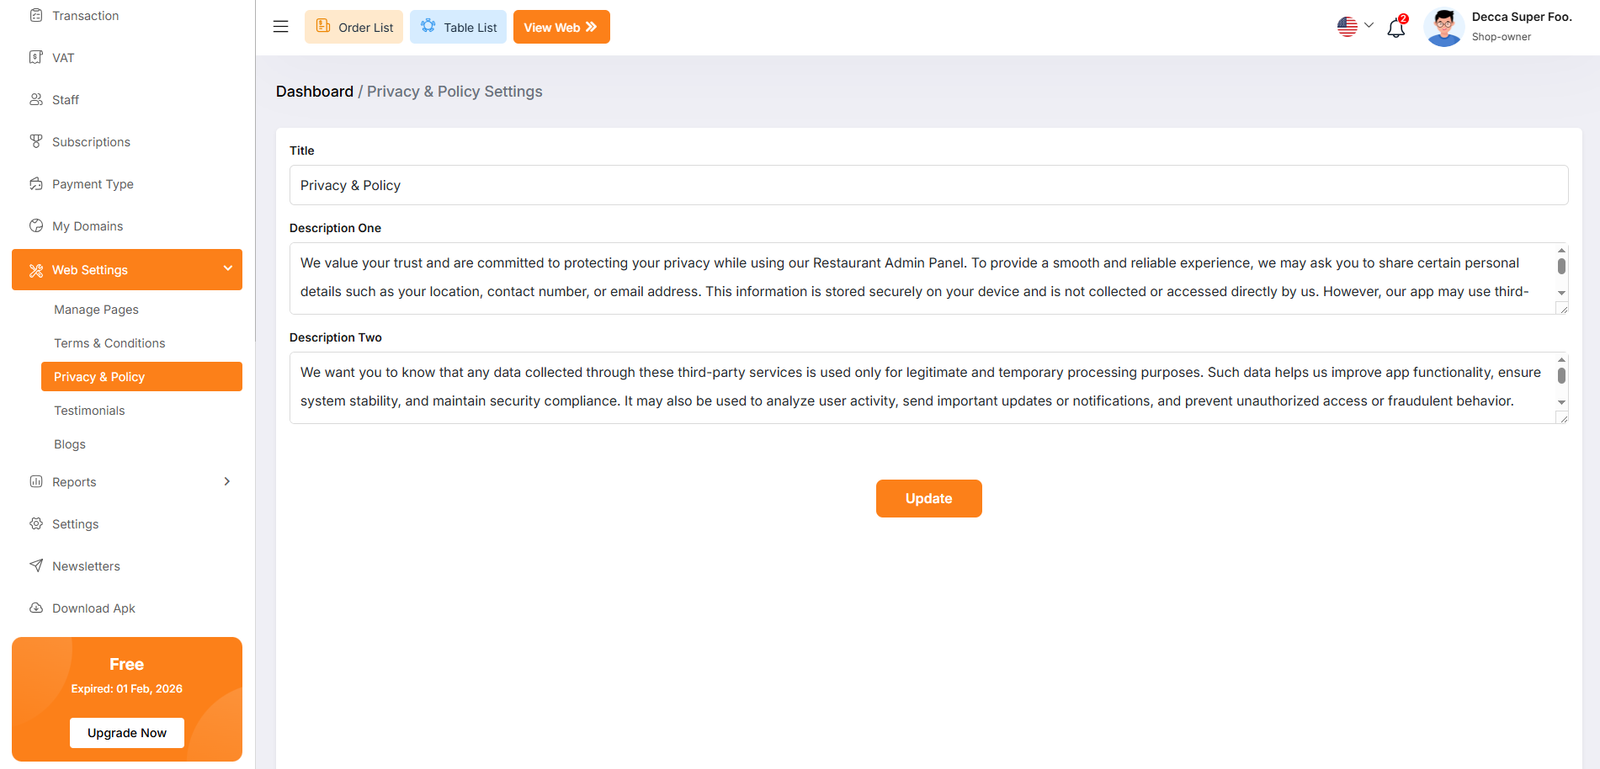
The Privacy & Policy Settings page, found under the Web Settings menu, allows administrators to configure the legal privacy disclosures for the restaurant's digital platforms. This content is essential for informing users about how their data is collected, stored, and utilized.
Testimonials
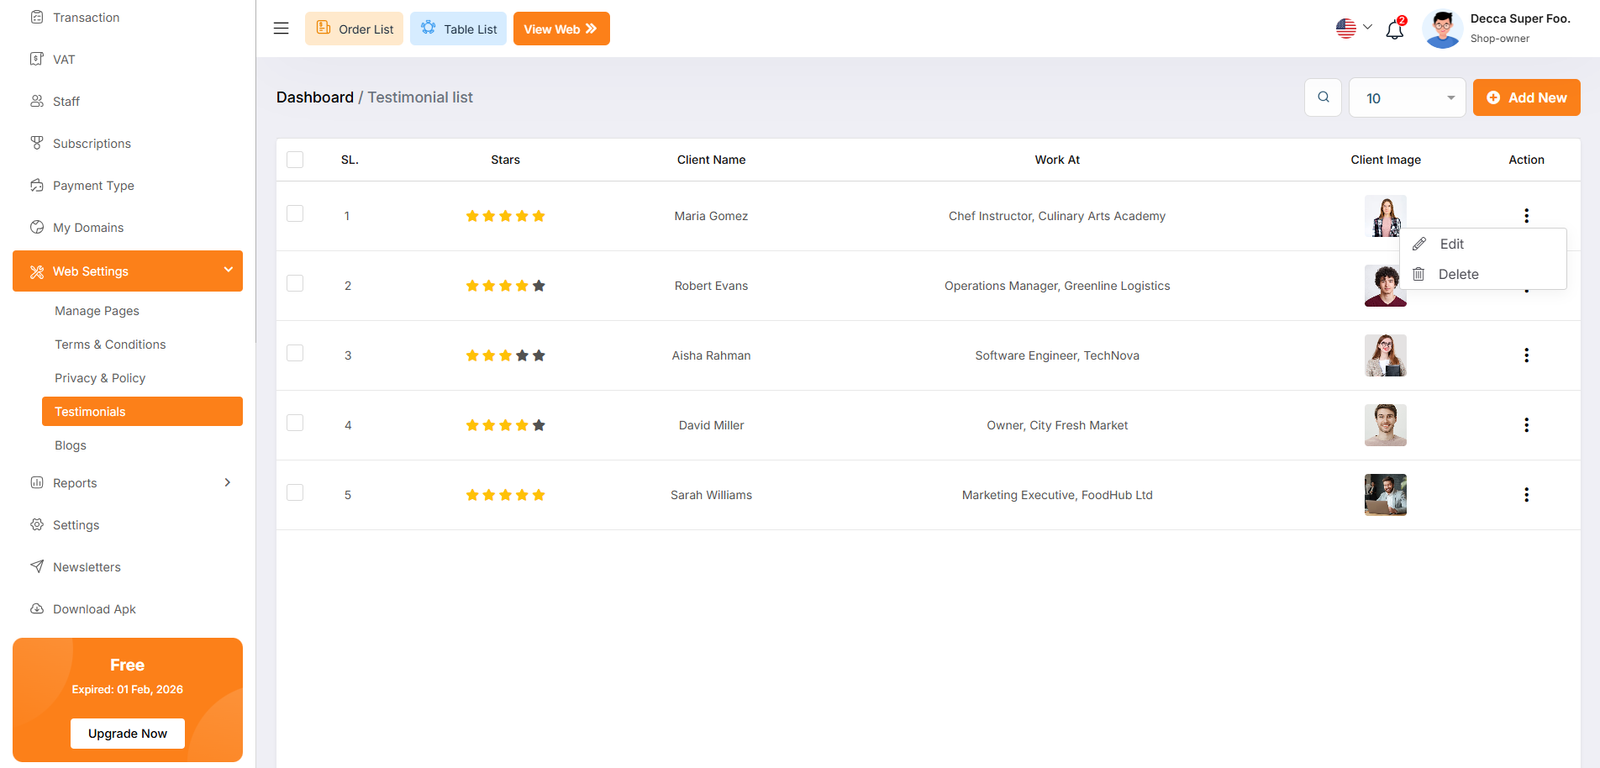
The Testimonial List page, located under the Web Settings menu, allows administrators to manage customer feedback and social proof displayed on the restaurant's website. This section is vital for building trust with potential diners by showcasing positive experiences from previous clients.
Each testimonial entry features a three-dot menu icon to access management options.Edit Opens a modal or page to update the client's information, rating, or testimonial text.
Delete Permanently removes the testimonial from the database and the website.
Testimonial Create
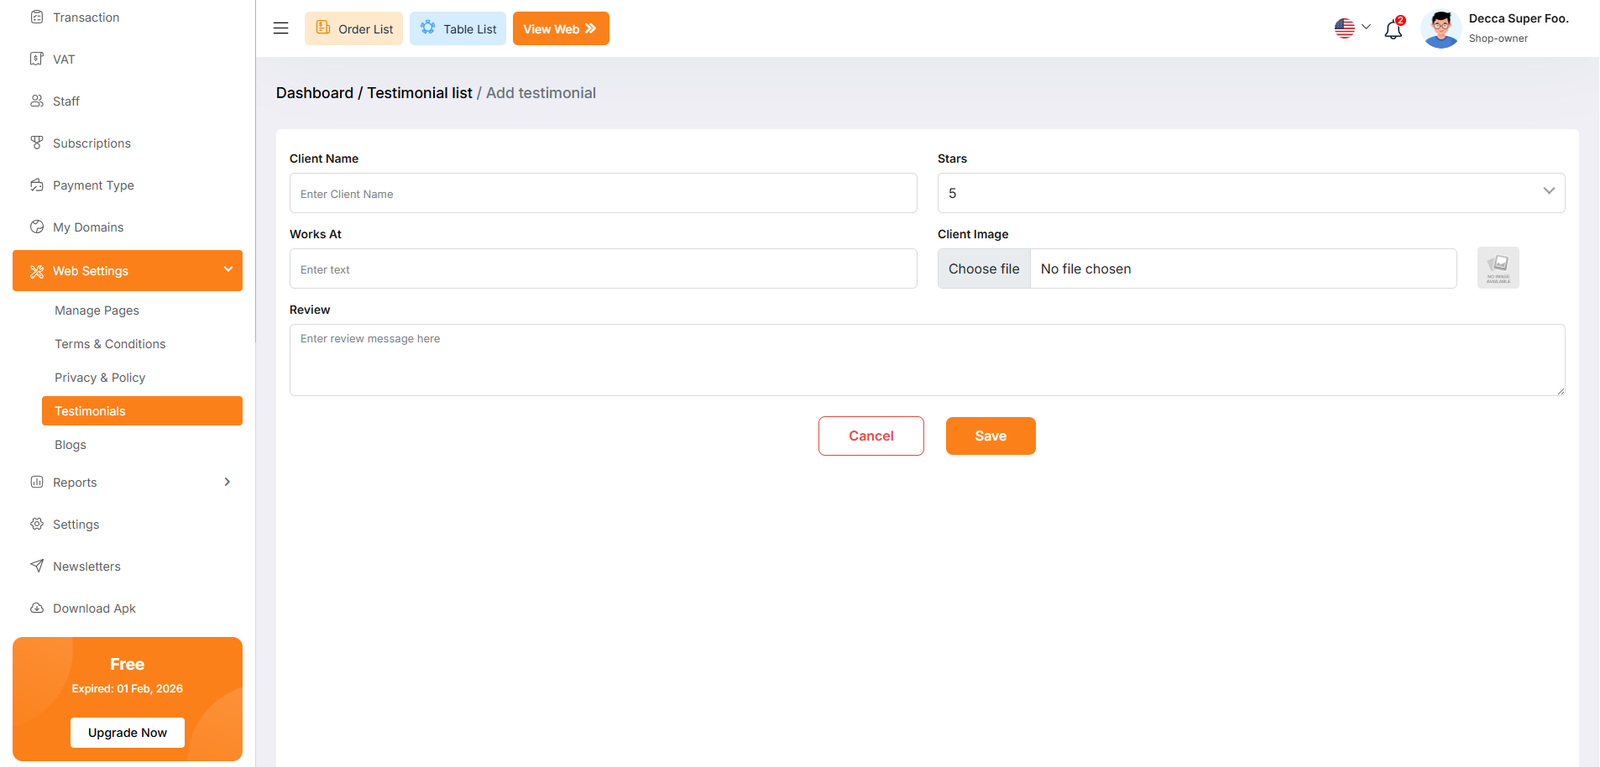
The Add Testimonial page, located under Web Settings > Testimonials, provides a dedicated interface for administrators to manually enter customer feedback. This information is used to populate the social proof section of the restaurant's online storefront.
Blog List
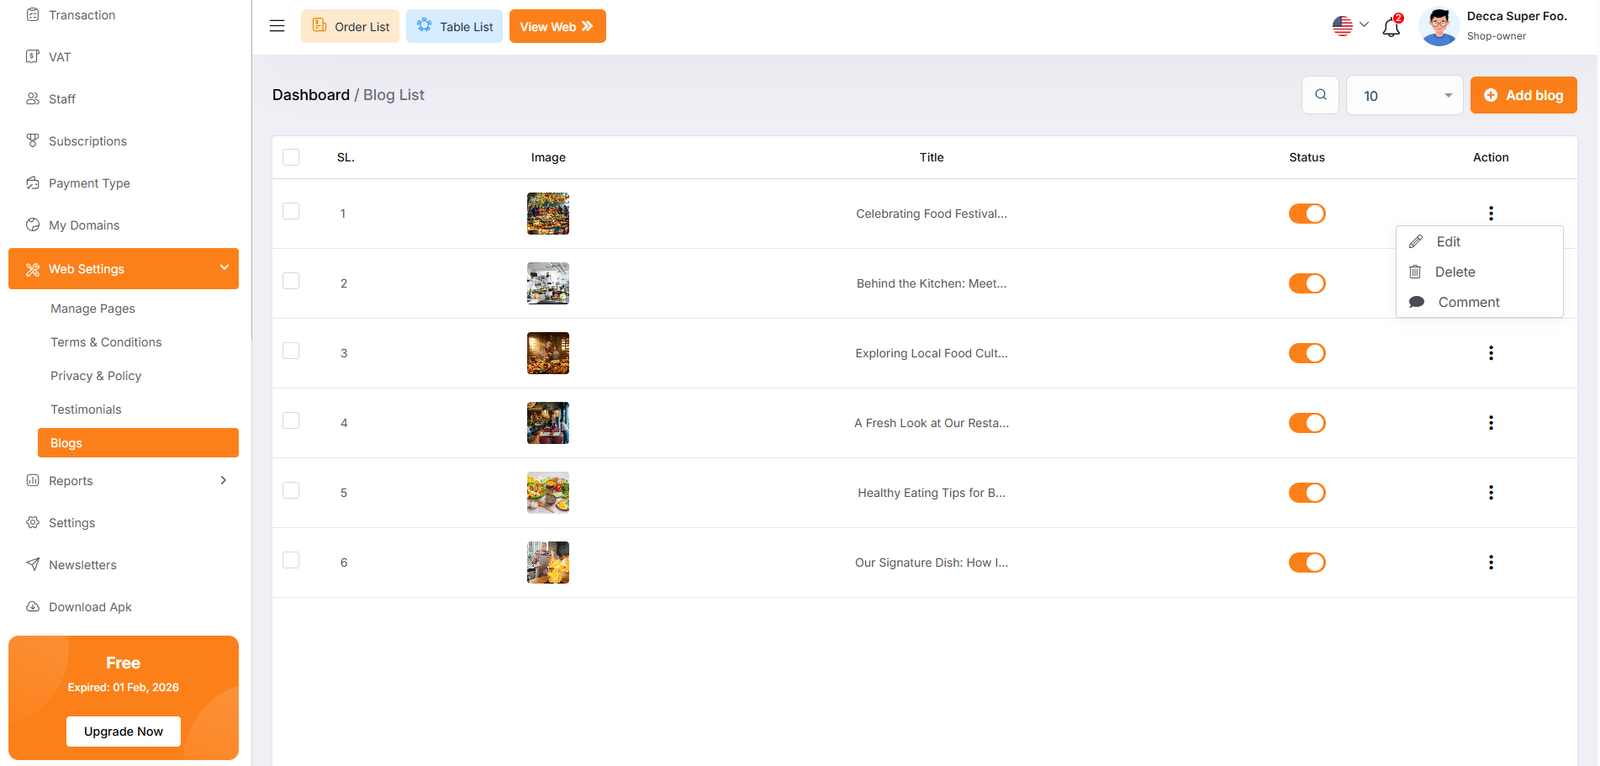
The Blog List page, located under the Web Settings menu, serves as the content management hub for the restaurant's website articles. This section allows administrators to share news, culinary tips, and behind-the-scenes updates to engage customers and improve the site's search engine visibility.
Blog Create
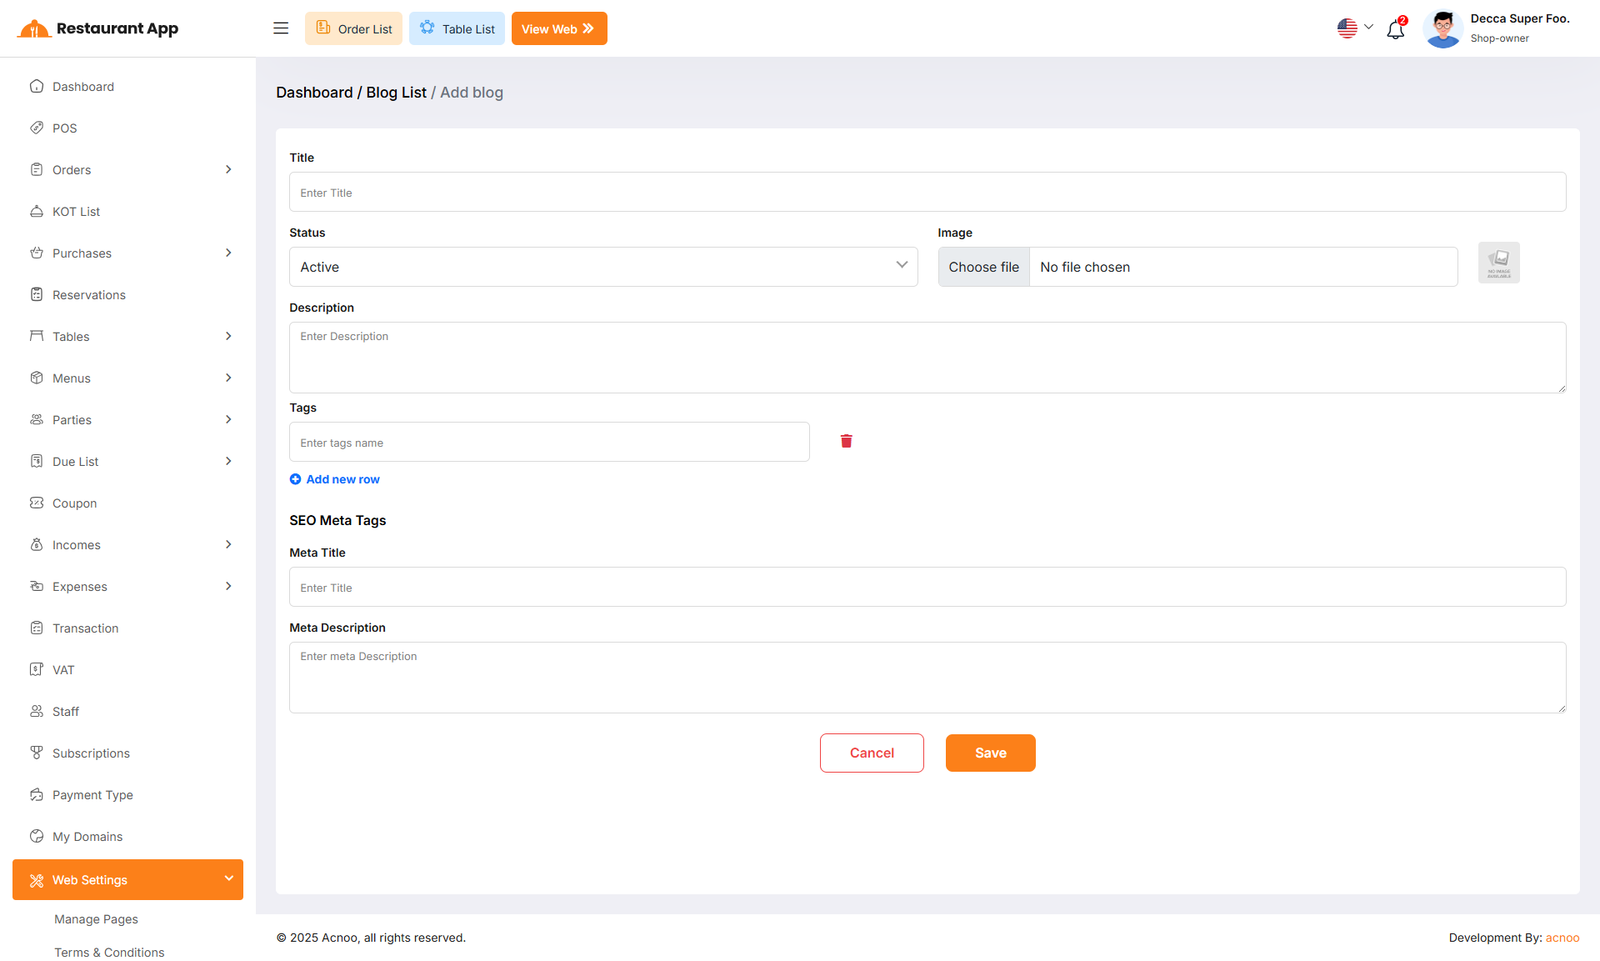
The Add Blog page, located under Web Settings > Blogs, provides a comprehensive interface for administrators to create and optimize articles for the restaurant's website. This tool is designed to manage both the visual content and the underlying metadata for search engine optimization (SEO).
Reports
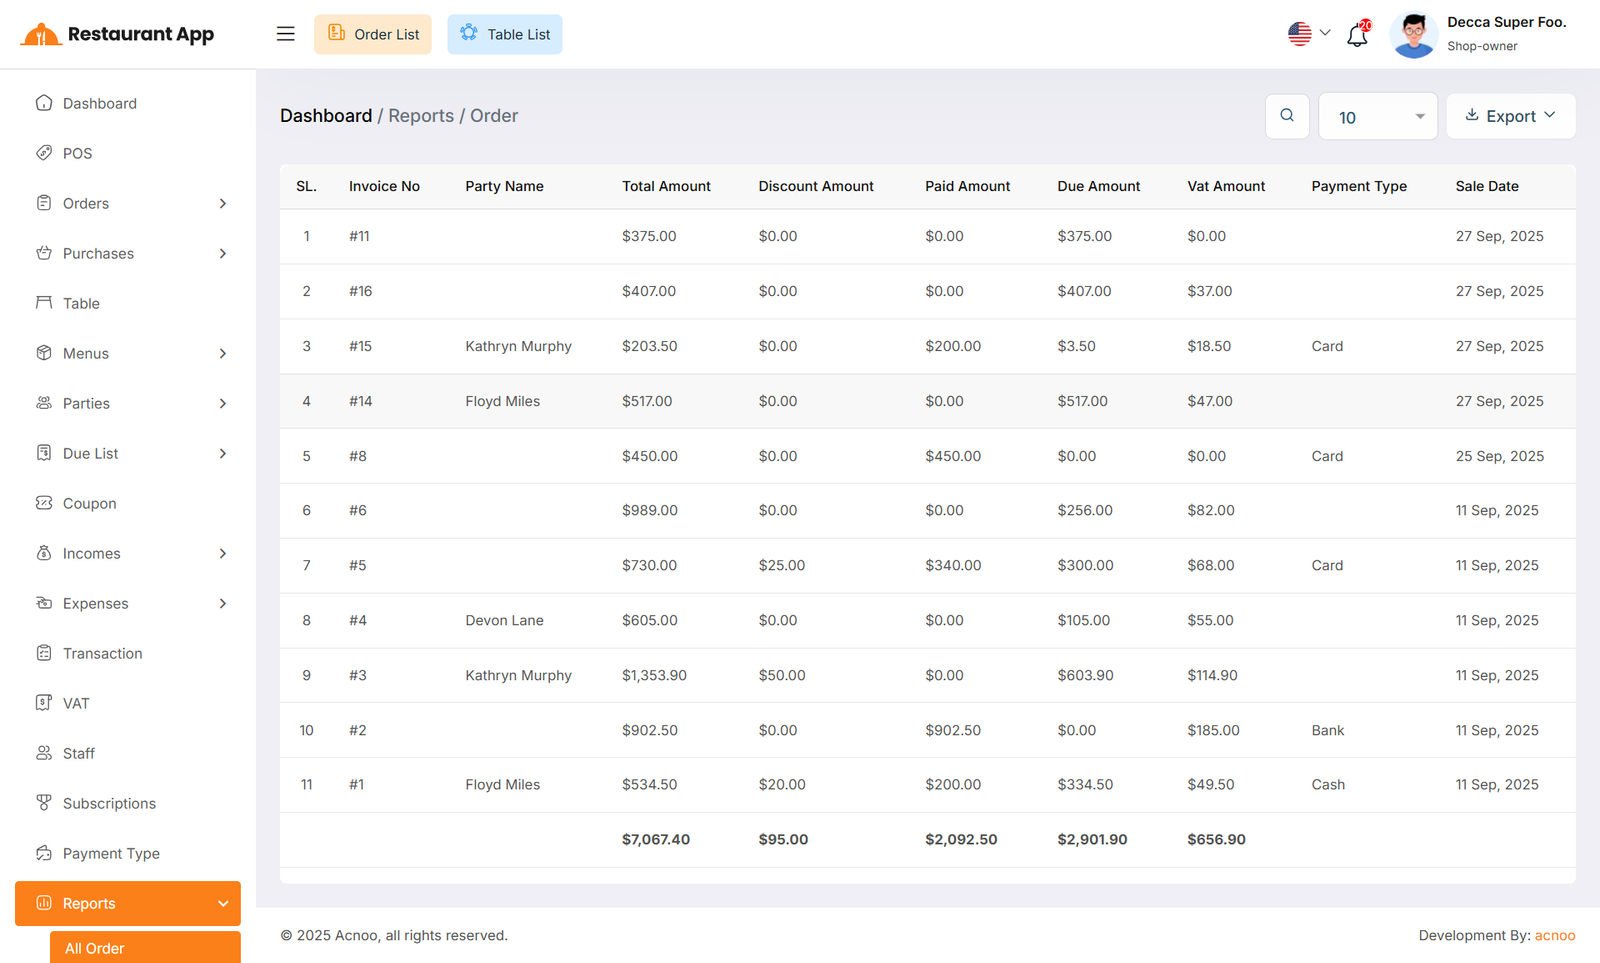
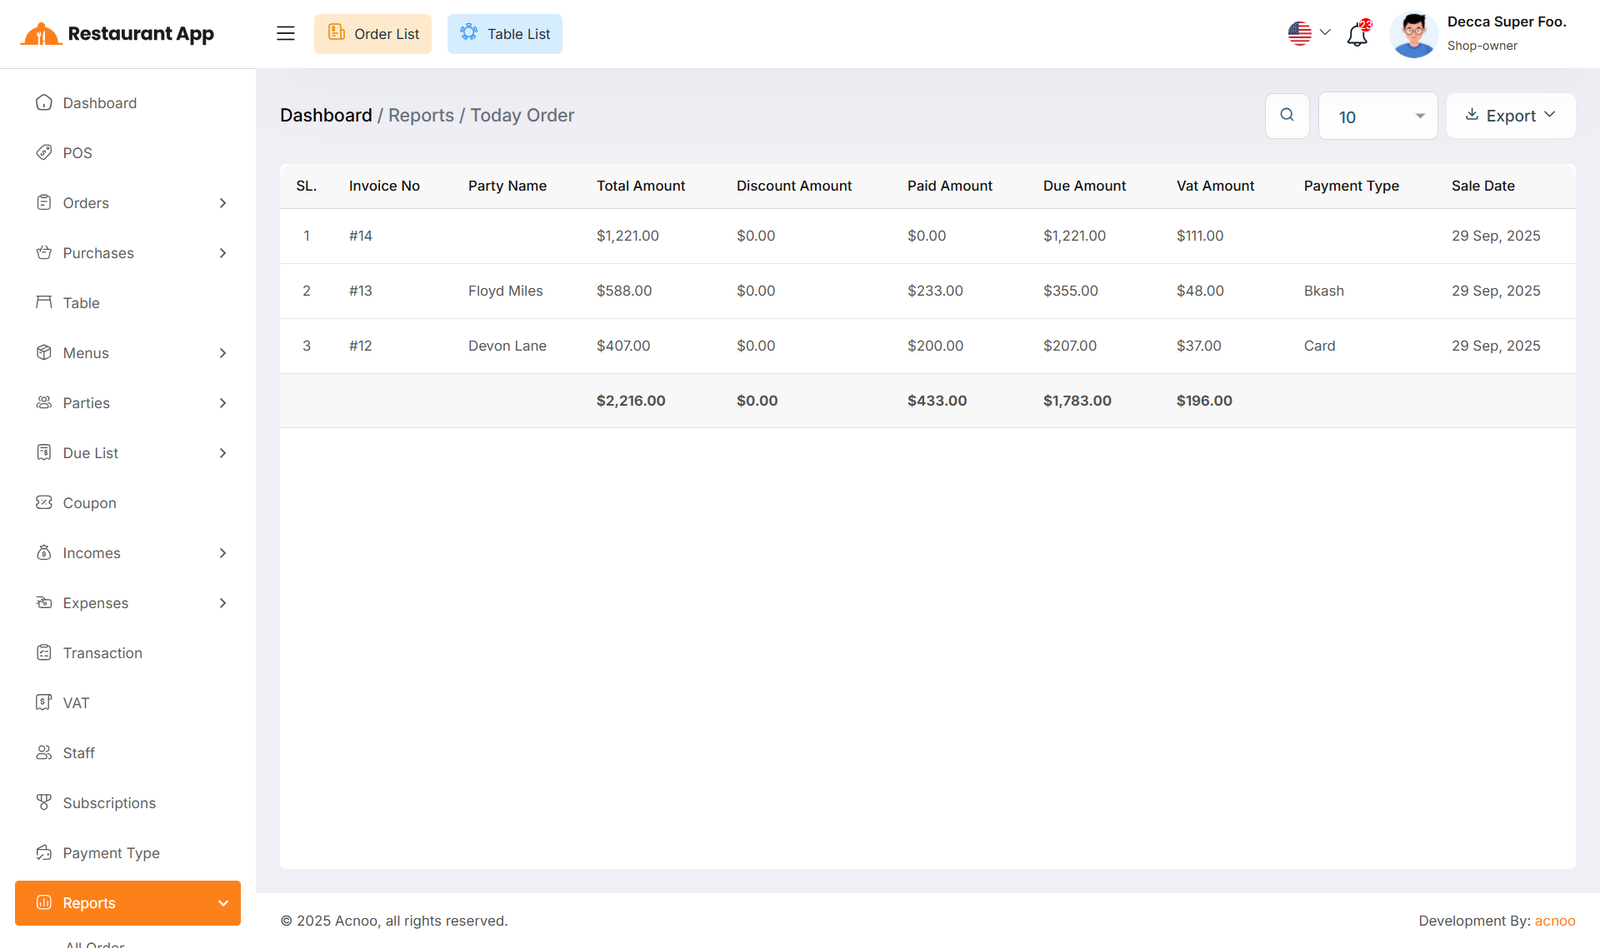
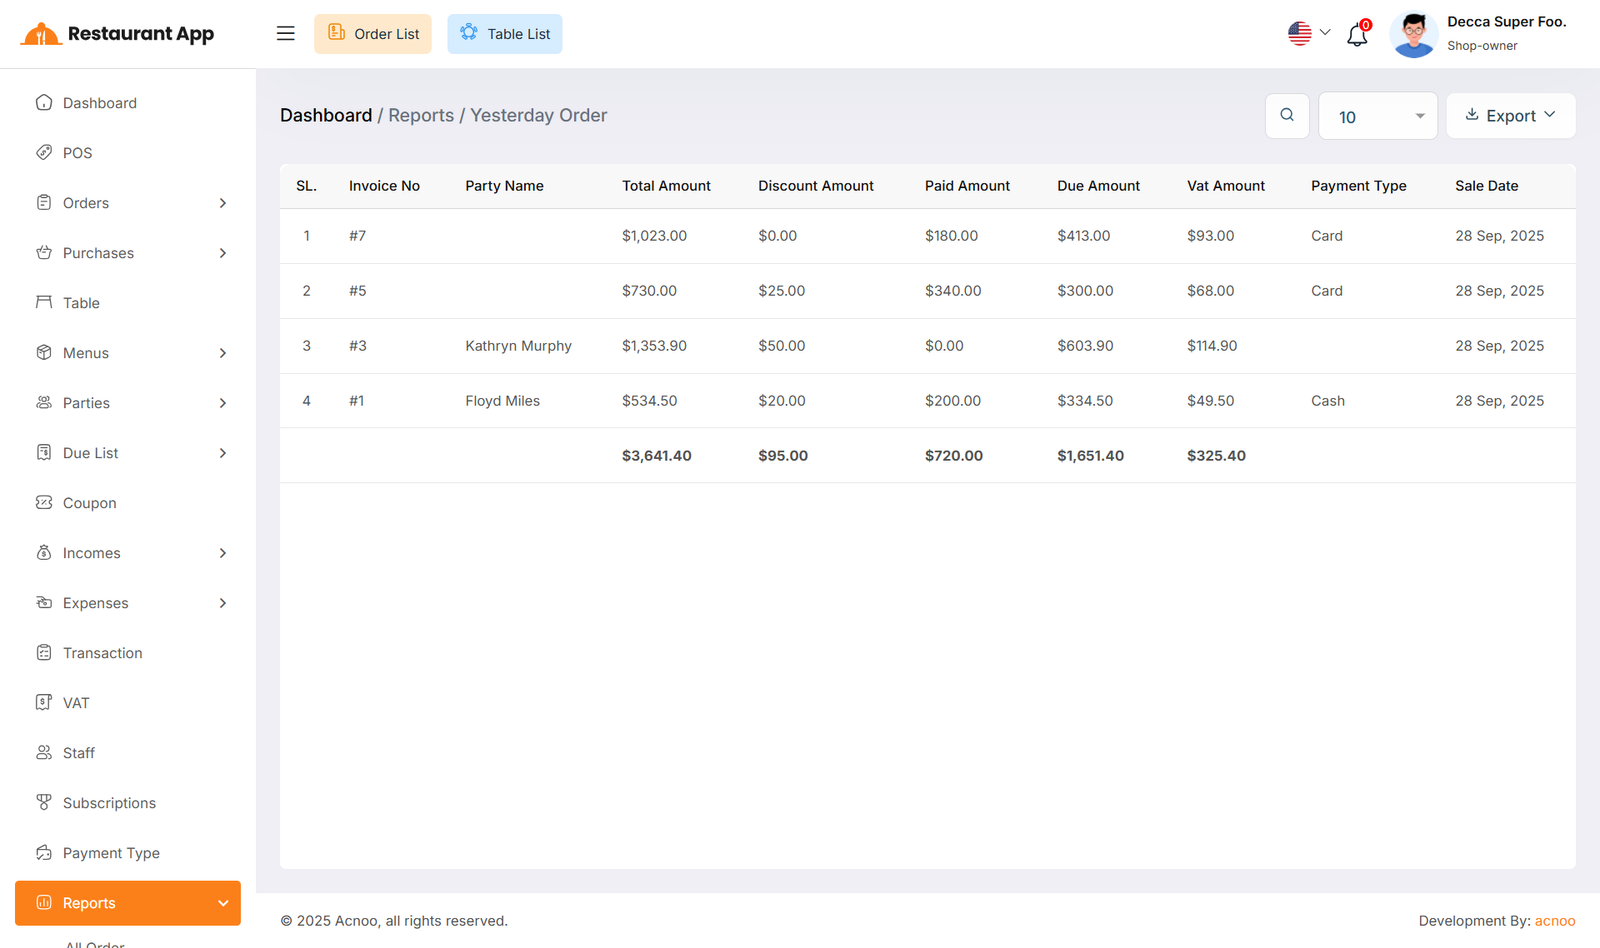
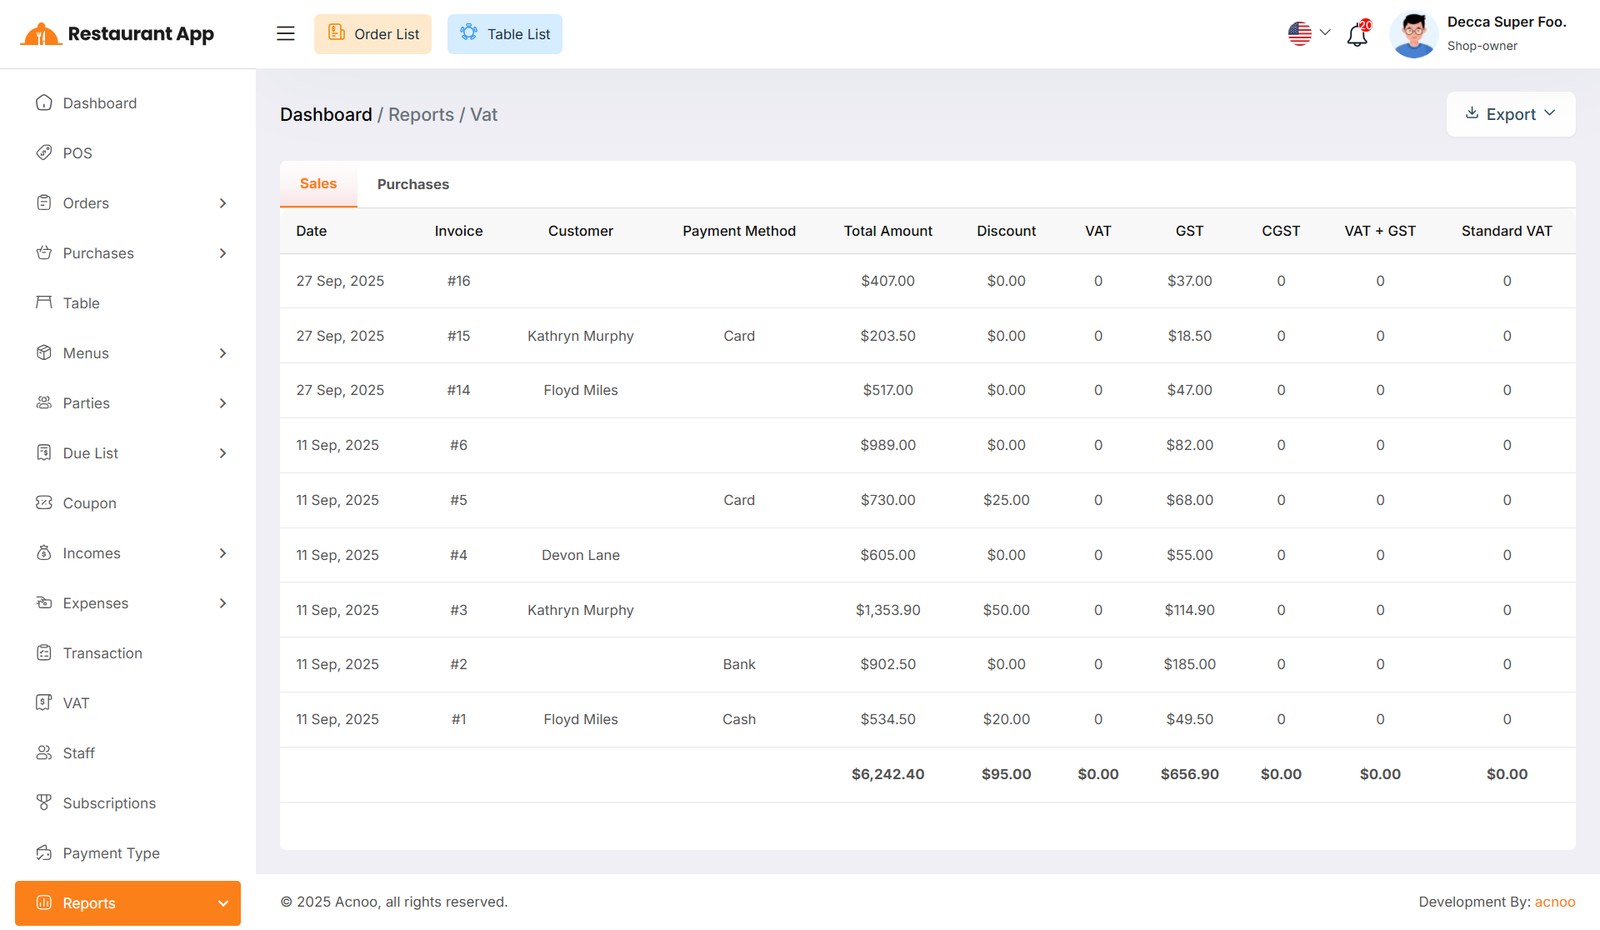
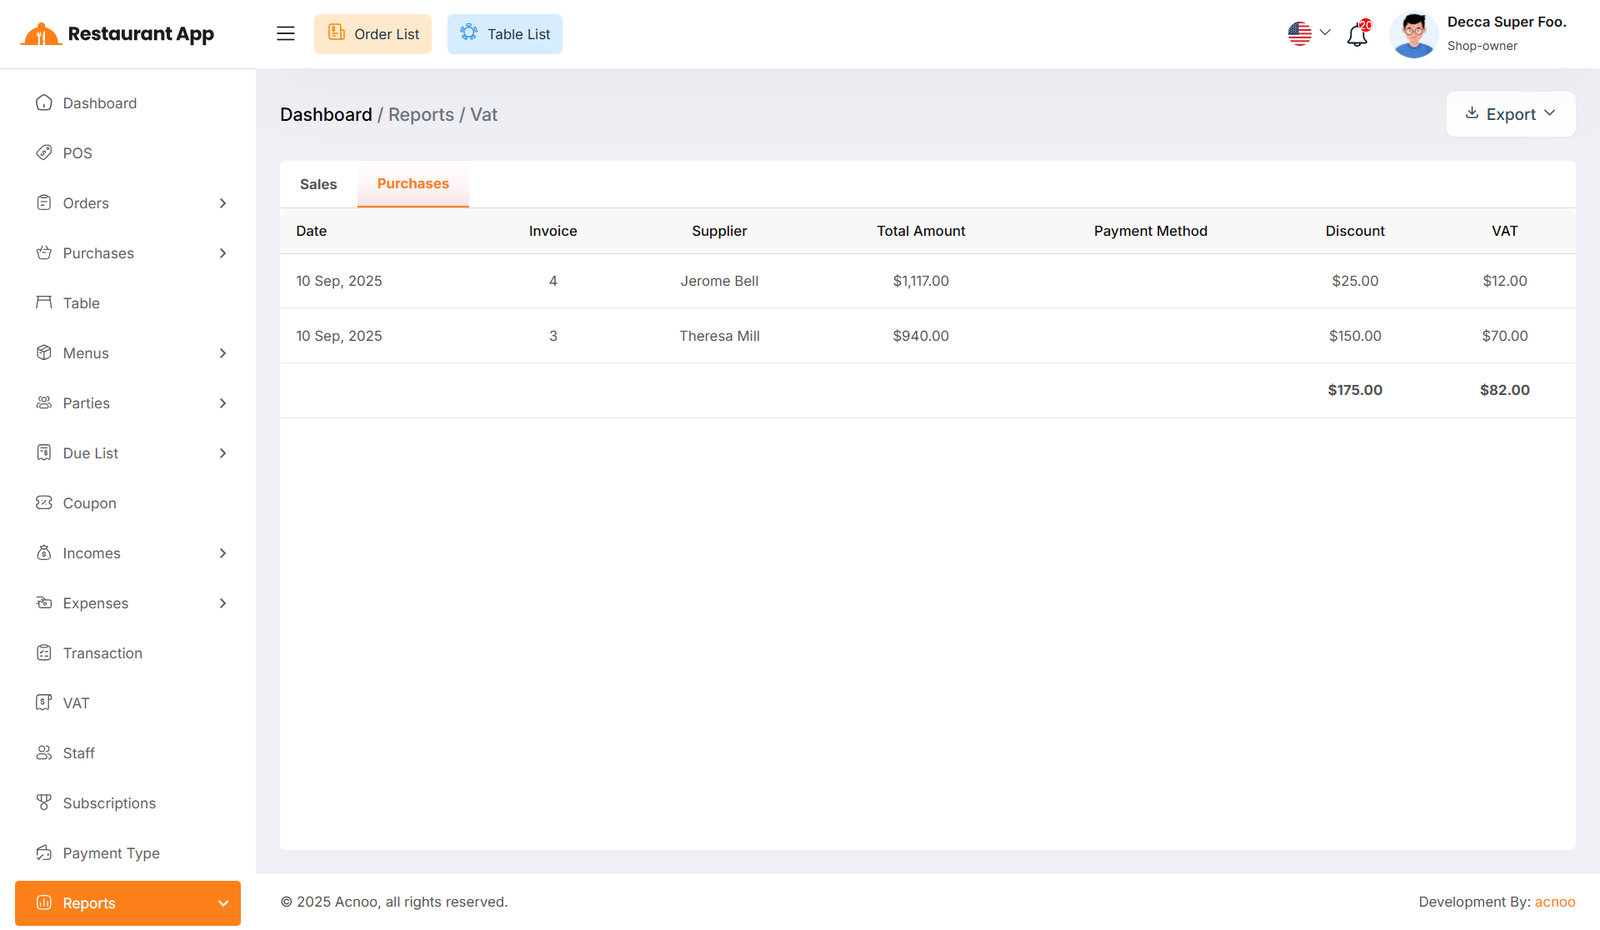
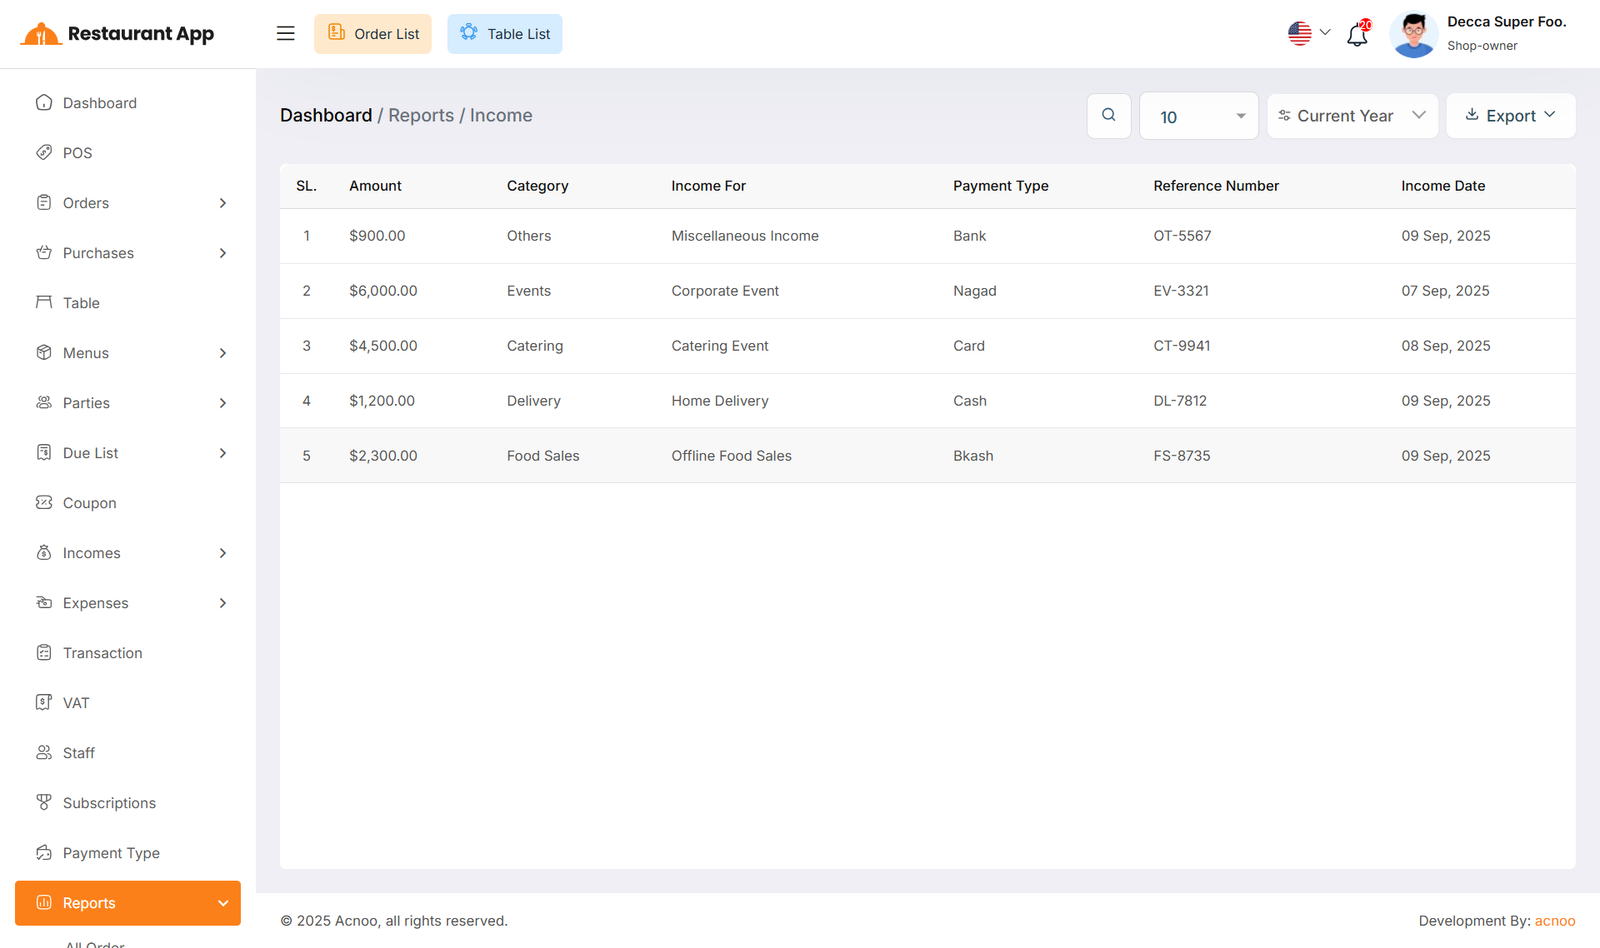
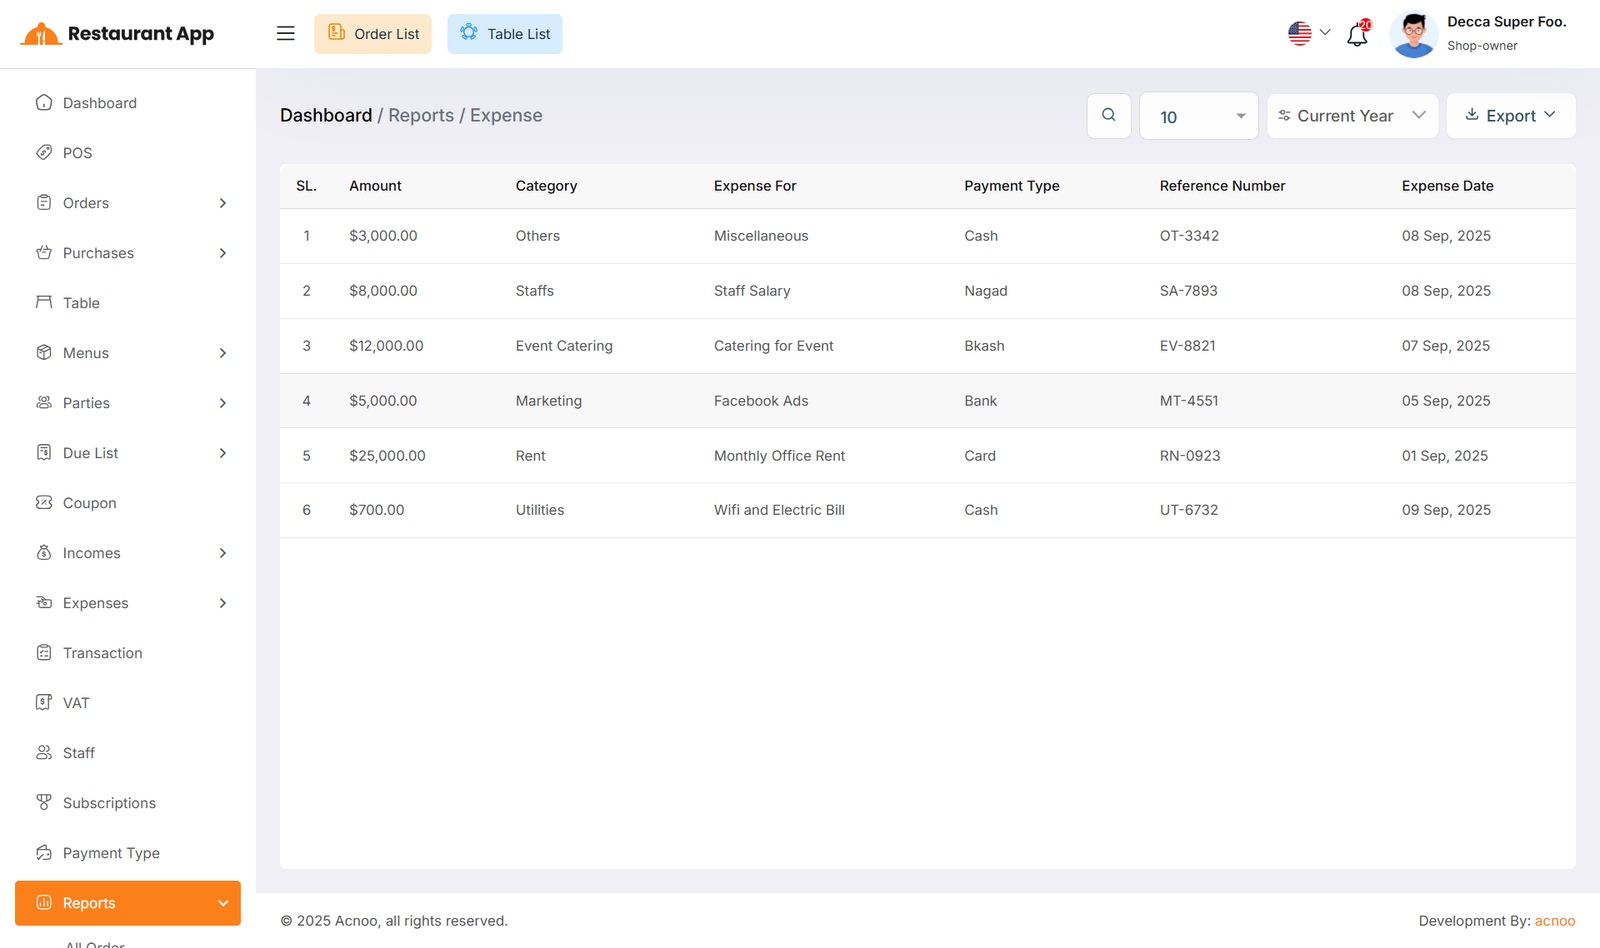
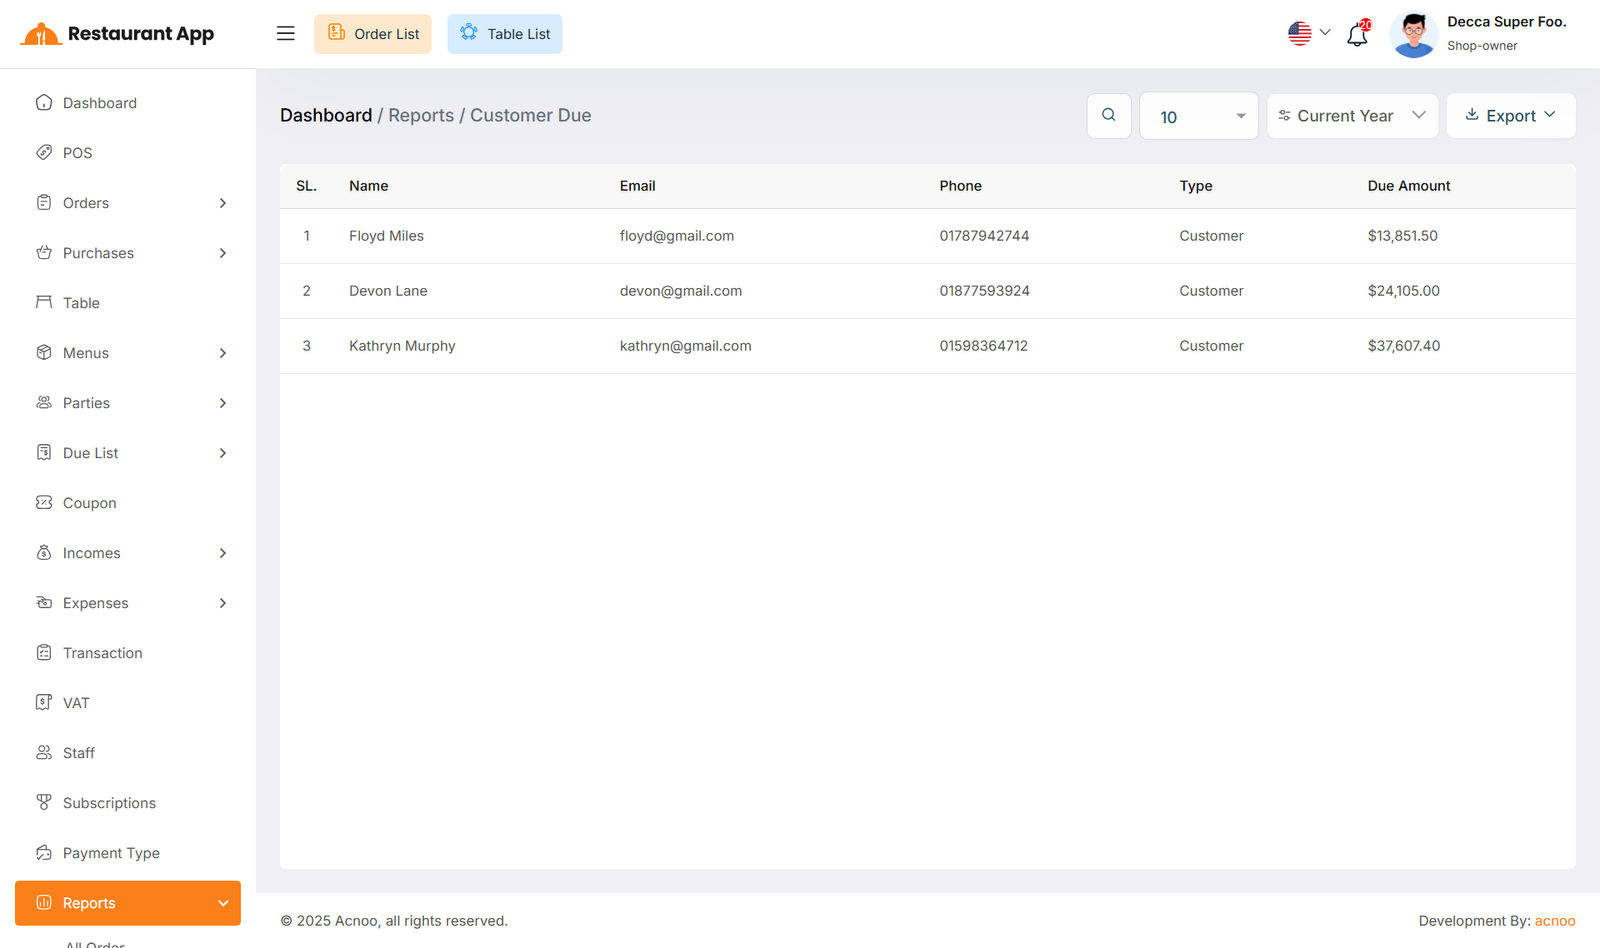
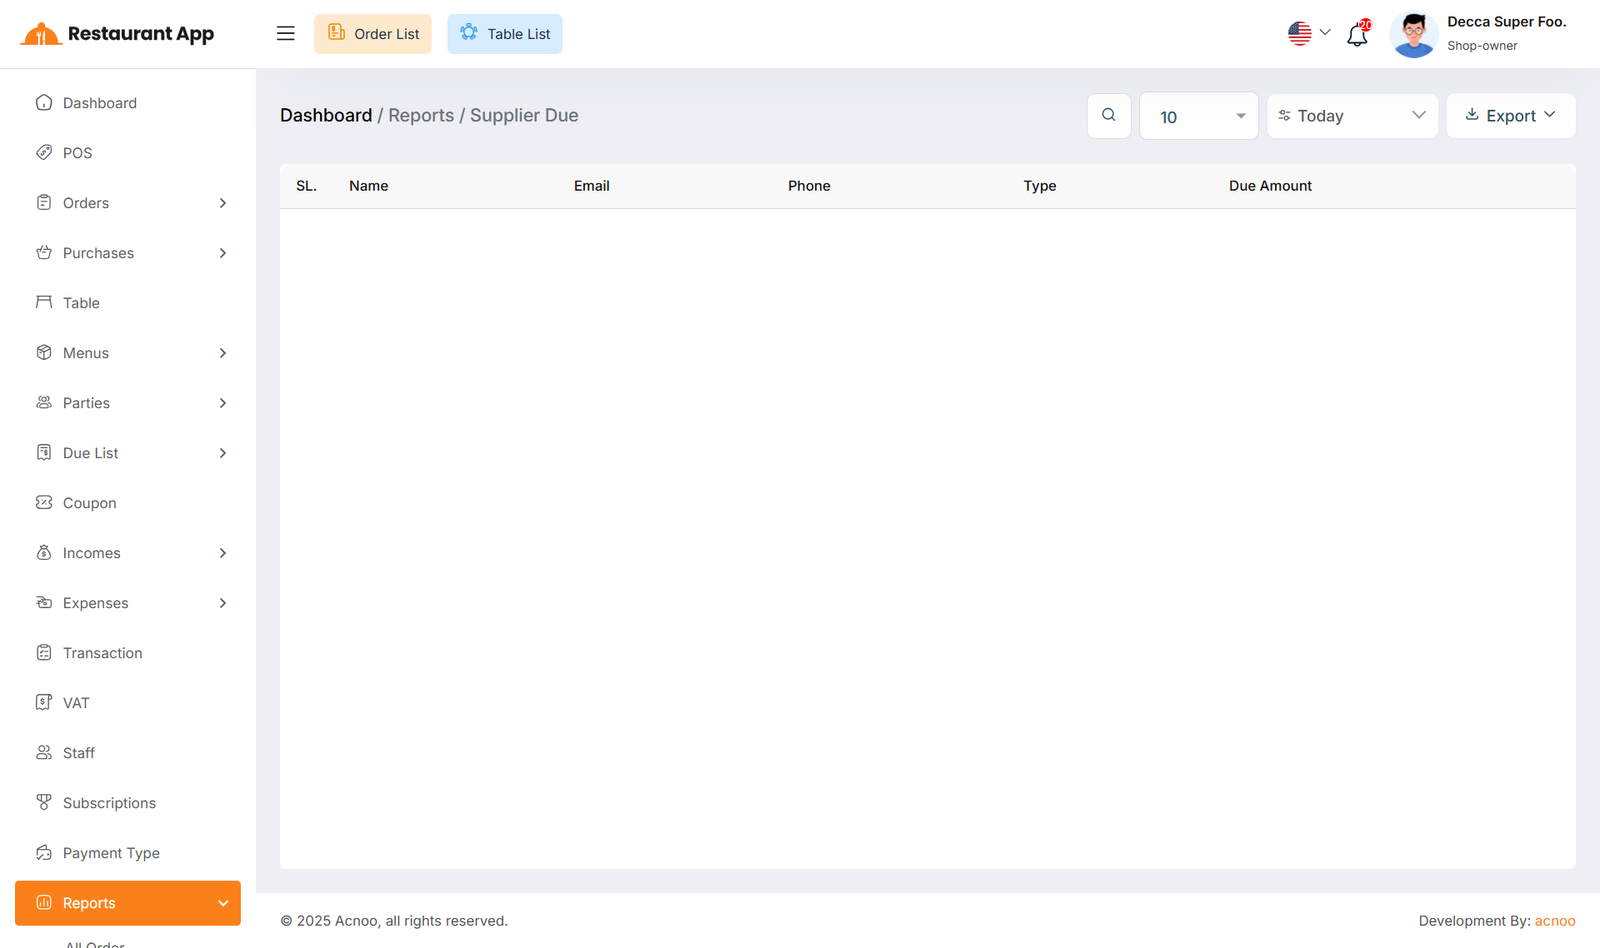
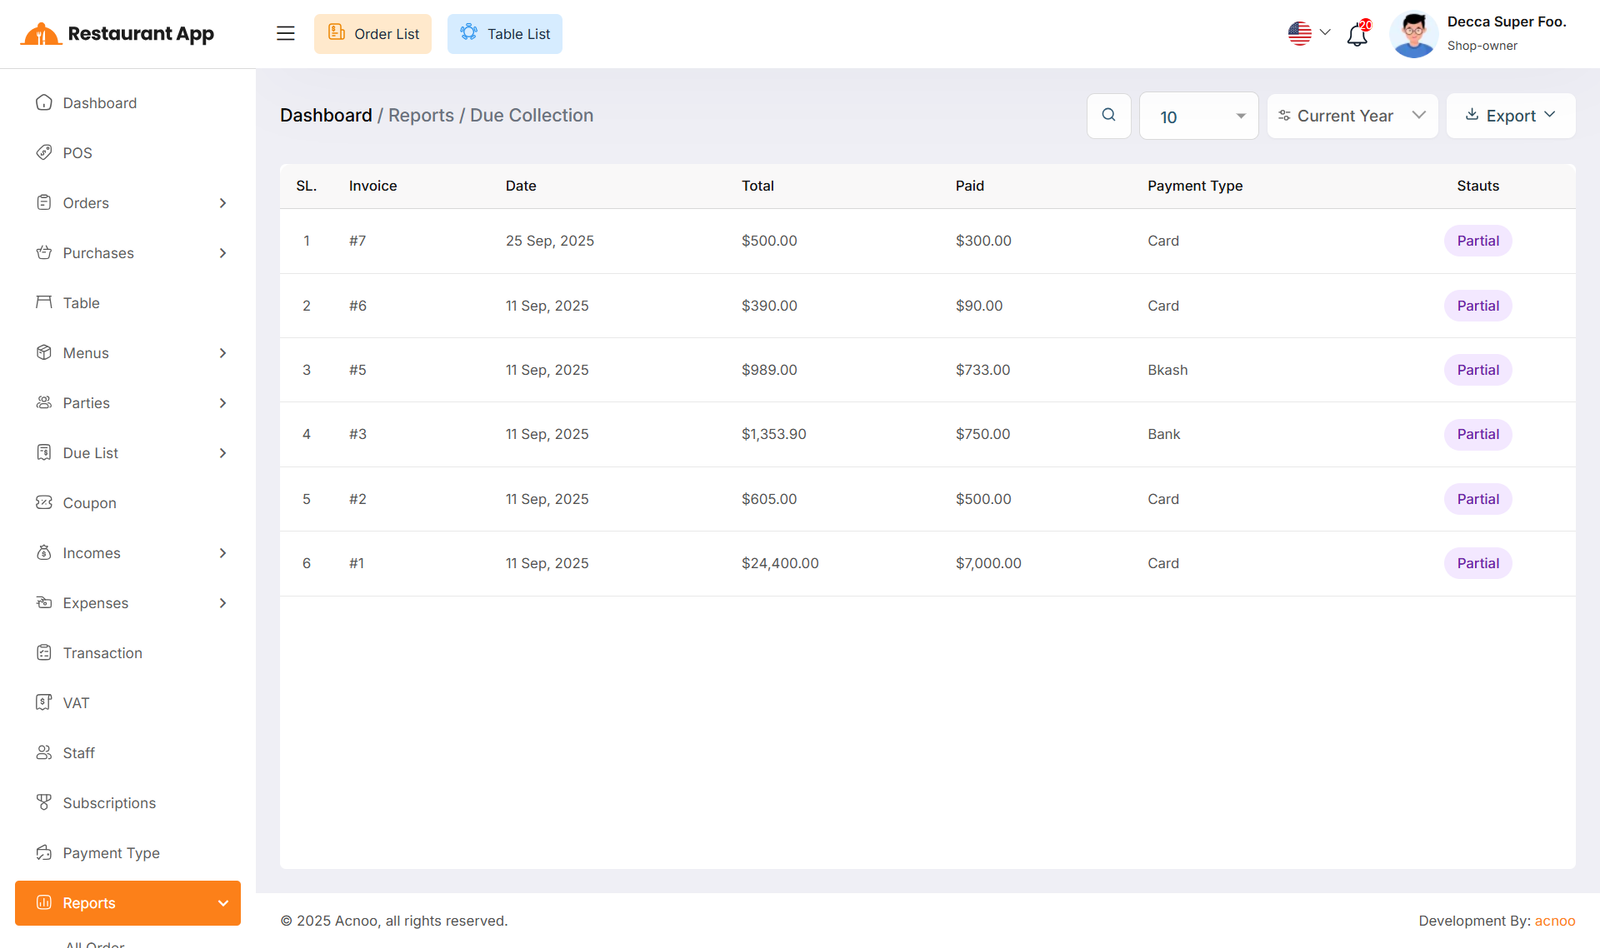
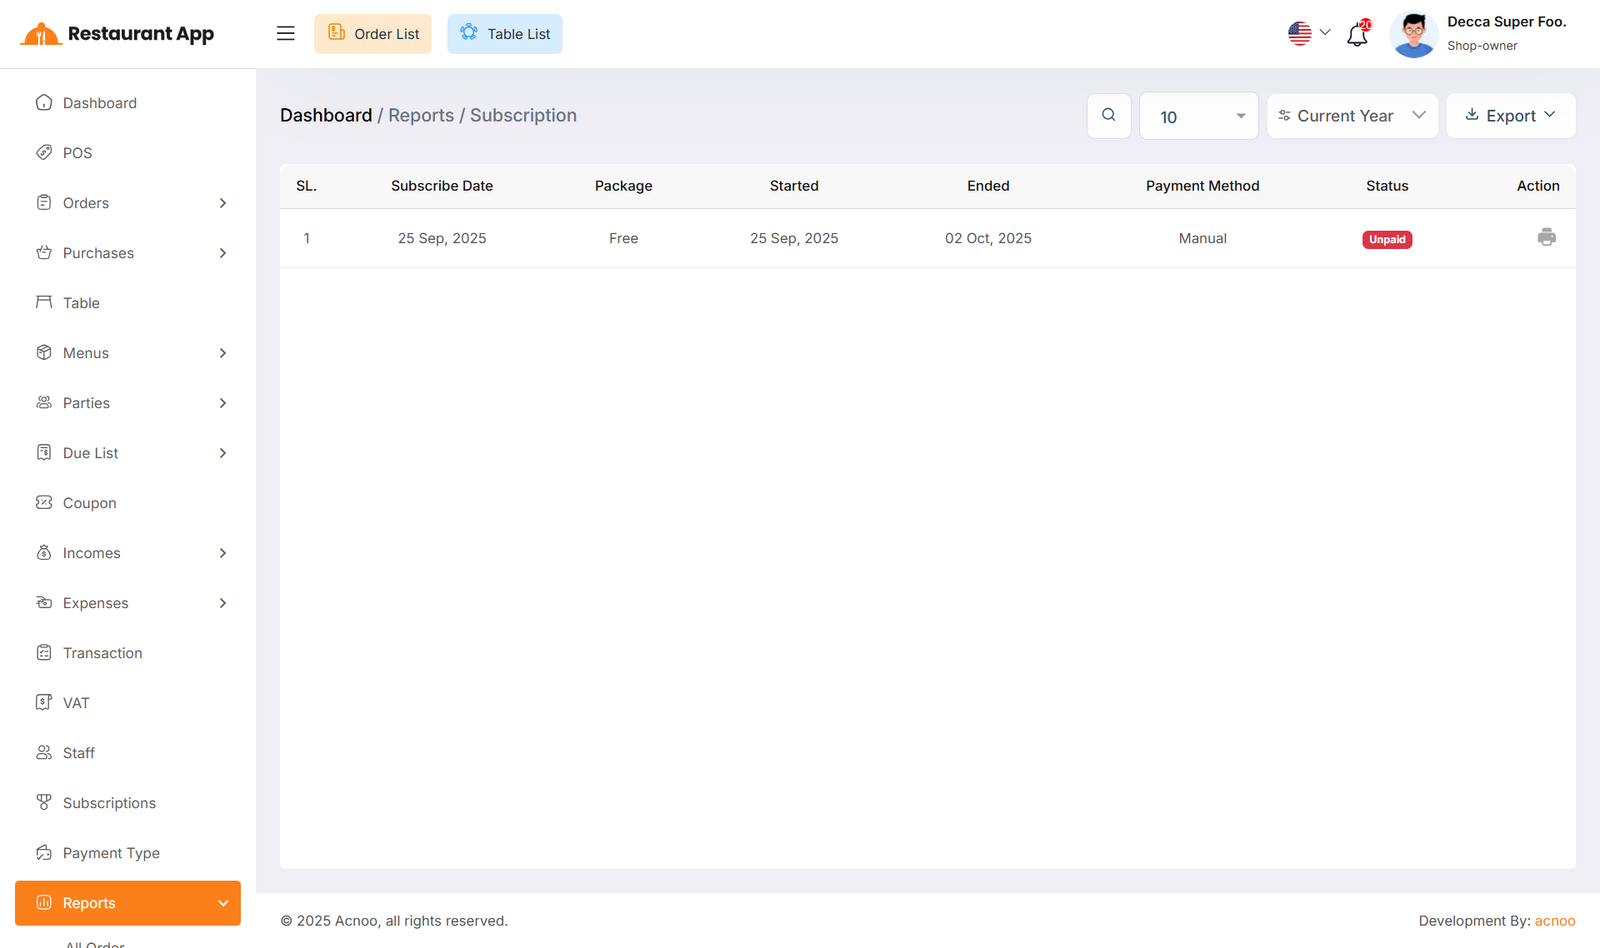
Here, various reports are available, including All Order, Today Order, Yesterday Order, Current Month Order, Quotation, Purchase, Vat, Income, Expense, Customer Due, Supplier Due, Due Collection and Subscription. Each report includes filtering options for data. Additionally, you can export data as CSV, Excel and PDF.
All Order Report
Today Order Report
Yesterday Order Report
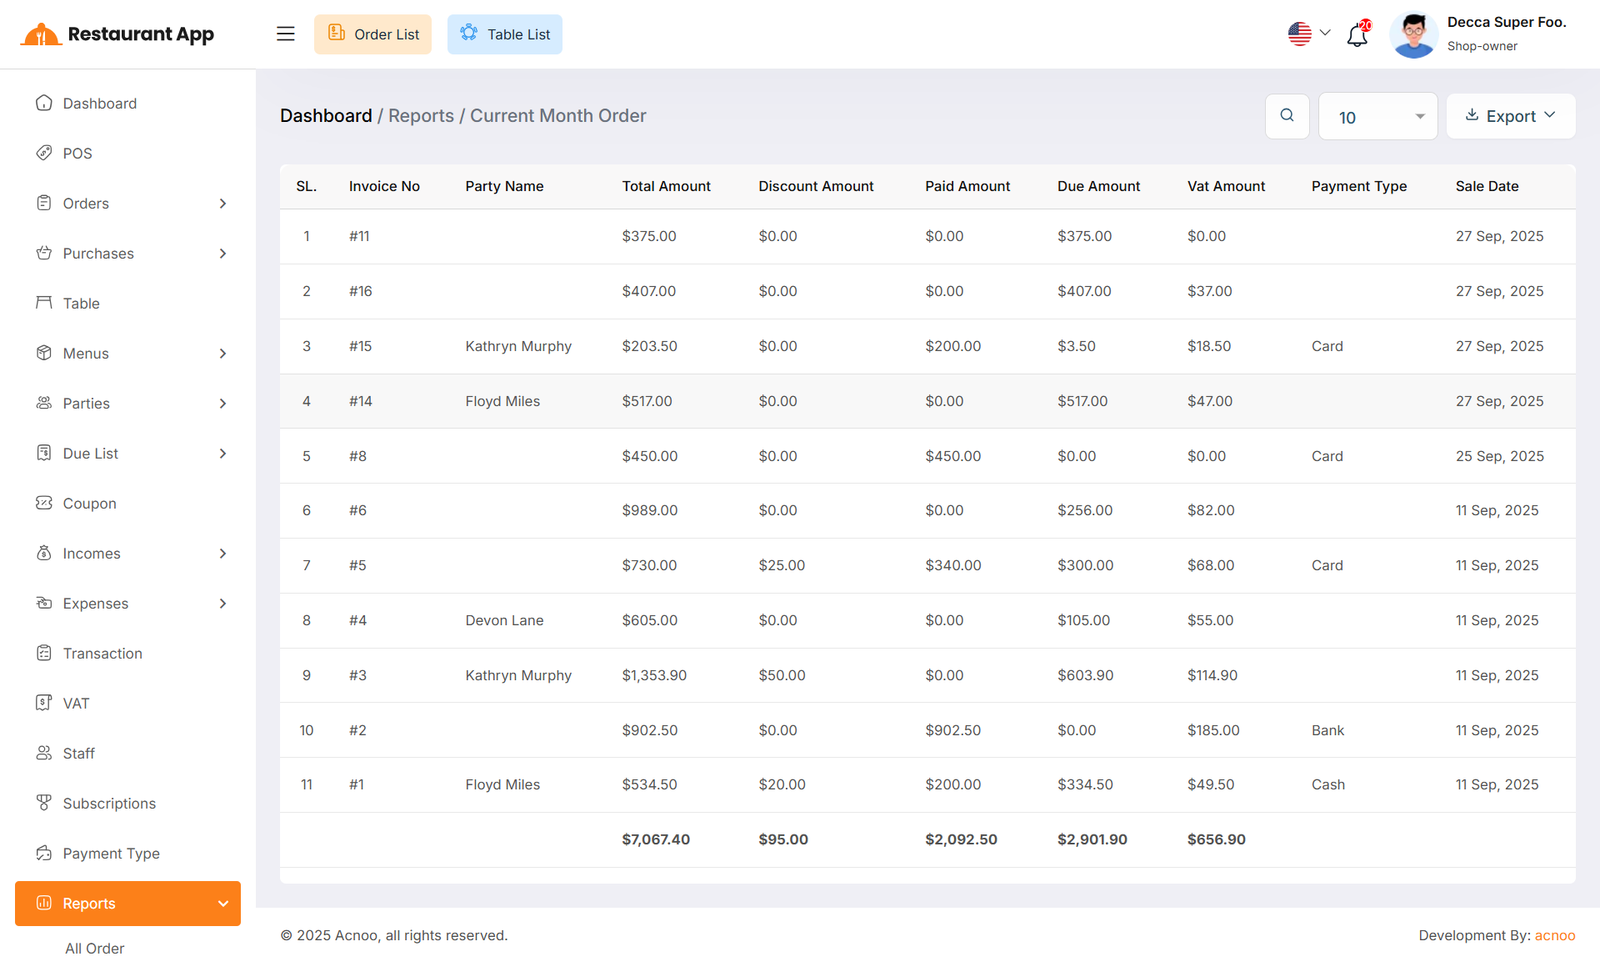
Current Month Order Report
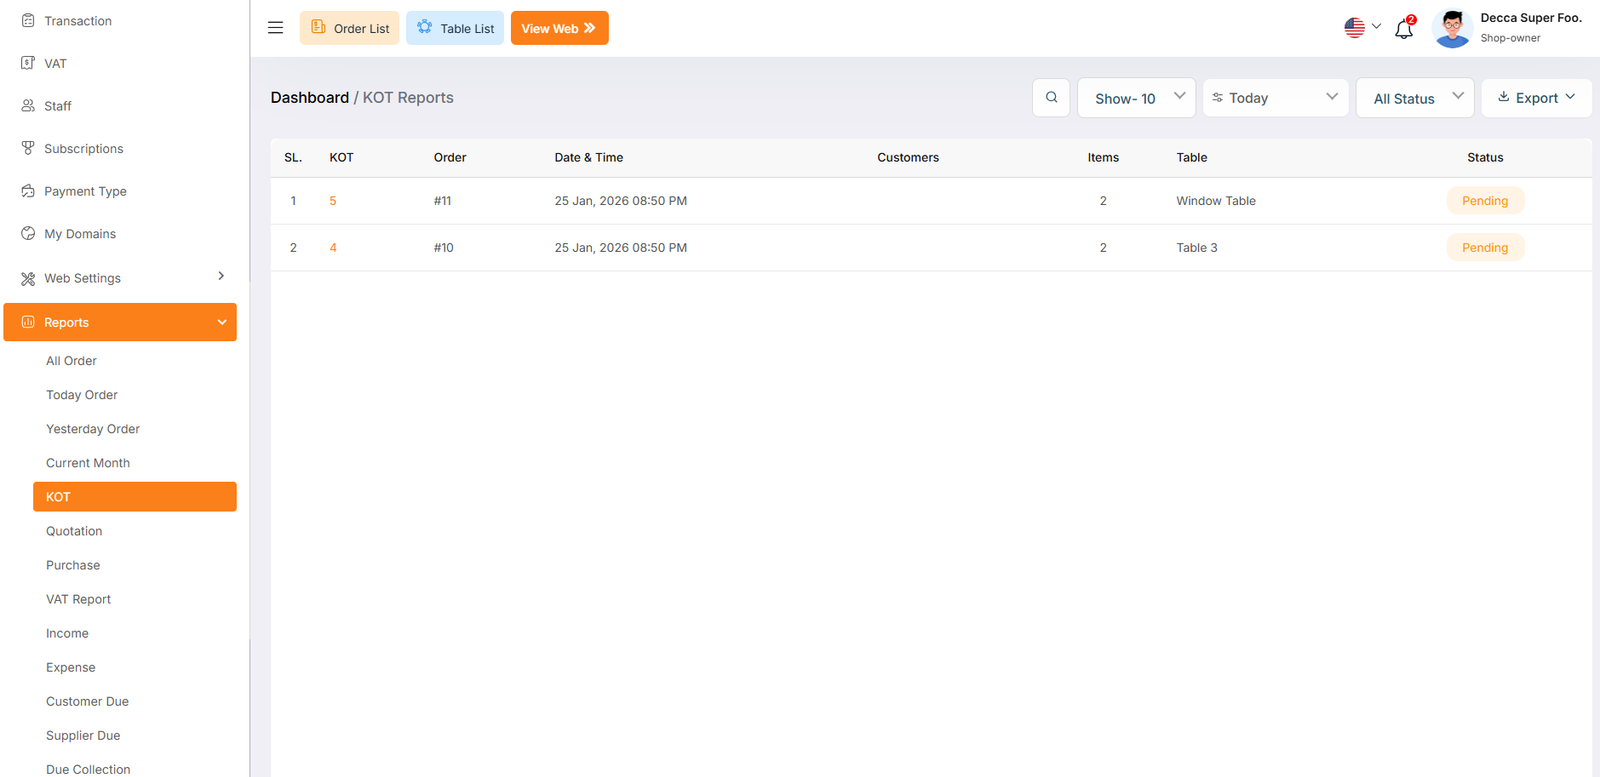
Kot Reports
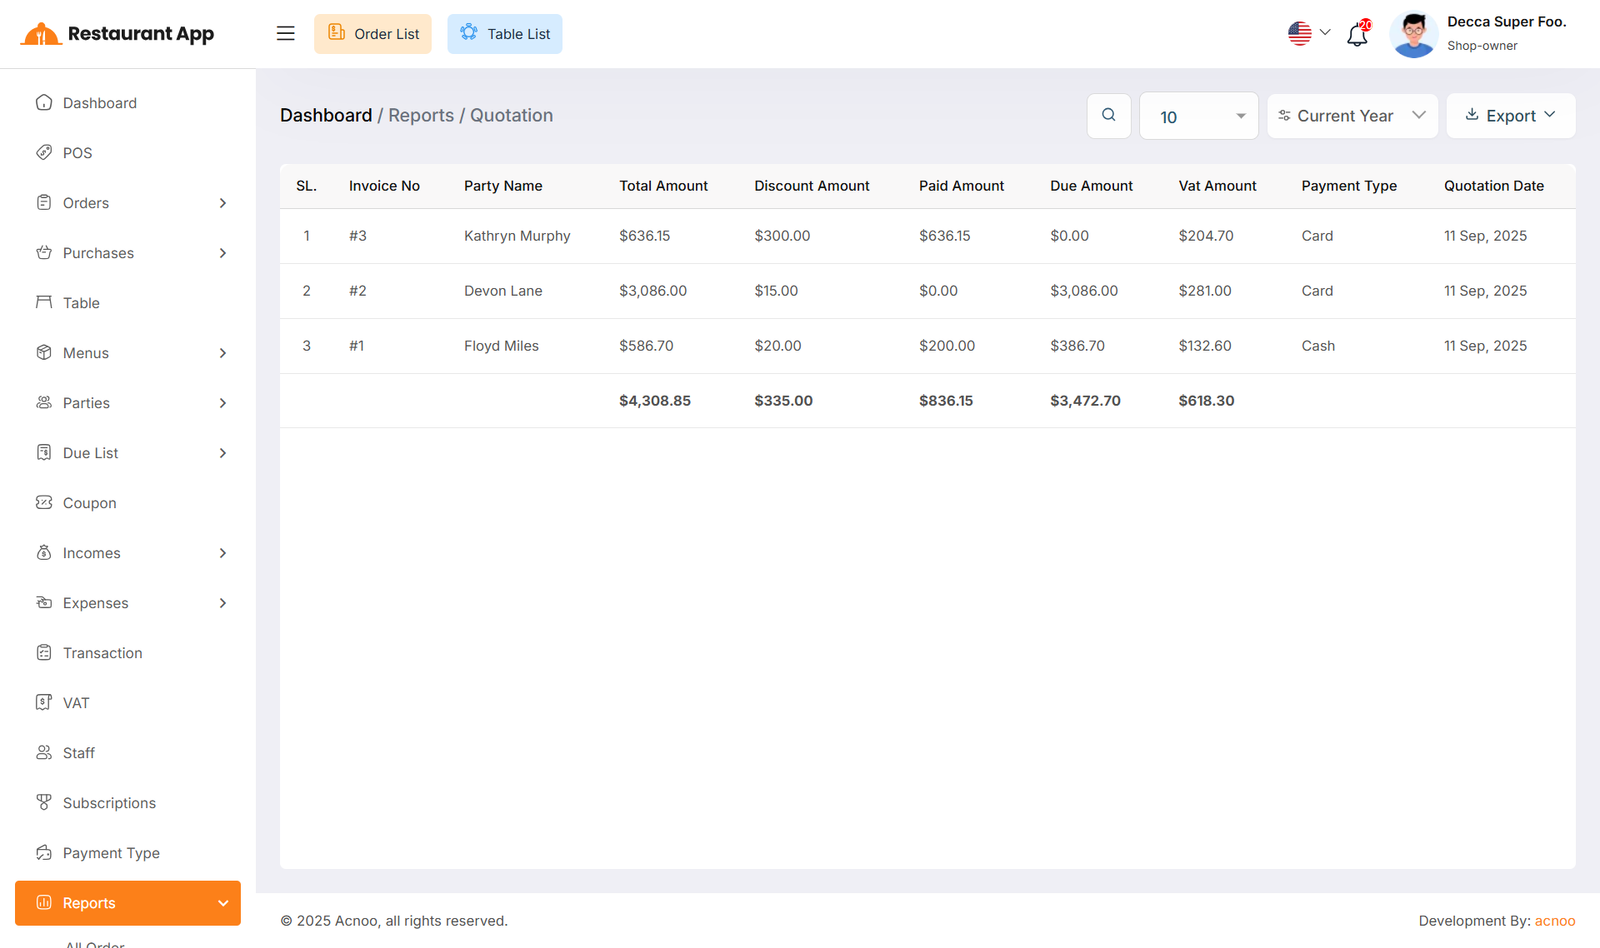
Quotation Report
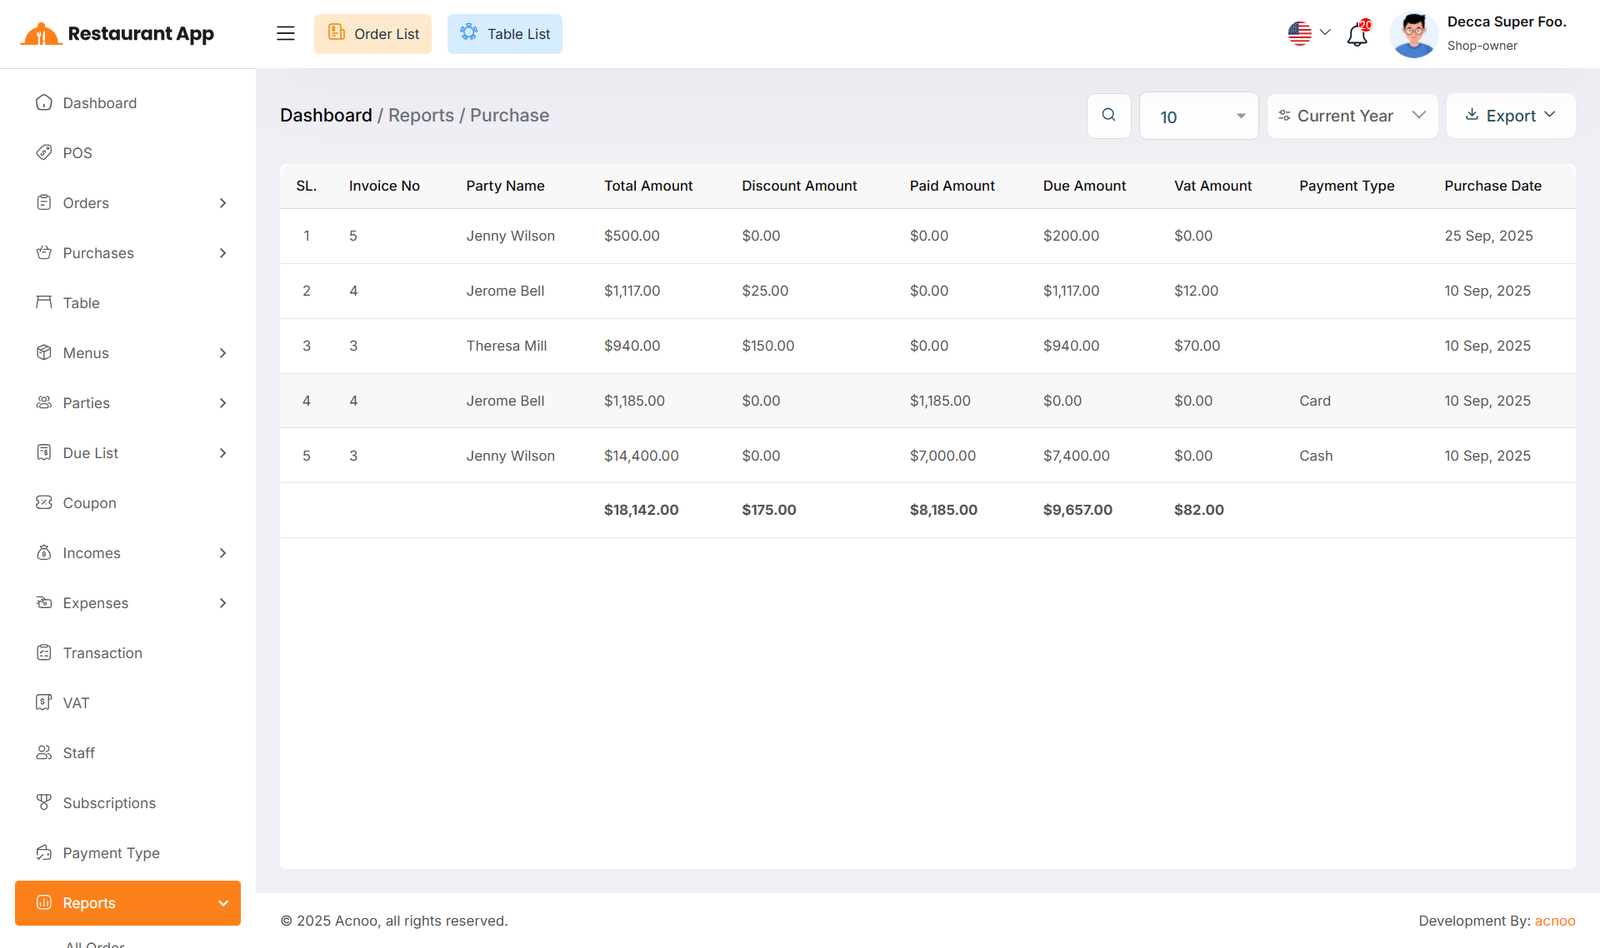
Purchase Report
Vat Report
Income Report
Expense Report
Customer Due Report
Supplier Due Report
Due Collection Report
Subscription Report
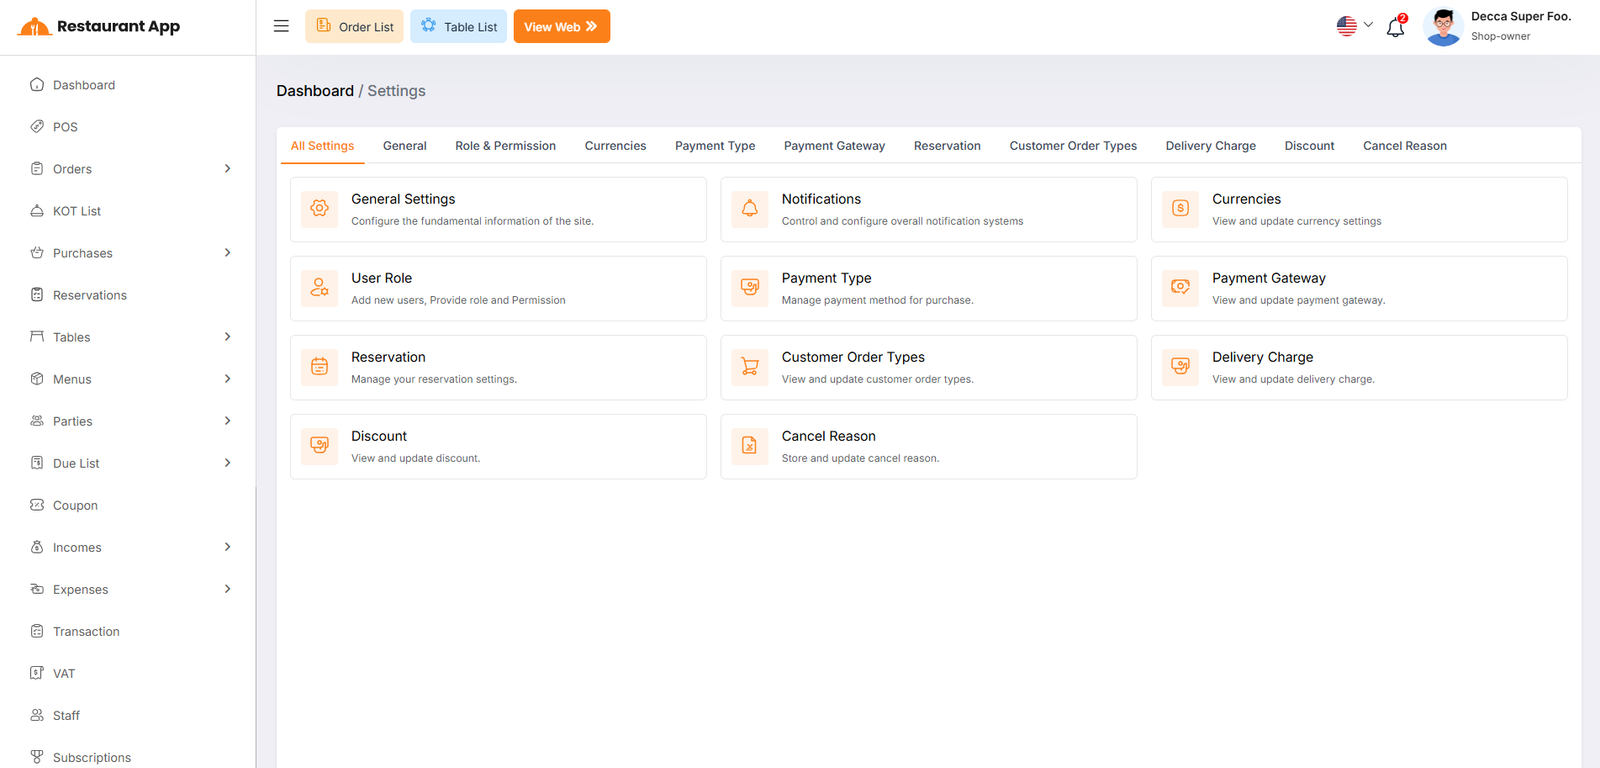
Settings
In the Setting section, you have the capability to configure the fundamental aspects or core elements of this project.
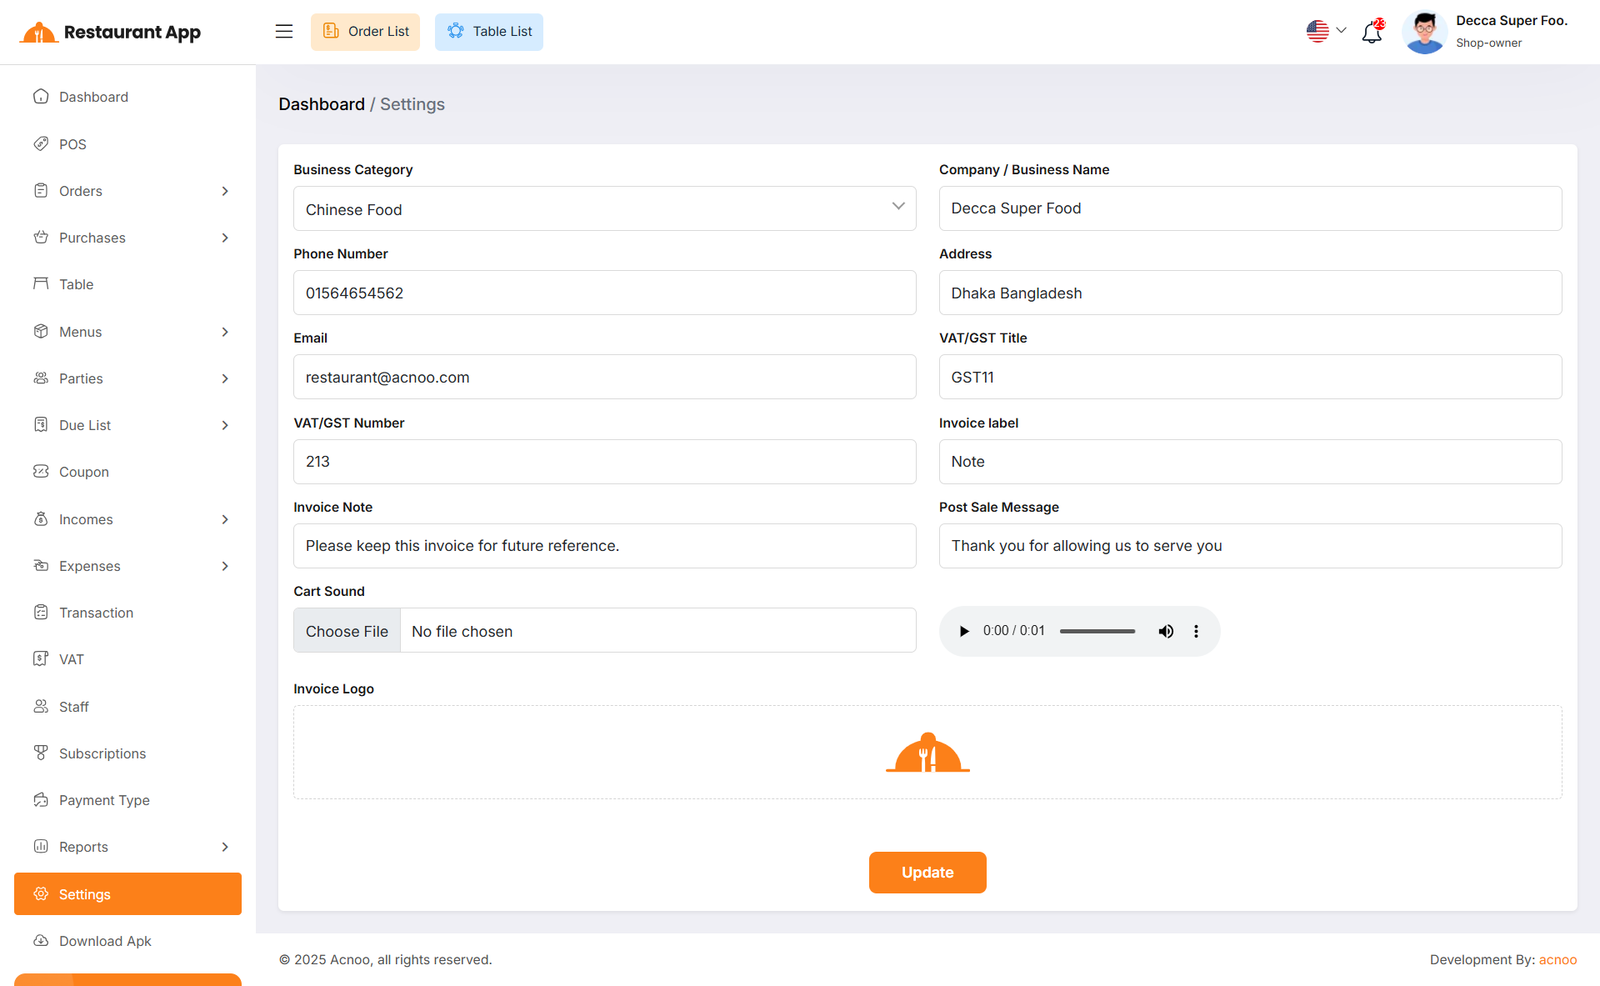
Generale Settings
You can modify the general project information, which will also reflect in all your project invoices. For example, if you update the invoice logo here, it will be displayed on all invoices, including Sales, Purchases, and Due Invoices.
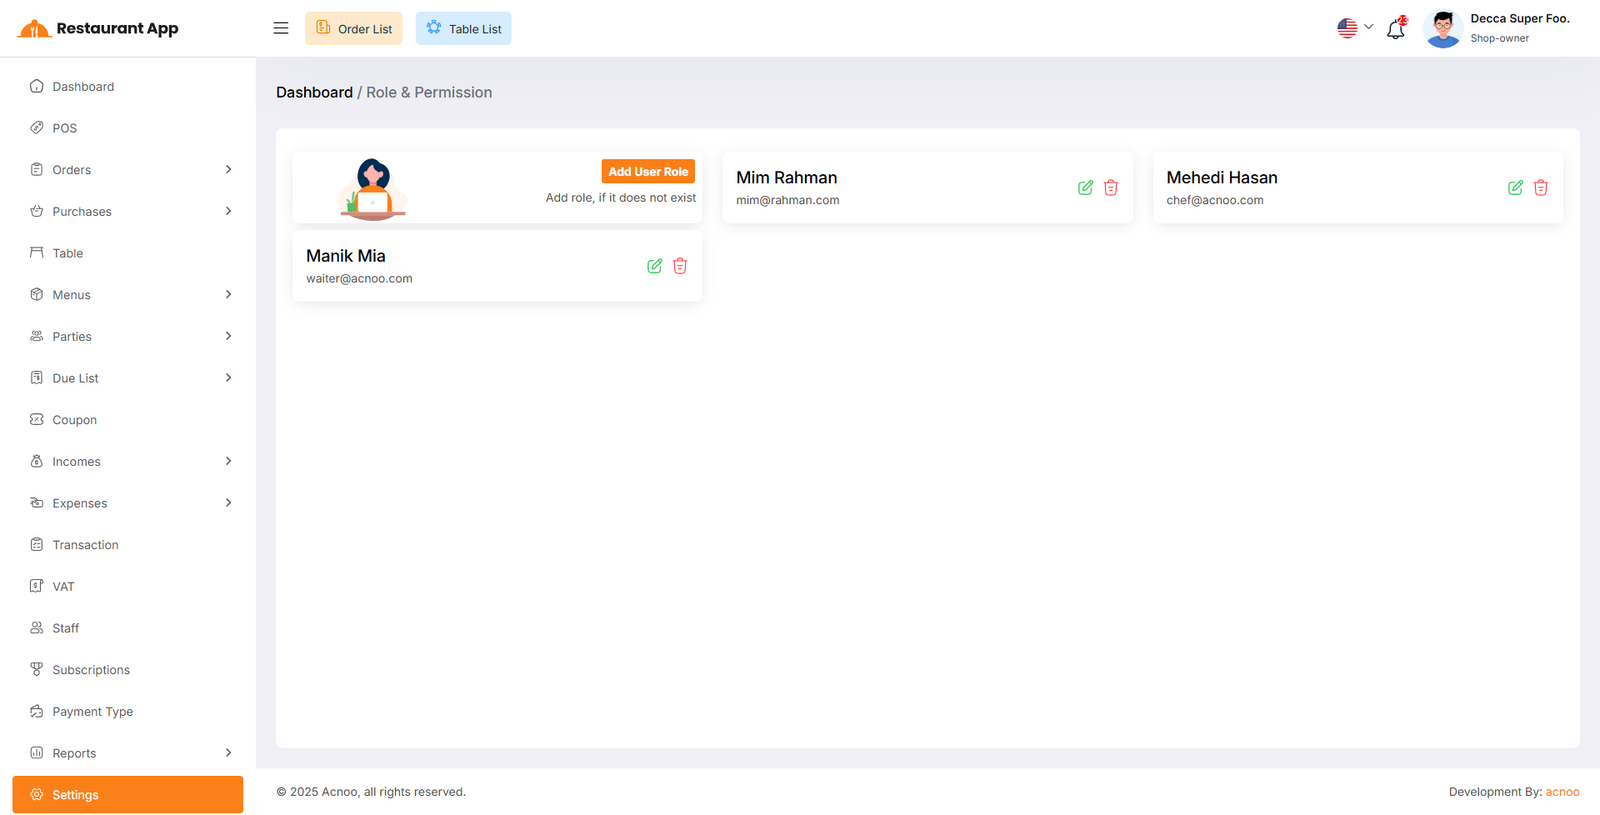
User Role
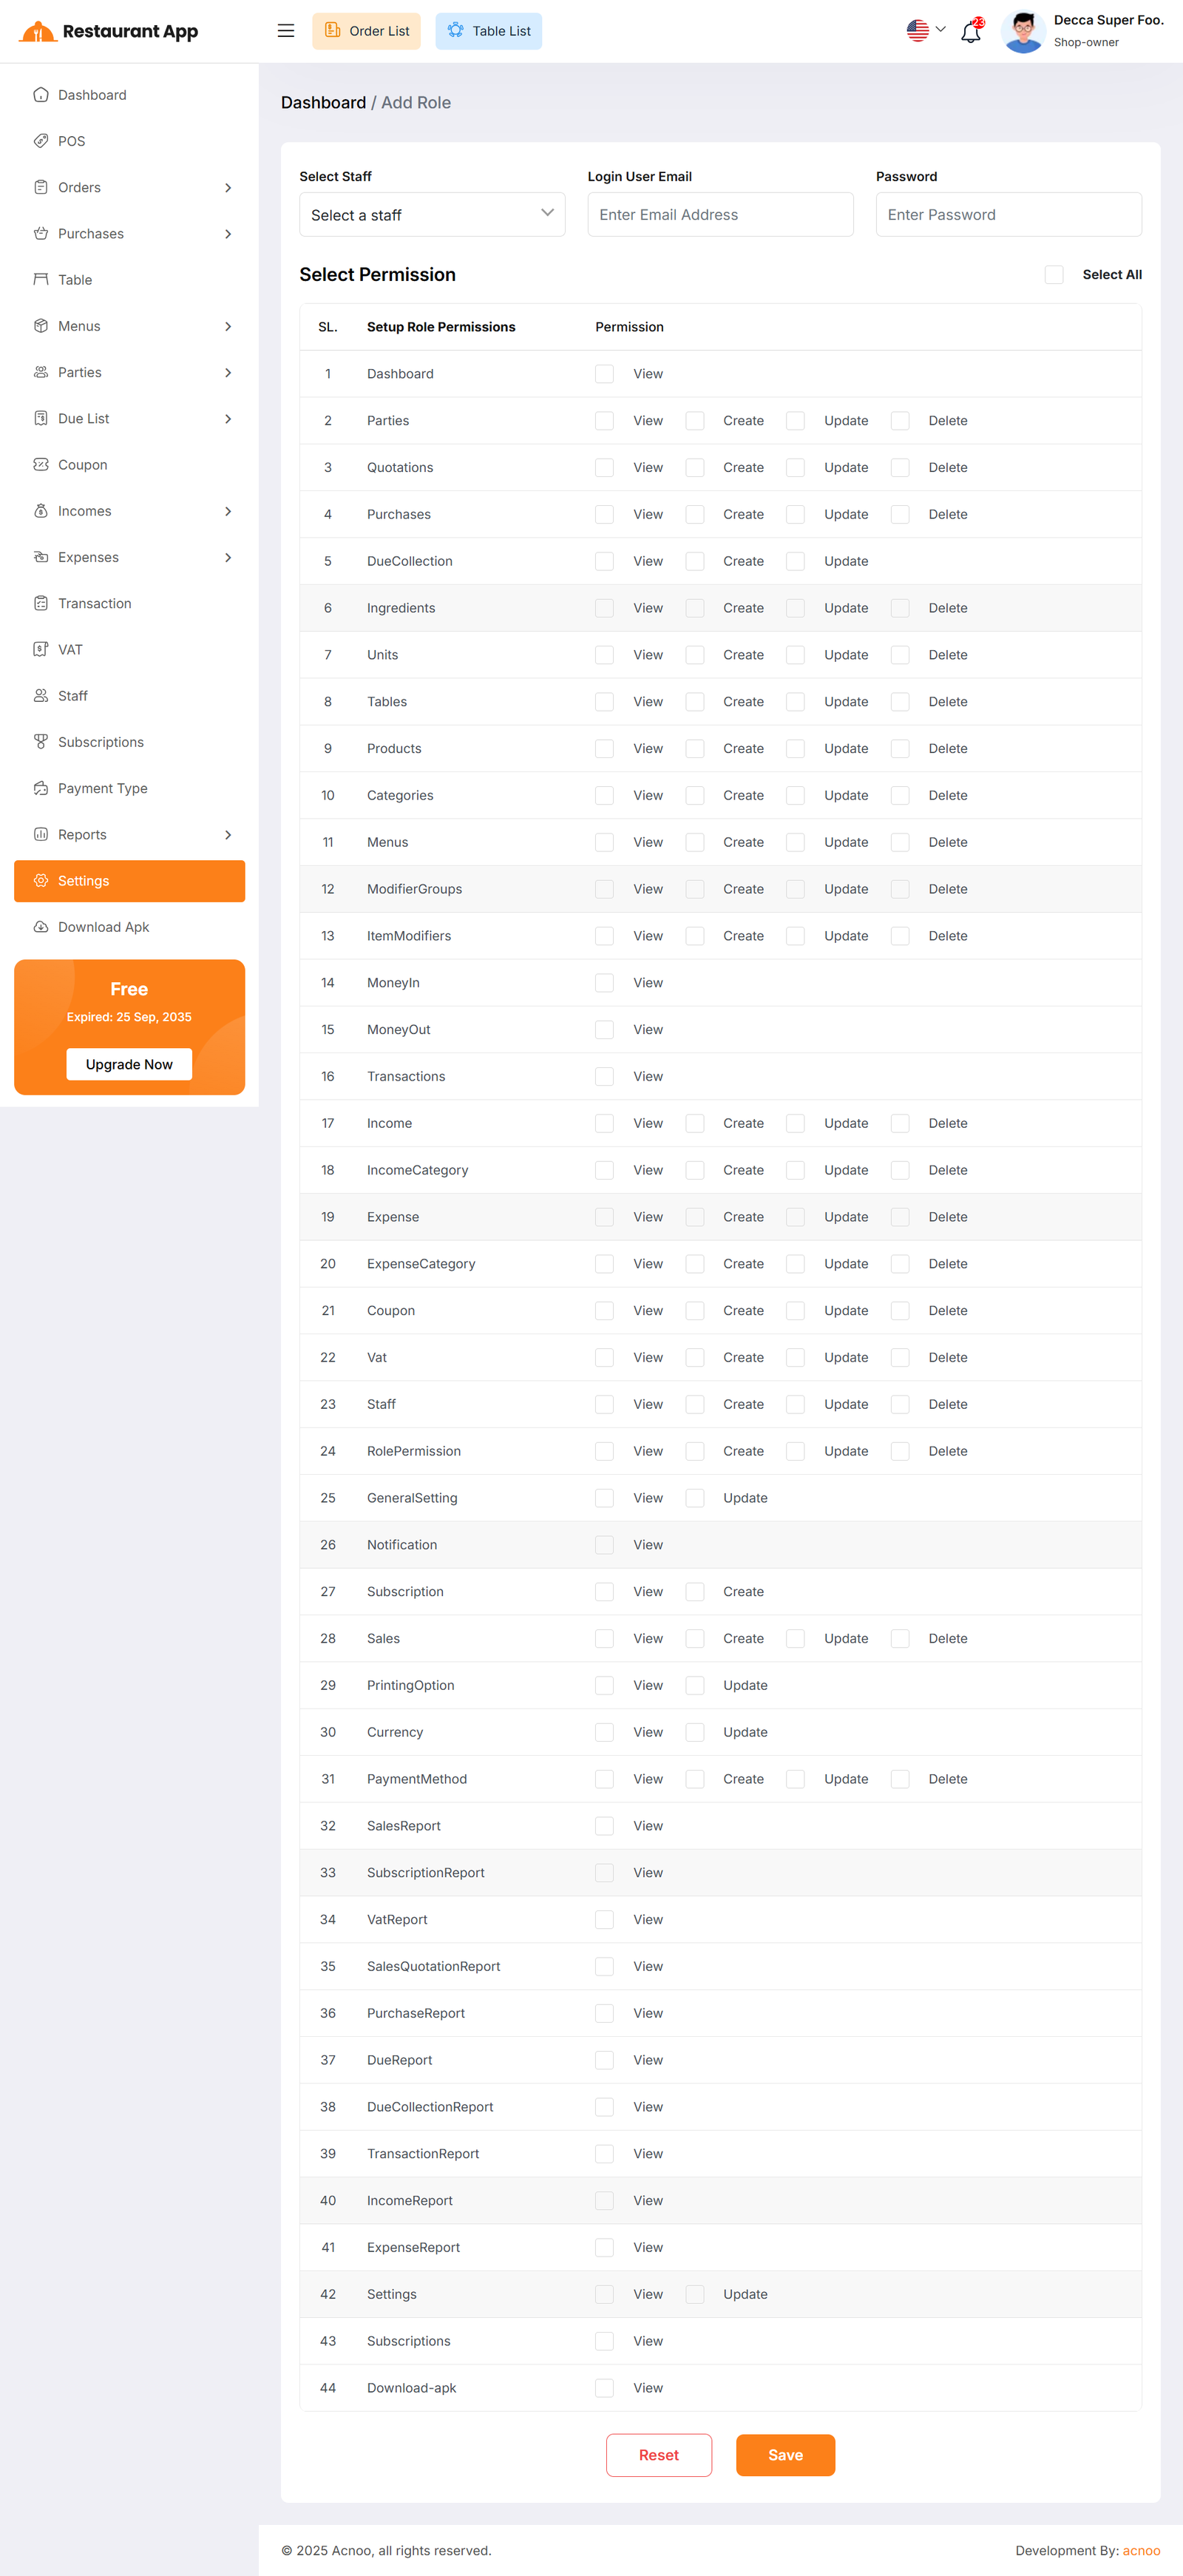
In this section, you can create new roles, update existing ones, and delete them. While updating roles, you can configure specific permissions to grant or restrict access to various features and functionalities. This enables you to customize user roles according to your organizational needs and security requirements.
Example Usages
Step 1: Add Staff Member and Assign Designation
Before creating a user role, the individual must first be added to the staff list with the correct designation (Chef or Kitchen).
- Navigate to the Staff section from the left-hand sidebar menu.
- Click on the Add Staff button located at the top right corner of the dashboard.
- Fill out the required staff details in the modal form:
- Name: Enter the staff member's full name (e.g., Camilla Hughes).
- Email: Provide a valid email address.
- Phone: Enter the contact number.
- Address: Input the physical address.
- Designation: Click the dropdown menu and select either Chef or Kitchen based on their role.
- Save the entry to register the staff member.
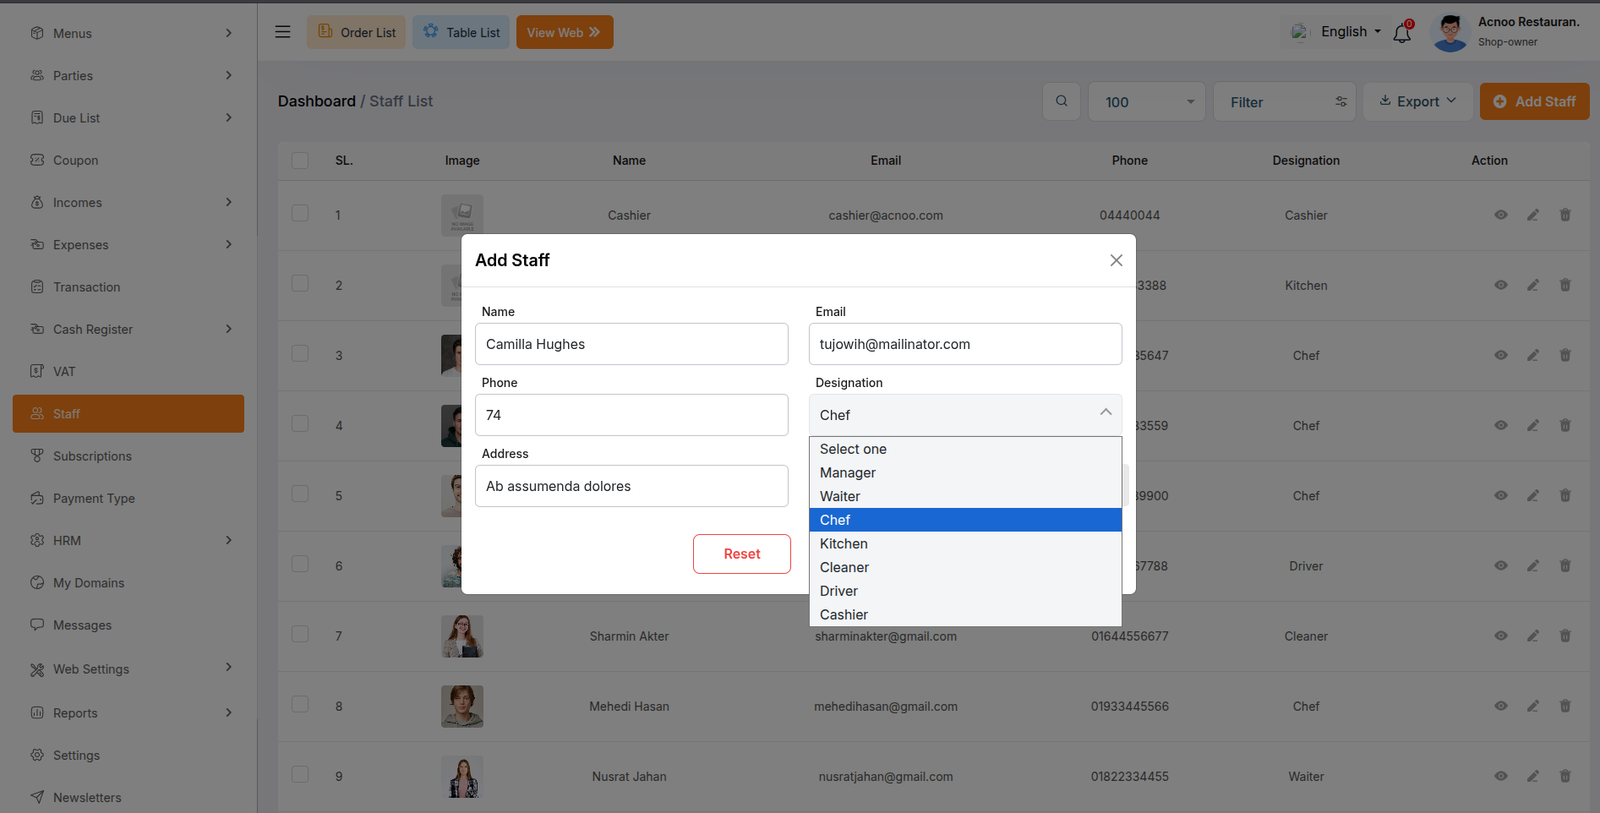
Step 2: Navigate to Role & Permission Settings
Once the staff member is created, proceed to the Role & Permission settings page.
- Locate and click on Settings in the main sidebar, then select Role & Permission.
- You will be directed to the
Dashboard / Settings / Role & Permissionmanagement screen. - Click on the Add User Role button to open the role creation interface.
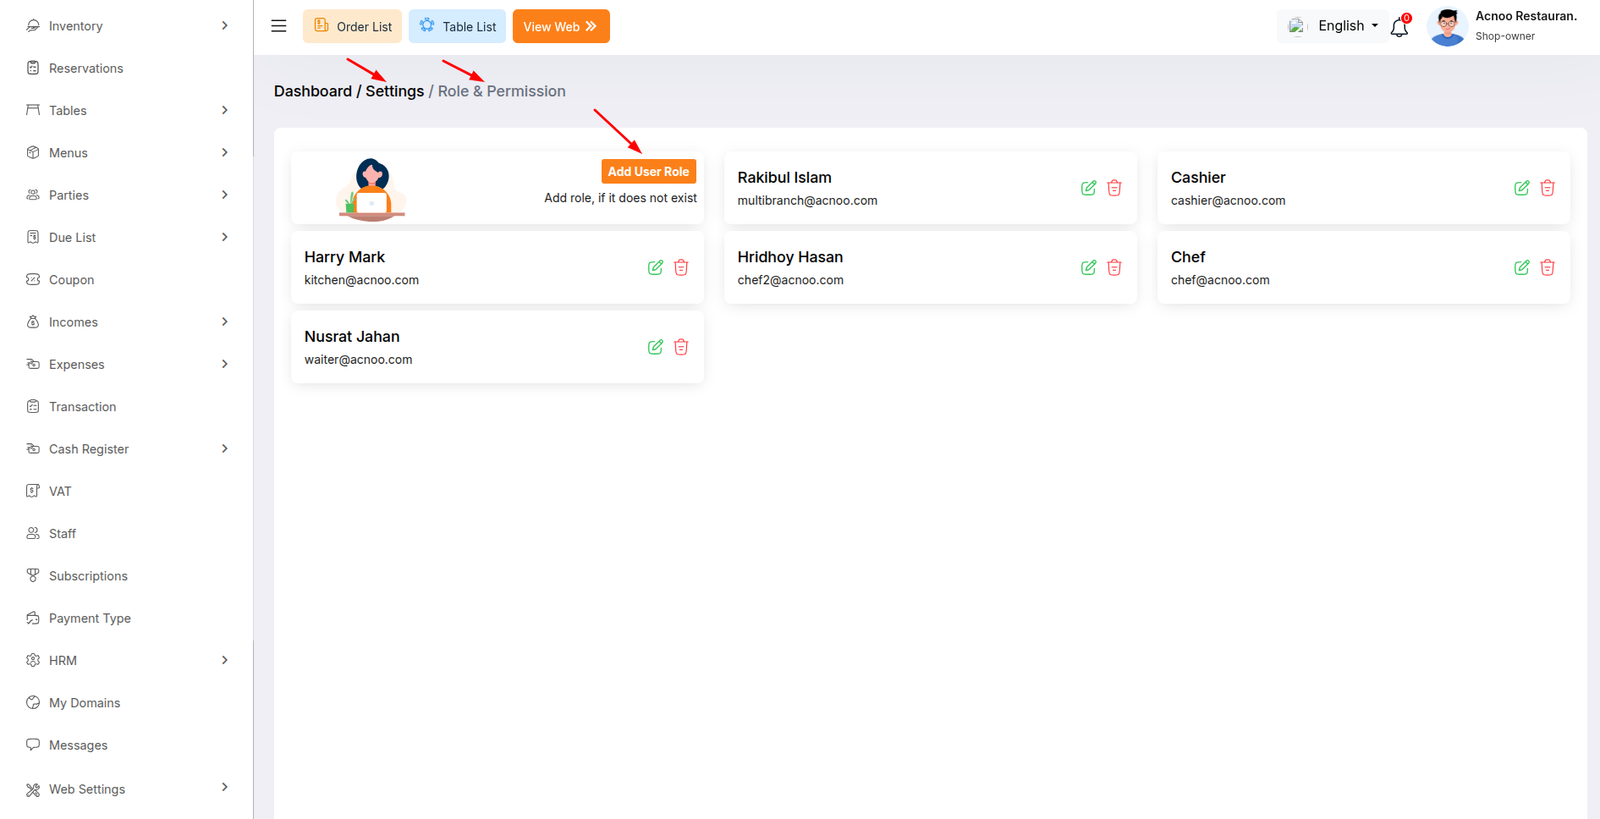
Step 3: Configure Login Credentials and Permissions
After clicking "Add User Role", you will land on the Dashboard / Settings / Add Role page where you can map the newly created staff member to login parameters.
- Select Staff: Click the Select Staff dropdown menu to view the list of registered personnel. Choose the specific staff member you added in Step 1 (e.g., a staff member designated as Chef or Kitchen, such as Mim Rahman (Chef) or Harry Mark (Kitchen)).
- Login User Email: Input the designated login email address in the Enter Email Address field.
- Password: Enter a secure password in the Enter Password field for system access.
- Permissions: Configure module-specific permissions (such as
View,Create,Update,Delete, orView All Data) by checking the appropriate boxes corresponding to the user's operational needs. You can also toggle Select All if full permissions are required. - Save the configuration to finalize creating the user role for the chef or kitchen staff member.
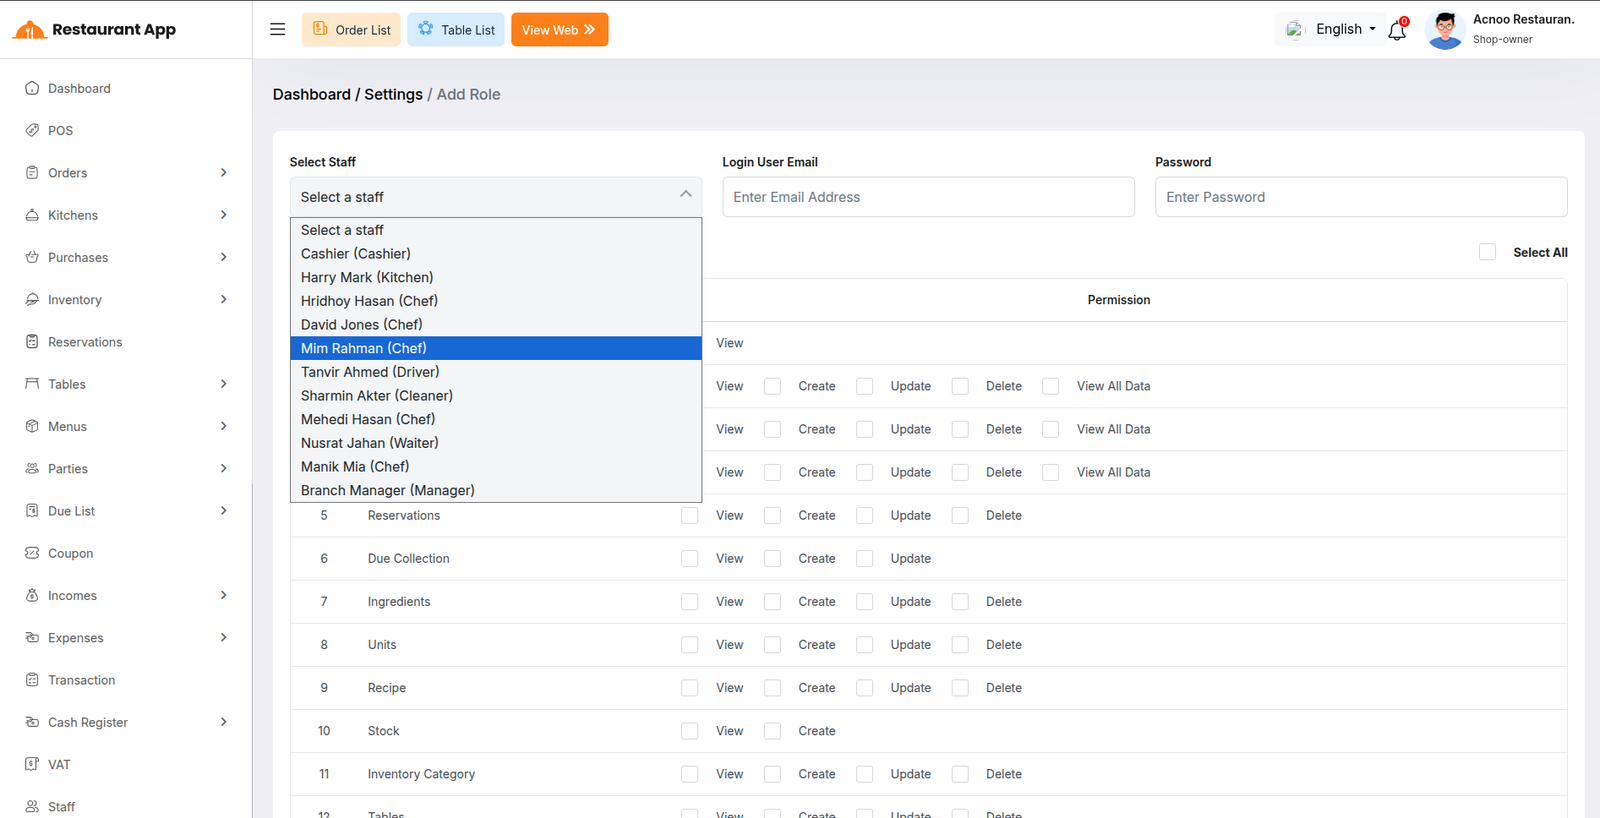
Note
The same process must be applied for other roles and permissions, such as waiter and cashier.
Notification
Here, you can view a list of notifications for Sales, Purchases, Income, Expenses, and Due Collections. You can also filter these notifications using the available criteria. For each notification, clicking the "View" button will display detailed information.
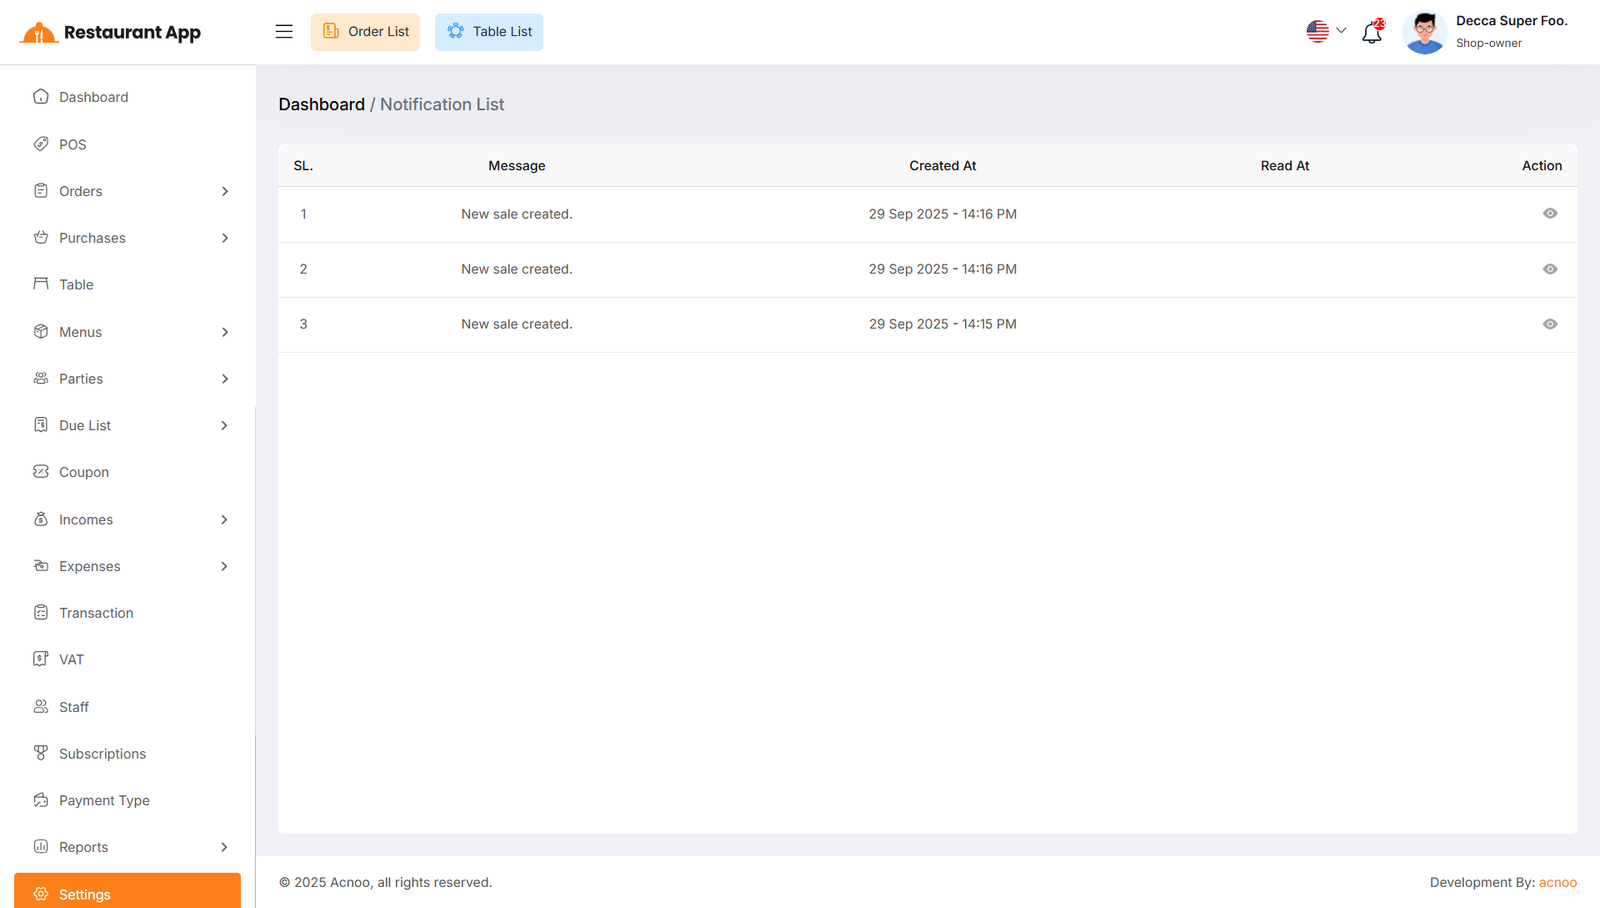
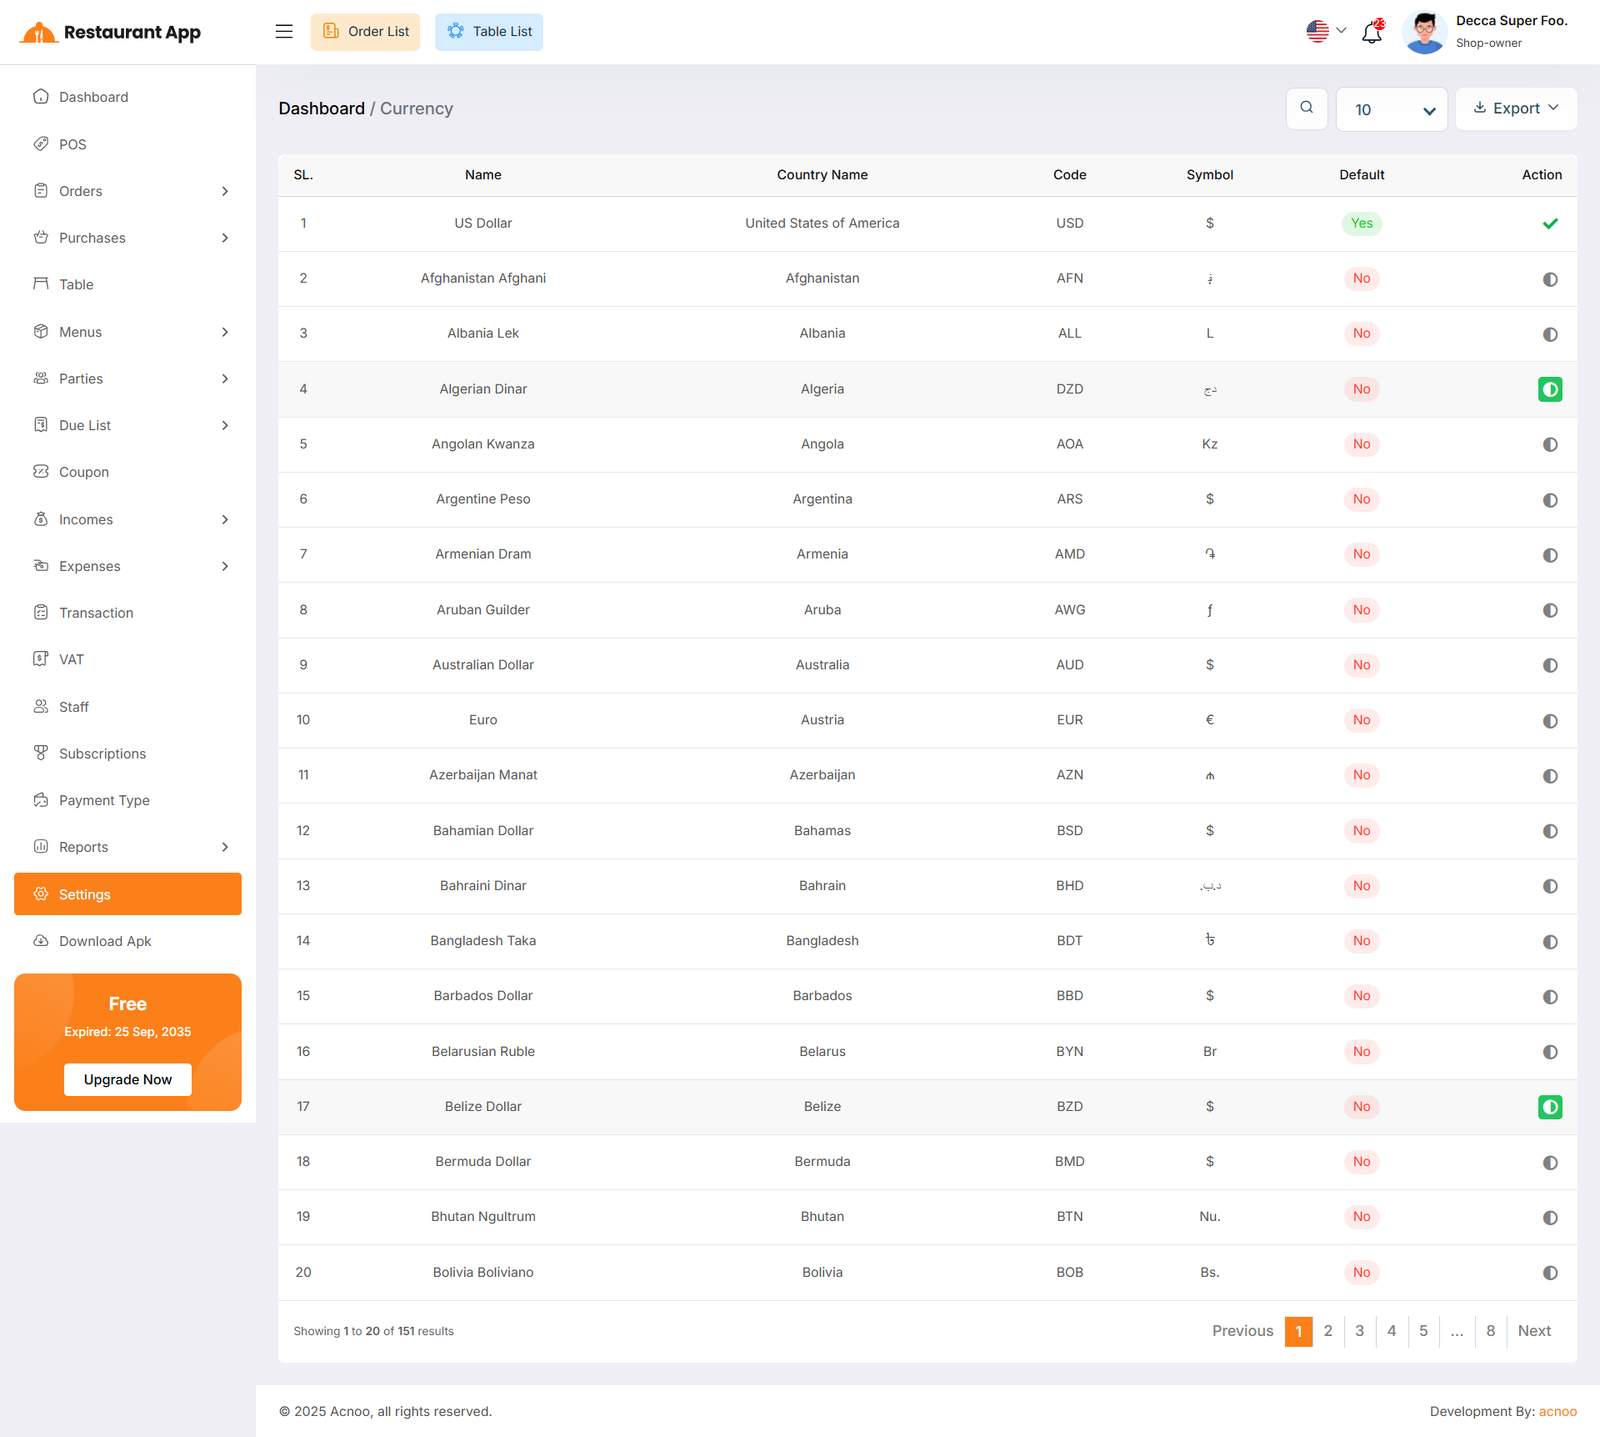
Currencies
Here, you can view a list of currencies added through the Admin Panel. You can select your preferred default currency, but by default, the system uses the currency set in the Admin Panel.
Payment Gateways
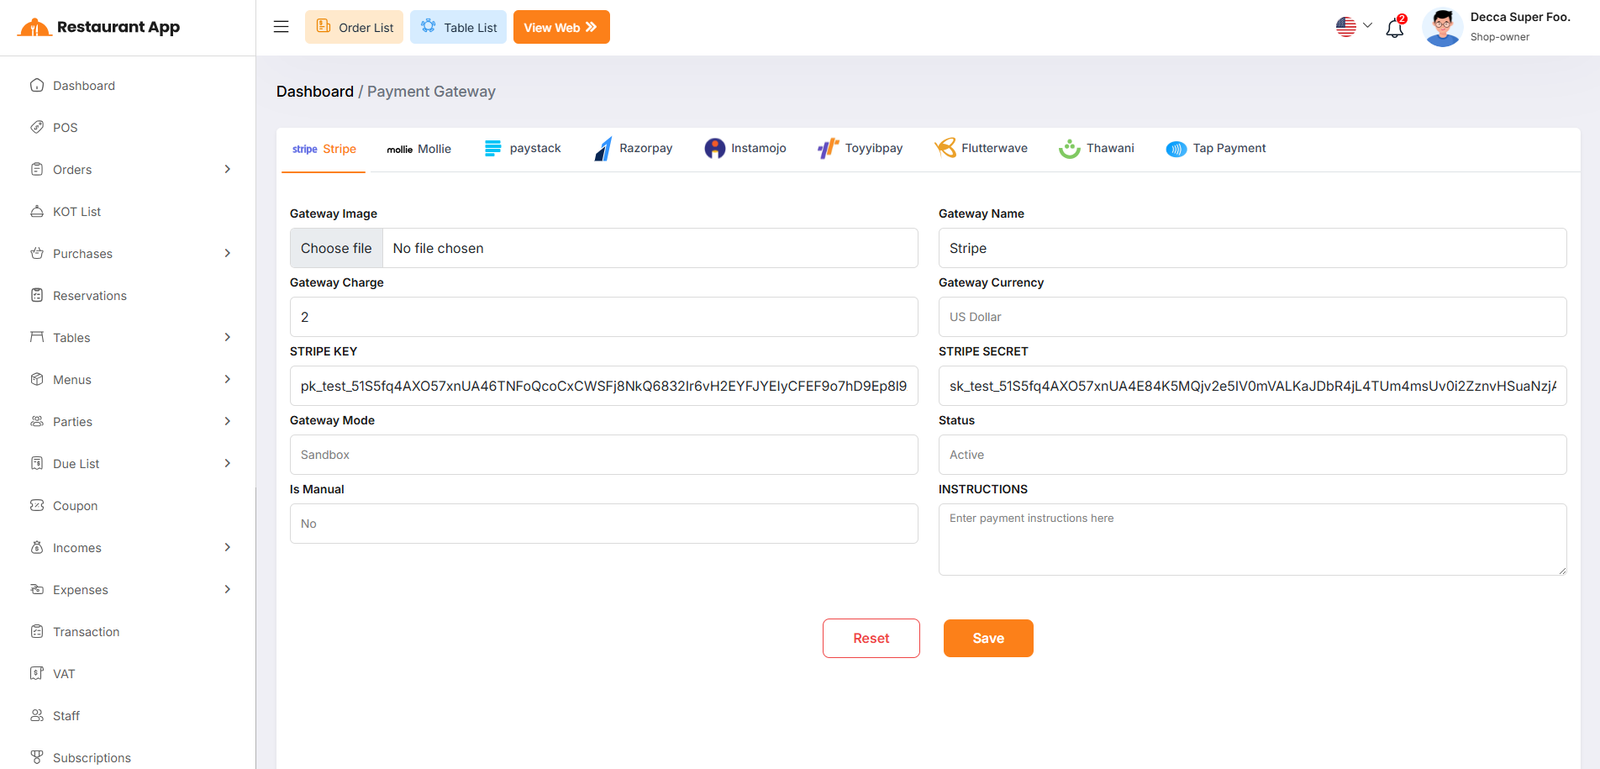
The Payment Gateway section is where administrators configure the merchant accounts required to process online payments from customers. This setup is essential for enabling seamless checkout experiences for users placing online orders.
Each gateway requires specific credentials and parameters to function correctly. Below are the key fields used during setup:Gateway Image Allows you to upload a custom logo for the payment method that will be displayed to customers during checkout.
Gateway Name The display name of the provider (e.g., "Stripe") as it appears in the system.
Gateway Charge A field to enter any additional processing fees you wish to apply to online transactions.
Gateway Currency Defines the specific currency (e.g., "US Dollar") used for transactions through this provider.
API Credentials Specific keys required for secure communication, such as the Stripe Key (Public Key) and Stripe Secret.
Gateway Mode A toggle between "Sandbox" (for testing transactions without real money) and "Live" (for actual customer payments).
Status Sets the gateway as either "Active" or "Inactive" to control its visibility on the front-end ordering site.
Instructions A text area for providing specific payment guidance or notes to the customer during the checkout process.
Reservation Settings
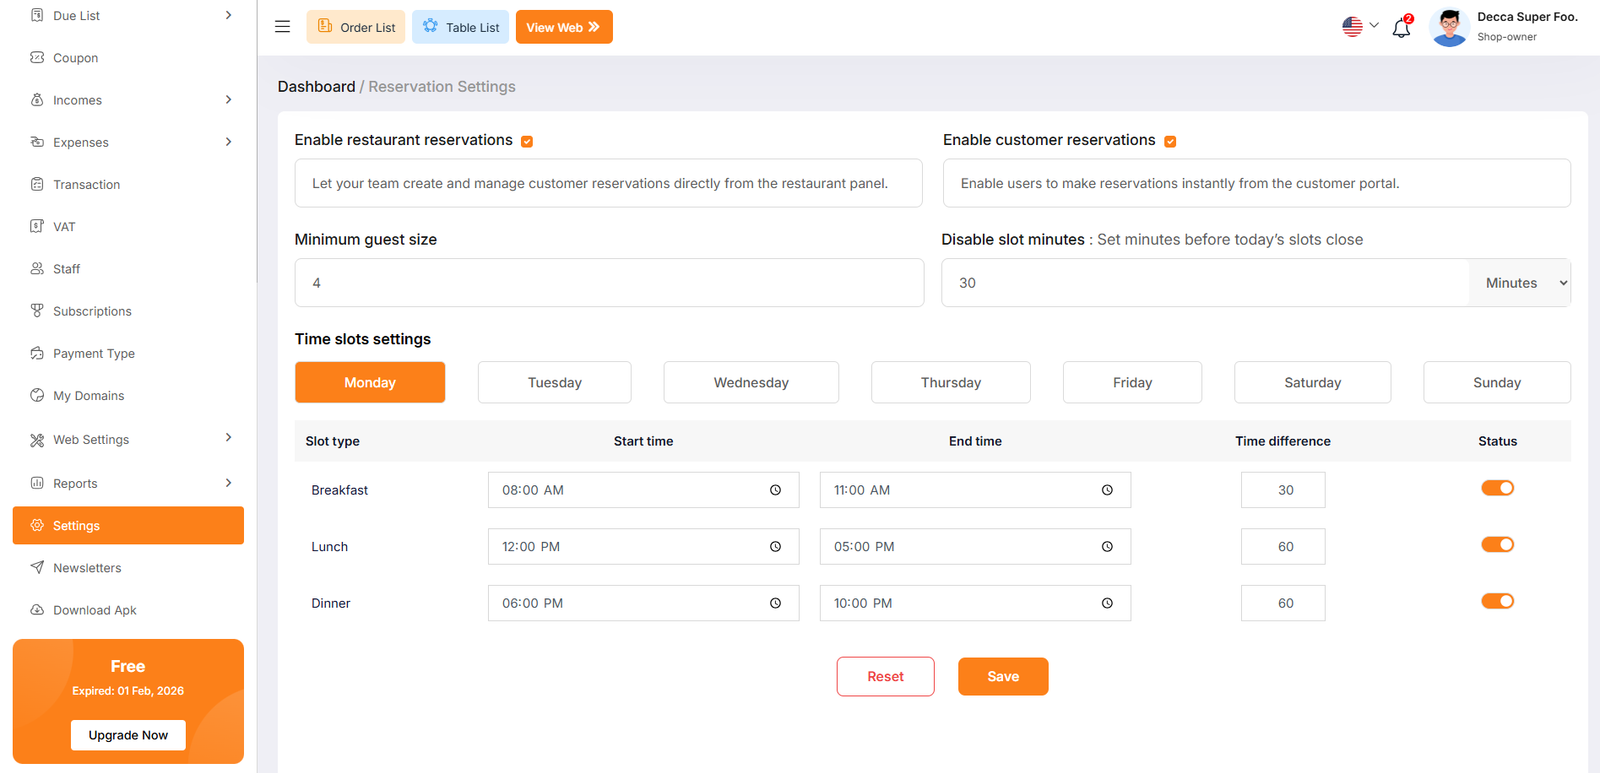
The Reservation Settings page provides administrators with the controls necessary to define how the restaurant accepts bookings, set capacity limits, and manage daily operational time slots.
These settings determine the overall functionality of the booking system across both internal and customer-facing platforms.Enable restaurant reservations When checked, this allows your internal team to create and manage customer reservations directly from the restaurant panel.
Enable customer reservations Checking this box allows users to make reservations instantly through the customer portal.
Minimum guest size Defines the smallest party size permitted for a reservation (e.g., 4 guests).
Disable slot minutes Sets how many minutes before a specific time slot occurs that it should close and no longer accept new bookings.
This section allows for granular control over the restaurant's daily availability. Settings can be customized individually for each day of the week (Monday through Sunday).Slot Type Categorizes time blocks into standard meal periods such as Breakfast, Lunch, and Dinner.
Start & End Time Defines the specific operational hours for each meal period (e.g., Breakfast from 08:00 AM to 11:00 AM).
Time Difference Sets the duration or interval (in minutes) between available booking slots within that period (e.g., 30 or 60 minutes).
Status Toggle An orange switch used to enable or disable specific meal periods for the selected day.
Order Type Settings
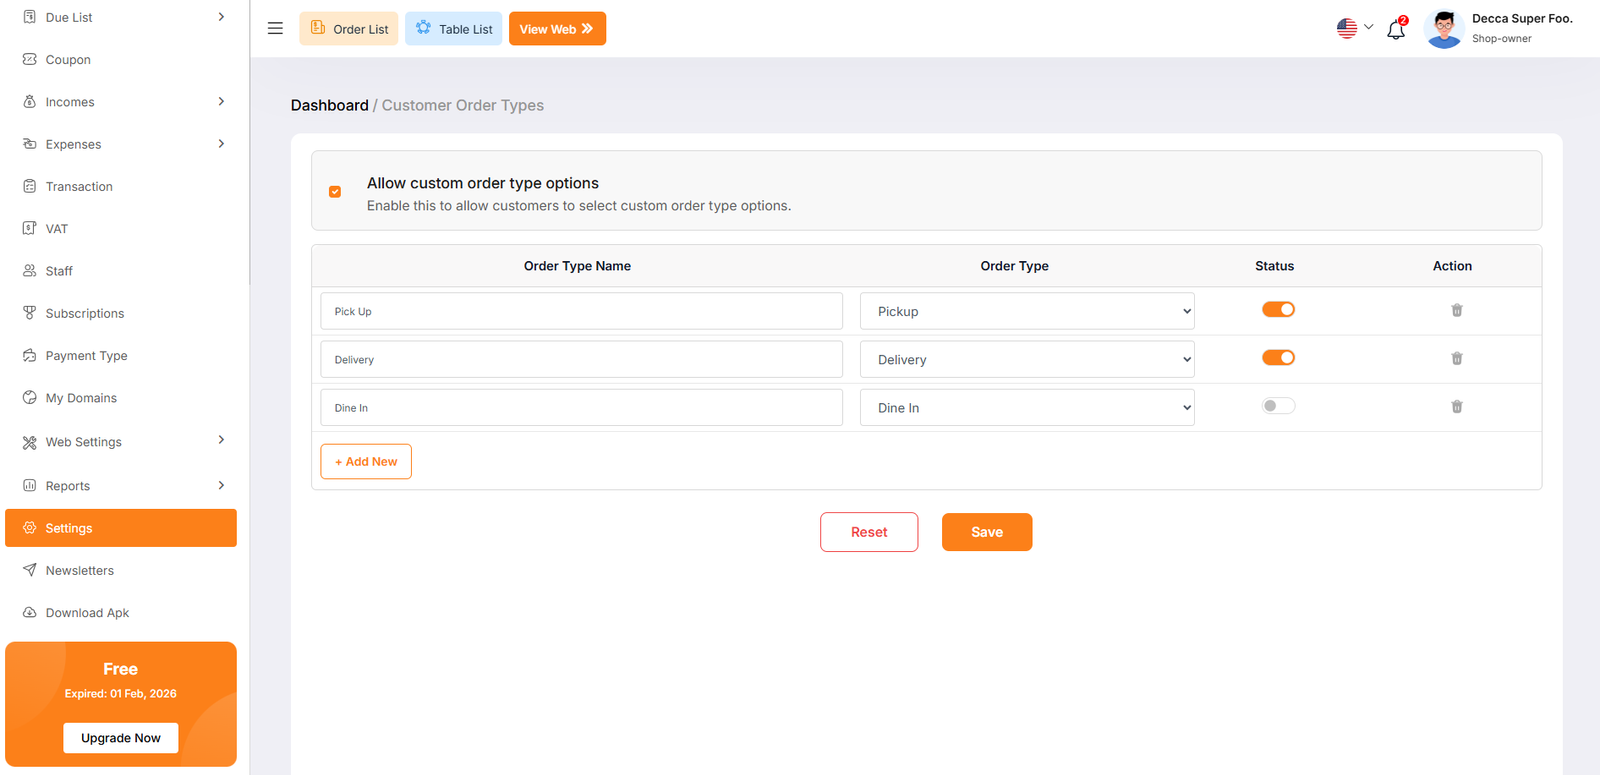
The Customer Order Types page under the Settings menu allows administrators to define and manage the different fulfillment methods available to customers. This configuration is essential for controlling how orders are categorized and processed through the system.
The primary toggle at the top of the page controls the availability of custom fulfillment options.Allow custom order type options Enable this checkbox to allow customers to select from specific order type options during the checkout process.
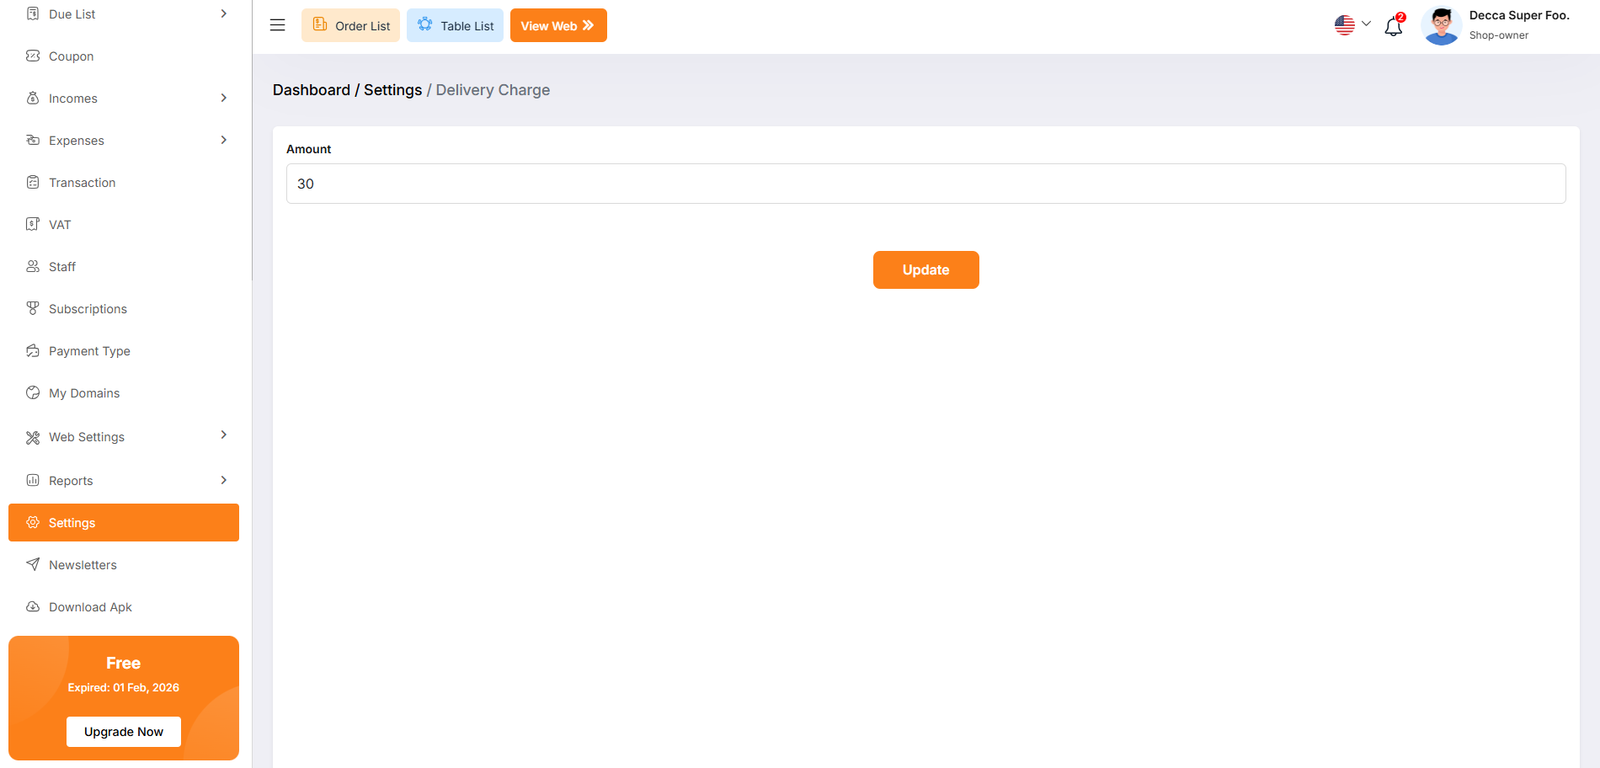
Delivery Charge Settings
This simple interface ensures that your delivery pricing is consistent across all online orders.
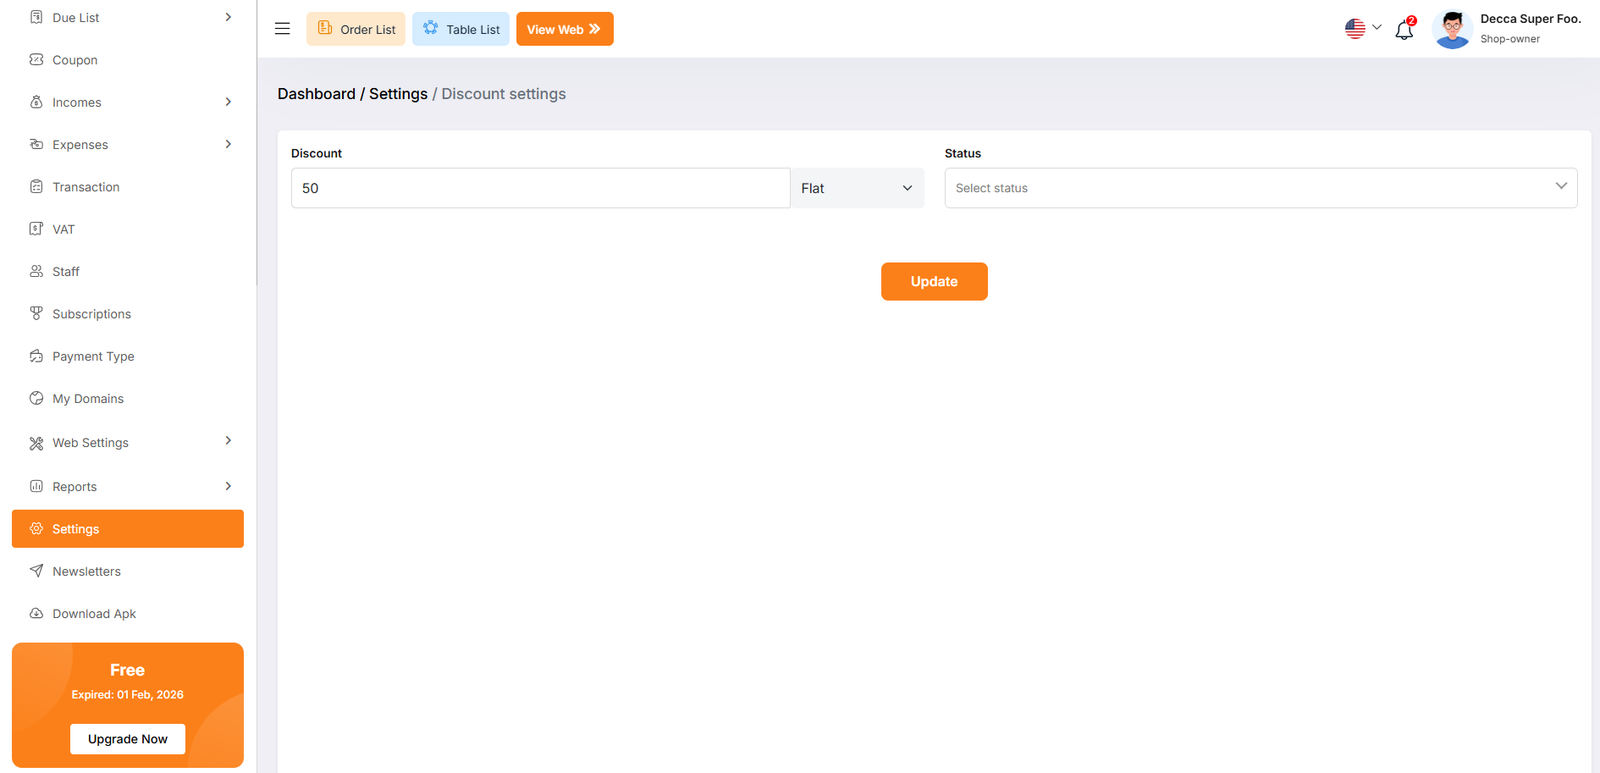
Discount Settings
Administrators can set the primary value and type for the discount across online orders.
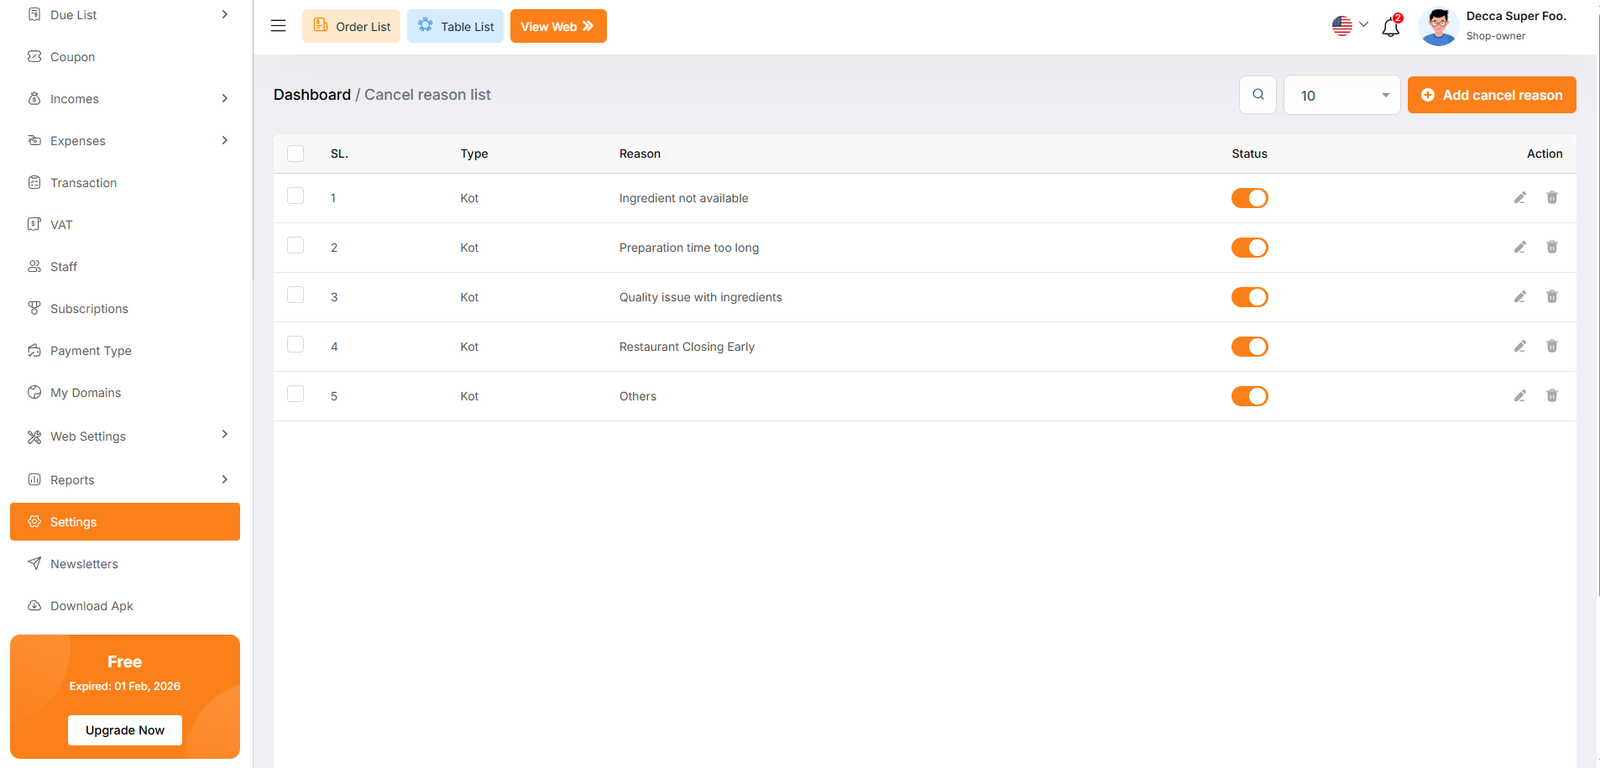
Cancel Reason Settings
The Cancel Reason List page allows administrators to predefined standard justifications for order or KOT cancellations. Maintaining a consistent list of reasons helps management track operational issues, such as ingredient shortages or timing delays, for future analysis.
Loyalty Point
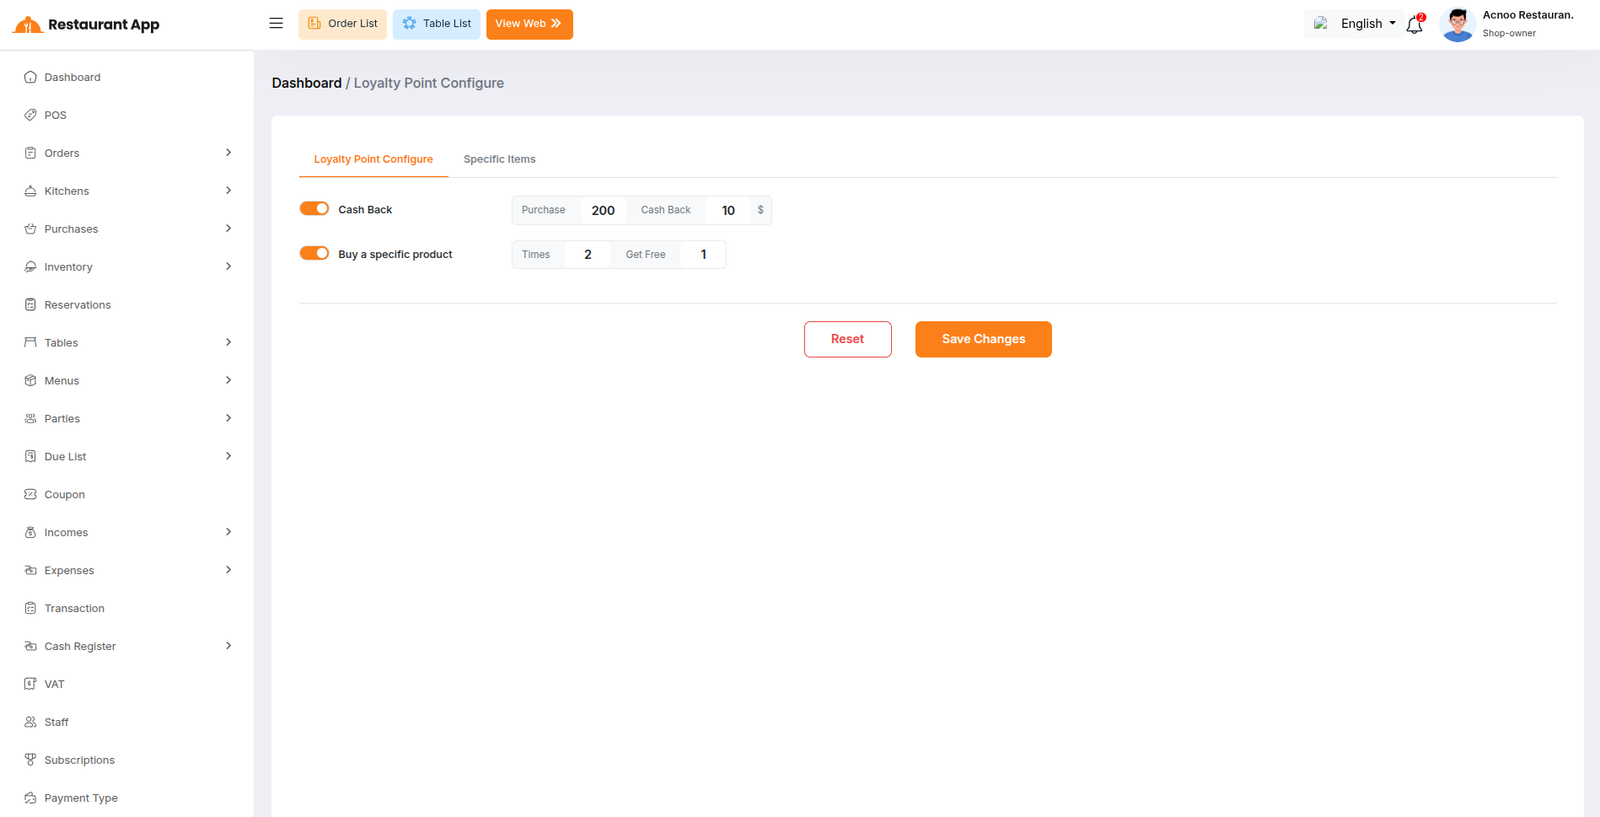
The Loyalty Point module helps administrators create customer reward programs based on purchases. Customers can receive cashback rewards or free items when they meet the configured purchase conditions. The system automatically checks sales and applies rewards according to the saved settings.
1. Loyalty Point Configure
This section is used to create general reward rules for all customers. There are two available options:
- Cash Back
- Buy a Specific Product
Cash Back
This option gives customers cashback when their purchase amount reaches a specific value.
Example:
- Purchase Amount = 200
- Cash Back = 10$
This means if a customer purchases products worth $200, they will receive $10 cashback.
Steps:
- Enable the Cash Back toggle
- Enter the purchase amount
- Enter the cashback amount
- Click Save Changes
Buy a Specific Product
This option gives customers a free item after purchasing the same product a specific number of times.
Example:
- Times = 2
- Get Free = 1
This means if a customer buys the same product 2 times, they will receive 1 item free.
Steps:
- Enable the Buy a Specific Product toggle
- Set the required purchase count
- Set the free item quantity
- Click Save Changes
Buttons
- Reset – Remove unsaved changes
- Save Changes – Save the loyalty configuration
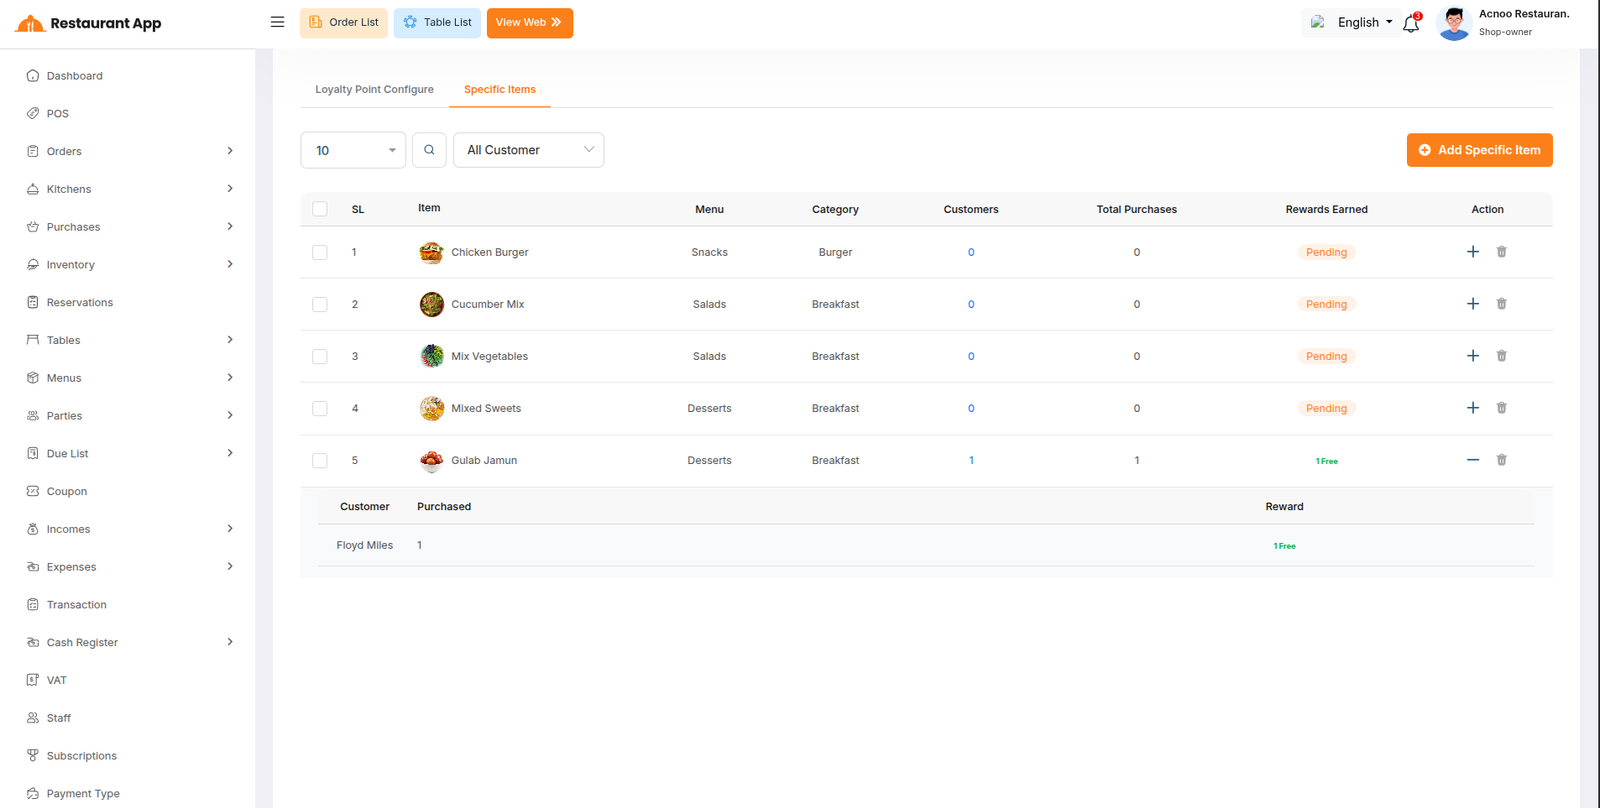
2. Specific Items
This section is used to create loyalty rewards for selected products only. Instead of applying rewards to all items, rewards are tracked for specific menu items.
Add Specific Item
Click the Add Specific Item button to add a product to the loyalty reward system.
Example items:
- Chicken Burger
- Gulab Jamun
- Mixed Sweets
Table Information
The table shows all products included in the loyalty program.
- Item – Product name
- Menu – Menu group
- Category – Product category
- Customers – Number of customers
- Total Purchases – Total purchase count
- Rewards Earned – Reward status
- Action – Manage rewards
Reward Status
- Pending – Reward condition is not completed yet
- 1 Free – Customer earned 1 free item
Customer Reward Details
The expanded row shows customer reward details.
Example:
- Customer: Floyd Miles
- Purchased: 1
- Reward: 1 Free
How It Works During Sale
When a customer places an order from POS, the system automatically checks the loyalty configuration. If the customer meets the reward condition, the system will:
- Add cashback reward
- Give free item reward
- Update reward status
This helps improve customer satisfaction and increases repeat sales.
Newsletter
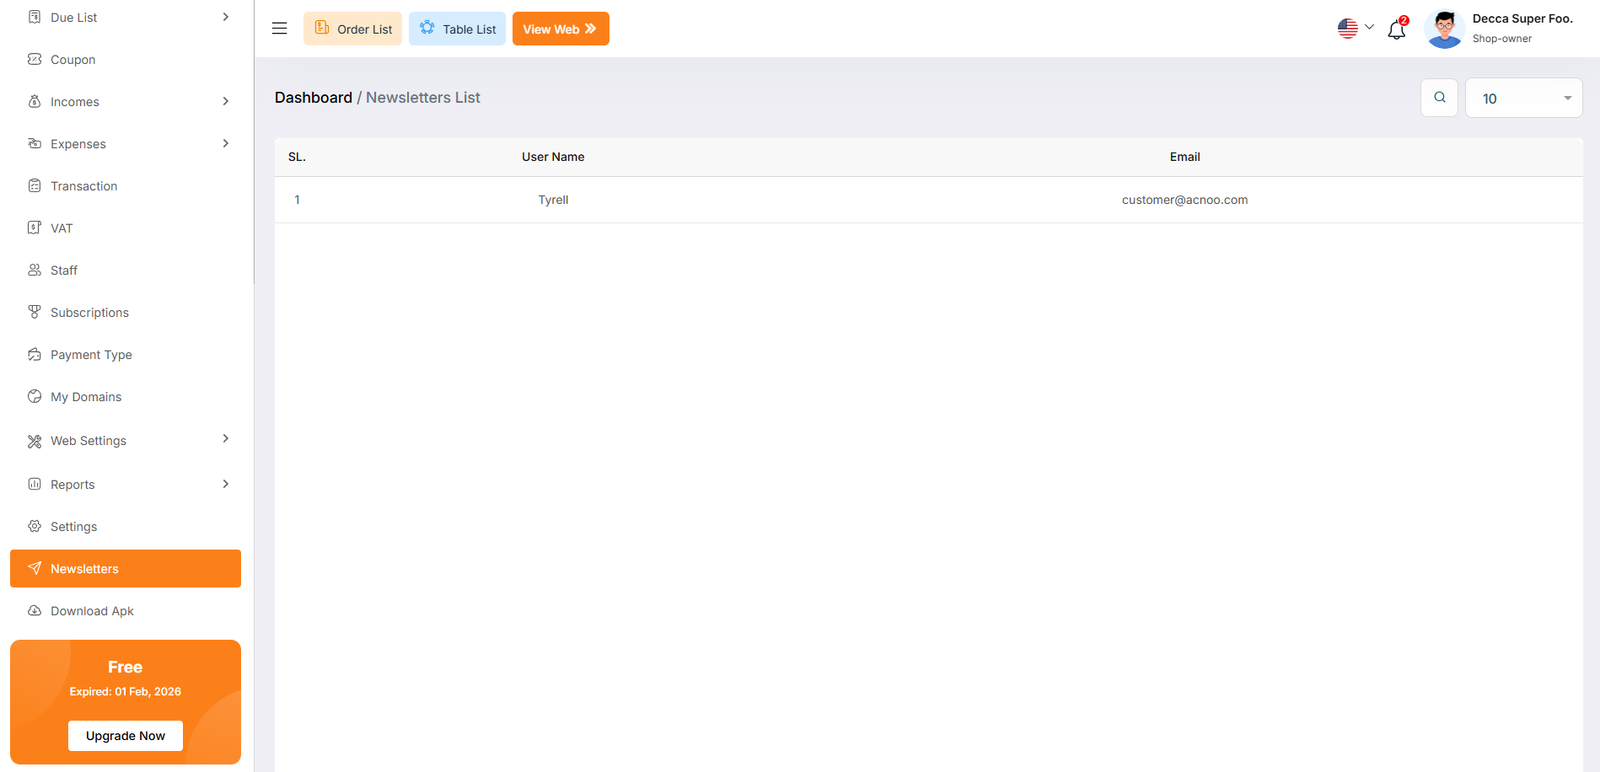
The Newsletters List page provides administrators with a centralized directory of customers who have subscribed to receive marketing communications, updates, and promotional content from the restaurant.
Download Apk
After this, you will be redirected to a URL where you can download the APK file
Push Notification Configuration (Firebase)
This section explains how to configure Firebase for push notifications, including Firebase project creation, SDK generation, VAPID key setup, and Laravel configuration.
1. Create Firebase Account & Project
- Go to Firebase Console
- Sign in with a Google account
- Click Add project
- Enter a project name (example:
restaurant) - Enable or skip Google Analytics
- Click Create project
After completion, your Firebase project will be ready to use.
2. Register Web App (Generate Firebase Config)
- Open your Firebase project
- Go to Project Settings (⚙️ icon)
- Under Your apps, click the Web (</>) icon
- Enter an app nickname (example: Restaurant Web Panel)
- Click Register app
Firebase will provide configuration values like apiKey,
projectId, and messagingSenderId.
These values are used in the frontend and stored in Laravel config.
3. Generate Firebase Admin SDK (Service Account)
- Firebase Console → Project Settings
- Open the Service accounts tab
- Click Generate new private key
- Download the JSON file
Place the downloaded file inside your Laravel project:
storage/app/firebase/firebase-adminsdk.json⚠️ Do not expose this file publicly or commit it to version control.
4. Generate VAPID Key (Web Push)
- Firebase Console → Project Settings
- Open the Cloud Messaging tab
- Scroll to Web Push certificates
- Click Generate key pair
- Copy the Public key
This public key is used as the VAPID key for browser notifications.
5. Firebase Configuration File (Laravel)
Create or update the following file:
config/firebase.php<?php
return [
'credentials' => storage_path('app/firebase/firebase-adminsdk.json'),
'project_id' => 'restaurant-1f6bf',
// Web Push VAPID key
'vapid_key' => 'YOUR_VAPID_KEY_HERE',
// Firebase Web App credentials
'service_credentials' => [
'apiKey' => 'YOUR_API_KEY',
'authDomain' => 'YOUR_AUTH_DOMAIN',
'projectId' => 'YOUR_PROJECT_ID',
'storageBucket' => 'YOUR_STORAGE_BUCKET',
'messagingSenderId' => 'YOUR_SENDER_ID',
'appId' => 'YOUR_APP_ID',
'measurementId' => 'YOUR_MEASUREMENT_ID',
],
];
6. Using VAPID Key in Frontend
The VAPID key is accessed from Laravel config and used when requesting the Firebase Cloud Messaging token.
                getToken(messaging, {
                    vapidKey: "{{ config('firebase.vapid_key') }}"
                });
Security Notes
- ✔ VAPID key is public and safe for frontend use
- ❌ Admin SDK JSON must remain server-side only
- ❌ Never expose service account credentials in JavaScript
Firebase Service Worker Configuration
Firebase push notifications require a Service Worker to handle
background notifications when the browser tab is closed or inactive.
This configuration is done inside the
firebase-messaging-sw.js file.
What is firebase-messaging-sw.js?
The firebase-messaging-sw.js file runs in the browser
background and is responsible for:
- Receiving push notifications when the app is not open
- Displaying system notifications
- Handling notification click events
Because this file runs independently from Laravel and Blade templates, Firebase configuration values must be initialized directly inside it.
Service Worker Firebase Initialization
Add the Firebase Web App credentials inside
firebase-messaging-sw.js.
These credentials are the same values used in the frontend Firebase
configuration.
                importScripts('https://www.gstatic.com/firebasejs/12.7.0/firebase-app-compat.js');
                importScripts('https://www.gstatic.com/firebasejs/12.7.0/firebase-messaging-compat.js');

                firebase.initializeApp({
                    apiKey: "YOUR_API_KEY",
                    authDomain: "YOUR_AUTH_DOMAIN",
                    projectId: "YOUR_PROJECT_ID",
                    storageBucket: "YOUR_STORAGE_BUCKET",
                    messagingSenderId: "YOUR_MESSAGING_SENDER_ID",
                    appId: "YOUR_APP_ID",
                    measurementId: "YOUR_MEASUREMENT_ID"
                });

                const messaging = firebase.messaging();

                messaging.onBackgroundMessage(payload => {
                    self.registration.showNotification(
                        payload.notification.title,
                        {
                            body: payload.notification.body,
                            icon: payload.notification.icon,
                            data: payload.data,
                        }
                    );
                });
Why are credentials added here?
The Service Worker cannot access Laravel configuration files or environment variables. Therefore, Firebase Web credentials must be defined directly in this file or loaded via a public JavaScript configuration file.
Security Notes
- ✔ Firebase Web credentials are public and safe to expose
- ✔ Required for background push notifications
- ❌ Do not include Firebase Admin SDK credentials here
- ❌ Never expose
firebase-adminsdk.jsonin Service Worker
File Location
public/firebase-messaging-sw.jsEnsure this file is publicly accessible so the browser can register the Service Worker correctly.
RestaurantWeb Add-on Change Logs
Note: Before updating to the new version, please ensure you have a database and full project backup, and that your project is already updated to the latest version. This is extremely important!
Version: 2.5 ( 13 July 2026 )
- Implemented comprehensive multi-branch management across all relevant modules.
- Enhanced role and permission management with branch-specific access control.
- Introduced branch-wise product stock and out-of-stock management.
- Added restaurant operating hours and scheduling management.
- Implemented takeaway order processing functionality.
- Enabled table-based order placement without immediate payment.
- Enhanced subscription plan upgrades with module-based feature activation.
- Improved overall application security and performance.
- Refined UI/UX for a more intuitive user experience.
- Resolved various bugs and stability issues.
Note: Please replace the following folders:
✔Modules/RestaurantWebAddon
✔app
✔config
✔database
✔lang
✔public/assets
✔resources
✔routes
After replacing them, visit yourdomain.com/update to install the new version and
please don't forget to reload hard your browser. Without visiting the URL and reloading
hard, your project will not function correctly, so ensure you complete this step.
Note: If you face any issues with the update, please contact us.
Version: 2.4 ( 10 June 2026 )
- Improved sidebar layout, navigation, and functionality.
- Added Table List visual card grid with real-time status tracking (Available, KOT, Occupied).
- Added Table Sale (POS) page for managing orders tied to specific tables.
- Added Table Move feature to transfer active orders between tables instantly.
- Added QR Code management for tables with Download, View, and Re-Generate actions.
- Added order status stepper on table sales with Pending, Preparing, Ready, Served, and Completed stages.
- Cash payment system added from online store
- Added Loyalty Point Configuration for cashback and purchase-based rewards.
- Added Specific Item Loyalty Configuration for product-wise reward tracking.
- Integrated loyalty point rewards into the sales/POS process.
- Updated purchase unit and cart calculations based on inventory management.
- Fixed UI/UX design issues and improved responsiveness.
- Resolved minor bugs and enhanced overall system stability.
Note: Please replace the following folders:
✔Modules/RestaurantWebAddon
✔app
✔config
✔database
✔lang
✔public/assets
✔routes
After replacing them, visit yourdomain.com/update to install the new version and
please don't forget to reload hard your browser. Without visiting the URL and reloading
hard, your project will not function correctly, so ensure you complete this step.
Note: If you face any issues with the update, please contact us.
Version: 2.3 ( 15 March 2026 )
- Updated sidebar functionality and layout.
- Fixed several minor bugs and improved overall stability.
Note: Please replace the following folders:
✔Modules/RestaurantWebAddon
After replacing them, visit yourdomain.com/update to install the new version and
please don't forget to reload hard your browser. Without visiting the URL and reloading
hard, your project will not function correctly, so ensure you complete this step.
Note: If you face any issues with the update, please contact us.
Version: 2.2 ( 05 March 2026 )
- Language issue fixed
- Order report duration filter added
Note: Please replace the following folders:
✔Modules/RestaurantWebAddon
After replacing them, visit yourdomain.com/update to install the new version and
please don't forget to reload hard your browser. Without visiting the URL and reloading
hard, your project will not function correctly, so ensure you complete this step.
Note: If you face any issues with the update, please contact us.
Version: 2.1 ( 26 February 2026 )
- Added Kitchen module with dedicated section support
- Updated and optimized KOT listing functionality
- Multiple variation support added
- Resolved multiple UI/UX design inconsistencies
- Fixed various minor bugs and performance issues
Note: Please replace the following folders:
✔app
✔config
✔database
✔lang
✔public/assets
✔routes
After replacing them, visit yourdomain.com/update to install the new version and
please don't forget to reload hard your browser. Without visiting the URL and reloading
hard, your project will not function correctly, so ensure you complete this step.
Note: If you face any issues with the update, please contact us.
Version: 2.0 ( 03 February 2026 )
- Kitchen/Chef panel added
- KOT list and reports added
- Kitchen panel modules now accessible based on role permissions set by restaurant owner
- Restaurant panel KOT list and reports added
- KOT list now allows generating and printing KOT tickets
- Table area added
- Table section now generates QR codes
- Users can now scan table QR codes to access the online store and place orders directly from the restaurant
- Custom domain add-on added
- Reservation system added in restaurant panel
- Payment gateway added
- Settings section added to manage reservations, payment gateways, discounts, delivery charges, order types, and cancellation reasons
- Web settings added for online store where restaurant owners can customize content
- Online store added
- Customers can now order food from the online store with login system to track orders, including features like profile management, dashboard, review system, reservations, billing address, and more
- Bug fixes and improvements
- Many section update and code refactoring
Note: Please replace the following folders:
✔app
✔config
✔database/migrations
✔lang
✔public/assets also public/firebase-messaging-sw.js
✔resources
✔routes
✔storage/app/firebase/firebase-adminsdk.json
✔vendor
✔composer.json
After replacing them, visit yourdomain.com/update to install the new version and
please don't forget to reload hard your browser. Without visiting the URL and reloading
hard, your project will not function correctly, so ensure you complete this step.
Note: If you face any issues with the update, please contact us.
Version: 1.1 ( 13 October 2025 )
- Sale page design issue fixed
- Convert sale page design issue fixed
Note: Please replace the following folders:
✔Module/RestaurantWebAddon/resources
✔public/assets
After replacing them, visit yourdomain.com/update to install the new version and
please don't forget to reload hard your browser. Without visiting the URL and reloading
hard, your project will not function correctly, so ensure you complete this step.
Note: If you face any issues with the update, please contact us.
Version: 1.0 ( 07 October 2025 )
- Initial Release
Getting Started
The Kitchen Panel Login page is the secure entry point for culinary staff to access the restaurant's real-time order management system. This specialized portal ensures that the kitchen team can view, process, and update the status of incoming food orders efficiently.
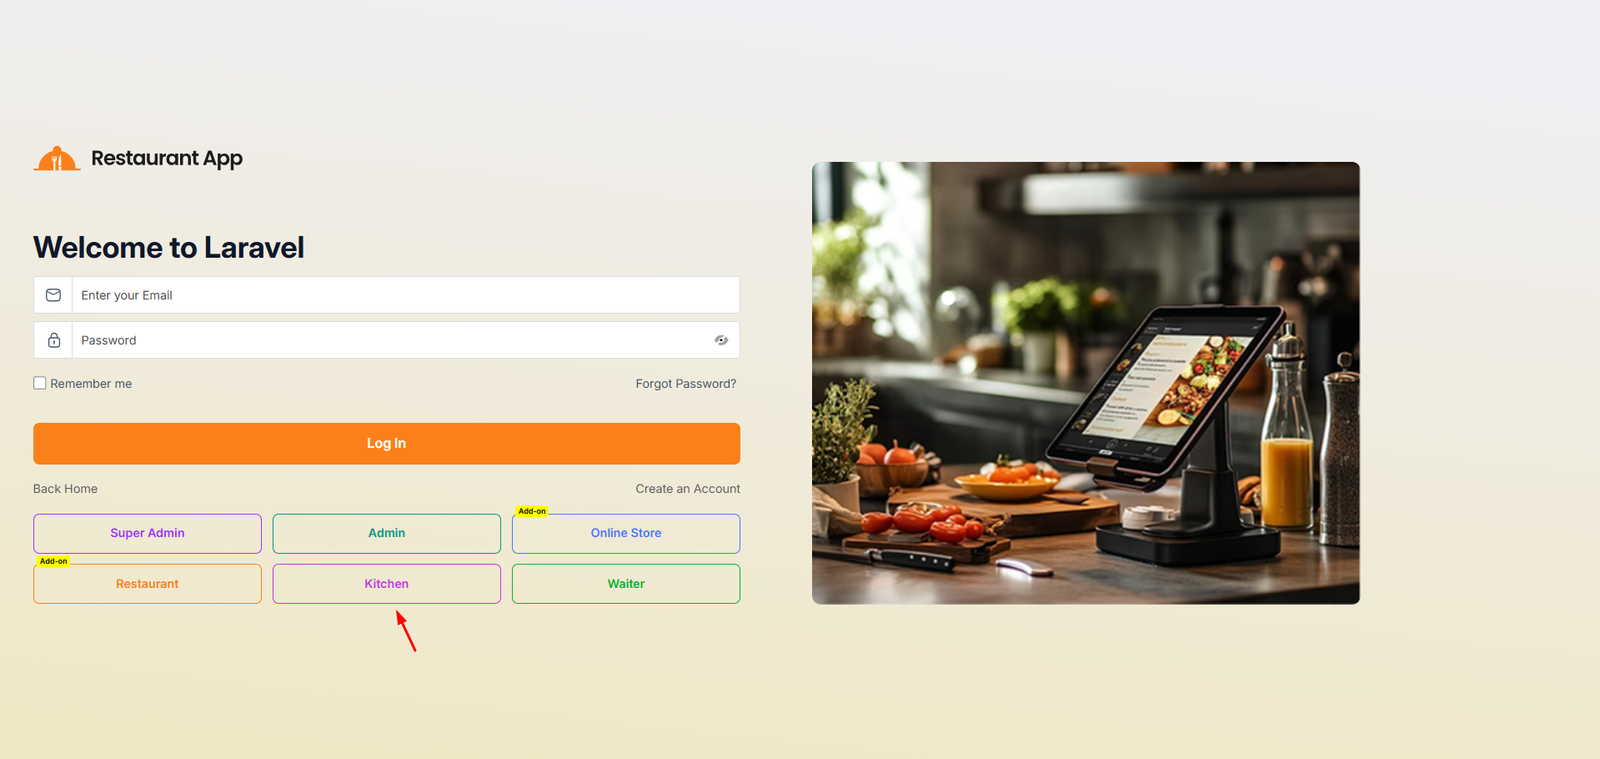
Step 1: Add Staff Member and Assign Designation
Before creating a user role, the individual must first be added to the staff list with the correct designation (Chef or Kitchen).
- Navigate to the Staff section from the left-hand sidebar menu.
- Click on the Add Staff button located at the top right corner of the dashboard.
- Fill out the required staff details in the modal form:
- Name: Enter the staff member's full name (e.g., Camilla Hughes).
- Email: Provide a valid email address.
- Phone: Enter the contact number.
- Address: Input the physical address.
- Designation: Click the dropdown menu and select either Chef or Kitchen based on their role.
- Save the entry to register the staff member.
Step 2: Navigate to Role & Permission Settings
Once the staff member is created, proceed to the Role & Permission settings page.
- Locate and click on Settings in the main sidebar, then select Role & Permission.
- You will be directed to the
Dashboard / Settings / Role & Permissionmanagement screen. - Click on the Add User Role button to open the role creation interface.
Step 3: Configure Login Credentials and Permissions
After clicking "Add User Role", you will land on the Dashboard / Settings / Add Role page where you can map the newly created staff member to login parameters.
- Select Staff: Click the Select Staff dropdown menu to view the list of registered personnel. Choose the specific staff member you added in Step 1 (e.g., a staff member designated as Chef or Kitchen, such as Mim Rahman (Chef) or Harry Mark (Kitchen)).
- Login User Email: Input the designated login email address in the Enter Email Address field.
- Password: Enter a secure password in the Enter Password field for system access.
- Permissions: Configure module-specific permissions (such as
View,Create,Update,Delete, orView All Data) by checking the appropriate boxes corresponding to the user's operational needs. You can also toggle Select All if full permissions are required. - Save the configuration to finalize creating the user role for the chef or kitchen staff member.
Note
Kitchen and chef navigate the same panel and their work functionality are same.
You can access the online store by clicking the "View Web" button in the top corner of the restaurant panel.
All Kitchen
The Kitchens module is designed to streamline restaurant operations by separating food preparation into logical units (e.g., Non-Veg Kitchen, Veg Kitchen). This ensures that orders are routed to the correct staff and inventory is managed efficiently.
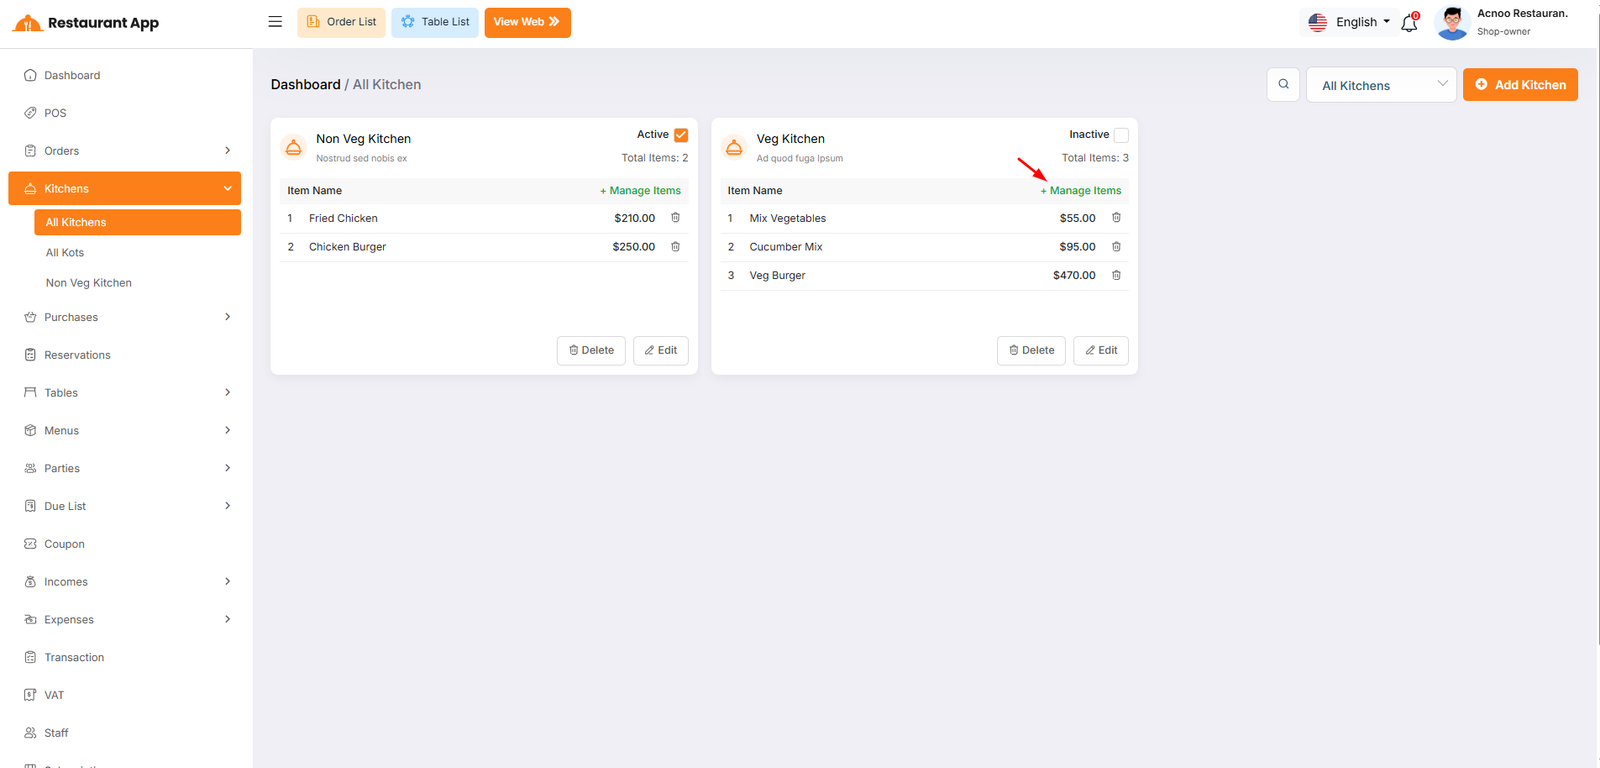
Manage Items
Operational Segmentation: It allows a restaurant to split food preparation into specific stations, such as a "Veg Kitchen" and a "Non-Veg Kitchen". Order Routing: By assigning items to specific kitchens, the system ensures that when an order is placed, the ticket is sent to the correct preparation area. Status Control: Owners can quickly toggle a kitchen to "Inactive" if a station is closed for the day, preventing orders from being routed there.
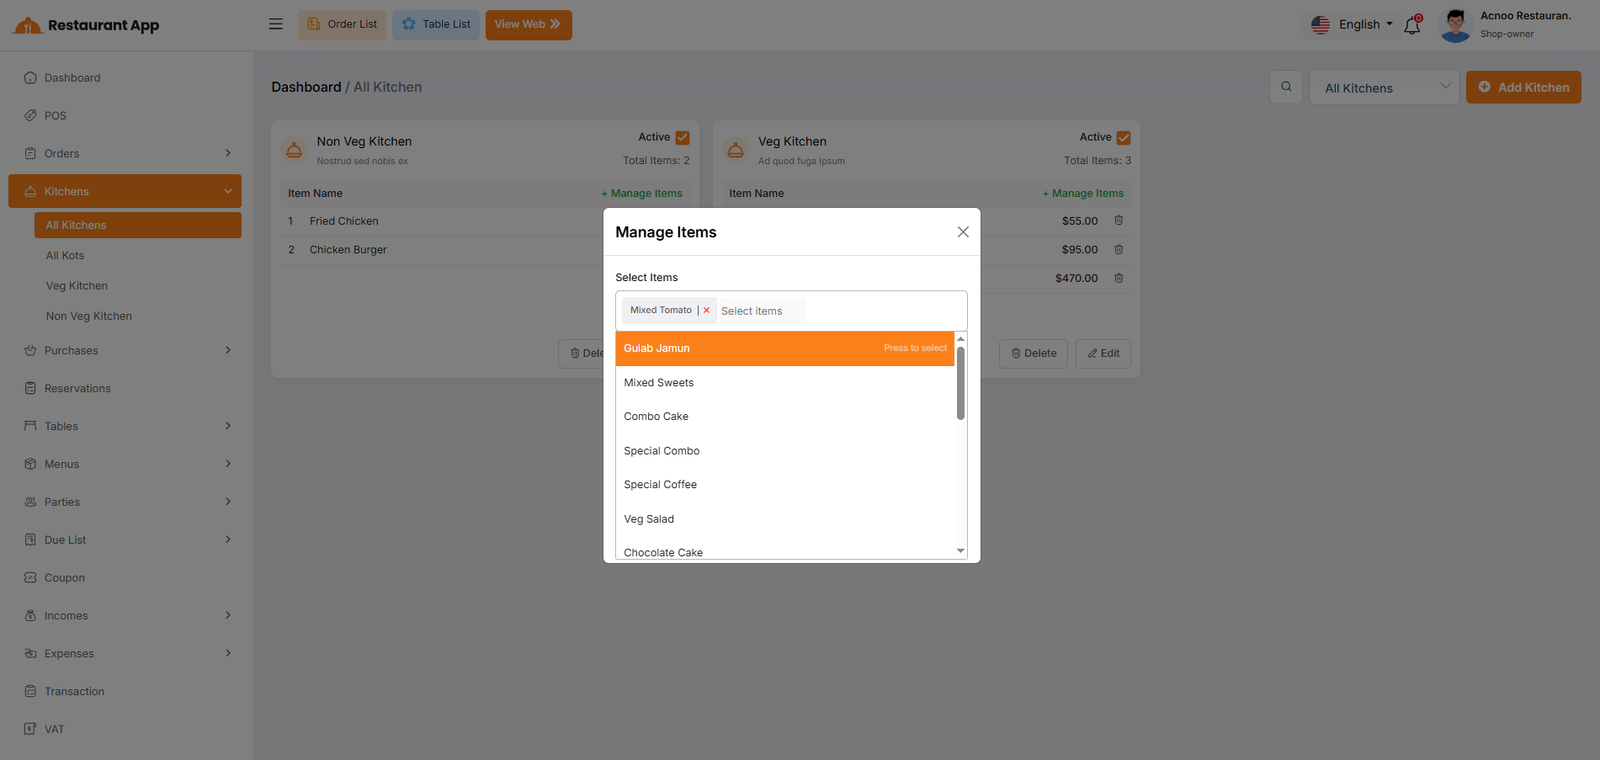
All KOTS
You can access the online store by clicking the "View Web" button in the top corner of the restaurant panel.
1. Individual Item Status ControlsEach dish within a single order can be managed independently to account for different preparation times.
Start Cooking: When a chef begins preparing a specific dish (e.g., Basmoti Rice), they trigger this action. This moves the item from a "New" state into an active preparation state.
Mark Ready: Once an individual item is finished, the chef selects this option. This signals that the specific dish is plated and waiting for the rest of the order.
Ready: The final state for an individual item, confirming it is complete and ready to be served or packed.
2. Global KOT (Full Order) StatusesWhile individual items are being prepared, the entire order moves through a global lifecycle that is visible on the KOT List and the customer’s My Orders page.
Pending: The initial state of the full order immediately after the customer clicks Place Orders. It remains here until the kitchen acknowledges the ticket.
Preparing: The global status automatically shifts to Preparing as soon as the first item in the order is set to Start Cooking. This provides live transparency to the customer that their meal is on the line.
Ready: Once all individual items in a ticket are marked as finished, the global KOT status updates to Ready. This alerts waitstaff (for Table: Special) or drivers that the entire order is ready for pickup.
Cancelled: If the restaurant cannot fulfill the order due to ingredient shortages or other issues, the status is set to Cancelled. This stops the preparation process and notifies the customer immediately.
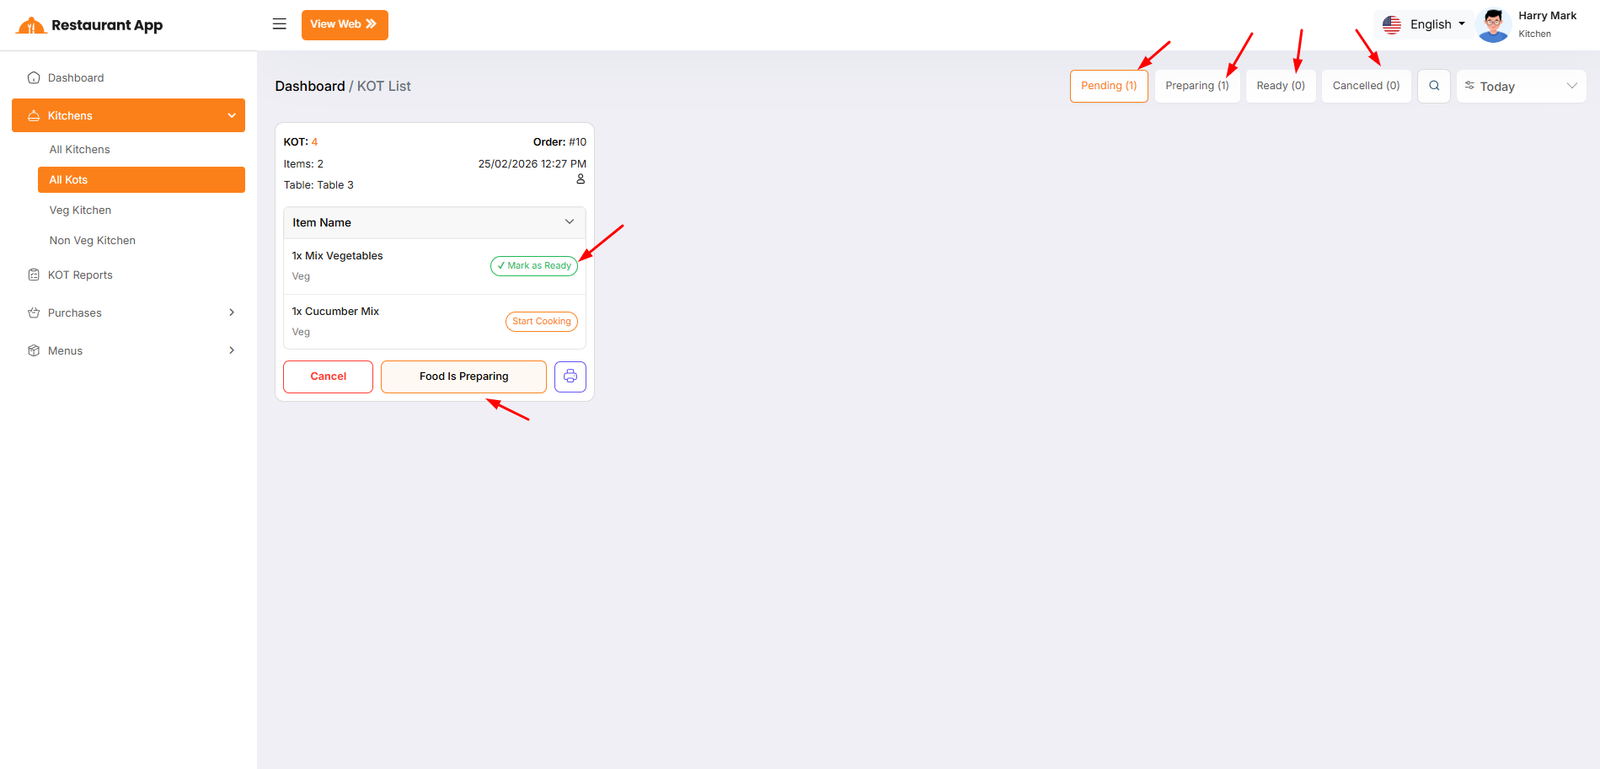
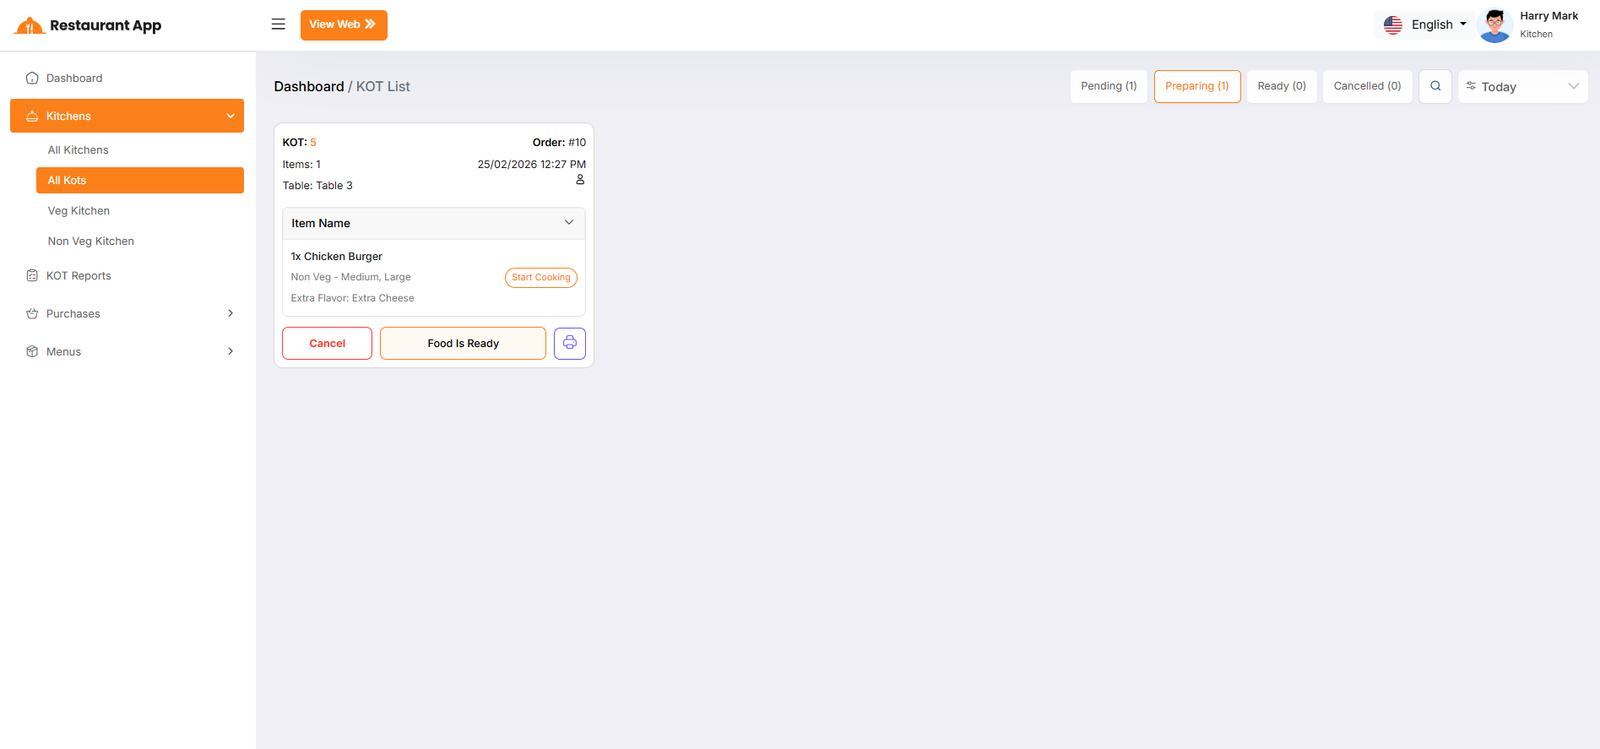
KOT Reports
The Kitchen Dashboard features a granular status management system that tracks both individual menu items and the overall KOT (Kitchen Order Ticket). This ensures that the culinary team can monitor the specific progress of every dish while keeping the customer and front-of-house staff informed of the total order lifecycle.
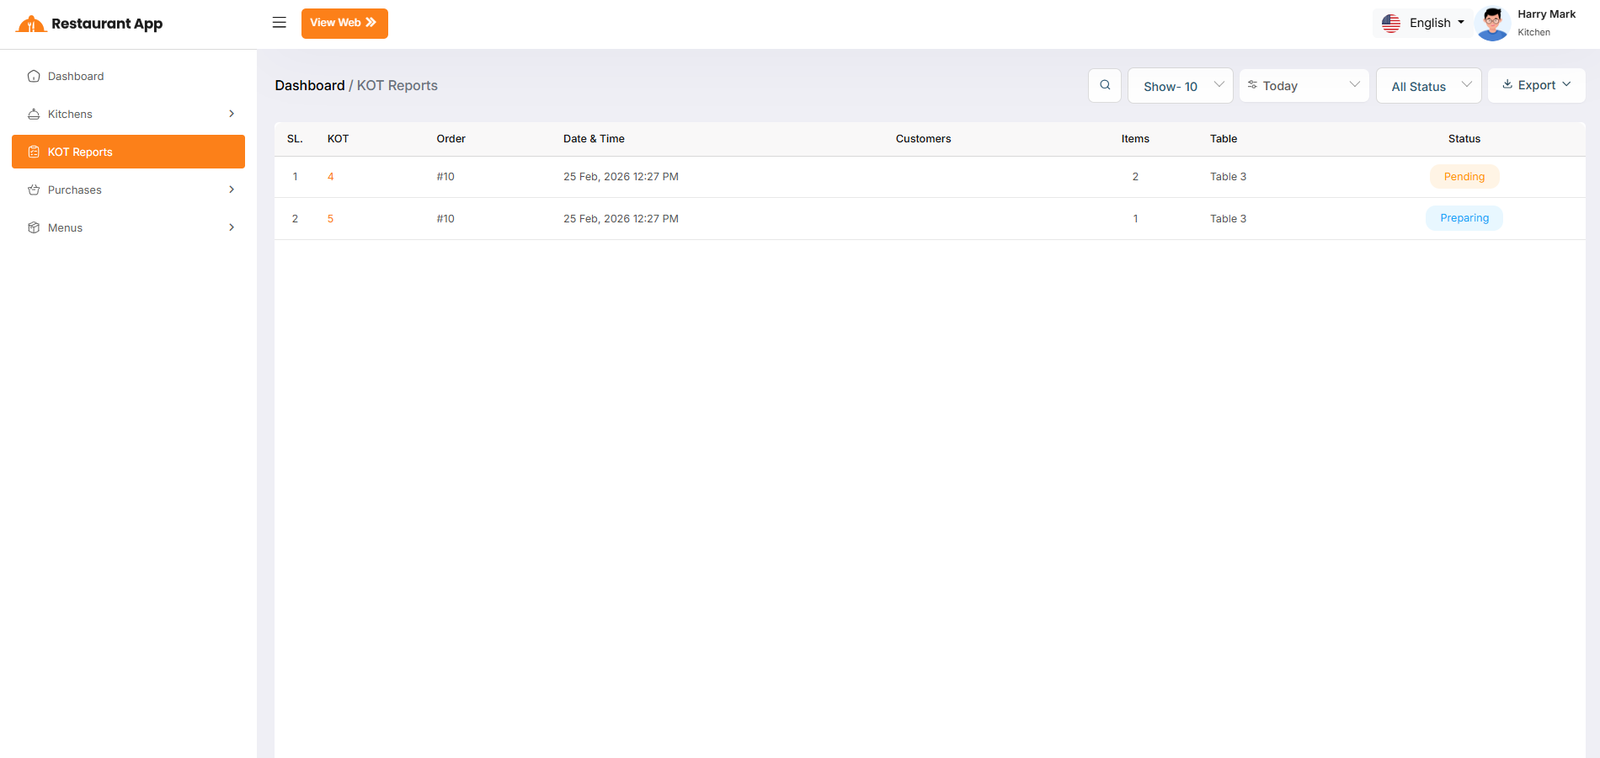
Getting Started
You can access the online store by clicking the "View Web" button in the top corner of the restaurant panel.
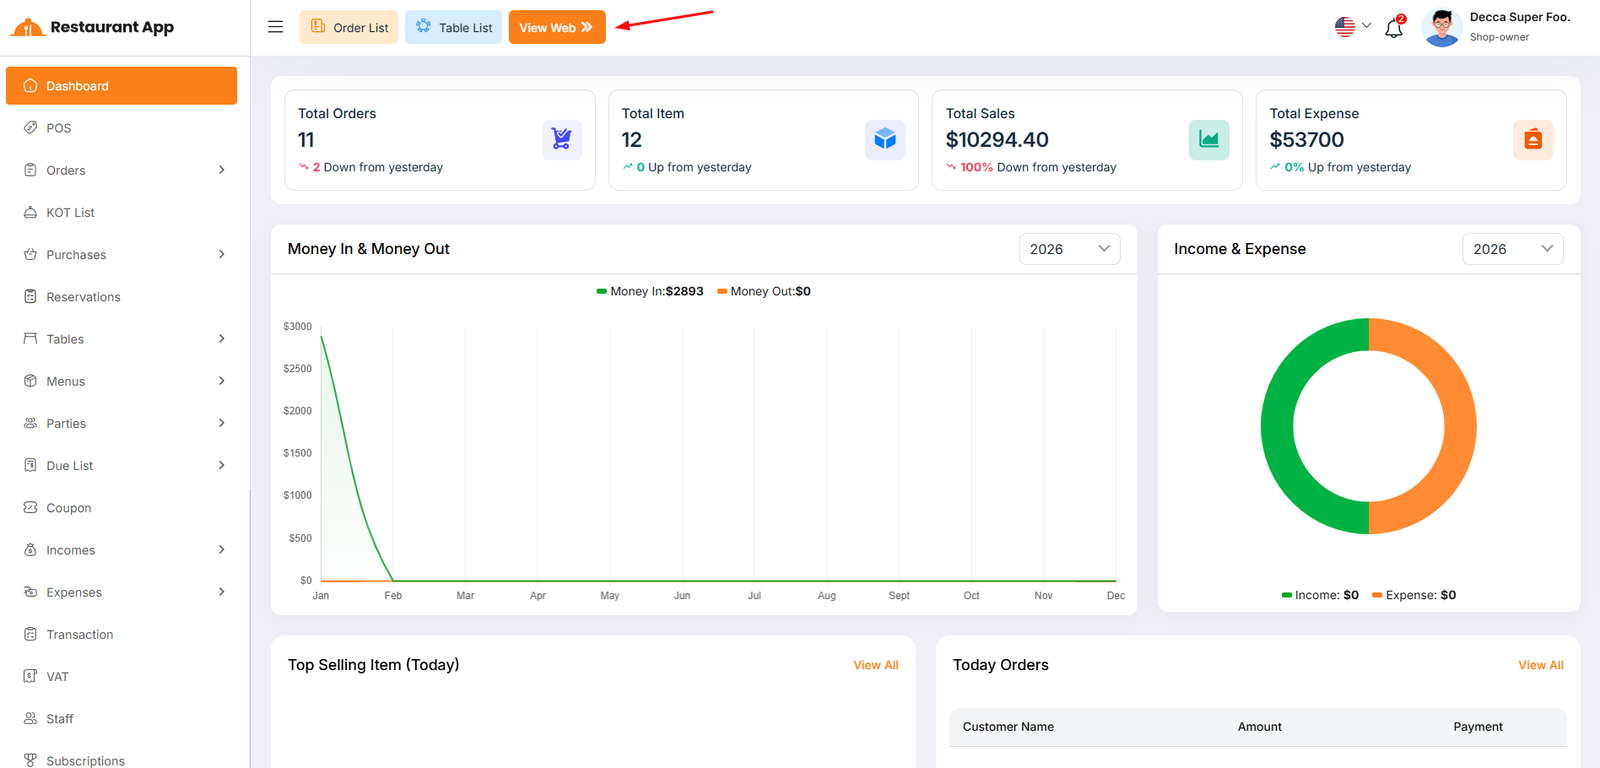
Home Page
1. Hero & Service Sections This is the primary engagement area located at the top of the website.Brand Welcome Features a customizable main title (e.g., "Welcome To Your Food Village"), a supporting subtitle, and a brand description to introduce the restaurant's culinary philosophy.
Primary Call-to-Action A prominent button (e.g., "Shop Now") that directs users to the full menu or ordering platform.
Service Highlights Three key pillars of service are showcased here, such as "Online Order," "Swiss Delivery," and "Best Quality," to build immediate trust with new visitors.
2. Menu & Dining Explorations These sections allow customers to view the restaurant's offerings and secure their visit.Popular Dishes A curated carousel or grid featuring top-rated menu items with their respective pricing and quick-add-to-cart functionality.
Regular Menu Pack Categorized tabs (e.g., Breakfast, Pizza, Drinks) that allow customers to filter and browse the full menu catalog with ease.
Table Reservations A dedicated "Book Your Table" module where guests can select their preferred date, time, and guest count to secure a reservation directly from the home page.
3. Social Proof & Engagement This area focuses on building community and credibility through customer feedback and updates.Mobile Integration A dedicated section encouraging users to download the restaurant's mobile application for a more streamlined ordering experience.
Testimonials ("Food Lover Says") Displays verified customer reviews, including star ratings, client names, and profile images managed through the Testimonial List.
Latest Blogs Showcases the most recent articles, food festivals, or chef tips created in the Blog List section to keep content fresh and improve SEO.
4. Footer & Newsletter The bottom of the page provides essential navigation and subscription options.Newsletter Subscription A prominent input field allowing customers to subscribe to the restaurant's mailing list, with data populating the Newsletters List for marketing use.
Navigation Links Provides quick access to legal policies managed in the admin panel, including Terms & Conditions and Privacy & Policy.
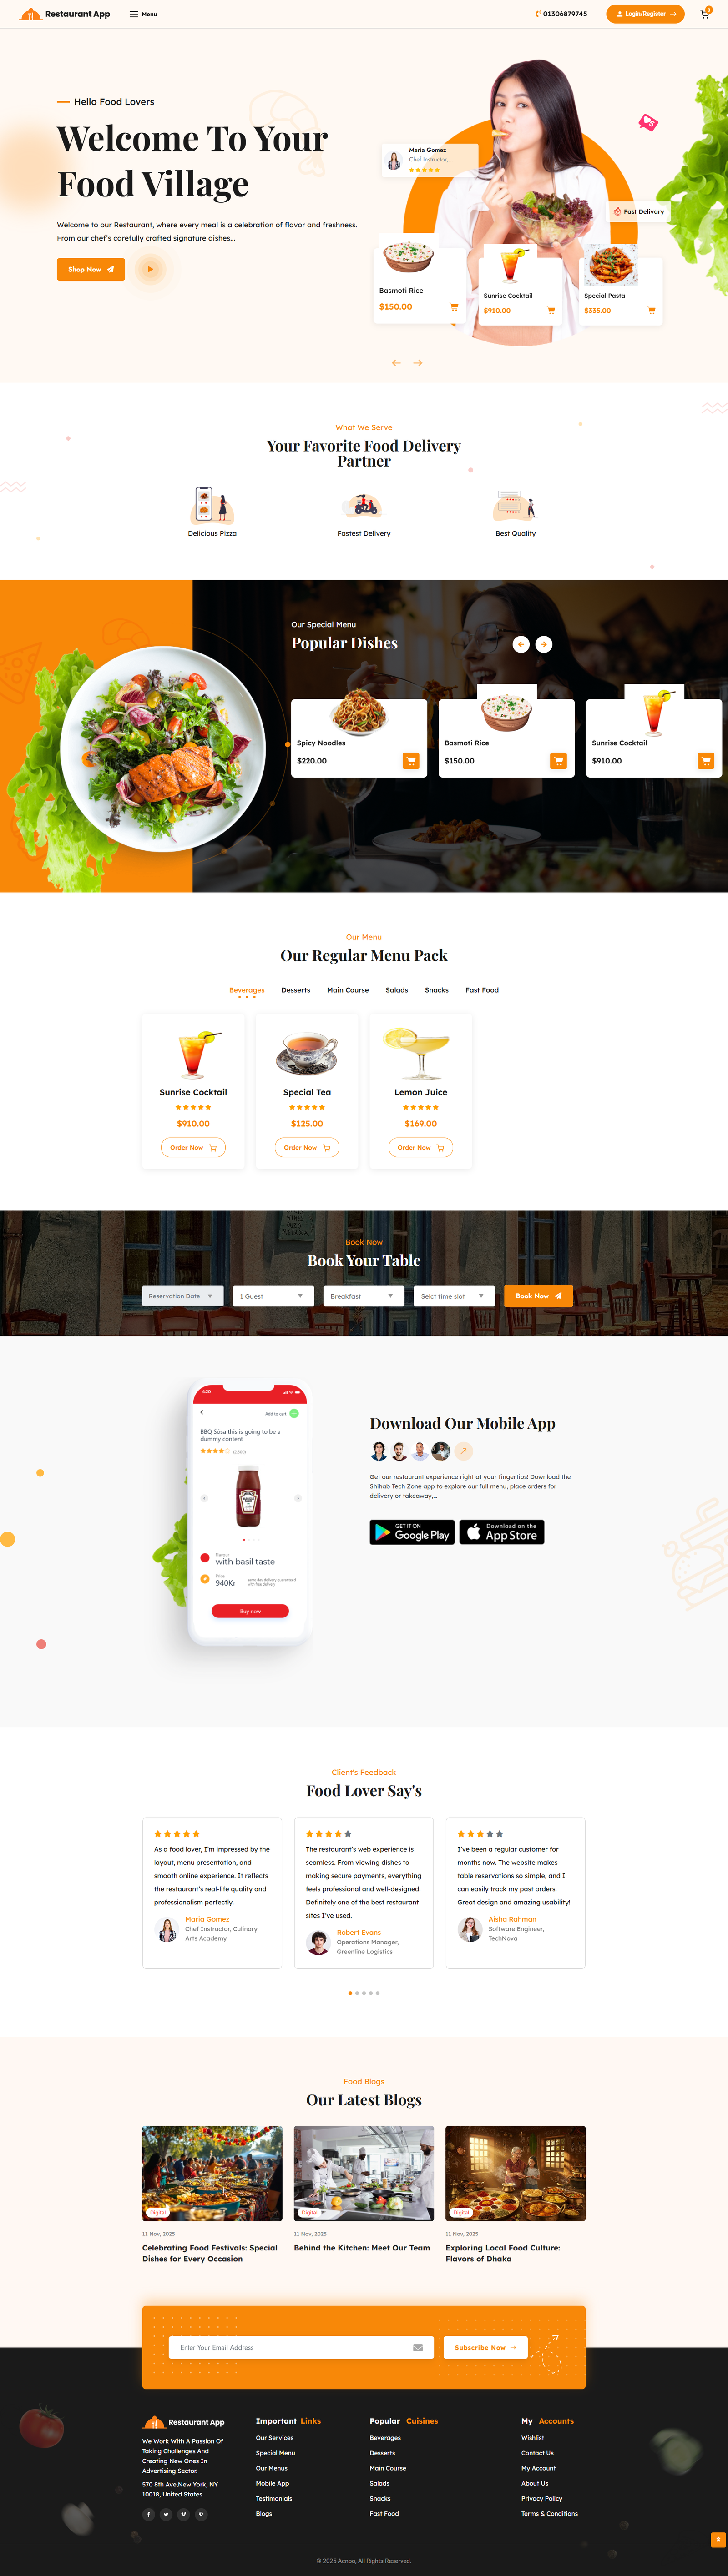
Cart Content
The My Cart interface is a dynamic sidebar component designed to manage the customer's selection and initiate the checkout process.
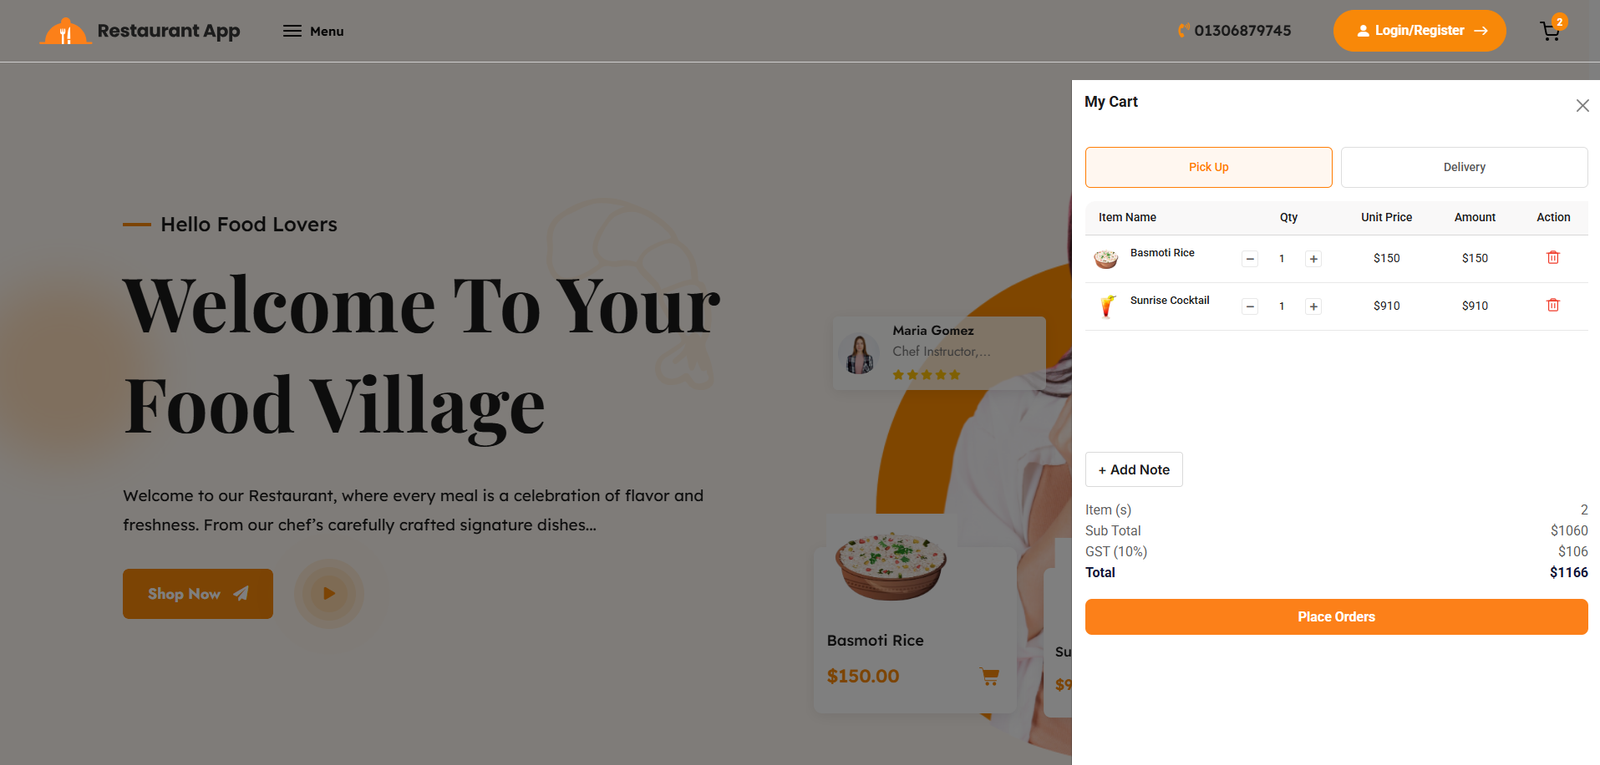
The Order Authentication workflow ensures that all transactions are tied to a verified customer account. This process is automatically triggered during the checkout phase to maintain secure record-keeping and order tracking.
When a customer has finalized their selections in the My Cart sidebar, they must initiate the final transaction process.
Place Orders Button: Clicking this primary orange action button signals the system to begin the final invoice calculation and payment transition.
Authentication Check: Before proceeding to the payment gateway, the system performs a real-time check of the user's current session status.
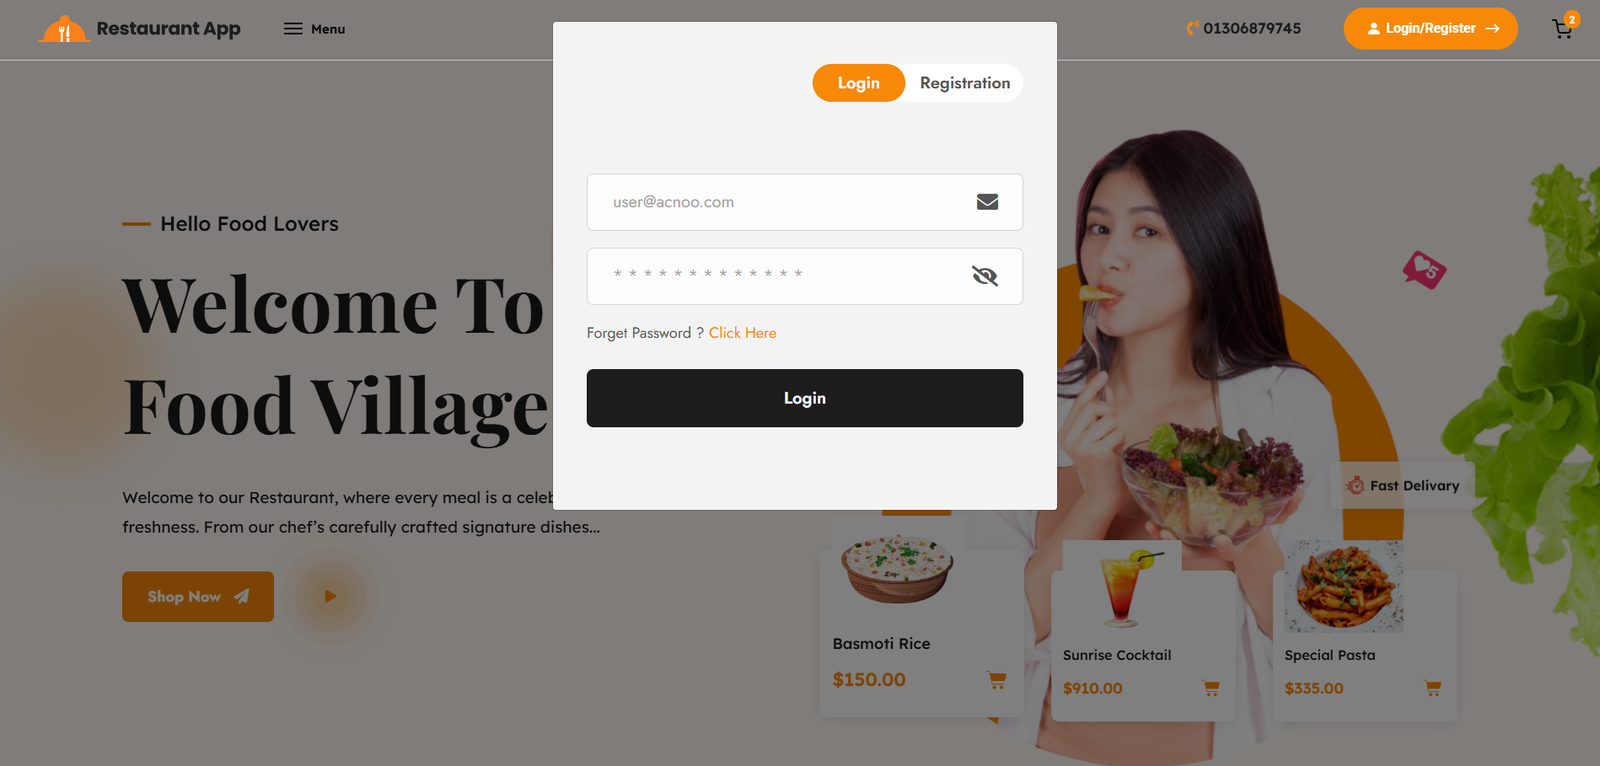
Checkout
The Checkout Page is the final destination for authenticated users to review their order details, select a delivery address, and proceed to payment. This page is automatically accessed after a user successfully logs in or registers via the authentication modal during the "Place Orders" workflow.
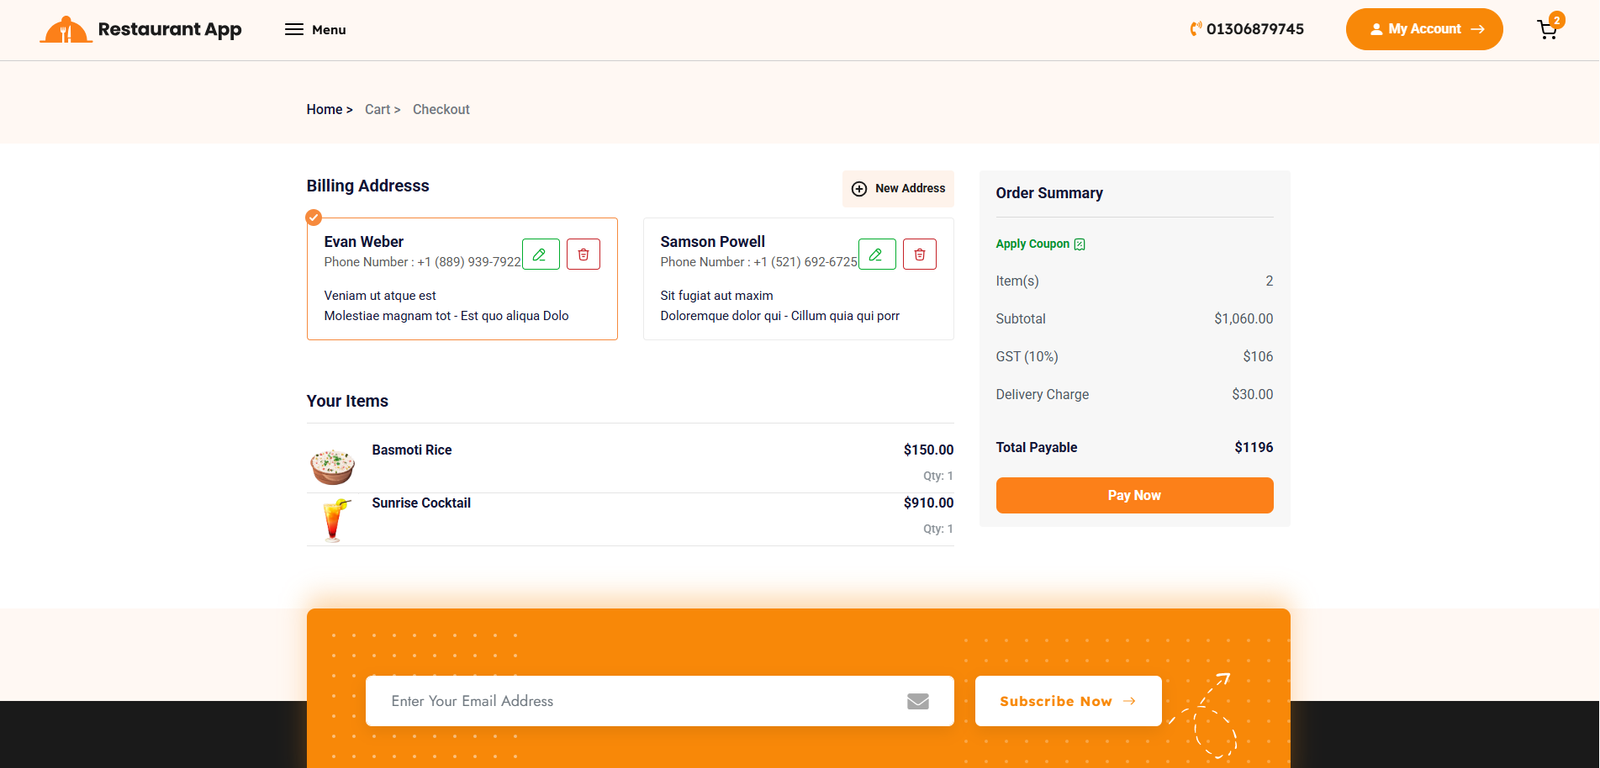
Food Menu
The Table QR Ordering system allows guests to access the digital menu and place orders directly from their seat by scanning a unique QR code. This process streamlines the dining experience by linking the customer's digital cart directly to their physical table in the restaurant's Point of Sale (POS) system.
1. Landing Page & Table IdentificationUpon scanning the QR code, the customer is redirected to a landing page that confirms their physical location within the restaurant.
QR Verification: The page displays a Menu List header with the message "Please Scan QR Code Send Quick Order," confirming the digital connection.
Table Assignment: The system automatically identifies and displays the specific table name (e.g., Table: Special) and its seating Capacity. This ensures that when the order is placed, the kitchen and waitstaff know exactly where to deliver the food.
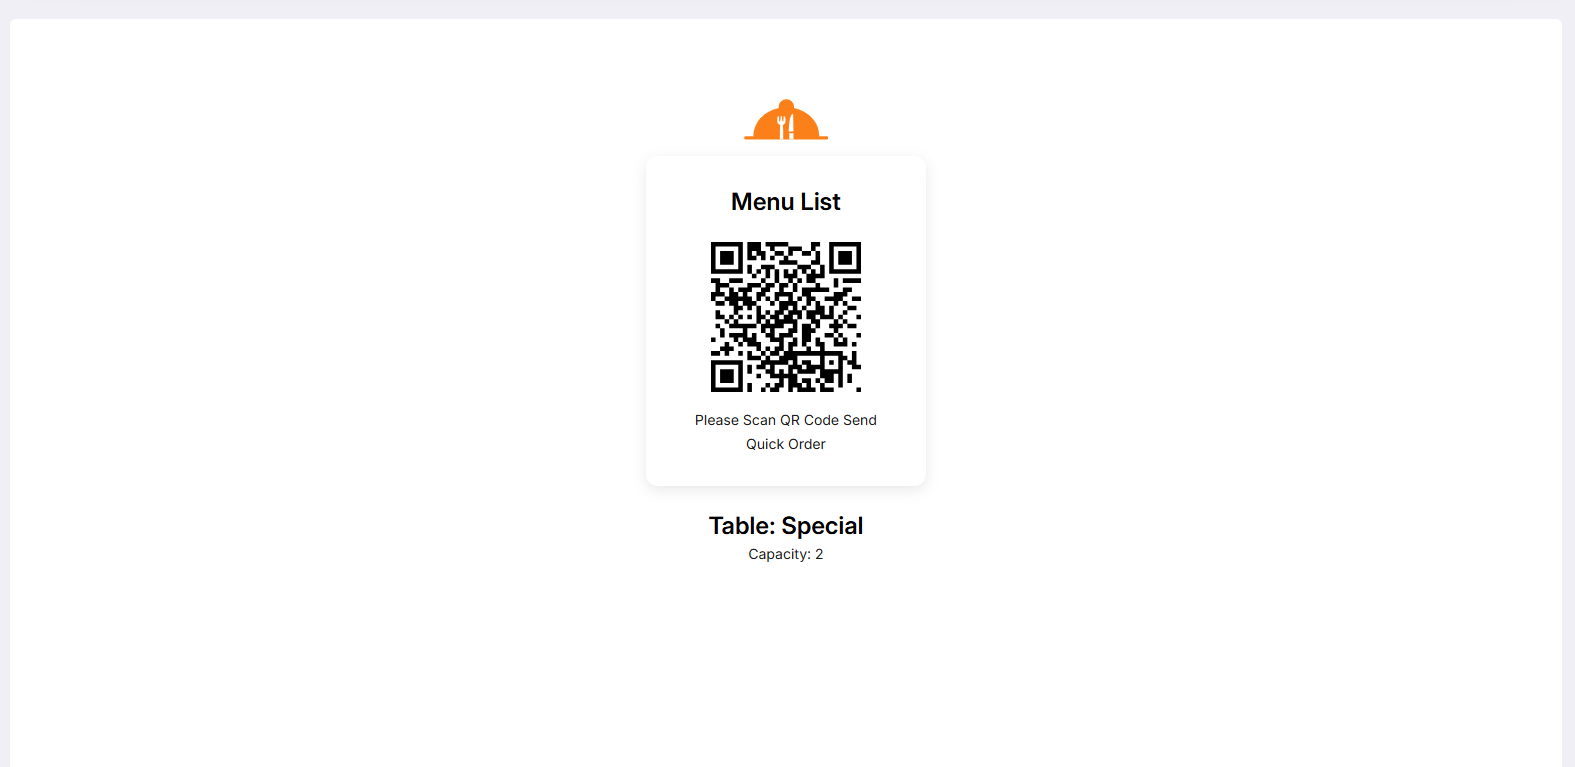
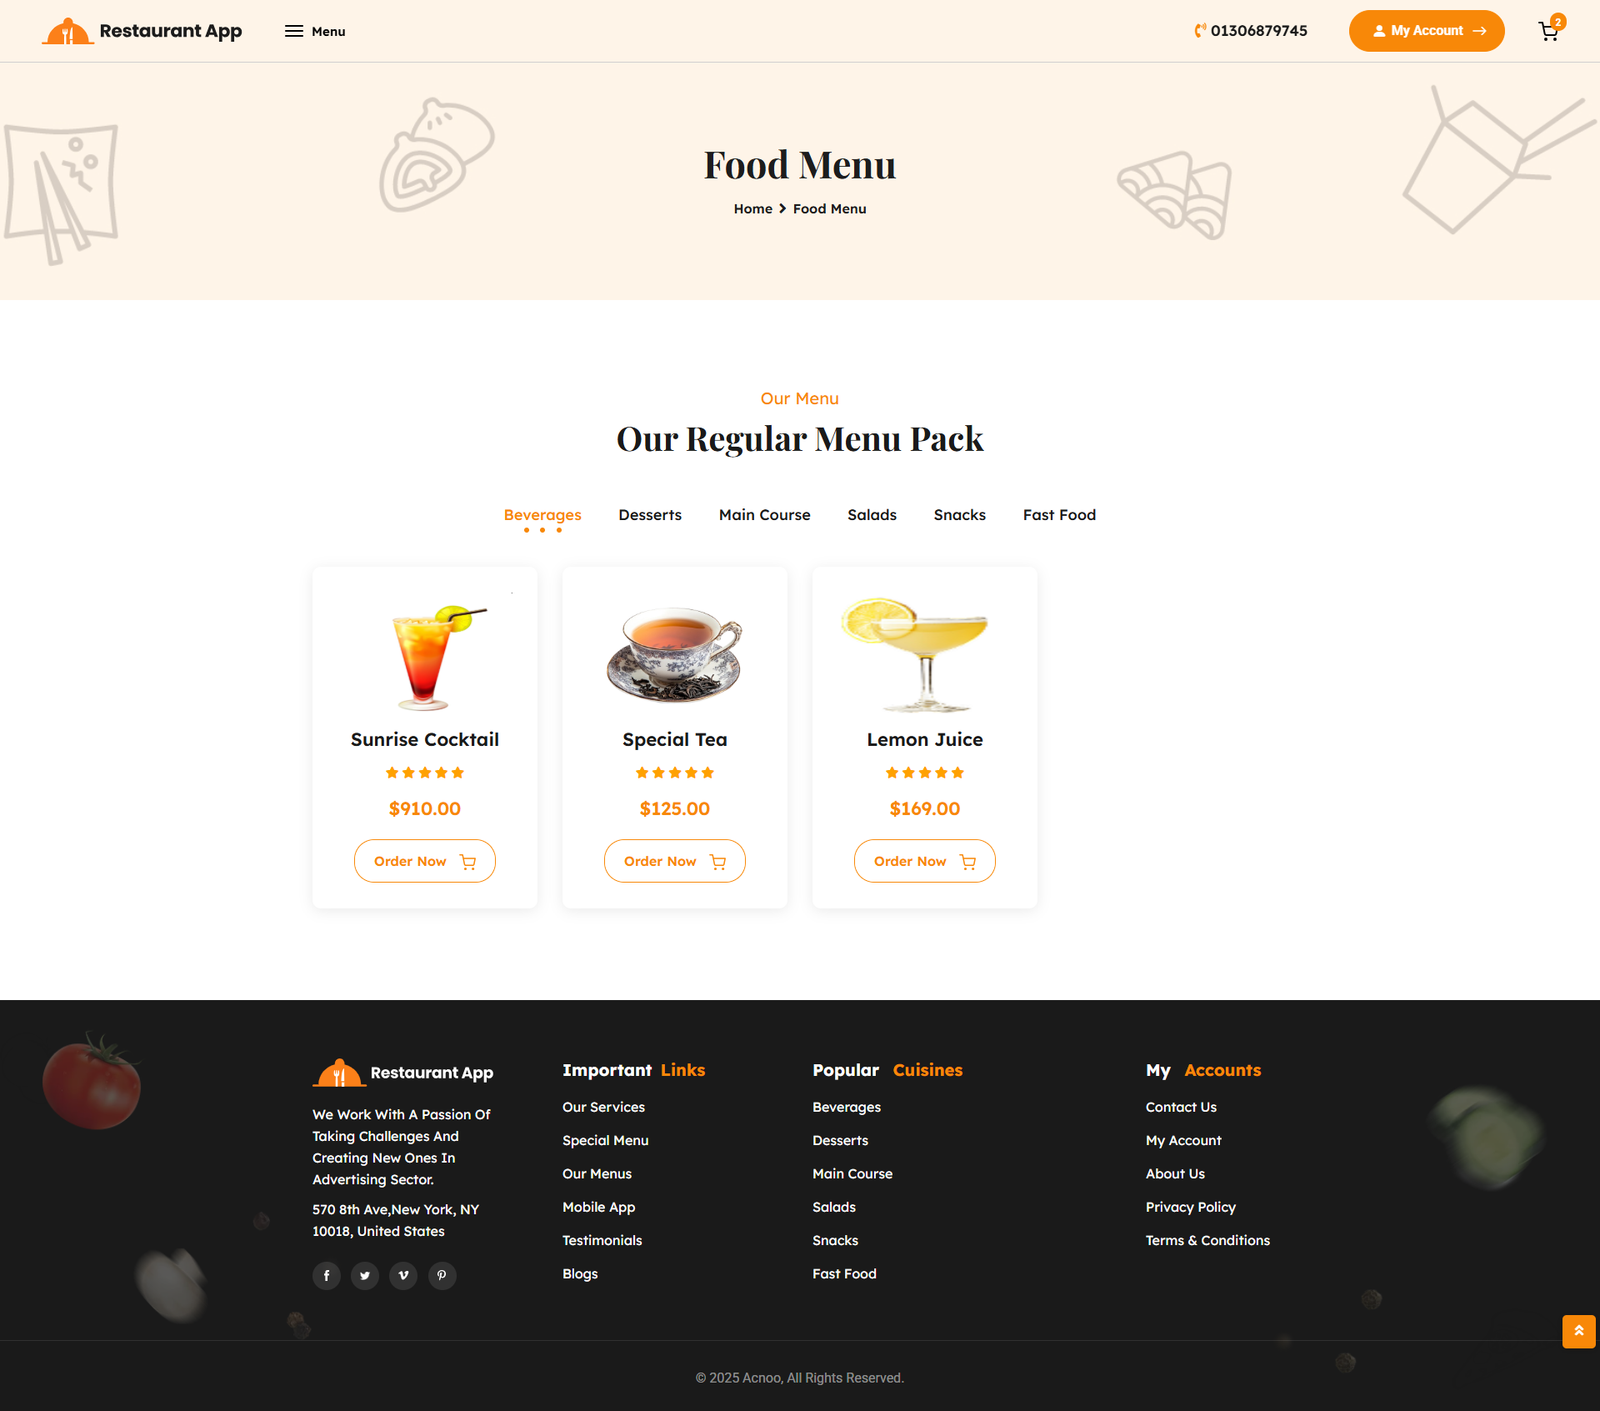
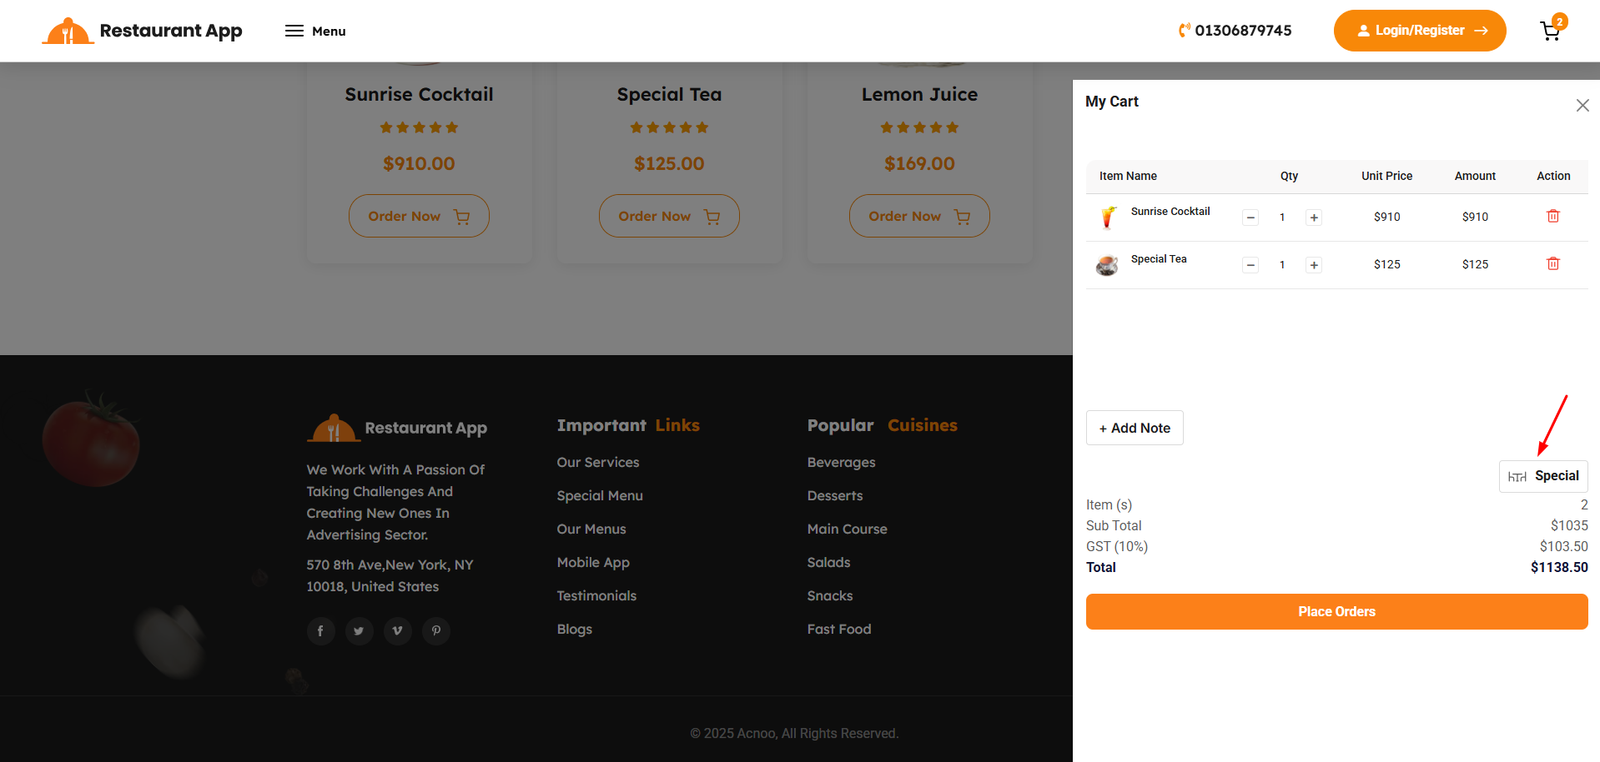
My Profile
The My Profile page serves as the personal dashboard for authenticated customers. It provides a centralized location for users to manage their account details, track their dining activity, and review their interaction history with the restaurant.
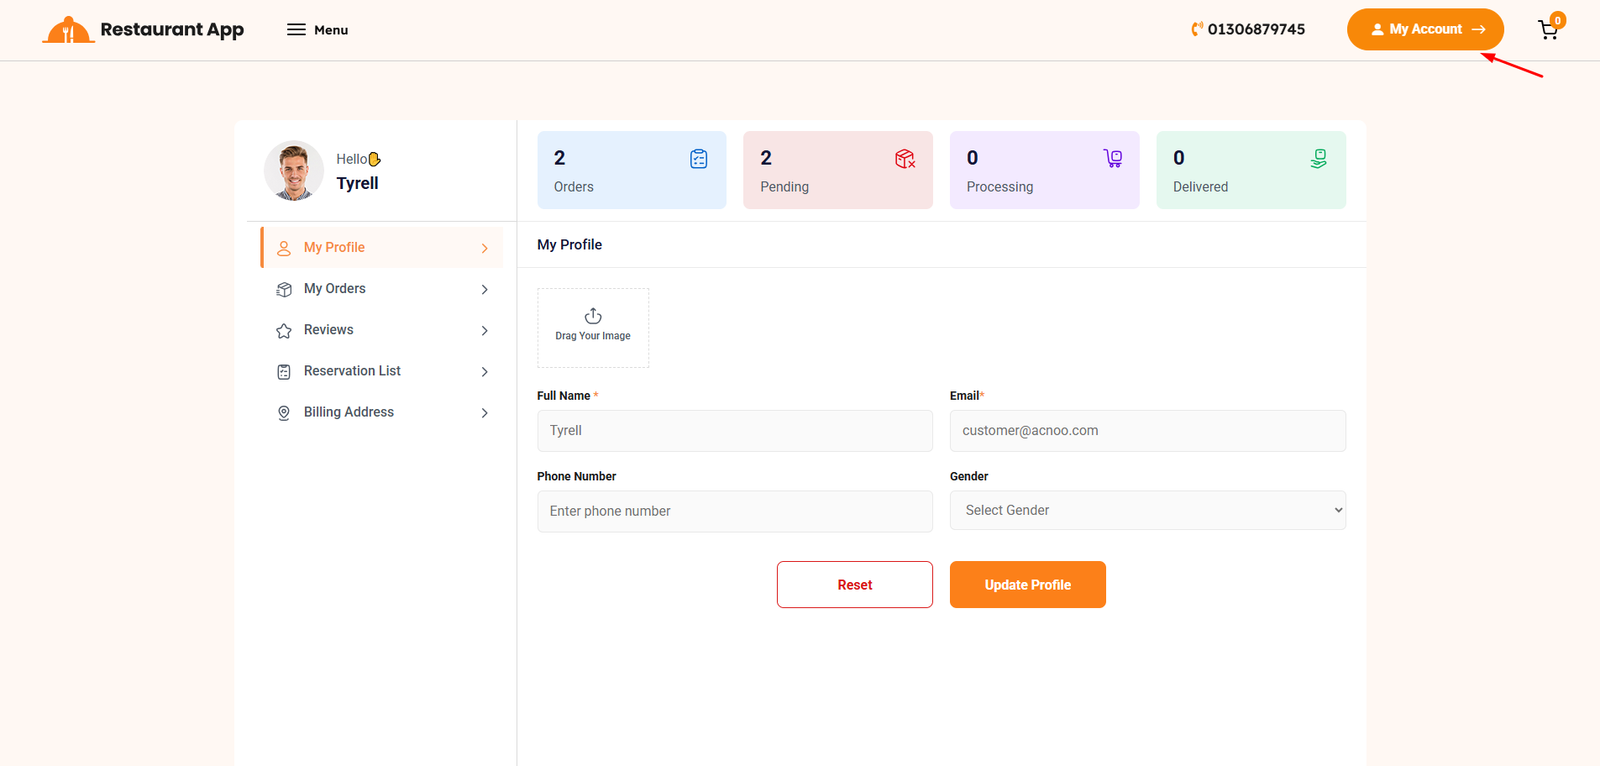
Order List
The My Orders page, accessible through the customer profile dashboard, provides a comprehensive history of all transactions made by the user. This interface allows customers to track real-time order progress and access historical receipts.
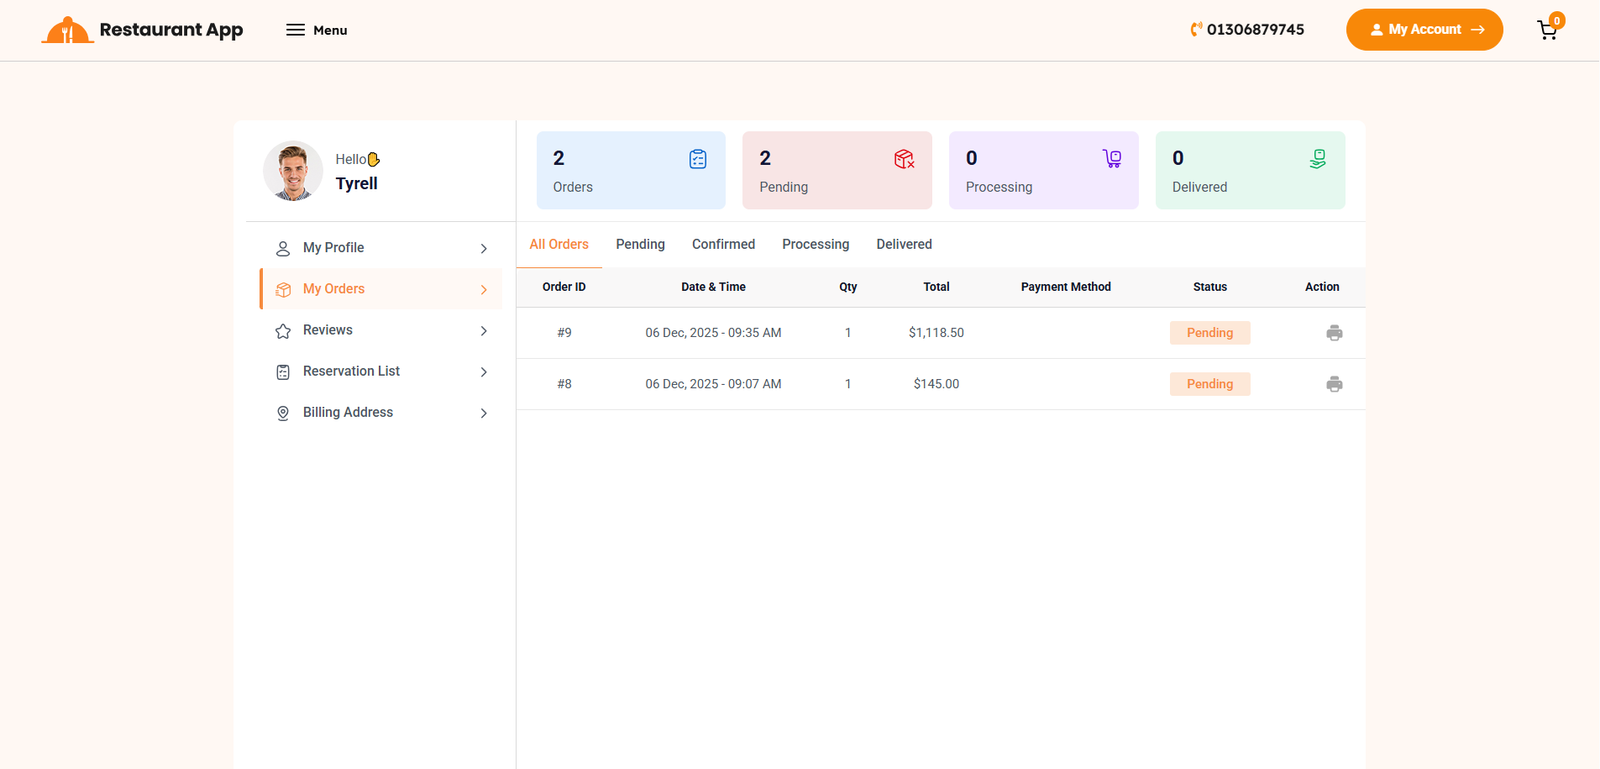
Review Create
The Reviews section, located within the customer dashboard, provides a dedicated space for guests to share their dining experiences. This feedback loop is essential for maintaining food quality and helping other customers make informed choices.
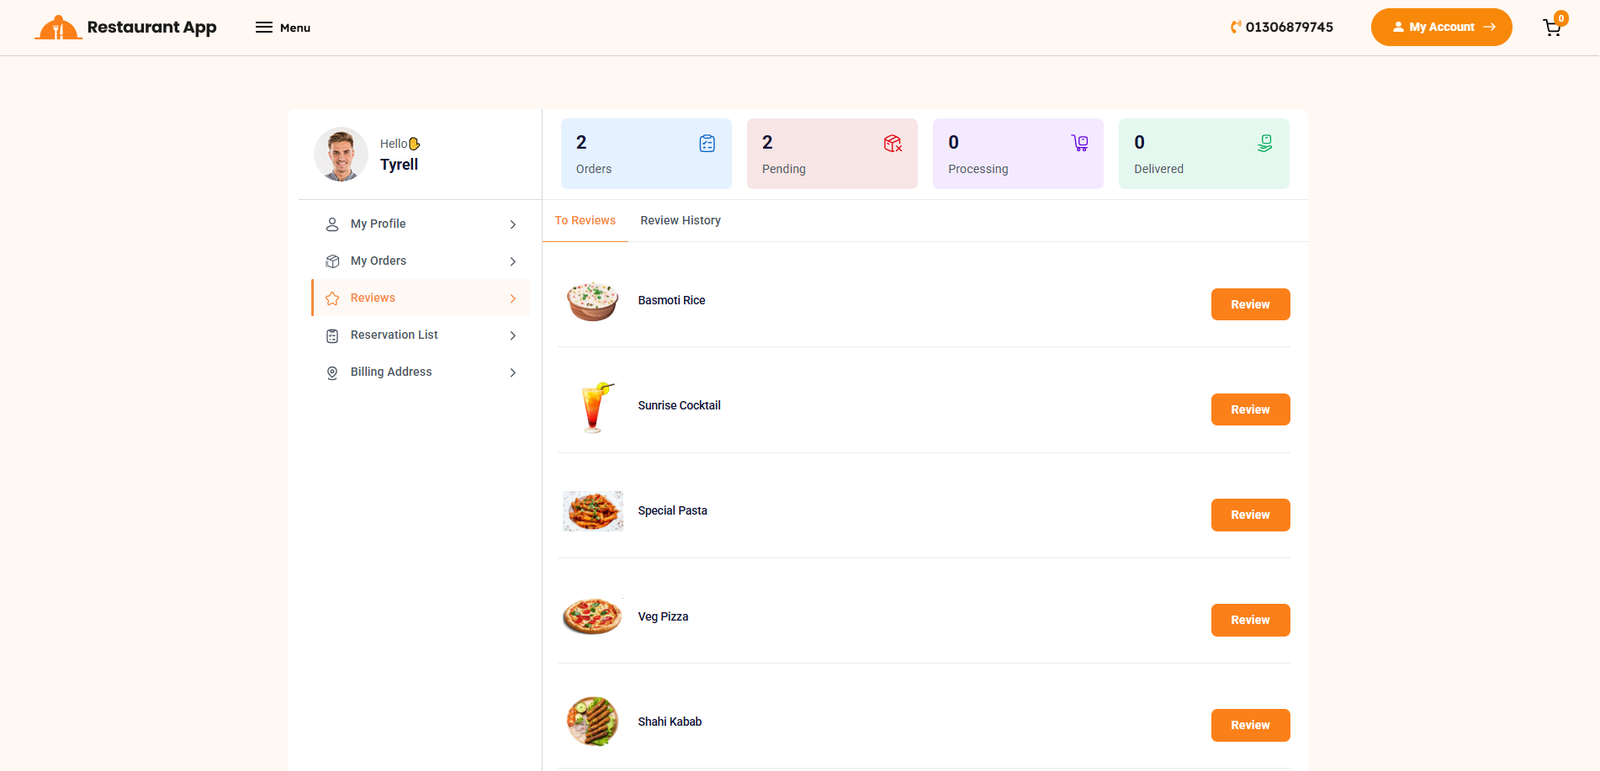
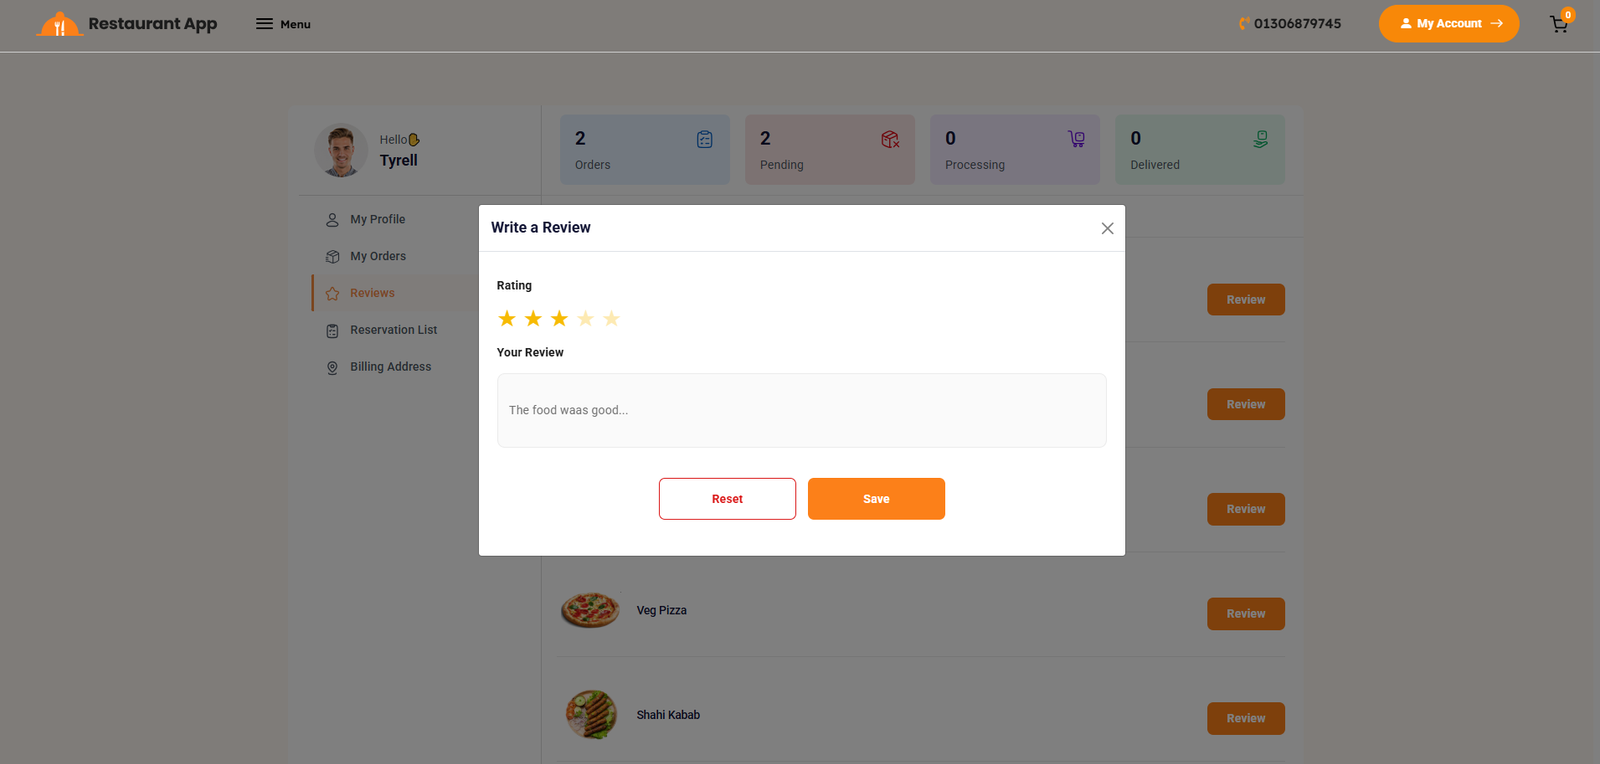
Reservation
The Reservation List section, located within the customer dashboard, provides a comprehensive overview of all table booking requests. This interface allows guests to manage their upcoming dining plans and schedule new reservations directly from their profile.
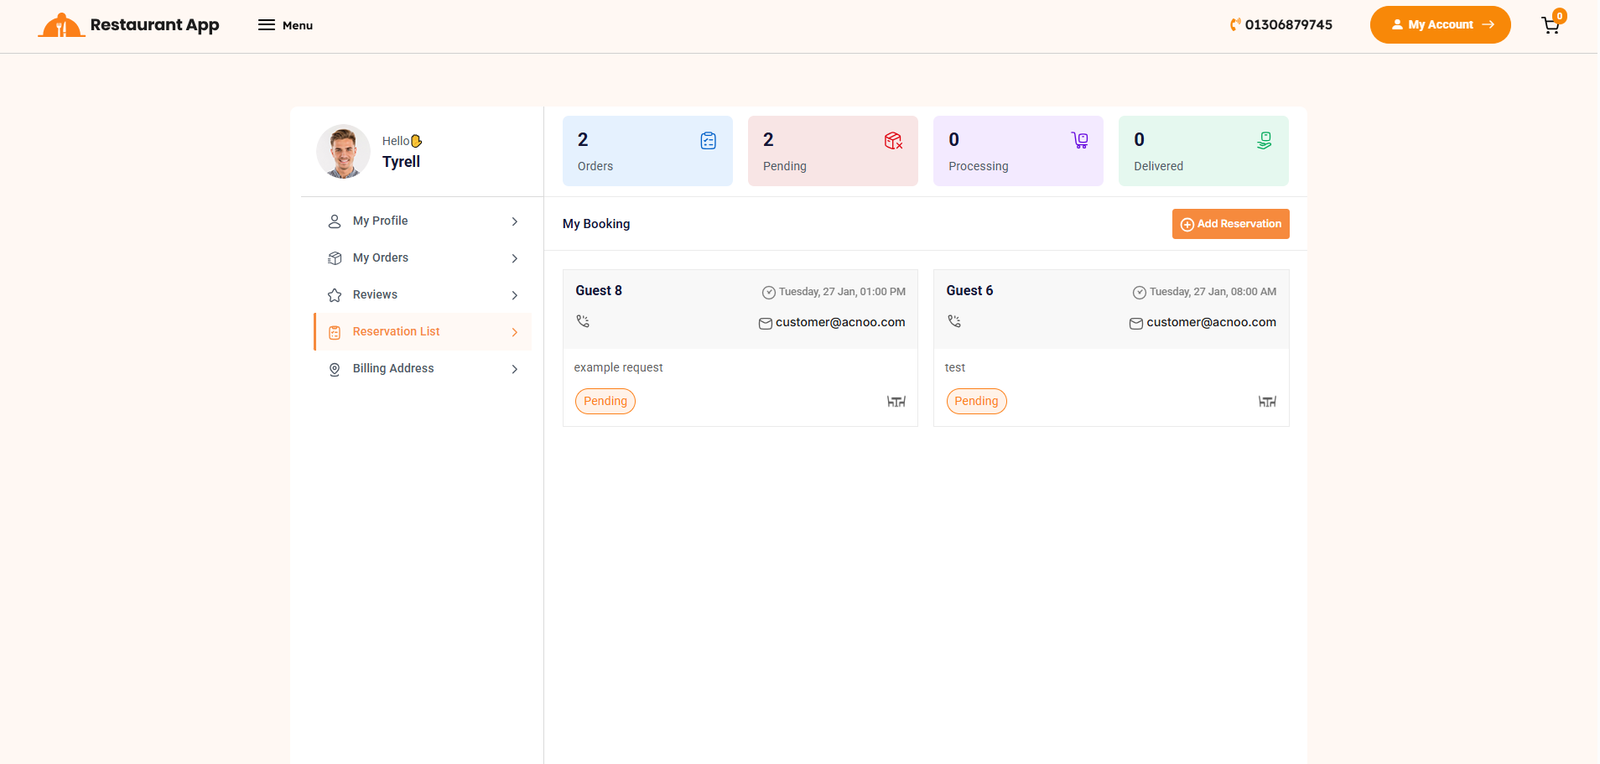
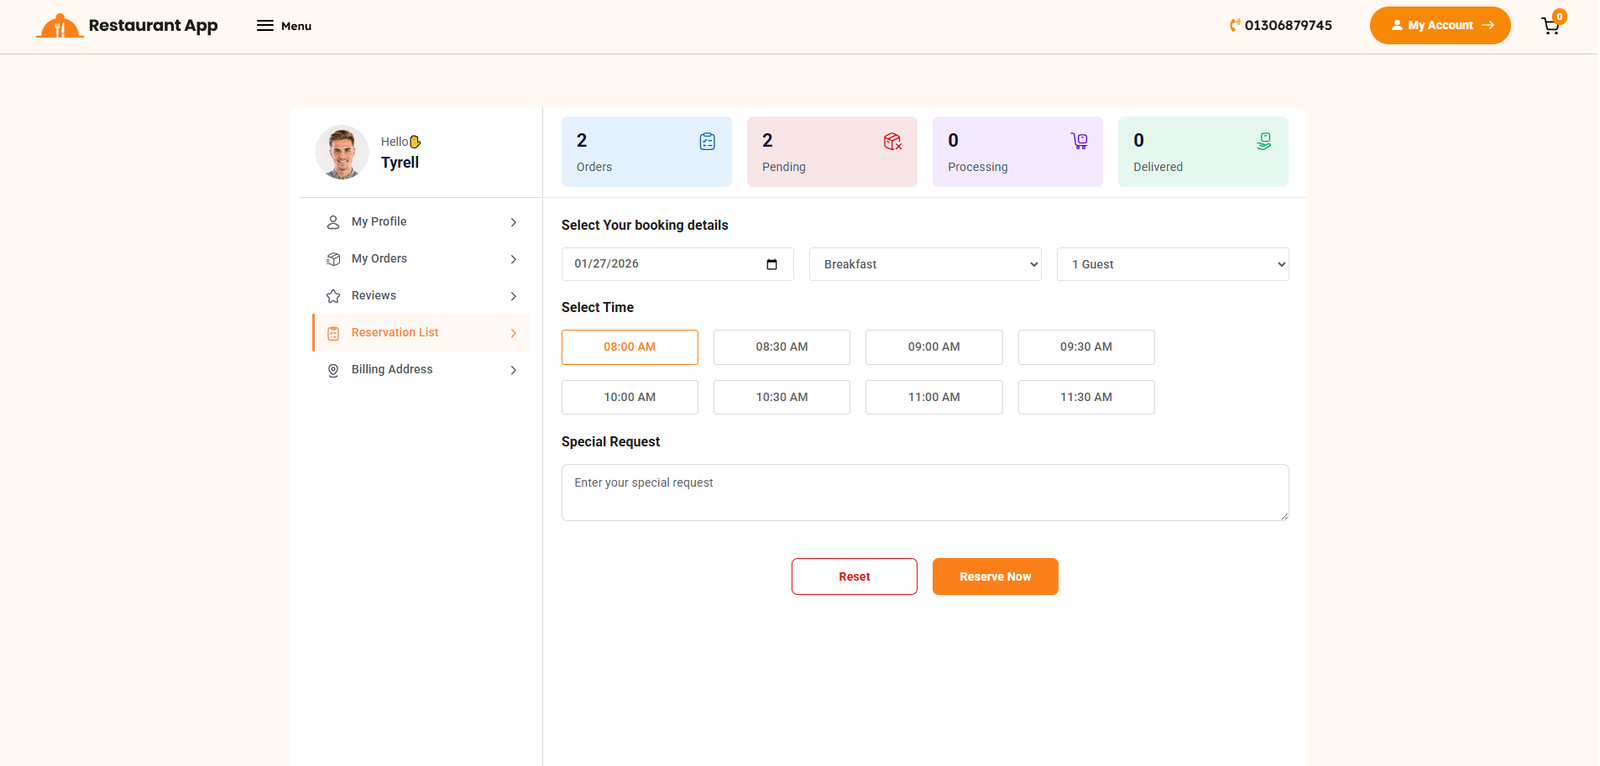
Billing Address
The Billing Address page, located within the customer dashboard, provides a centralized interface for users to manage their saved locations. This section ensures a faster checkout process by allowing customers to store and edit multiple delivery or billing destinations.
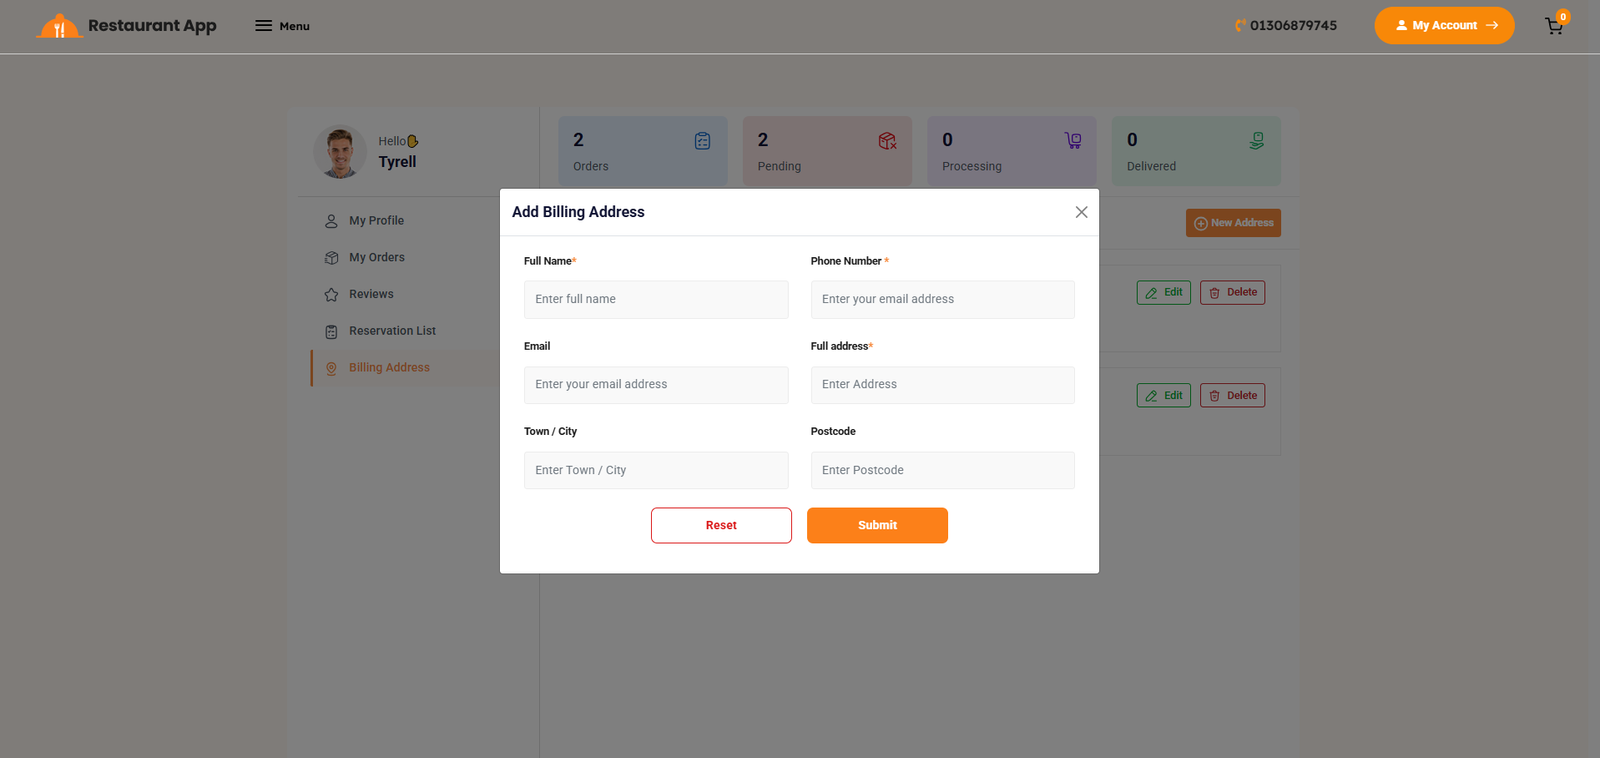
QR Code for Restaurant Tables
Each restaurant table has a unique QR Code that customers can scan to access the restaurant's online menu. The QR Code is automatically generated when a new table is created from the Restaurant Panel. If a QR Code is lost or damaged, you can generate a new one from the QR Code. You can download and print the QR Code and place it on the corresponding table.
Table Scanner List: From the Restaurant Panel, you can view the list of tables along with their QR Codes and other relevant information.
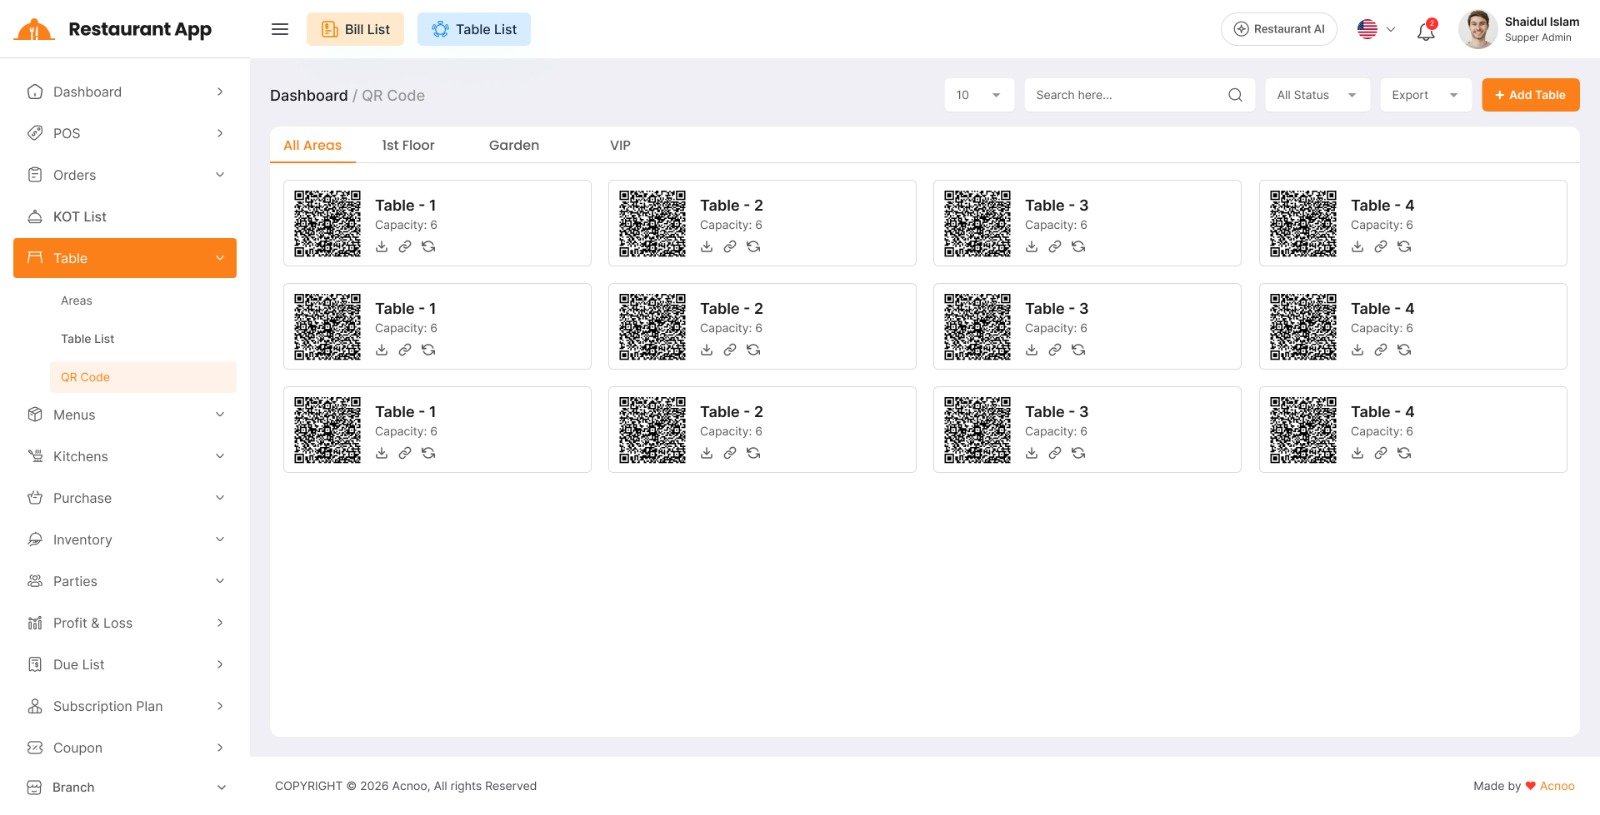
Scan QR Code: Customers can scan the QR Code placed on their table using their mobile phone. After scanning, they will be redirected to the restaurant's online menu, where they can view the menu and place their order directly from their table.
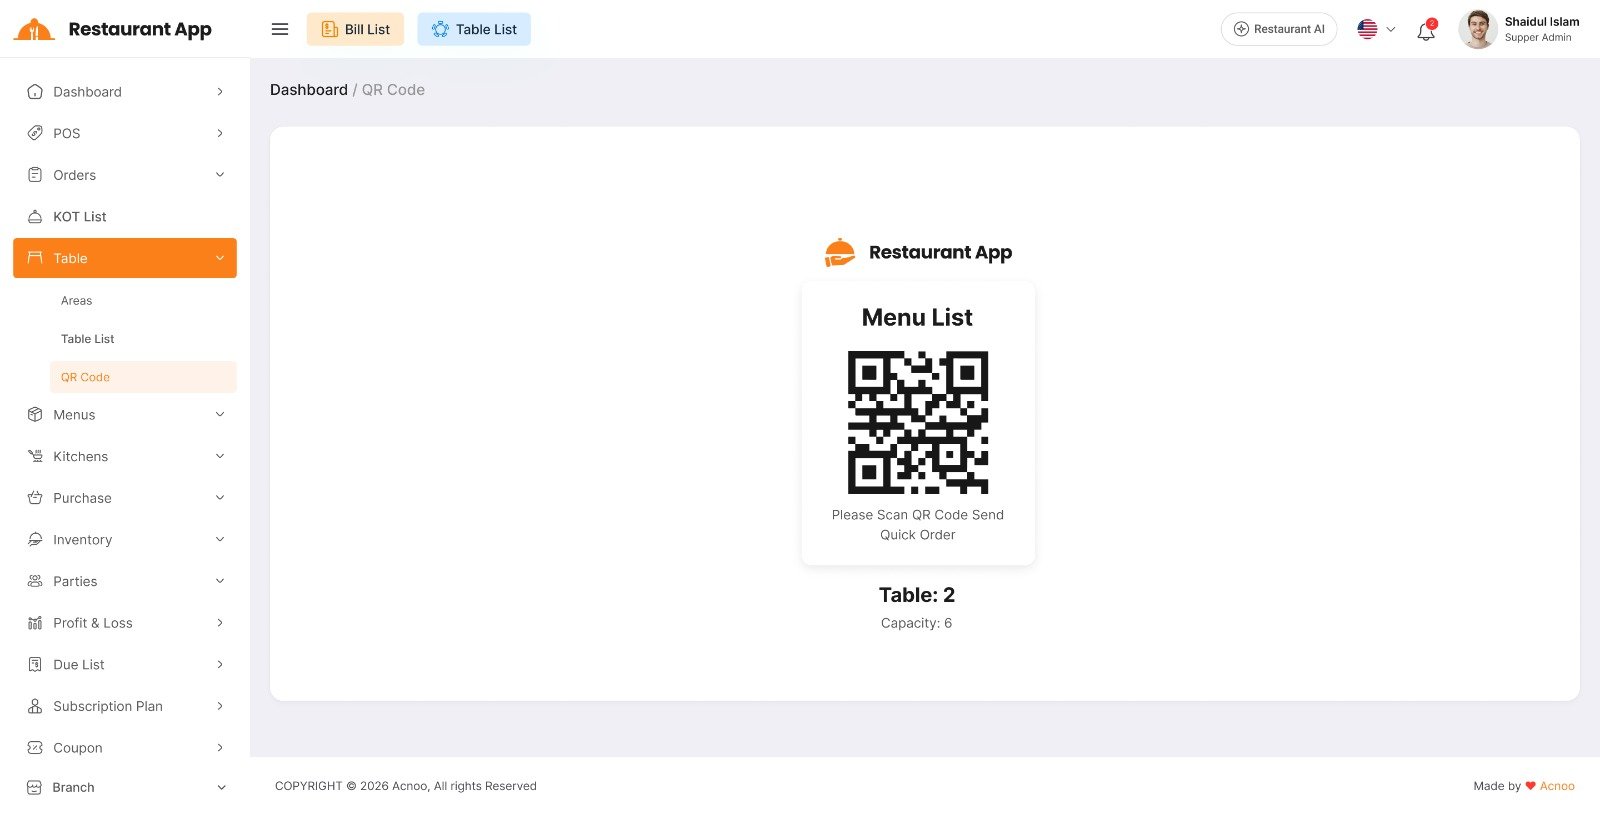
Online Store Items: Customers can browse the available food items, add their preferred items to the cart, and place an order without needing to log in or provide a delivery address when ordering from a restaurant table.
Once the order is placed, the restaurant staff can receive and prepare the order based on the customer's table. The table status and order details can also be monitored from the Restaurant Panel.
For Takeaway tables, customers can scan the QR Code, select their preferred items, and complete the order by making an online payment.
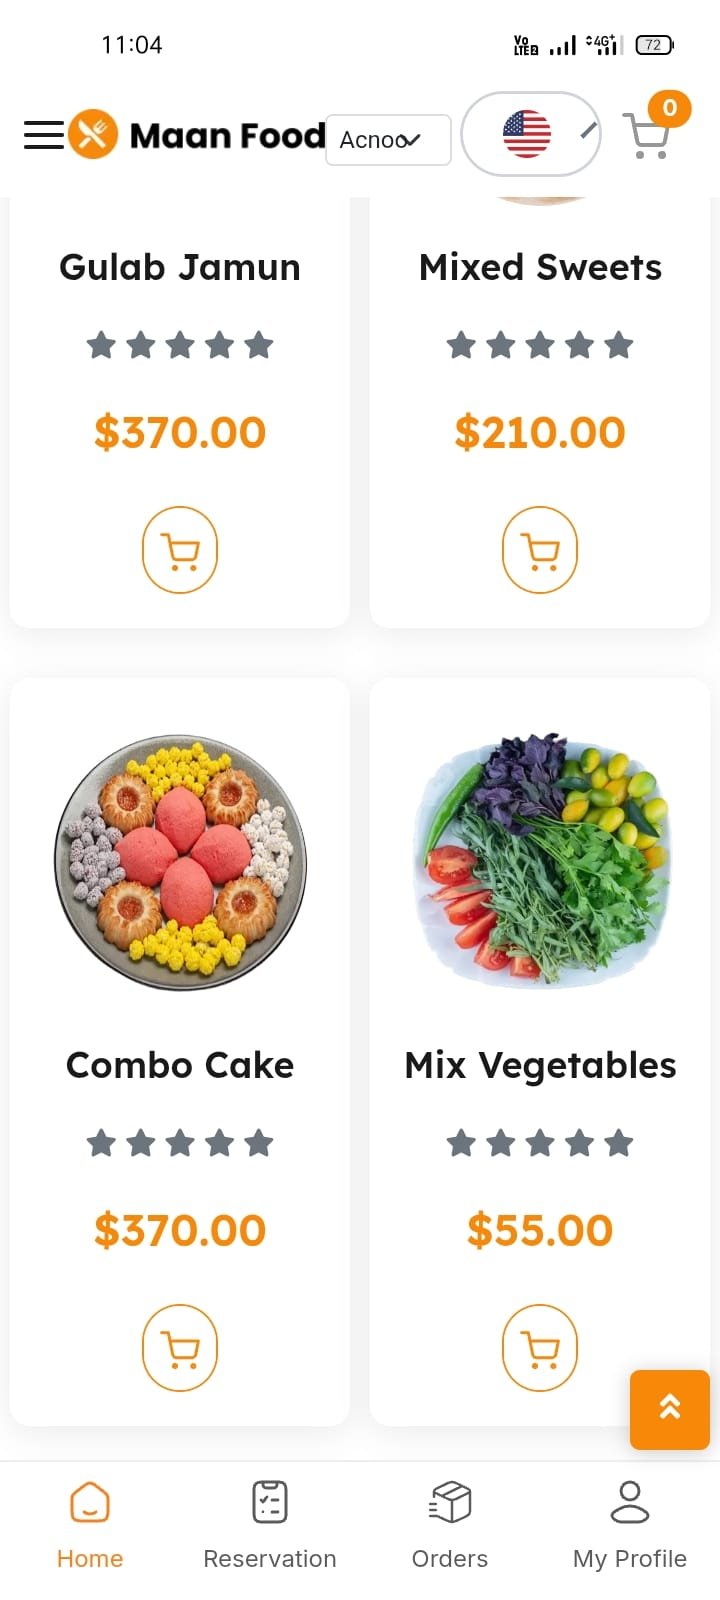
Change Logs
Note: Before updating to the new version, please ensure you have a database and full project backup, and that your project is already updated to the latest version. This is extremely important!
Version: 1.4 ( 13 July 2026 )
- Implemented comprehensive branch management functionality.
- Added takeaway order management features.
- Enabled order placement without immediate payment.
- Implemented online store open/close scheduling and availability management.
- Added product out-of-stock management.
- Enhanced the user interface and overall user experience (UI/UX).
- Resolved various bugs and improved system stability.
Note: Please replace the following folders:
✔Modules/RestaurantOnlineStore
✔app
✔config
✔database
✔lang
✔public/assets
✔resources
✔routes
After replacing them, visit yourdomain.com/update to install the new version and
please don't forget to reload hard your browser. Without visiting the URL and reloading
hard, your project will not function correctly, so ensure you complete this step.
Note: If you face any issues with the update, please contact us.
Version: 1.3 ( 10 June 2026 )
- Updated navbar design and responsive.
- General improvements and updates.
Note: Please replace the following folders:
✔Modules/RestaurantOnlineStore
✔public/assets
After replacing them, visit yourdomain.com/update to install the new version and
please don't forget to reload hard your browser. Without visiting the URL and reloading
hard, your project will not function correctly, so ensure you complete this step.
Note: If you face any issues with the update, please contact us.
Version: 1.2 ( 05 March 2026 )
- Language issue fixed
Note: Please replace the following folders:
✔Modules/RestaurantOnlineStore
After replacing them, visit yourdomain.com/update to install the new version and
please don't forget to reload hard your browser. Without visiting the URL and reloading
hard, your project will not function correctly, so ensure you complete this step.
Note: If you face any issues with the update, please contact us.
Version: 1.1 ( 26 February 2026 )
- Added Kitchen module with dedicated section support
- Updated and optimized KOT listing functionality
- Multiple variation support added
- Resolved multiple UI/UX design inconsistencies
- Fixed various minor bugs and performance issues
Note: Please replace the following folders:
✔app
✔config
✔database
✔lang
✔public/assets
✔routes
After replacing them, visit yourdomain.com/update to install the new version and
please don't forget to reload hard your browser. Without visiting the URL and reloading
hard, your project will not function correctly, so ensure you complete this step.
Note: If you face any issues with the update, please contact us.
- Initial Release
Note: Please click here to install your add-on. Before installing this add-on, you must first update the base project (Super-Admin.zip) to version 3.0
Note: If you face any issues with the update, please contact us.
📌 Custom Domain Add-on: Setup and Installation
🚀 Why You Need This Add-On
After installing this add-on, you will unlock Subdomain and Custom Domain features for your customers (businesses).
-
After installing this add-on, two new options will be available in your Subscription Plan: Custom Domain Limit and Subdomain Limit.
You can configure how many custom domains and subdomains each plan will allow, giving you full control over your subscription tiers.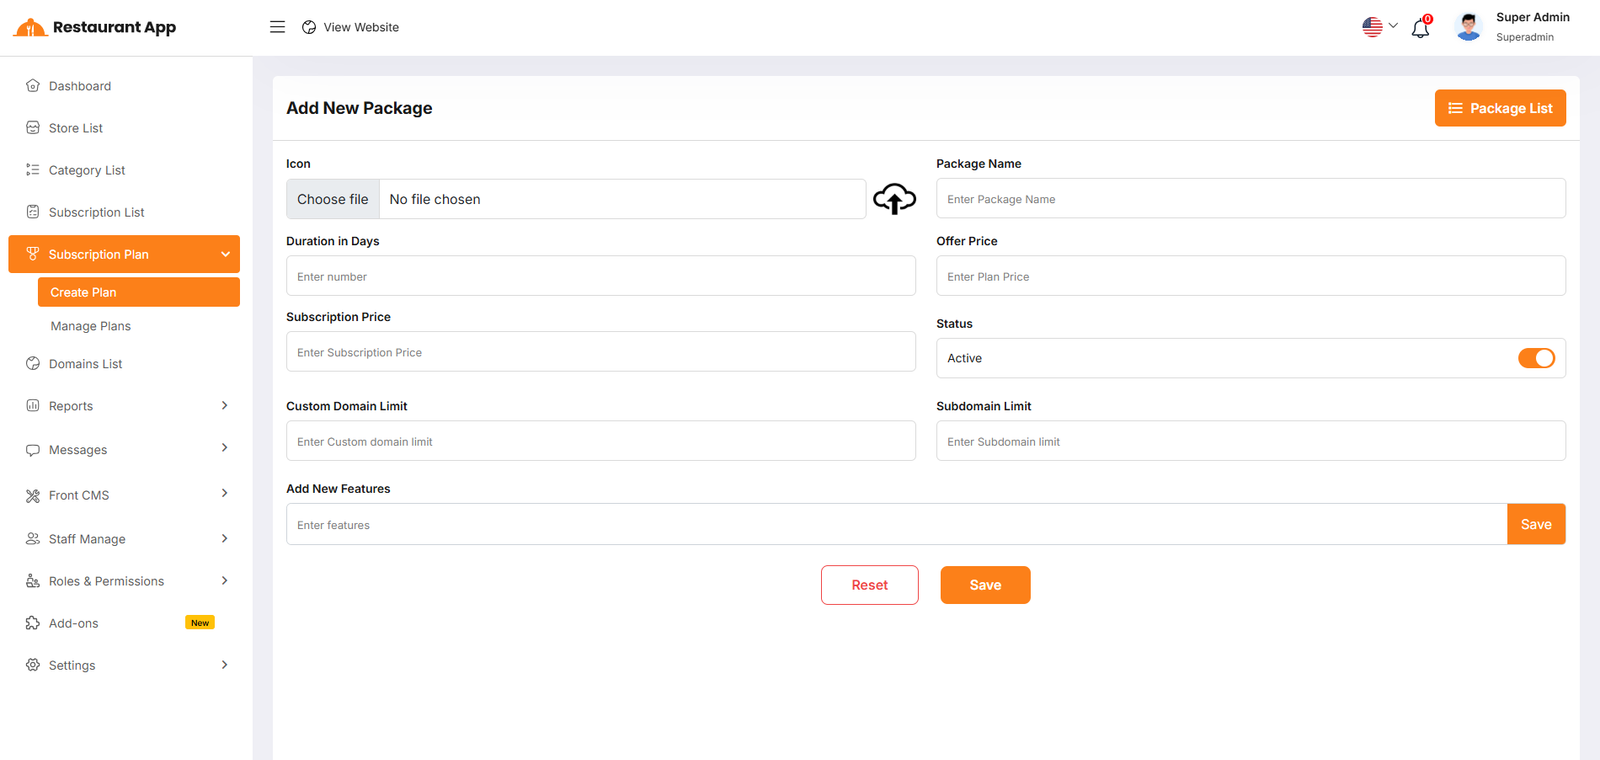
-
A new section will also appear in the Settings page, where you can configure how domain requests will be handled.
You may choose to approve requests automatically or review them manually before activation.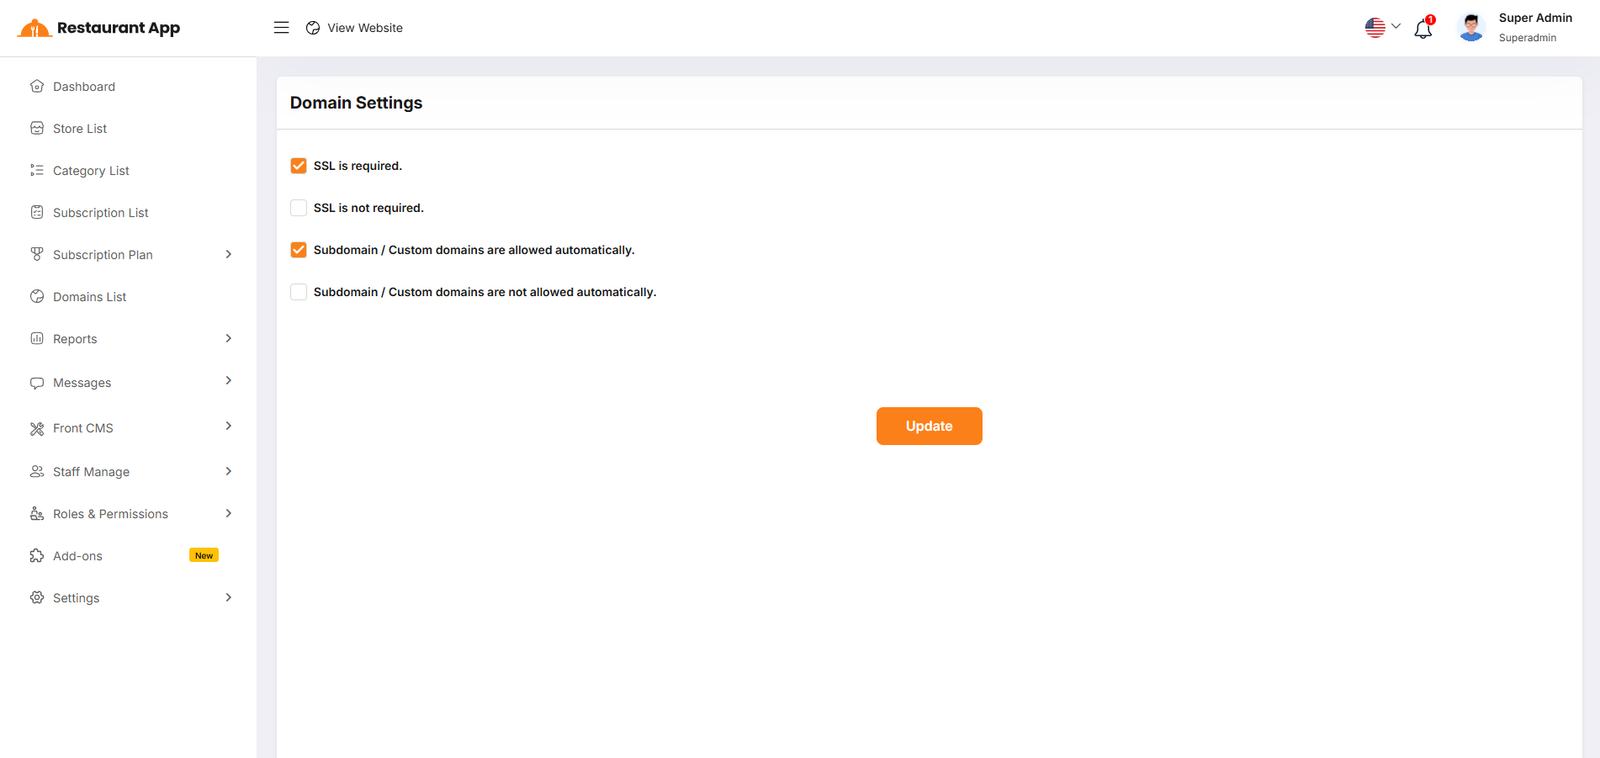
-
Each business can create and manage multiple Subdomains (e.g.,
yourbusiness.yourdomain.com) and Custom Domains (e.g.,yourbusiness.com), depending on the limits defined in their Subscription Plan.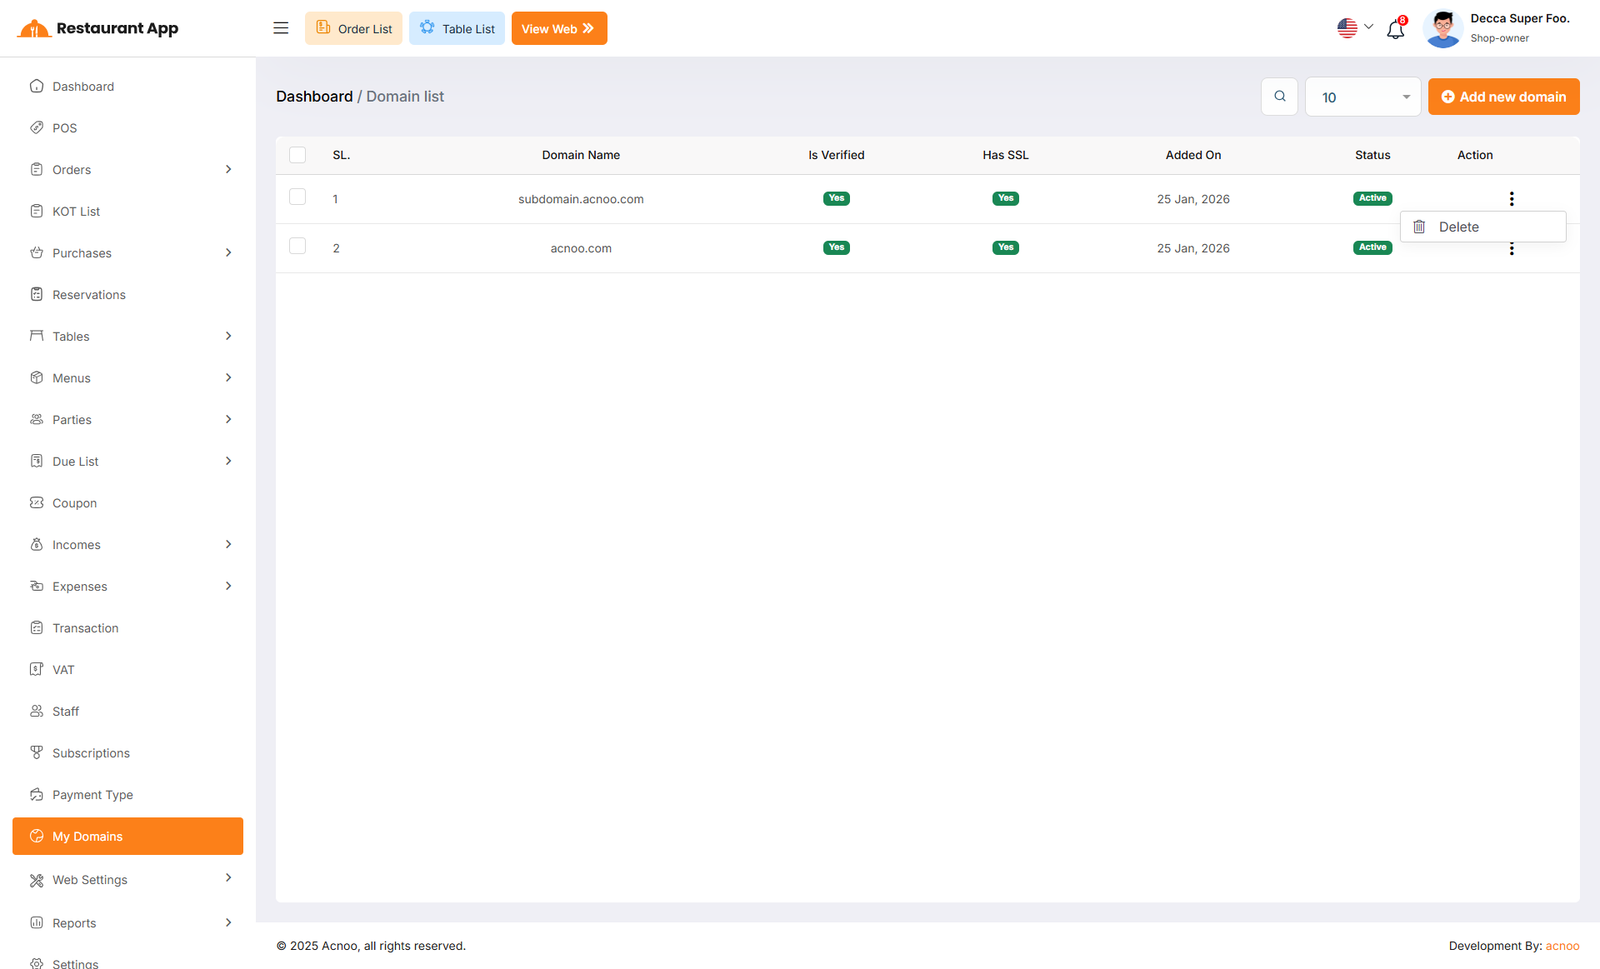
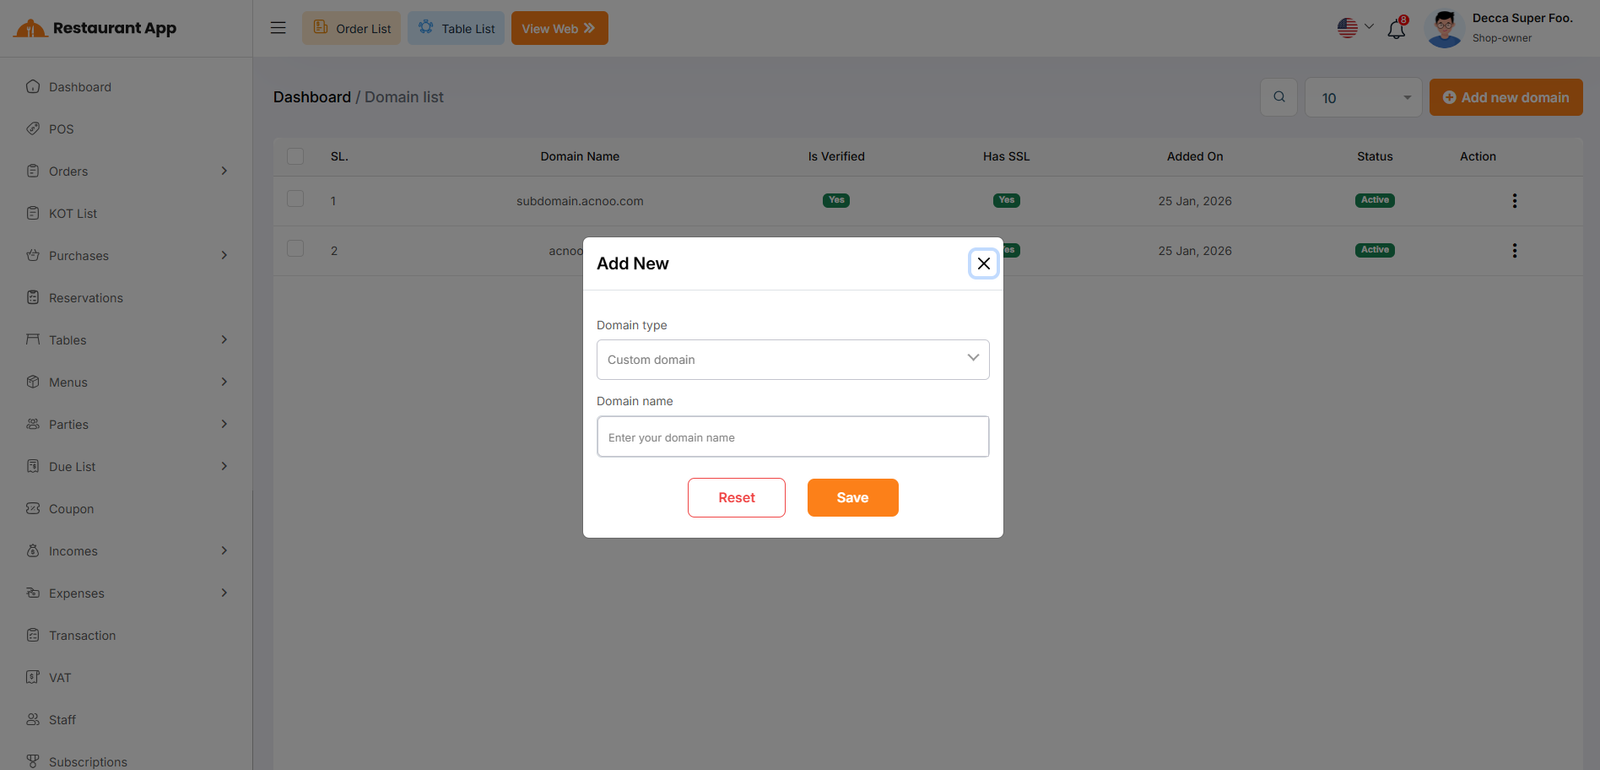
-
These features are seamlessly integrated with your subscription plans, ensuring businesses enjoy premium branding options as part of their plan without extra setup.
-
By enabling subdomains and custom domains, you boost professionalism, strengthen brand identity, and make your Restaurant App platform more flexible and appealing for businesses of all sizes.
📦 Installation
The installation process for the Custom Domain Add-on follows the same steps as outlined in the Restaurant Web Add-on documentation.
👉 Please refer to the Restaurant Web Add-on Installation Guide for detailed instructions.
⚙️ Domain Setup Instructions
🌐 cPanel Setup
- Login to your cPanel account
- Go to
Domains → Addon Domains - Enter your new domain (e.g.,
restaurantapp.com) - Leave the auto-generated subdirectory and FTP as default
- Click Add Domain
- Update your domain’s DNS to point to your cPanel nameservers
SSL/TLS in cPanel and issue a
certificate
(Let’s Encrypt is free).
🌐 hPanel (Hostinger) Setup
- Login to your hPanel account
- Go to
Websites → Managefor your hosting plan - Click Domains → Add Website / Add Domain
- Enter your domain name (e.g.,
restaurantapp.com) - Choose the directory (or keep default)
- Click Add Domain
- Update DNS to point to Hostinger nameservers
Websites → Manage → SSL and activate
free
SSL (Let’s Encrypt).
⚙️ Apache VPS Setup
Create a config file in /etc/apache2/sites-available/:
                                    <VirtualHost *:80>
                                    ServerName default
                                    ServerAlias *
                                    DocumentRoot /var/www/your_project/public
                                    DirectoryIndex index.php

                                    <Directory /var/www/your_project/public>
                                        AllowOverride All
                                        Require all granted
                                    </Directory>
                                    </VirtualHost>
Enable site & reload Apache:
sudo a2ensite your_conf.confsudo systemctl reload apache2
example.com,
and use Certbot for SSL.
⚙️ Nginx VPS Setup
Create a config file in /etc/nginx/sites-available/:
server {
listen 80;
server_name _;
root /var/www/your_project/public;

index index.php index.html;

location / {
    try_files $uri $uri/ /index.php?$query_string;
}

location ~ \.php$ {
    include snippets/fastcgi-php.conf;
    fastcgi_pass unix:/var/run/php/php8.1-fpm.sock;
}
}
Enable site & reload Nginx:
sudo ln -s /etc/nginx/sites-available/your_config /etc/nginx/sites-enabled/sudo nginx -t && sudo systemctl reload nginx
example.com, and use Certbot for SSL.
Custom Domain Add-on Change Logs
Note: Before updating to the new version, please ensure you have a database and full project backup, and that your project is already updated to the latest version. This is extremely important!
- Initial Release
Note: Please click here to install your add-on. Before installing this add-on, you must first update the base project (Super-Admin.zip) to version 3.0
Note: If you face any issues with the update, please contact us.
Restaurant App HRM Add-on: Setup and Installation
📘 Overview:
The HRM Add-on for Restaurant App is a comprehensive extension designed to streamline human resource management in your organization. This add-on allows users to efficiently manage employees, departments, shifts, leaves, attendance, and payroll in one unified system. With real-time visibility, HR managers can quickly track employee status, monitor attendance, process payroll, and generate detailed reports on workforce activities.
🔑 Key Features
👥 Employee management with complete profiles and role assignments
🏢 Department and designation setup for structured organizational hierarchy
⏰ Shift management and attendance tracking for accurate working hours
📅 Leave and holiday management with approval workflows
💰 Payroll management including salaries, deductions, and bonuses
📊 Detailed reports for attendance, leave, payroll, and HR analytics
🔄 Seamless integration with Restaurant App modules for smooth operations
🔒 Secure and reliable system, ensuring HR data integrity
⚡ User-friendly, lightweight, and compatible with future Restaurant App updates
📦 Installation
The installation process for the HRM Add-on follows the same steps as outlined in the Restaurant Web Add-on documentation.
👉 Please refer to the Restaurant Web Add-on Installation Guide for detailed instructions.
Department
The "Department List" page displays a list of all defined department,
including
their names, descriptions, and status. It provides options to manage these
department.
Use the search bar to find specific department by name or description.Click the "Add New
department" button to navigate to a page or modal where you can add a new
department.Clicking the three dots in the "Action" where you can edit,delete and view.
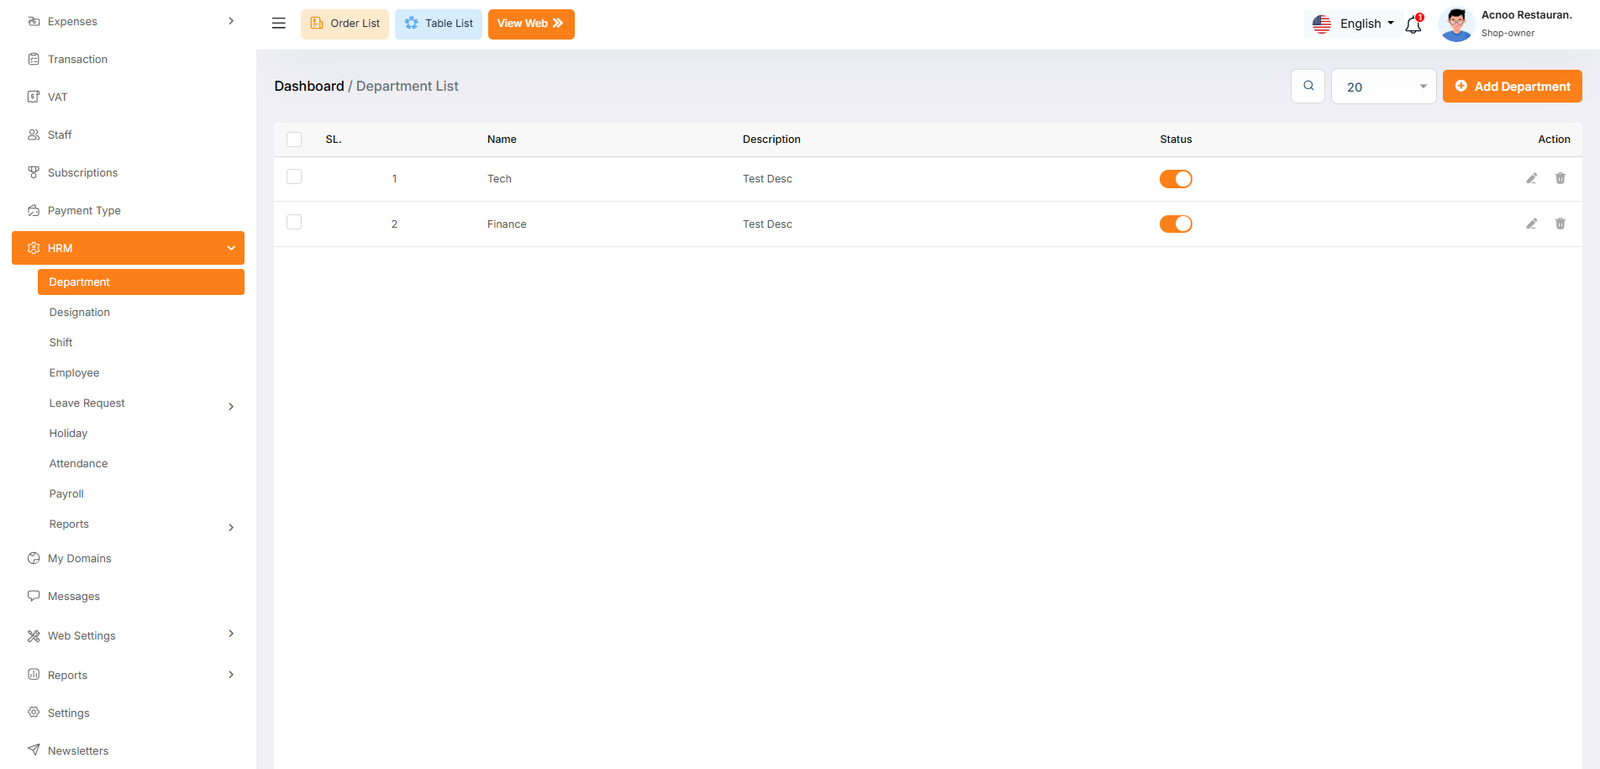
Add New Department
The "Department" form appears as a pop-up or overlay on the "Department List" page. It contains the following fields:
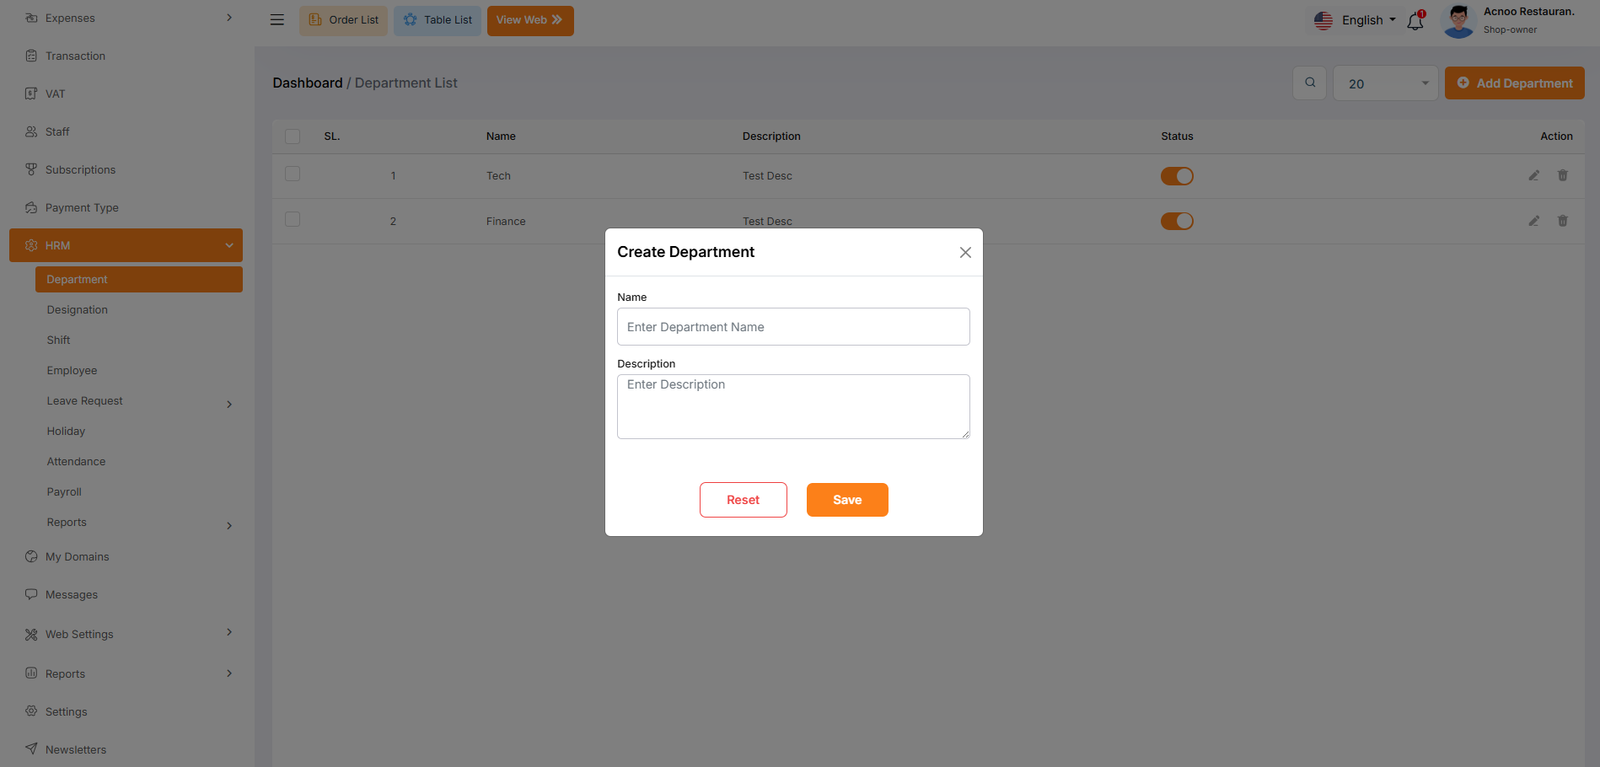
Designation
The "Designation List" page displays a list of all defined designations,
including their names, descriptions, and status. It provides options to manage these
designations.
Use the search bar to find specific designations by name or description.Click the "Add New
designation" button to navigate to a page or modal where you can add a new
designation.Clicking the three dots in the "Action" where you can edit,delete and view.
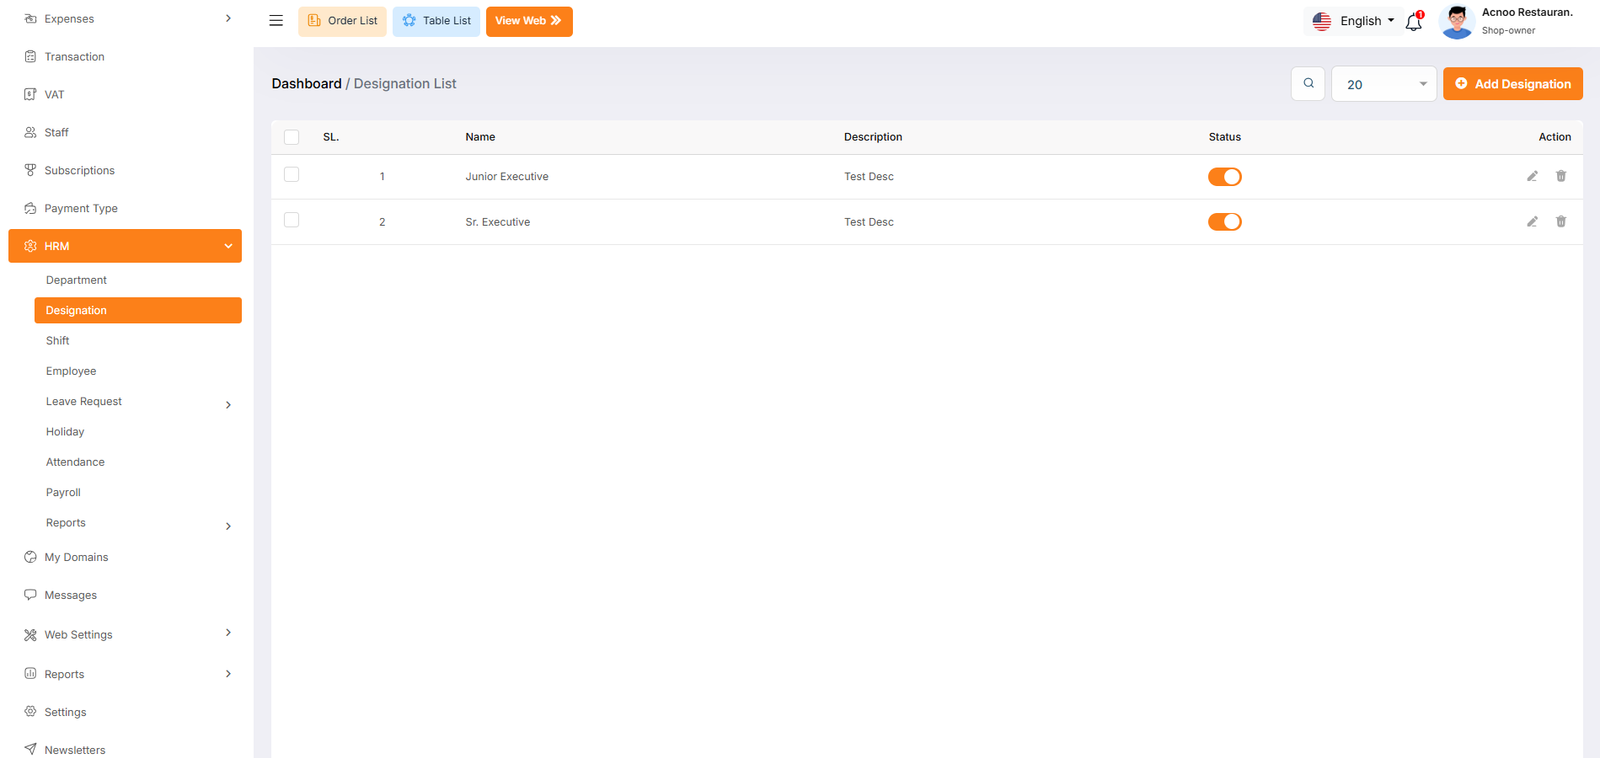
Add New Designation
The "Designation" form appears as a pop-up or overlay on the "Designation List" page. It contains the following fields:
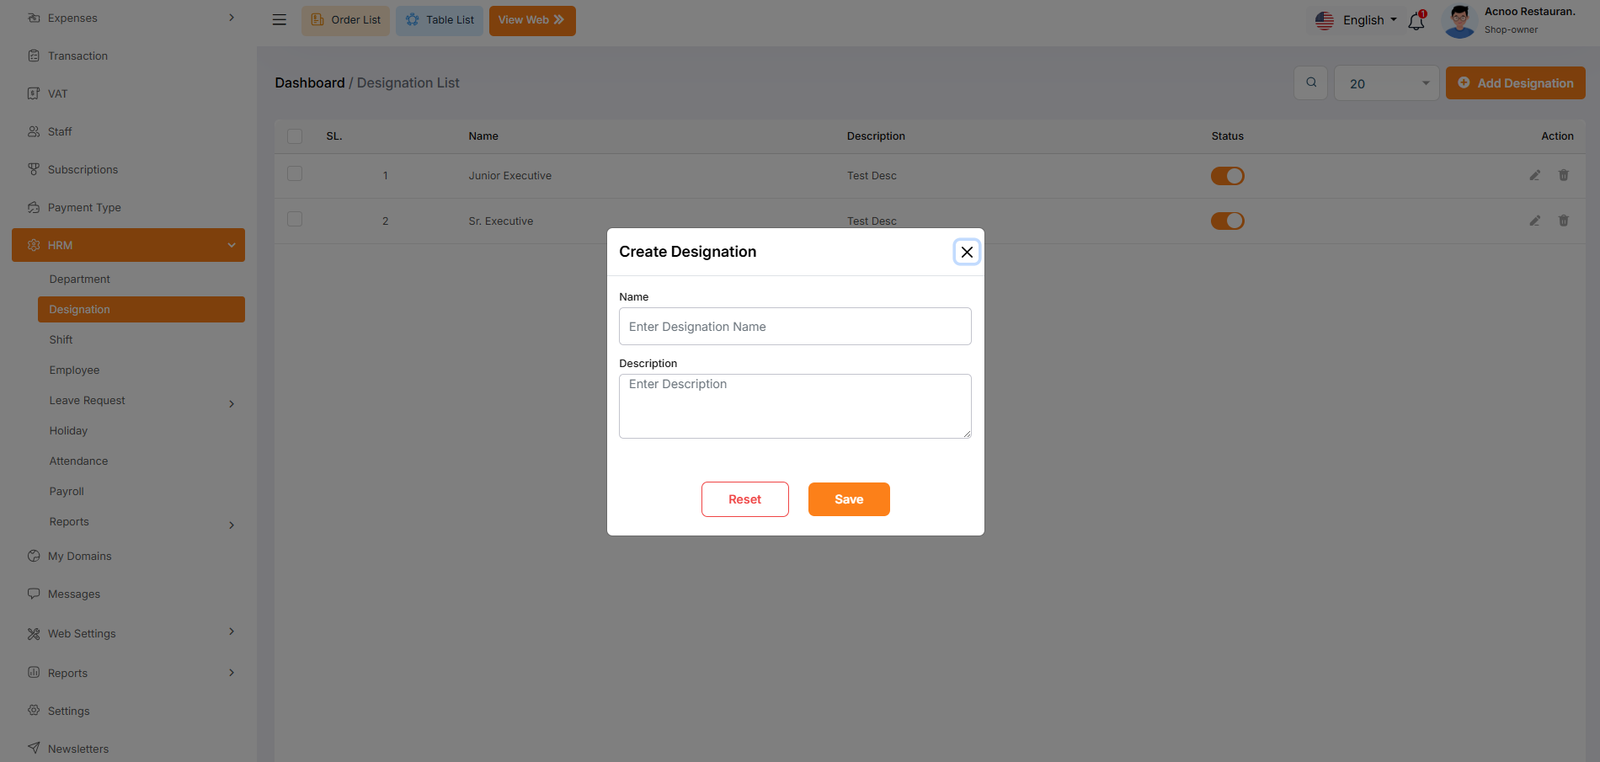
Shift List
The "Shift List" page displays a list of all defined work shifts, including their
names, start and end times, break times, and status. It provides options to manage these
shifts.
Use the search bar to find specific shifts by name.Click the "Add New Shift" button to
navigate to a page or modal where you can add a new work shift to the system.Clicking the
three dots where you can edit,delete and view for shift.
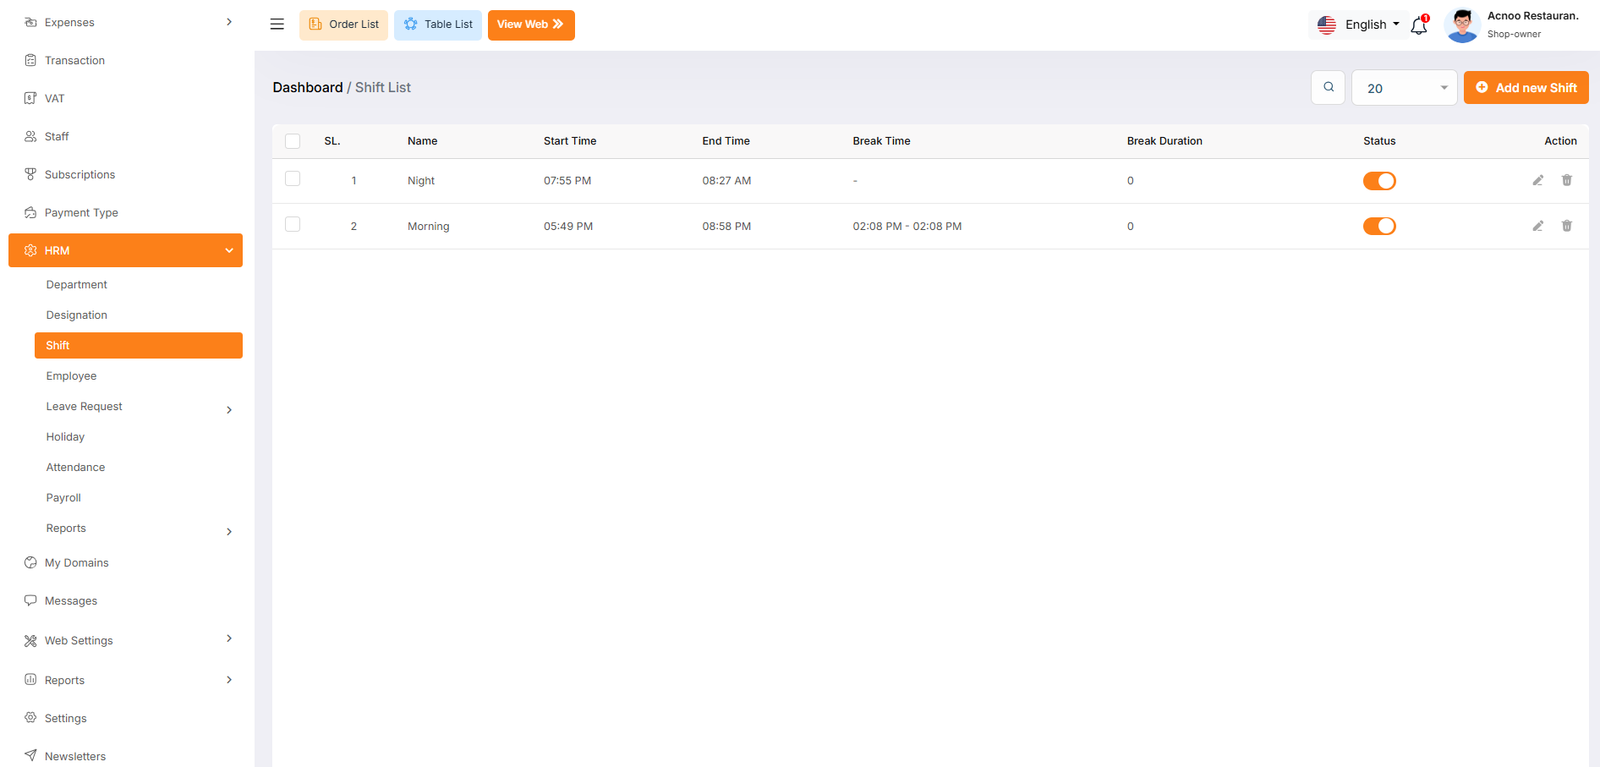
Create New Shift
The "Add New Shift" form appears as a pop-up or overlay on the "Shift List" page. It contains filled the following input fields.
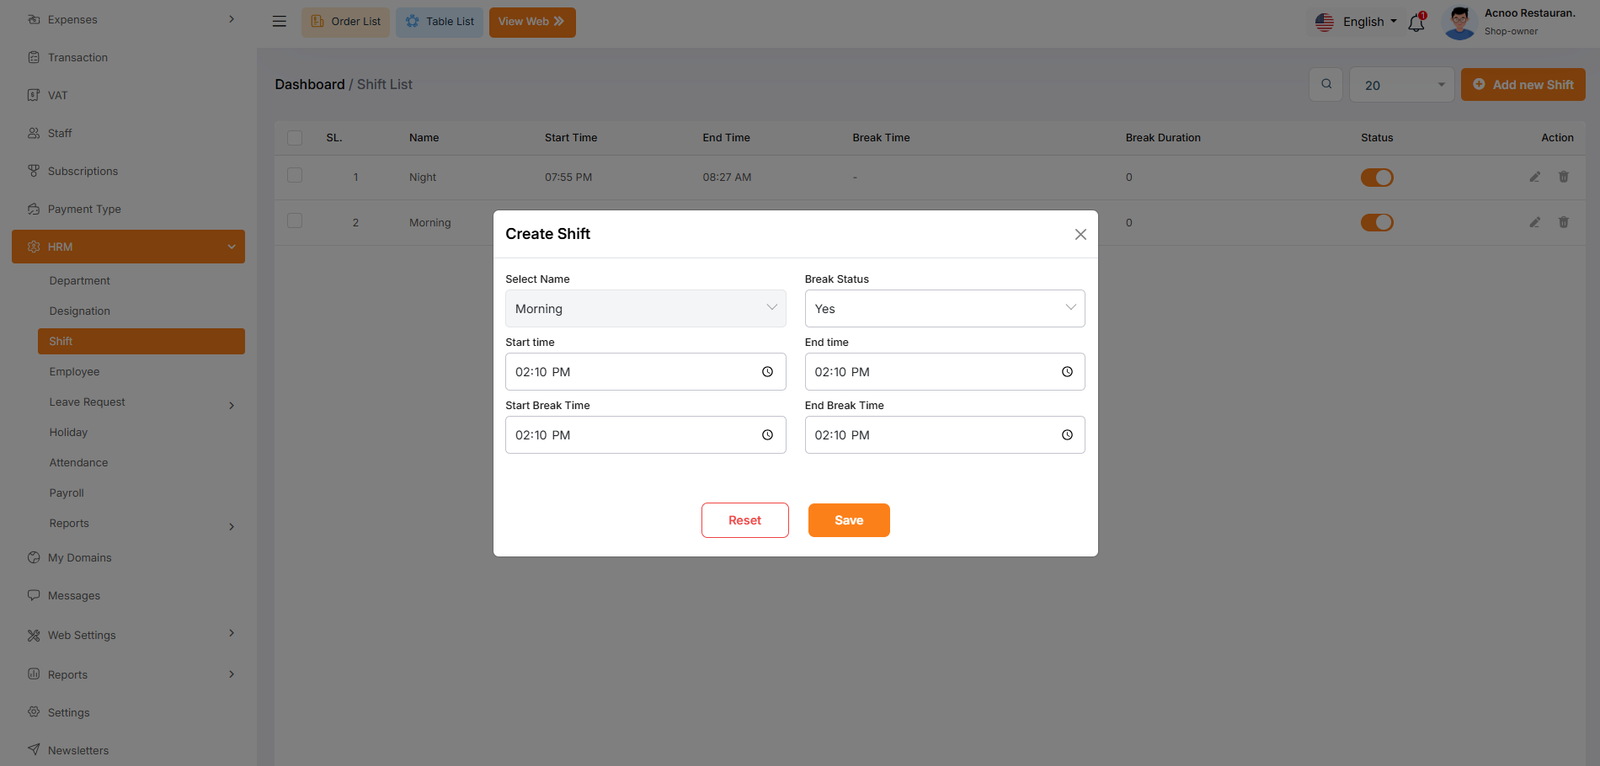
Employee
The "Employee List" page displays a list of all employees, including relevant
details such as their employee ID, name, designation, department, join date, employment
status, shift, and salary. It provides options to manage these employee records.
Use the search bar to find specific employees by name, employee ID, designation, or other
relevant criteria.Click the "Add New Employee" button to navigate to a page or modal where
you can add a new employee record.Clicking the three dots in the "Action" where you can
perform edit,delete and view.
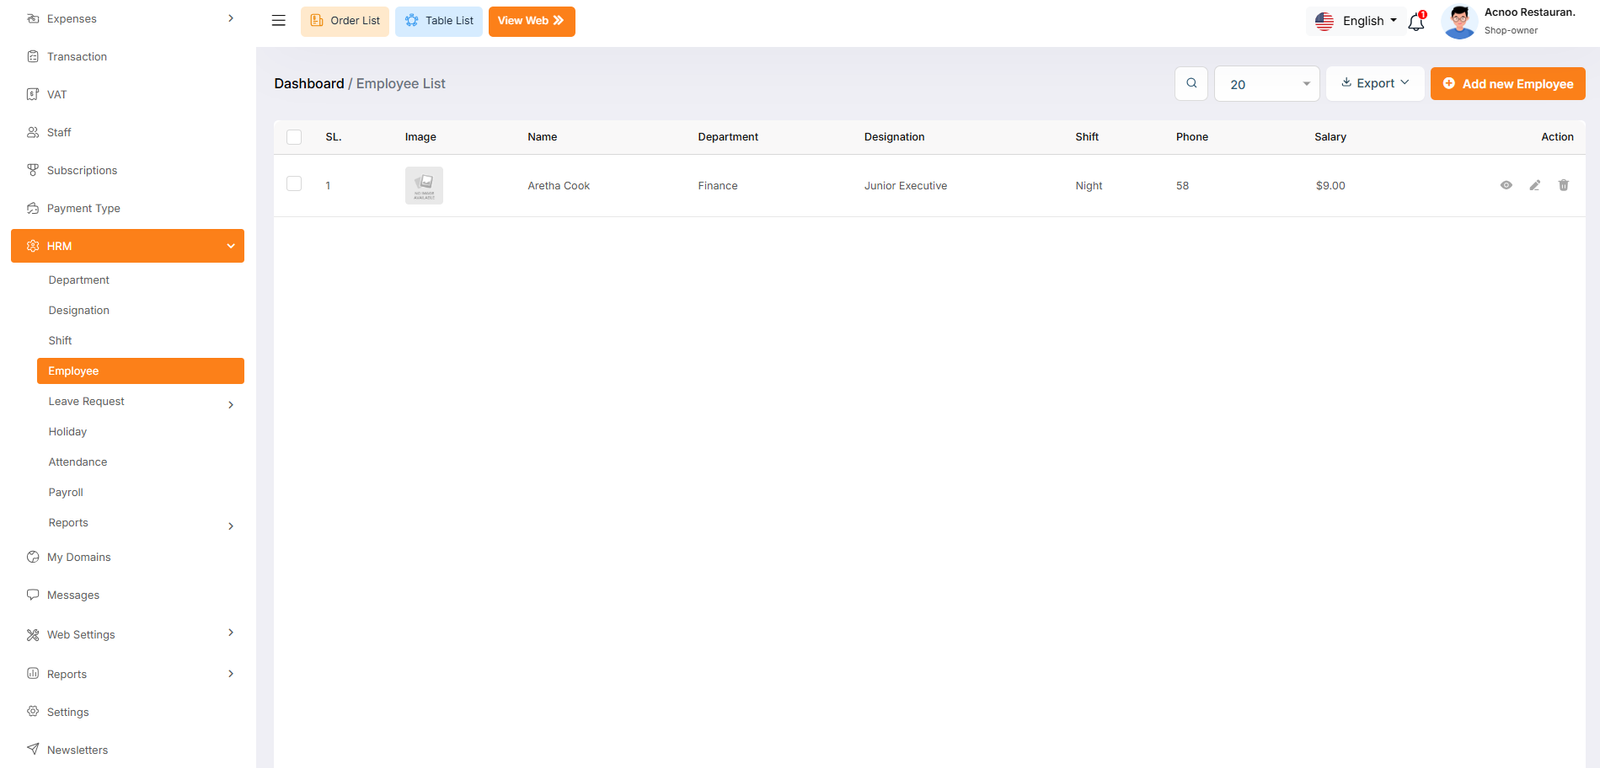
Add New Employee
Here you can create a Employee by filling the following form.
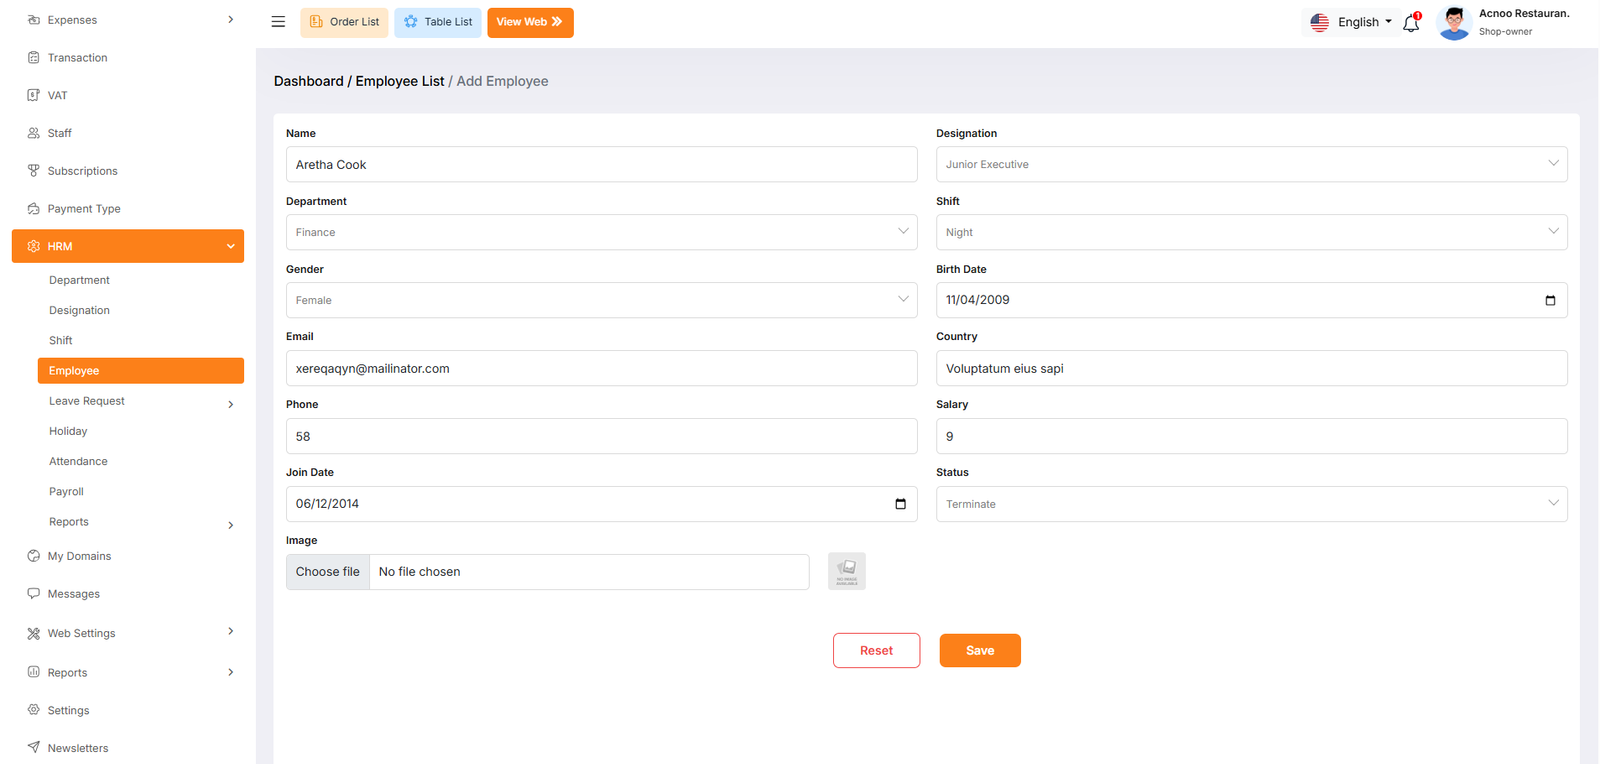
Leave Type List
The "Leave Type List" page displays a list of all defined leave types, including
their names, descriptions, and status. It provides options to manage these leave types.
Use the search bar to find specific leave types by name or description.Click the "Add New
Leave Type" button to navigate to a page or modal where you can add a new leave
type.Clicking the three dots where you can edit,delete and view for leave type.
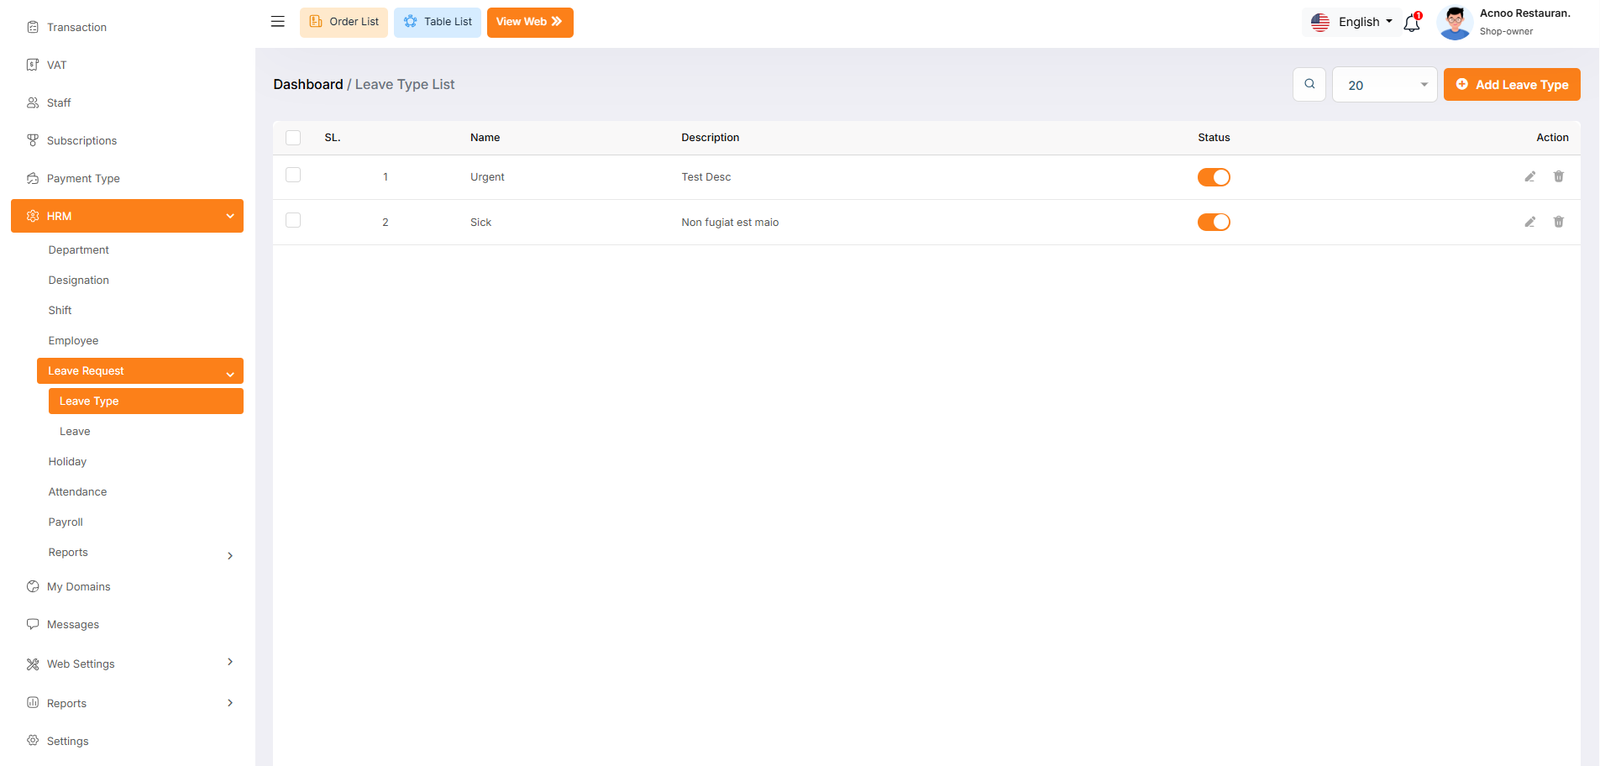
Create New leave type
The "Add New leave type" form appears as a pop-up or overlay on the "Leave Type List" page. It contains filled the following input fields.
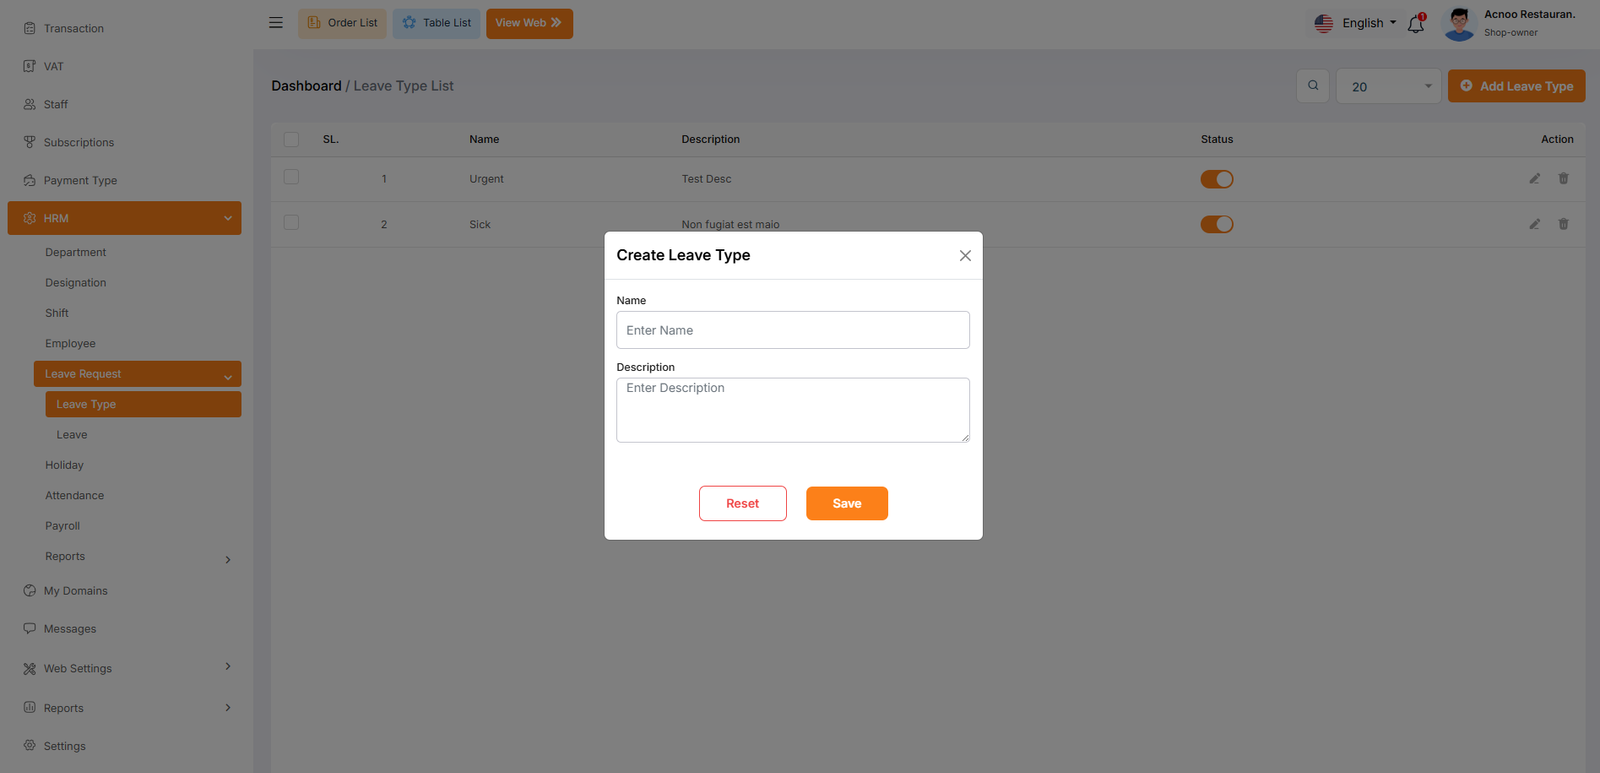
Leaves
The "Leave Employee List" page displays a list of all employee leave requests,
including relevant details such as the employee ID, name, leave type, start and end dates,
leave duration, approval status, and approver. It provides options to manage these leave
requests.
Use the search bar to find specific leave requests by employee ID, name, leave type, or
other relevant criteria.Click the "Add Now Leave" button to navigate to a page where you can
add a new leave request.Clicking the three dots in the "Action" where you can edit,delete
and view.
Status: The current status of the leave request (e.g., Pending, Approved,
Rejected).Where you can update the status.
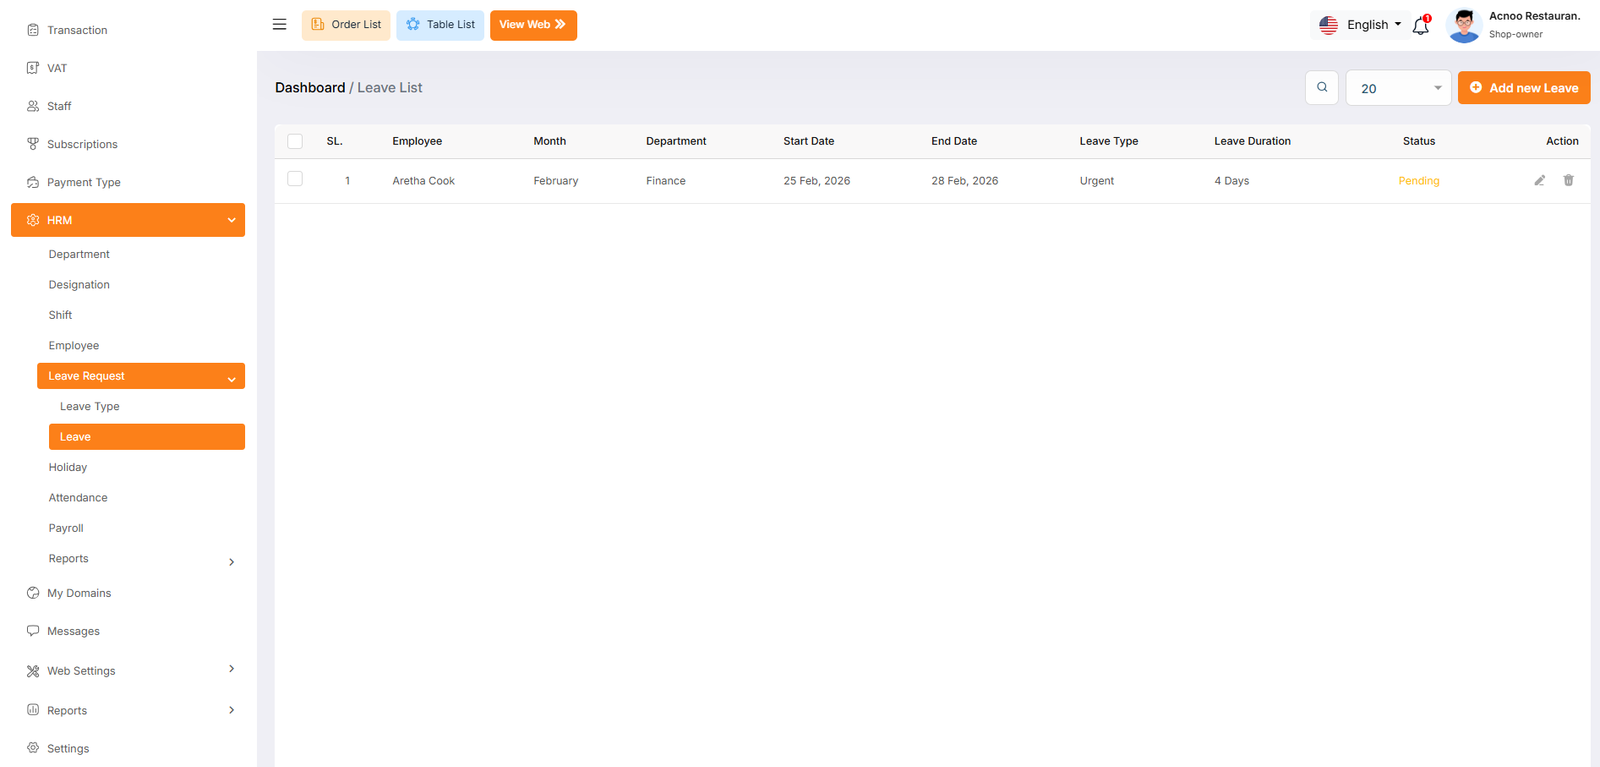
Add New Leave
The "Add New Leave" form appears as a pop-up or overlay on the "Leave Employee List" page. It contains the following fields:
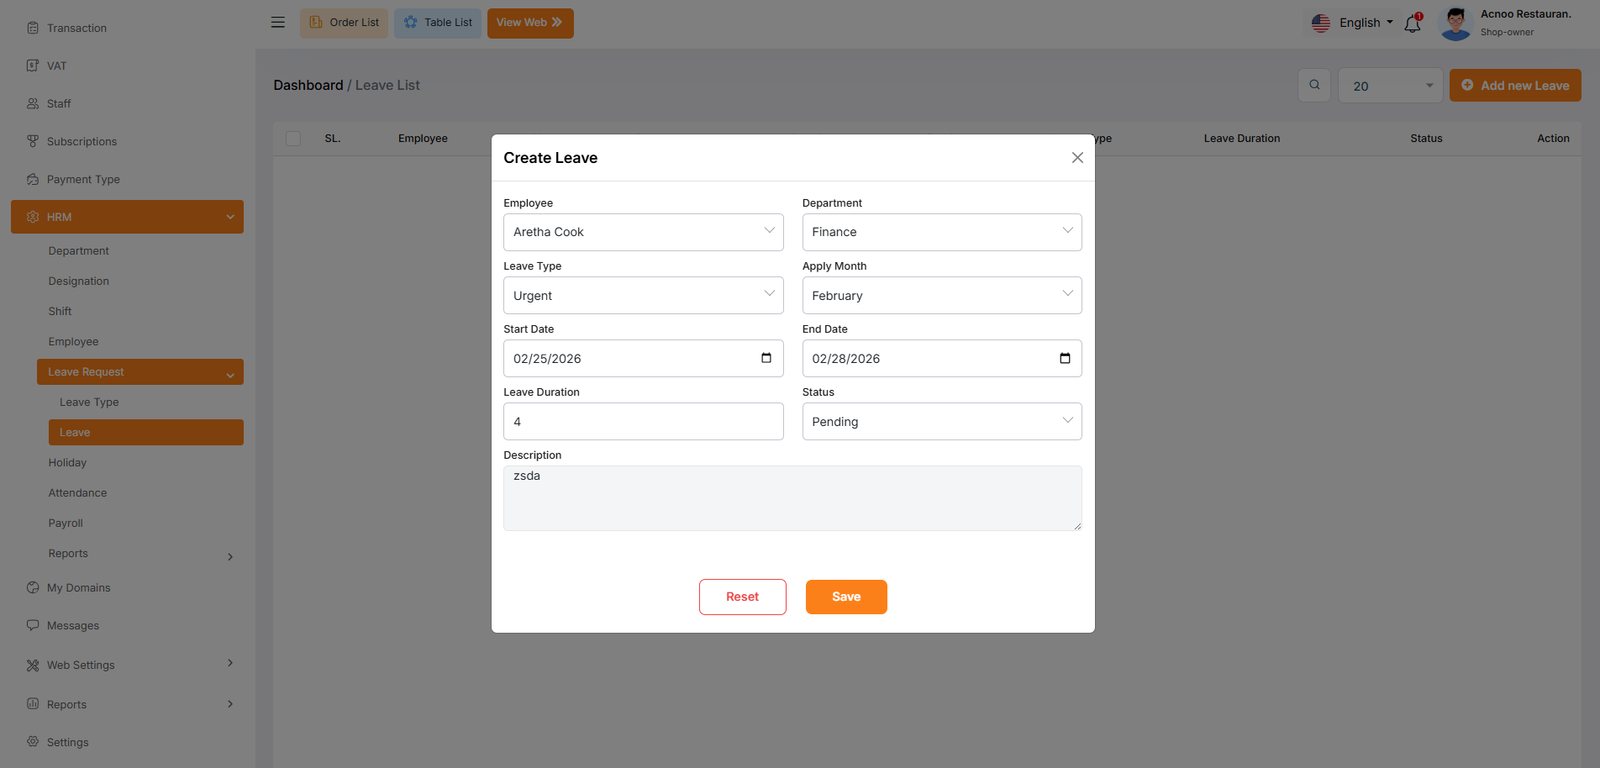
Holiday List
The "Holiday List" page displays a list of defined holidays with their dates, names, and descriptions. It provides options to manage these holidays.Click the "Add New Holiday" button to navigate to a modal where you can add a new holiday to the system.Clicking the three dots in the "Action" where you can edit,delete and view for holiday.
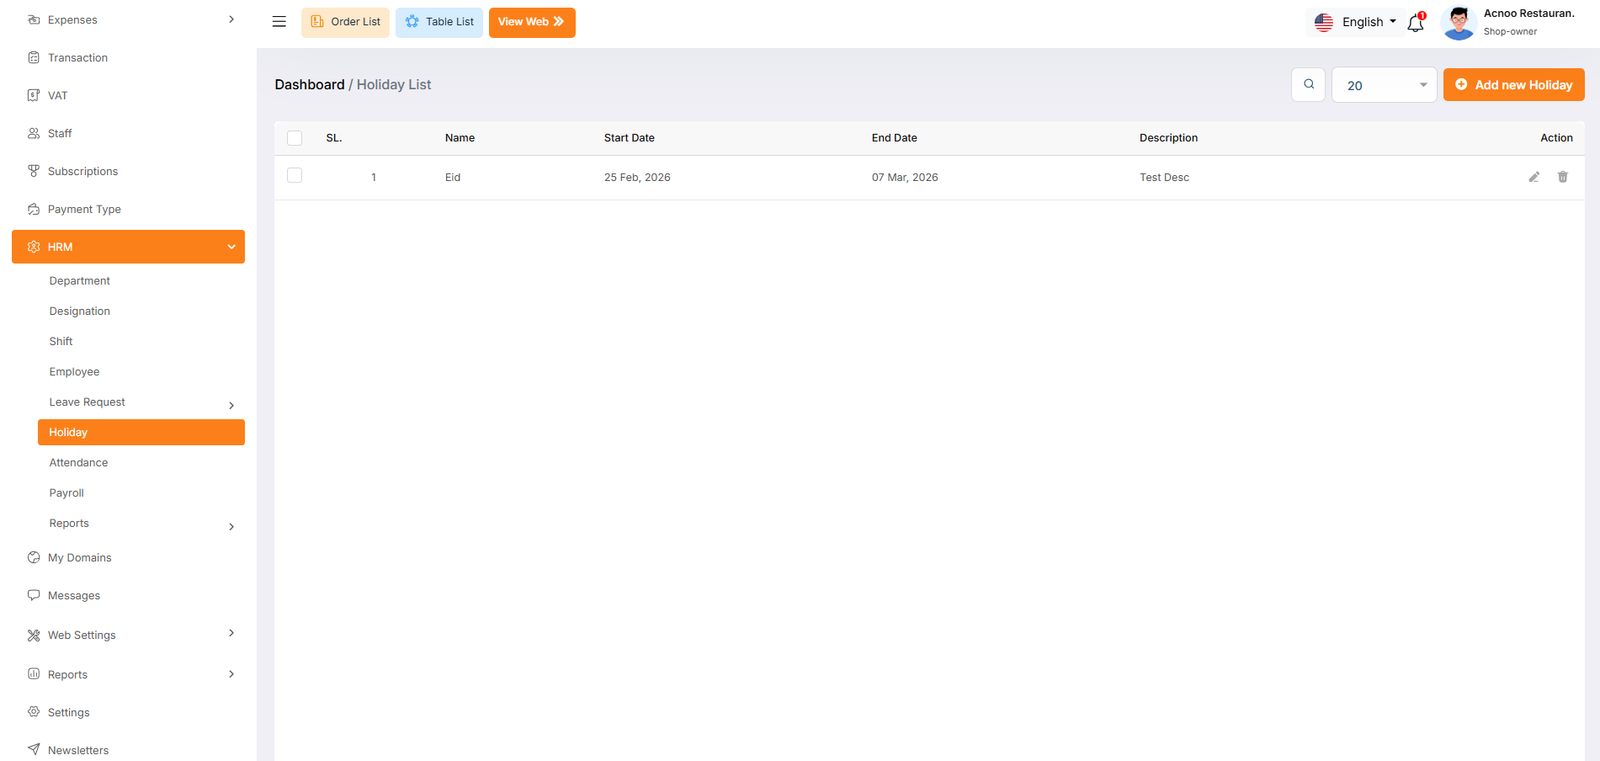
Create New Holiday
The "Add New Holidays" form appears as a pop-up or overlay on the "Holiday List" page. It contains filled the following input fields.
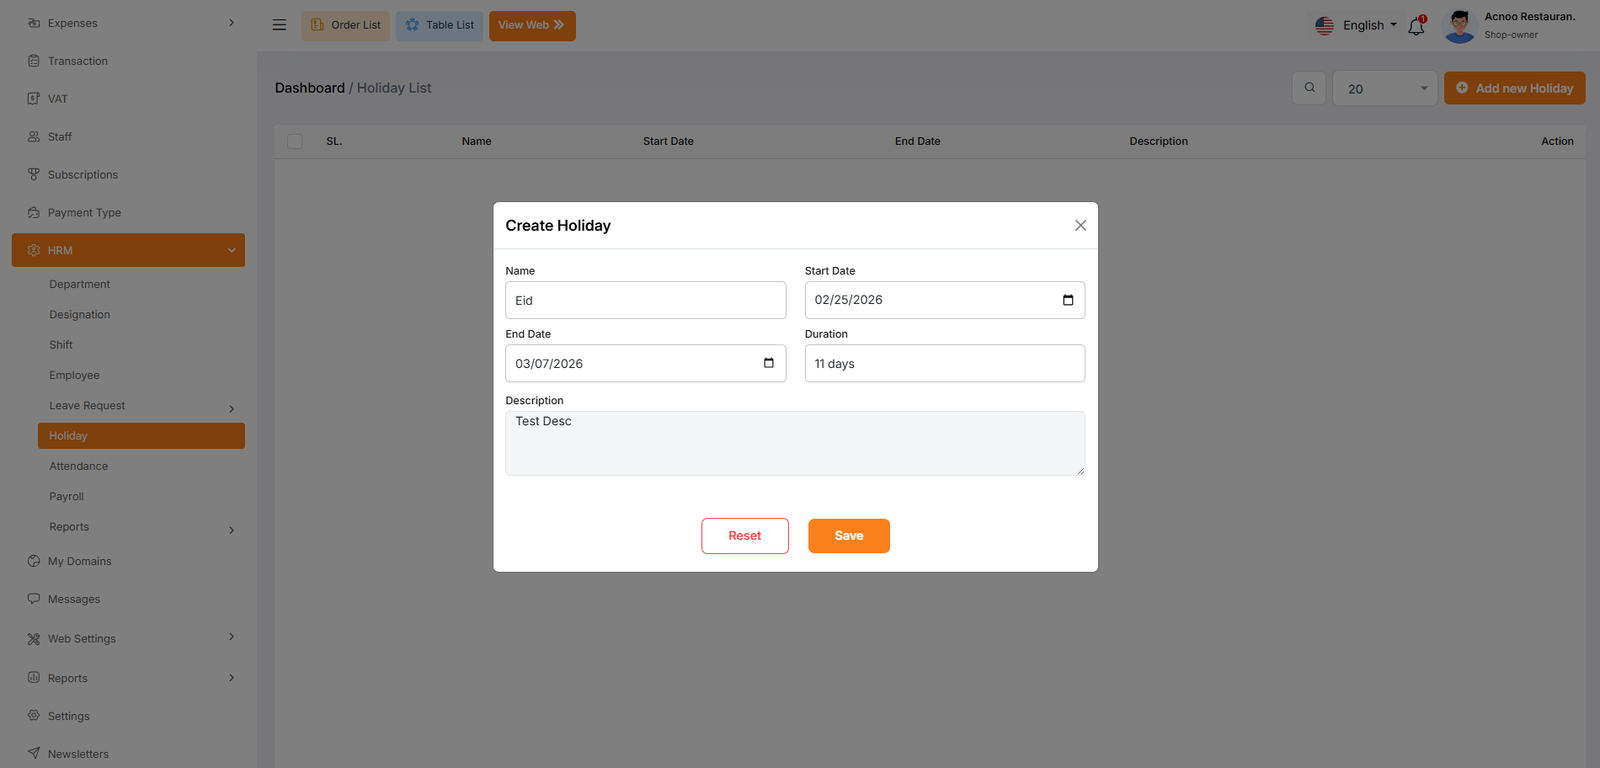
Attendance List
The image displays an attendance records of employees. The system appears to track employee attendance with timestamps and duration calculations.Click the "Add New Attendance" button to navigate to a modal where you can add a new Attendance to the system.Clicking the three dots in the "Action" where you can edit,delete and view for Attendance.
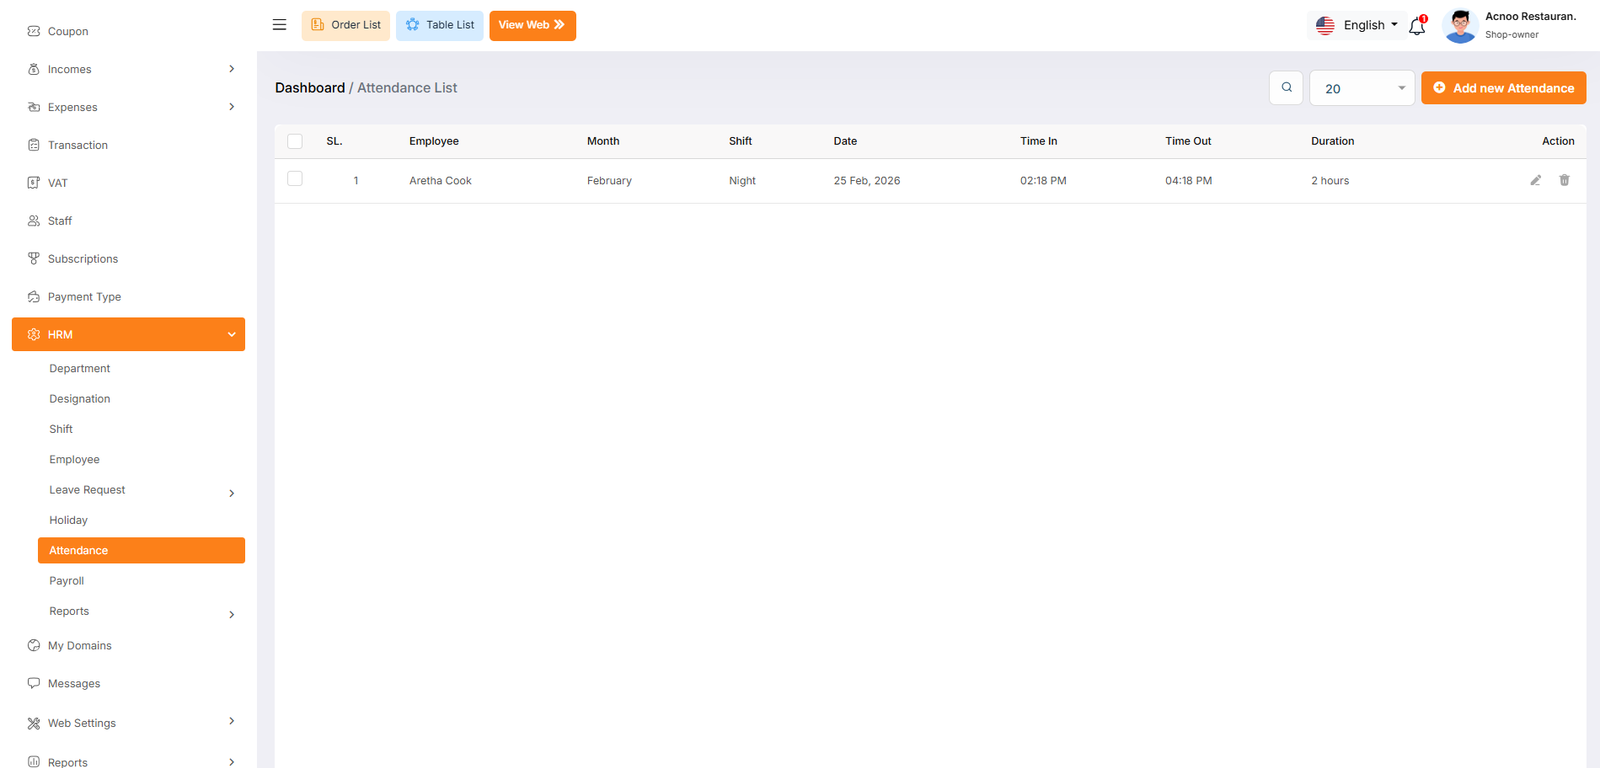
Create New Attendance
The "Add New Attendance" form appears as a pop-up or overlay on the "Attendance List" page. It contains filled the following input fields.
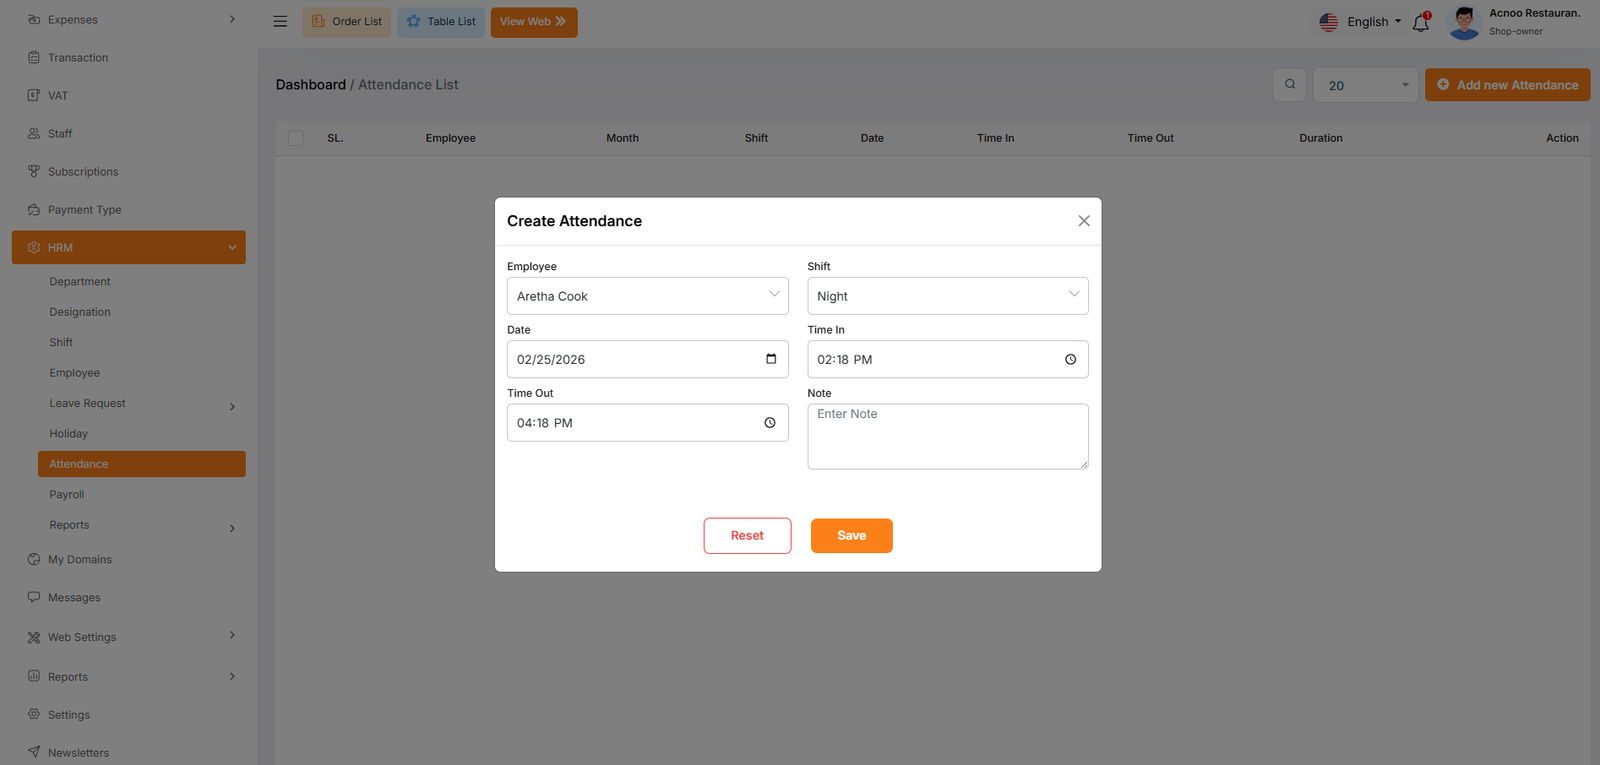
Payroll List
The Payroll List interface provides a comprehensive view of employee payroll transactions, enabling administrators to track payments, verify statuses, and manage records efficiently. This document outlines the key components, functionality, and observations from the displayed interface.Click the "Add New Payroll" button to navigate to a modal where you can add a new Payroll to the system.Clicking the three dots in the "Action" where you can edit,delete and view for Payroll.
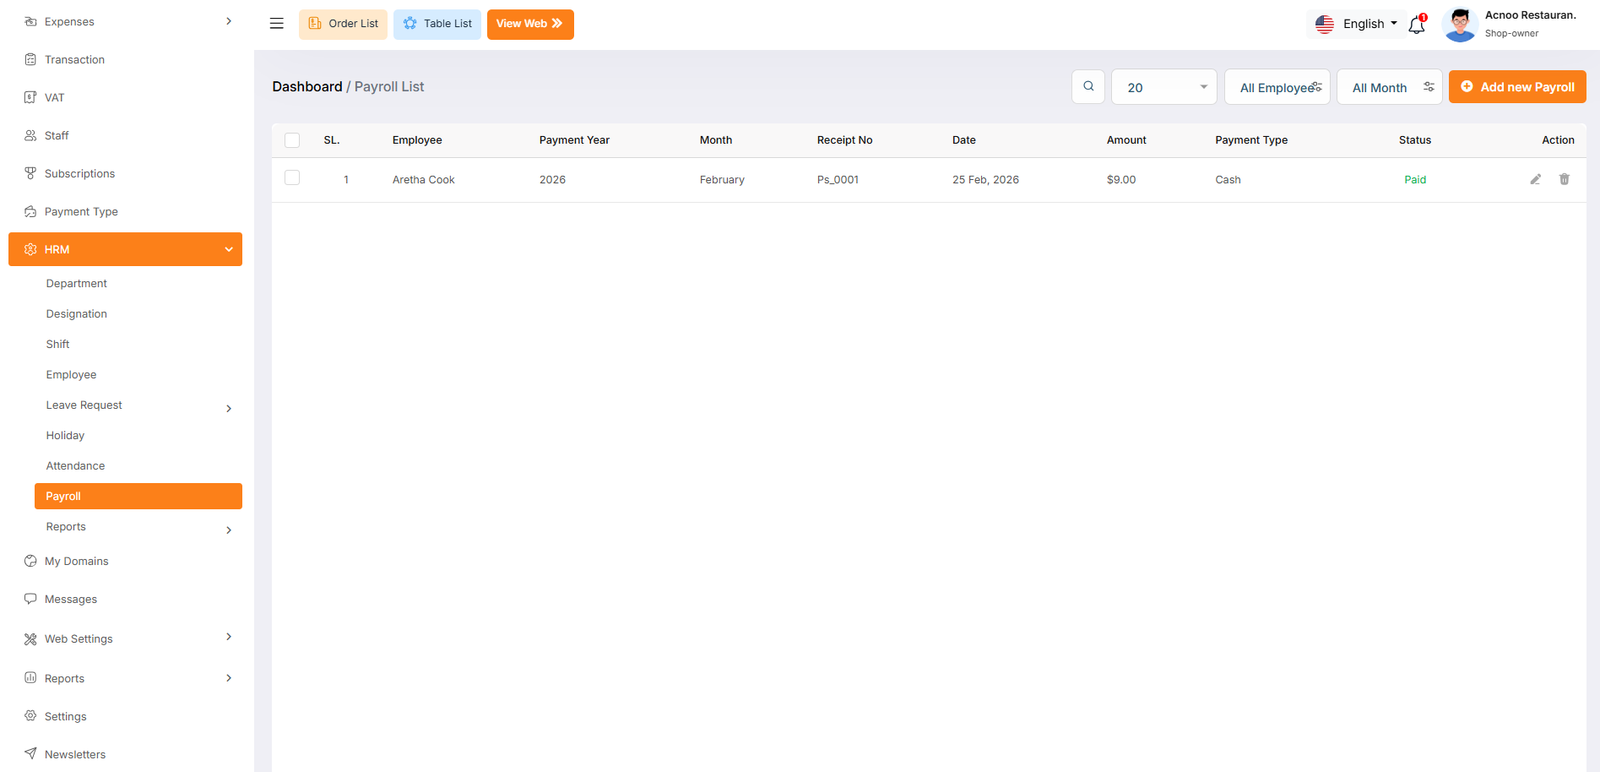
Create New Payroll
The "Add New Payroll" form appears as a pop-up or overlay on the "Payroll List" page. It contains filled the following input fields.
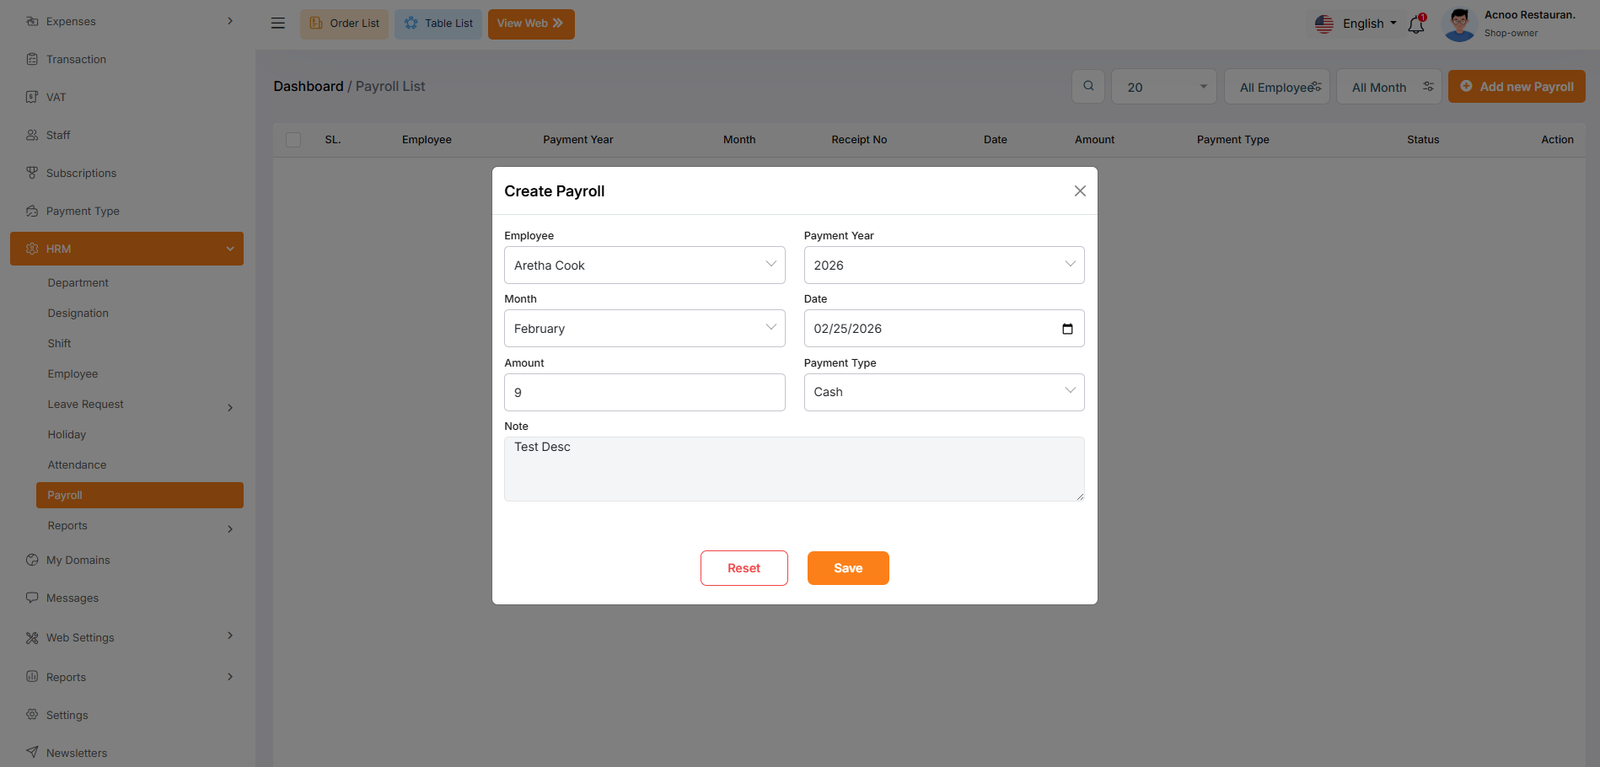
Attendance Reports
The Attendance Report module effectively tracks employee attendance with detailed shift and time data. Minor adjustments to filter logic, date formatting, and labeling would enhance accuracy and user experience.
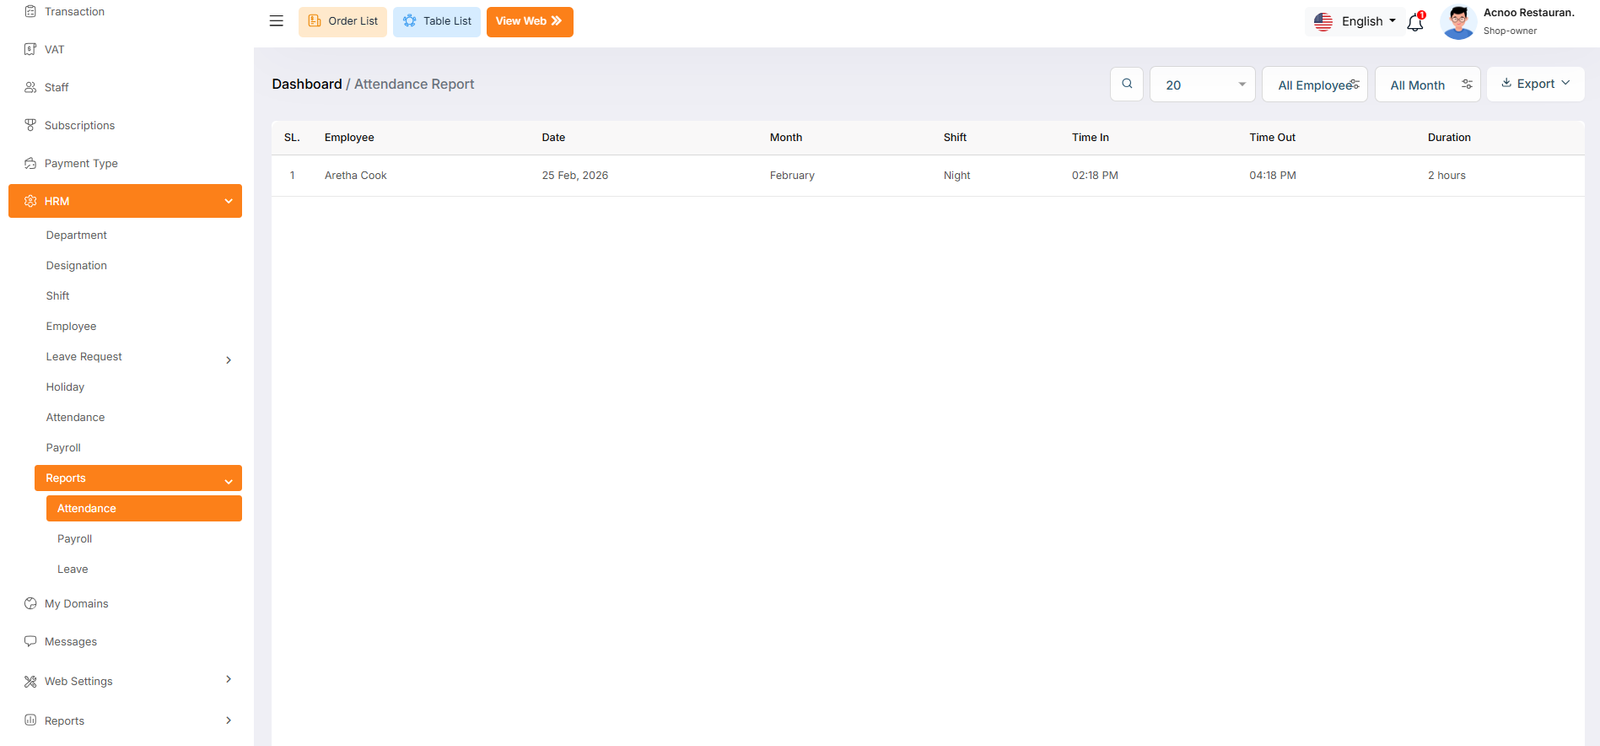
Payroll Reports
The Payroll Report module provides a consolidated view of employee compensation data, enabling HR teams to efficiently manage, verify, and audit payroll transactions.
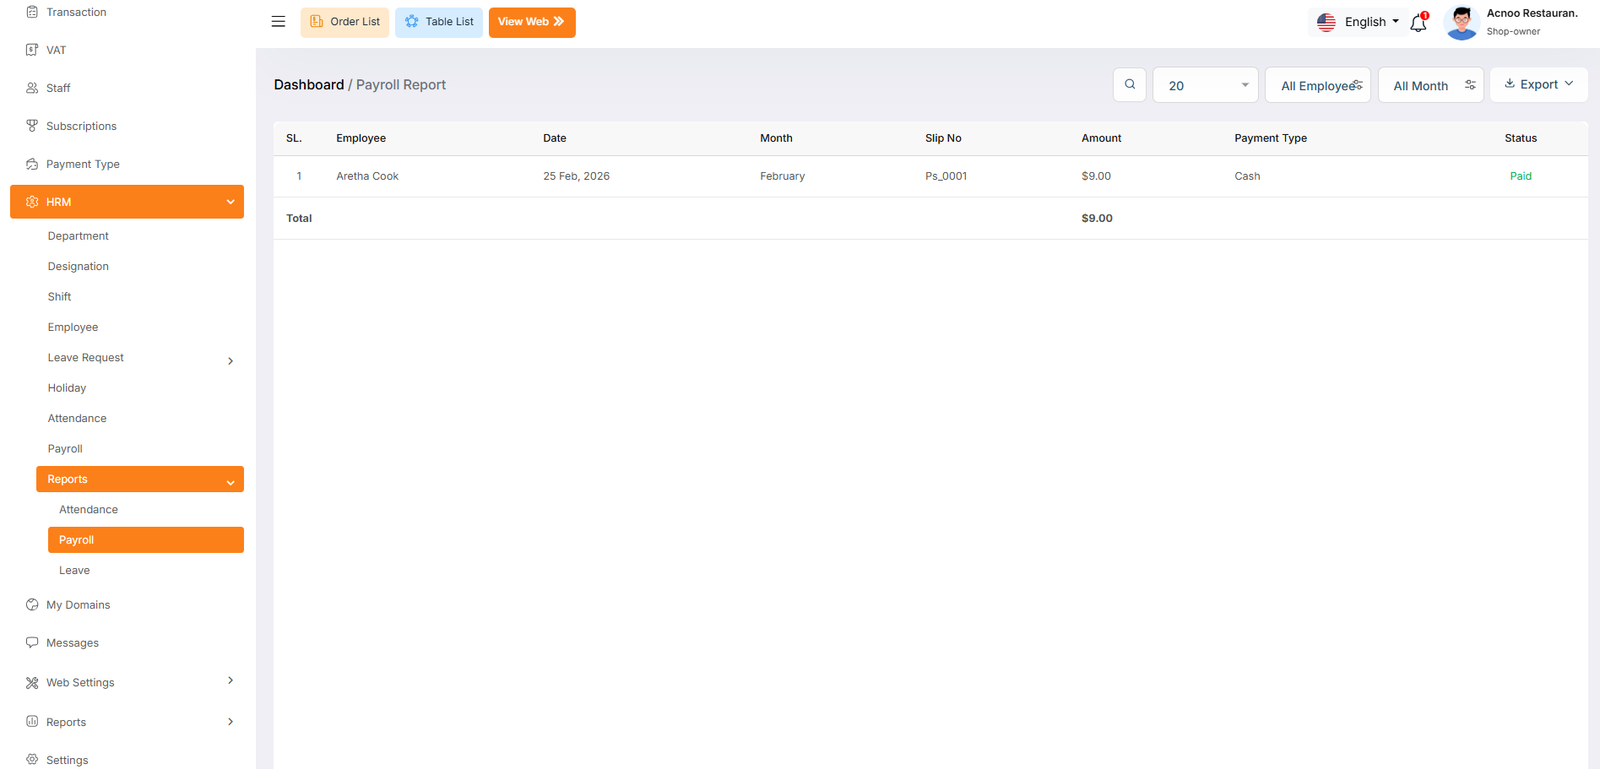
Leave Reports
The Leave Report provides a comprehensive view of employee leave requests, approvals, and tracking.
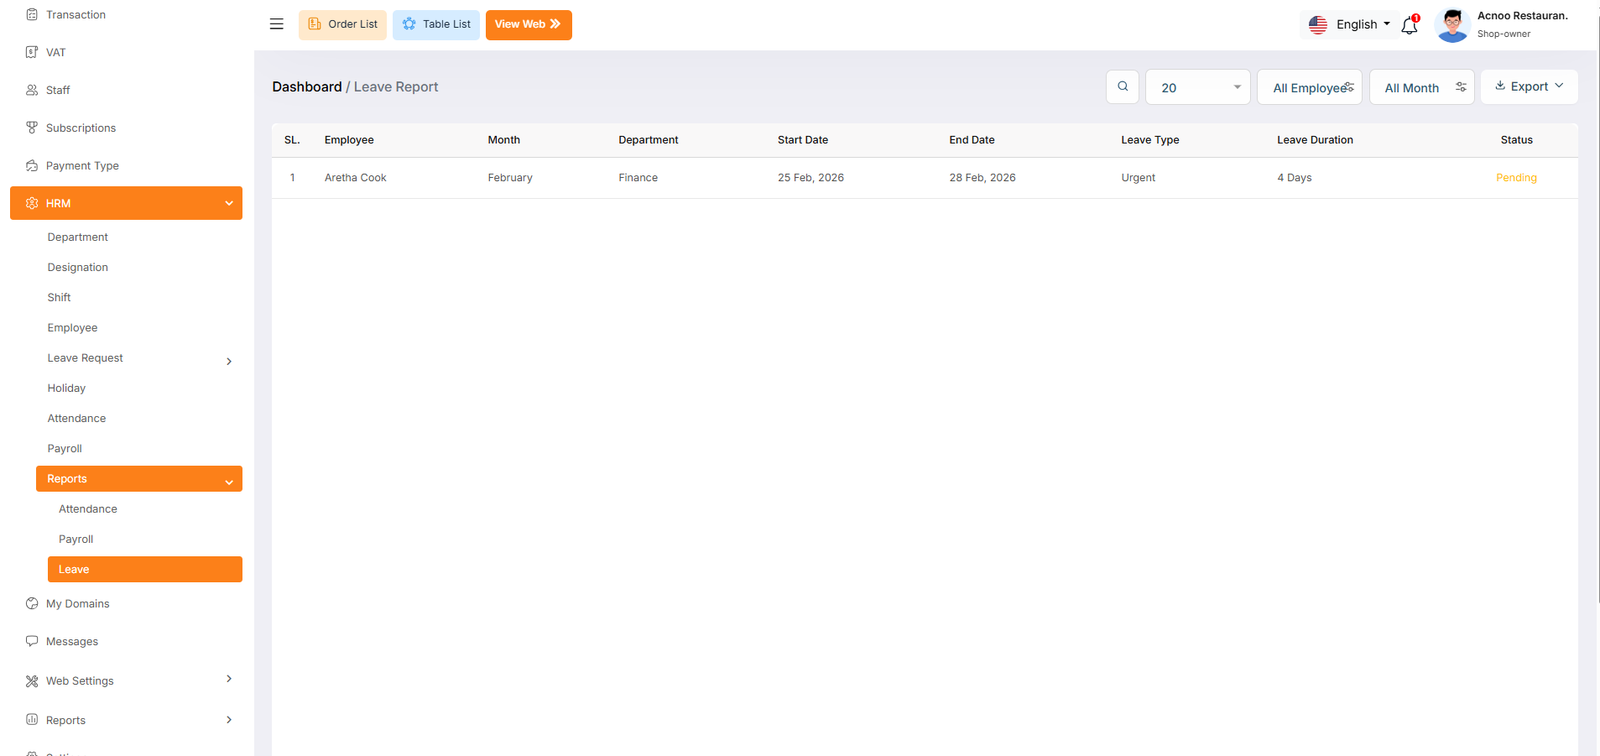
HRM Add-on Change Logs
Note: Before updating to the new version, please ensure you have a database and full project backup, and that your project is already updated to the latest version. This is extremely important!
Version: 1.1 ( 13 July 2026 )
- Implemented comprehensive branch management functionality.
Note: Please replace the following folders:
✔Modules/HrmAddon
✔app
✔config
✔database
✔lang
✔public/assets
✔resources
✔routes
After replacing them, visit yourdomain.com/update to install the new version and
please don't forget to reload hard your browser. Without visiting the URL and reloading
hard, your project will not function correctly, so ensure you complete this step.
Note: If you face any issues with the update, please contact us.
Version: 1.0 ( 26 February 2026 )
- Initial Release
Restaurant App Cash Register Add-on: Setup and Installation
📘 Overview:
The Cash Register Addon is designed to help businesses manage their daily cash transactions efficiently and maintain accurate financial control at the point of sale. In many businesses such as restaurants, retail shops, and service-based stores, cash handling happens frequently throughout the day. Without a proper system, it becomes difficult to track cash flow, identify discrepancies, and ensure accountability among staff members. This addon solves those problems by providing a structured and transparent cash management process.
🔑 Key Features
1. Overview Dashboard
The Overview section provides a quick summary of cash register activities. Users can easily monitor the current status of registers, view important financial metrics, and understand overall cash flow at a glance. This helps managers quickly assess daily performance without navigating through multiple sections.
2. Cash Register Management
This feature allows users to open and close cash register shifts with an initial opening balance. During the shift, all cash-related activities such as sales, cash in, and cash out are recorded. At the end of the shift, the system calculates the expected balance and compares it with the actual closing balance, helping identify any discrepancies immediately.
3. Approval System
The Approval feature ensures that sensitive cash operations require authorization. Managers or authorized users can review and approve requests related to cash adjustments, transactions, or register operations. This adds an extra layer of security and prevents unauthorized financial changes.
4. Denominations Management
The Denominations module allows users to count and record the physical cash by different currency denominations such as notes and coins. This makes cash reconciliation more accurate and organized when closing a shift, helping businesses maintain precise cash records.
5. Advanced Reports
The Reports section provides detailed insights into cash transactions and register activity. Users can generate reports such as transaction history, shift summaries, and financial overviews. With filtering options like date ranges and search functionality, businesses can easily analyze their cash flow and track financial performance.
6. Configuration and Settings
The Configuration section allows administrators to customize how the cash register system works. Businesses can define operational settings, user permissions, approval workflows, and other preferences to match their internal processes and operational requirements.
📦 Installation
The installation process for the Cash Register Add-on follows the same steps as outlined in the Restaurant Web Add-on documentation.
👉 Please refer to the Restaurant Web Add-on Installation Guide for detailed instructions.
Overview
The Overview page serves as the central command center for monitoring the financial health of your restaurant's cash operations. It provides high-level visual analytics and summary totals, allowing managers to track trends in cash flow, security drops, and overall counting accuracy over time.
Visual Analytics (Graphs)
Two primary charts help identify patterns in how money enters and leaves the business:
Cash In & Out Statistics: This area chart compares manual funds added (Cash In - Green) versus funds removed (Cash Out - Orange). Monitoring this graph helps identify days with unusually high payouts or manual deposits.
Safe Drops Statistics: This bar chart tracks the frequency and volume of money moved to the safe. Steady bars indicate consistent security practices, while gaps might suggest that the drawer is being left with too much cash on hand.
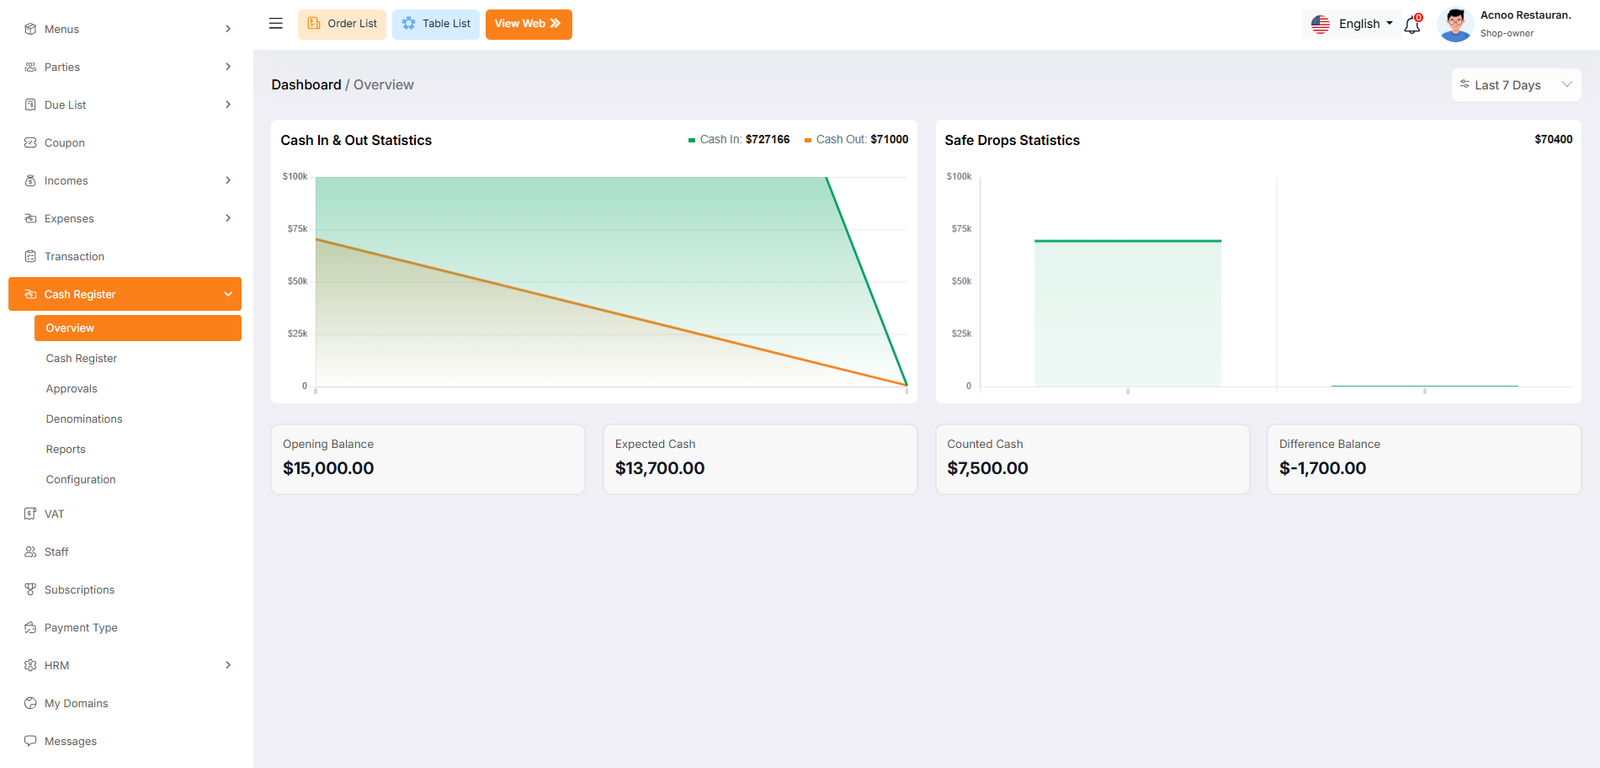
Cash Register
The Cash Register dashboard is designed to help you track real-time cash flow. It shows your Active Shift details, including the opening time and the cashier currently in charge. The Expected Cash ($4,500.00) is the total amount that should be in the drawer right now.
Financial Summary
Opening Balance: This is the starting cash in your drawer, currently set at $5,000.00.
Cash In: Total manual additions to the drawer, totaling $500.00.
Cash Out: Total manual withdrawals or payouts, totaling -$600.00.
Safe Drop: Large sums of cash moved to a secure safe for safety, totaling -$400.00.
Quick Actions
To record a new movement, enter the Amount and a Reason (like "payout" or "change"). Click Cash In to add money, Cash Out to remove it, or Safe Drop for secure transfers.
Closing the Shift
Before leaving, use the Closing Shift button. Strong Note: Always ensure your physical cash matches the expected balance to avoid discrepancies in your reports.
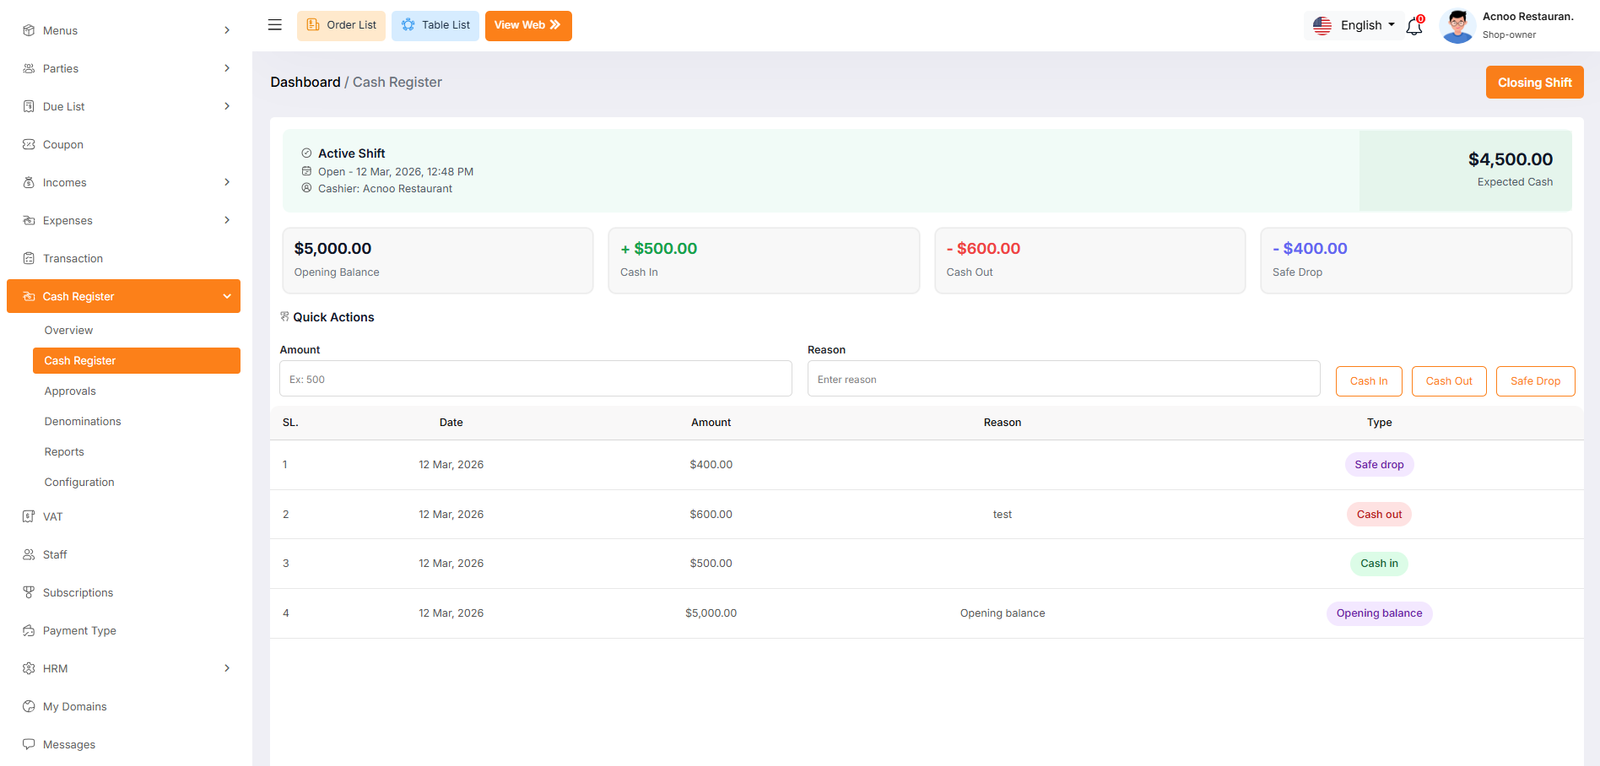
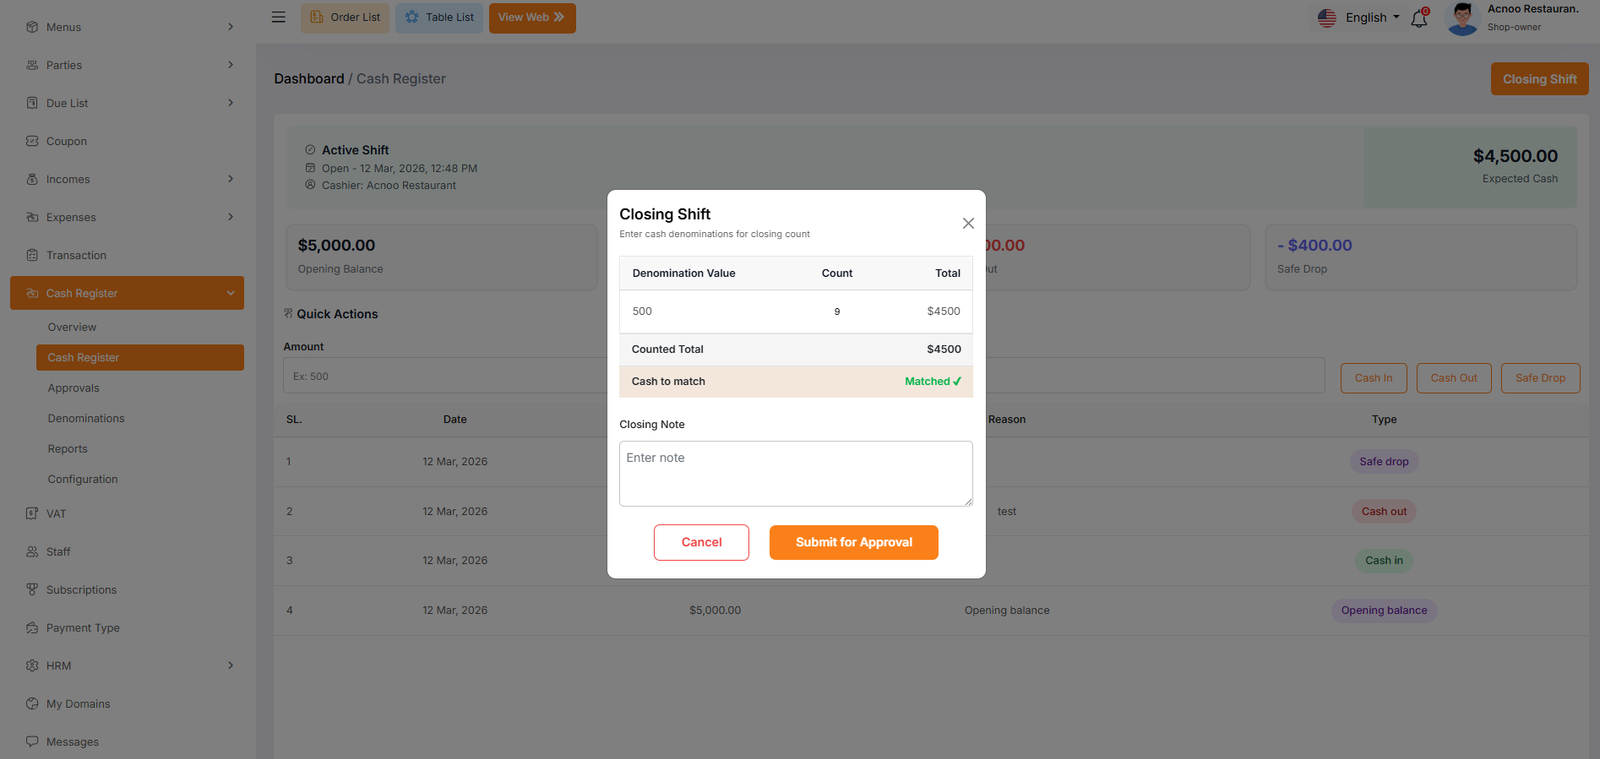
Approvals
The Approvals dashboard is a critical auditing tool used to review and finalize cash shifts after they have been closed by a cashier. This screen allows managers to identify discrepancies between the system's expected cash and the physical amount counted at the end of a shift.
Shift Reconciliation Details
Each row in the table represents a closed shift awaiting management review. The following columns provide the necessary data for a proper audit:
Owner have three primary options to handle a closed shift under the Action column:
Approve: Use this to confirm that the shift is correct or that a discrepancy has been noted and accepted. Once approved, the shift is finalized in the financial reports.
View: Click this to see a full breakdown of every transaction, safe drop, and expense that occurred during that specific shift for a deeper investigation.
Reopen: If there is a significant error or the cashier needs to recount the drawer, this button allows the shift to be sent back into an active state.
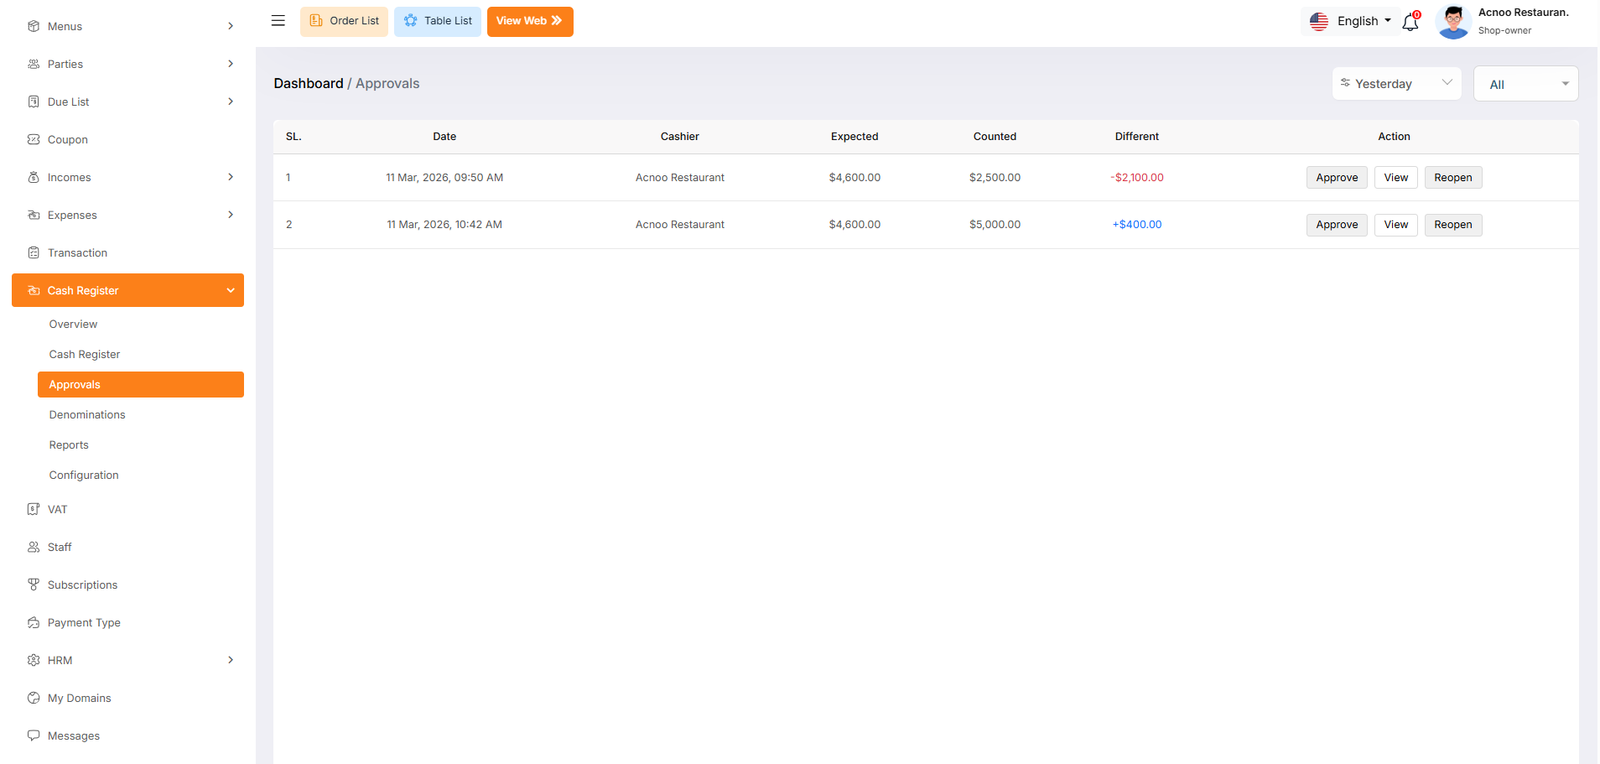
Denominations List
The Denominations page allows administrators to define the specific currency units (notes and coins) used by the business. Setting these up ensures that when a cashier closes a shift, they can perform an accurate physical count by entering the quantity of each specific bill or coin.
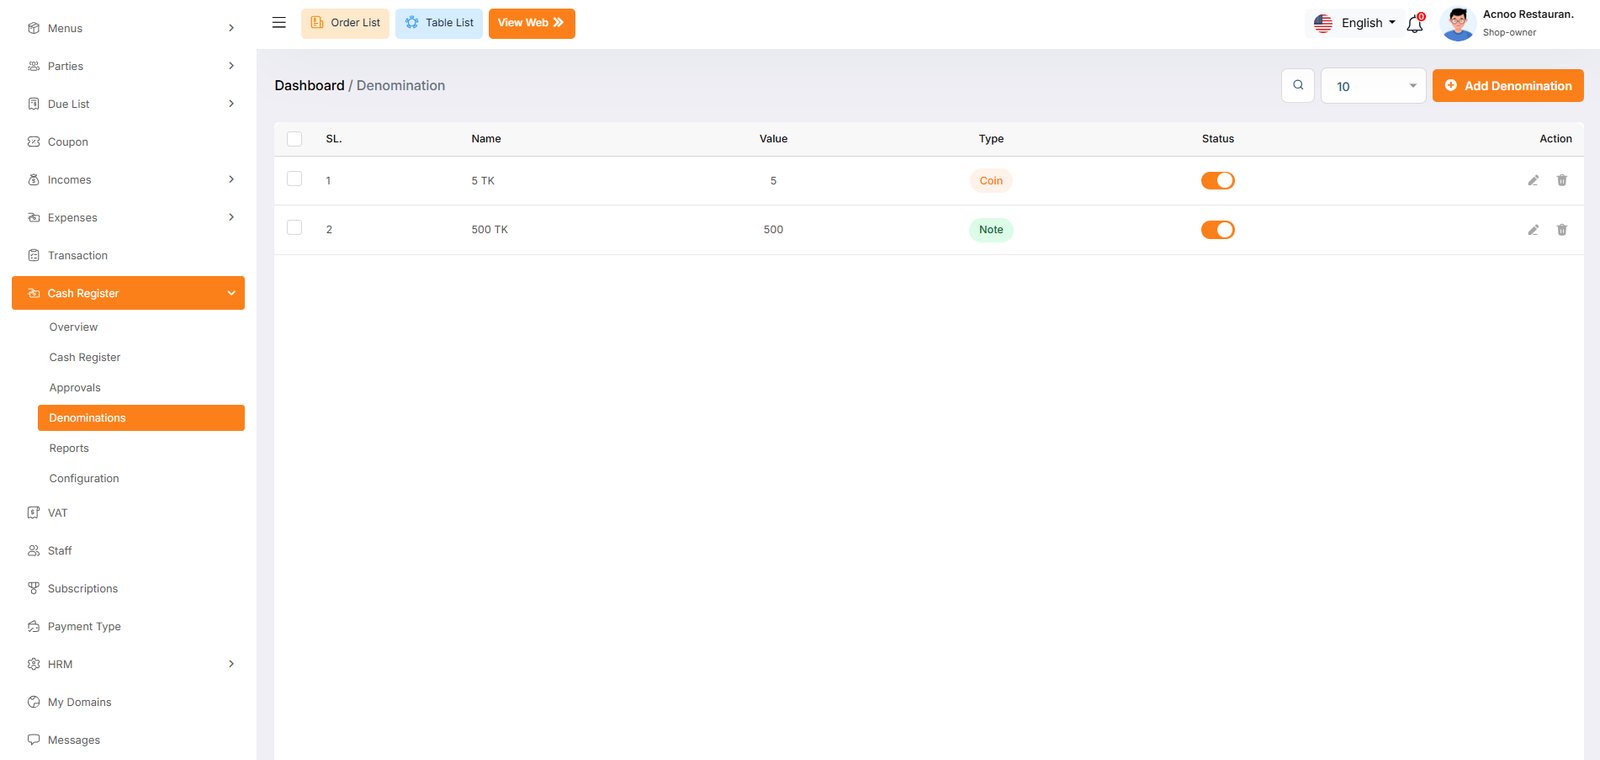
Denominations Create
The Denomination Create window is a pop-up form used to register a new currency unit into the system. This setup ensures that your cash register can accurately calculate the total money in the drawer based on the specific notes and coins you handle daily.
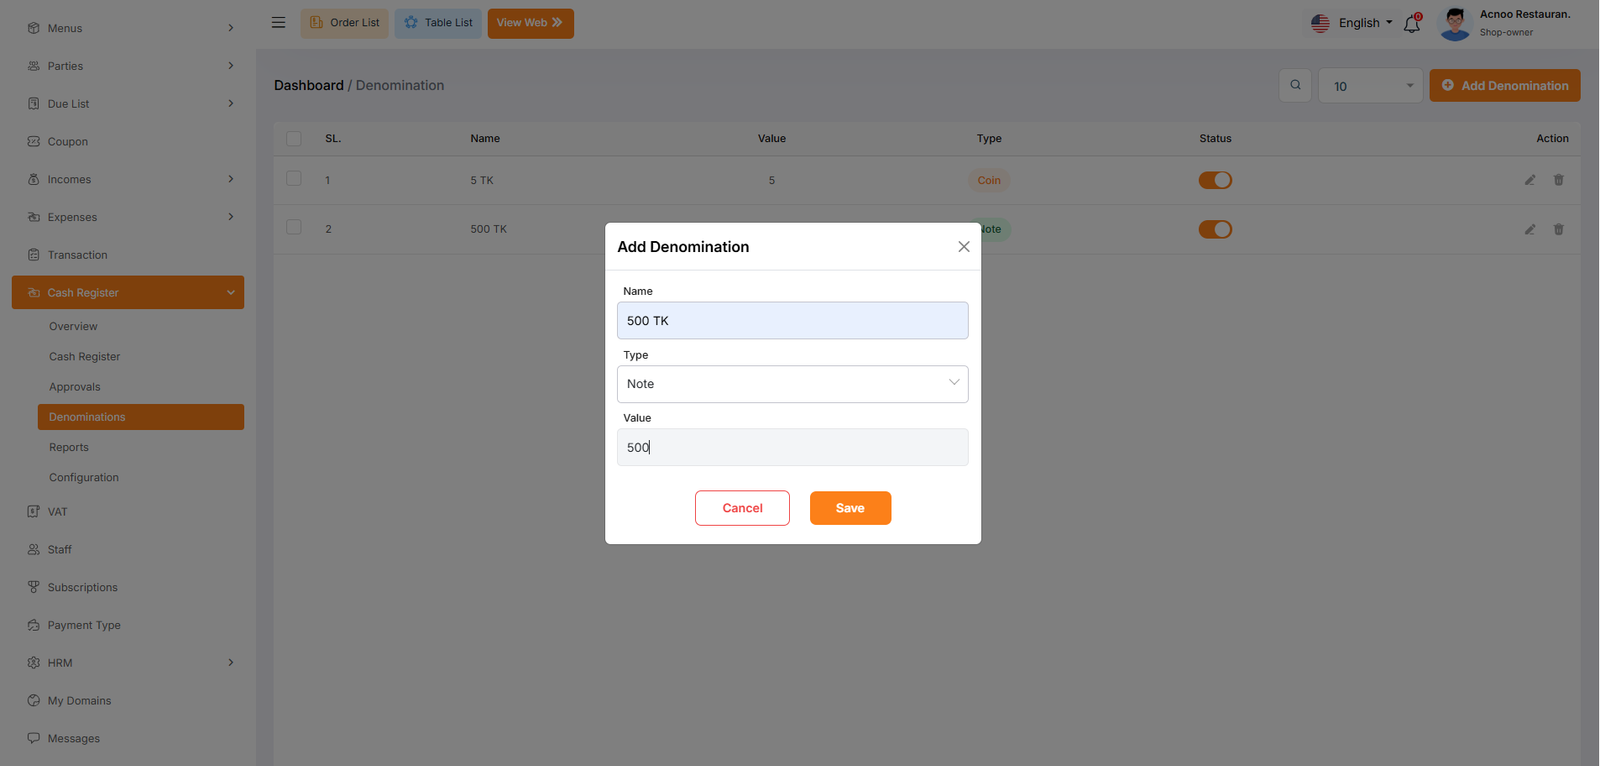
X Reports
The Open Shift Report, commonly known in the industry as an X Report, provides a summary of the current, active business session. Unlike a closed report, this document reflects live data for a shift that is still ongoing and has not yet been finalized by a manager.
This section identifies the current state of the register before any closing procedures have begun:
Session Status: Marked as "Open" or "Ongoing". This indicates that the cashier is still actively processing transactions and the drawer is still in use.
Opening Time: Records the exact moment the drawer was started (e.g., 12 Mar, 2026, 12:48 PM). This is useful for tracking how many hours the current cashier has been handling the register.
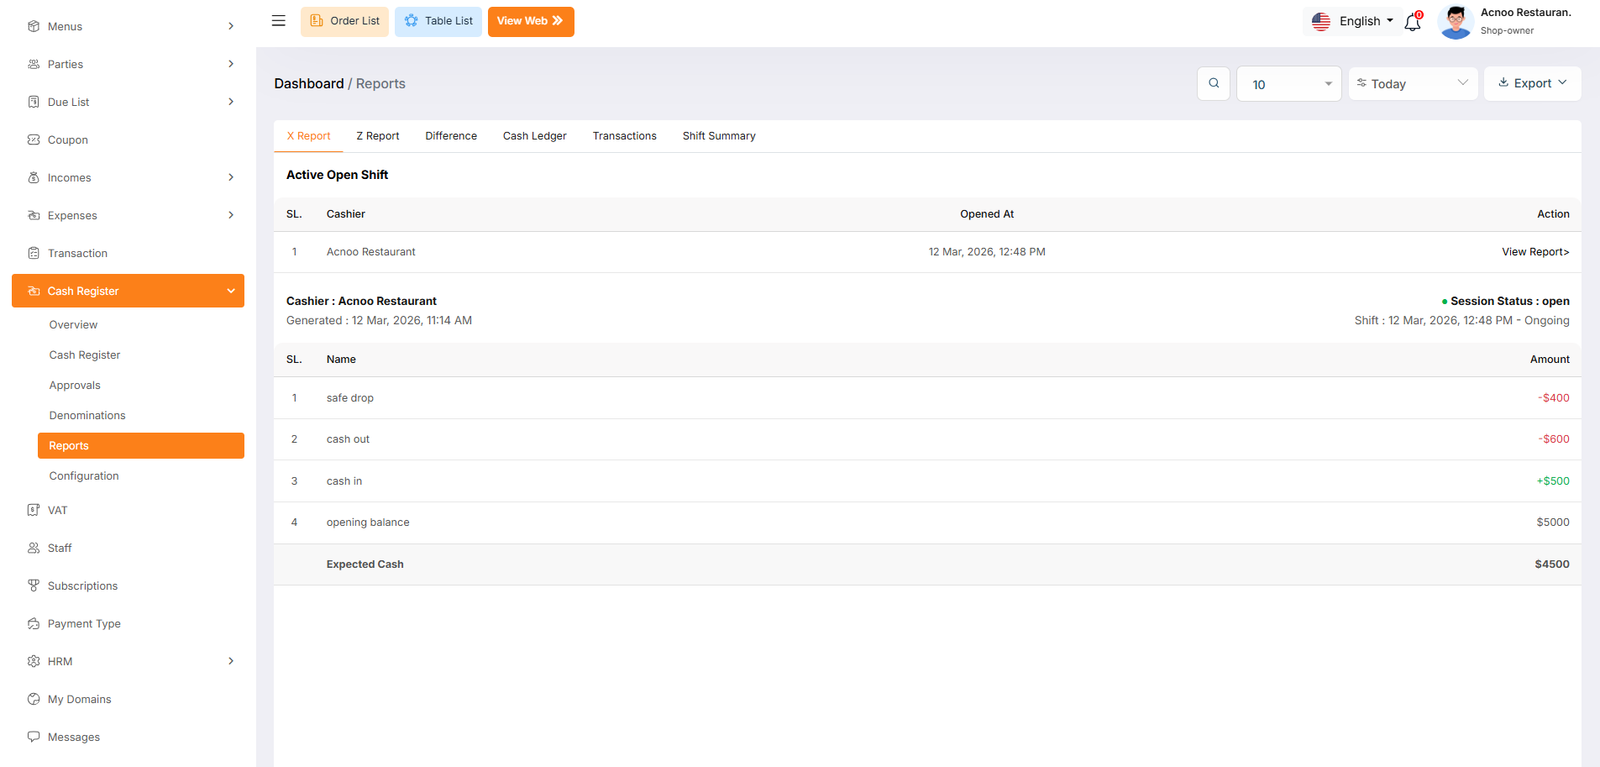
Z Reports
The Closed Shift report, traditionally known as a Z Report, provides the final financial summary of a completed work session. Unlike the X Report, which shows unclosed data, the Z Report is generated after a cashier has finished their shift and the drawer has been officially closed for reconciliation.
Closed Shift History
This section lists all historically completed shifts. It is used by management to review past performance and audit previous days.
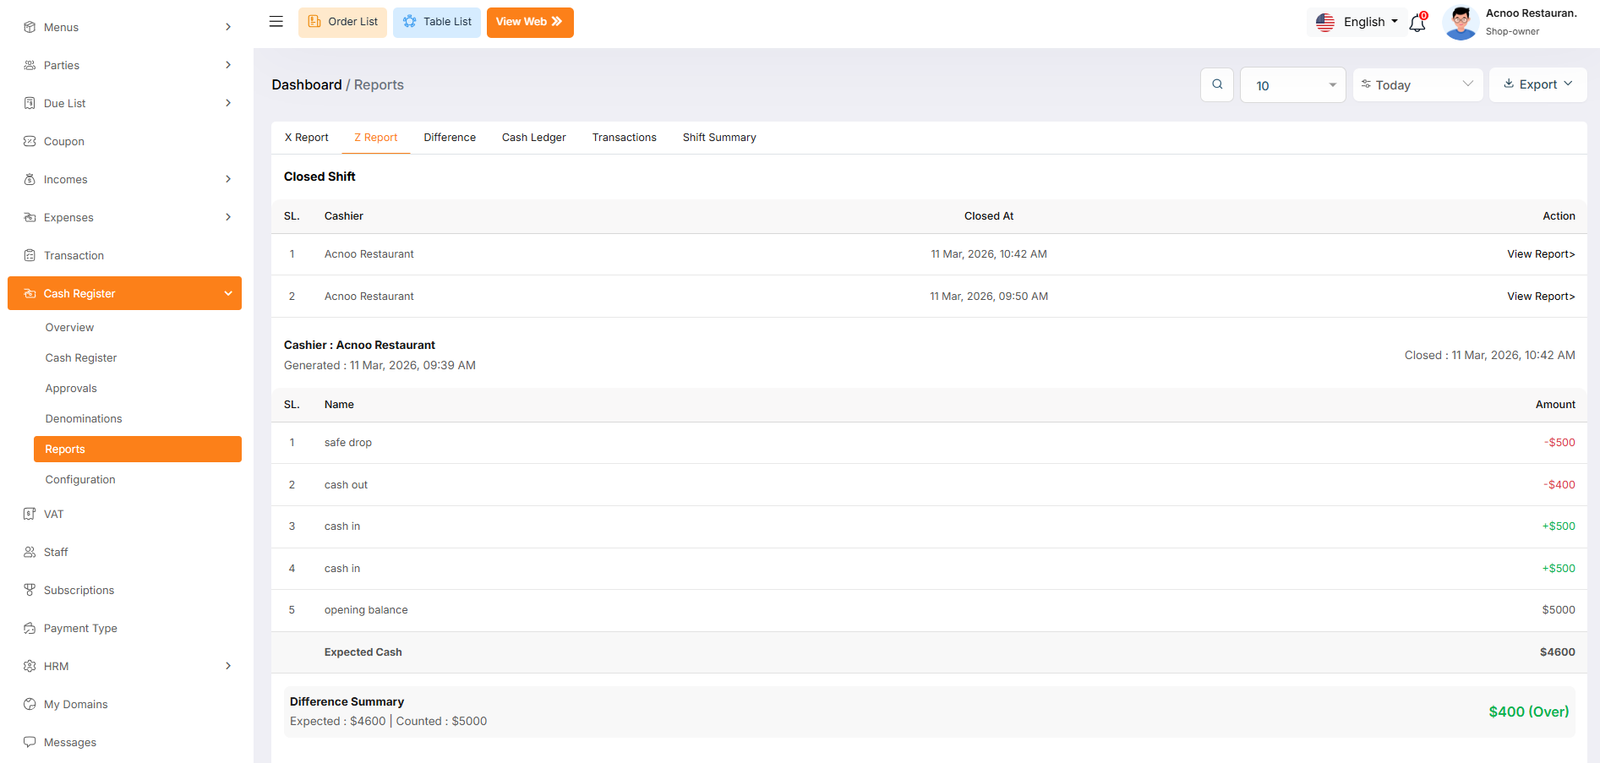
Difference
The Difference report is a specialized auditing tool used by management to track and categorize financial discrepancies. This page automatically flags shifts where the physical cash count does not match the system's expected total, allowing you to prioritize the investigation of significant losses or gains.
Difference Categorization Cards
At the top of the page, the system automatically groups shifts based on the severity of the discrepancy:
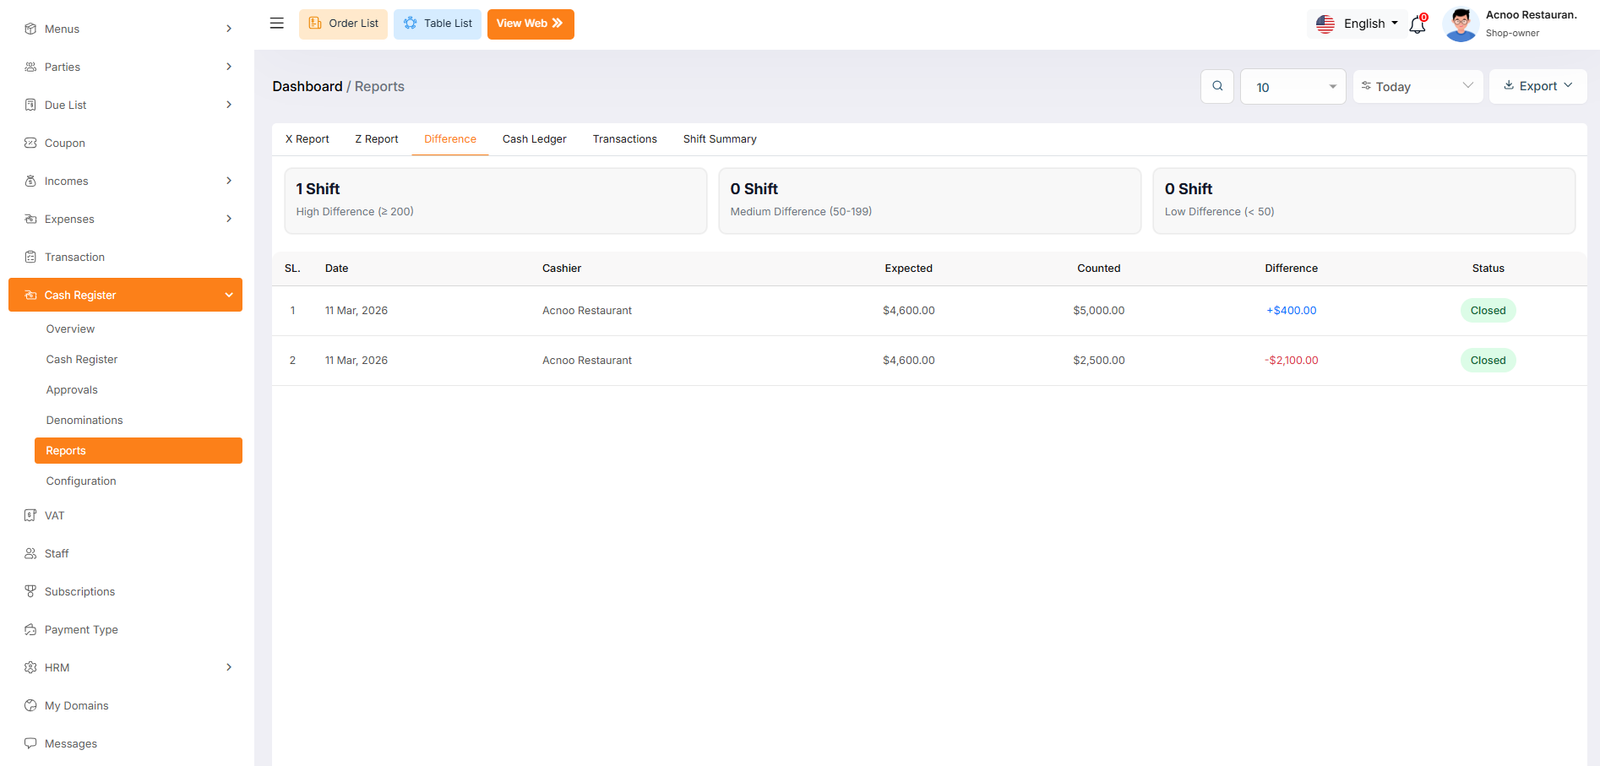
Cash Ledger
The Cash Ledger is the most comprehensive reporting view within the Cash Register module. It provides a complete, high-level overview of all financial activity across multiple shifts. This page is designed for deep auditing, allowing you to see exactly how cash moved from the moment a shift opened until it was finalized.
Aggregate Summary Cards
The top section provides a combined total for all shifts currently displayed in the list. This is useful for daily or weekly financial balancing:
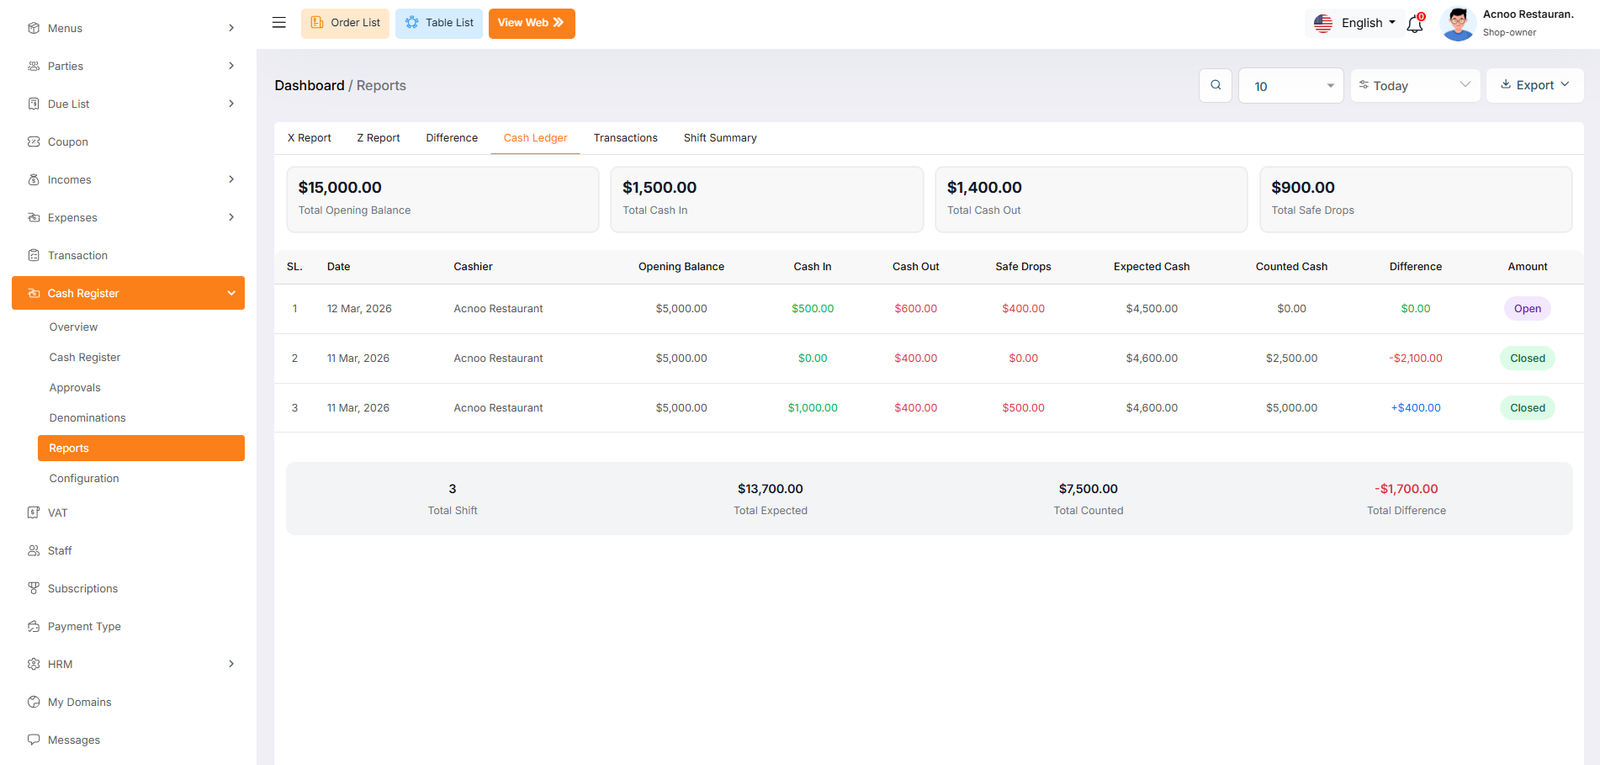
Transactions
The Transactions report tab provides a detailed breakdown of every individual cash movement recorded within the system. While the Ledger provides a shift-level summary, the Transactions page is designed for auditing the specific "Why" and "When" of every dollar that enters or leaves the register.
Transaction Performance Cards
The top section summarizes all manual movements and automated inflows for the filtered period
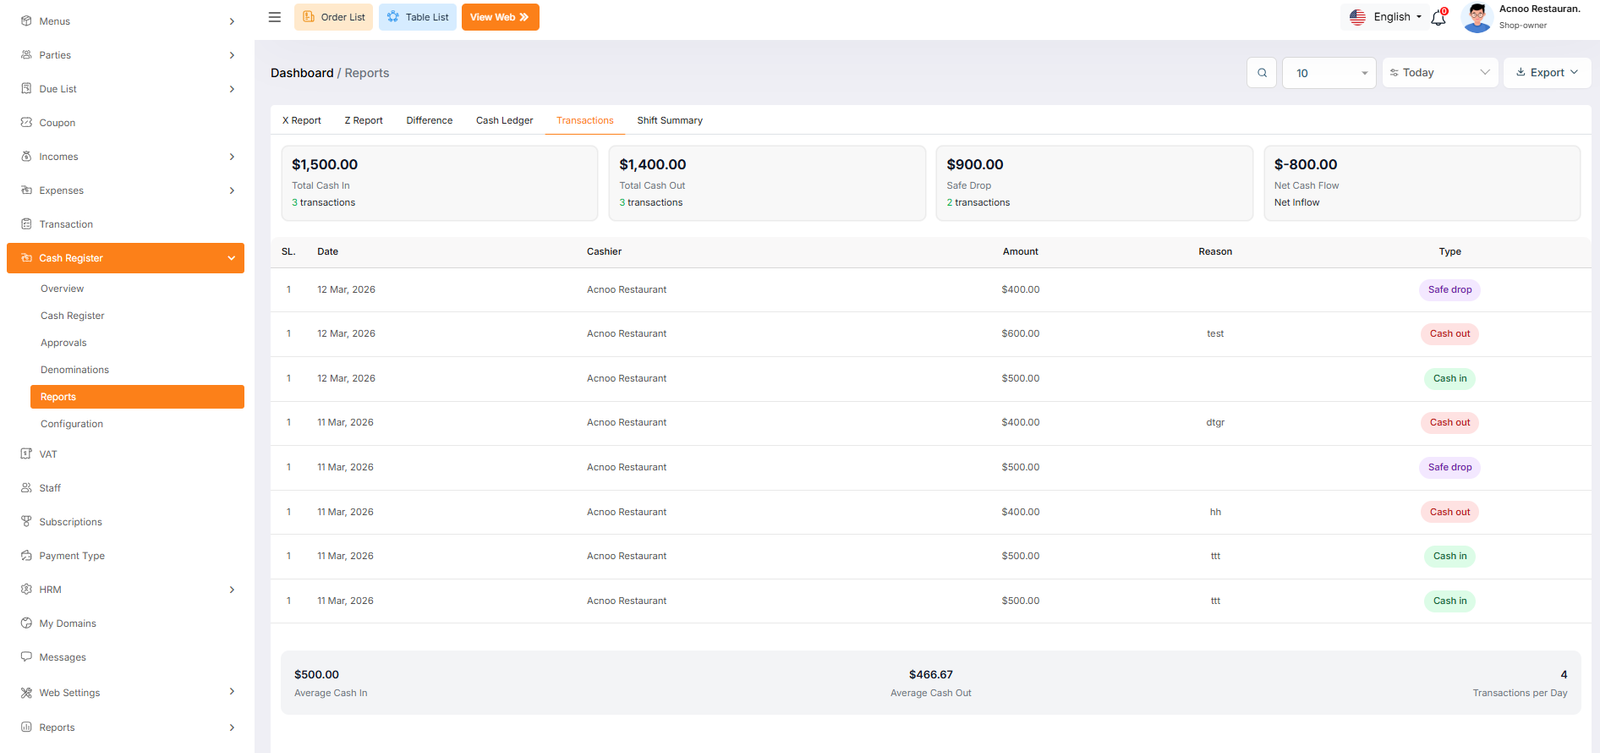
Shift
The Shift Summary tab provides a high-level analytical view of all cashier sessions. It is designed to help management monitor labor productivity, shift patterns, and overall financial accuracy across multiple time periods. This report focuses on the operational health of the register system.
Cashier Performance: Lists how many shifts each specific staff member has completed (e.g., Acnoo Restaurant - 3 Shifts).
Shift Performance: Tracks volume based on the time of day (e.g., Evening - 3 Shifts), helping you identify your busiest operating windows.
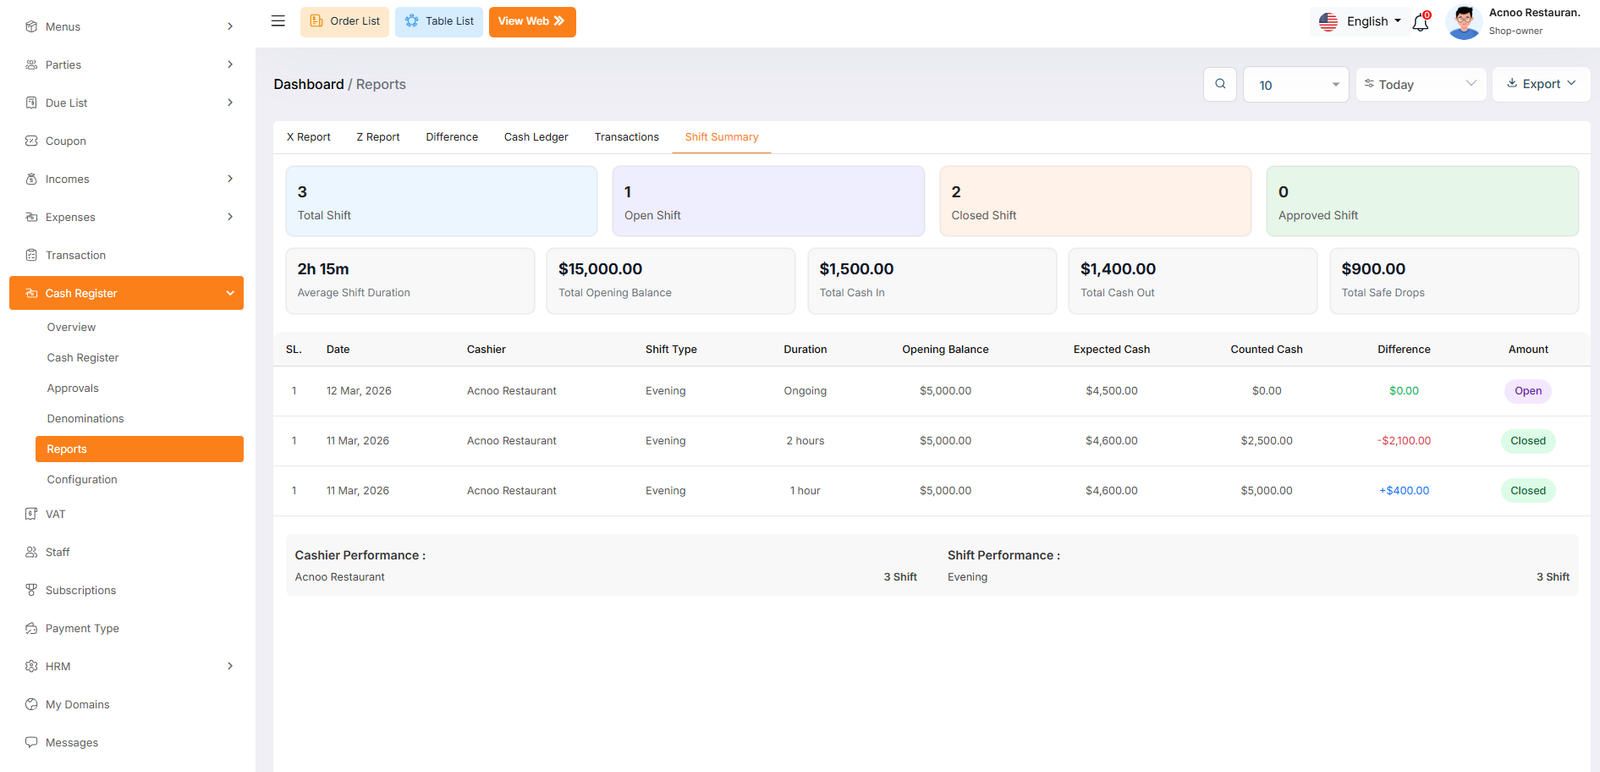
Configuration
The Configuration page allows administrators to automate the cash management workflow. By adjusting these settings, you can control how the cash register interacts with different staff roles upon logging into the system.
Auto-Open Cash Register on Login
This feature simplifies the start-of-day process by automatically initiating a cash register session when specific users log in. This ensures that no sales are processed without an active, tracked cash shift.
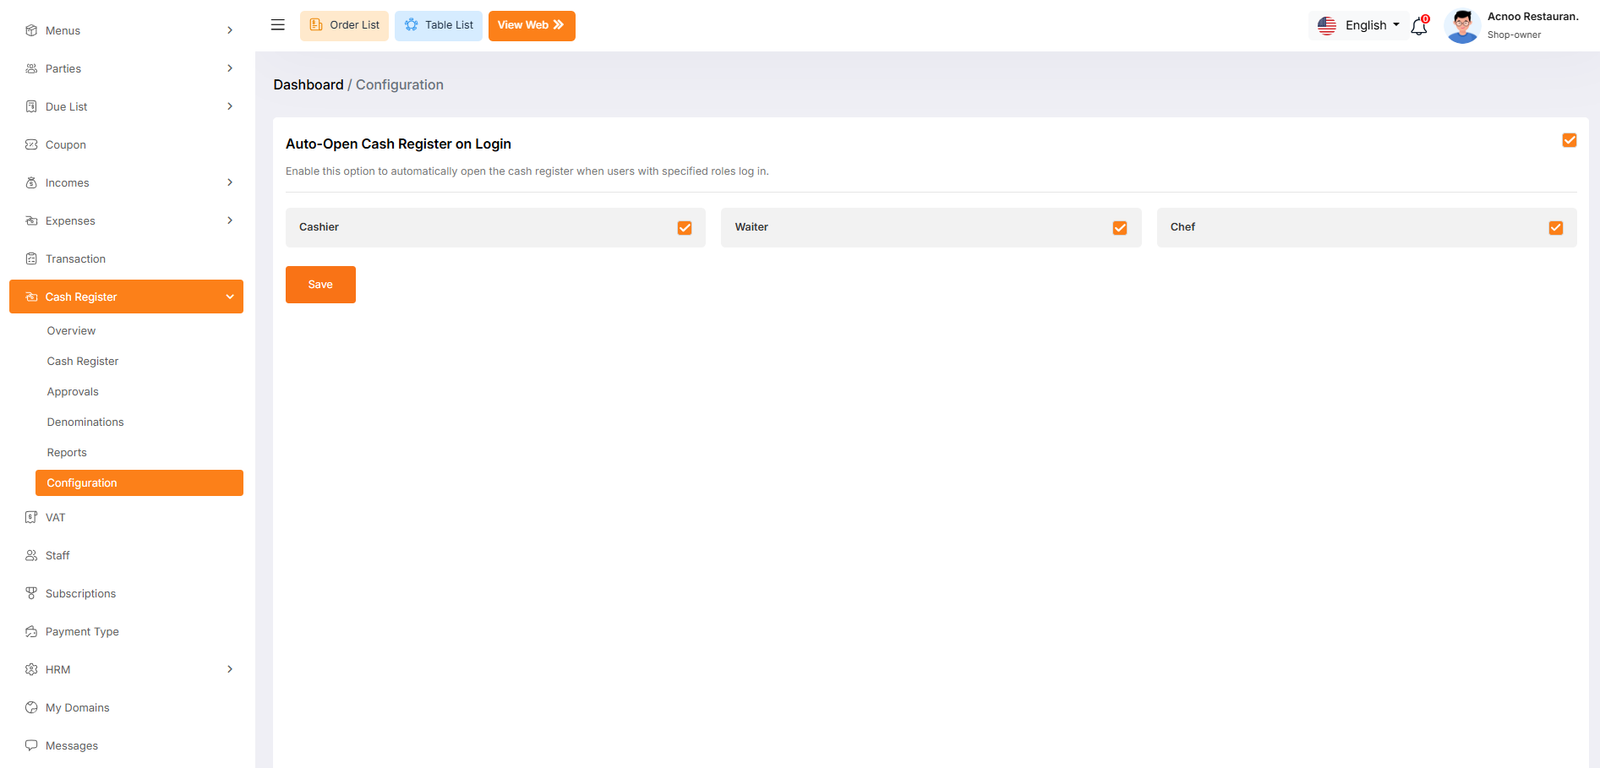
Cash Register Add-on Change Logs
Note: Before updating to the new version, please ensure you have a database and full project backup, and that your project is already updated to the latest version. This is extremely important!
Version: 1.1 ( 13 July 2026 )
- Implemented comprehensive branch management functionality.
Note: Please replace the following folders:
✔Modules/CashRegisterAddon
✔app
✔config
✔database
✔lang
✔public/assets
✔resouces
✔routes
After replacing them, visit yourdomain.com/update to install the new version and
please don't forget to reload hard your browser. Without visiting the URL and reloading
hard, your project will not function correctly, so ensure you complete this step.
Note: If you face any issues with the update, please contactus.
Version: 1.0 ( 15 March 2026 )
- Initial Release
Note: Please replace the following folders:
✔app
✔config
✔lang
✔public/assets
✔routes
After replacing them, visit yourdomain.com/update to install the new version and
please don't forget to reload hard your browser. Without visiting the URL and reloading
hard, your project will not function correctly, so ensure you complete this step.
Note: If you face any issues with the update, please contactus.
Inventory Add-on: Setup and Installation
📘 Overview:
The Inventory Addon is a comprehensive inventory and ingredient management system designed for restaurants and food businesses. It enables you to track stock quantities, manage ingredient costs, define recipes for menu items, monitor stock movements, and analyze ingredient consumption against sales. The addon integrates seamlessly with Purchases (auto stock-in) and Sales (auto stock-out based on recipes), ensuring real-time inventory accuracy.
🔑 Key Features
📂 Inventory Categories - Classify ingredients into organized categories for easy management.
📦 Inventory Items (Ingredients) - Track stock quantity, low-stock alerts, unit price, supplier, and unit for each ingredient.
⚖️ Units & Conversions - Define measurement units with base-unit conversion (multiply/divide factor) for accurate quantity tracking.
🍽️ Recipes - Link products to ingredient lists with quantities; auto-calculate recipe cost price via unit conversion.
📊 Stock Movements - Manual entries for stock_in, stock_out, adjustment, and damage with full tracking.
🔄 Auto Stock Impact - Purchases automatically add stock; Sales automatically deduct stock based on recipe ingredients.
📈 Ingredient Consumption Report - Analyze per-sale ingredient usage, cost, revenue, and profit with date filtering.
📄 Exports - PDF, Excel, and CSV export support for all main entities.
🔌 API Ready - Full REST API endpoints for mobile app integration.
📦 Installation
The installation process for the Inventory Add-on follows the same steps as outlined in the Restaurant Web Add-on documentation.
👉 Please refer to the Restaurant Web Add-on Installation Guide for detailed instructions.
Inventory Items (Ingredients)
Inventory Items (also called Ingredients) are the raw materials used in your recipes. Each ingredient tracks:
- Name - The ingredient name (e.g., "Tomato", "Chicken Breast")
- Category - The inventory category it belongs to
- Unit - The default measurement unit (e.g., Kg, Gram, Litre, Pcs)
- Stock Quantity - Current available quantity in stock
- Stock Alert - Threshold for low-stock warning
- Unit Price - Cost per base unit
- Supplier - The party (supplier) who provides this ingredient
When stock quantity falls below the stock alert level, the system highlights the ingredient as low-stock. The ingredients list supports search, filter, create, edit, delete, bulk delete, and export (PDF/Excel/CSV).
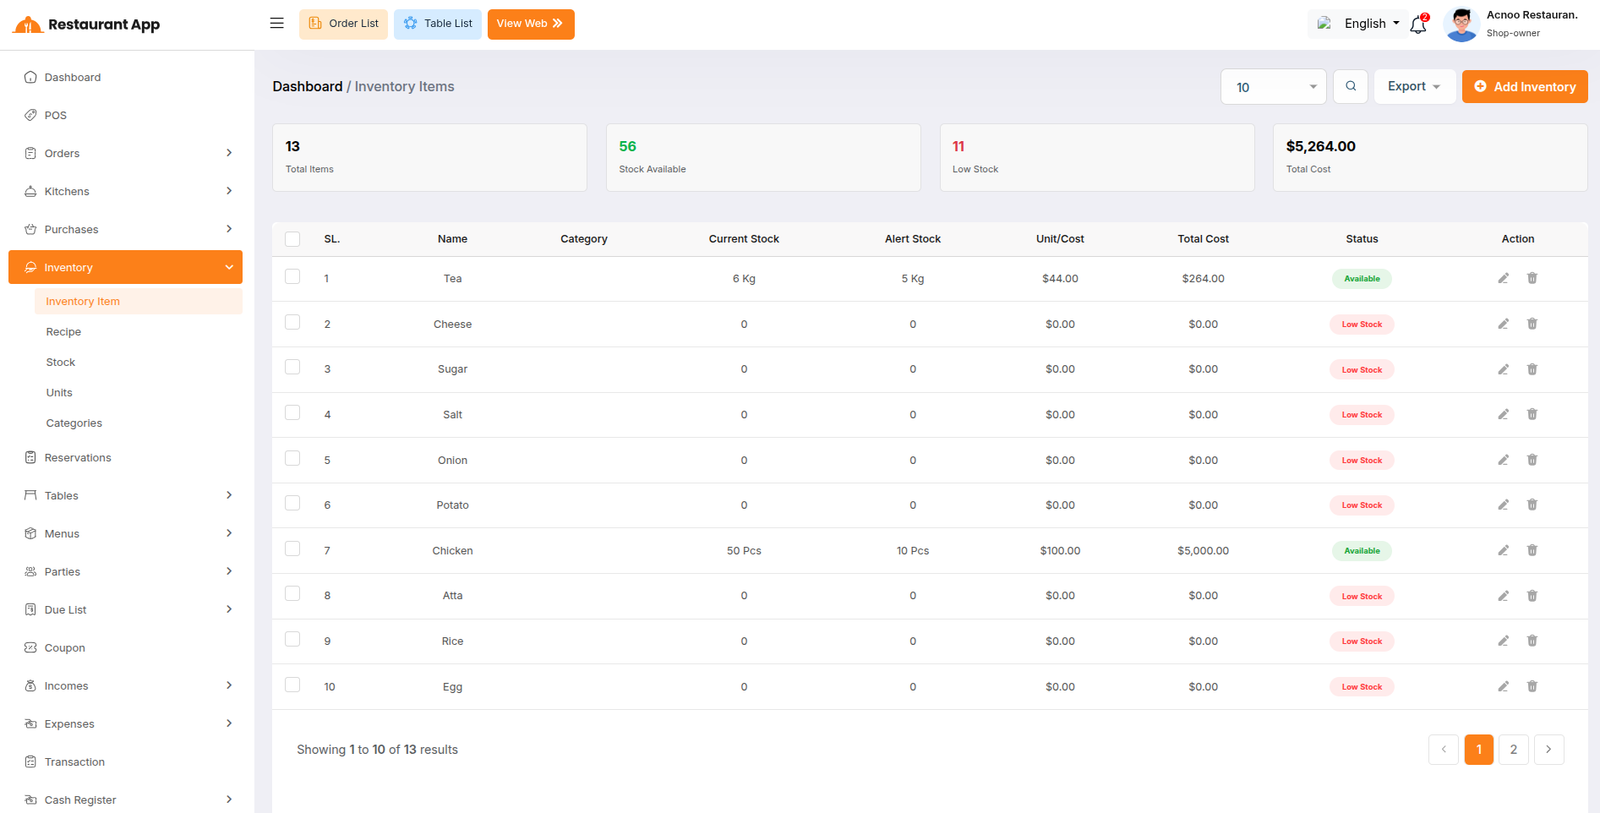
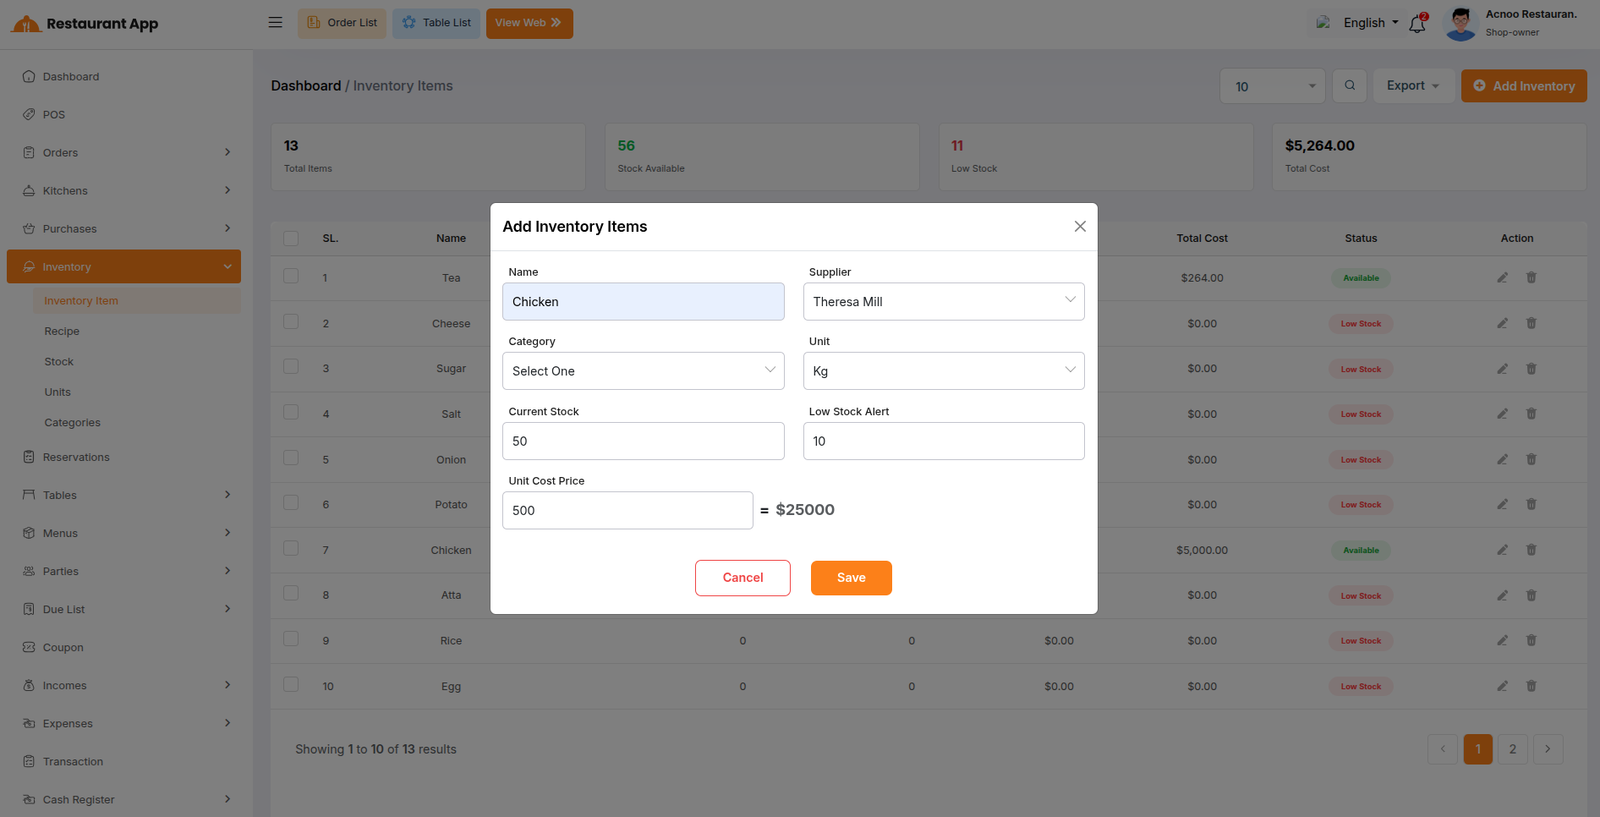
Recipes
Recipes link a Product (menu item) to a list of Ingredients with specific quantities. This serves as the Bill of Materials (BOM) for your menu items.
When creating a recipe:
- Select the Product (menu item) the recipe belongs to
- Add ingredients with quantity and unit
- The system auto-converts ingredient quantities to the base unit
- The system auto-calculates the total Cost Price of the recipe
Example: A "Chicken Burger" recipe might include 200g Chicken, 50g Lettuce, 30g Sauce. The system converts these to base units and calculates the total ingredient cost.
Recipes support CRUD, search/filter, view modal, bulk delete, and export.
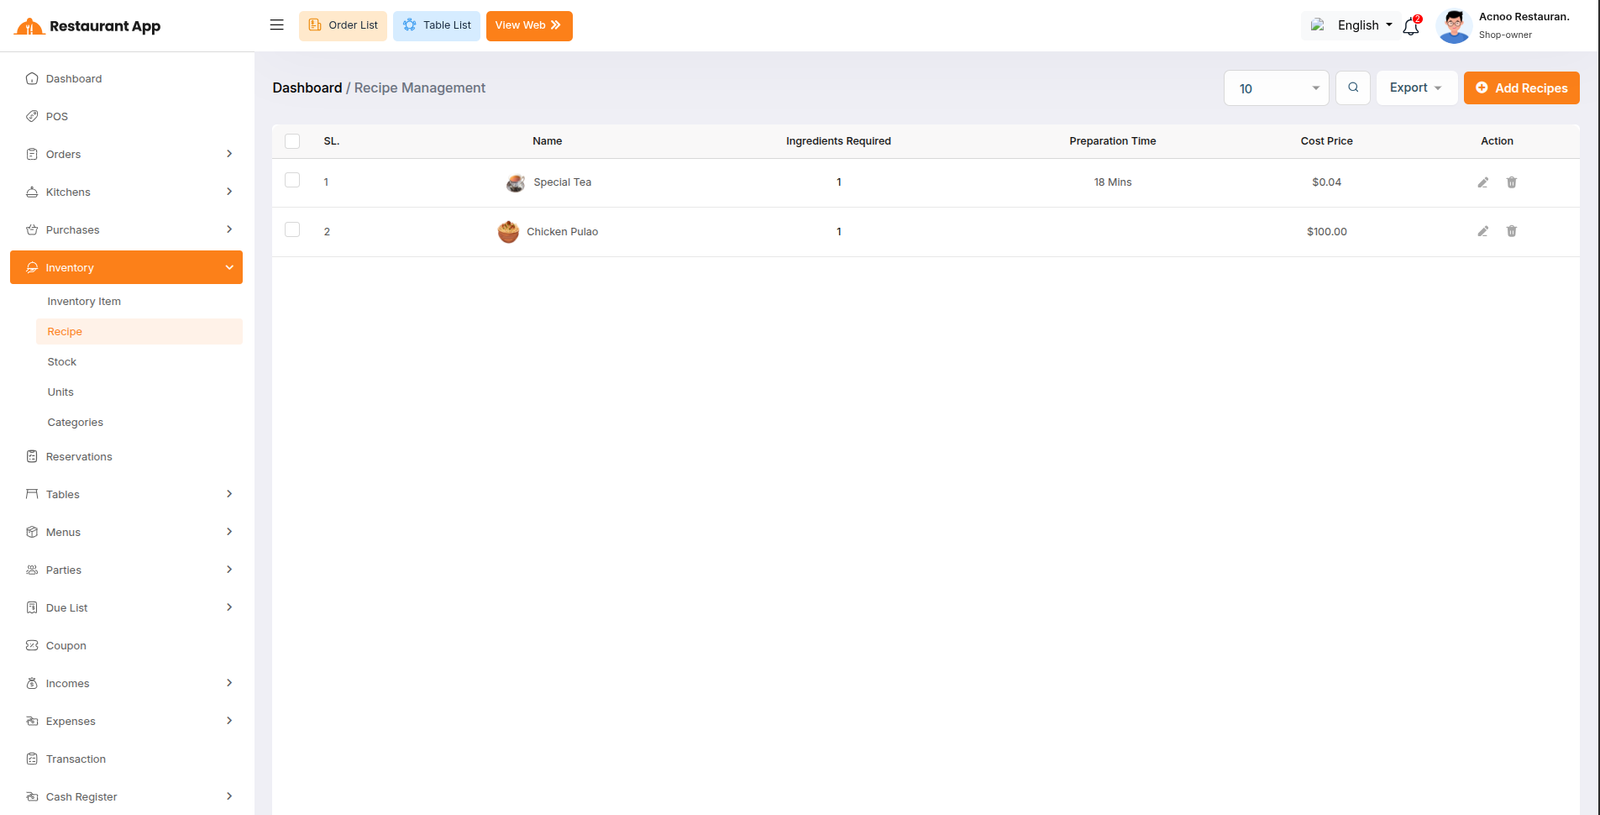
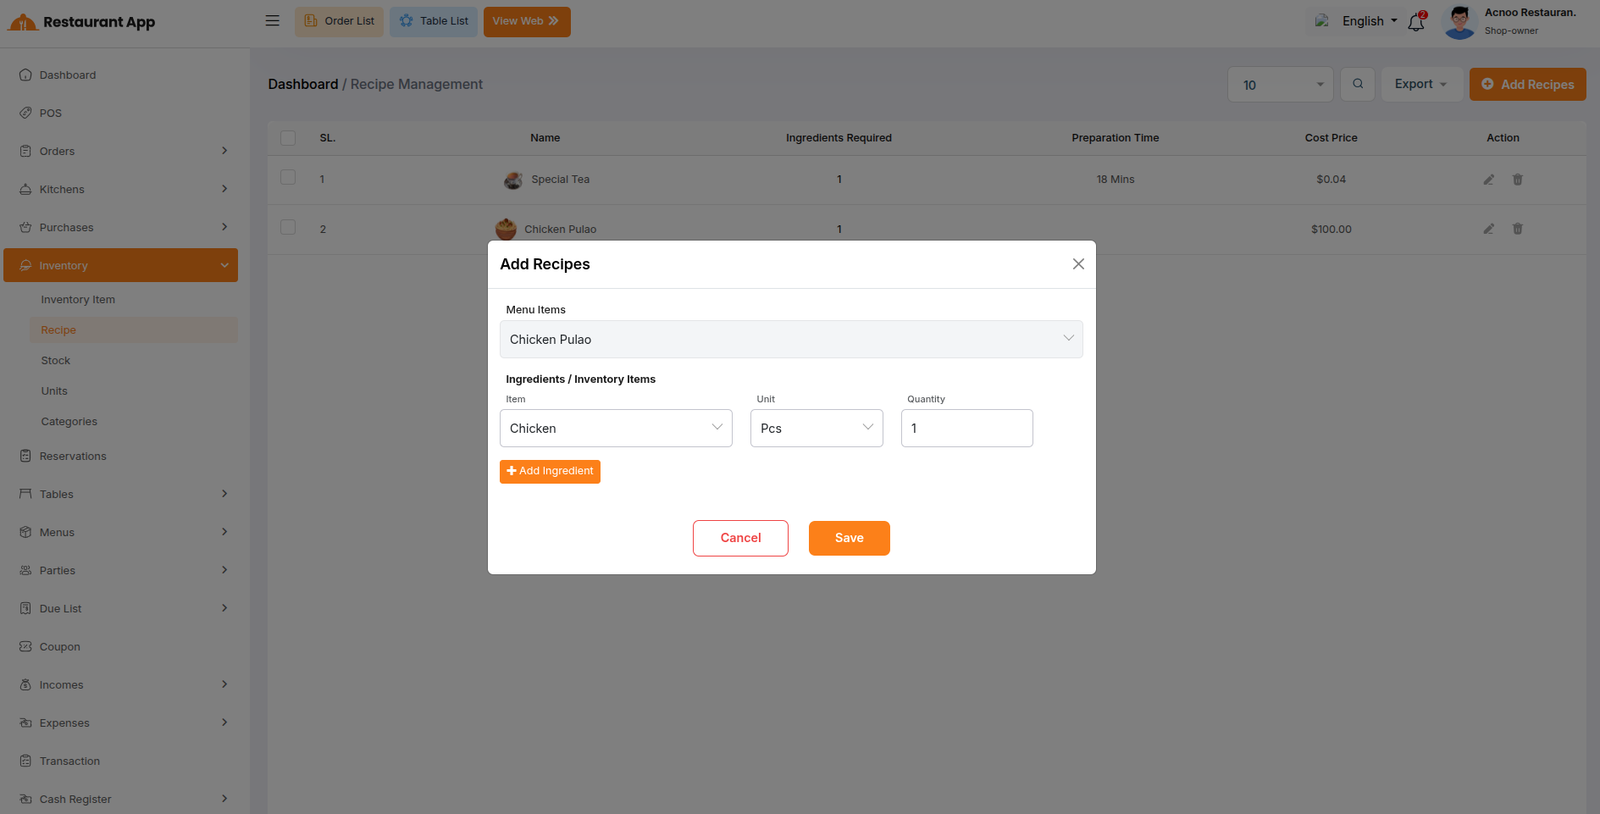
Stock Movements
Stock Movements track all changes to ingredient quantities. You can create manual stock entries with these types:
- Stock In - Add stock (e.g., received from supplier)
- Stock Out - Remove stock (e.g., wasted or used)
- Adjustment - Correct stock count (positive or negative)
- Damage - Record damaged/unsellable stock
Each movement records: ingredient, type, quantity, unit price, total amount, movement date, remark, and reference. The system automatically updates the ingredient's stock quantity when a movement is created, updated, or deleted.
Auto Stock Impact:
- Purchase - When you create a purchase, the system auto-creates stock_in movements for each purchased ingredient
- Purchase Update - Old stock movements are reversed, new ones are created
- Purchase Delete - Related stock movements are reversed
- Sale - When you create a sale, the system finds the product's recipe and auto-creates stock_out movements for each ingredient (quantity * sale quantity)
- Sale Update/Delete - Same reverse-and-reapply logic
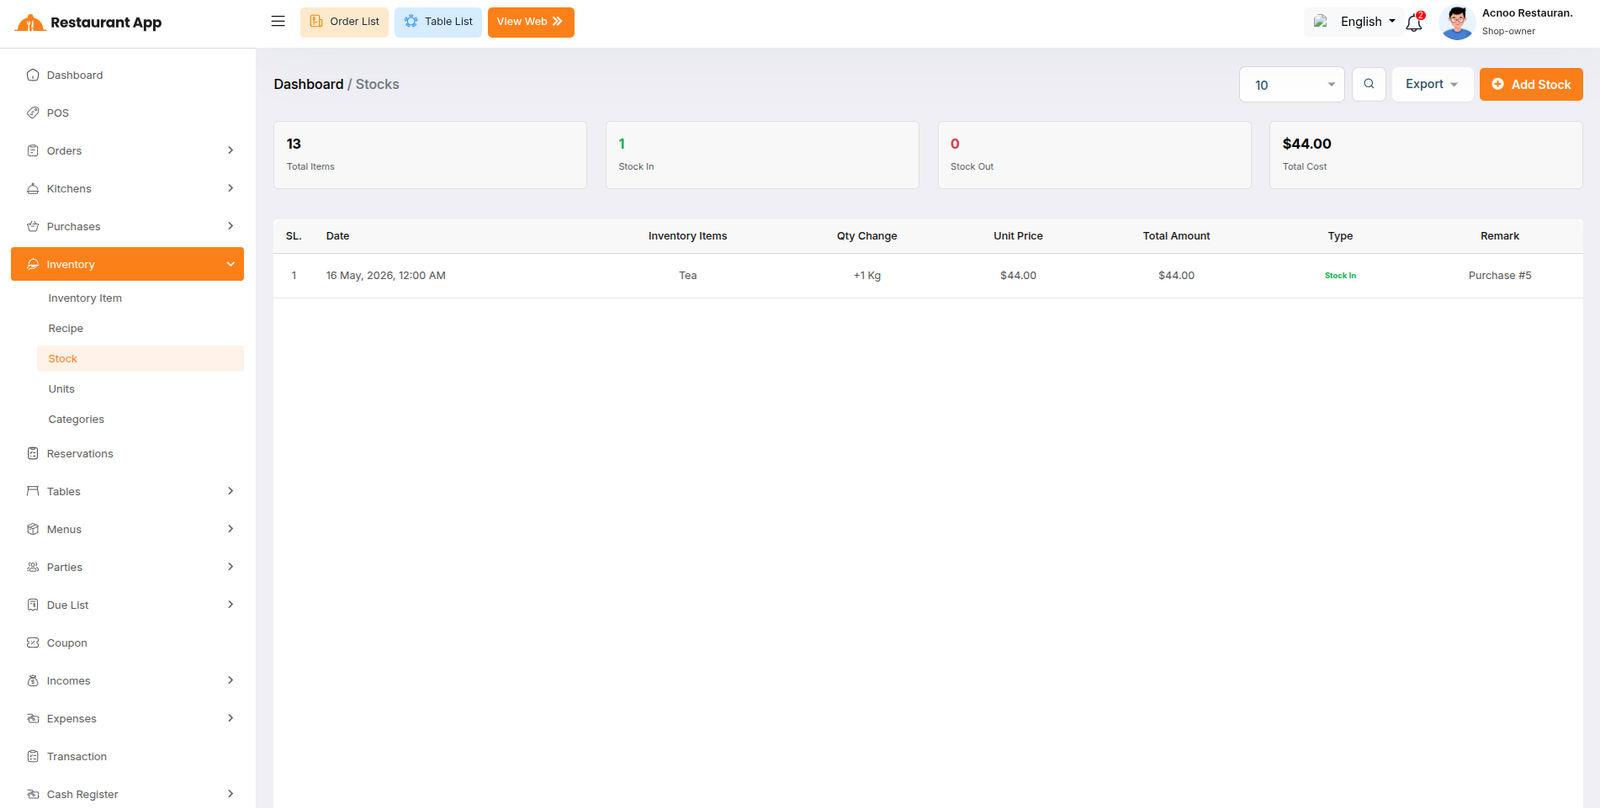
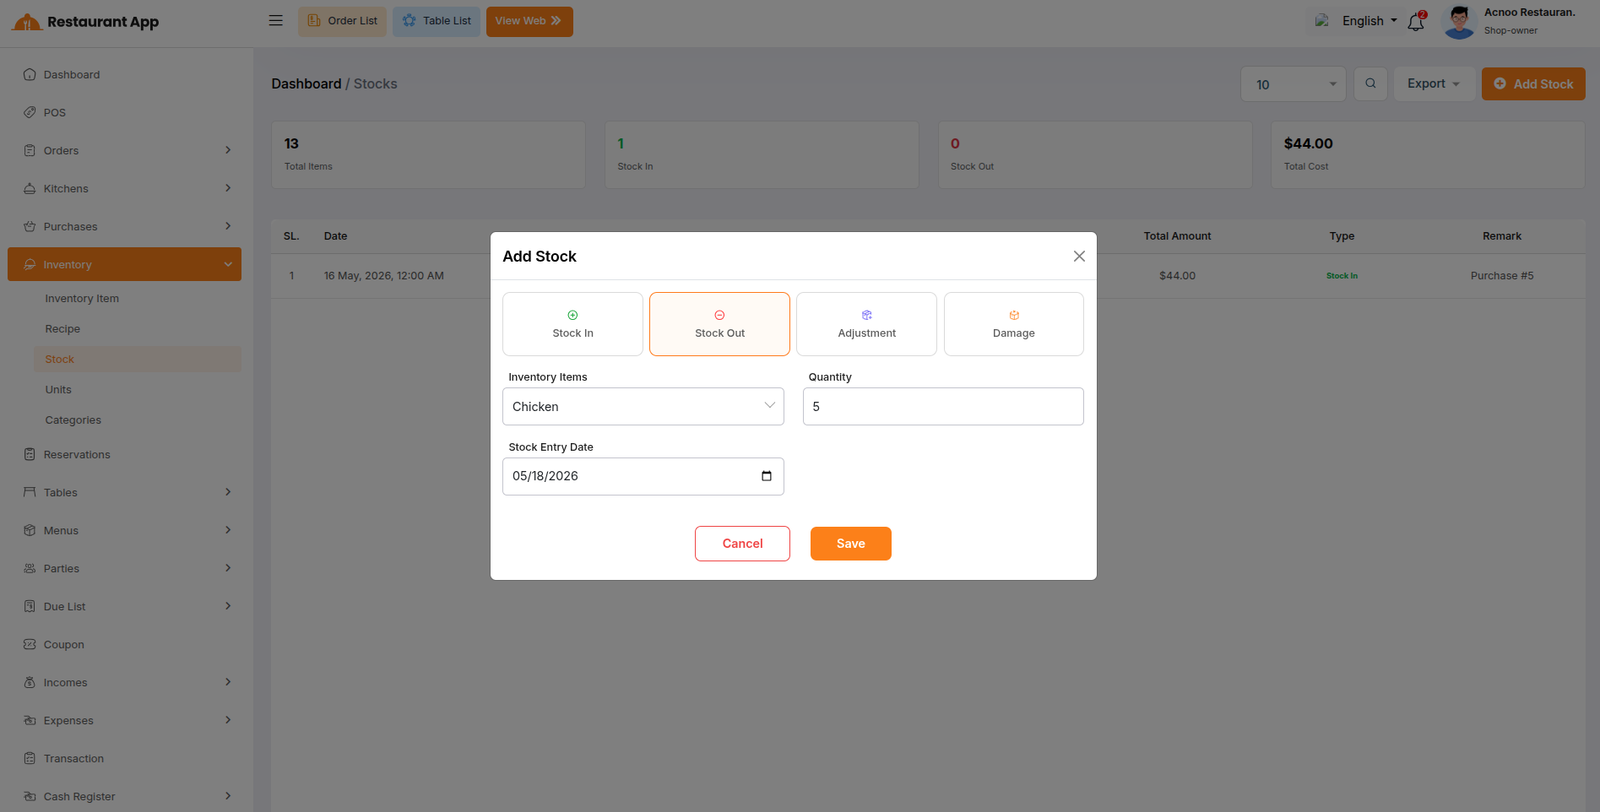
Units
The Units module defines measurement units for ingredients. Each unit has:
- Unit Name - Display name (e.g., "Kilogram", "Gram", "Piece")
- Code - Short code (e.g., "KG", "G", "PCS")
- Base Unit - Optional parent unit (e.g., Gram's base unit is Kilogram)
- Operator - "multiply" or "divide" conversion direction
- Factor - Conversion factor (e.g., 0.001 for Gram to Kg)
Example: If you define "Gram" with base unit "Kilogram", operator "multiply", and factor "0.001", then 500 Gram = 0.5 Kilogram. This conversion is used automatically when calculating recipe costs and stock movements.
Units support CRUD operations, status toggle, search/filter, bulk delete, and export.
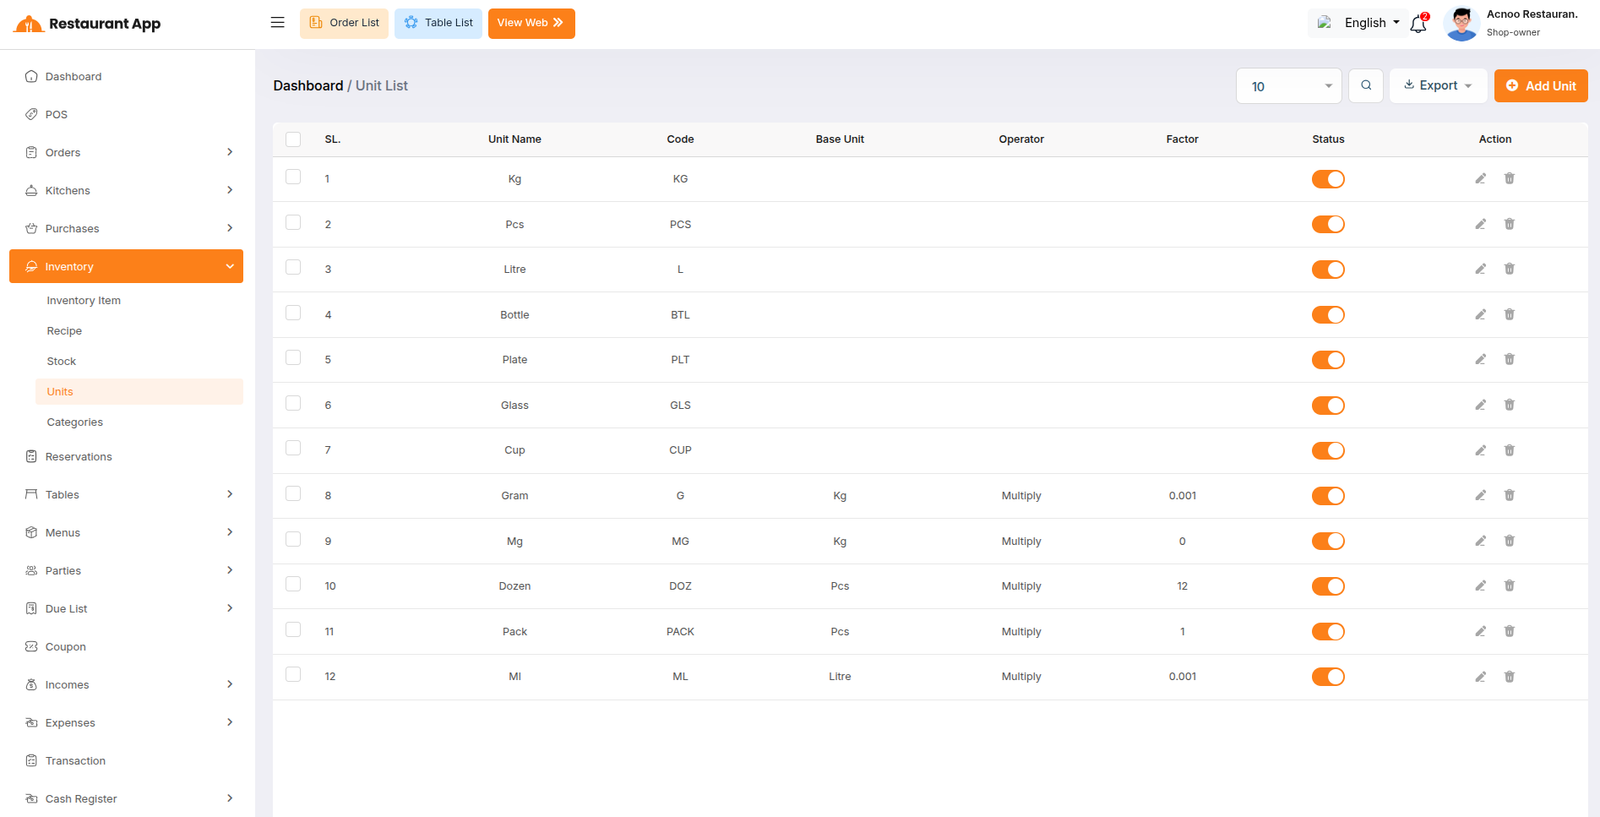
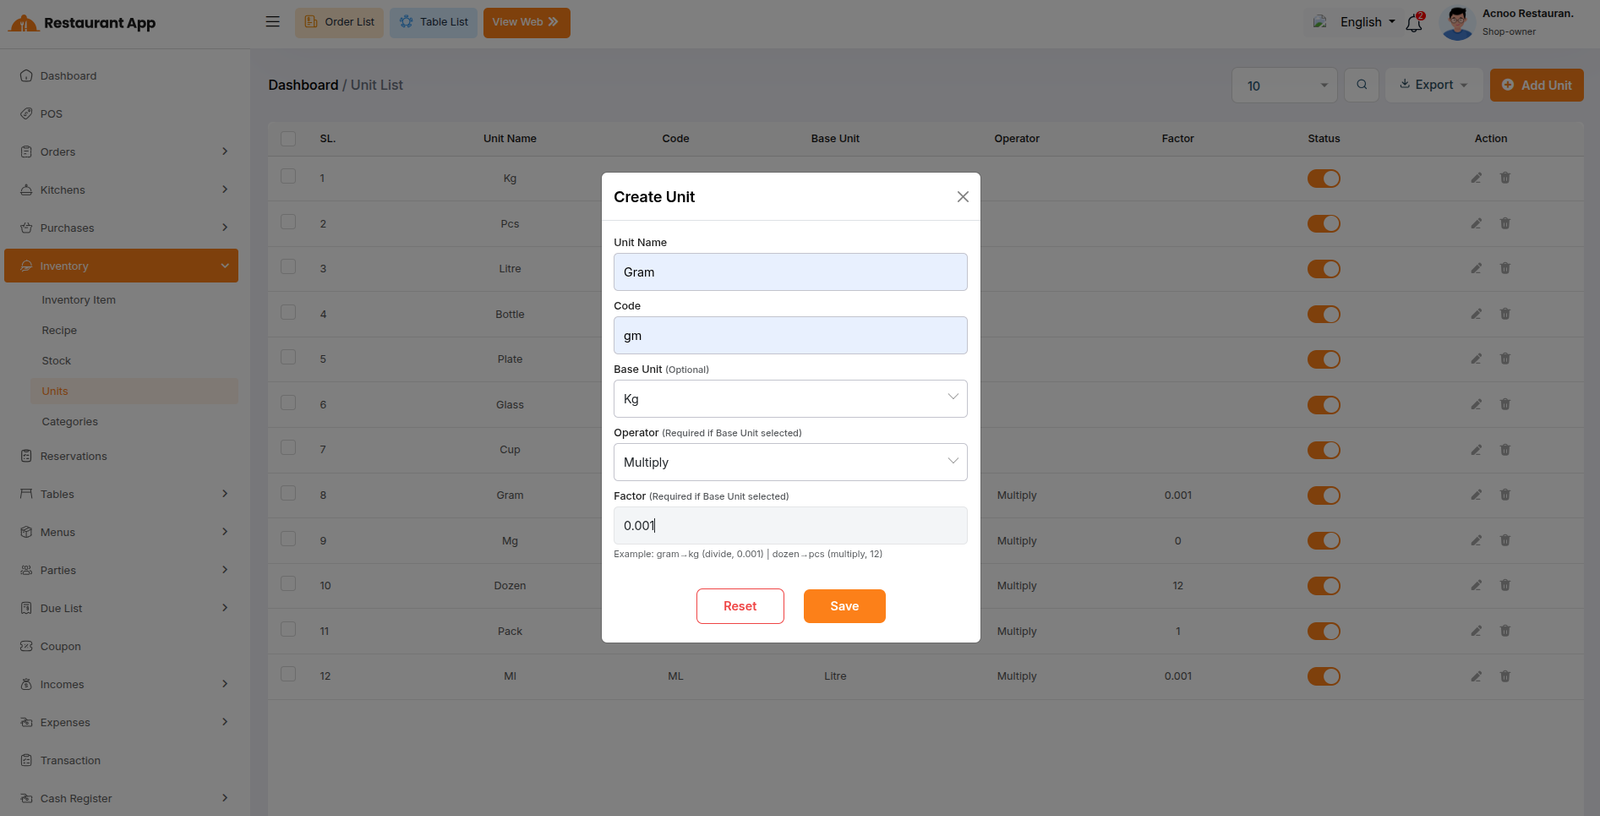
Inventory Categories
Inventory Categories allow you to classify ingredients into groups such as "Vegetables", "Meat", "Spices", "Beverages", etc. This makes it easier to organize and find ingredients in the system.
From the Categories page, you can view all categories with search/filter options. You can create a new category by entering a name and optional description. Each category can be activated or deactivated. Categories also support bulk delete, PDF export, Excel export, and CSV export.
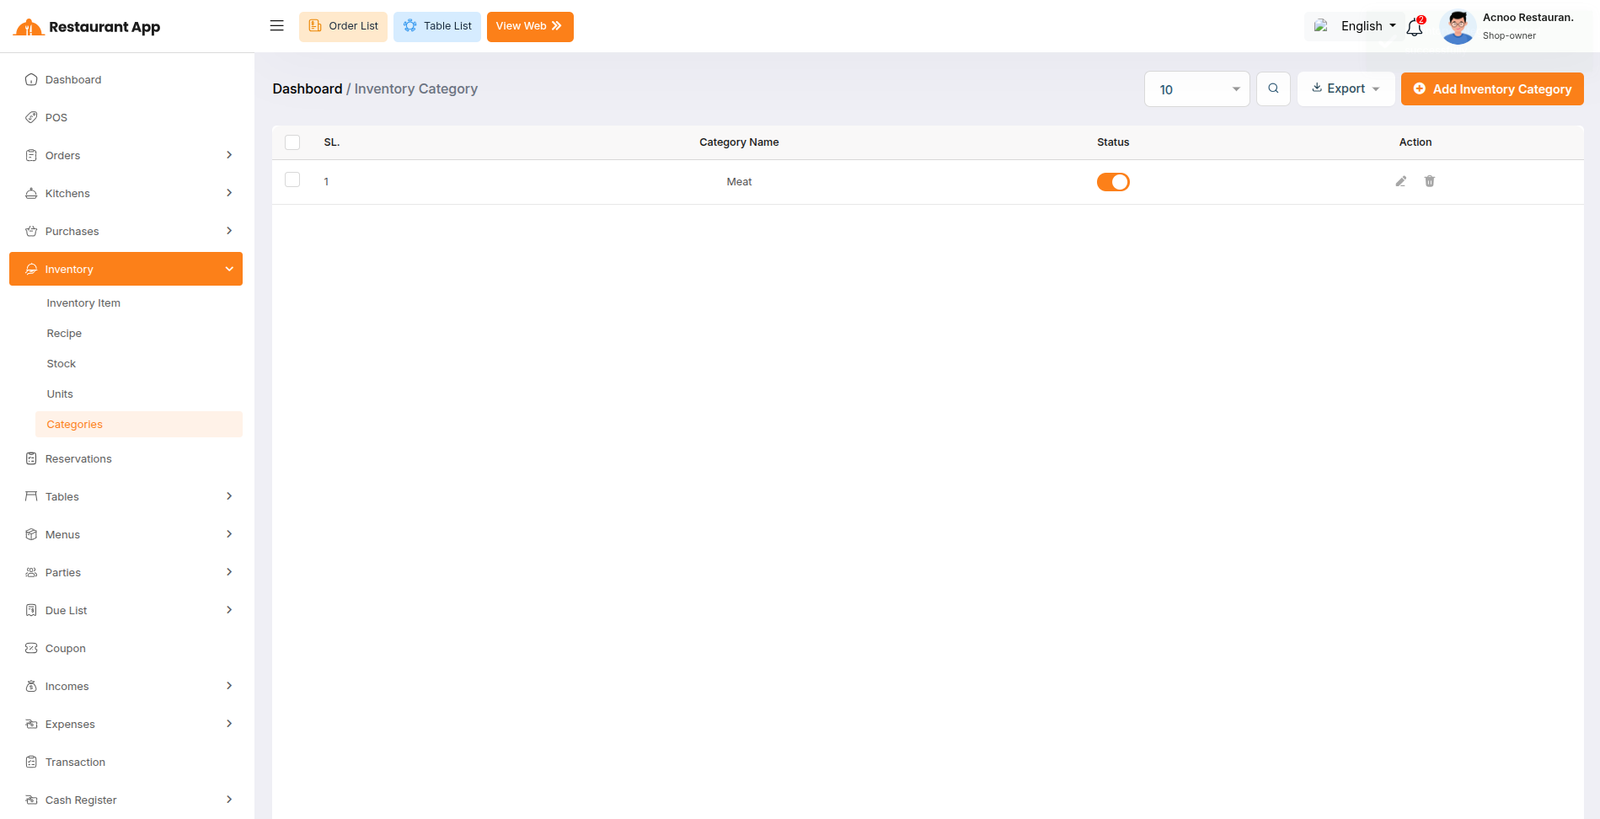
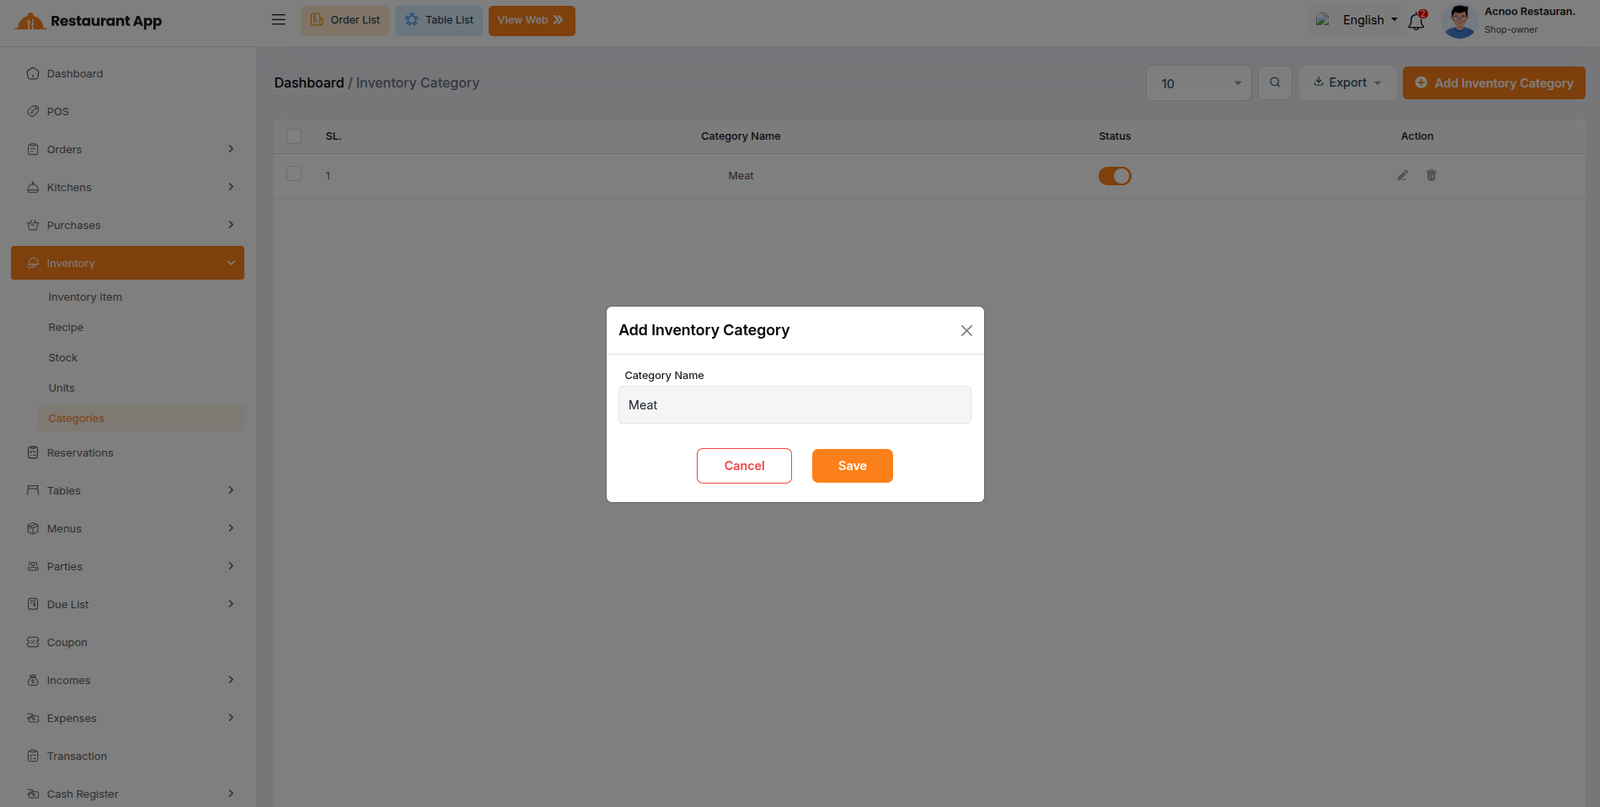
Ingredient Consumption Report
The Ingredient Consumption Report provides detailed insights into how ingredients are consumed through sales. It analyzes SaleDetails where the product has a linked recipe.
For each sale, the report calculates:
- Total Sold - Quantity of menu items sold
- Total Revenue - Revenue from those sales
- Total Cost - Ingredient cost based on recipe consumption
- Total Profit - Revenue minus ingredient cost
The report supports date filtering: Today, Yesterday, Last 7 Days, Last 30 Days, Current Month, Last Month, Current Year, and Custom Date Range. This helps you analyze profitability and ingredient usage patterns over time.
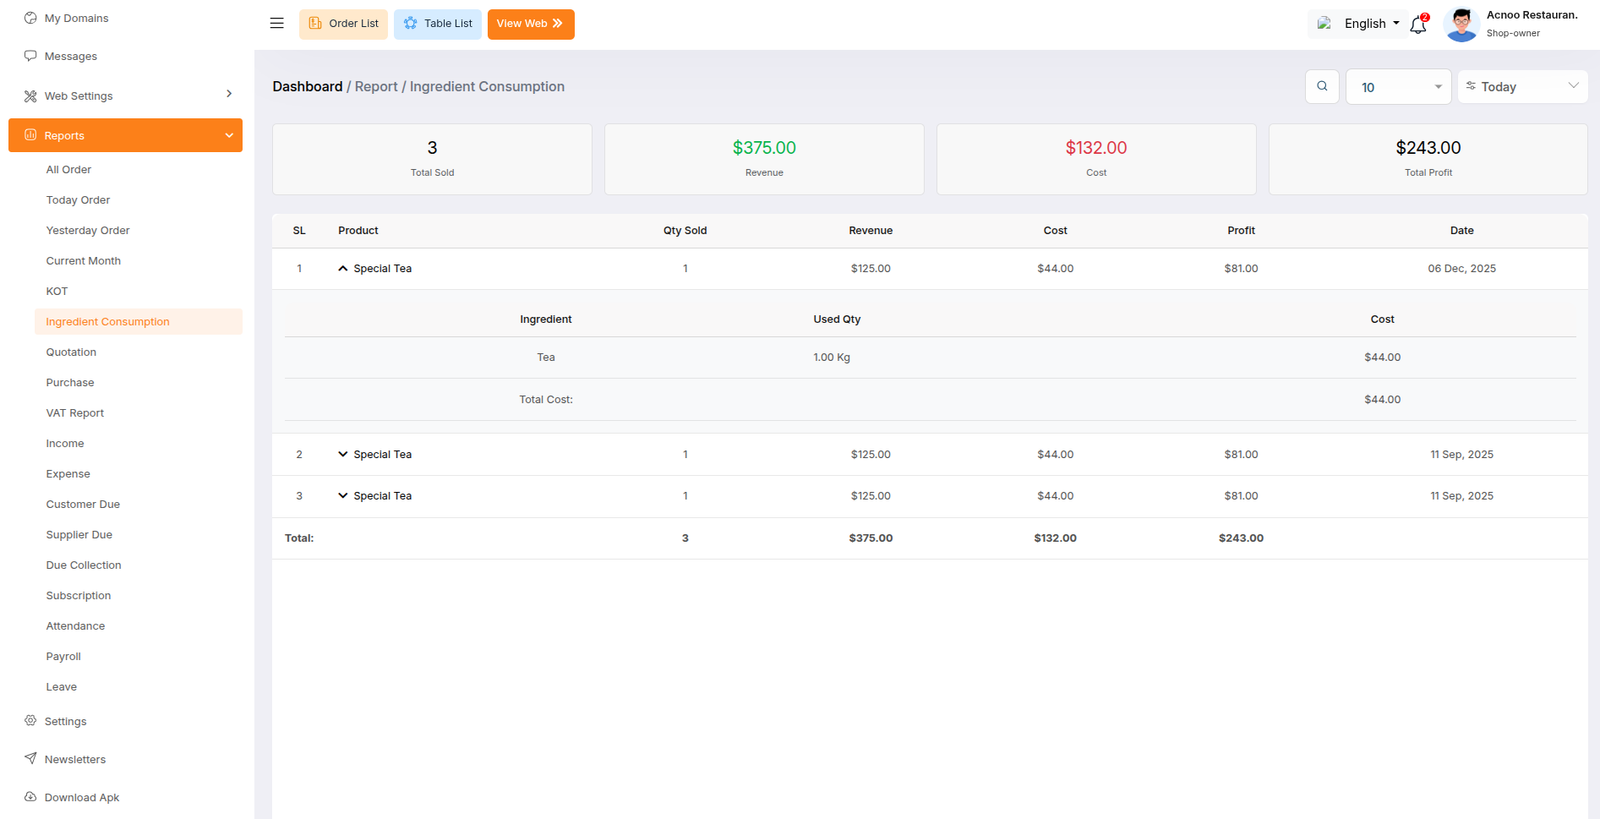
Inventory Add-on Change Logs
Important: Before upgrading to the new version, please ensure you have backed up both your database and the entire project. Additionally, verify that your project is currently running on the latest stable release. Taking these steps is highly critical to prevent any data loss.
Version: 1.1 ( 13 July 2026 )
- Implemented comprehensive branch management functionality.
Note: Please replace the following folders:
✔Modules/InventoryAddon
✔app
✔config
✔database
✔lang
✔public/assets
✔resouces
✔routes
After replacing them, visit yourdomain.com/update to install the new version and
please don't forget to reload hard your browser. Without visiting the URL and reloading
hard, your project will not function correctly, so ensure you complete this step.
Note: If you face any issues with the update, please contactus.
Version: 1.0.0 ( 14 April 2026 )
- Initial Release
Note: Please replace the following folders:
✔app
✔config
✔database
✔lang
✔public/assets
✔routes
After replacing them, visit yourdomain.com/update to install the new version and
please don't forget to reload hard your browser. Without visiting the URL and reloading
hard, your project will not function correctly, so ensure you complete this step.
Note: If you face any issues with the update, please contact us.
Restaurant App Multi-Branch Add-on: Setup and Installation
Get Started:
After installing the MultiBranch Add-on from the admin panel, it will automatically appear in the Business Add-on list. You only need to configure the Branch credentials to start using it. If you have branches, you must login to a branch to create sales, purchases, products, or expenses. If you have the HRM Module, you must login to a branch to add employees. Additionally, if you are logged in to a specific branch, only that branch's data will be displayed. If you are not logged in to any branch, data from all branches will be shown.
📦 Installation
The installation process for the MultiBranch Add-on follows the same steps as outlined in the Restaurant Web Add-on documentation.
👉 Please refer to the Restaurant Web Add-on Installation Guide for detailed instructions. After installing the MultiBranch Add-on from the admin panel, you can enable or disable Multibranch in the Subscription Plan as per your requirement. If a plan does not allow multibranch, then you will not see branches in the Business panel.
Subscription Plan
You can allow or disallow multibranch when creating or updating a plan.

Create Page
An example of the create page is shown below.

Overview
Here, you can view an overview of all branches. The revenue statistics are displayed, and you can select a year to dynamically update the chart for the chosen period. A pie chart shows profit and loss, with a yearly dropdown available for selection. Similarly, you can view branch-wise sales and purchase lists. The system also displays the quantity of expired products in each branch, as well as an employee overview showing the number of employees per branch.
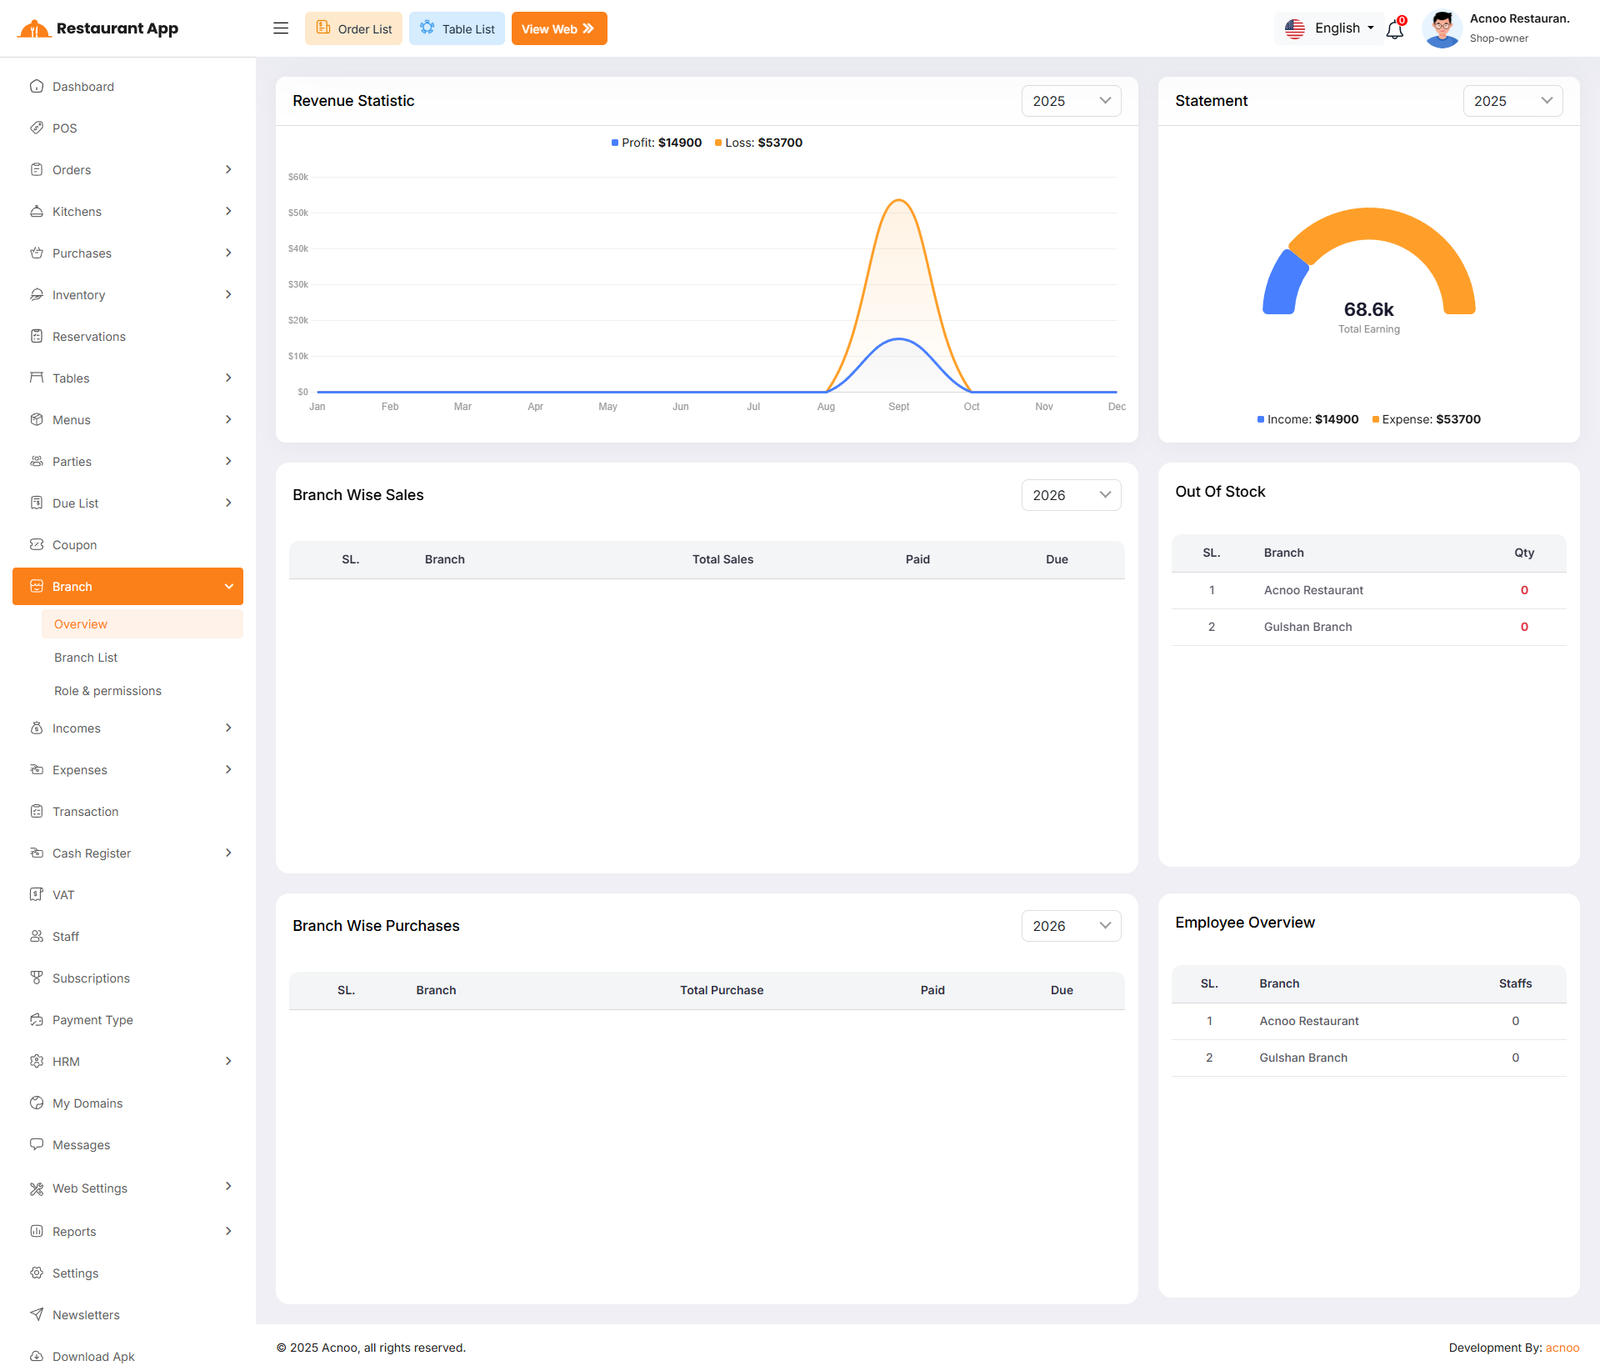
Branch List
Here, you can view a list of all branches, including the first branch. At the top of the
table, instructions are provided on how to create a branch. When creating a new branch, the
system will automatically generate it (if it does not already exist), and relevant data will
be moved to the new branch. For example, when a branch is created, the new branch will be
generated automatically using the business name. Note that the first branch cannot be
deleted.
In the listing, you can filter branches using the search input field or adjust the number of
entries displayed per page. From here, you can also add a new branch, edit or delete
branches, or perform a multi-delete. Additionally, by click on business name, also have the
"Login" button allows you to log in directly to the selected branch.
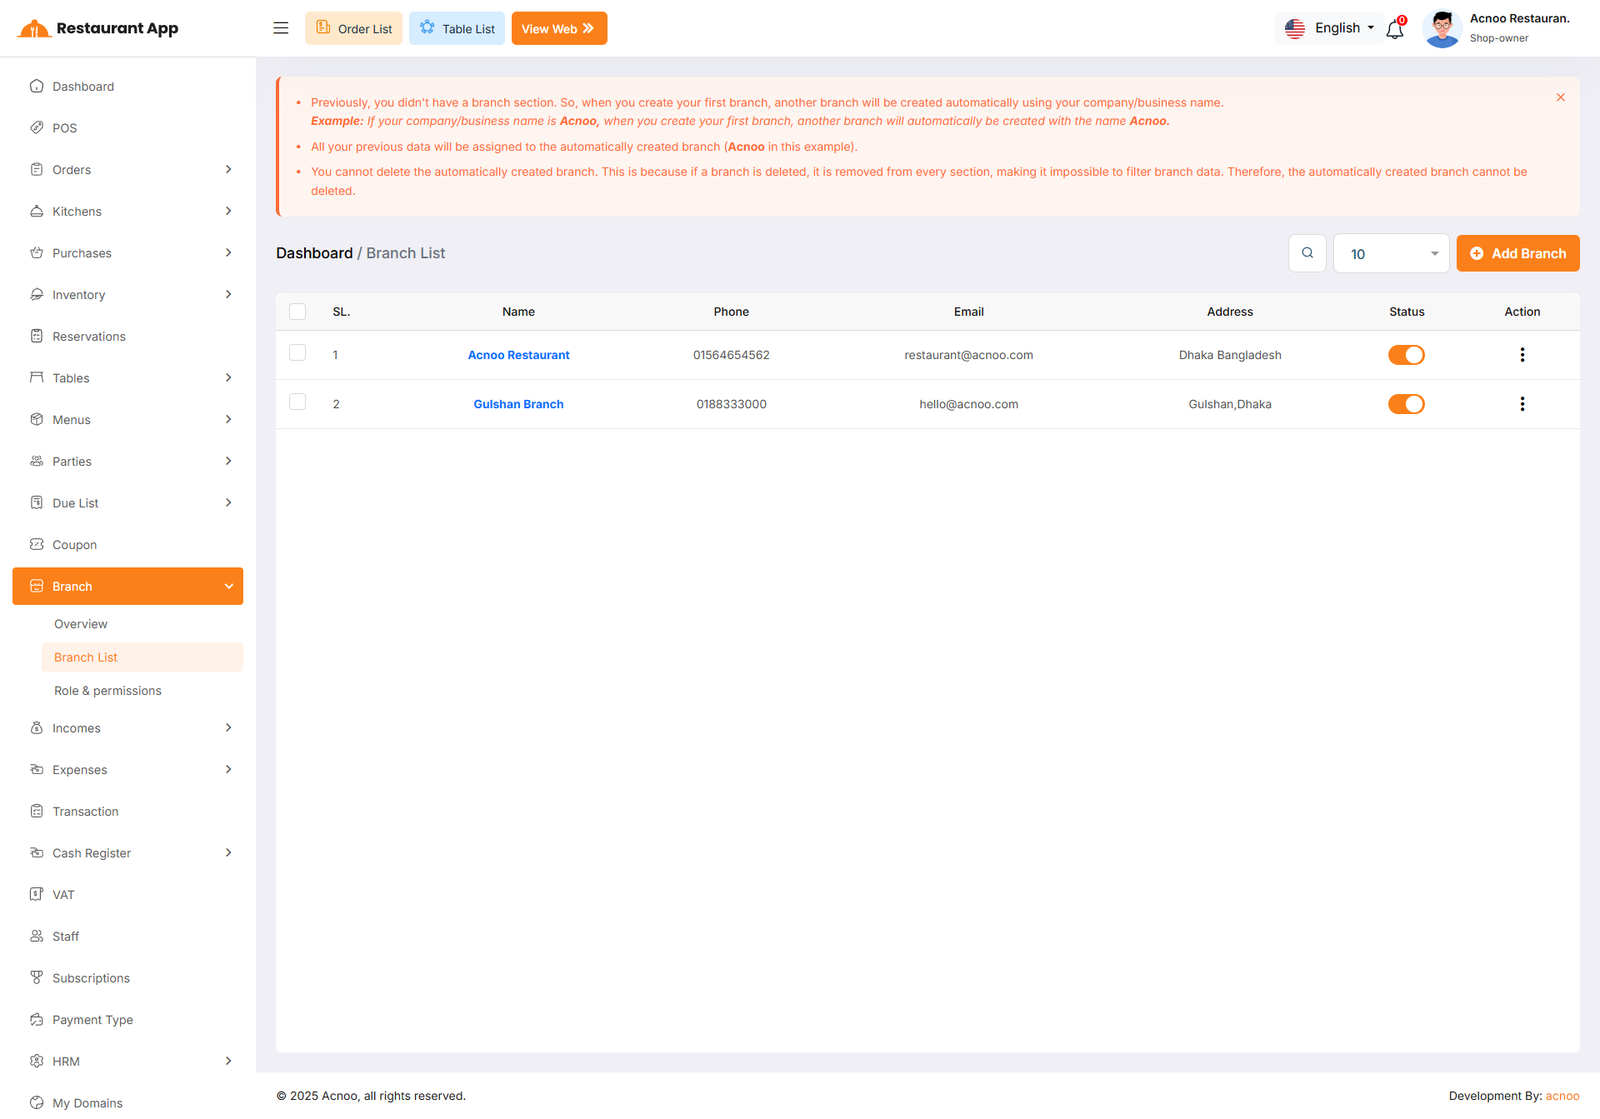
Create New
After clicking on "Add New Branch" a modal will open where you need to fill in the required information. Once completed, click the "Save" button. The new branch will be created successfully, and you will be redirected to the branch list. If you are logged in to a branch, the name of that branch will be displayed in the header.
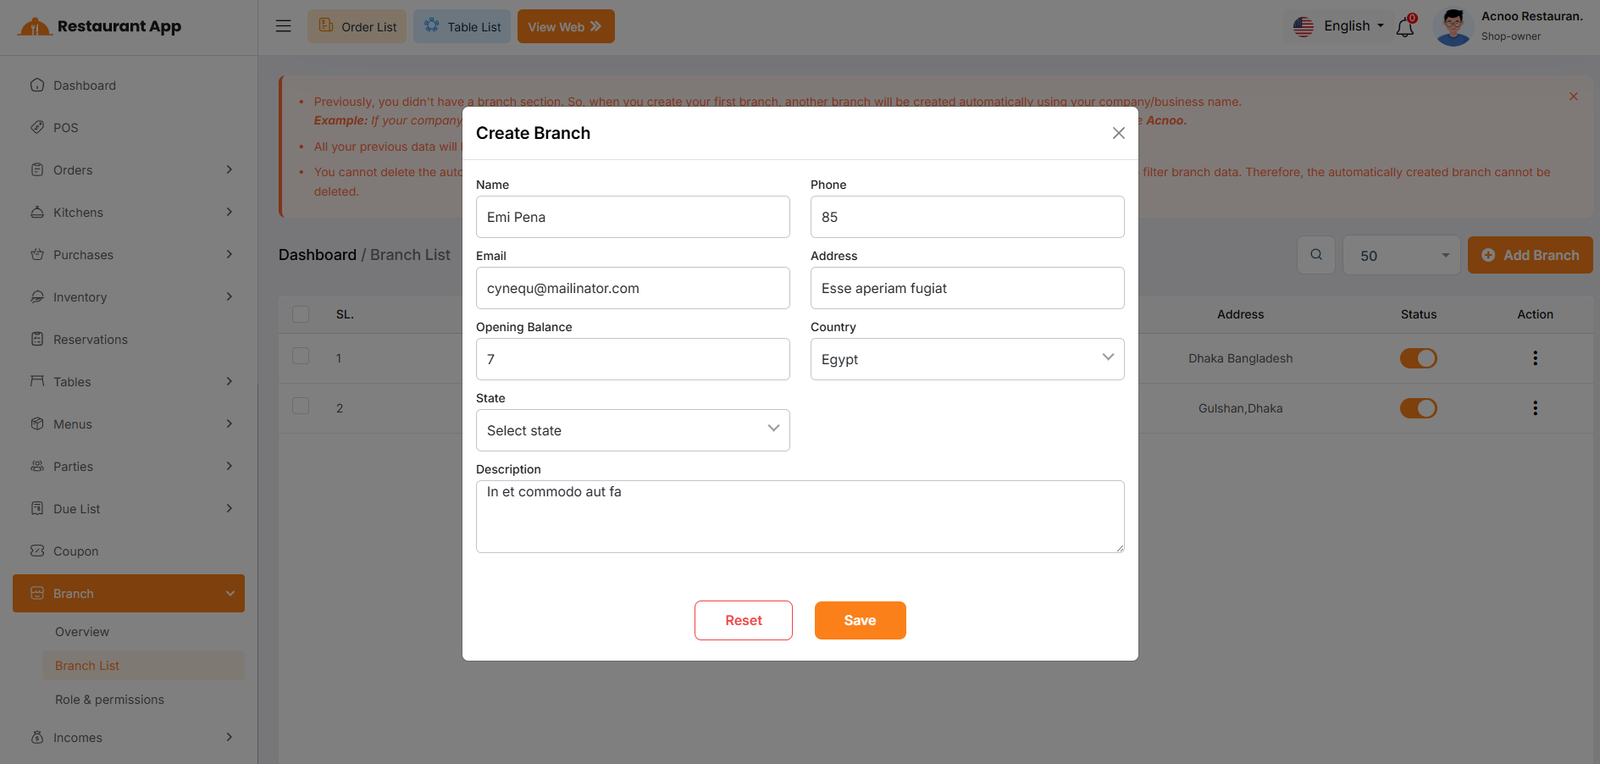
Profile
If you are logged in to a branch, you will see the Branch Opening/Remaining Balance. Otherwise, the Shop Opening/Remaining Balance will be displayed
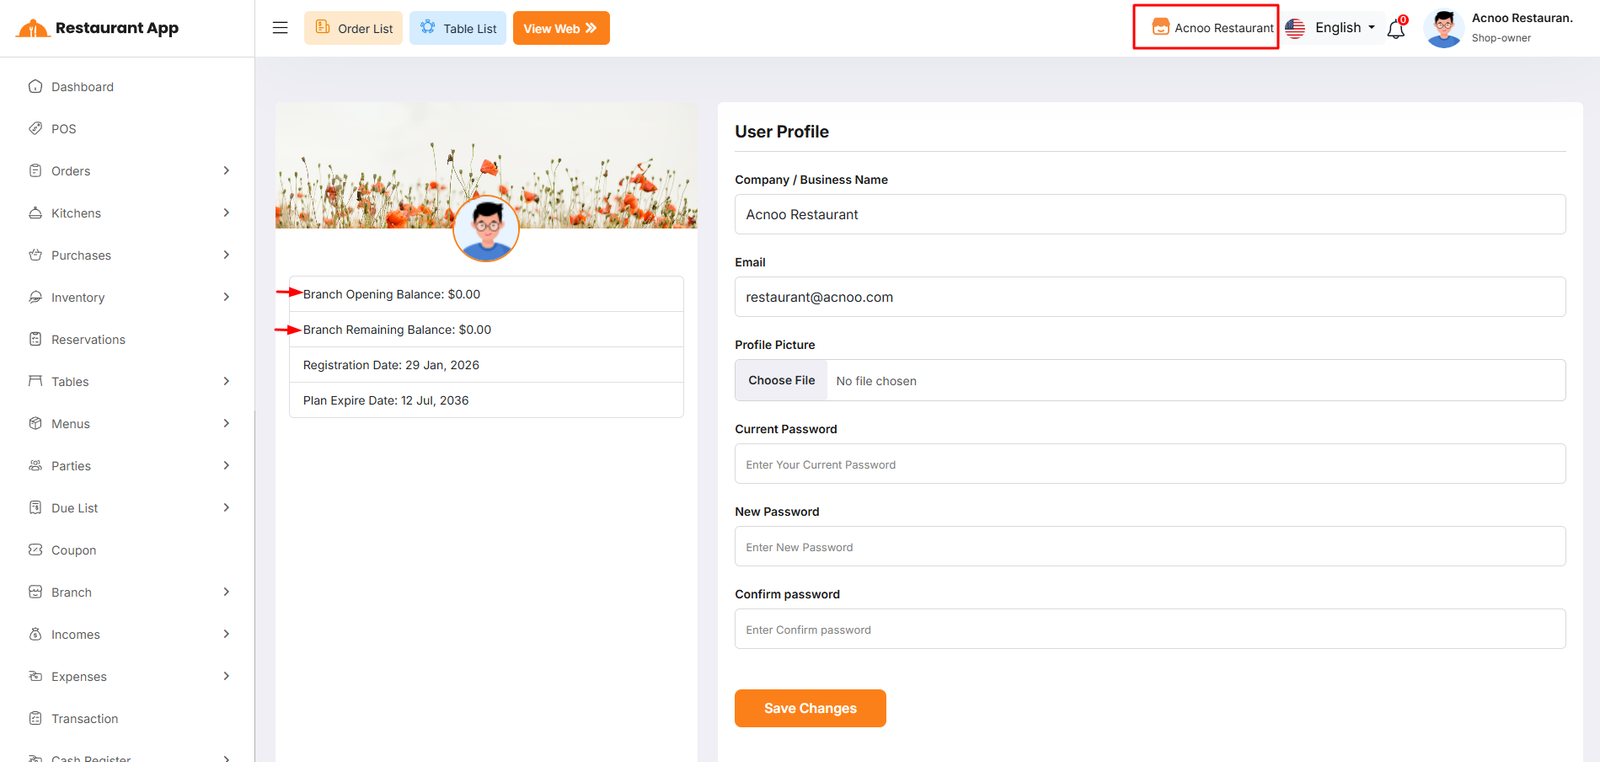
Role & Permission List
Here, you can view a list of roles and permissions. The list displays name along with the number of features accessible to users. You can filter the list using the search input field or the per-page filter option. From here, you can also add a new user role, edit an existing role, or delete one. Multi-delete functionality is also available.
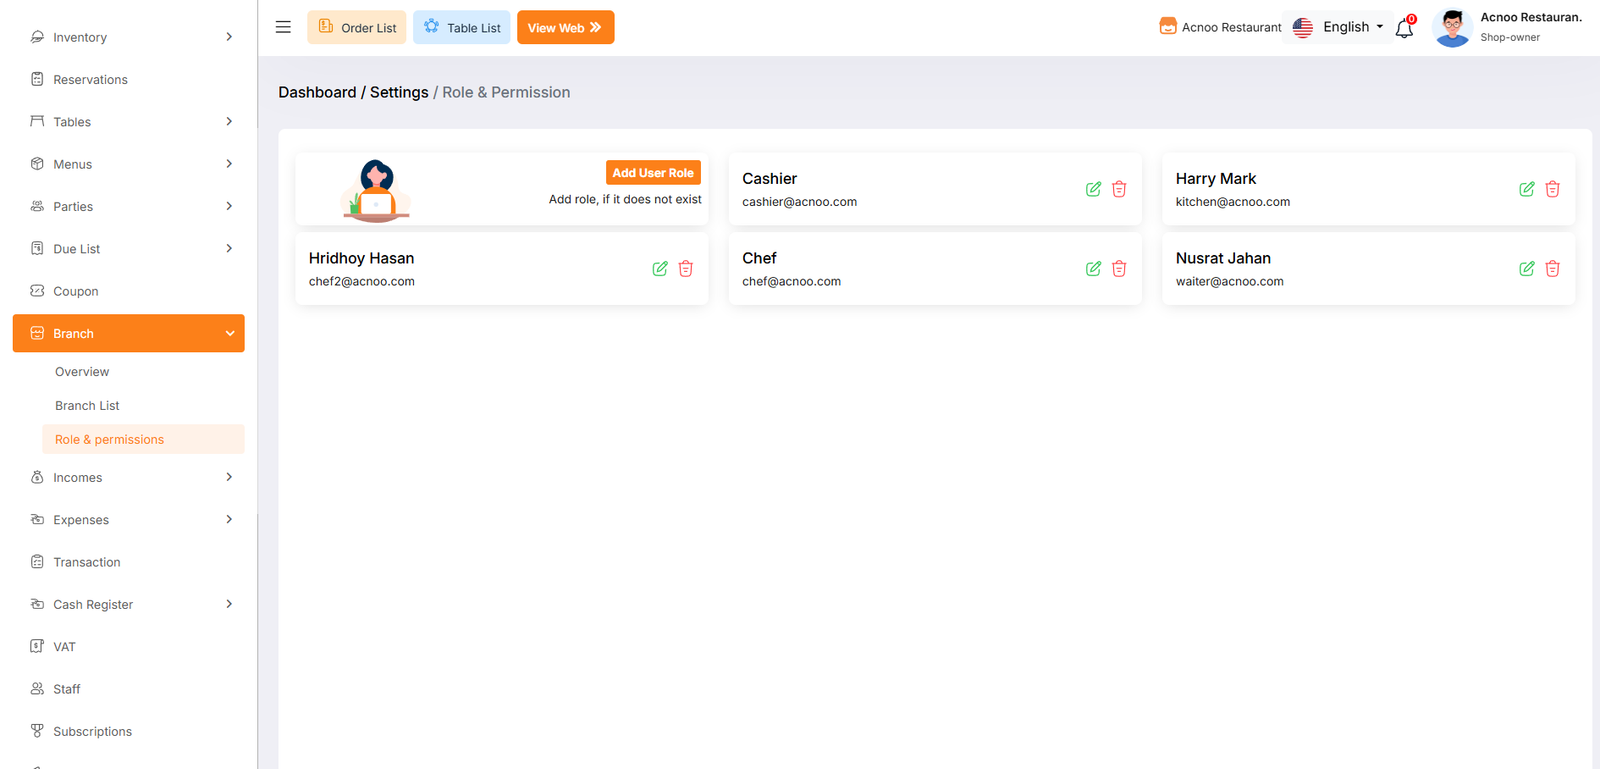
Add Role
After clicking on "Add Role," you will be redirected to the create page, where you need to fill in the required information. Once completed, click the "Save" button. The new user role will be created successfully, and you will be redirected back to the user role list. If you are not under any branch, a new field will appear where you can select the branch for which you want to assign the role and permissions.
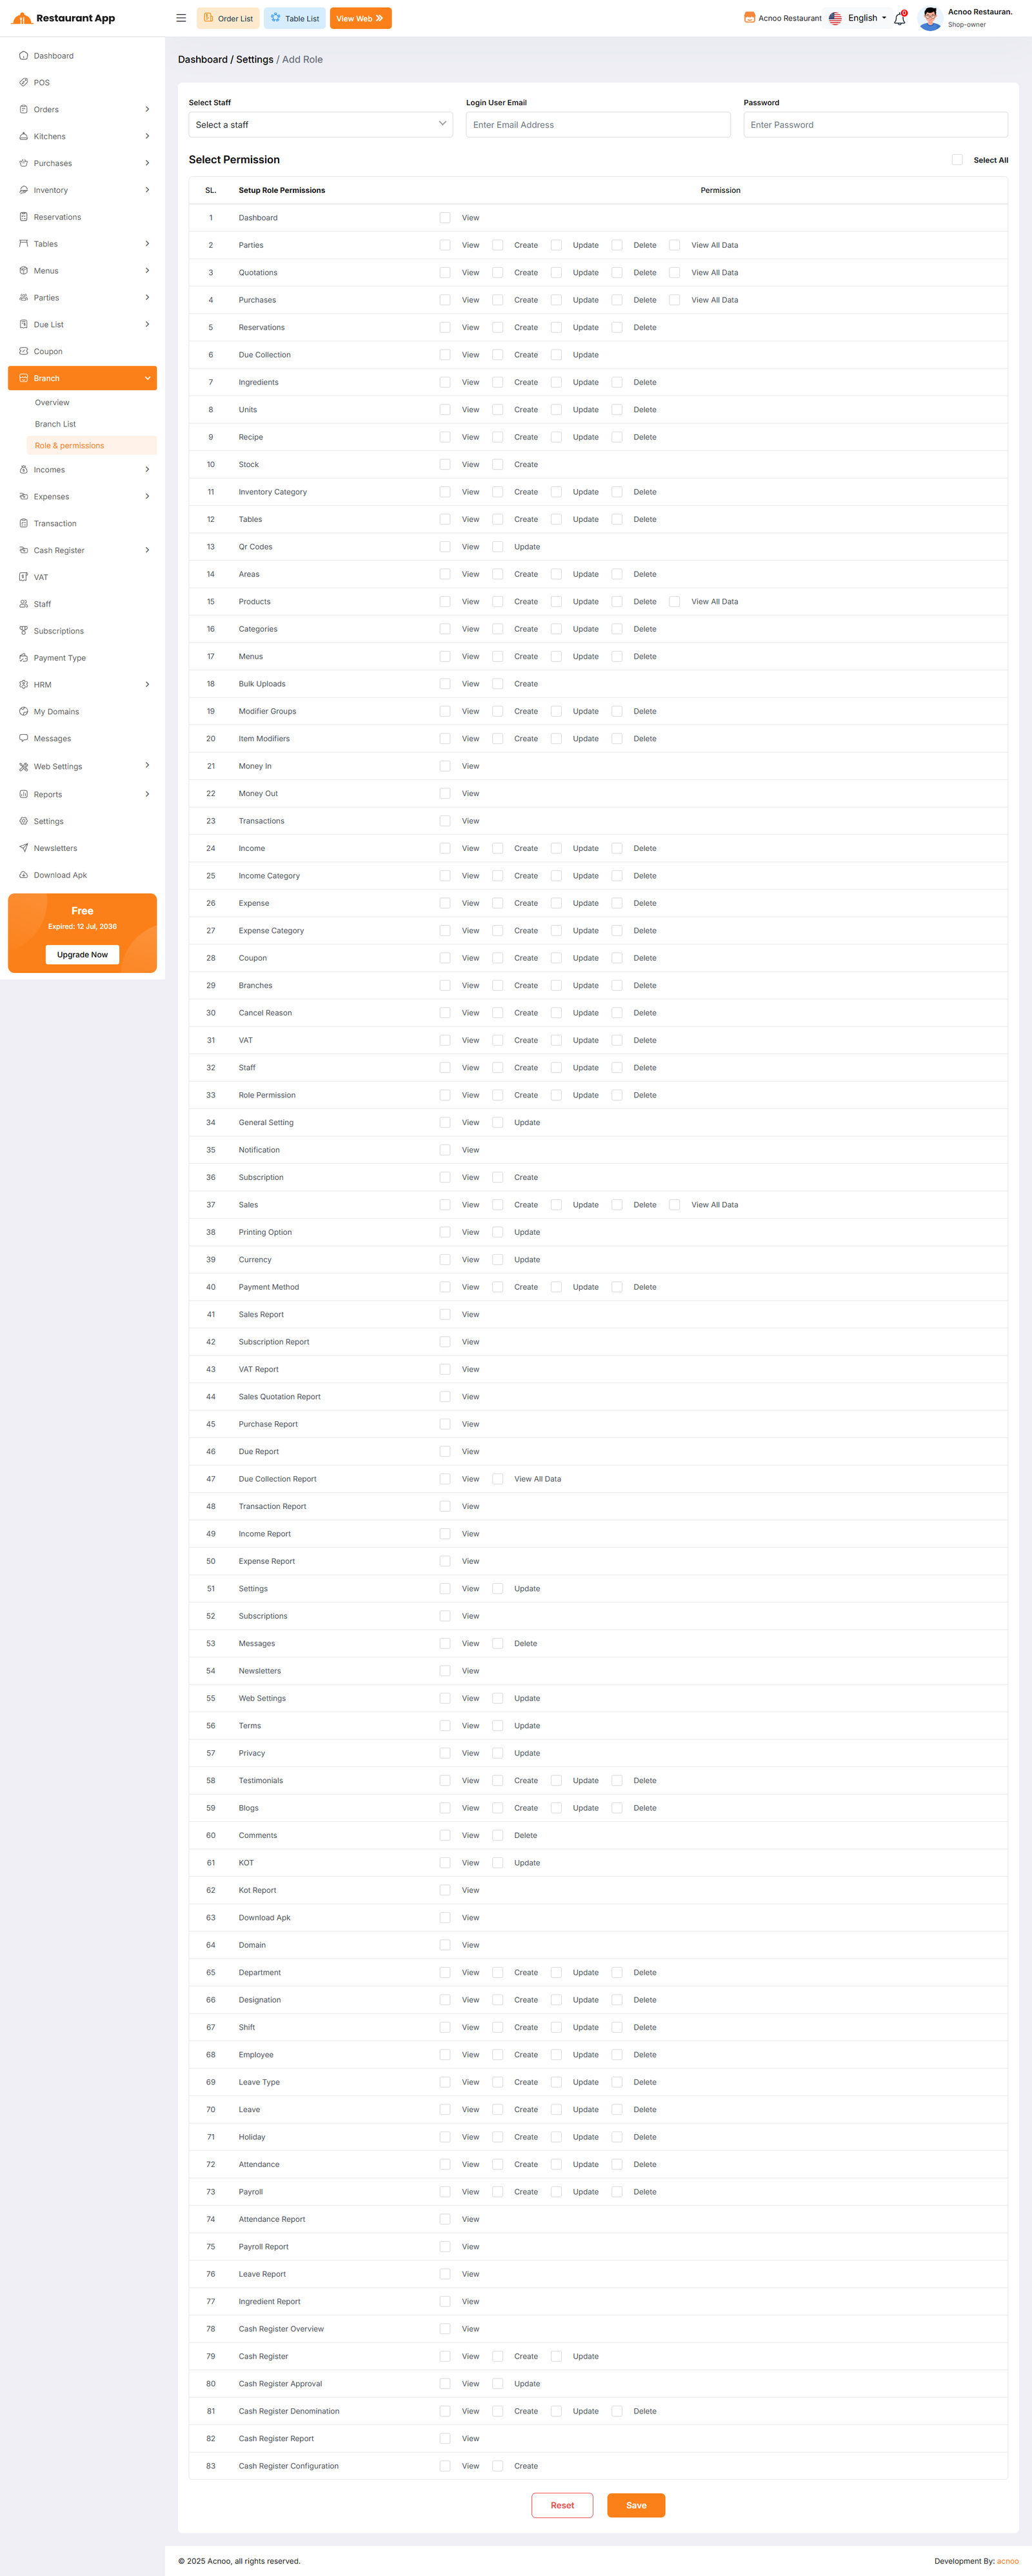
Multi Branch Add-on Change Logs
Note: Before updating to the new version, please ensure you have a database and full project backup, and that your project is already updated to the latest version. This is extremely important!
Version: 1.0.0 ( 15 september 2025 )
- Initial Release
Note: Please click here to update your addon. Before updating this addon, you must first update Super-Admin.zip to version 3.7
Note: After installing the Multi-Branch Addon, you must reinstall the Cash Register Addon, HRM Addon, and Inventory Addon if they were previously installed. This ensures compatibility and proper integration with the Multi-Branch Addon.
Note: If you face any issues with the update, please contact us.
Included Bundle Modules
📦 Installation
The installation process for the Bundle Modules follows the same steps as outlined in the Restaurant Web Add-on documentation. Please refer to the Restaurant Web Add-on Installation Guide for detailed instructions.
Each module included in this bundle must be installed individually. To install, go to the Addon List, click the Install button for the desired module, enter your Envato Purchase Code, upload the corresponding .zip file, and click Save. After installation, visit yourdomain.com/update and perform a hard reload on your browser.
The bundle includes all currently available modules:
Change Logs
Change Logs
Change Logs
Change Logs
Change Logs
Change Logs
Bundle Modules Change Logs
Version: 1.1 ( 14 June 2026 )
- Added Bundle Module integration support.
- Users can now easily include/install bundle modules.
Note: If you are unable to install or update the addon, Please contact us.
Restaurant App: Mobile Application
The Restaurant App is a powerful mobile application that works seamlessly with the Restaurant Admin Panel. It provides a complete restaurant management experience including order management, table booking, kitchen management, HRM, and more - all from your mobile device.
The app supports multiple features including menu browsing, order placement, table reservations, KOT management, staff management, and comprehensive reporting. Below is a complete guide to all features available in the mobile app.
When you download and open the Restaurant App, you will first see the language selection option. Select your preferred language and click the "Next" button. You will then see several introductory interfaces of the app. You can click the "Next" button to view all the interfaces one by one, or click the "Skip" button to skip them. After that, you will be redirected to the Login Page.
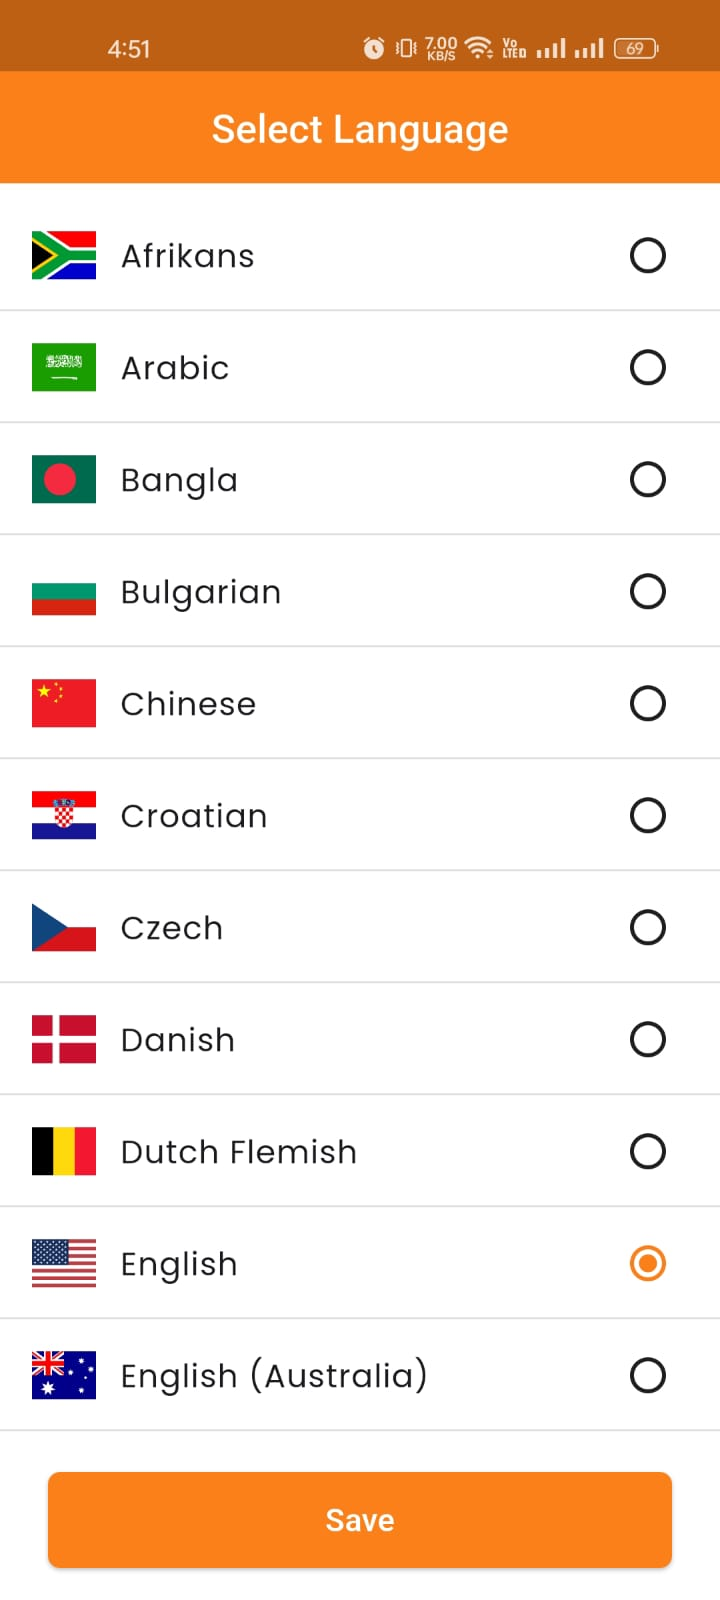
Login or Register
Login
If you already have an account, you can log in to the Restaurant Panel using your email and password. Alternatively, you can click on any of the Demo Panels provided below to explore and check the demo.
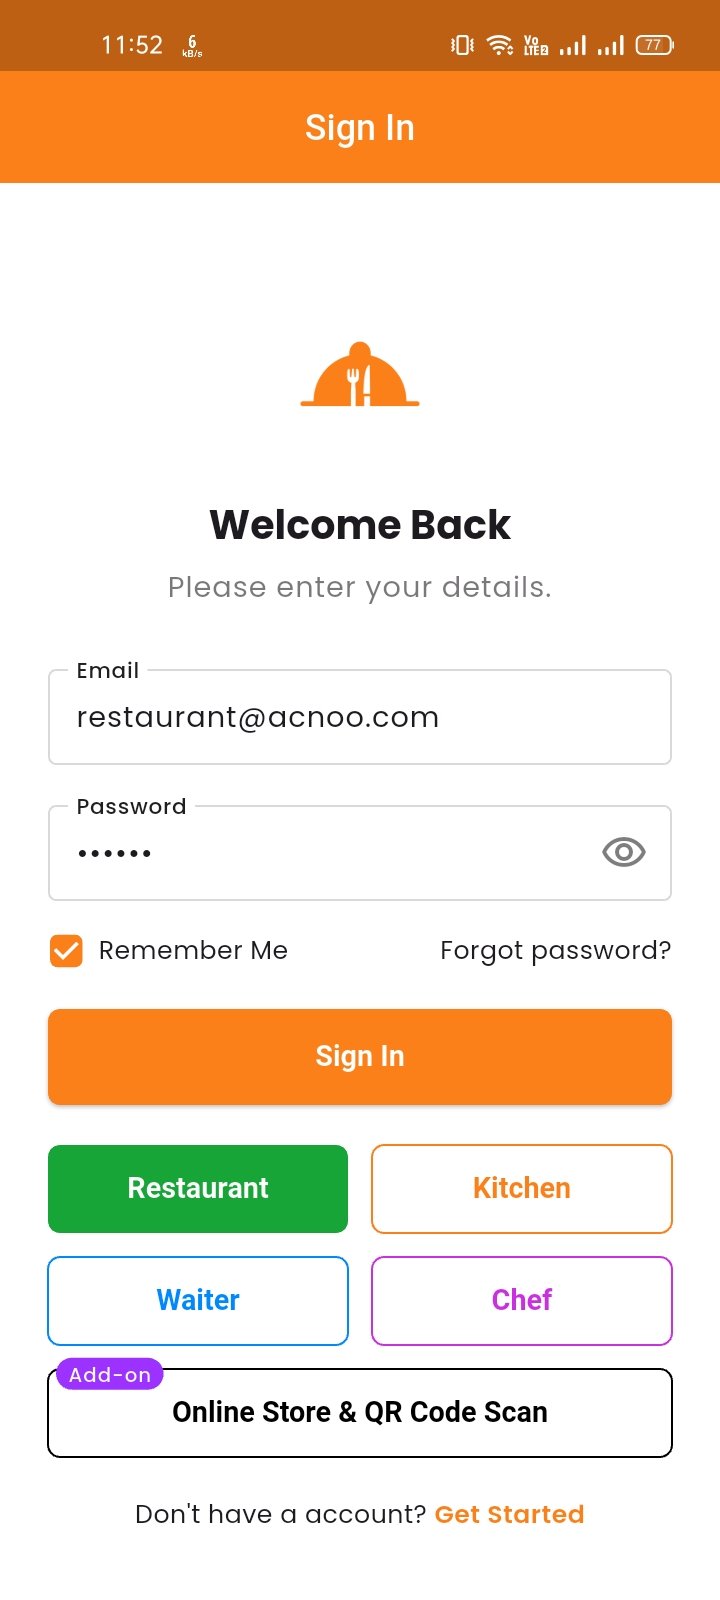
Register
If you want to create a new account, click the "Get Started" button. You will be redirected to the Create Account Page, where you can enter your Name, Email, and Password to create a new account.
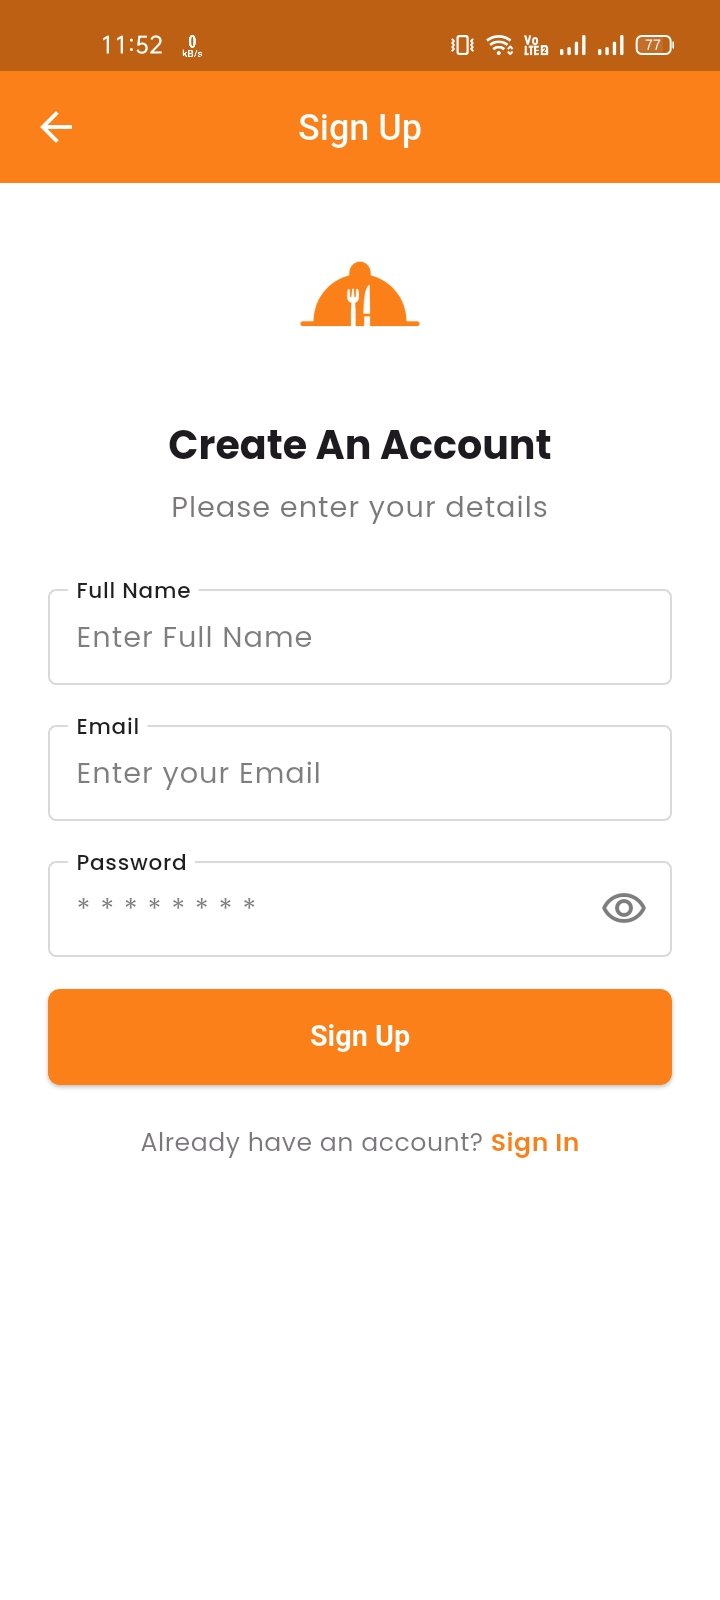
Forgot Password
If you forget your password, click the "Forgot Password" option. You will be redirected to a new page where you need to enter your email address and click the "Continue" button. A password reset link will then be sent to your email. Click the link and enter a new password to update your password.
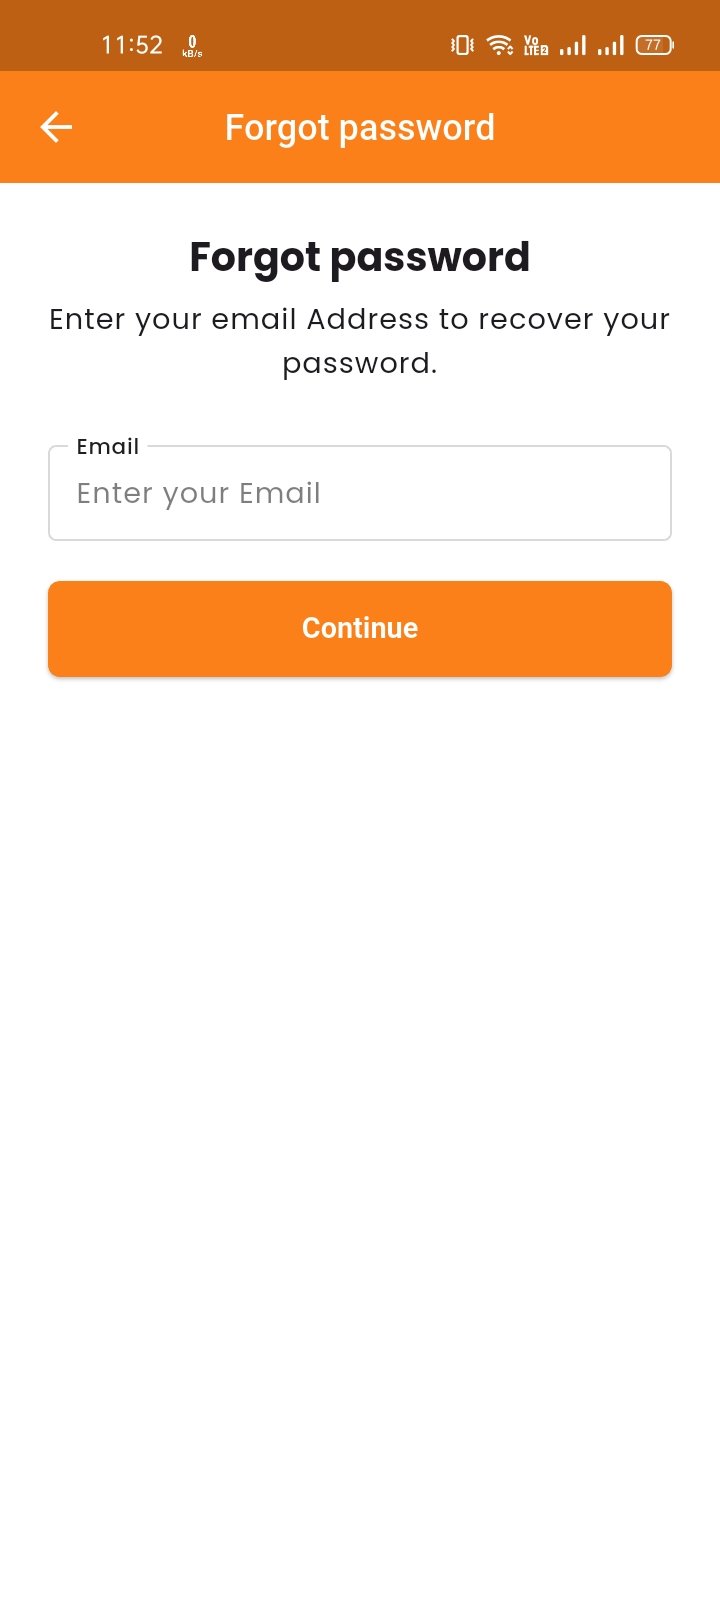
Sidebar
The Sidebar menu provides quick access to various sections of the app. Tap the menu icon at the top to open the sidebar. From here, you can navigate to different modules such as Dashboard, Parties, Subscription, Purchase, Inventory, Items, Table, Branch, and more. The sidebar also includes access to your Profile settings where you can manage your account, change language, currency, and logout.
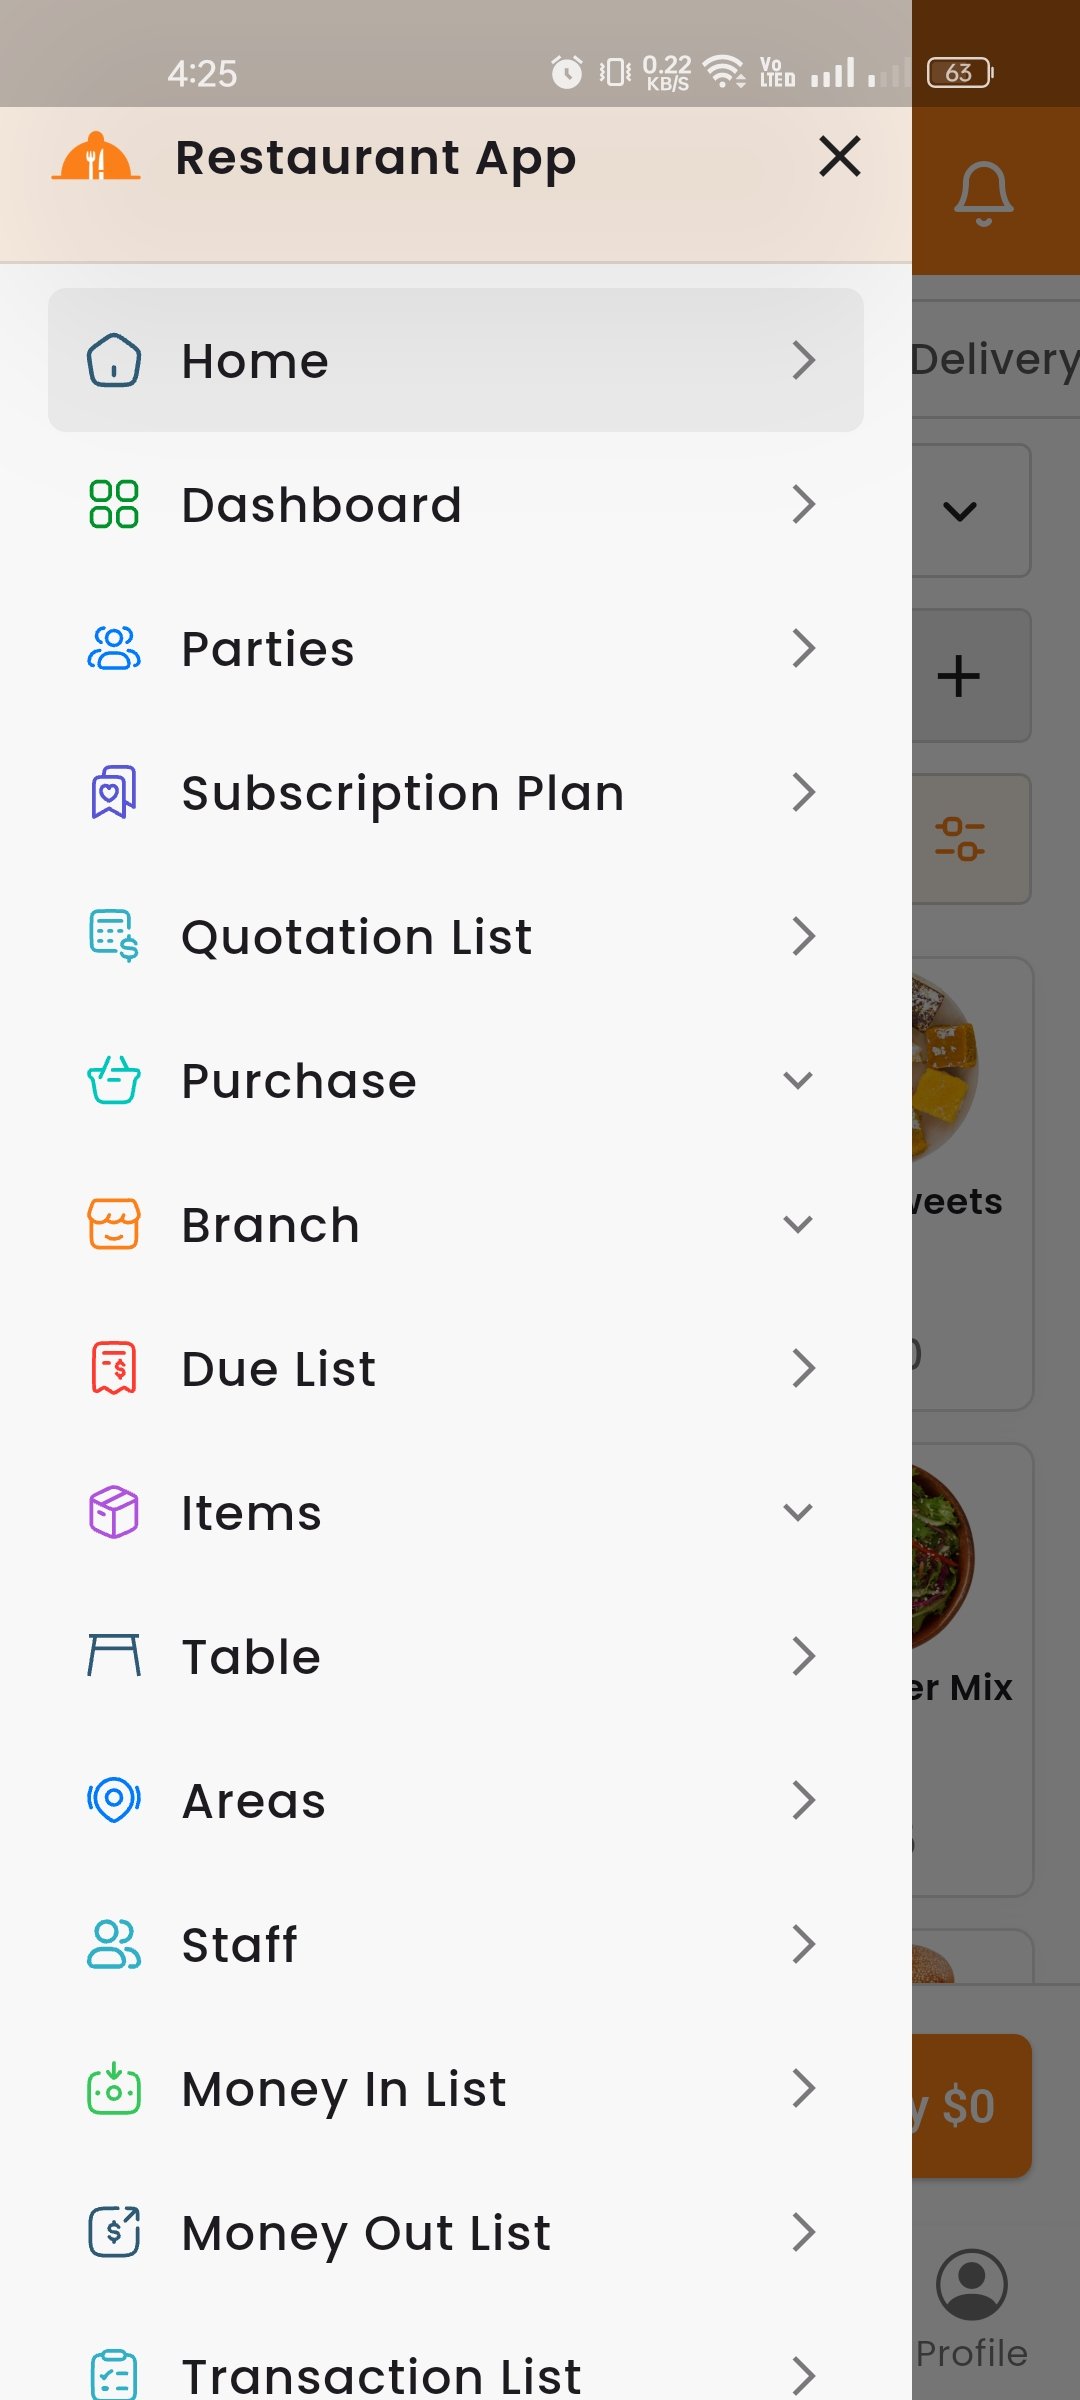
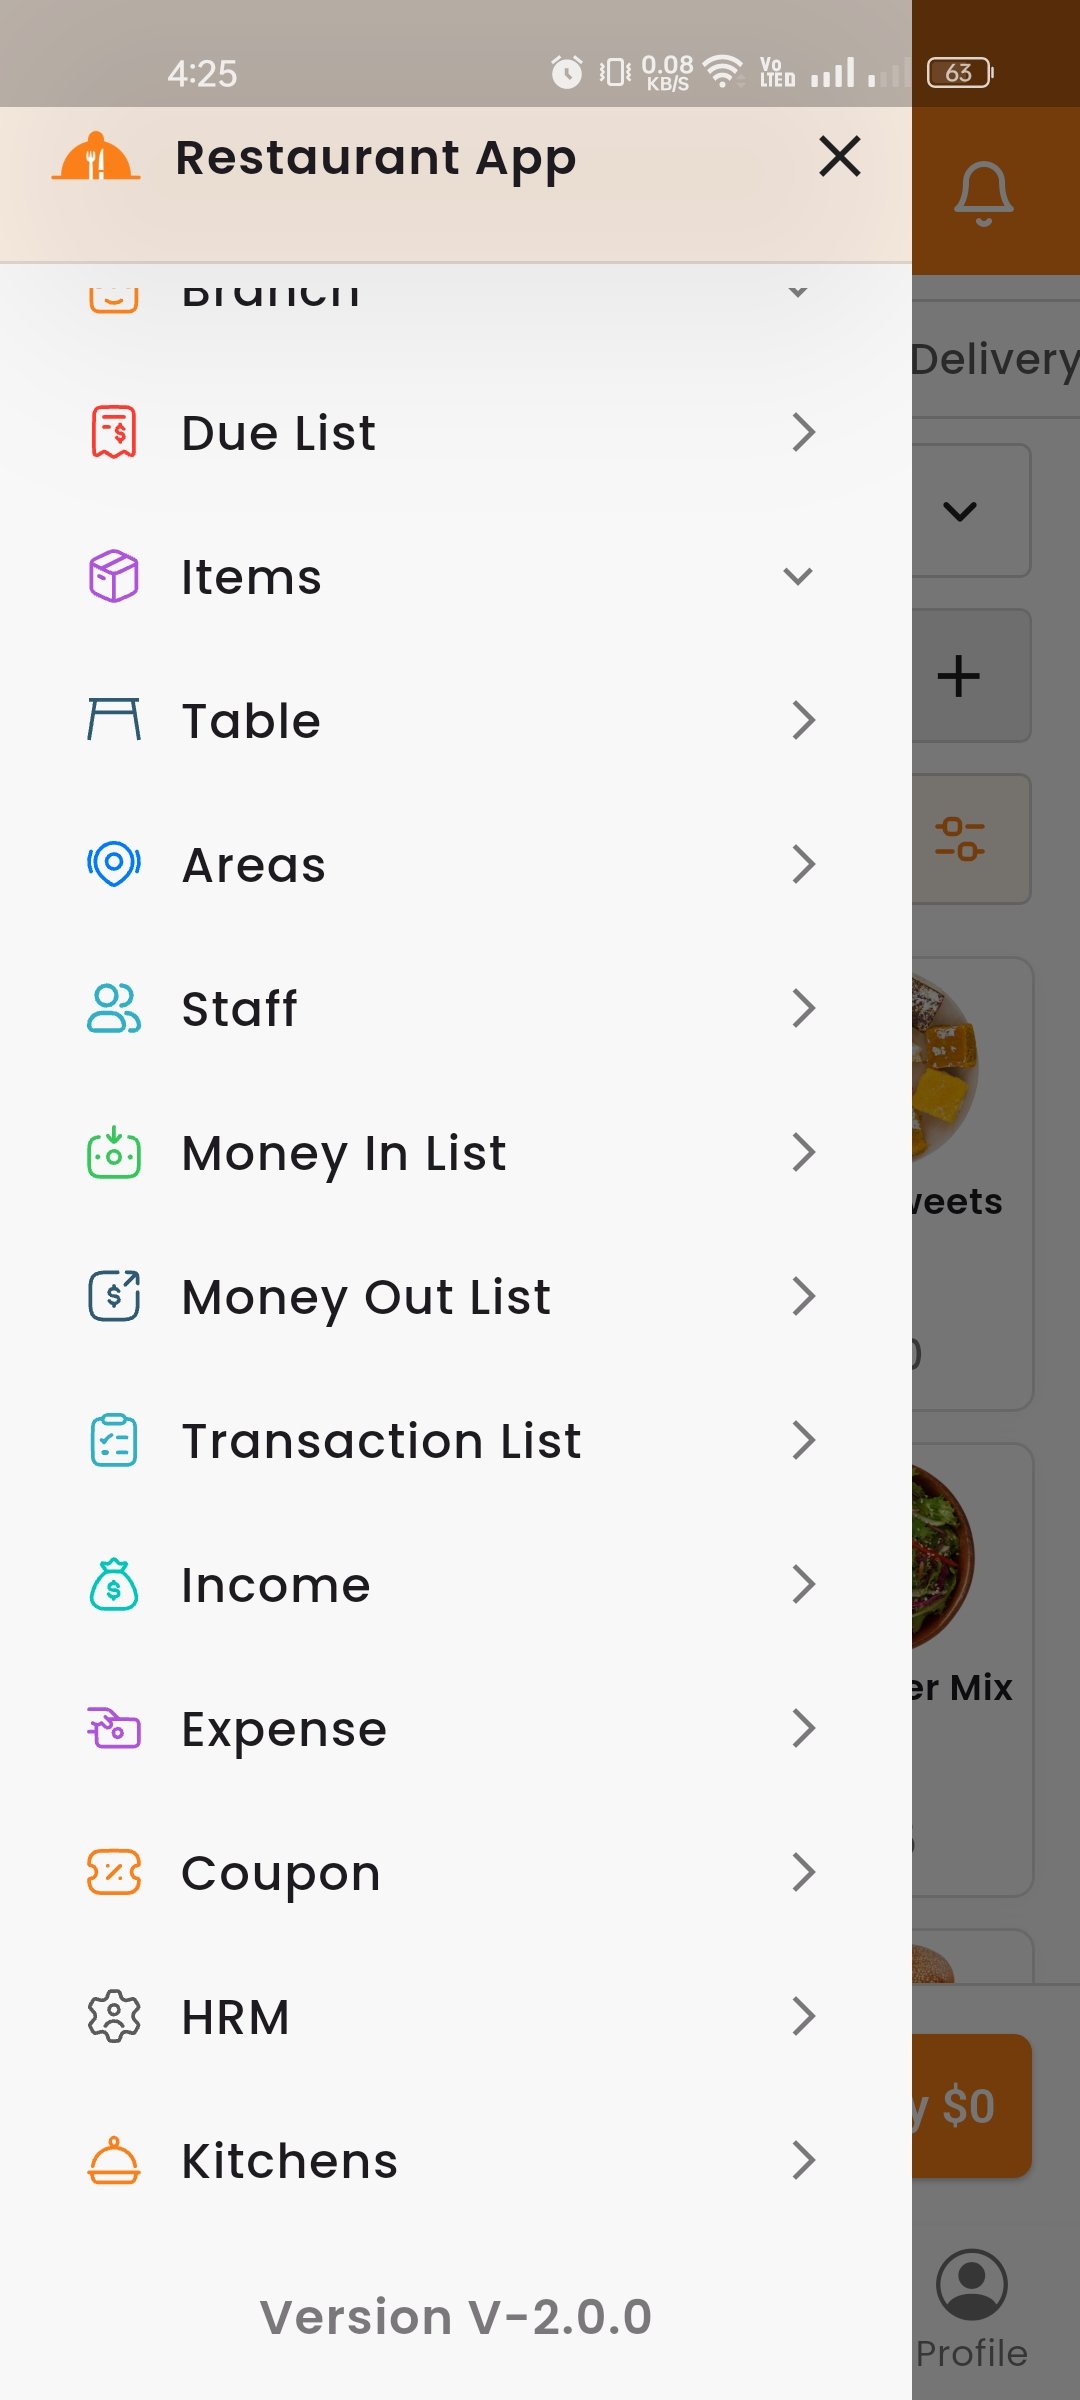
Home
The Home screen is the main hub of the Restaurant App. It features a bottom tab bar with five main sections: Sales, Orders, Items, Reports, and Profile. Each tab provides specific functionality as described below.
Sales Tab
The Sales tab is the Point of Sale (POS) interface where you can create new orders. Select items from the menu, add them to the cart, apply discounts or coupons, and complete the payment. You can choose order types such as Dine-in, Pickup, or Delivery. The system supports multiple payment methods including cash, card, and other configured gateways.
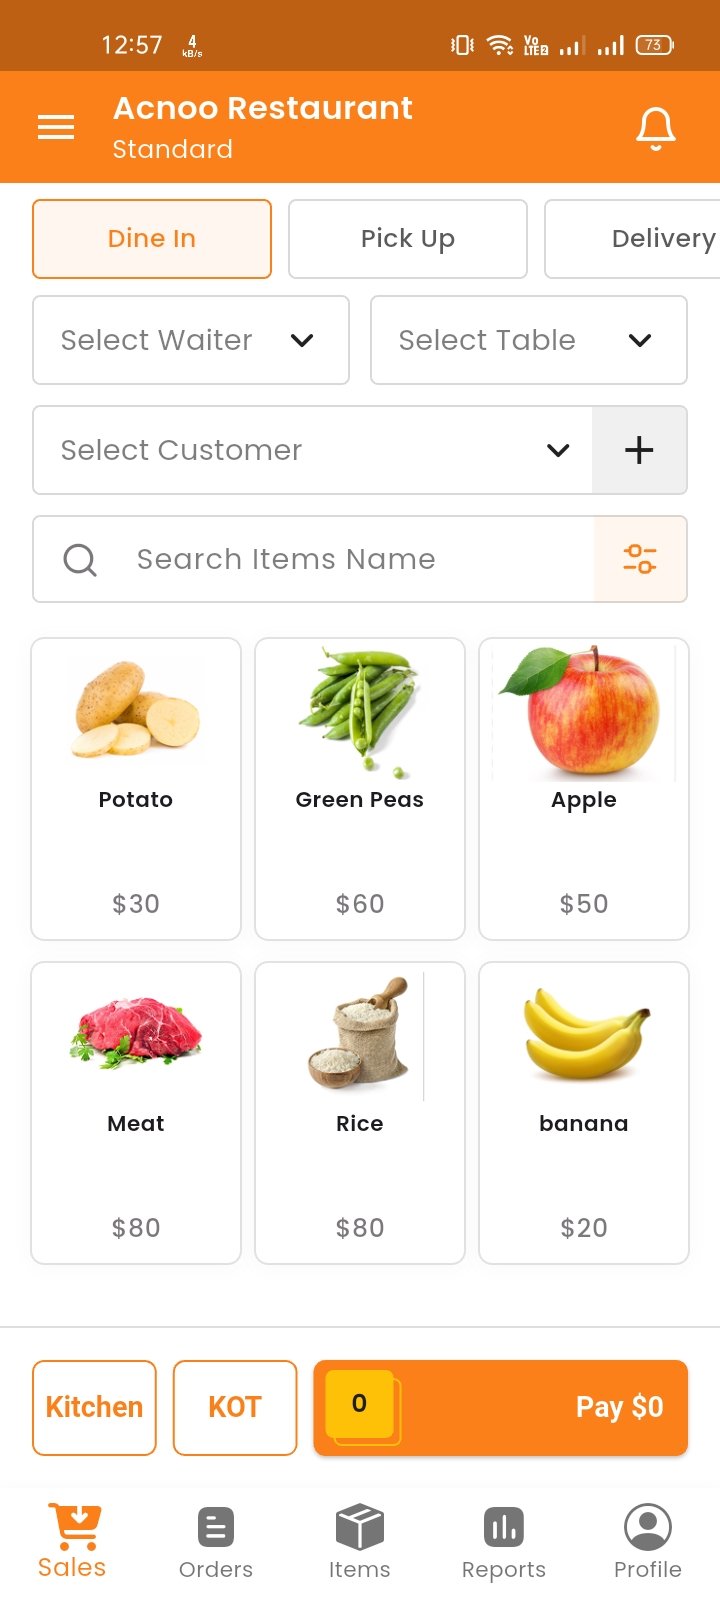
Select Item
You can search items by name or filter by category. When you tap on an item, if it has variations (e.g., Small, Medium, Large) or modifiers (e.g., extra cheese), a pop-up will appear to select options before adding to cart.
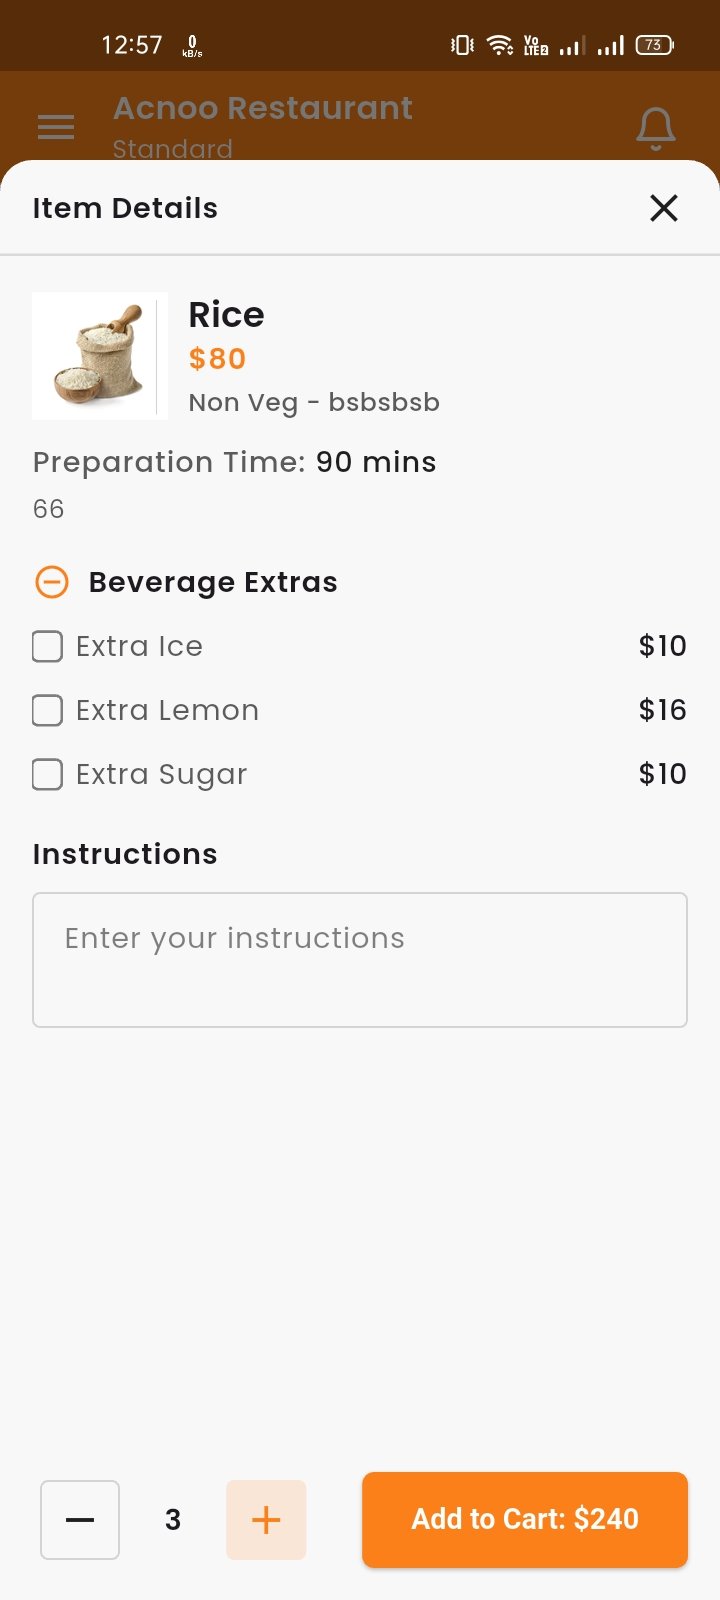
Create Sale
To create a sale, browse or search for items, select quantities, and add them to the cart. You can select customer, waiter, and table for dine-in orders. The cart shows subtotal, VAT, discounts, and total amount. Enter the received amount to calculate change or due amount.
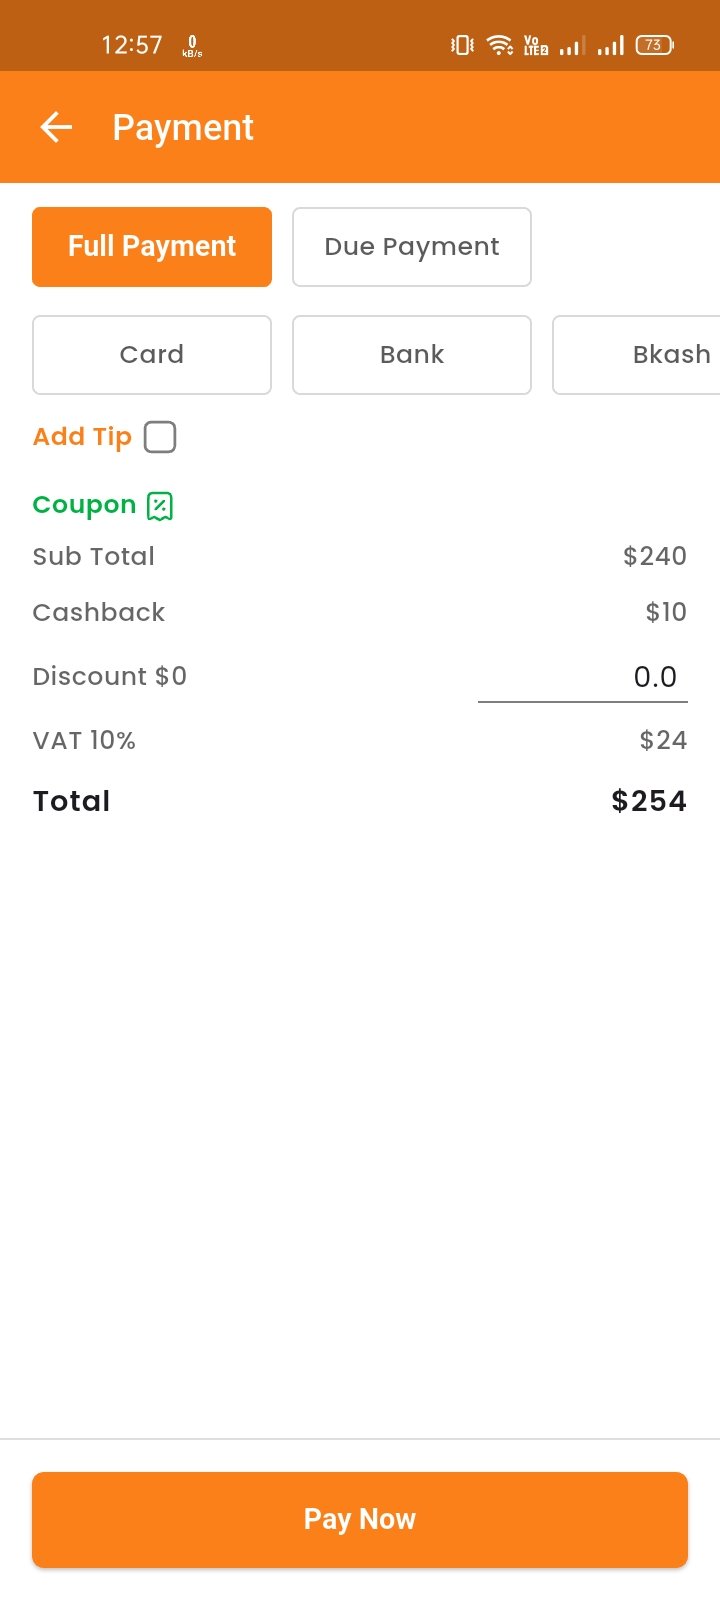
Cart & Payment
Adjust quantities, apply coupons, add tips, and view the total. Select payment type, enter received amount, and complete the order. The system auto-calculates change and due amounts. Also generate a invoice to view.
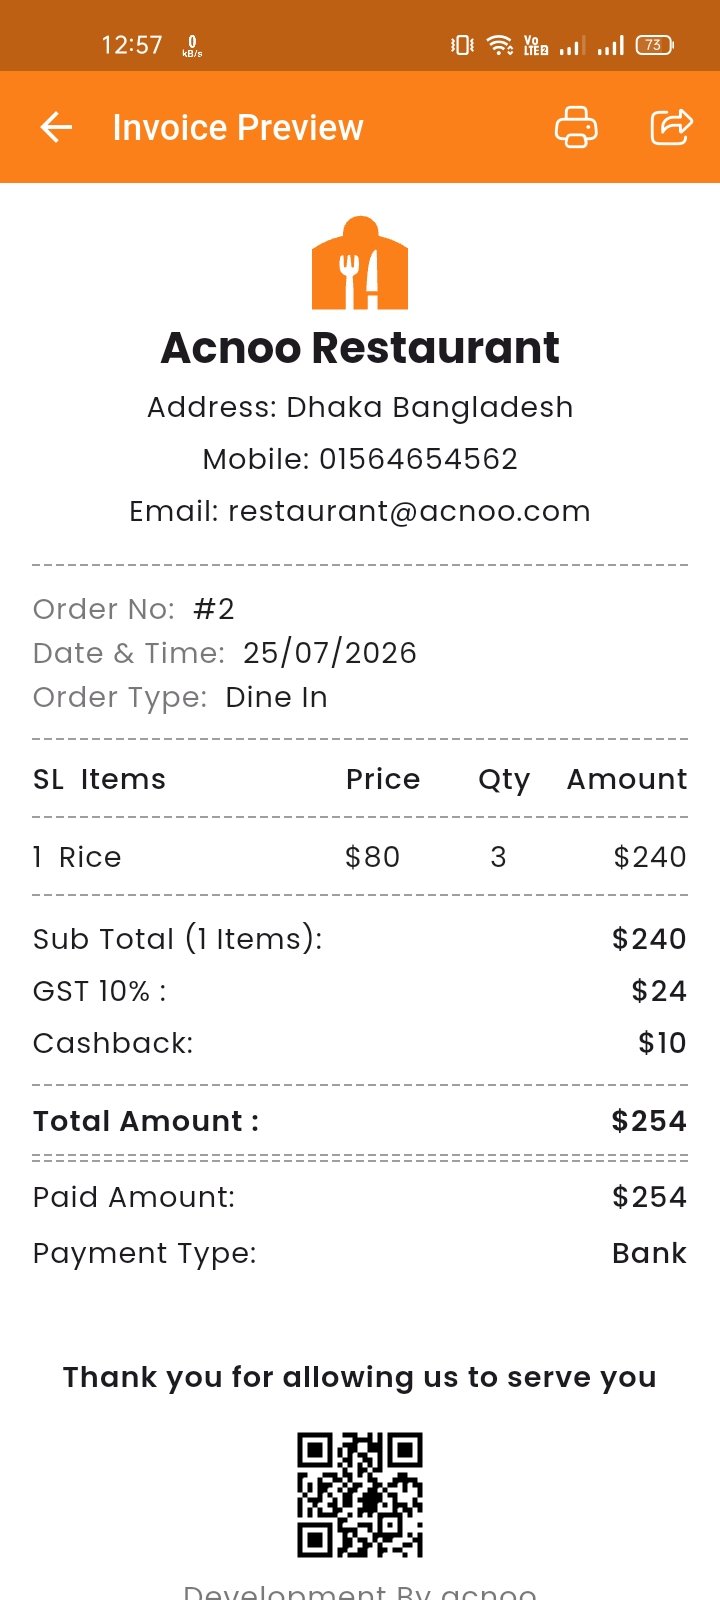
Orders Tab
The Orders tab displays a complete list of all orders placed. You can filter orders by date, payment status, order type and search by order ID or customer name. Also edit, delete & view orders.
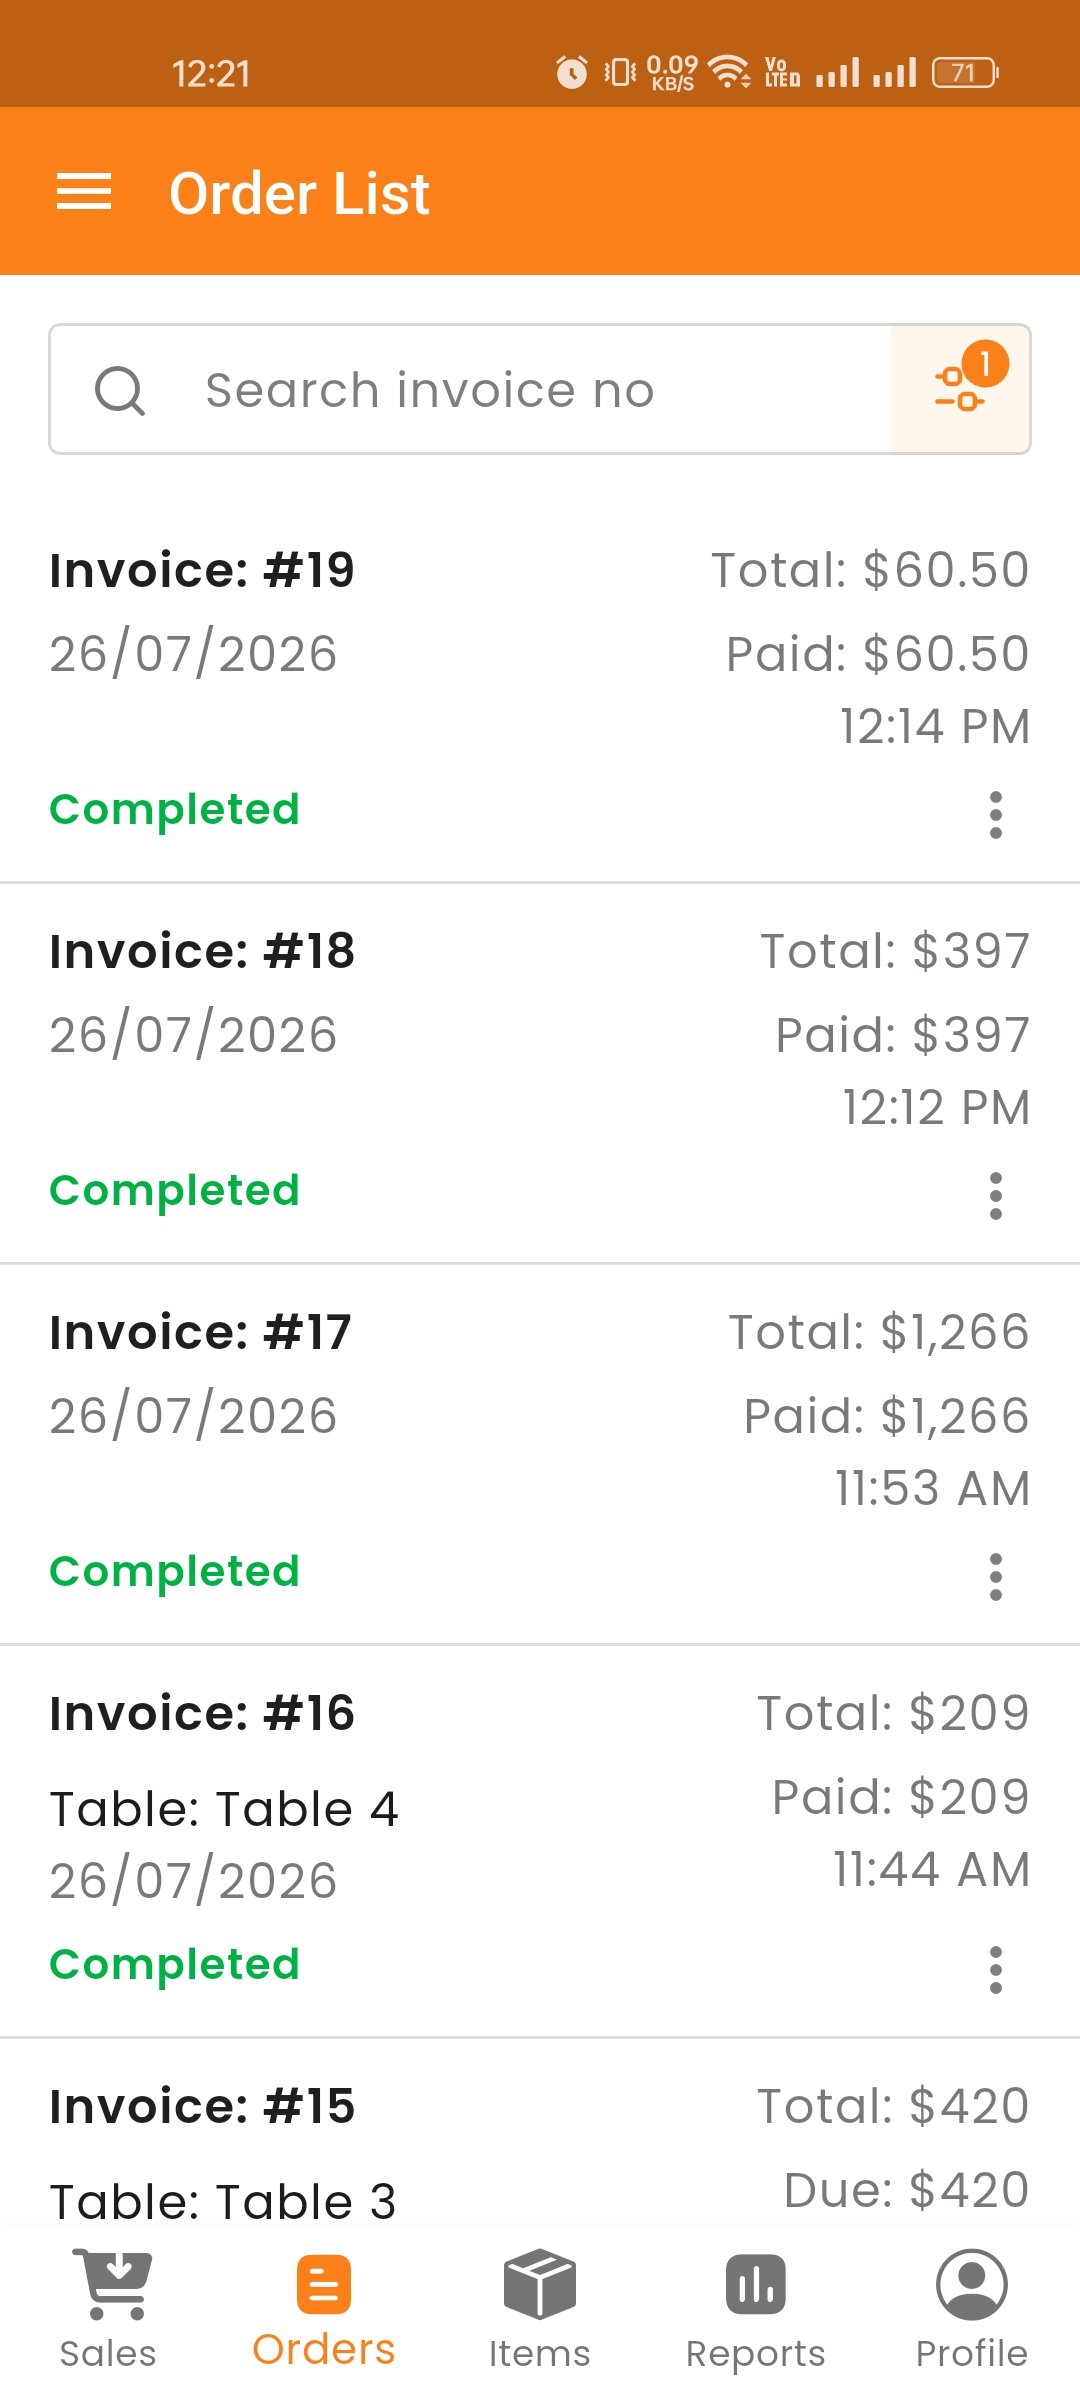
Invoice
View and print invoices for any completed order. The invoice includes item details, quantities, prices, taxes, and total amount.
Items Tab
The Items tab allows you to manage all menu items. You can view the item list with search, add new items, edit existing ones, and delete items.
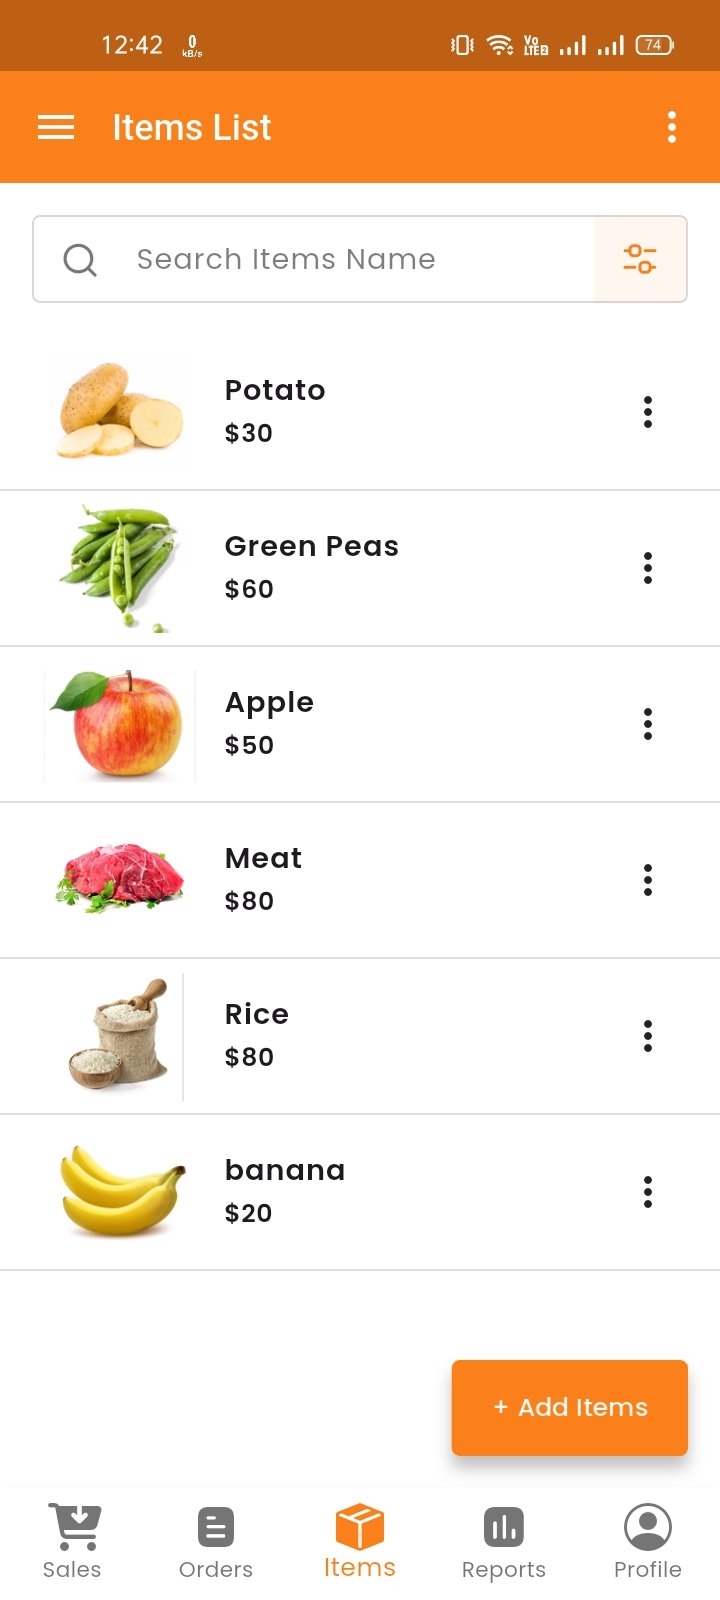
3-Dot Menu (More Options)
Tap the three-dot icon at the top to access additional management features:
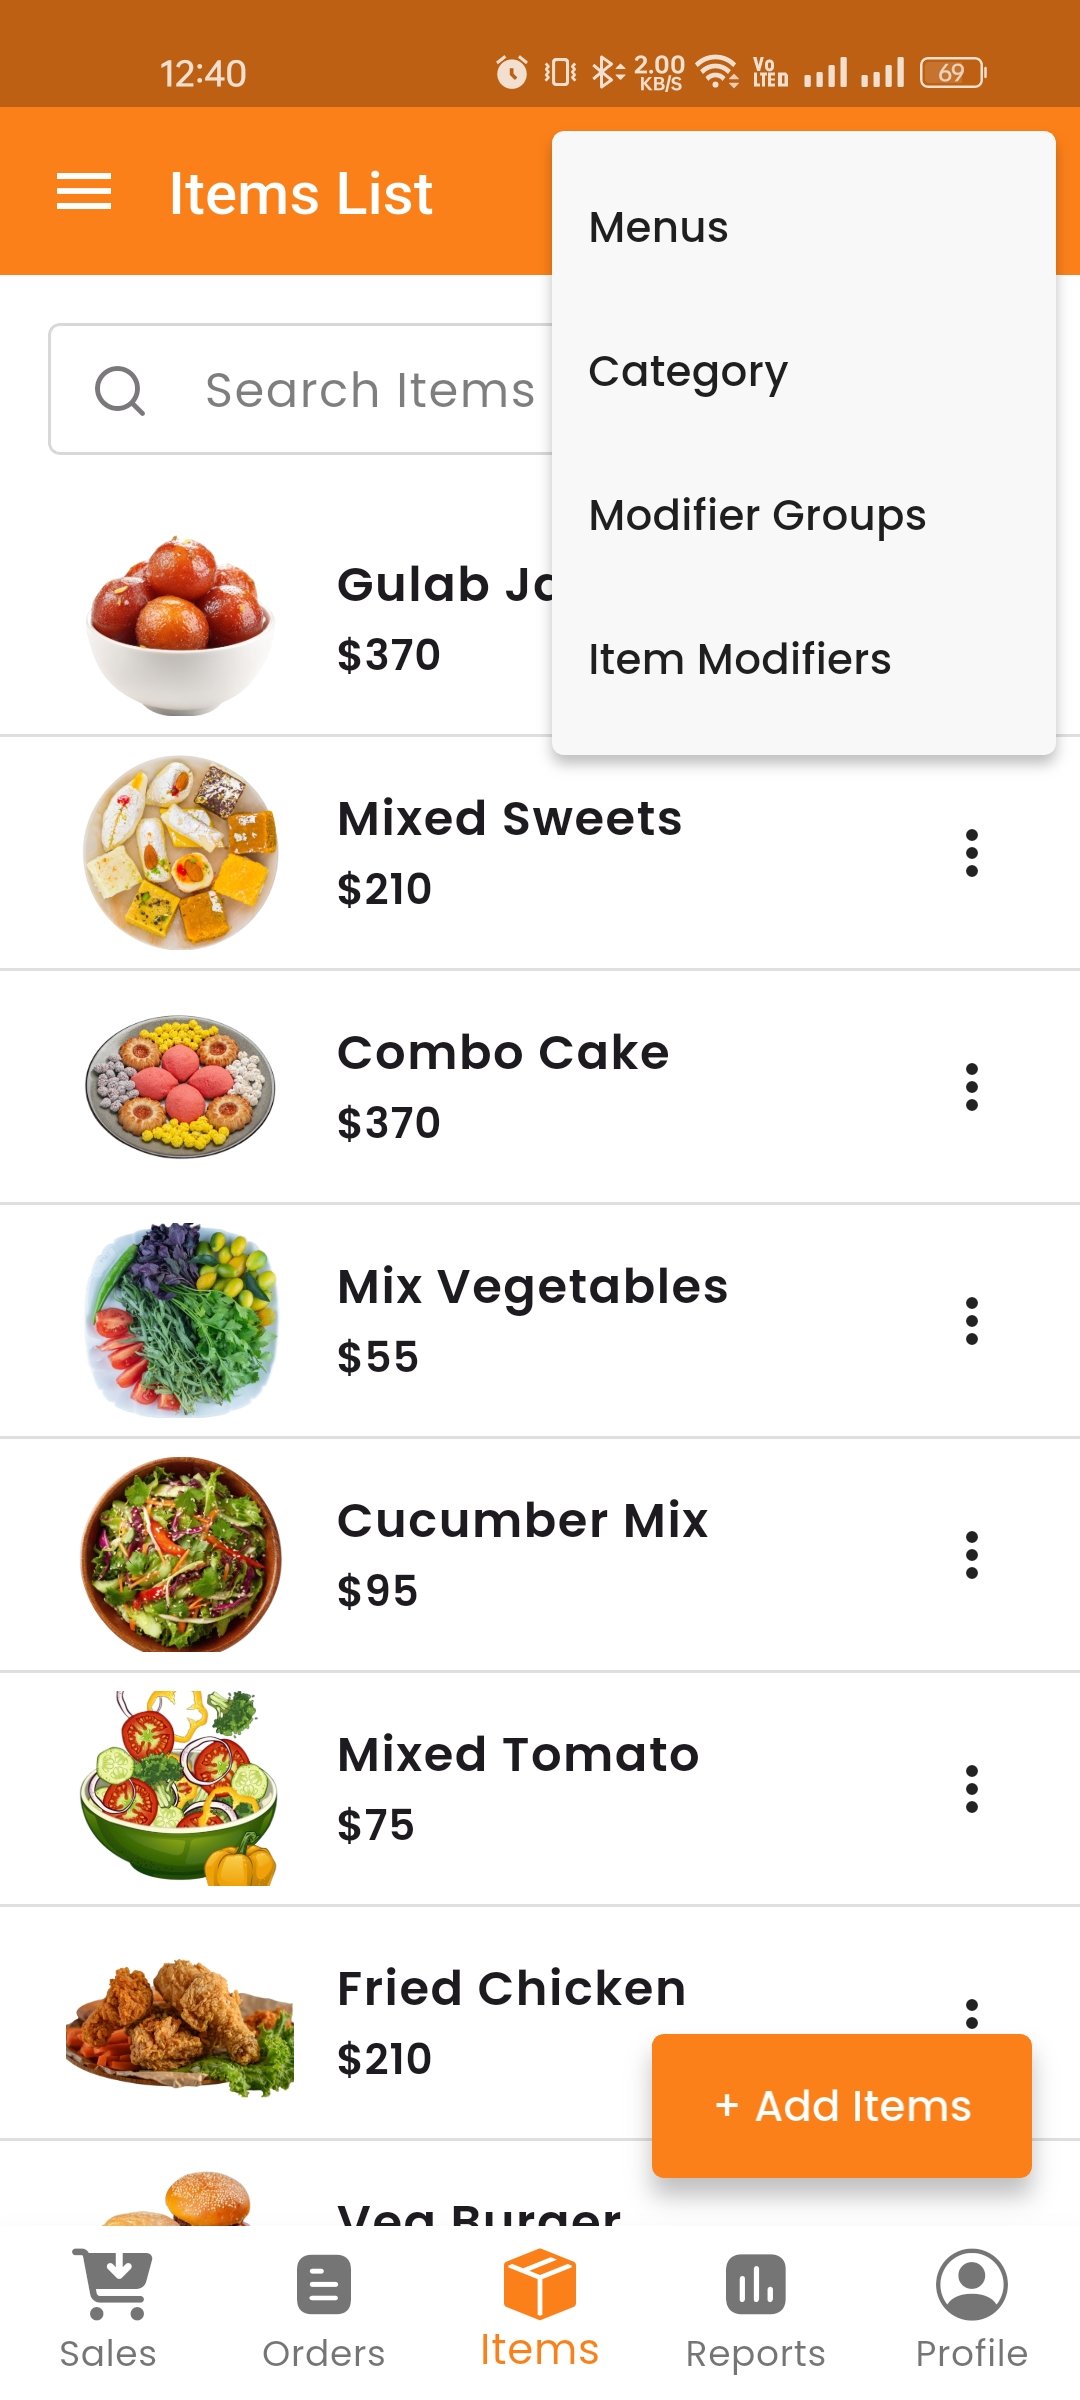
Menu List
Manage menu groups/categories. Add, edit, delete, and search menus.
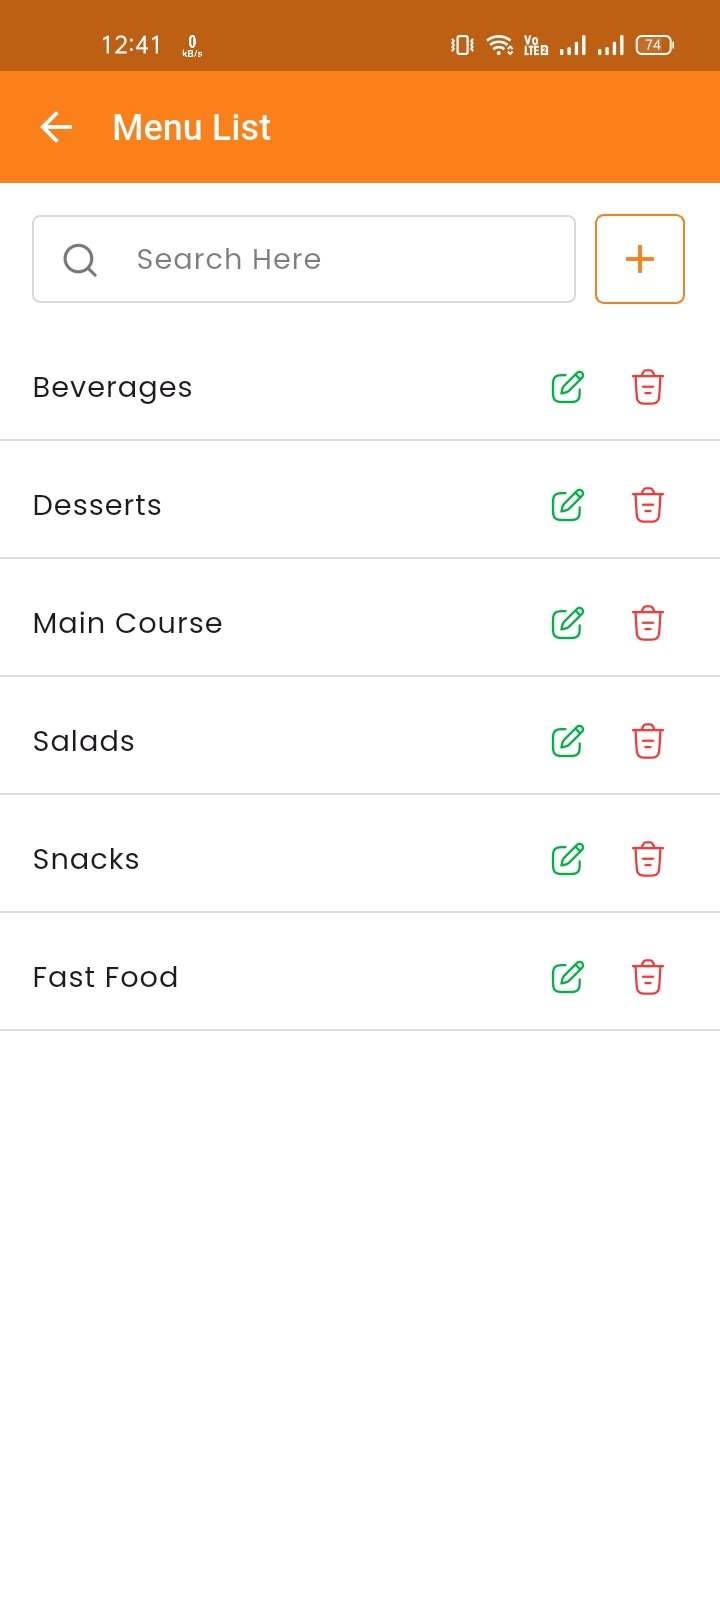
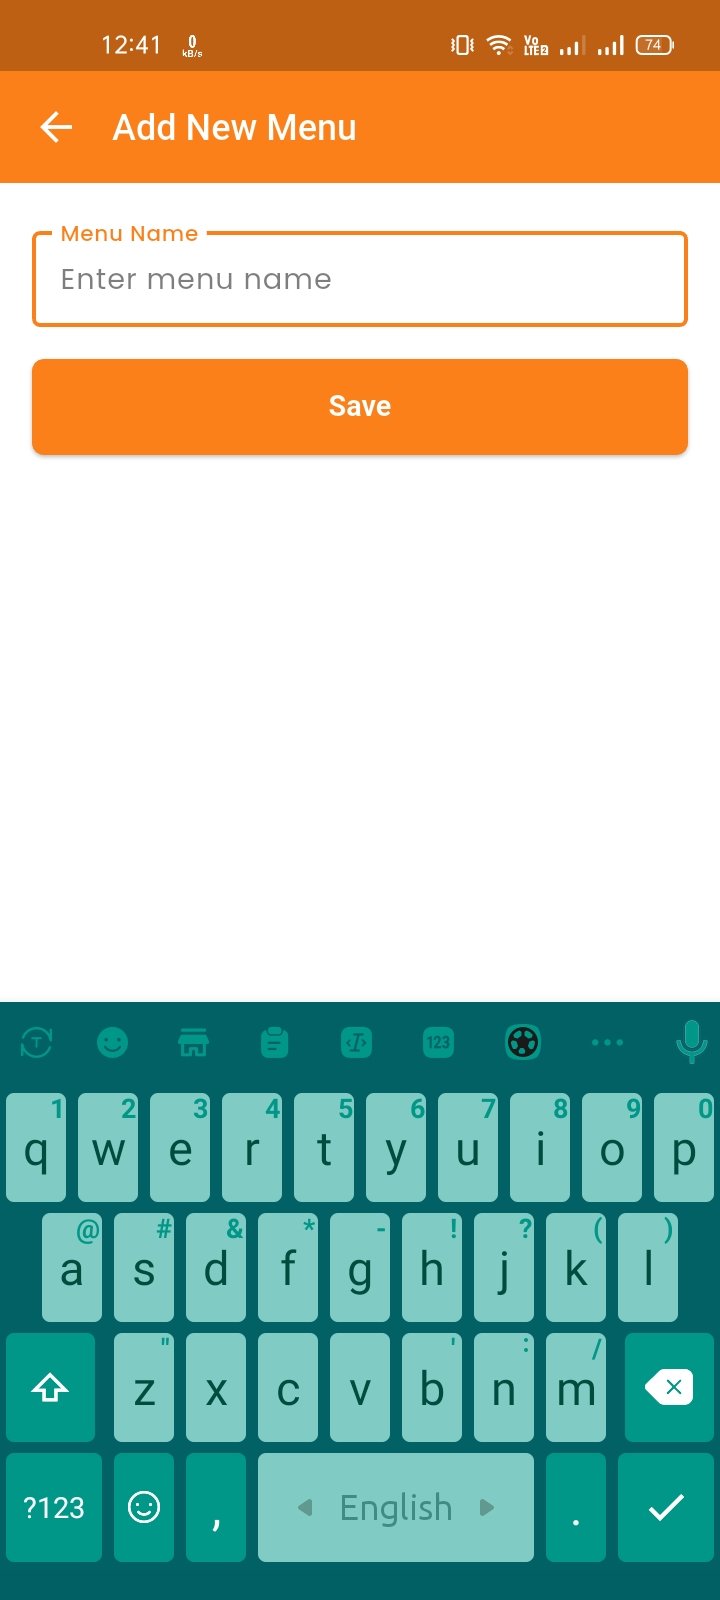
Category List
Manage item categories. Also Add, edit, delete, and search categories. Organize items into logical groups for easy browsing.
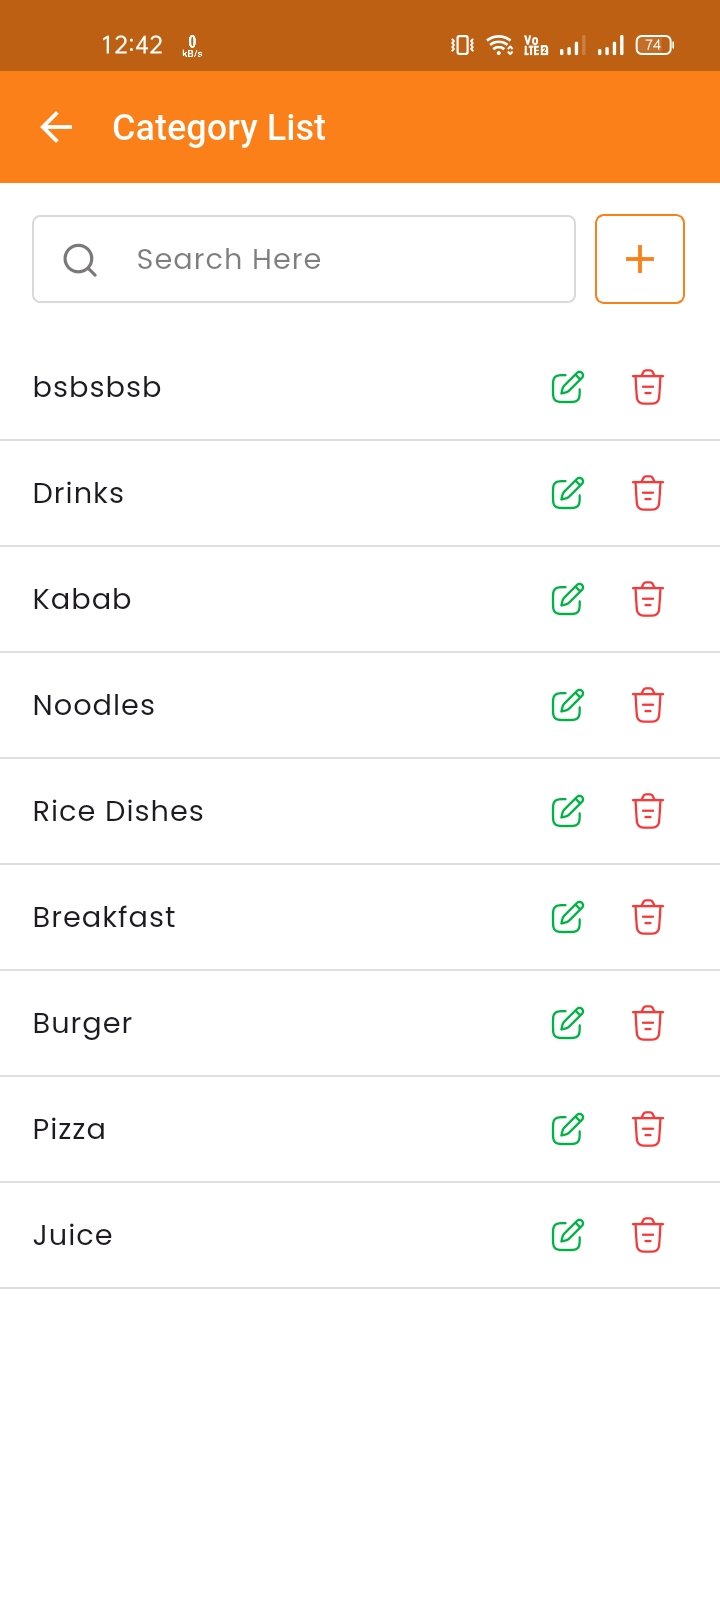
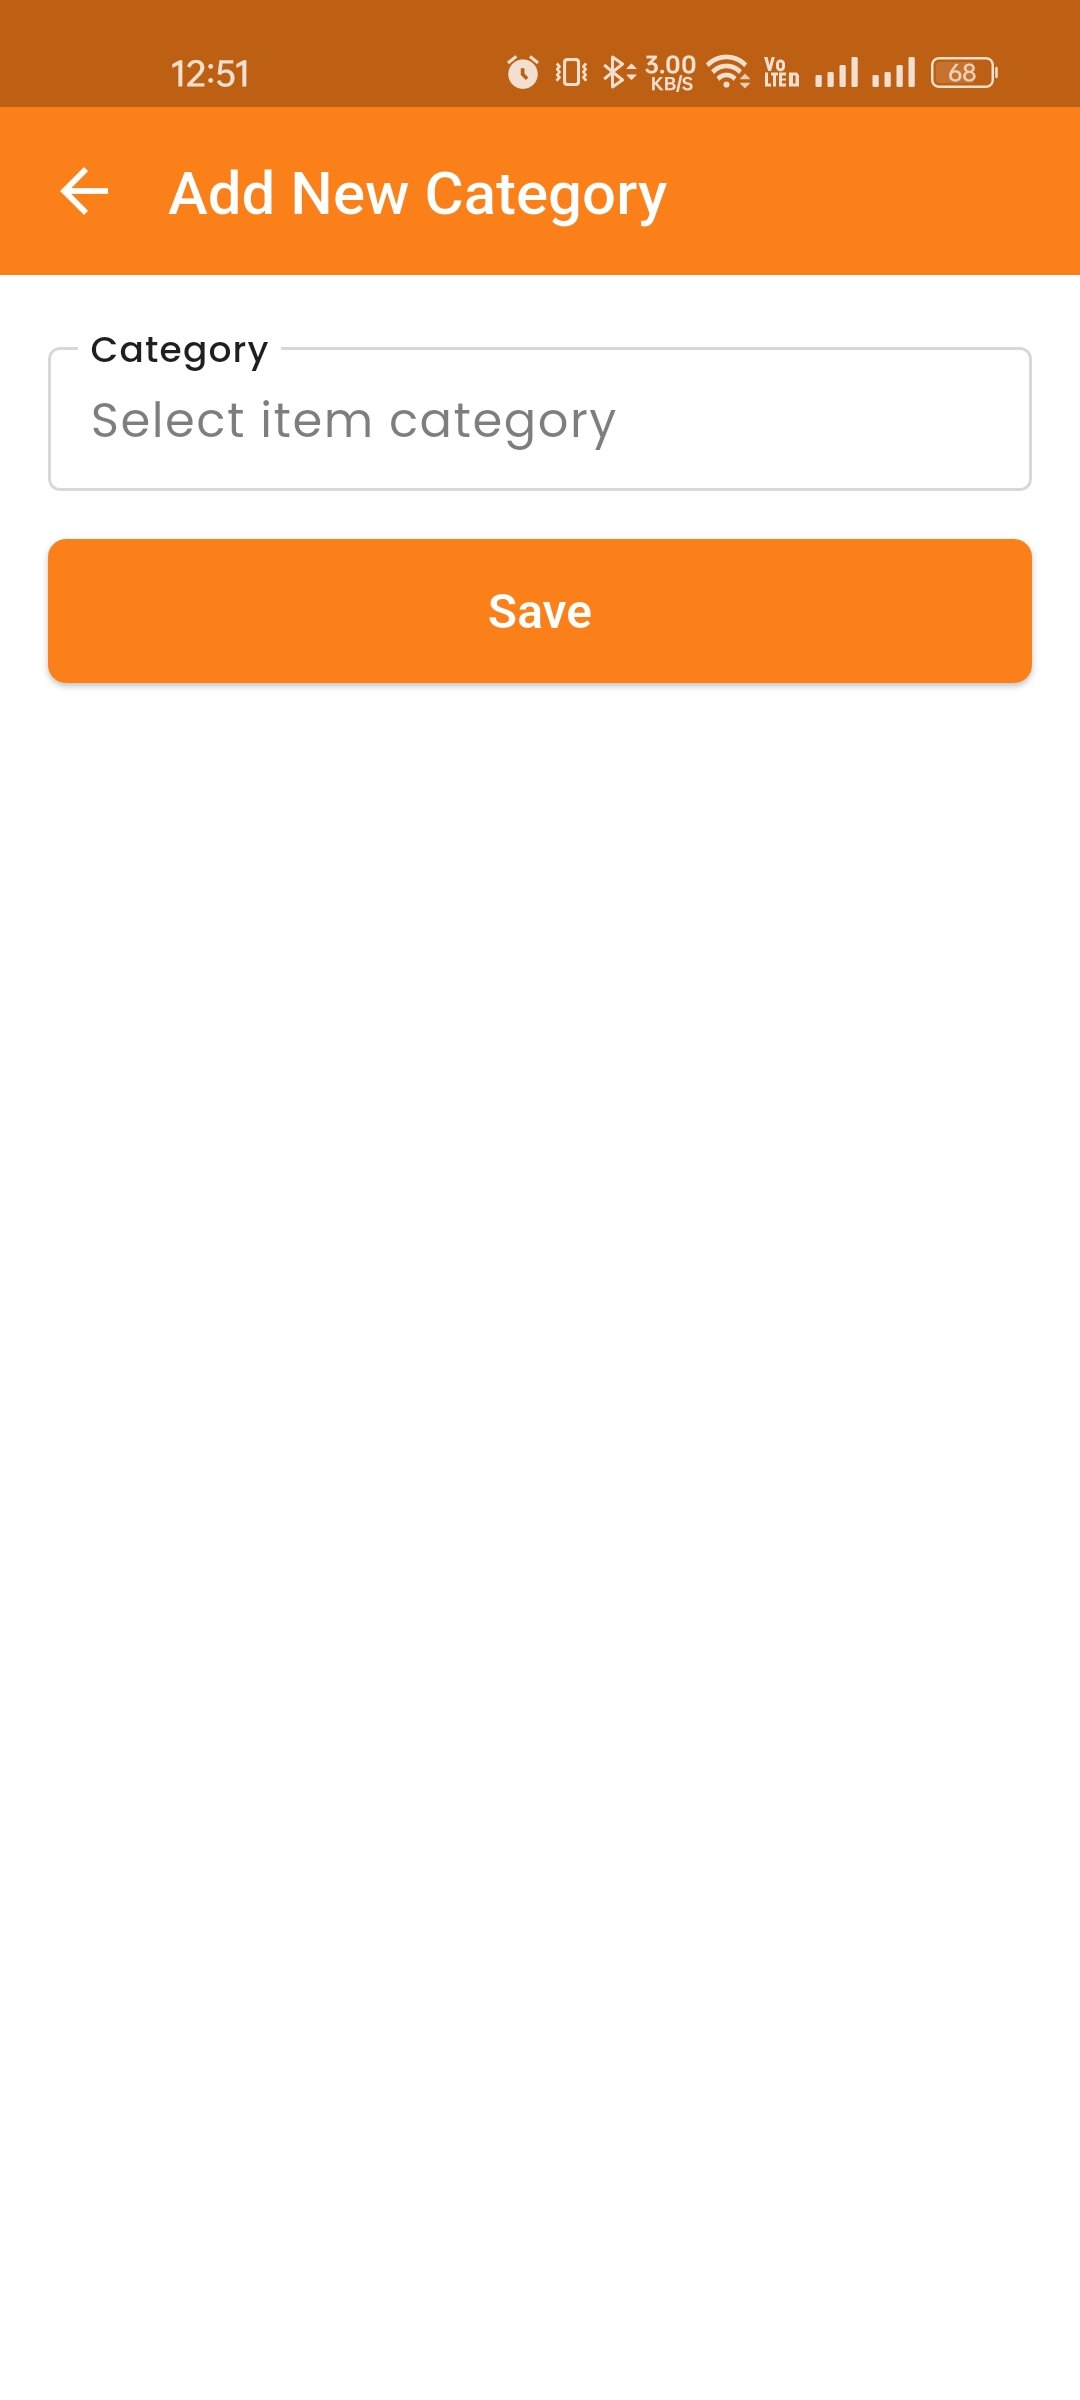
Modifier Groups
Create and manage modifier groups (e.g., Extra Toppings, Drink Sizes). Each group can have multiple modifier options with prices.
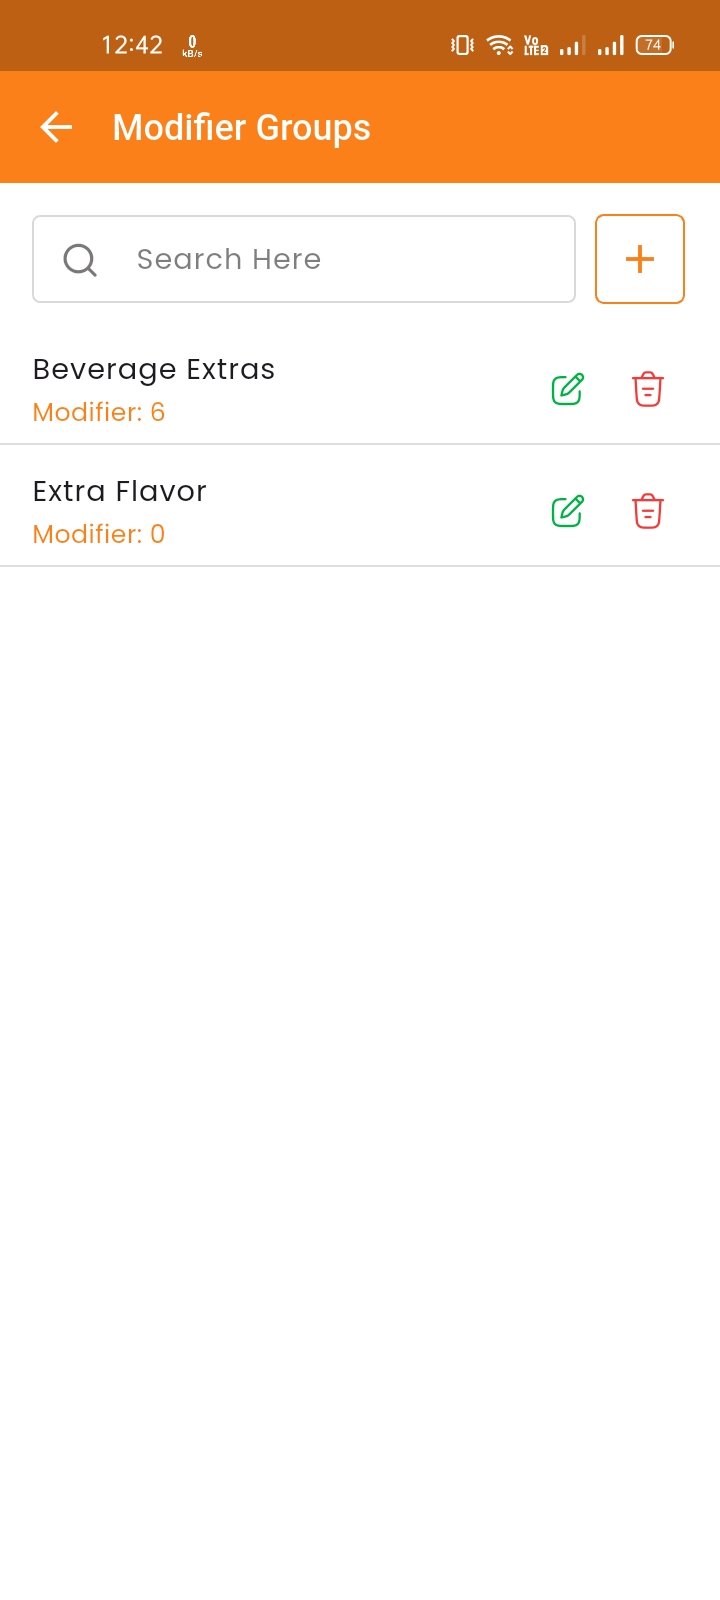
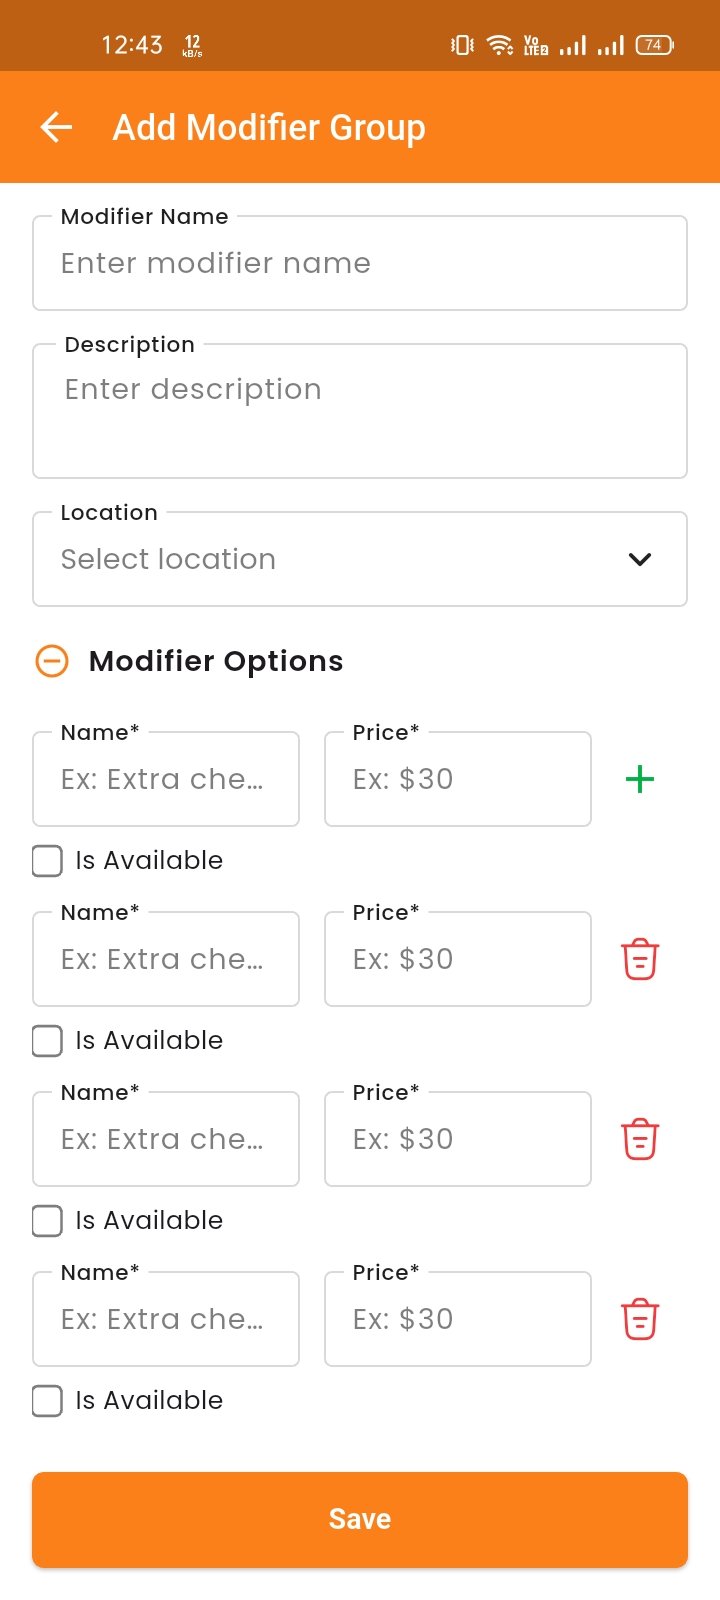
Item Modifier
Assign modifier groups to specific items. Configure whether multiple selections are allowed and if modifiers are required.
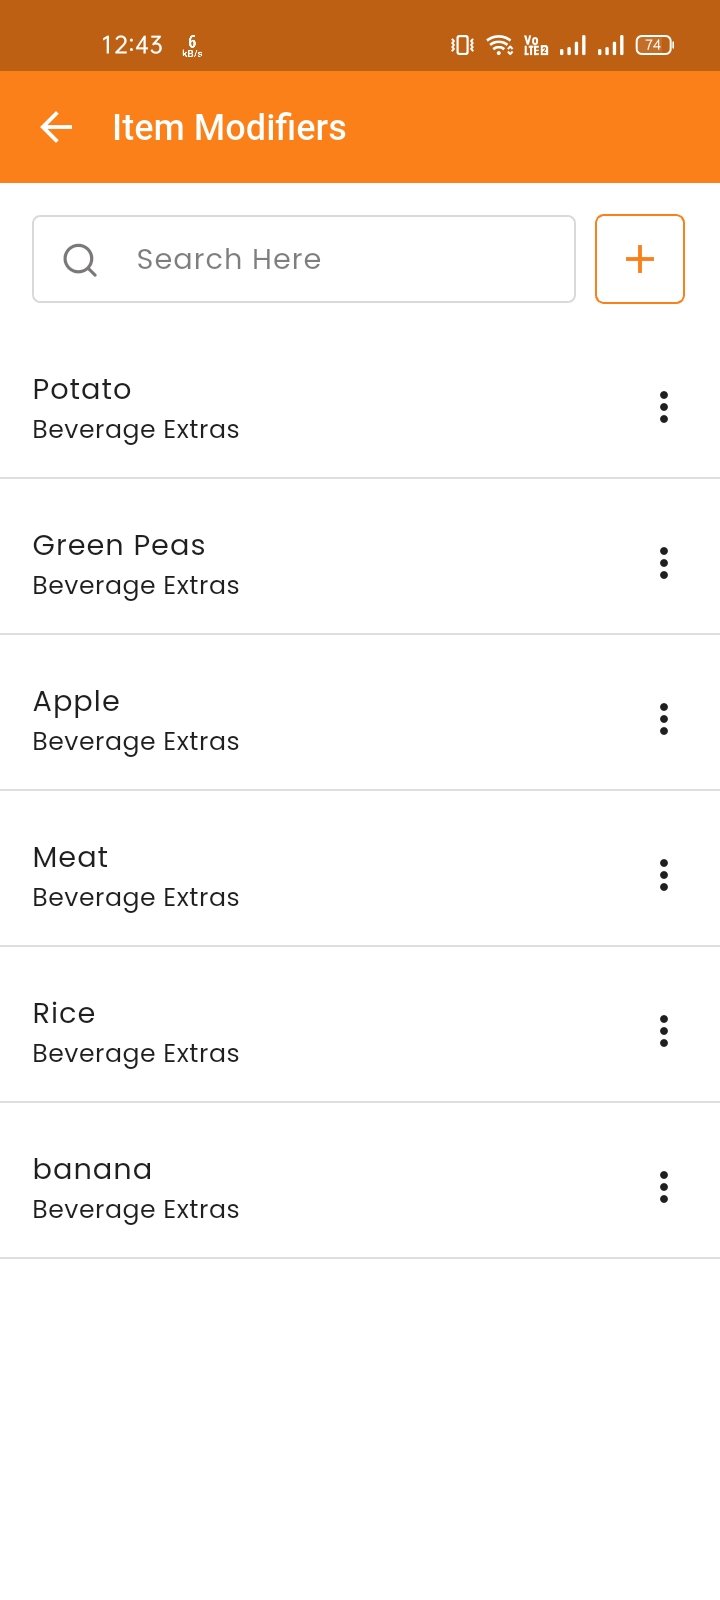
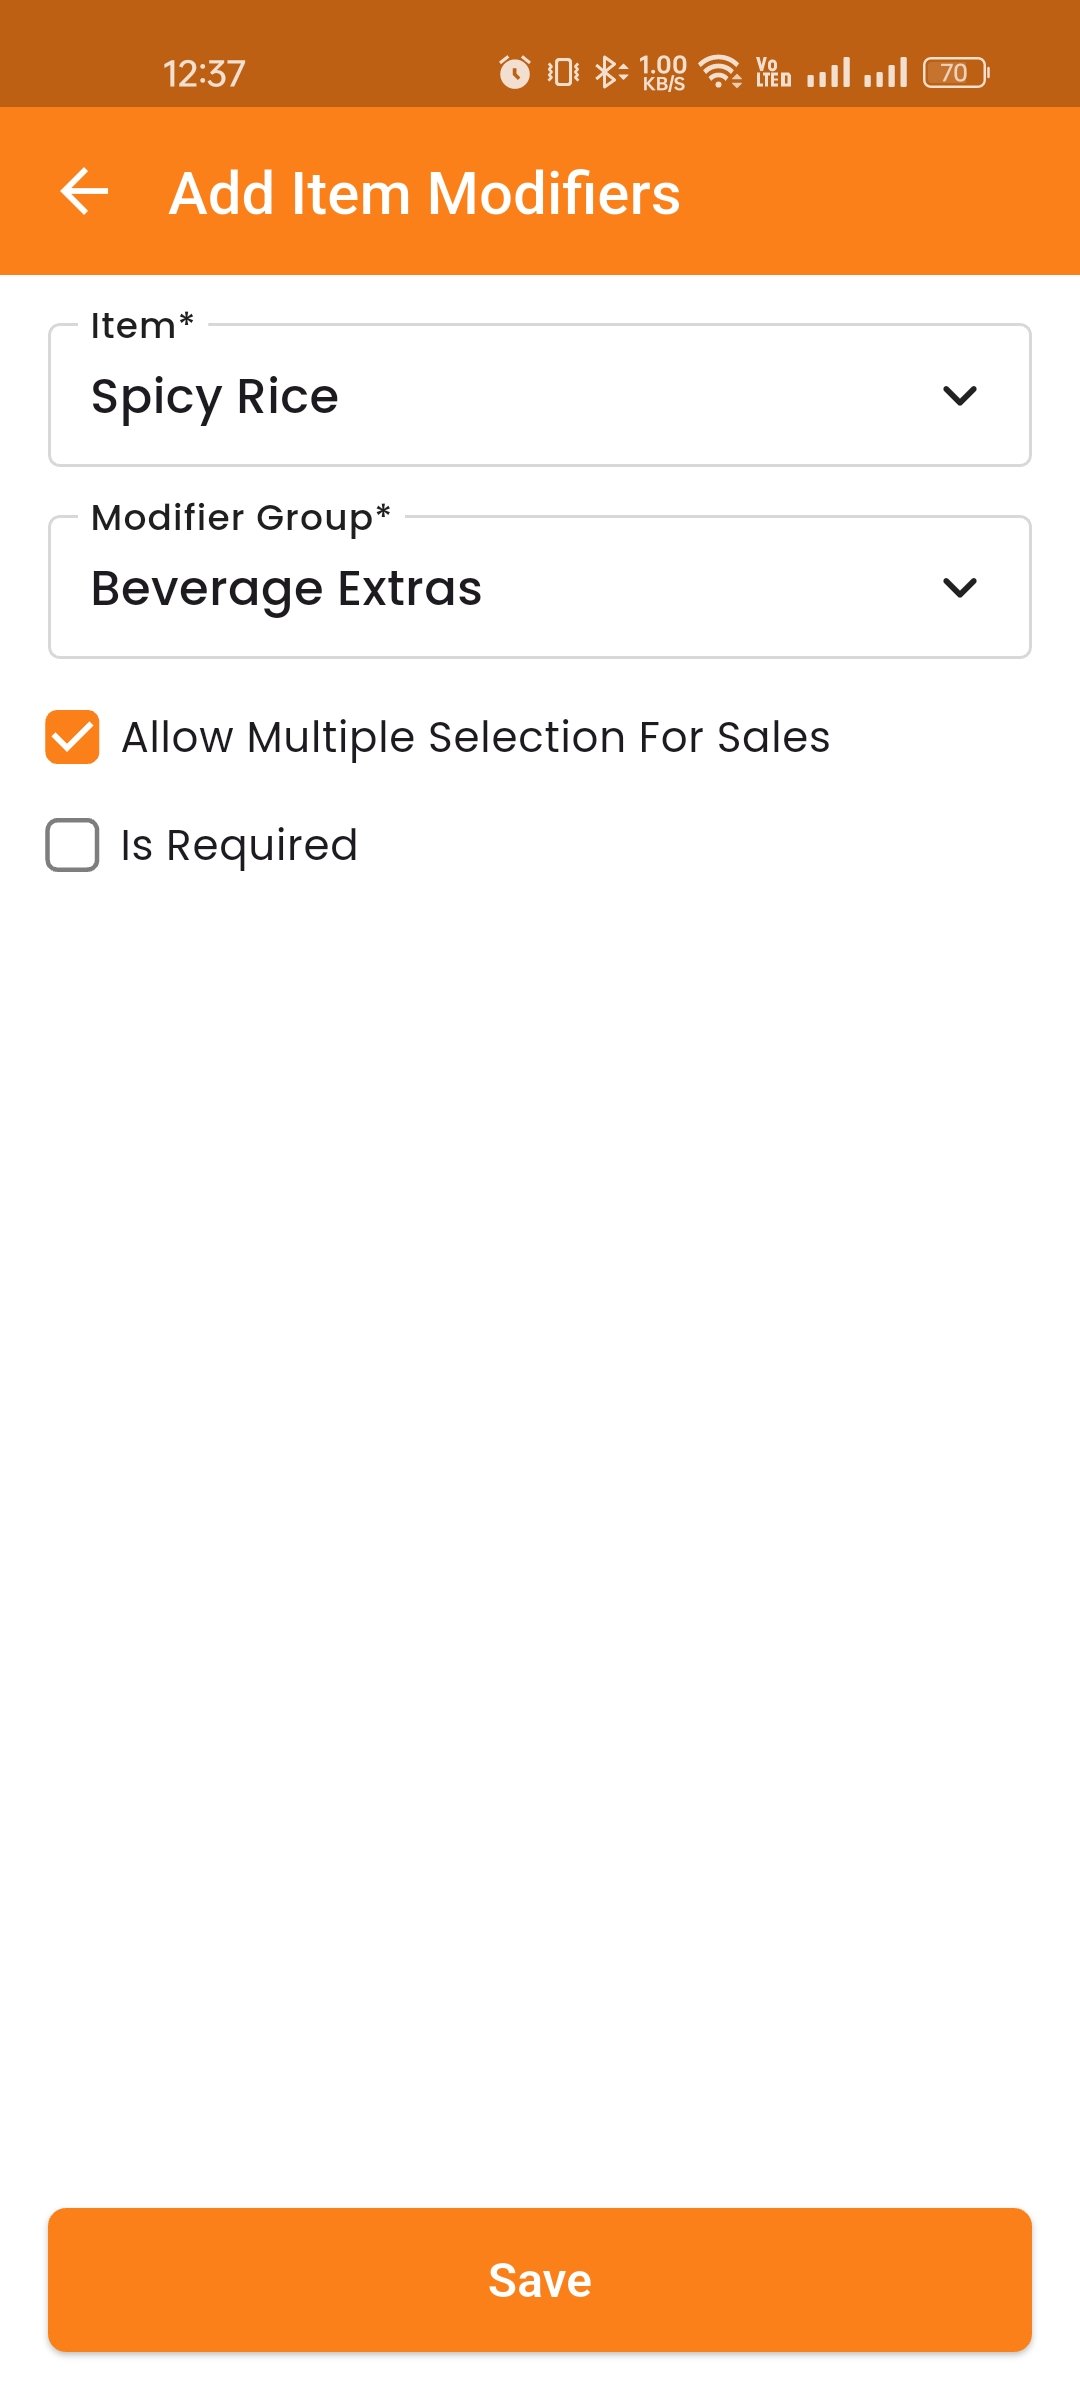
Reports Tab
The Reports tab provides detailed analytics and reports on various aspects of restaurant operations. The following reports are available:
Sales Report — View sales data with filters for date range and payment type.
Sales Quotation — View and manage quotation reports.
Purchase Report — Track all purchases with detailed breakdowns.
Due Report — View all due amounts from customers and suppliers.
Due Collection — Track collected due amounts and payment history.
Transaction Report — View all financial transactions with filtering options.
Income Report — Track all income sources and amounts.
Expense Report — Monitor business expenses by category.
KOT Report — View Kitchen Order Ticket reports for order preparation tracking.
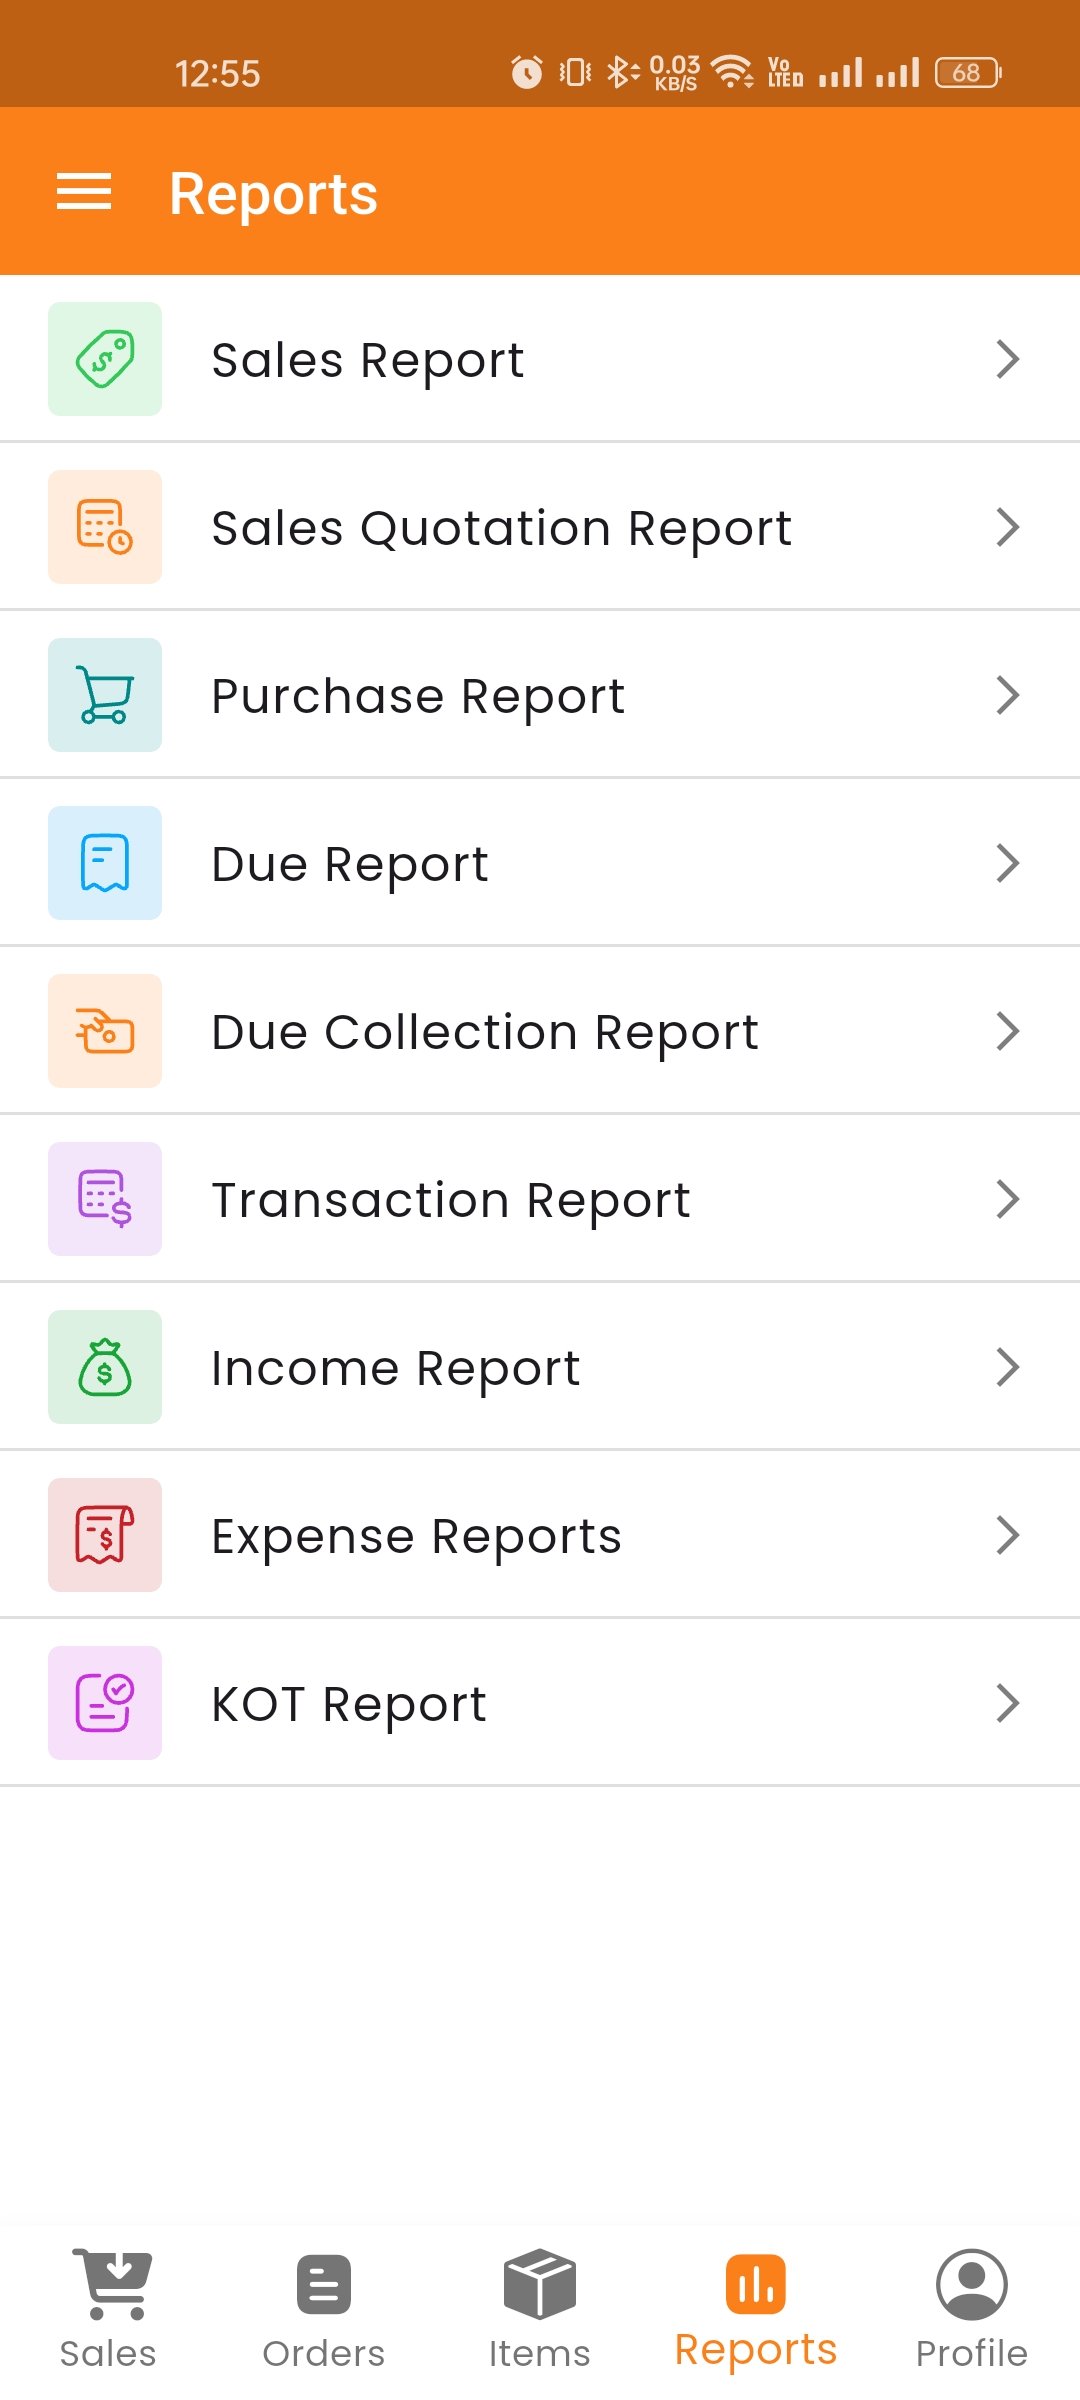
Profile Tab
The Profile tab provides access to your account management. Tap "My Profile" to open the profile menu with the following options:
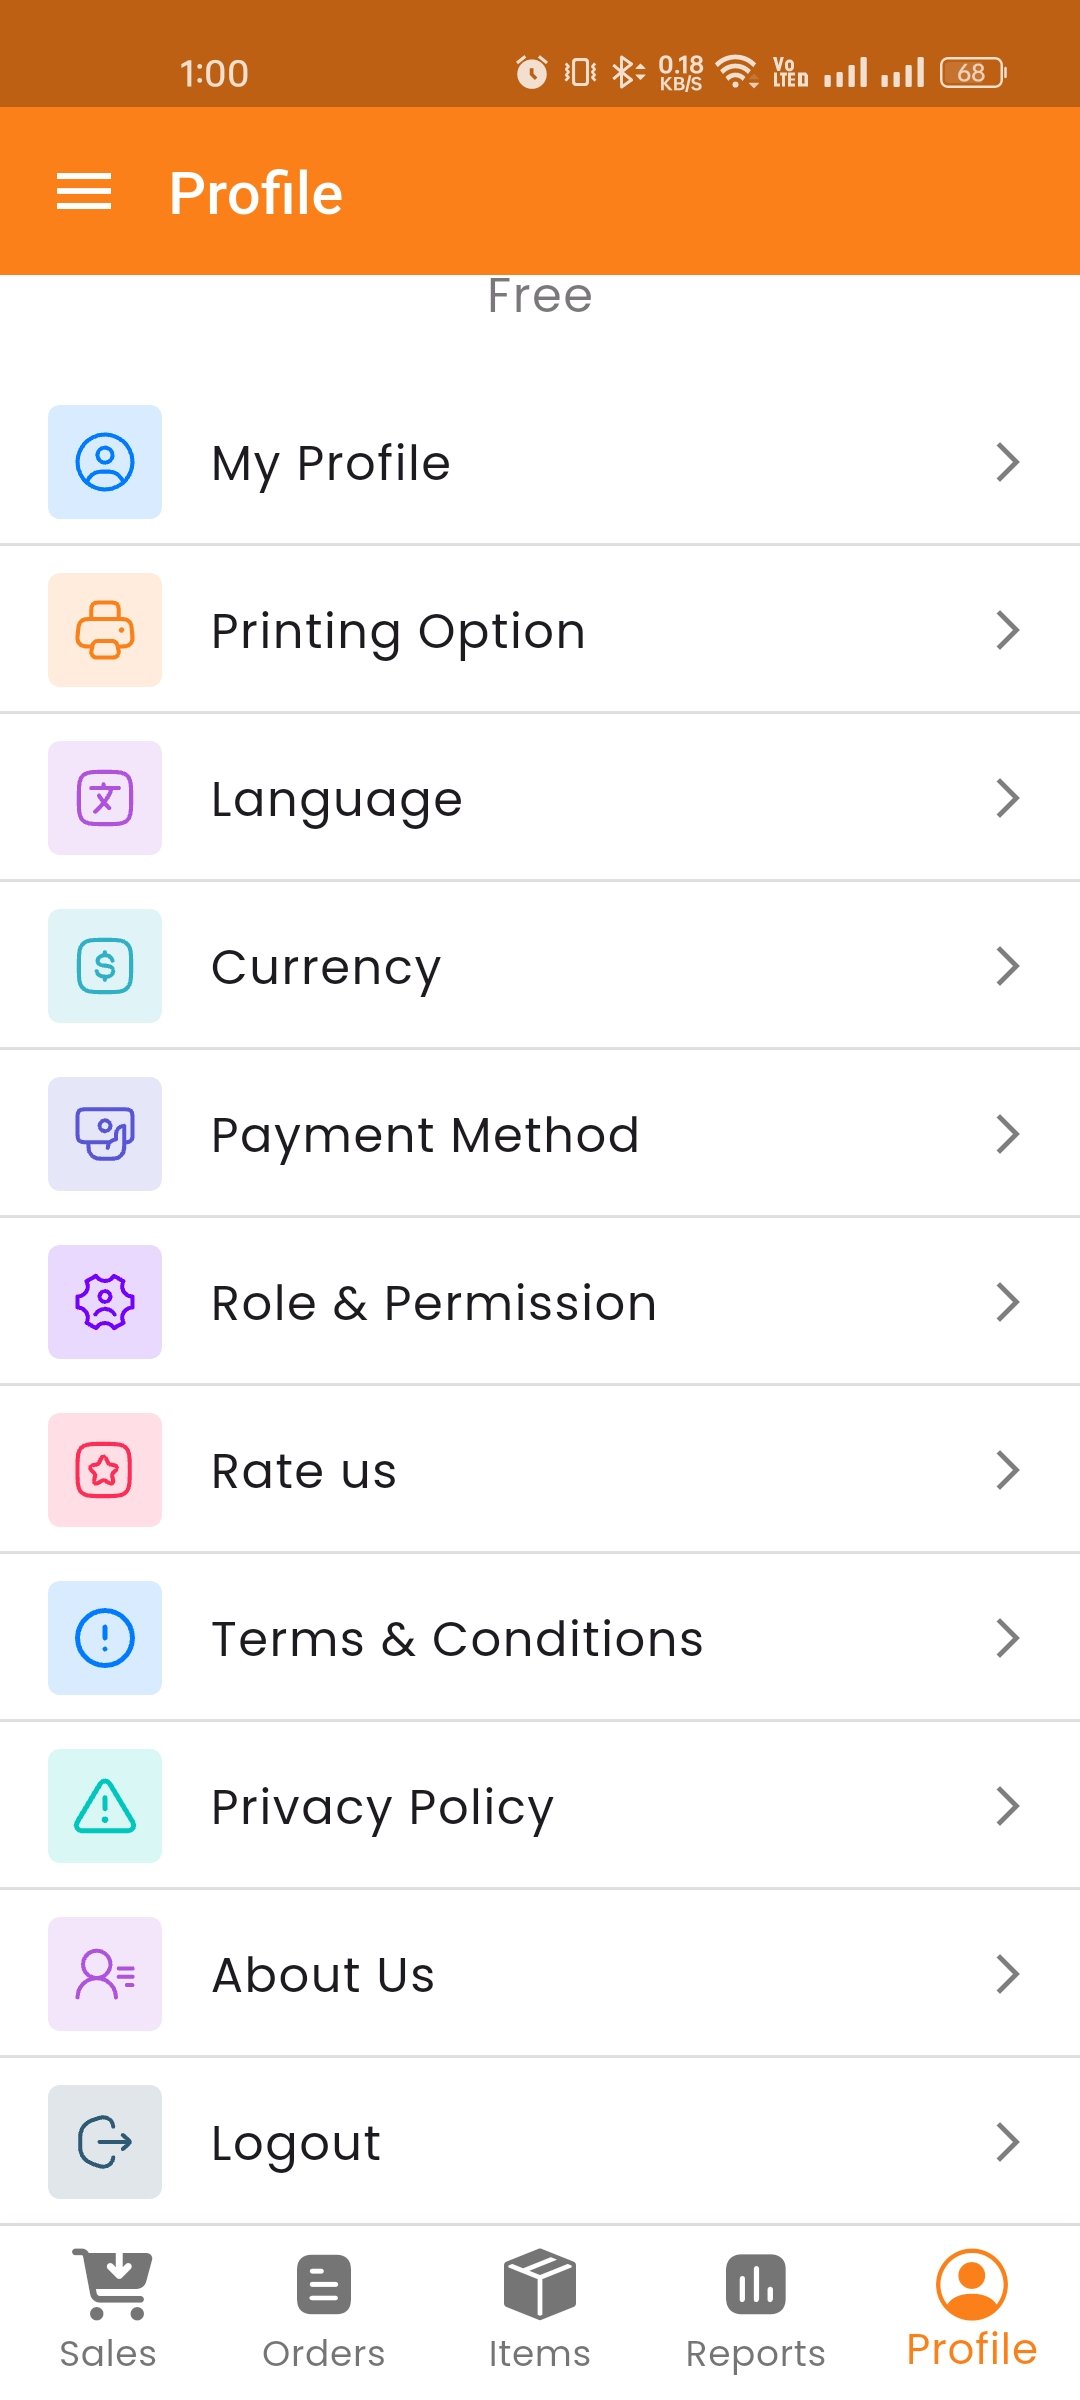
My Profile
View and update your personal information including name, email, phone number, and profile picture. Also update your business details such as business name, address, contact information, and other settings
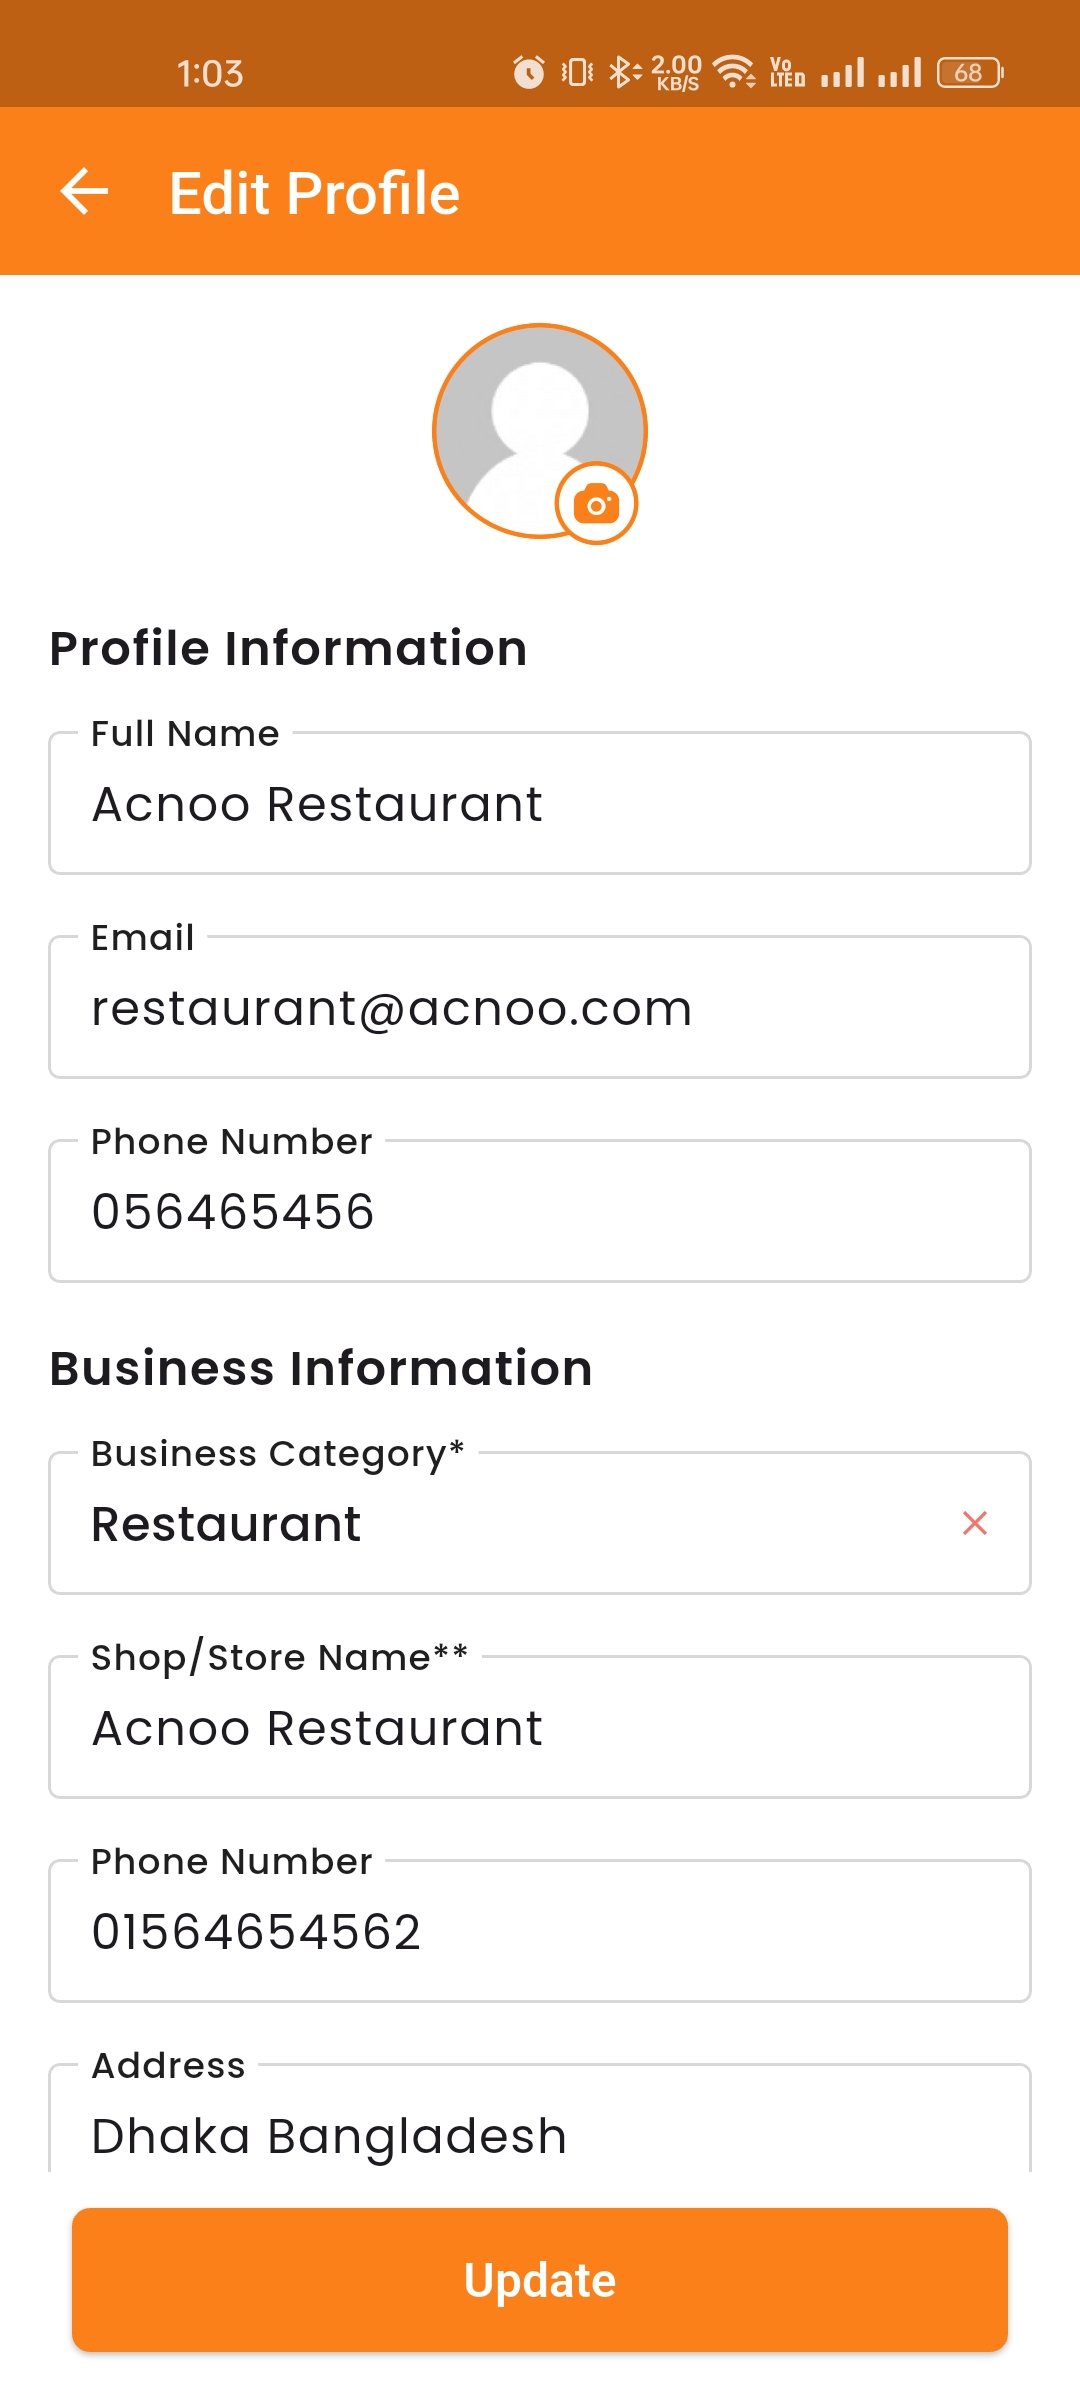
Printing Option
Configure printing settings for thermal printers and invoices. Choose print format, paper size, and other preferences.
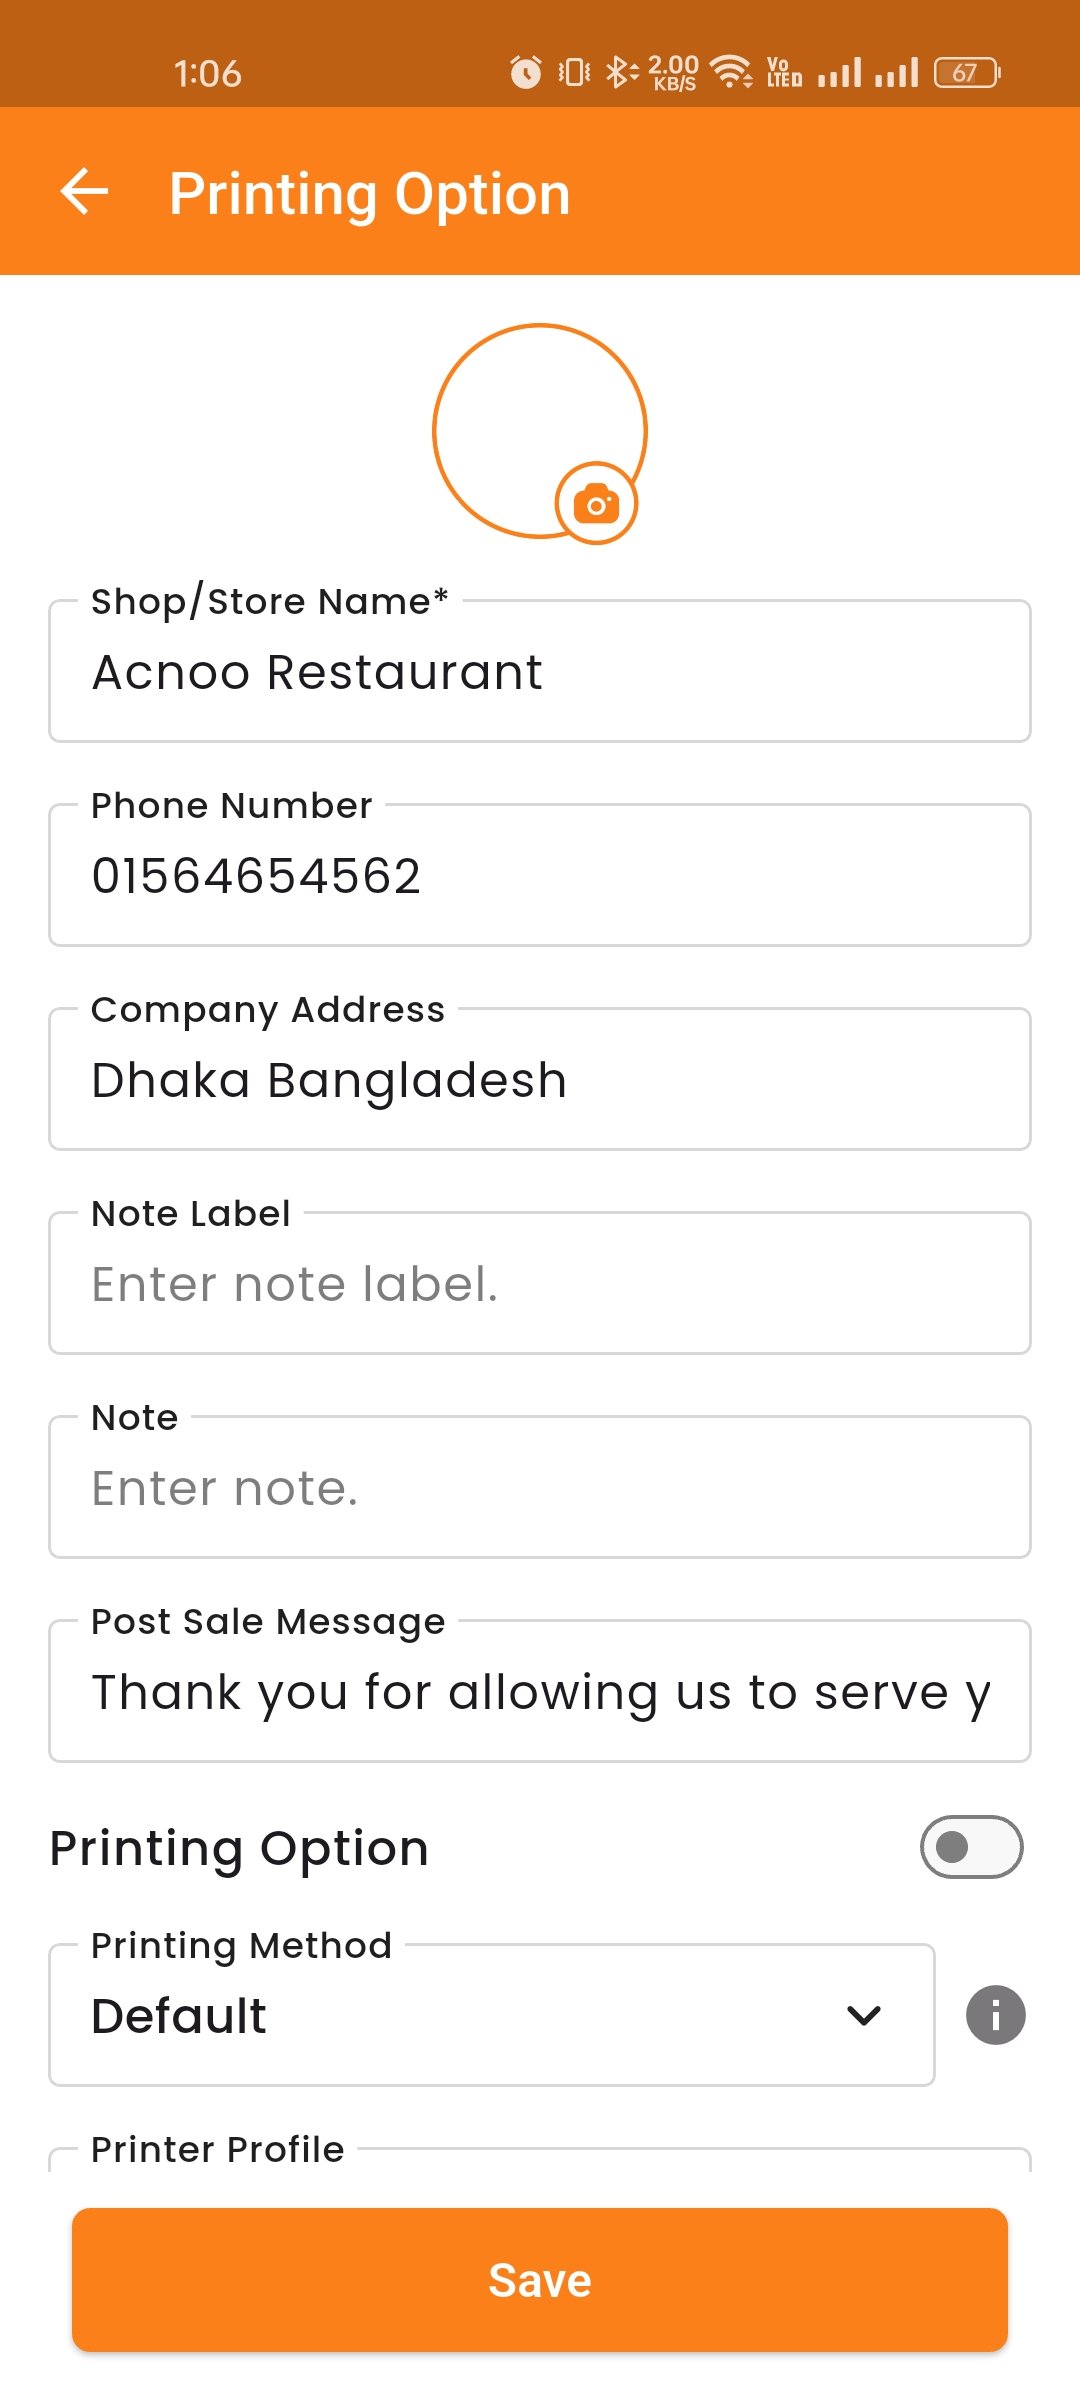
Language
Change the app language from available options for a localized experience.
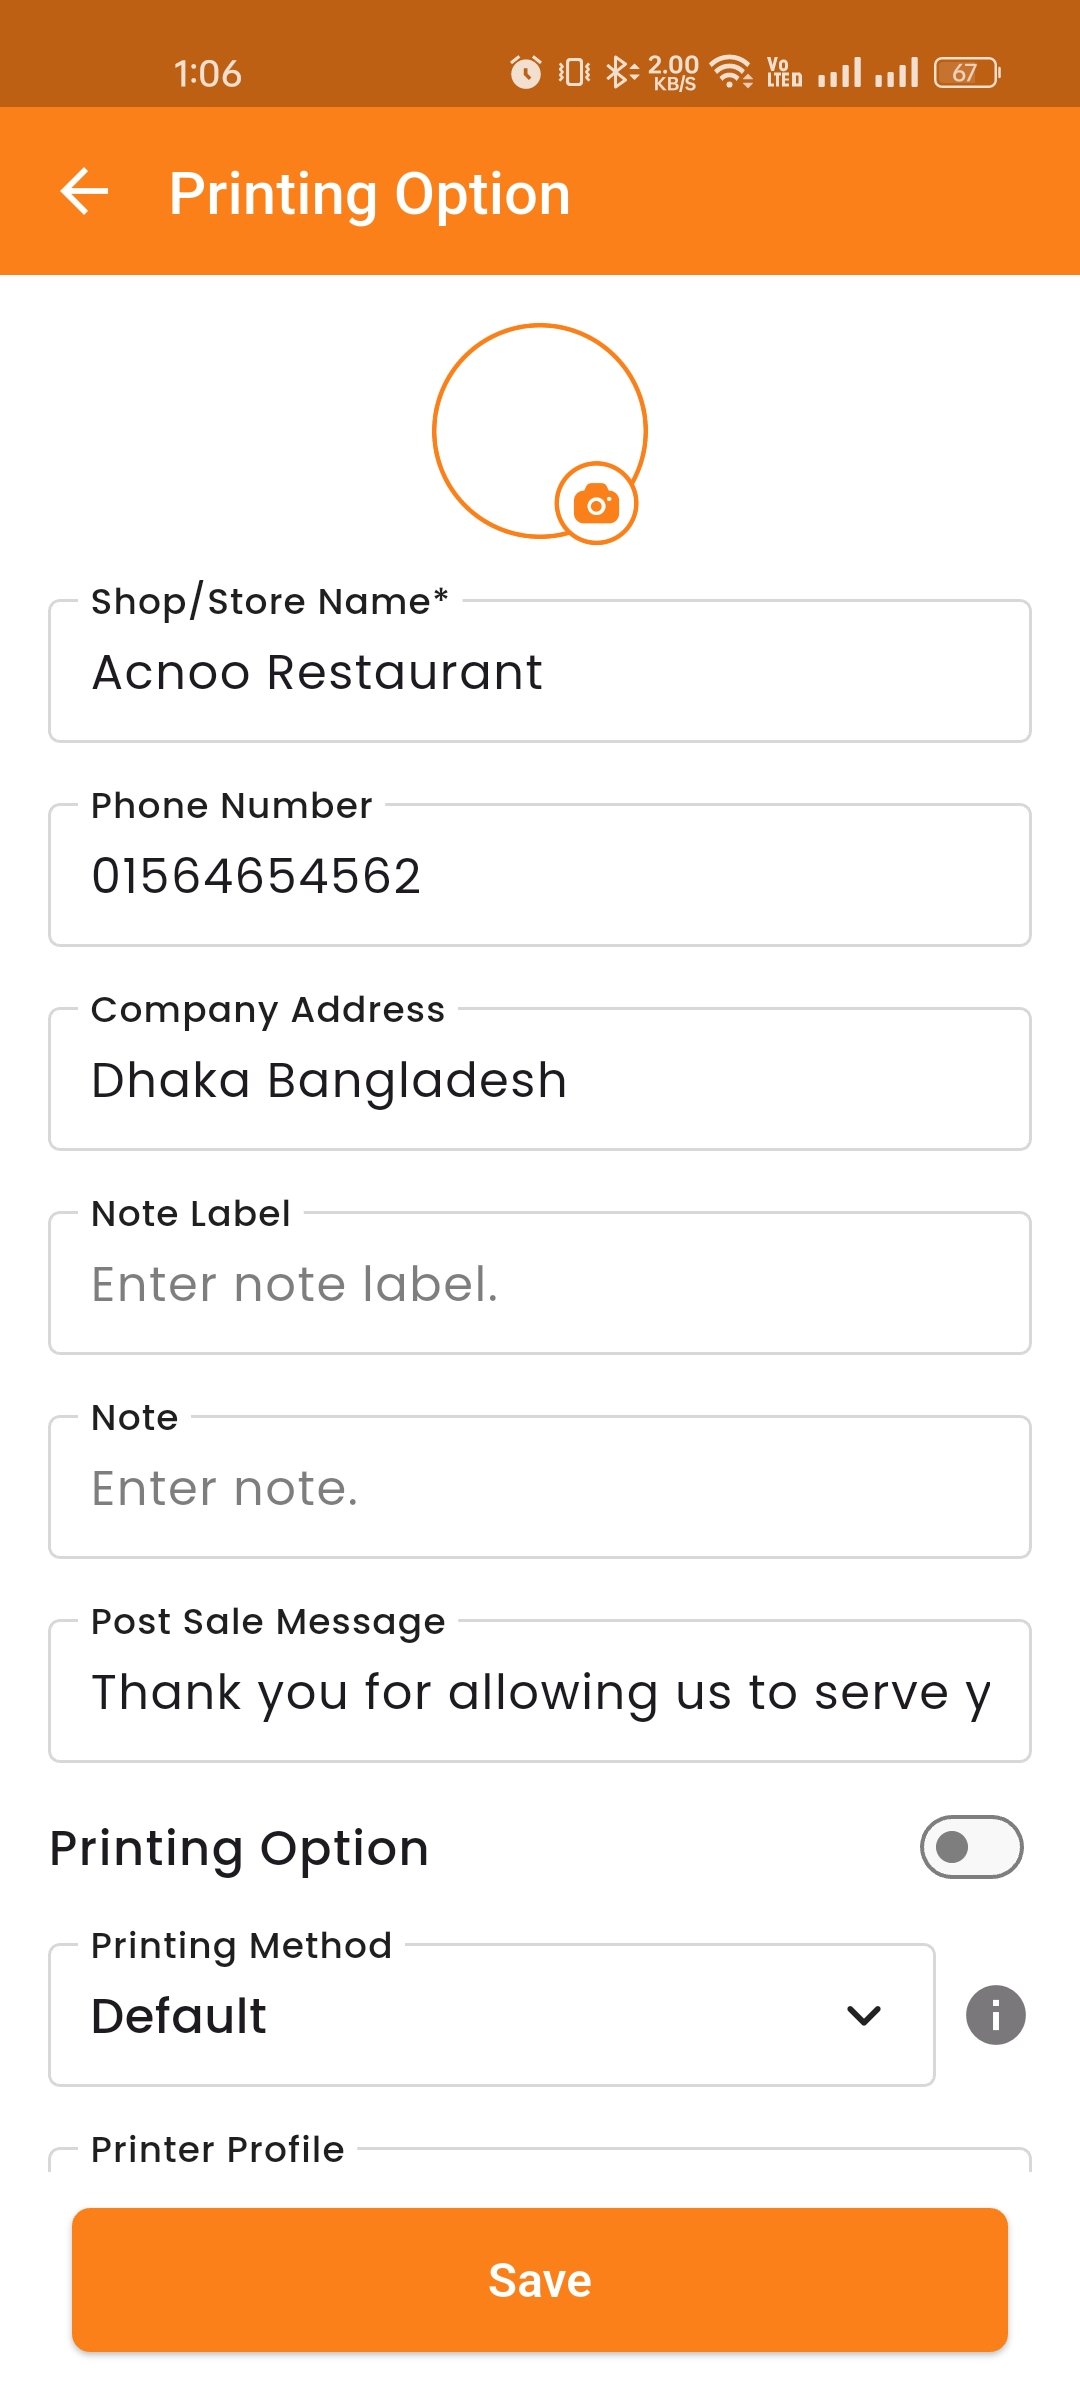
Currency
Set your preferred currency for transactions and reporting.
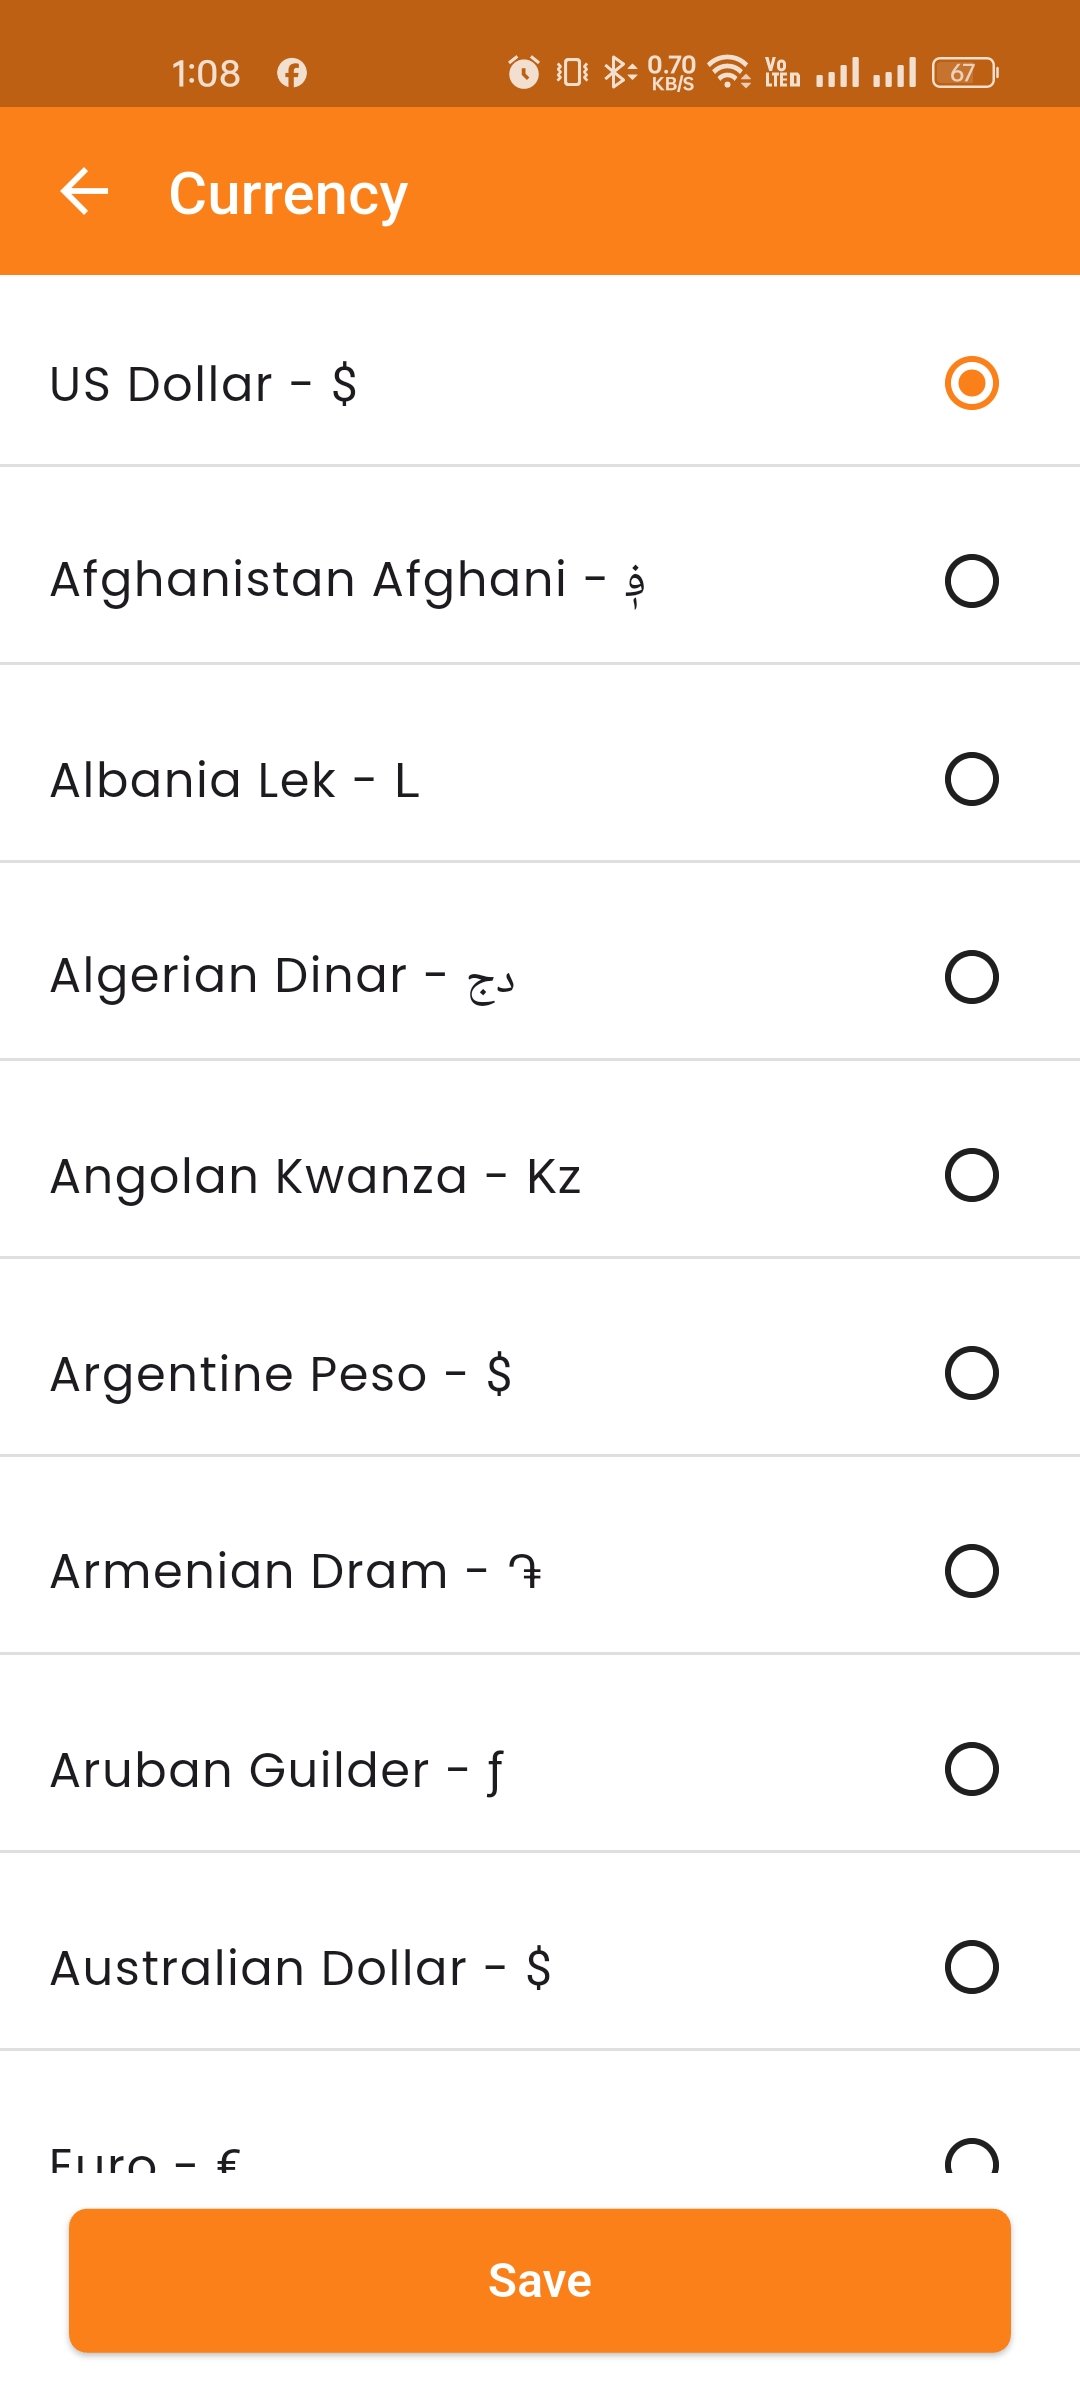
Payment Method
View create, edit, delete, search and configure available payment methods for your business.
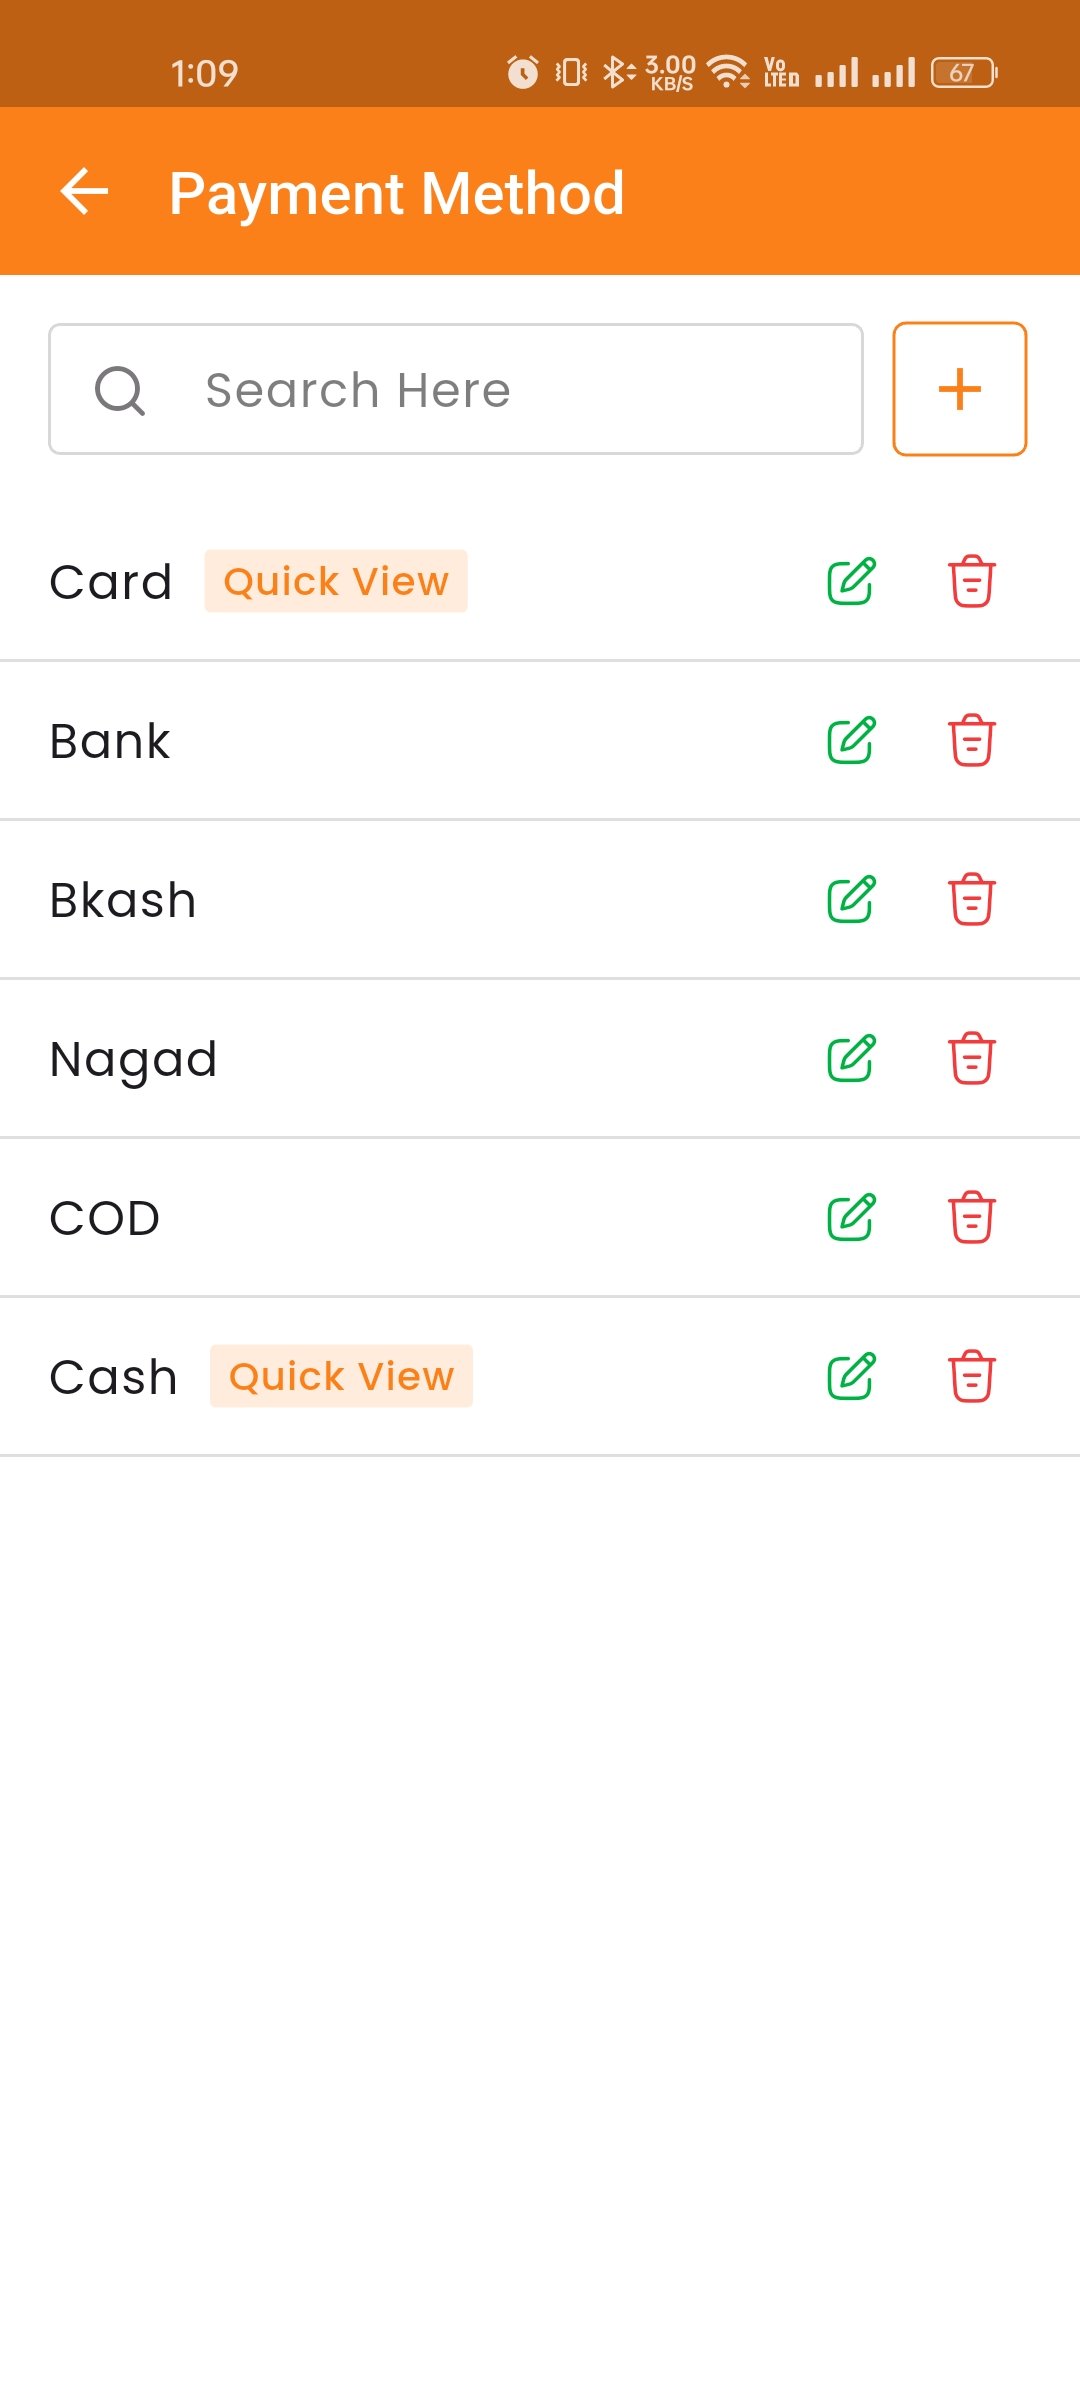
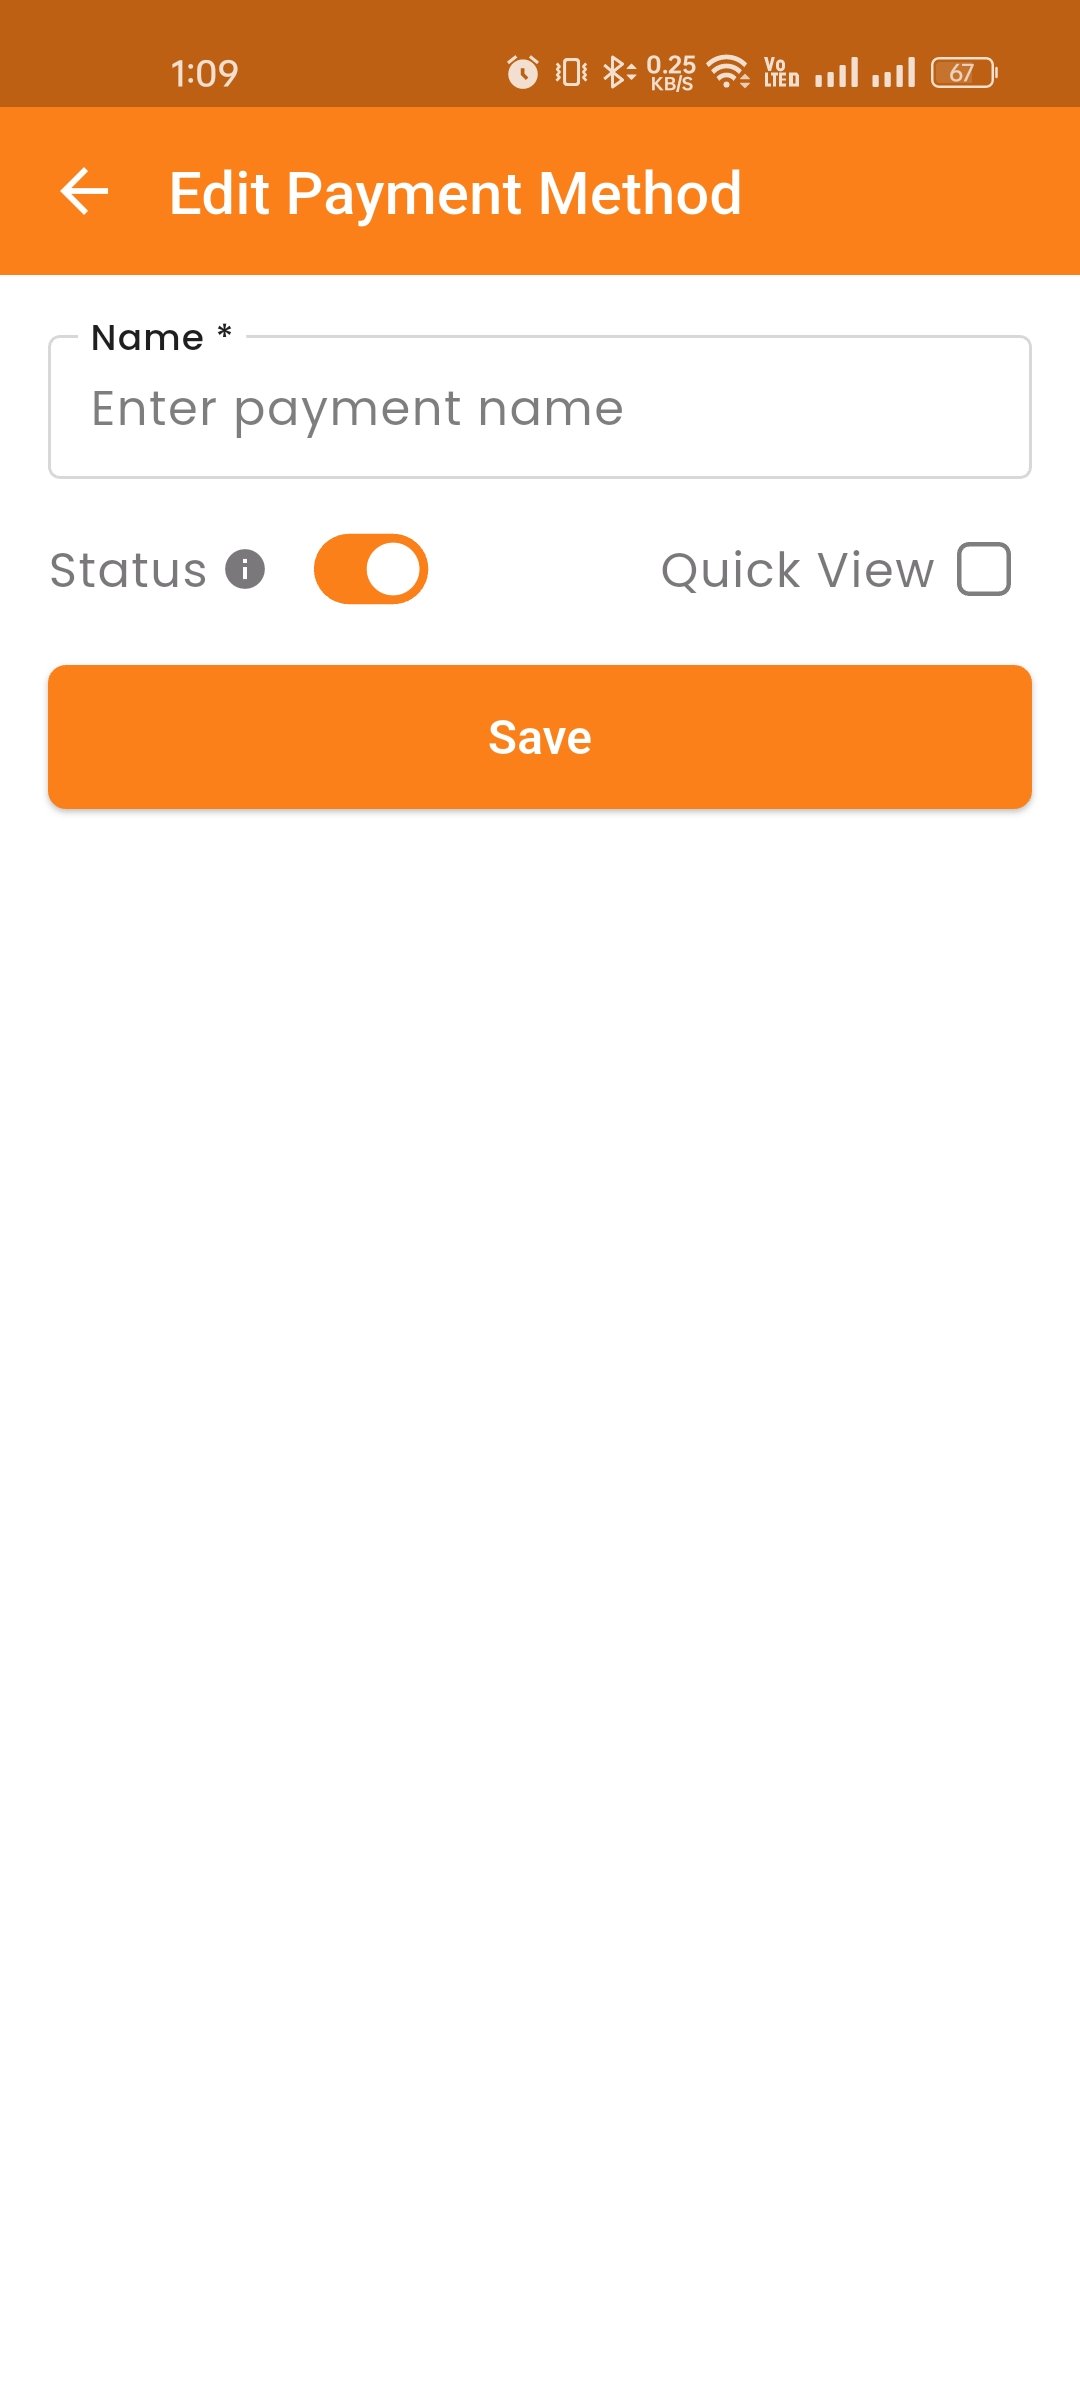
Roles & Permissions
Manage user roles and configure permissions for different staff members.
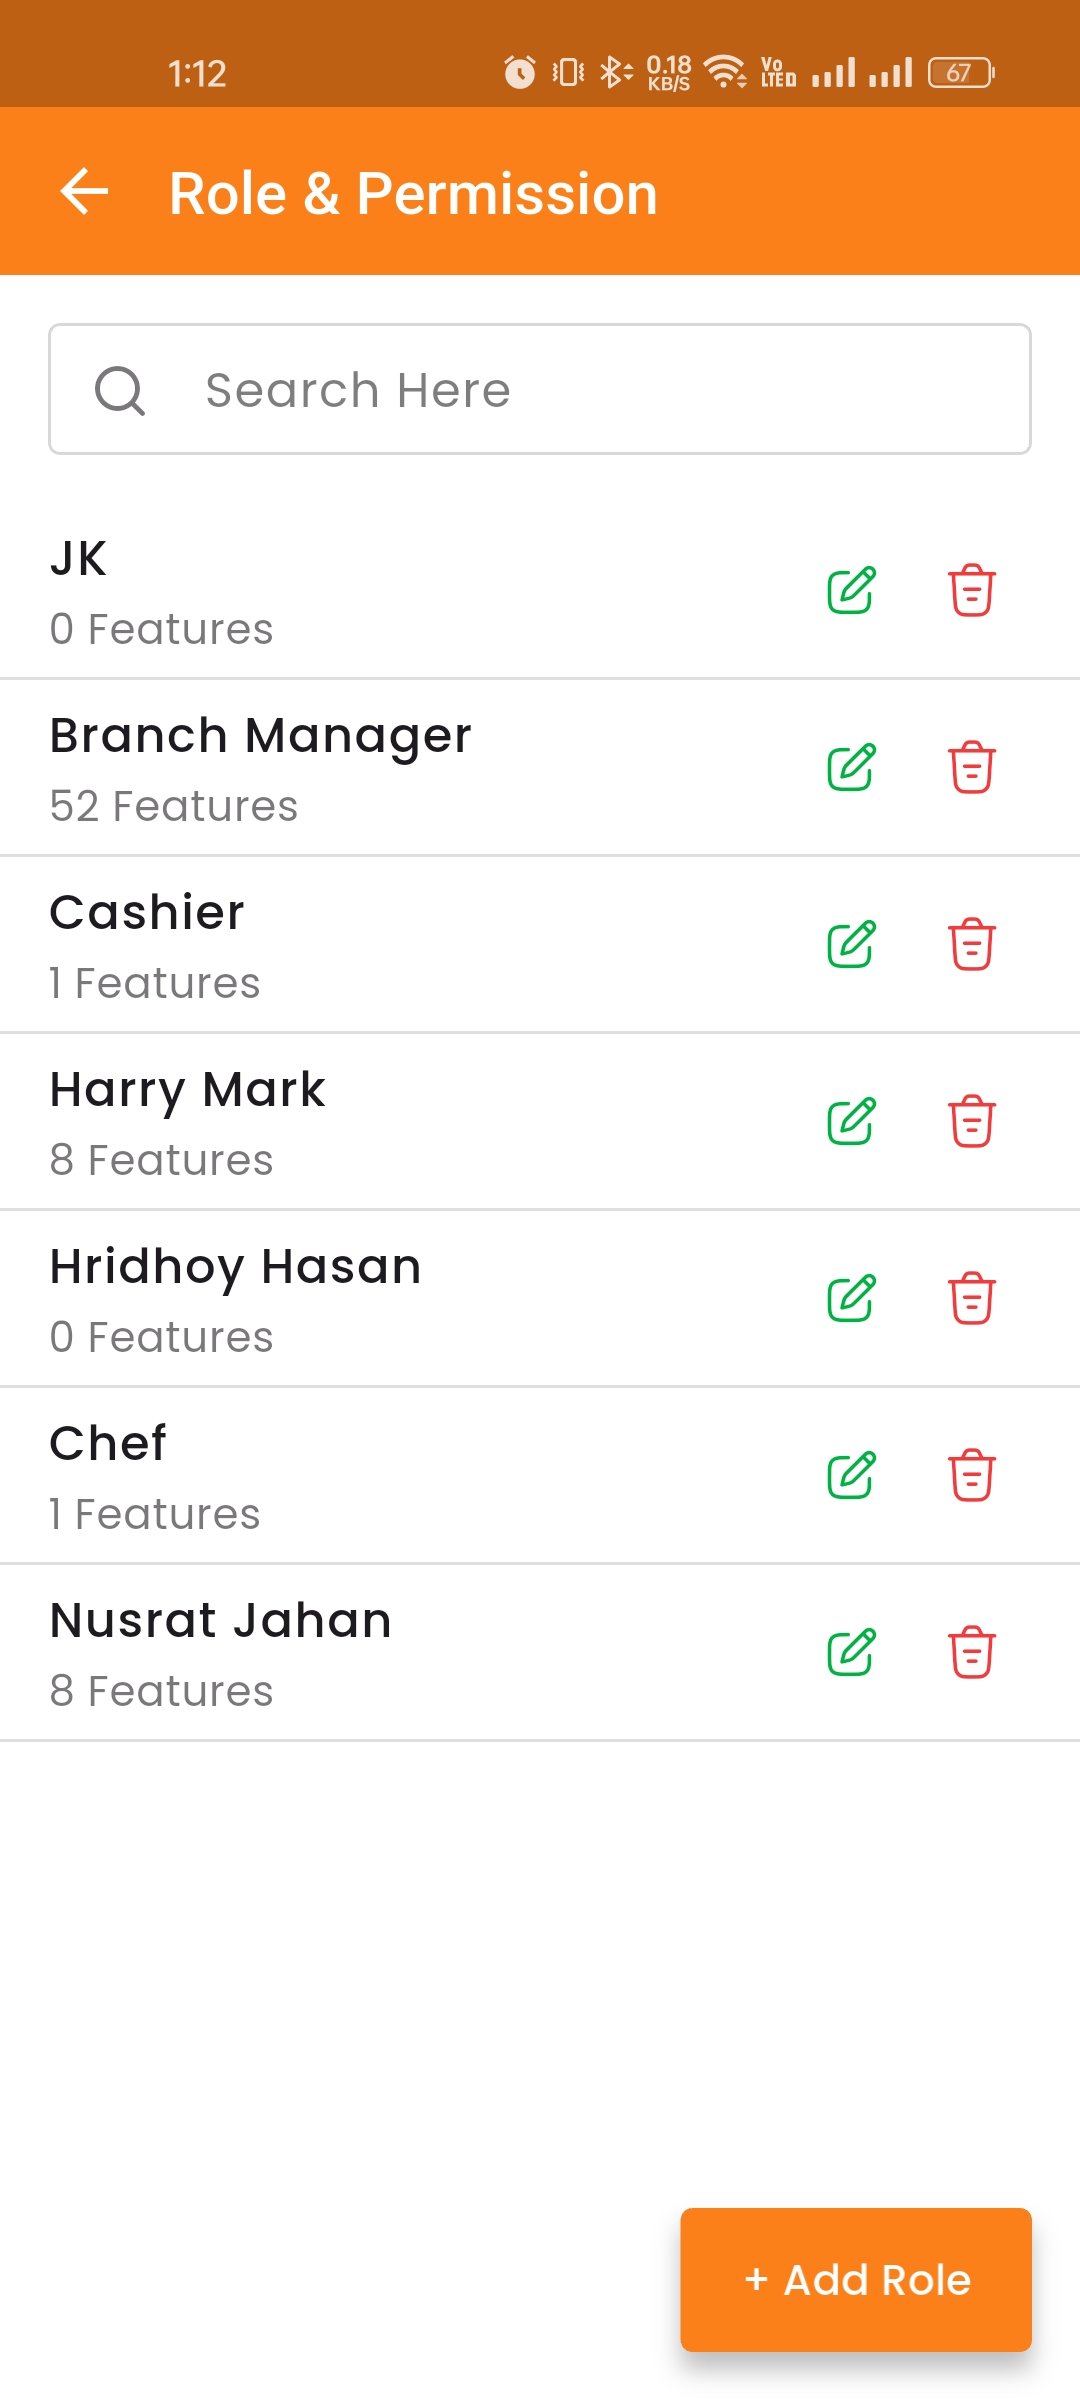
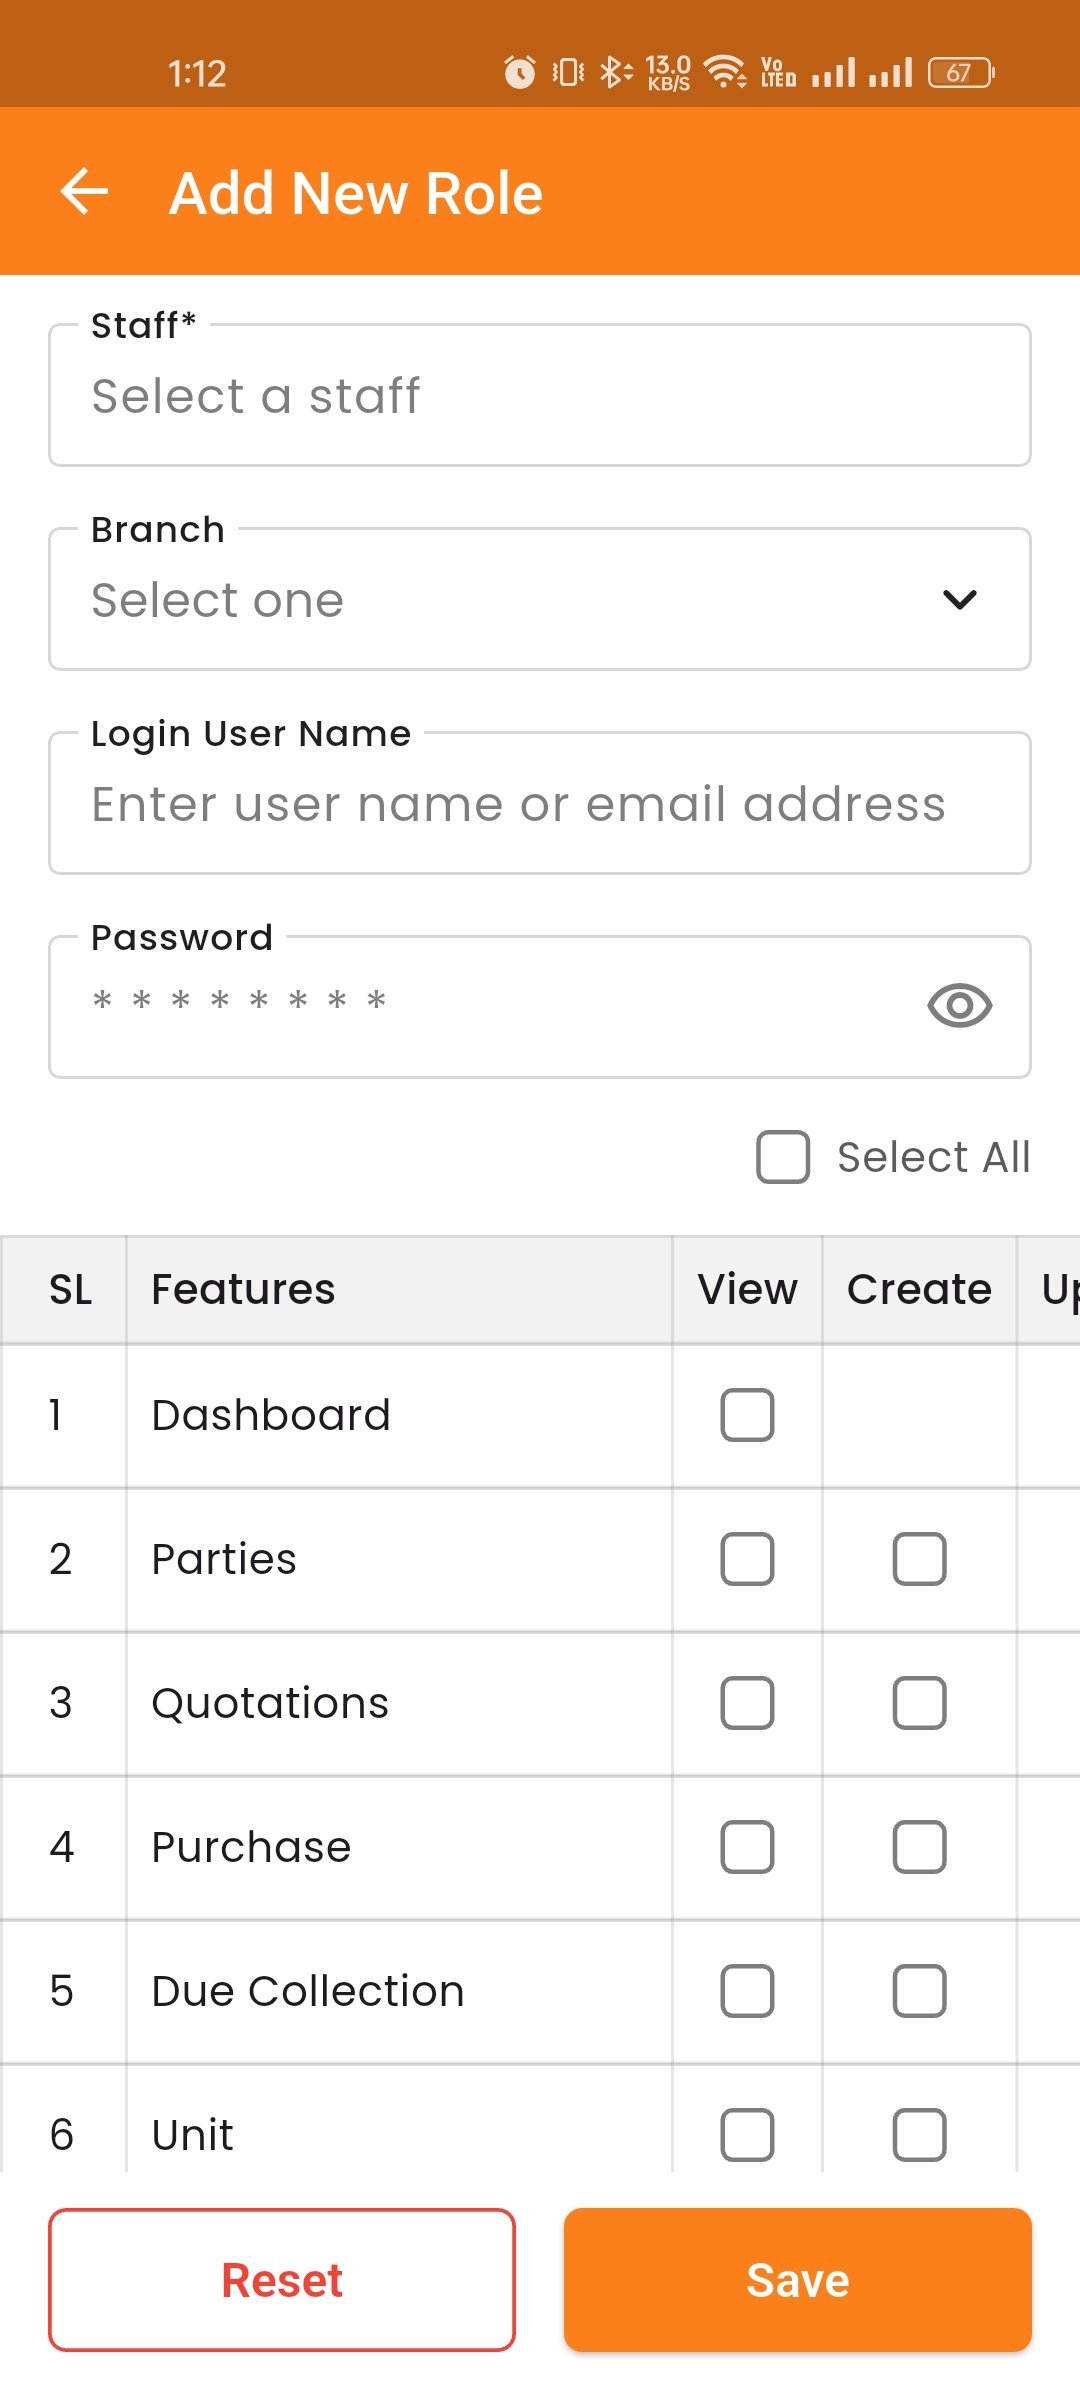
About, Terms & Privacy
View about us, terms of service and privacy policy of the application.
Logout
To log out of your account, click the "Logout" option from the menu. You will be securely logged out of the Restaurant Panel and redirected to the Login Page.
Dashboard
The Dashboard provides an intuitive overview of your restaurant operations. You can view key metrics such as total orders, hold orders, total purchases, total items, and total expenses. The dashboard also provides quick access to recent transaction list.
Key sections accessible from the dashboard include:
- Money In & Out — Show weekly, monthly & yearly reports.
- Profit & Loss — Show overall profit & loss reports.
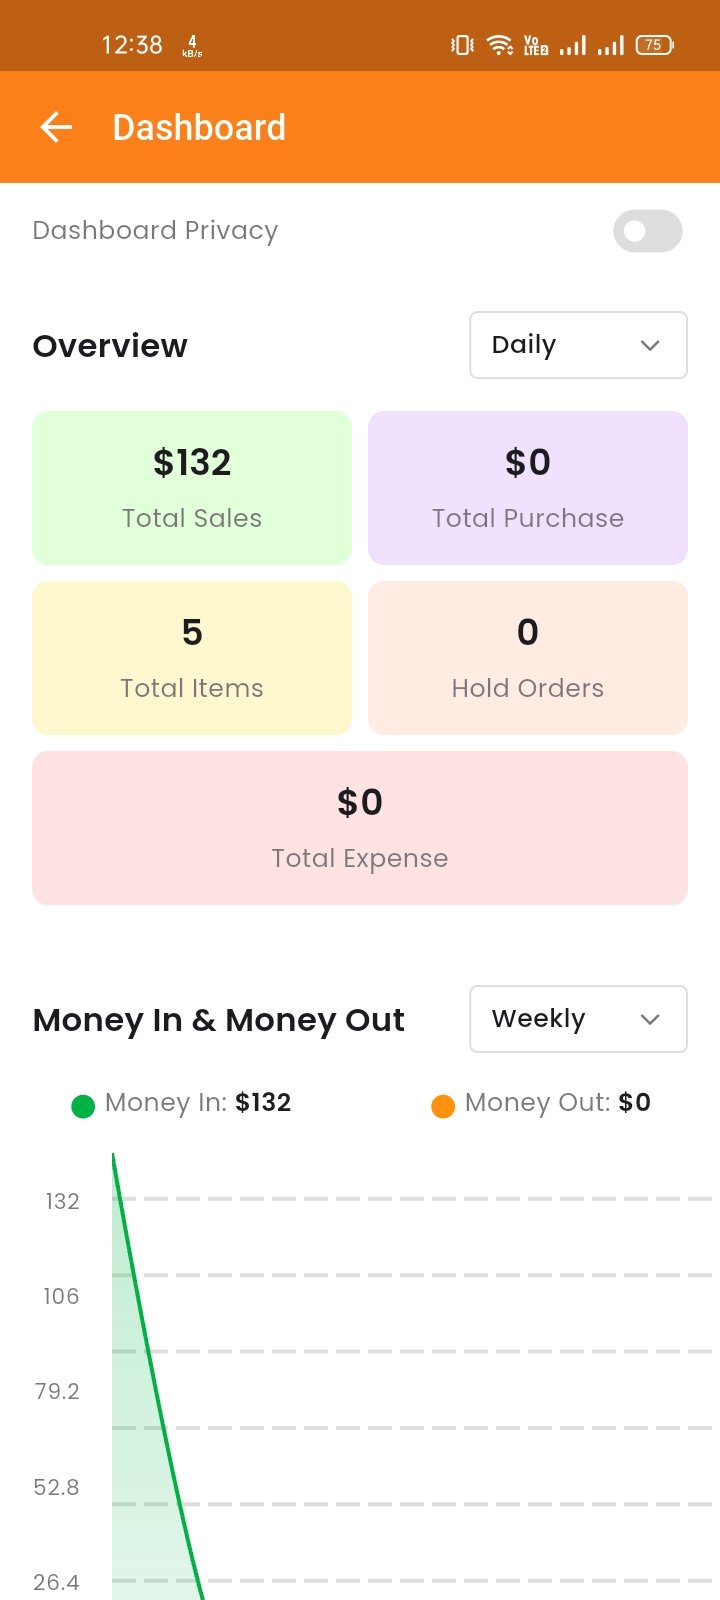
Parties
By clicking the "Parties" button, you can view a list of all parties. You can also switch between the available tabs to view Customers and Suppliers separately. For suppliers, you can create, edit, and delete supplier information. You can also easily find specific suppliers using the search options.
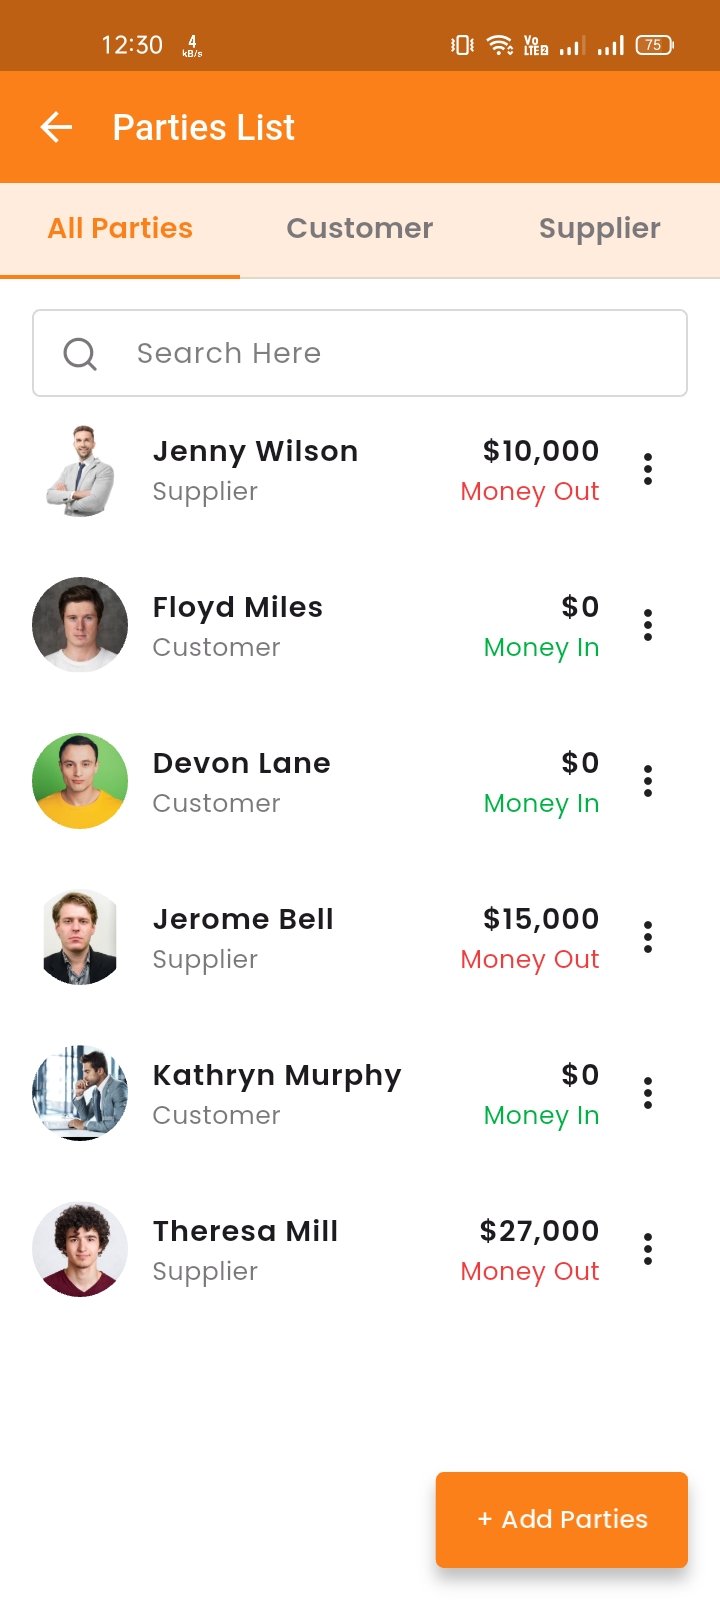
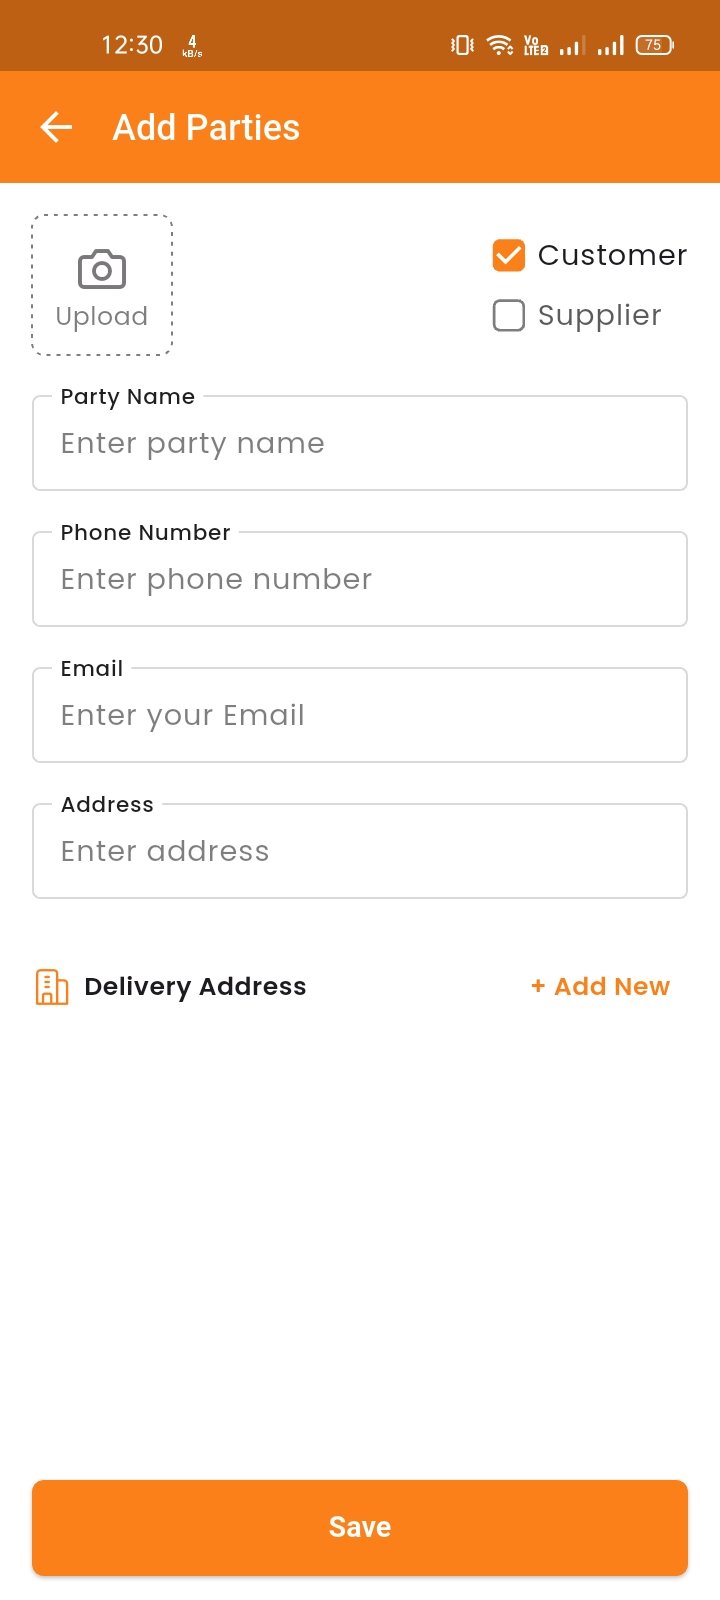
Subscription
Here, you can view your current plan status along with all other available plans. You can also upgrade your plan from this page.
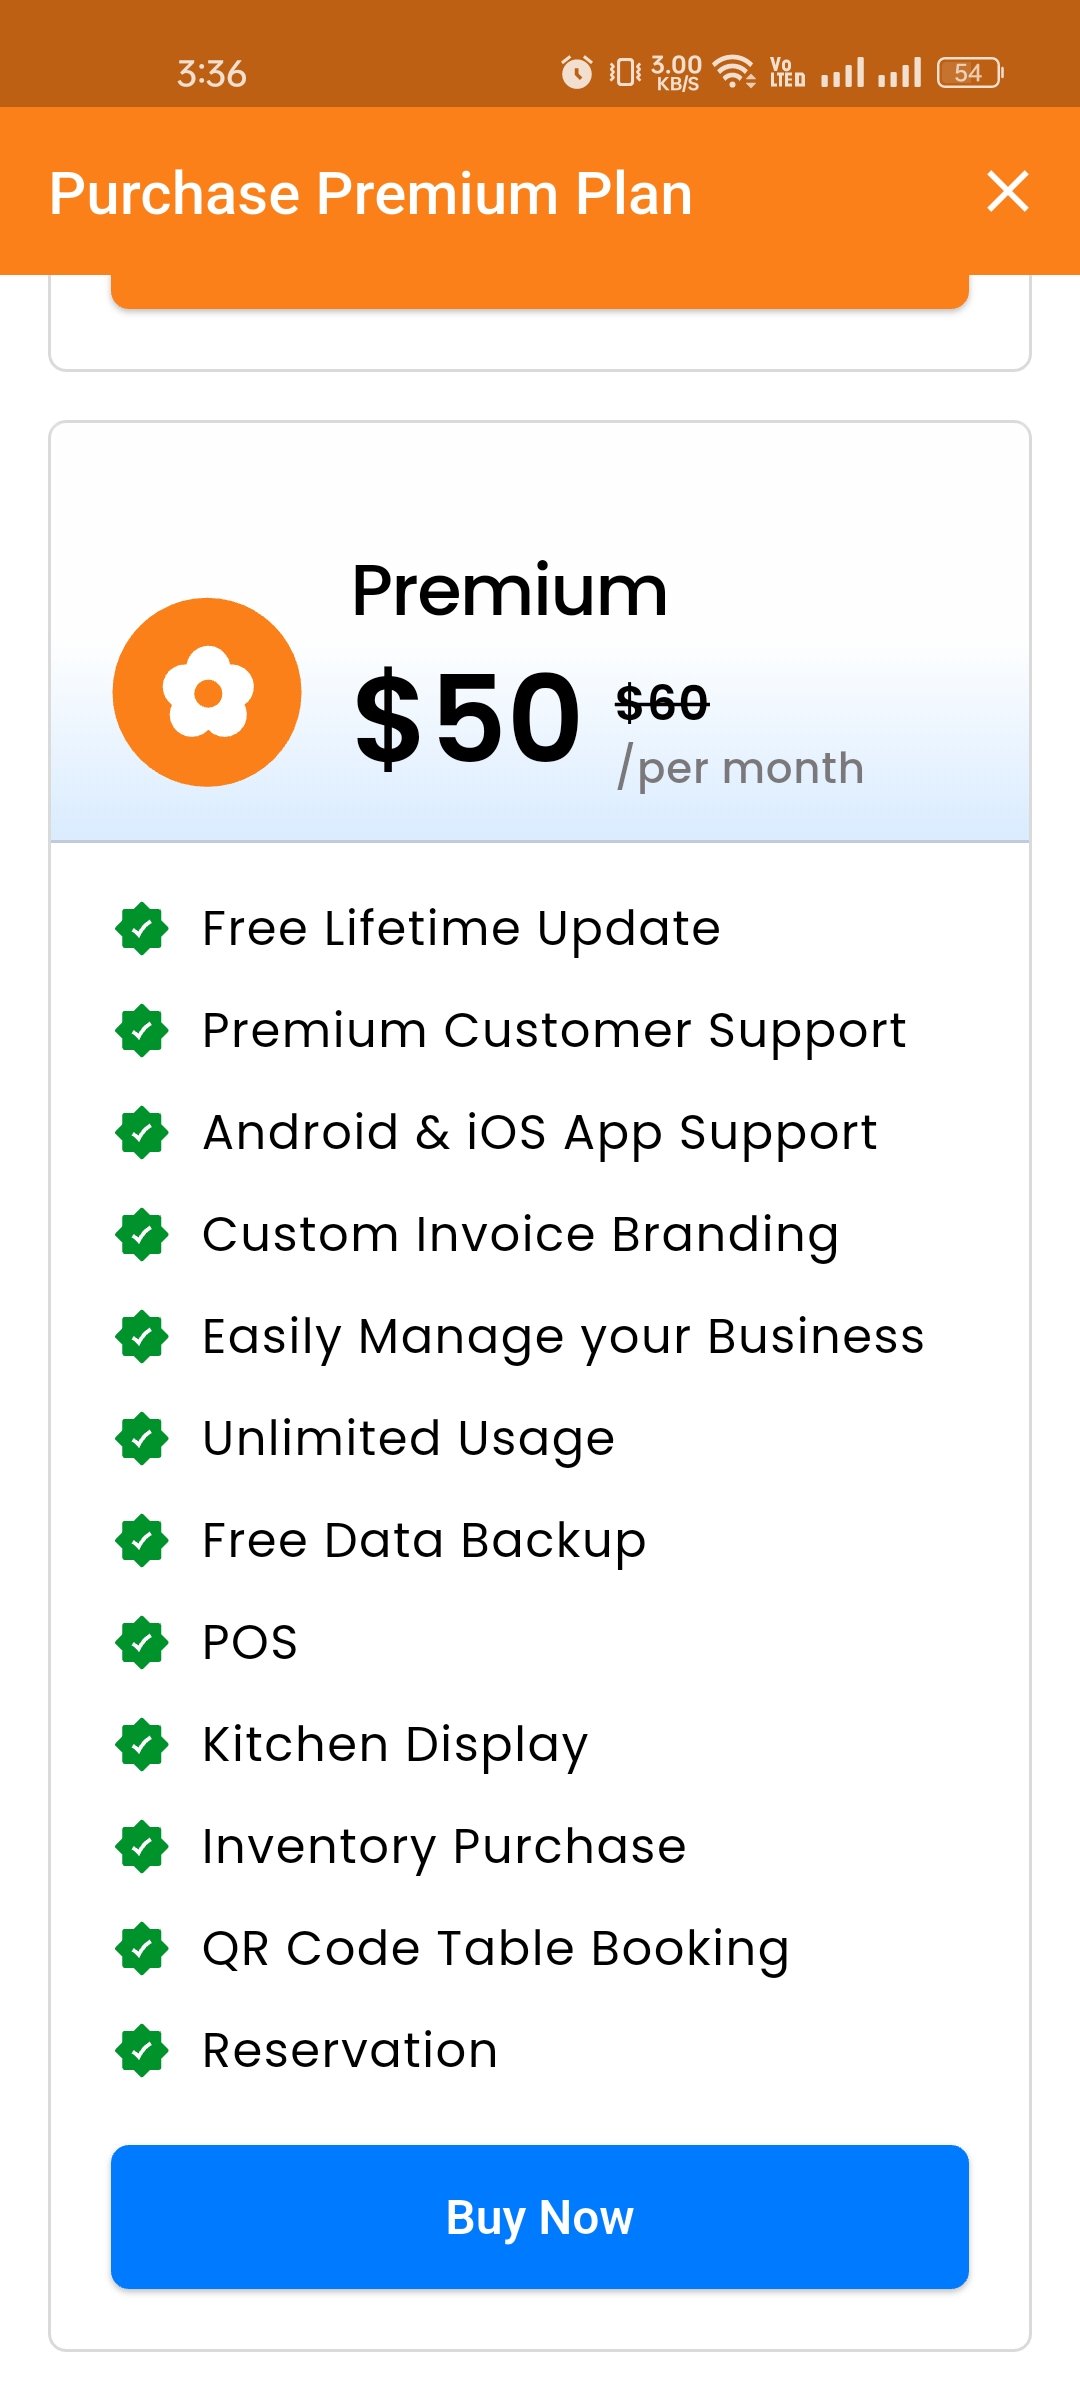
Payment
After choosing your desired plan, click to view the available payment options. Once you complete your payment, your plan will be upgraded.
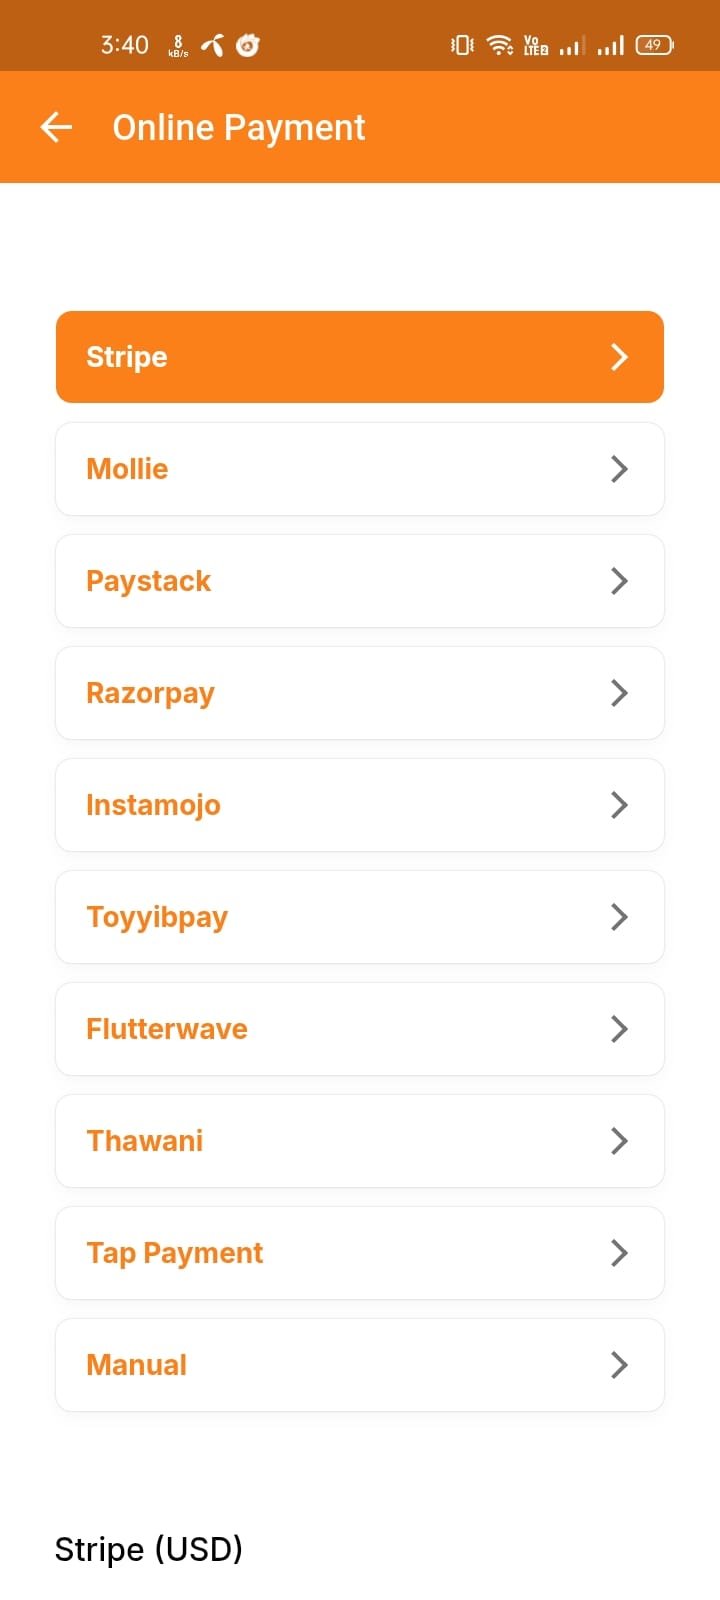
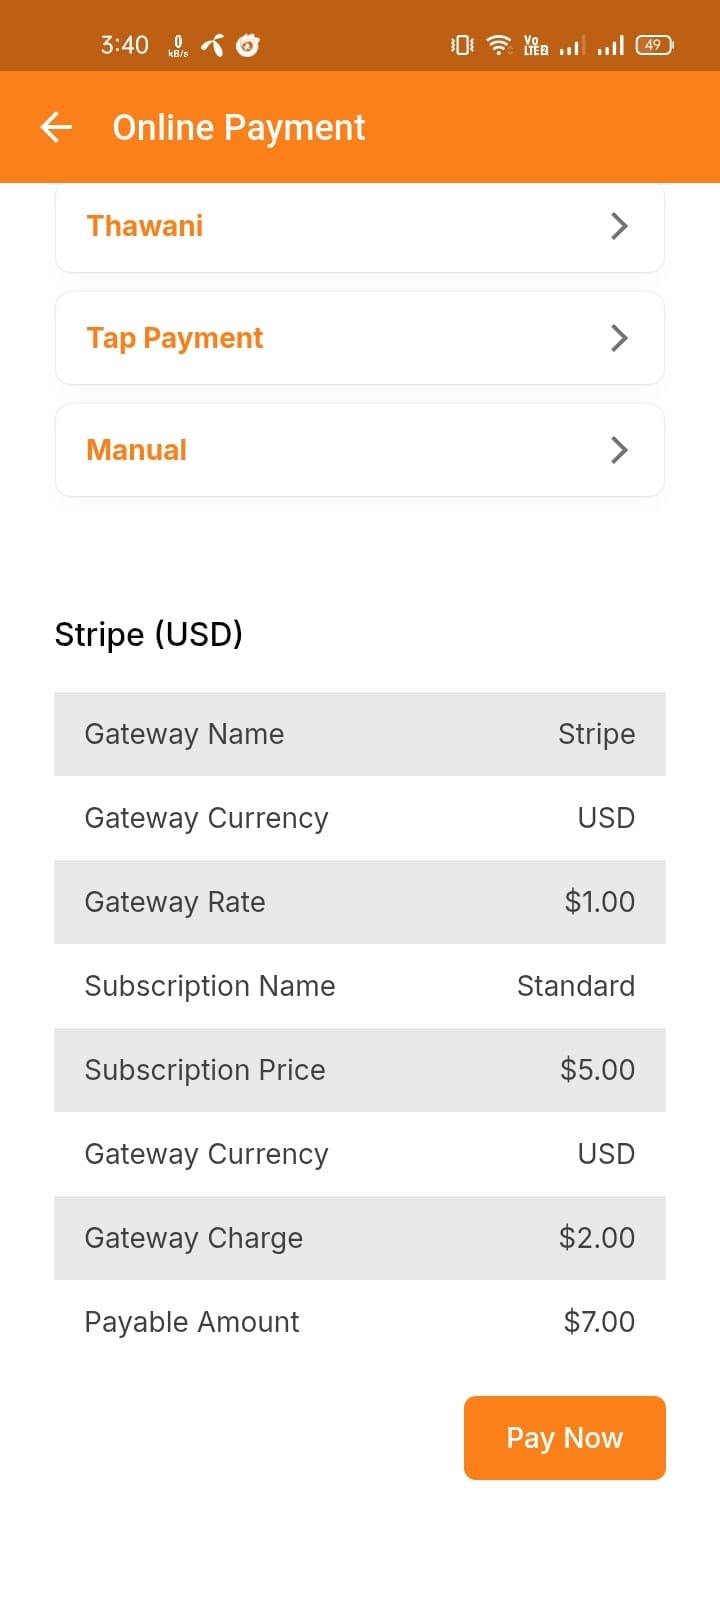
Quotation List
If you select the "Quotation" type while creating an order, it will appear in the Quotations list. Quotations give you a complete overview of the order.
Additionally, you can view quotation invoices, edit, delete, or use the search option. Also you can also easily convert any quotation into an actual order whenever needed.
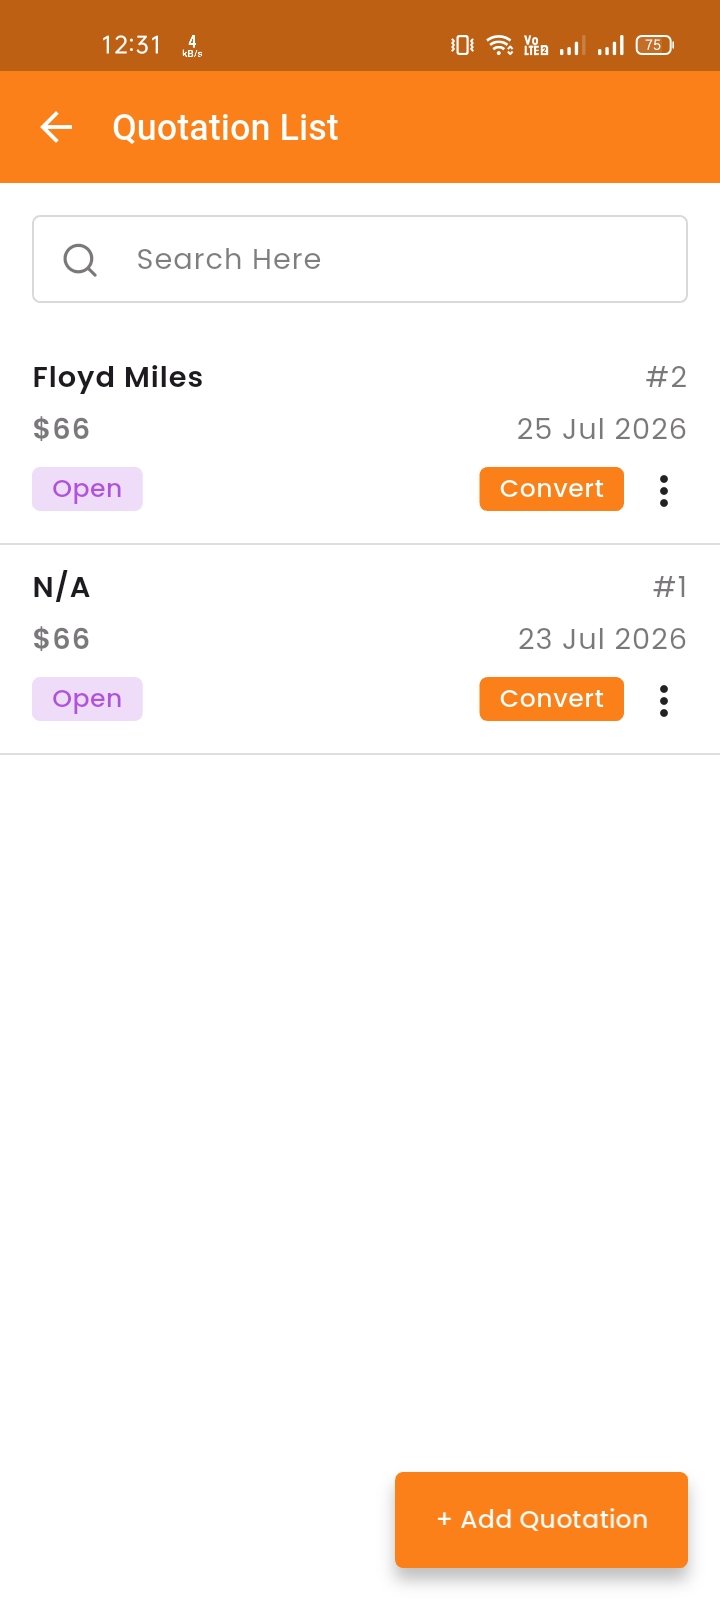
Purchase List
View the Purchase list with search options. You can view invoices, edit, delete, or view incoices.
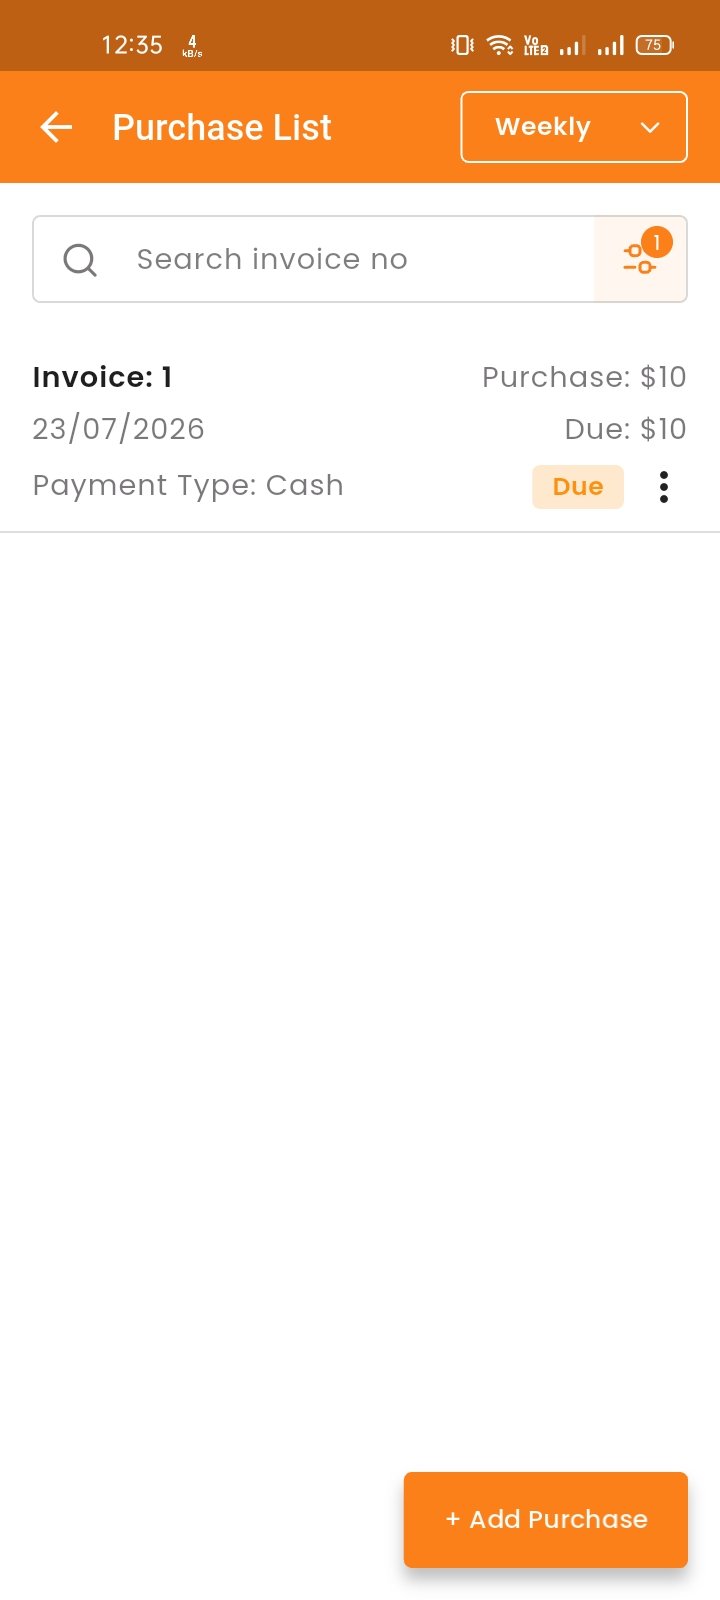
Create Purchase
By clicking on "Add Purchase", you can create a new purchase. First, select a supplier, then choose an inventory item for the purchase. Additionally, you can create new items and suppliers instantly.
Select an item for the purchase. Once selected, the item will automatically appear in the cart list. You can adjust the quantity and remove items. Enter the "Pay Amount" and if it is less than the total, the difference will be shown as "Due". Click save to complete the purchase.
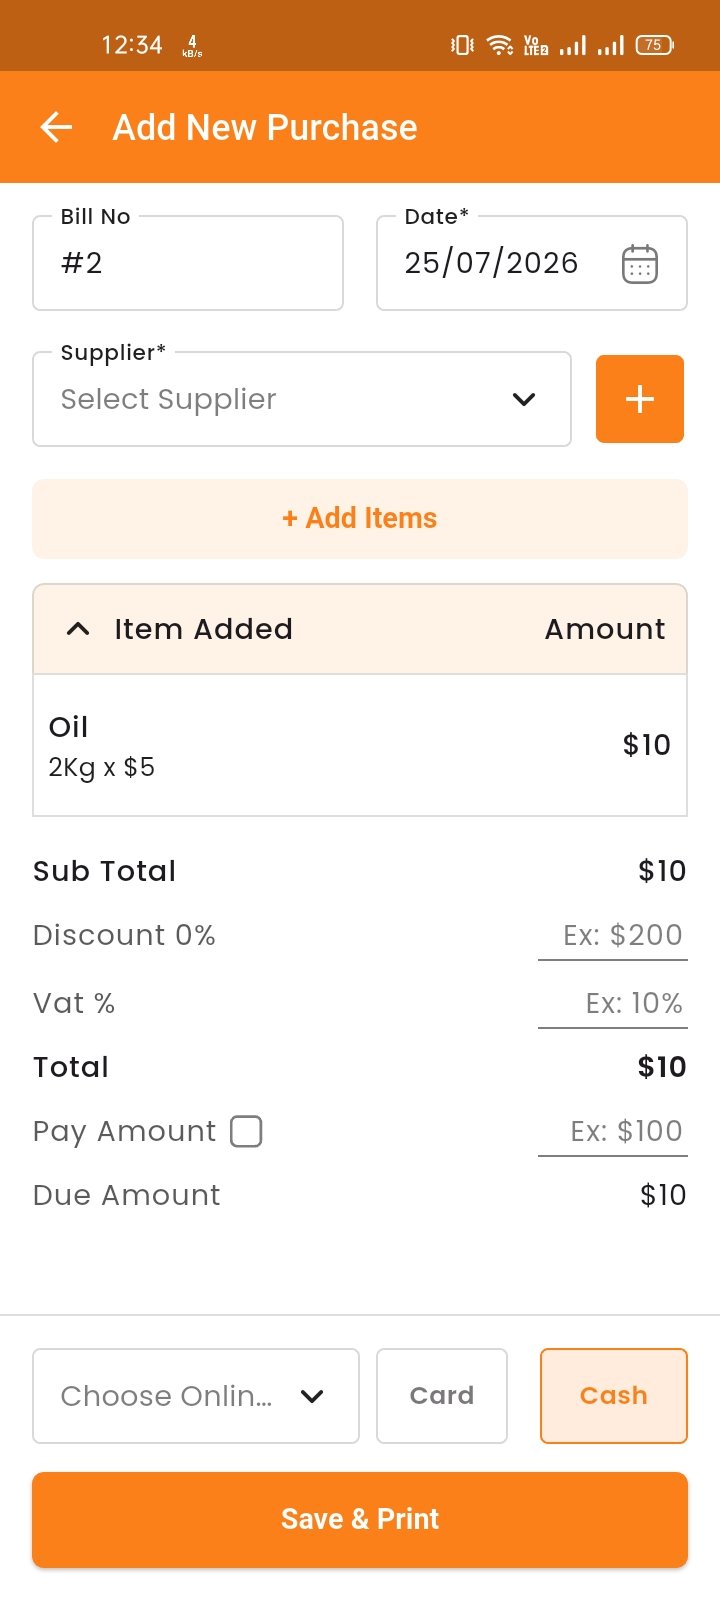
Inventory Items
The Inventory module helps you track stock quantities, manage ingredient costs, define recipes for menu items, and monitor stock movements.
Manage inventory items with name, category, unit, stock quantity, stock alert, and unit price. Get low-stock alerts for better inventory control.
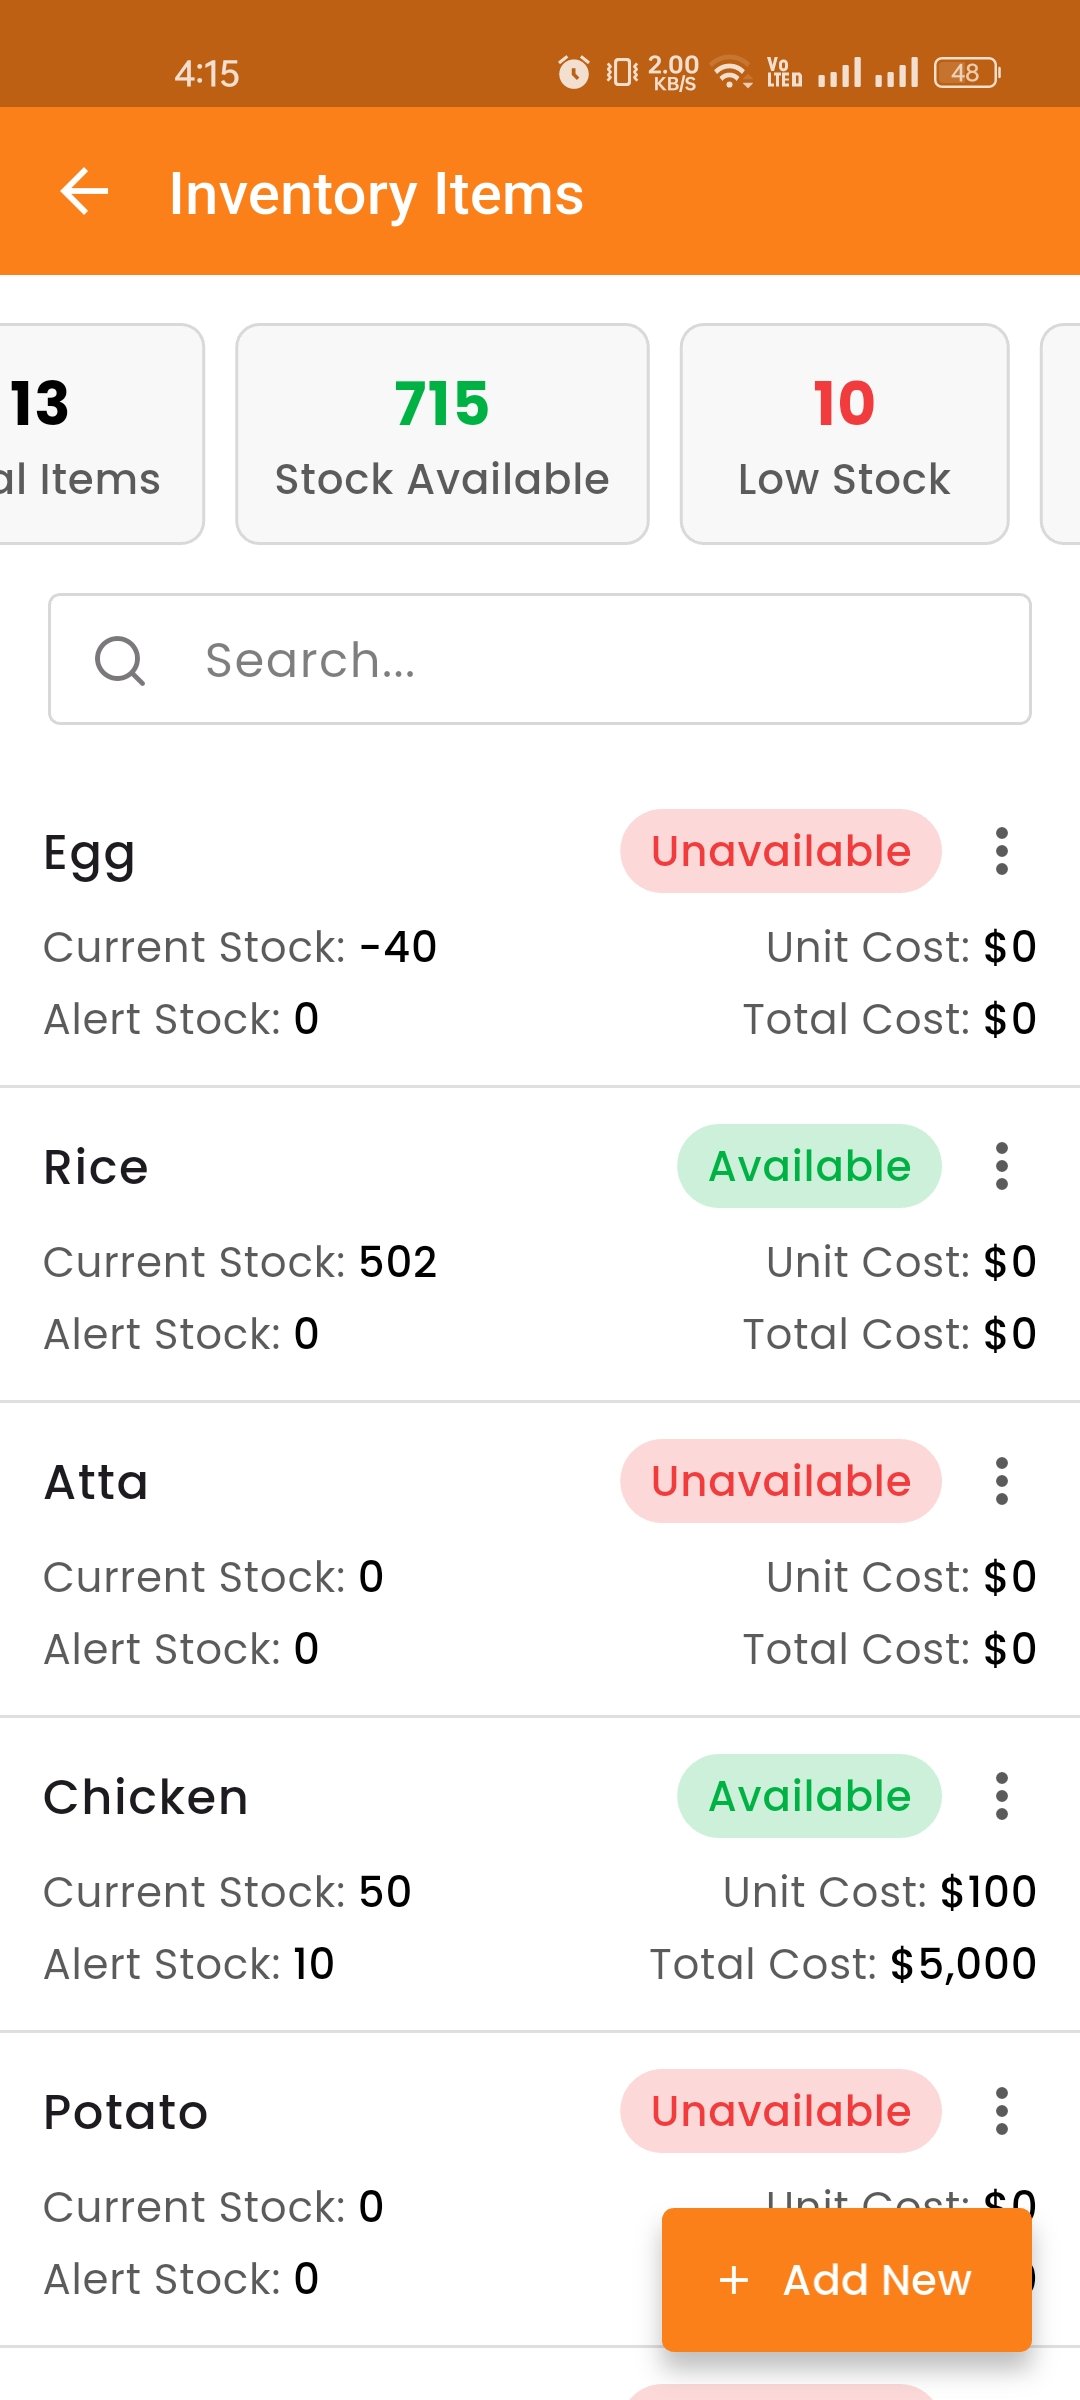
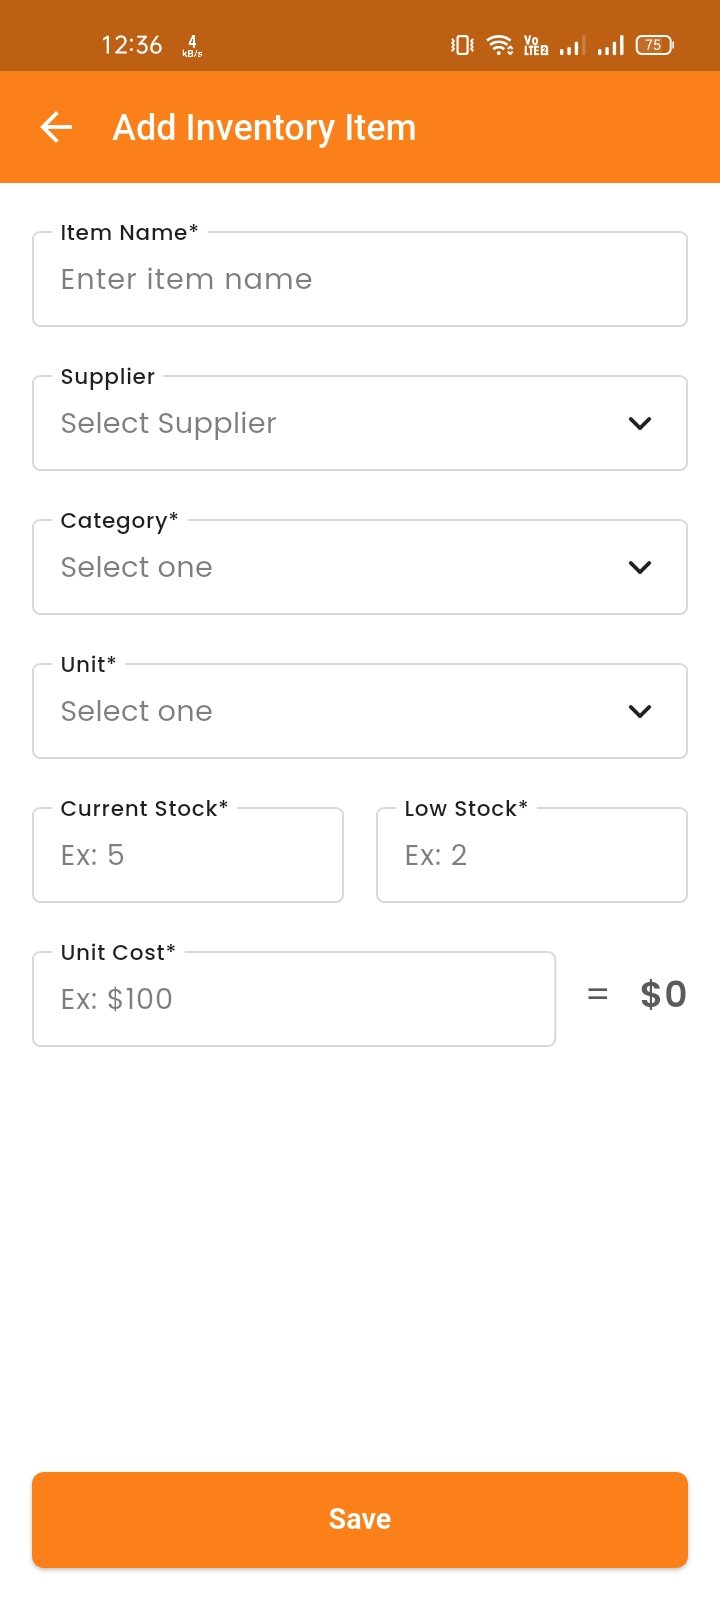
Stock Movements
Add Stock, Update, Track Stock In, Stock Out, Adjustment, and Damage movements. Purchases auto-add stock and sales auto-deduct stock based on recipes.
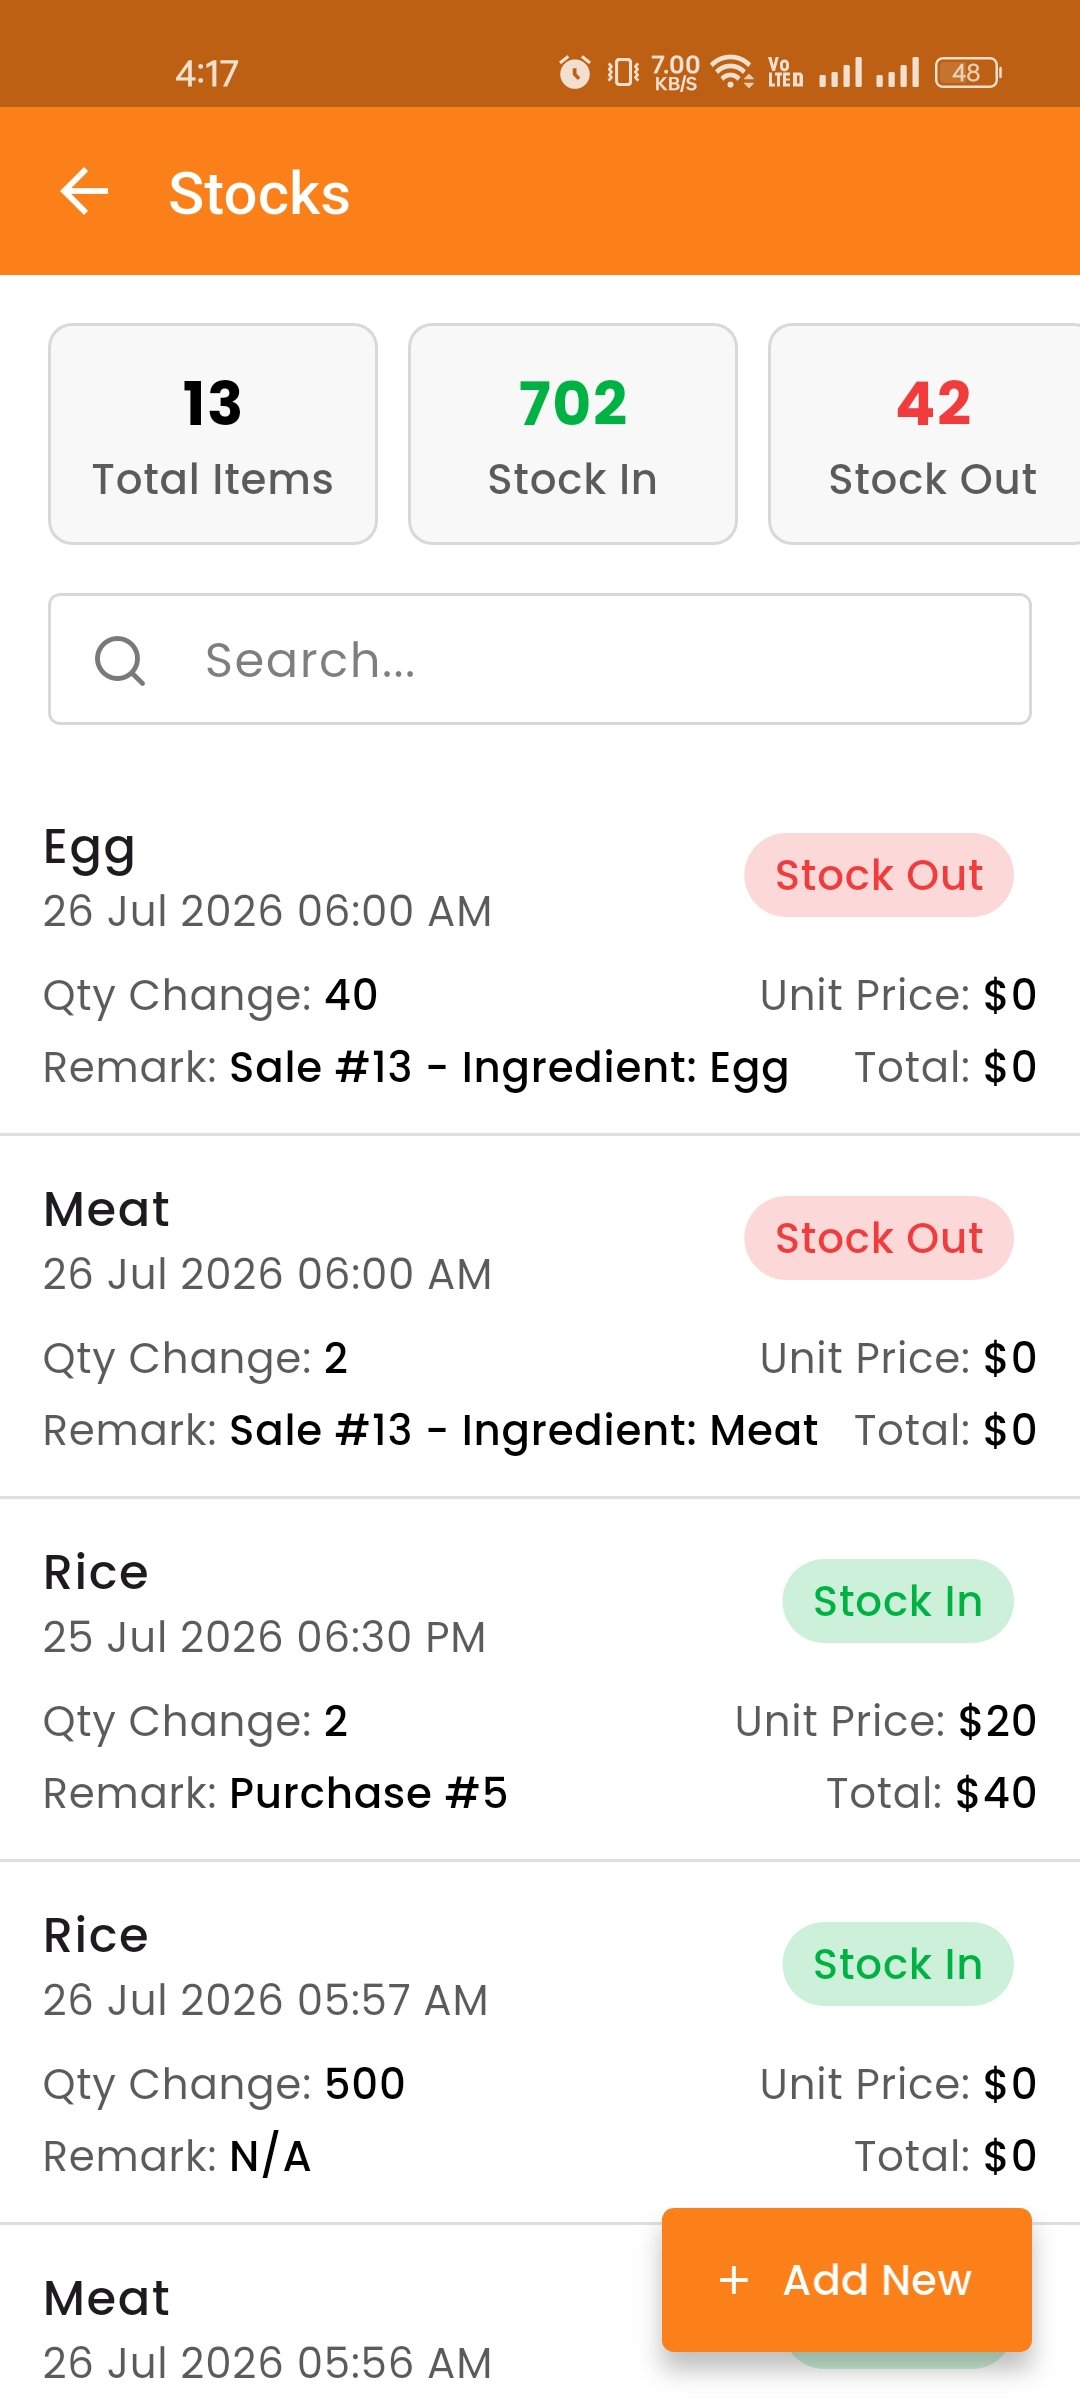
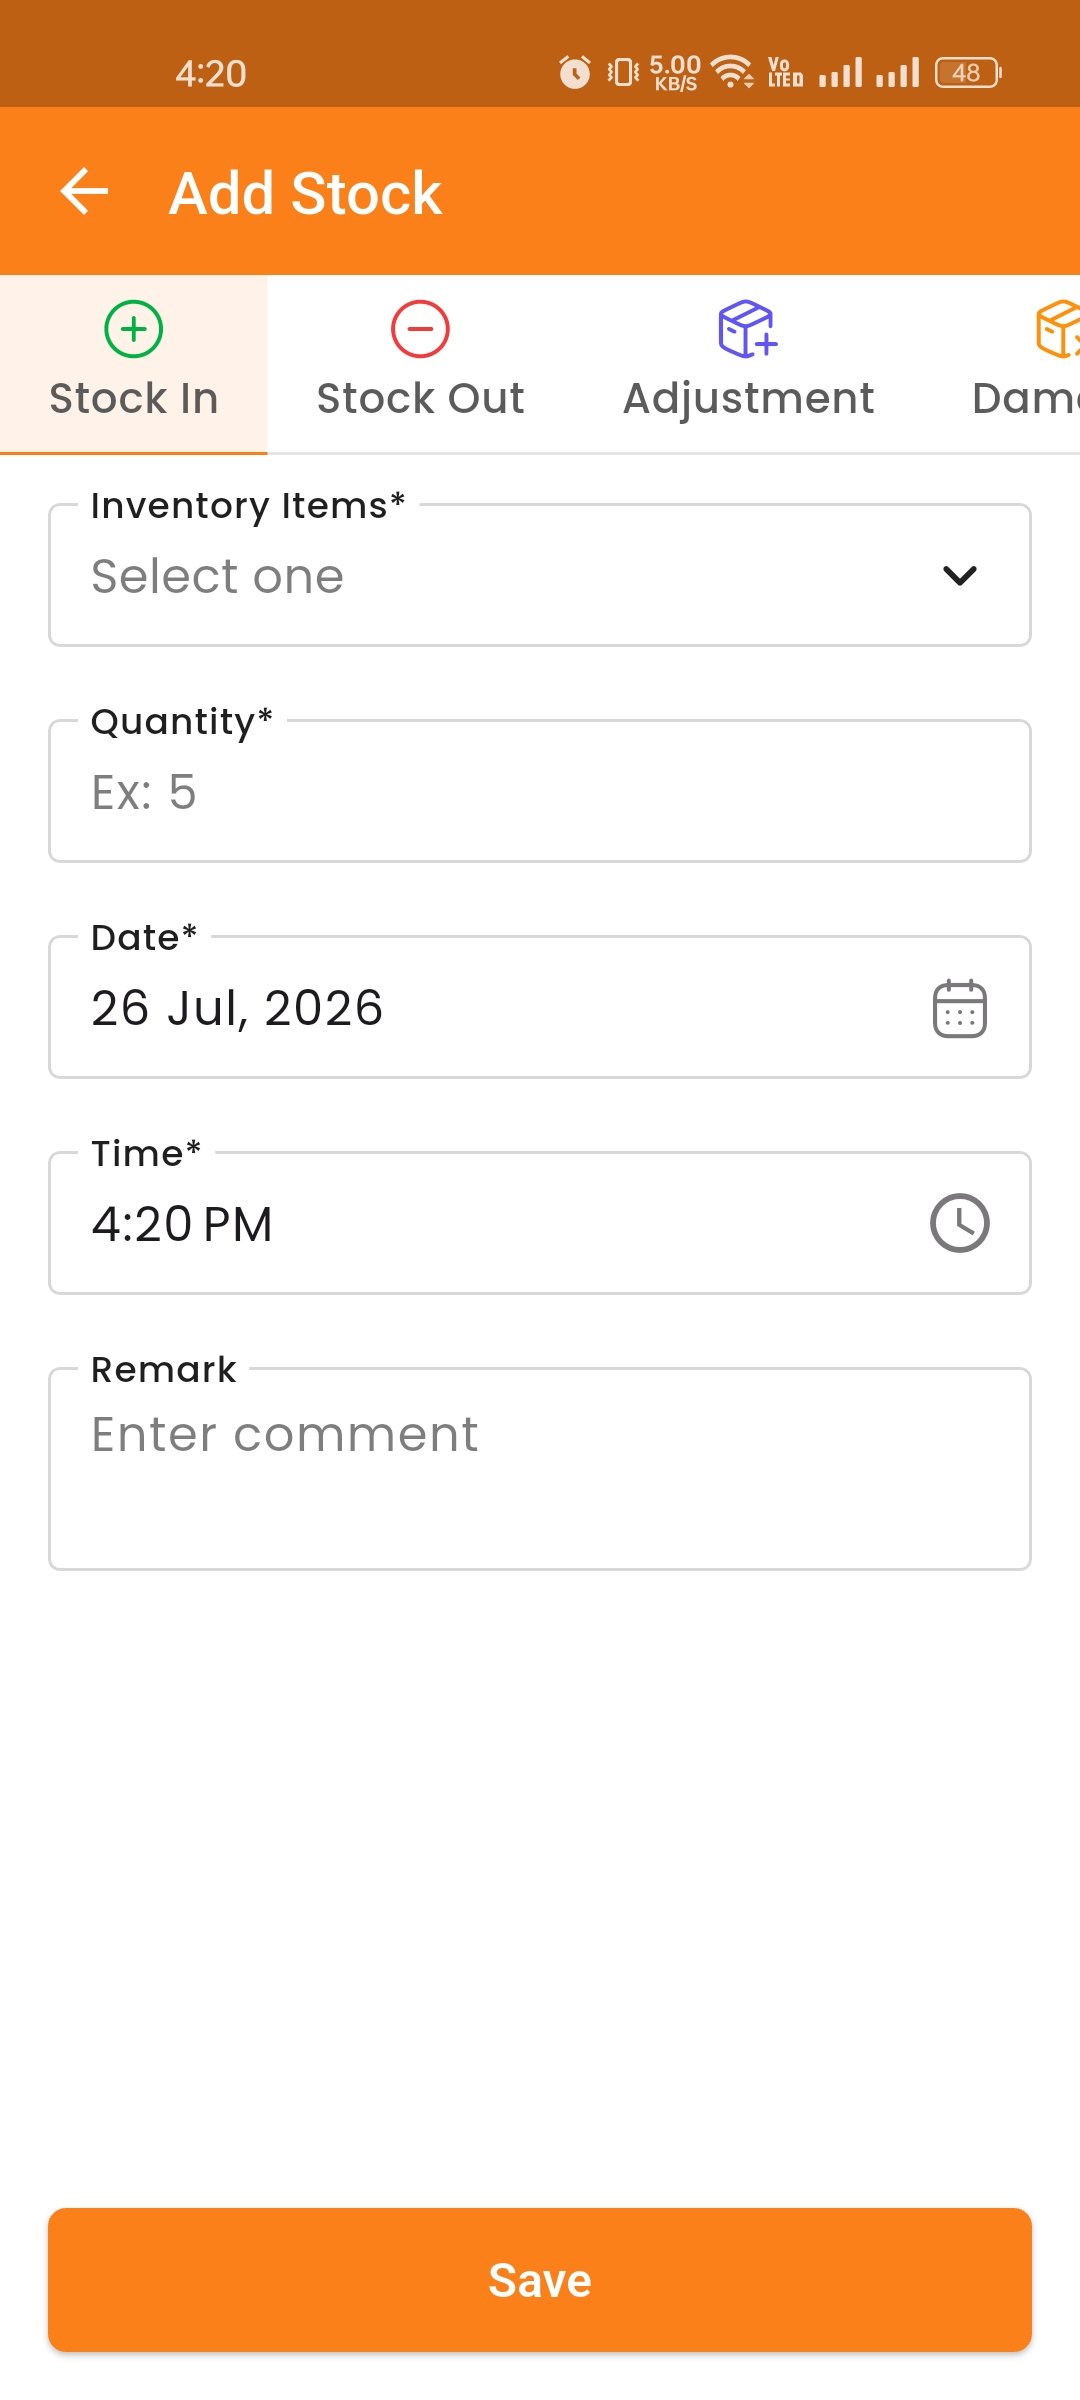
Recipes
The Recipes module lets you define which inventory items and quantities are needed to produce each menu item. For example, if "Chicken Burger" requires 1 bun, 1 chicken patty, and 10g of sauce, you can define that here. When a sale is made, the system automatically deducts the required stock based on the recipe.
You can view the list of all recipes with their associated menu item and ingredient details. Use the search option to quickly find specific recipes.
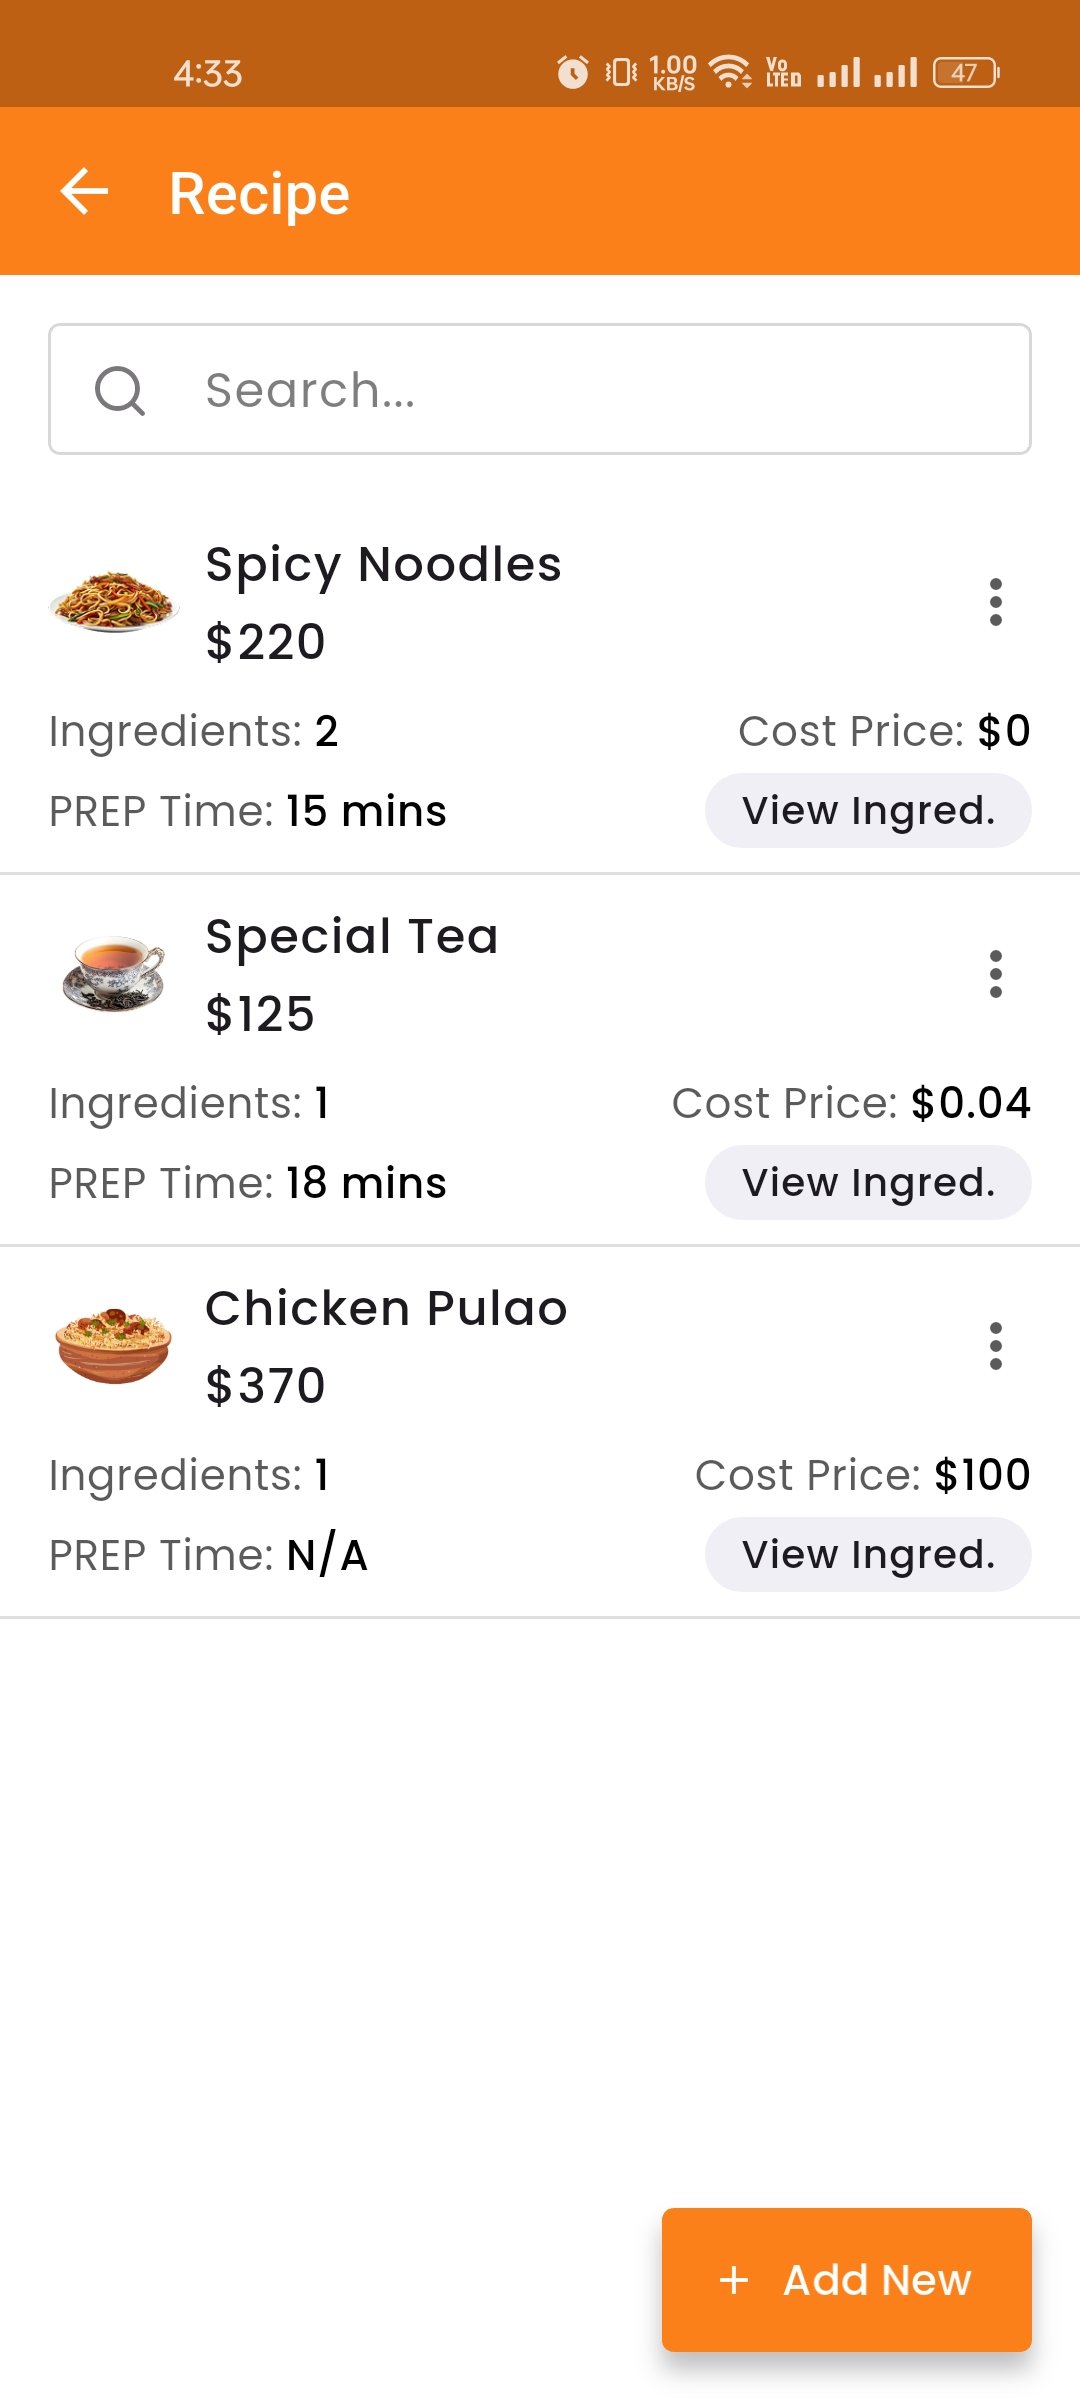
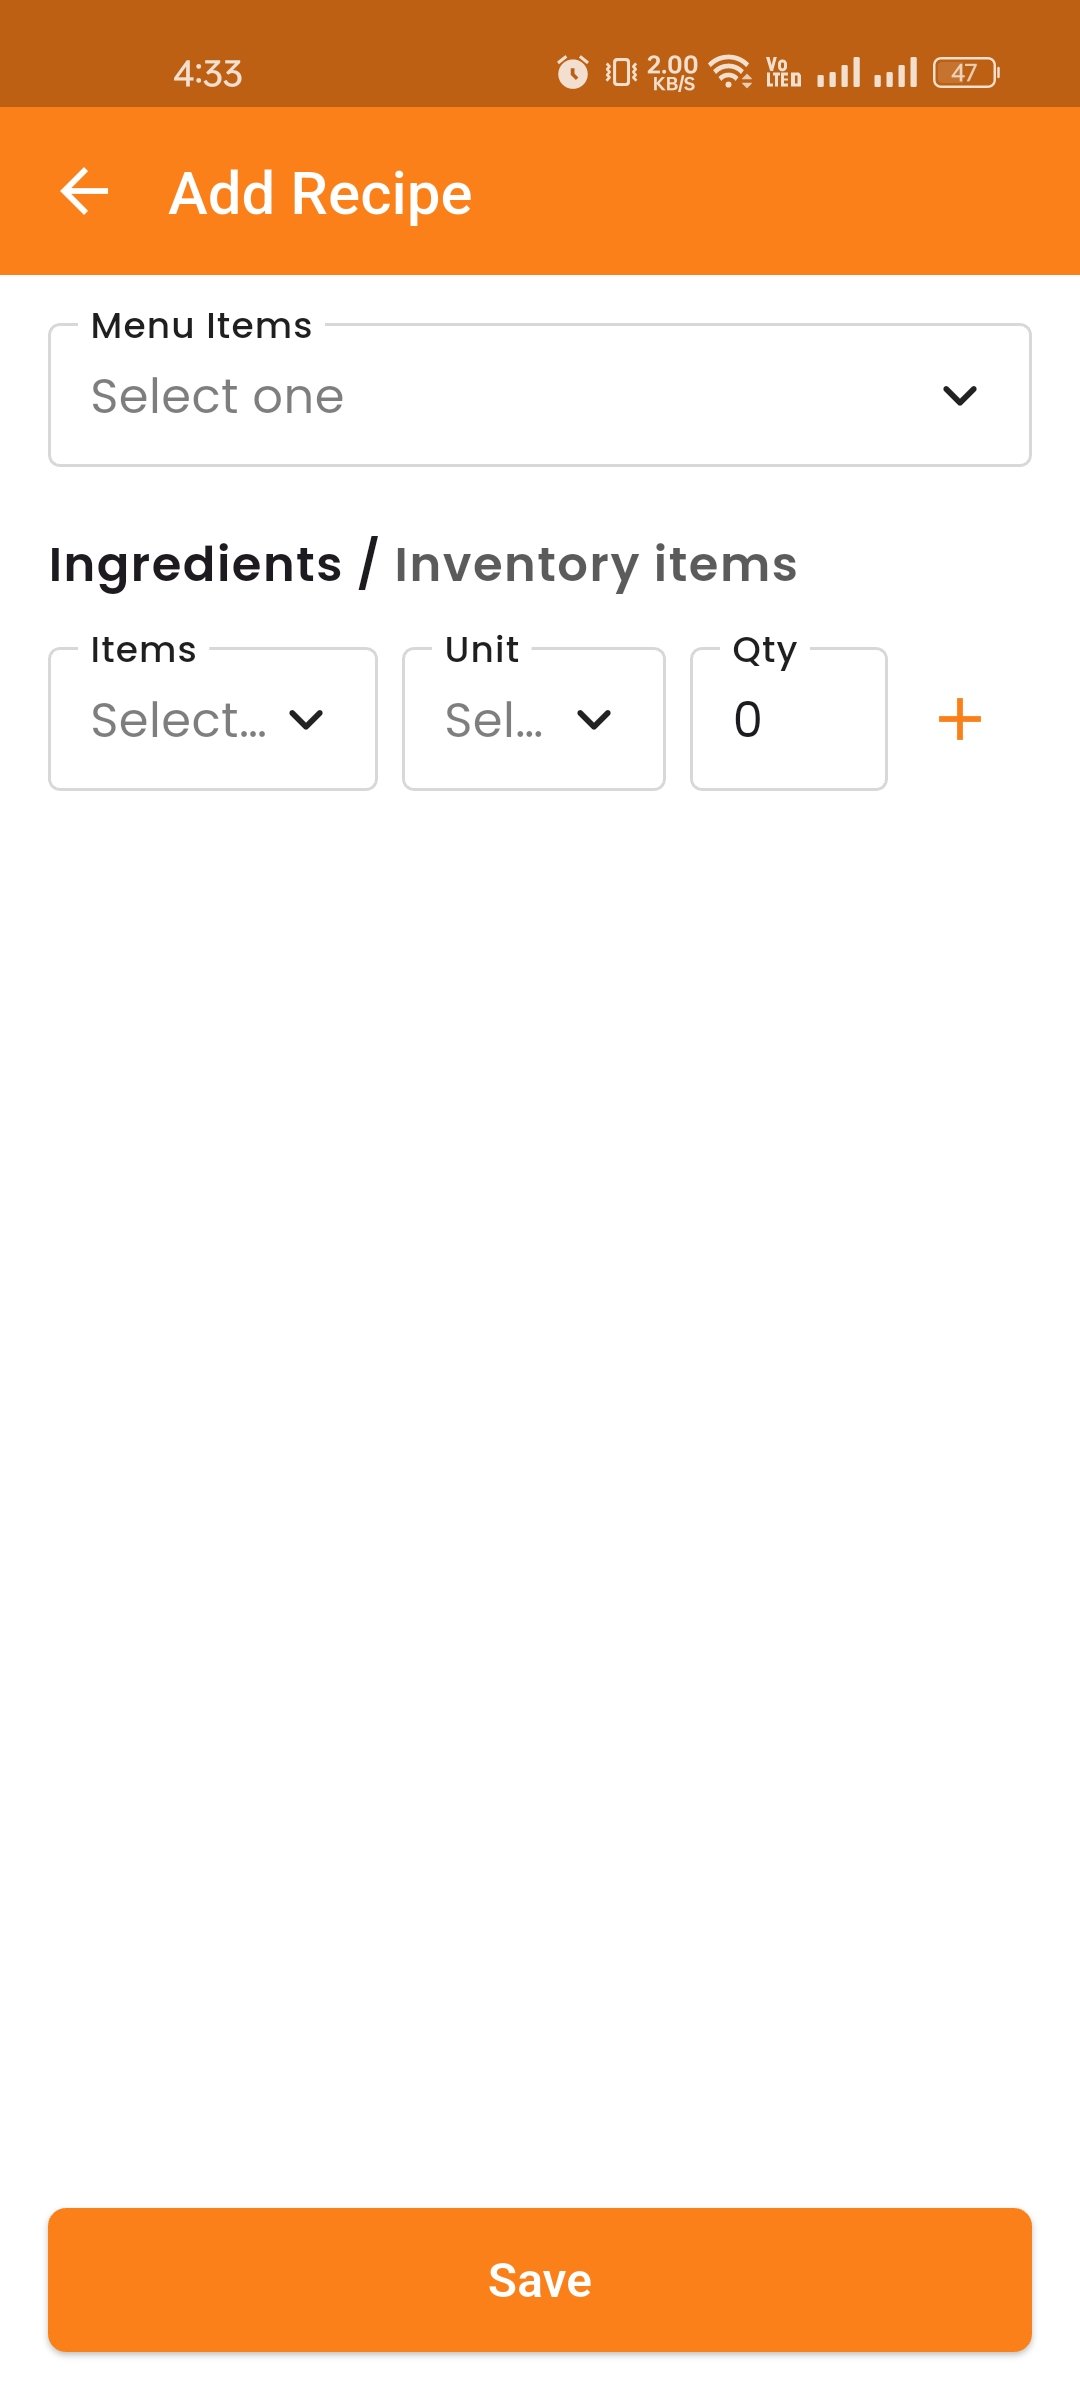
Units
Manage measurement units used across your inventory. Create units like "kg", "litre", "piece", or "gram" and define conversions between them (e.g., 1 kg = 1000 g). This ensures accurate stock tracking when purchasing and using ingredients in different unit measurements.
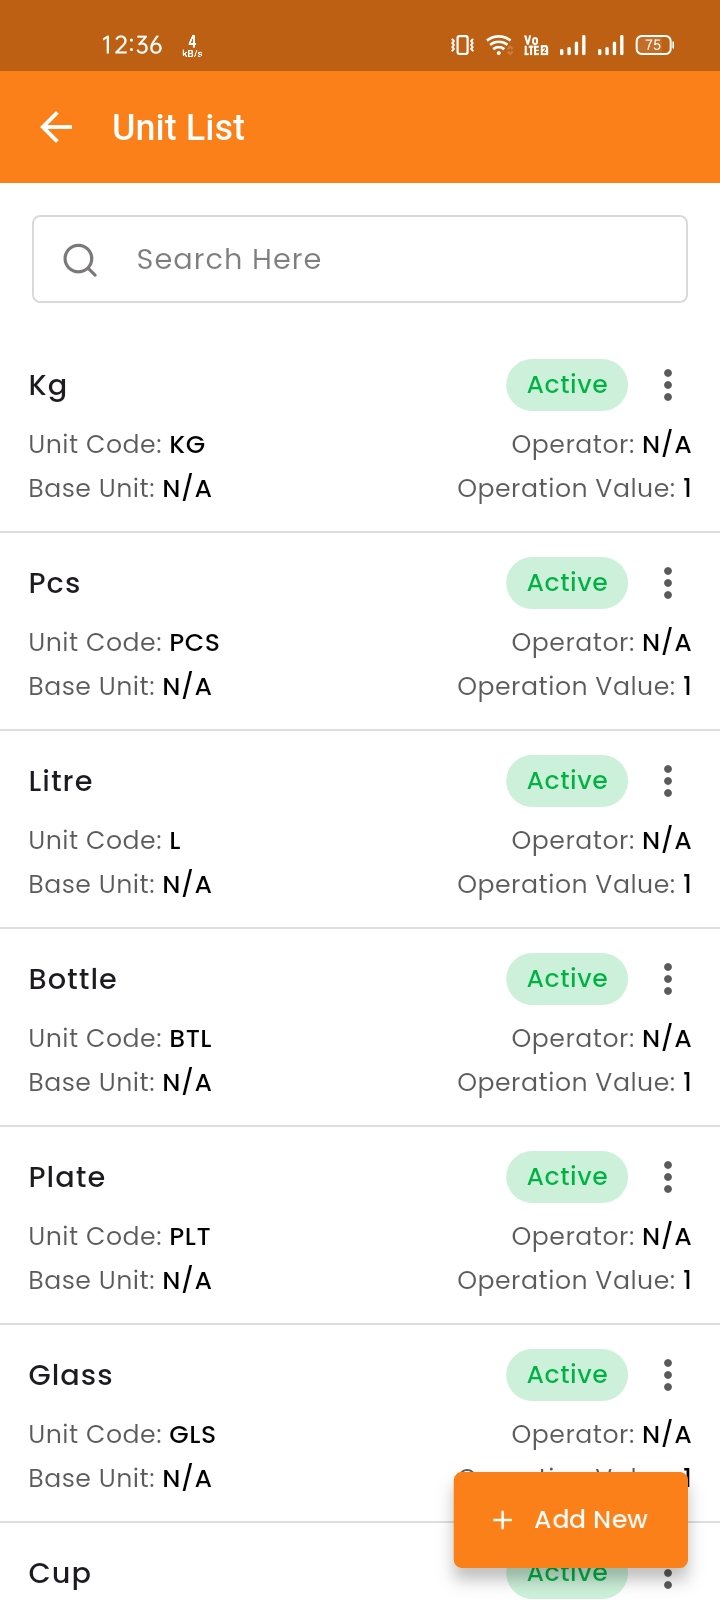
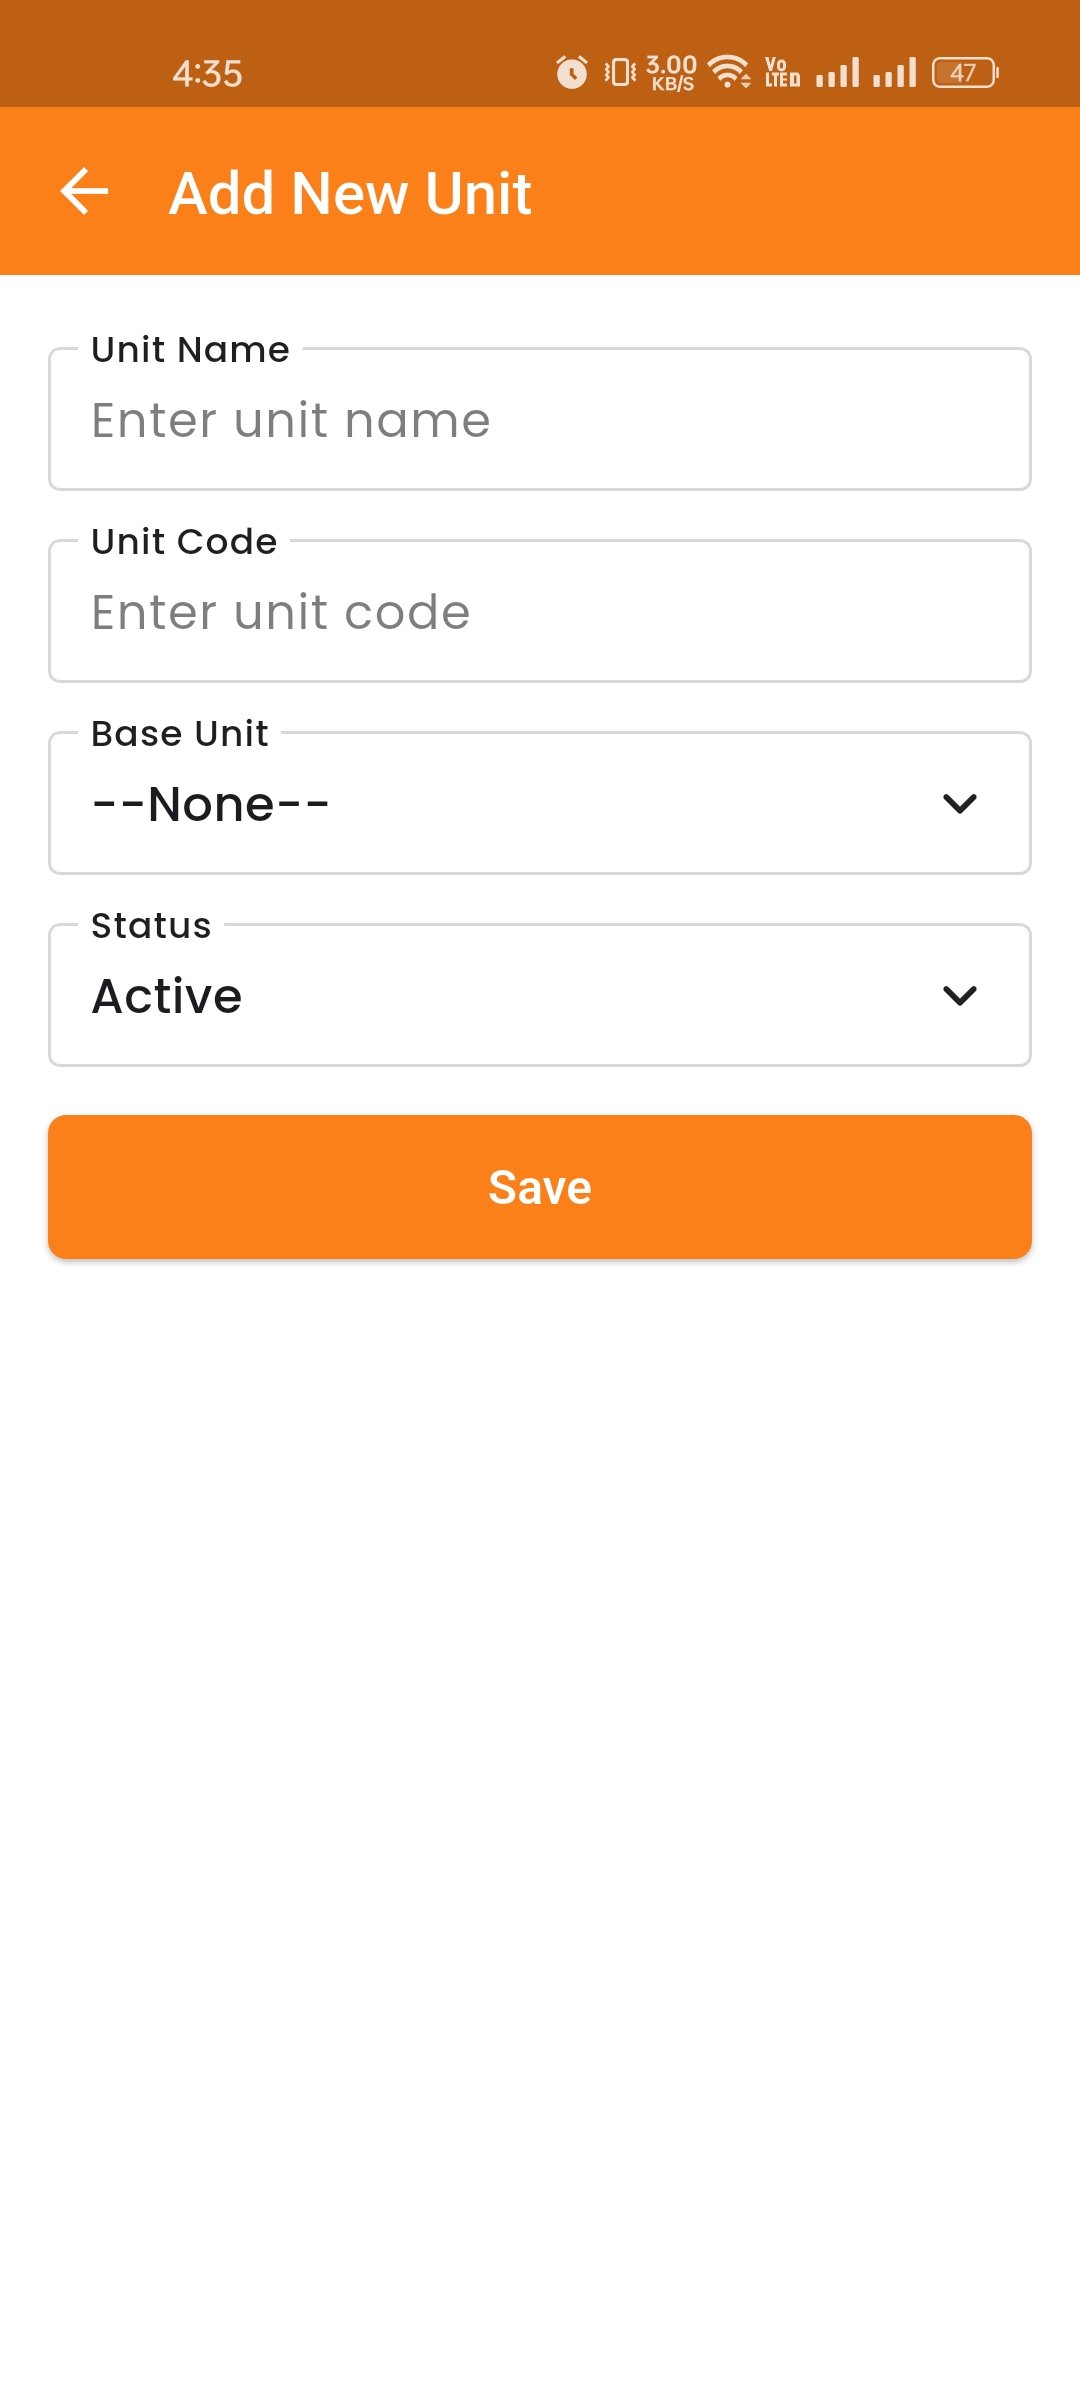
Categories
Organize your inventory items into categories such as "Vegetables", "Meat", "Dairy", "Beverages", etc. This helps you classify, filter, and manage inventory items more efficiently. You can create, edit, search, and delete categories as needed.
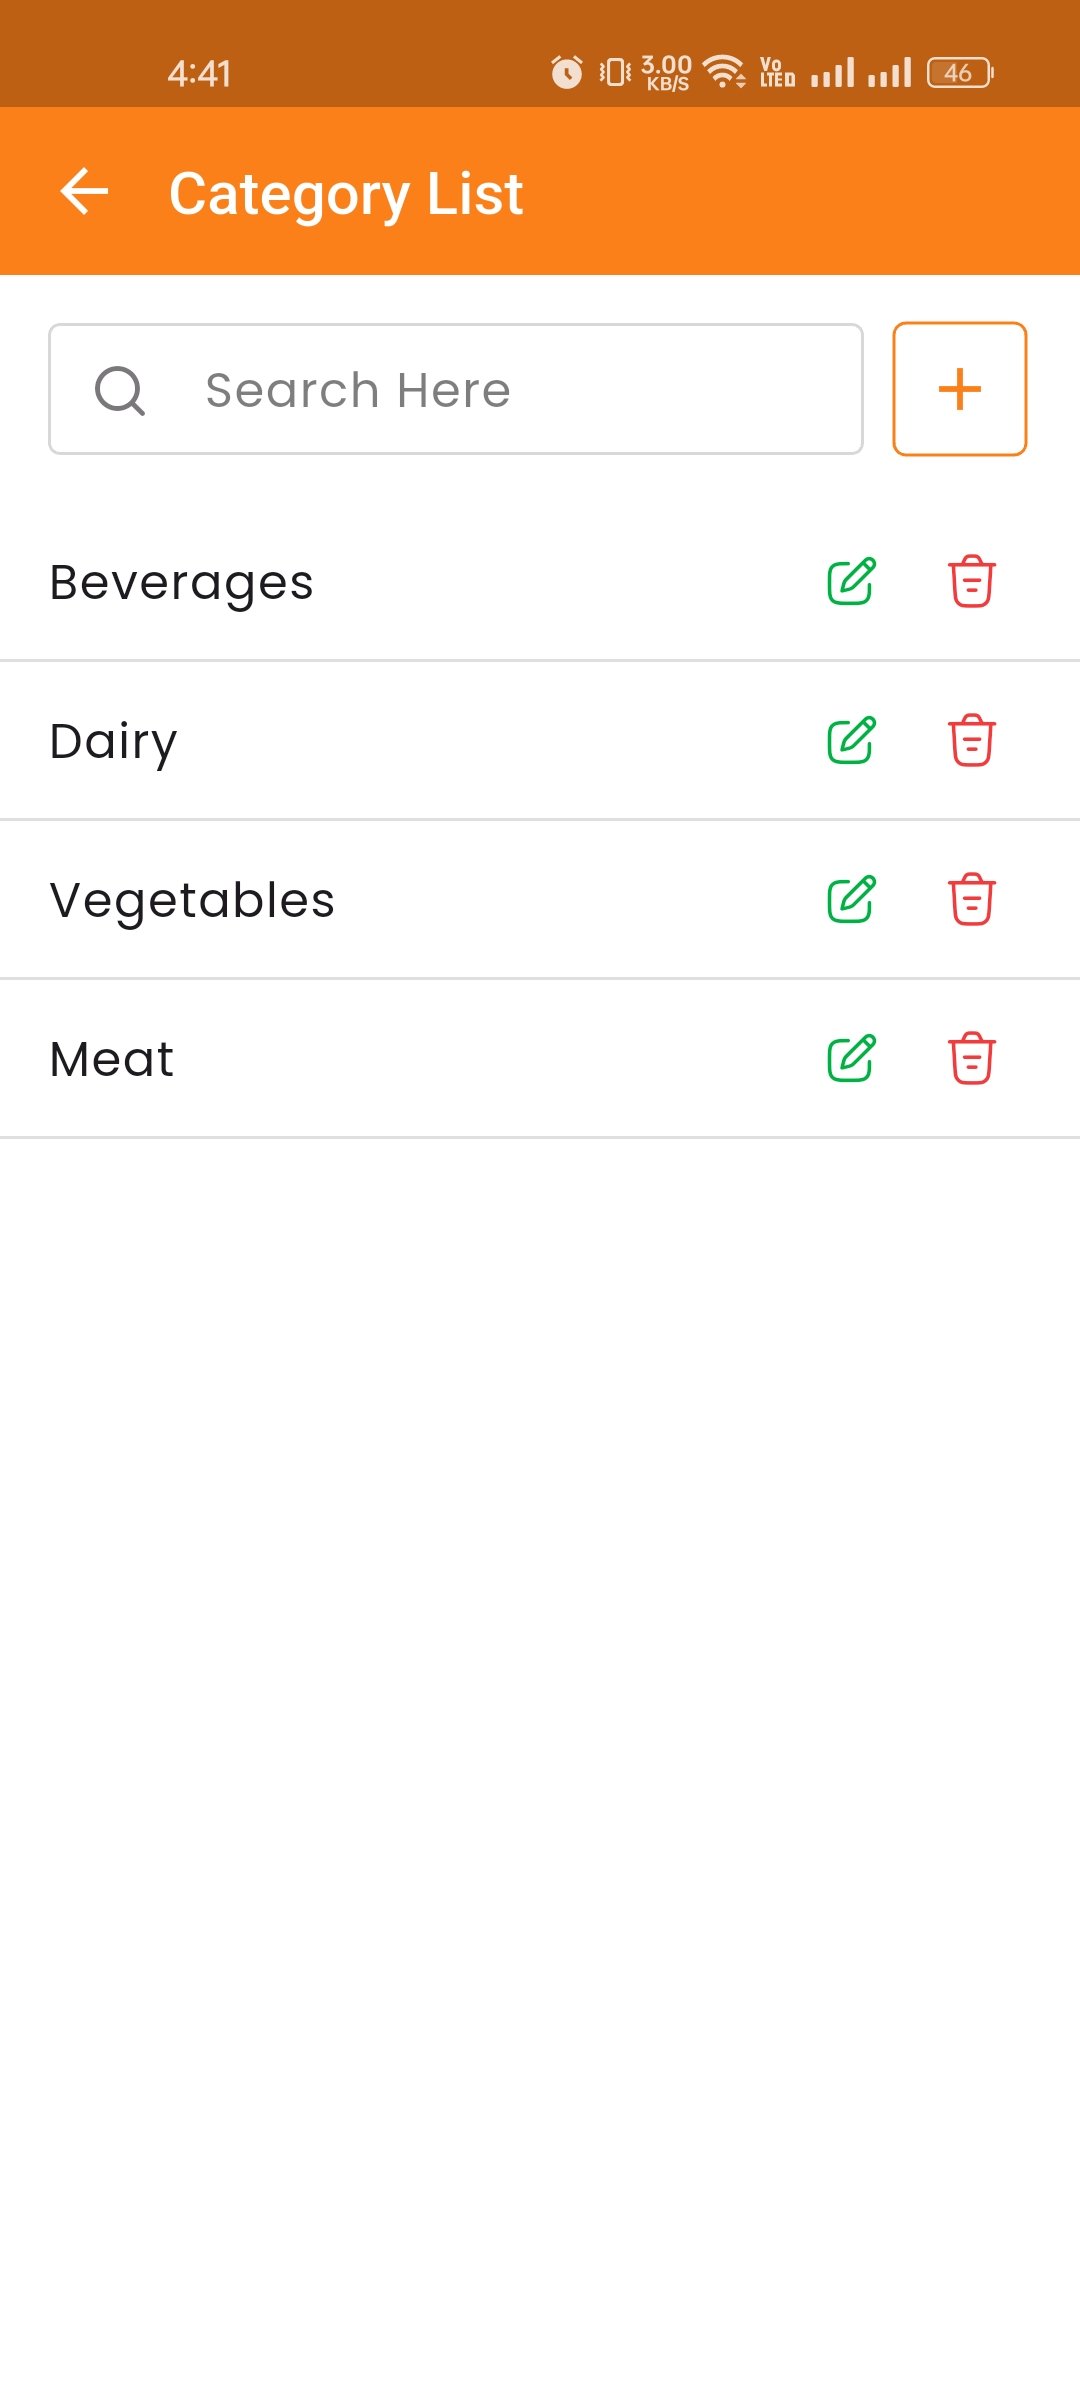
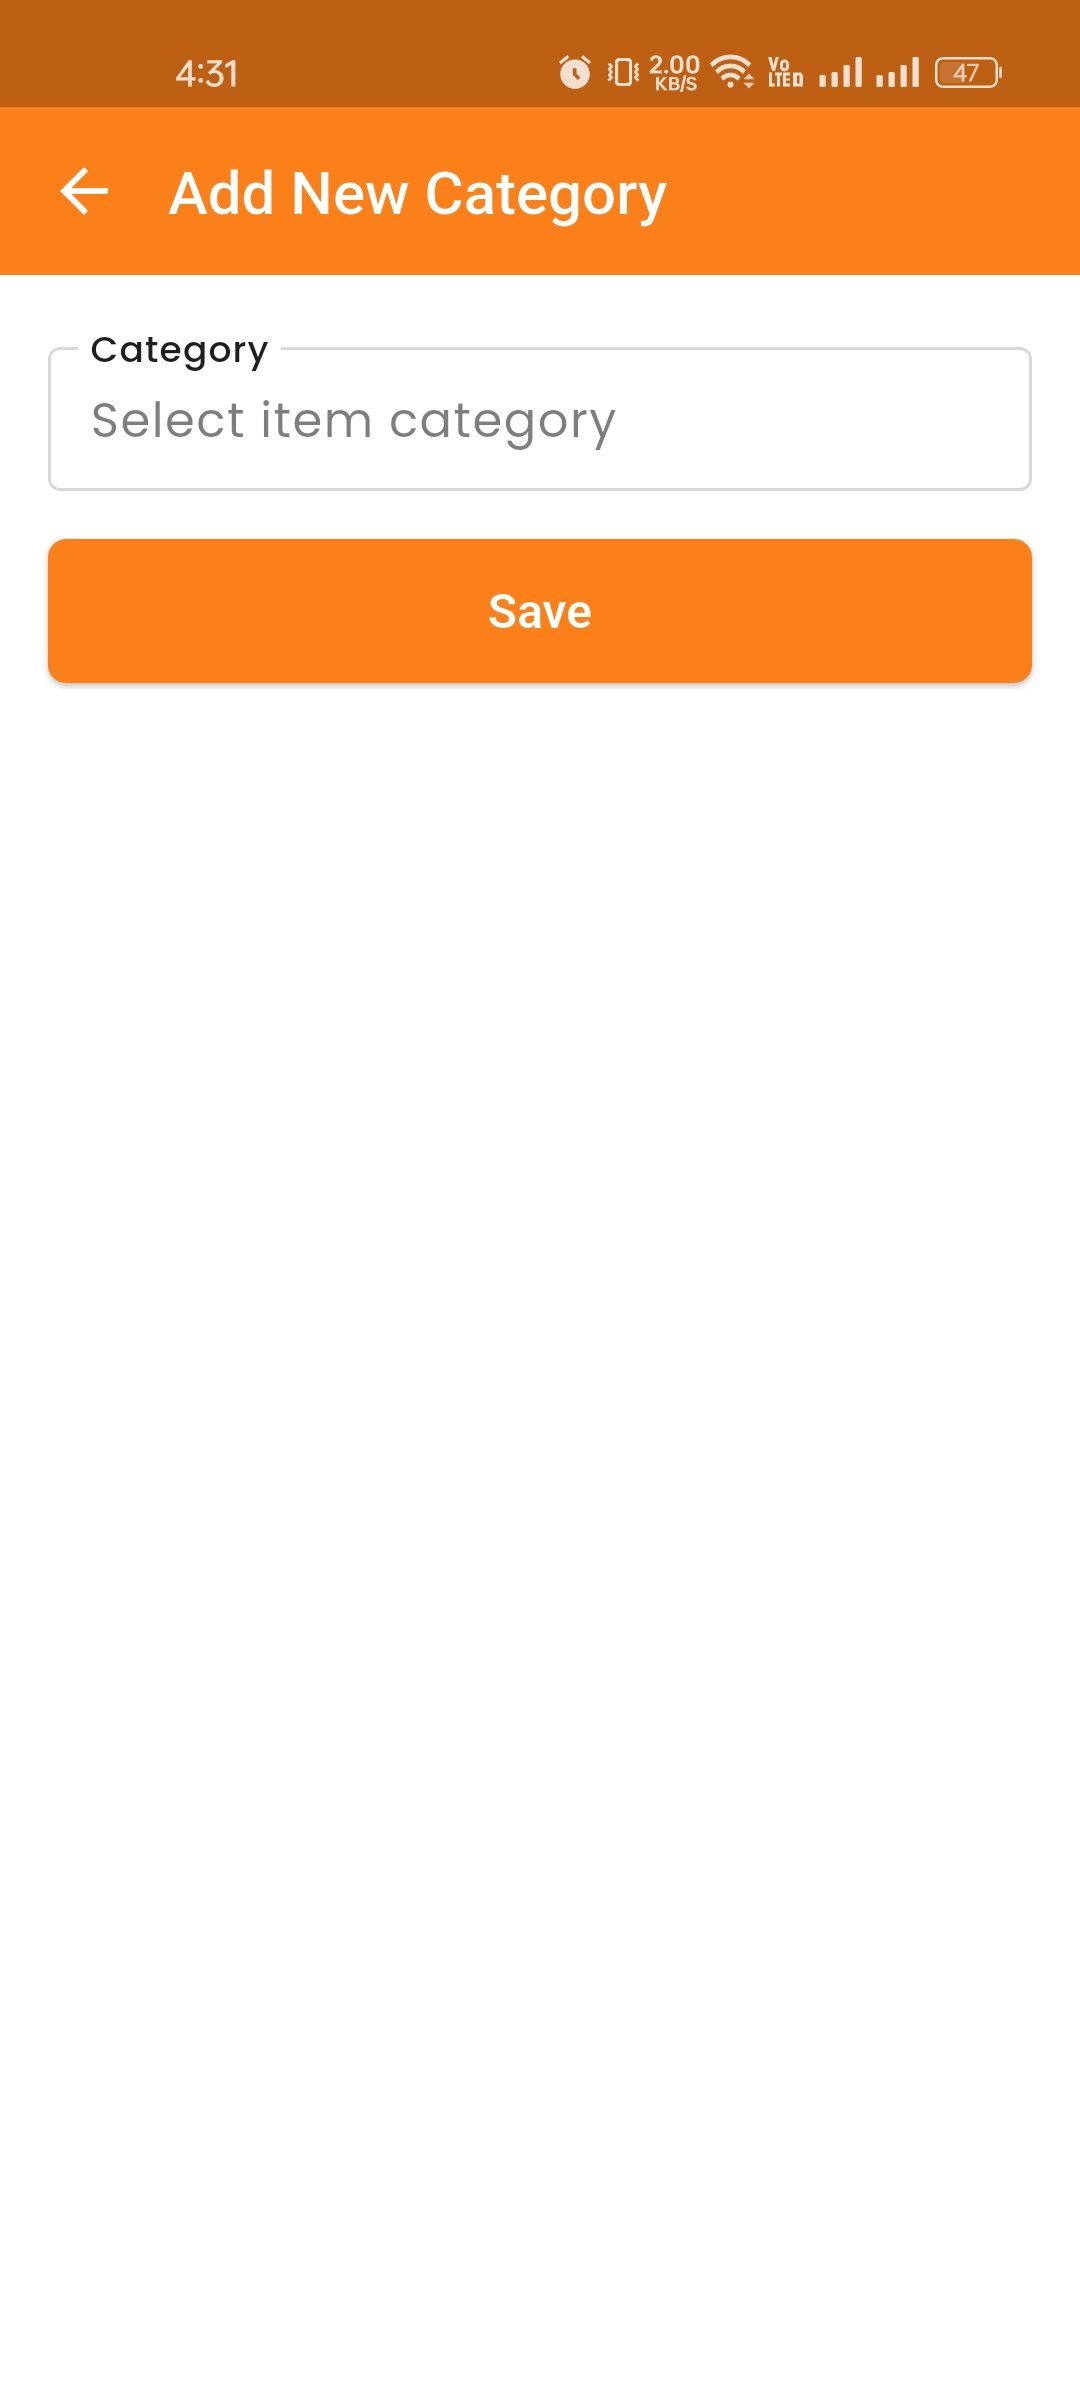
Branch
The Branch Management module allows multi-branch restaurant operations. Super admins can manage multiple branches from a single account, and each branch can have its own menu, staff, and settings.
Overview
The Overview page provides a comprehensive snapshot of your branch's performance. You can view Revenue Statistics, Statements, Branch-wise Sales & Purchase reports, and an Employee Overview — all in one place. This helps you quickly assess the health and performance of each branch.
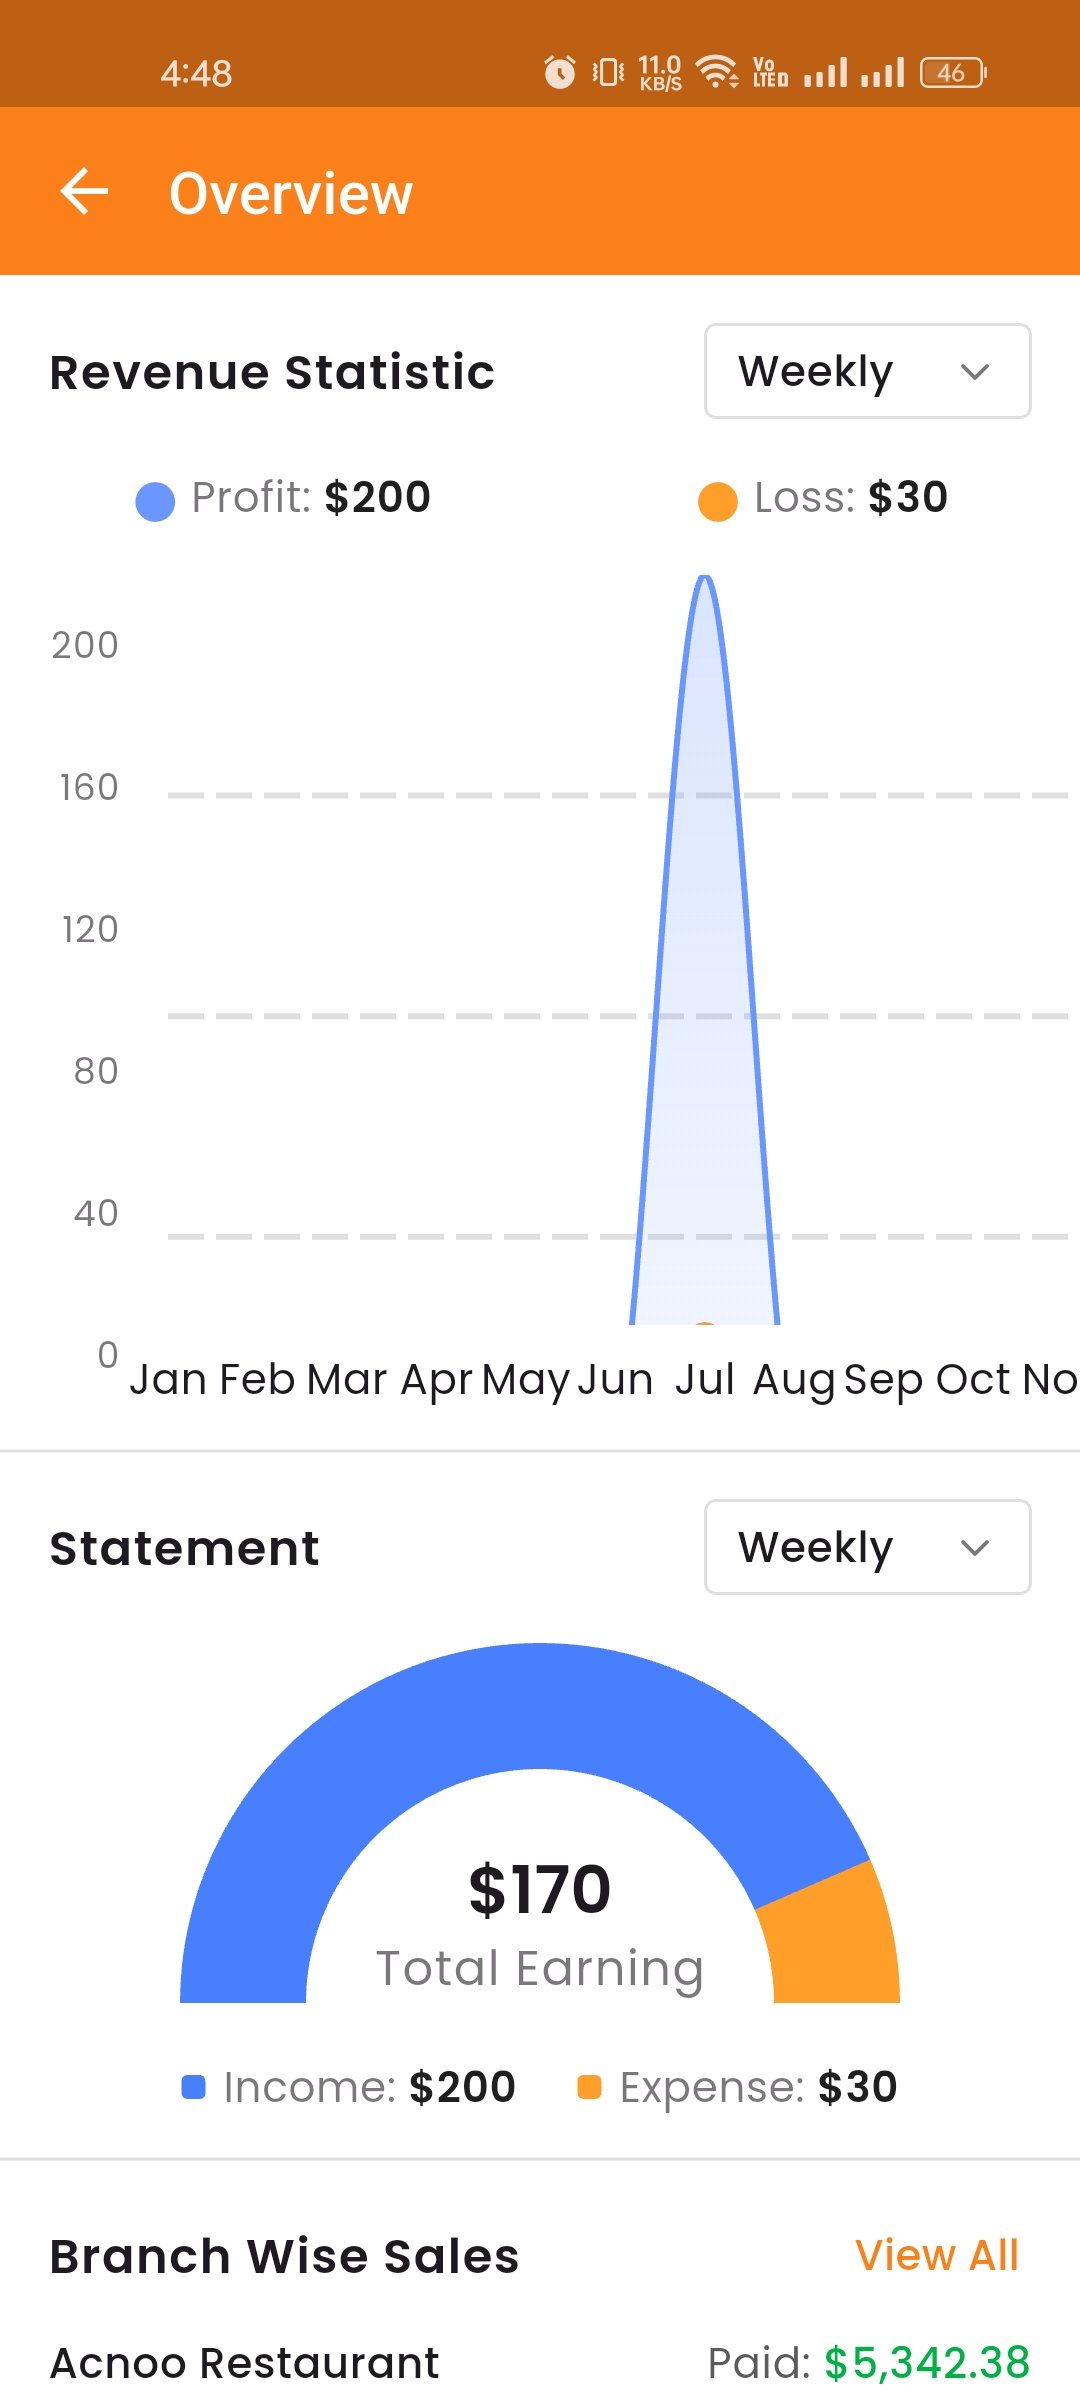
Branch List
View all branches in your organization. Each branch shows its name, location, status, and key metrics. You can add new branches, as well as edit, delete, and view existing branch details. You can also easily switch from one branch to another to manage each one individually.
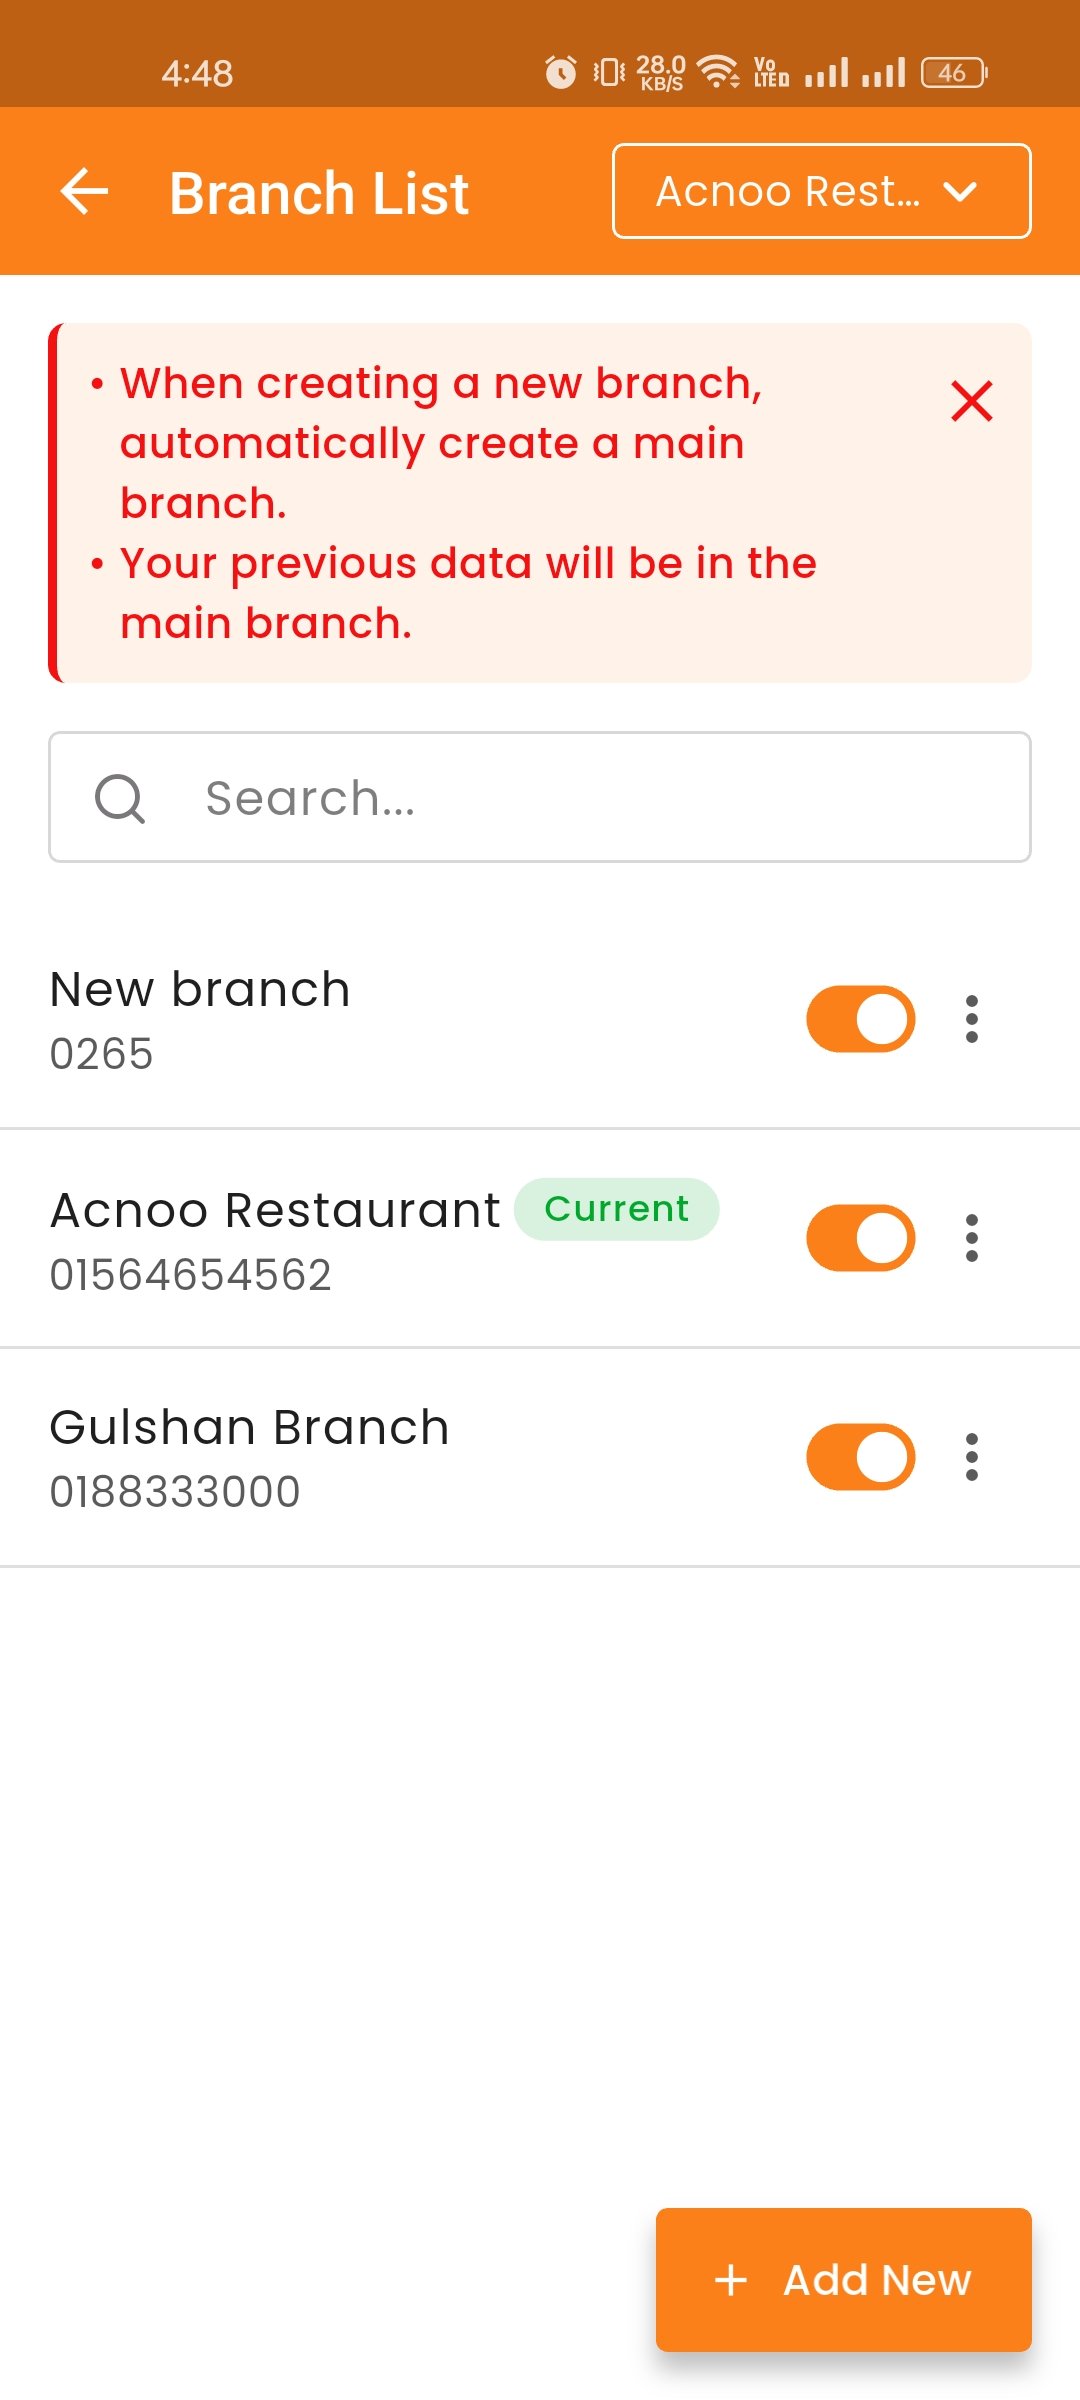
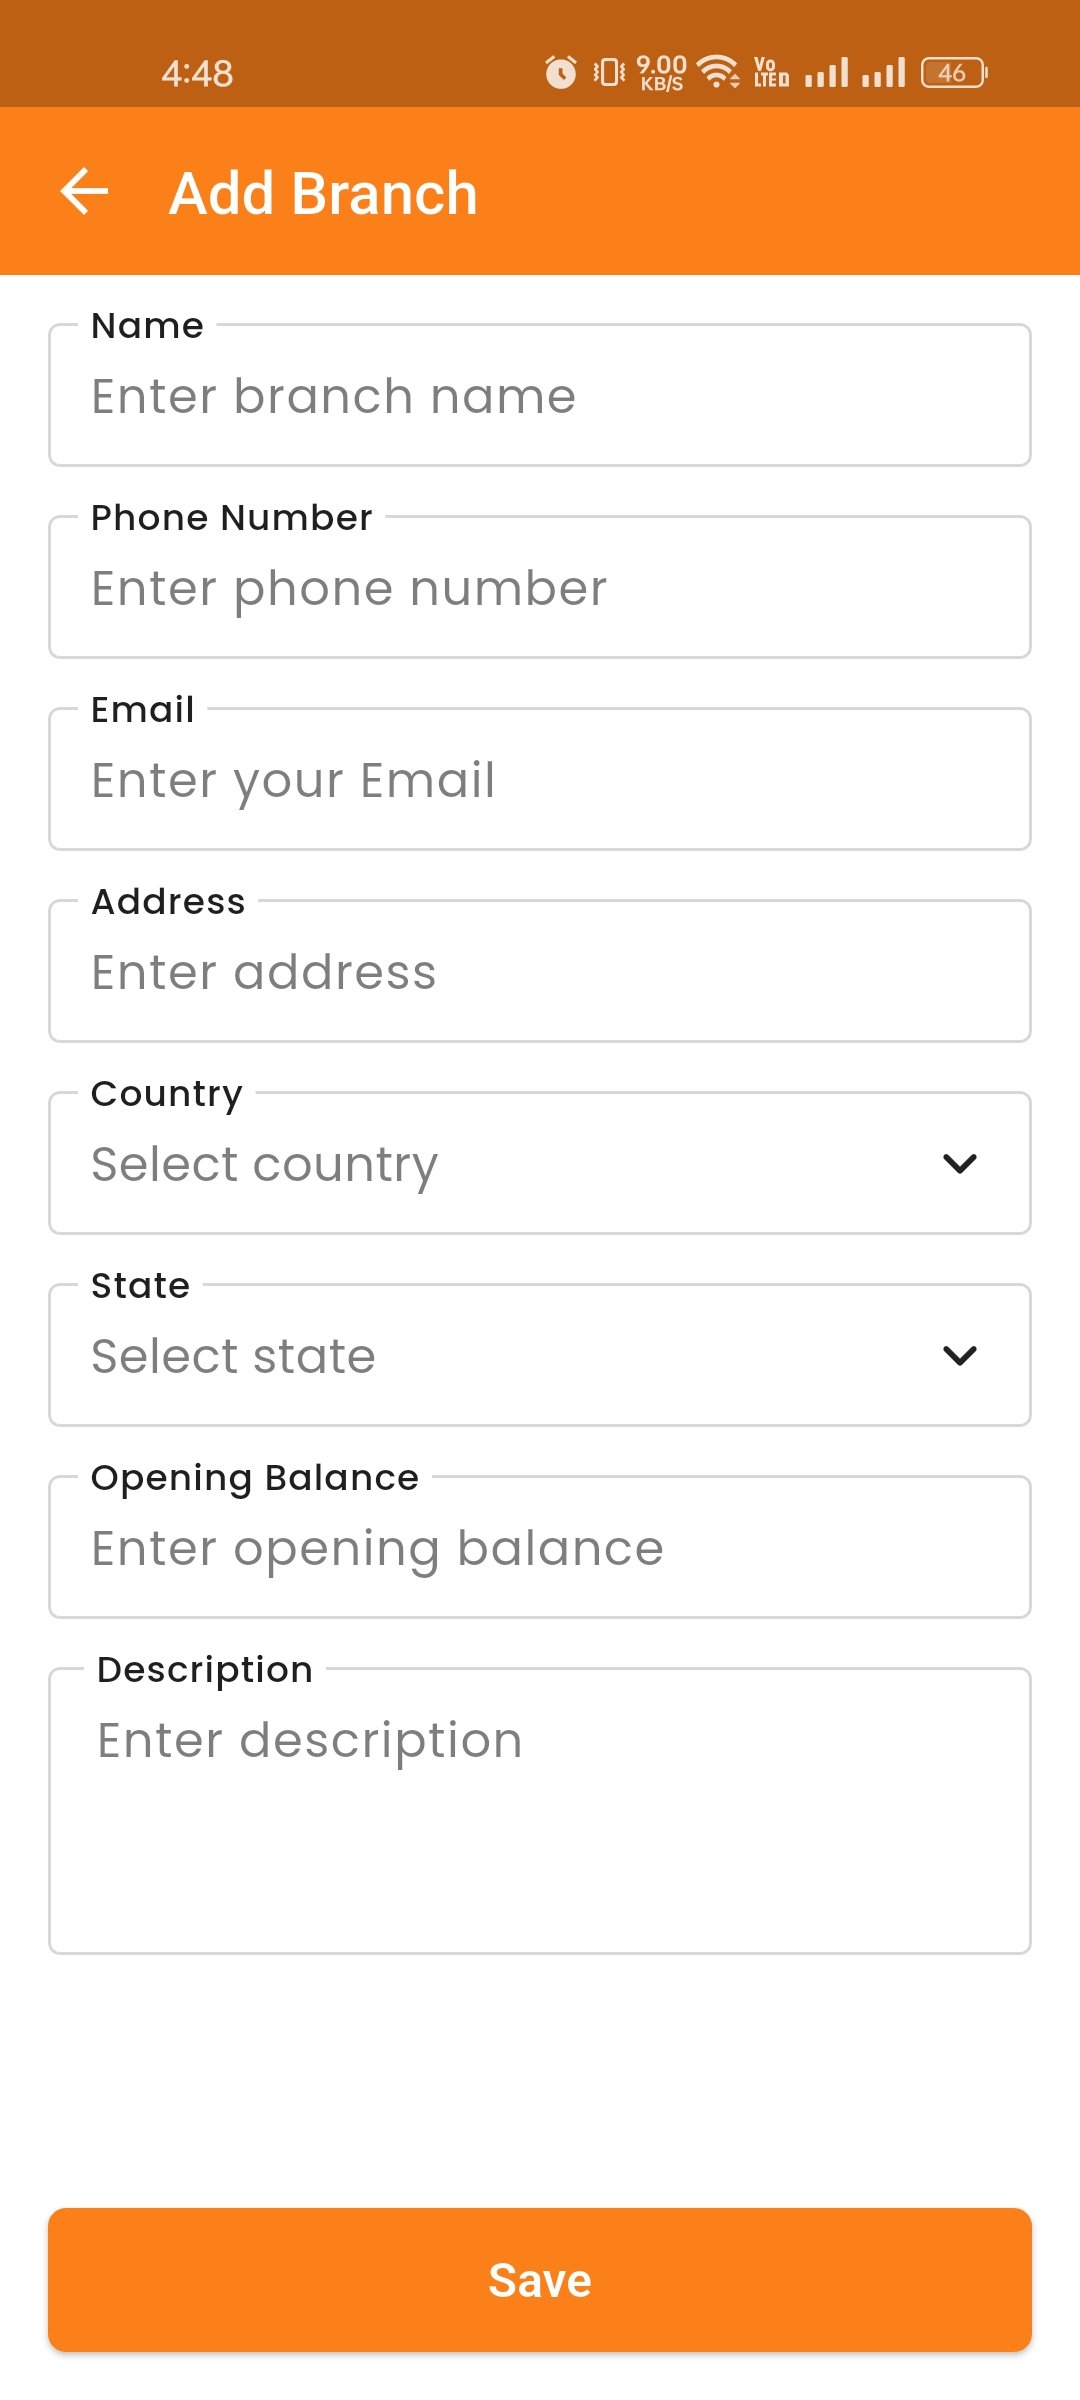
Due List
Here, you can view the list of all dues associated with Customers and Suppliers. Additionally, you can filter data, view invoices, and collect due amounts directly from this page.
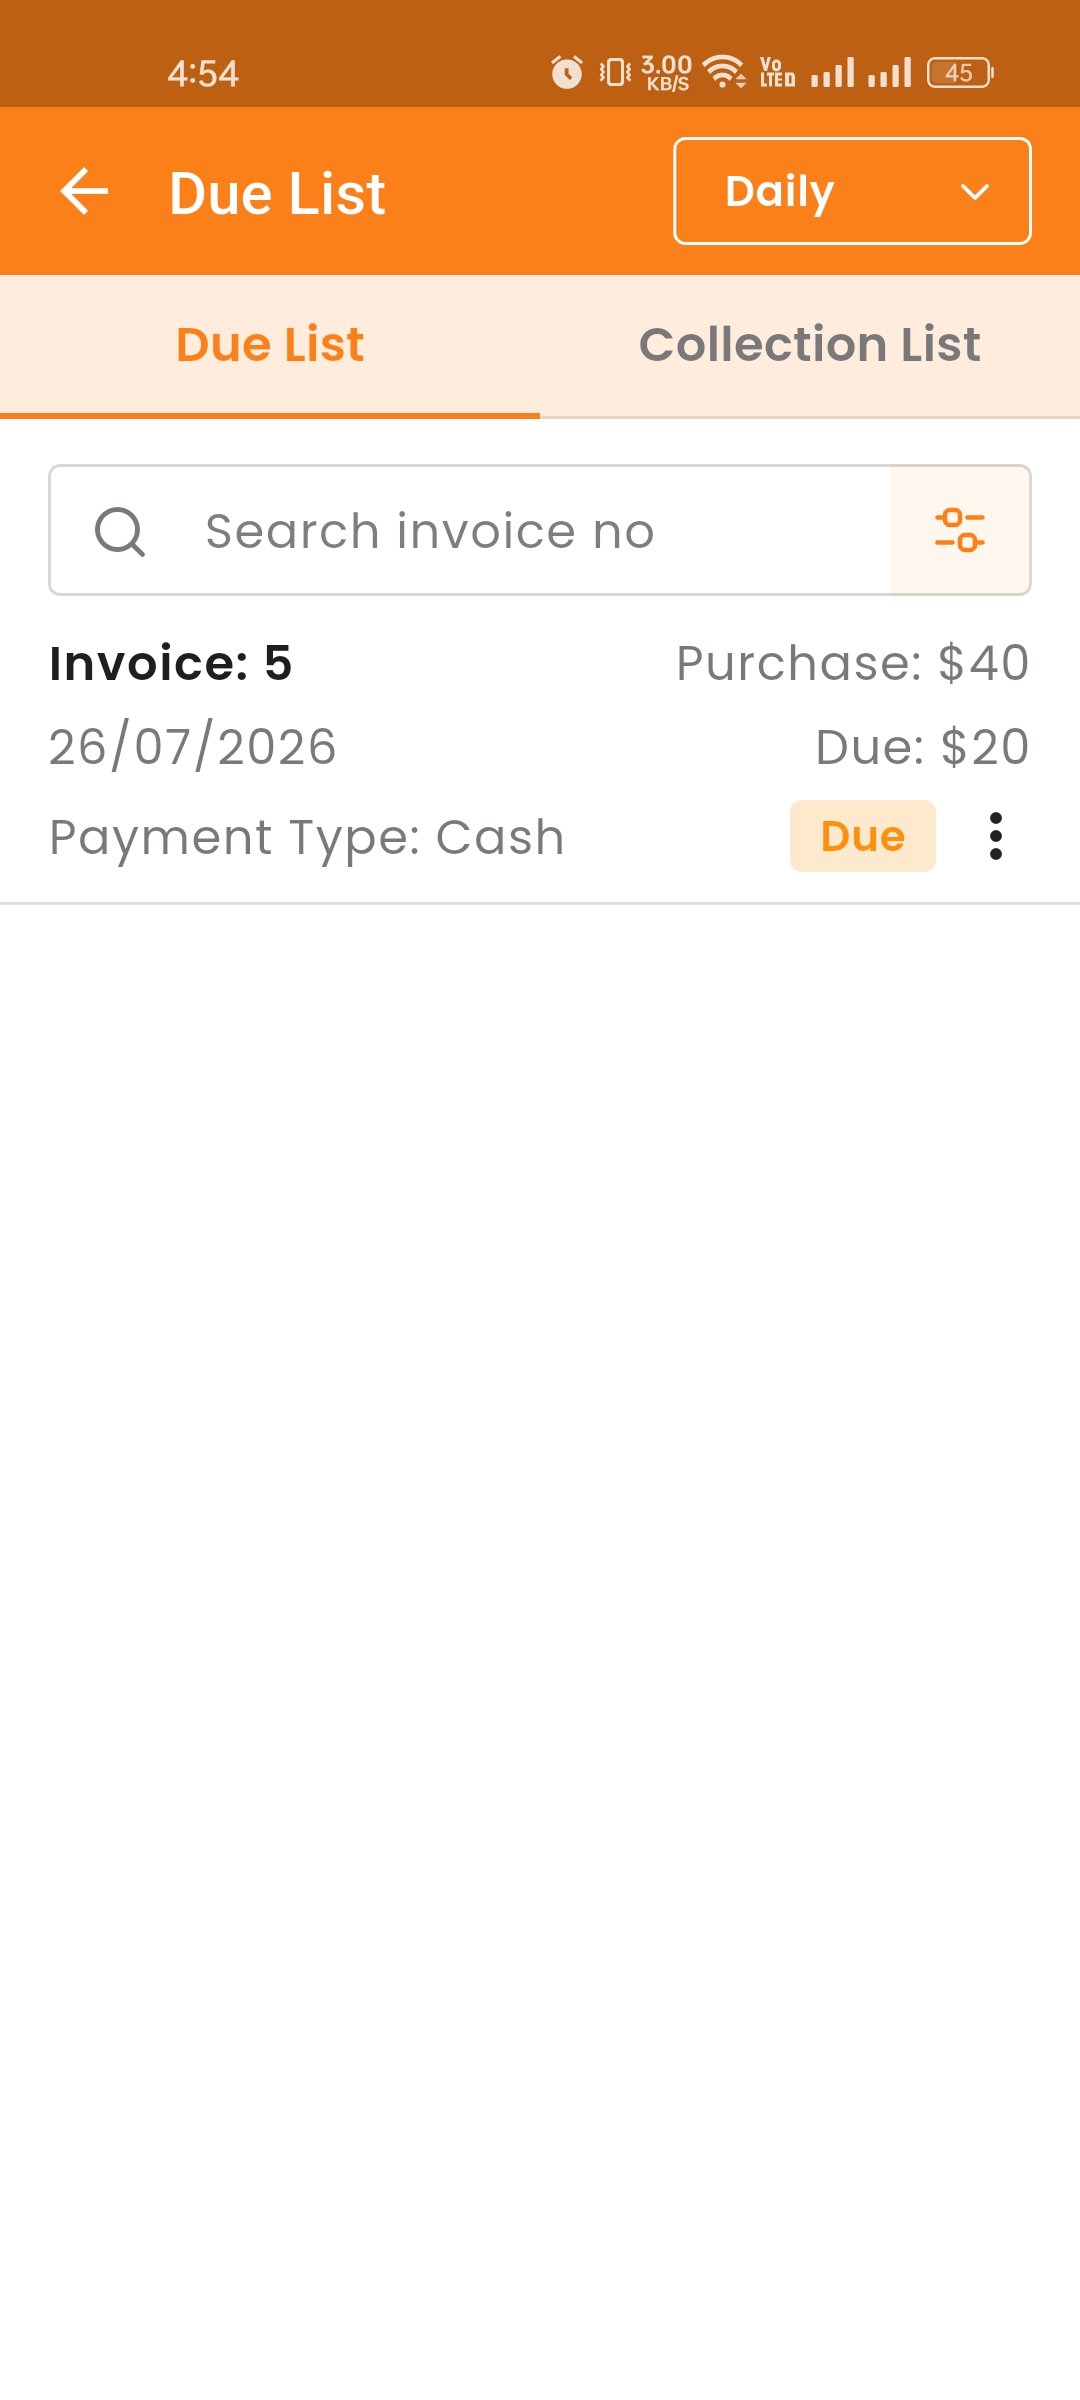
Collect Due
When you click "Collect", you can collect the due amount either by invoice or without an invoice.
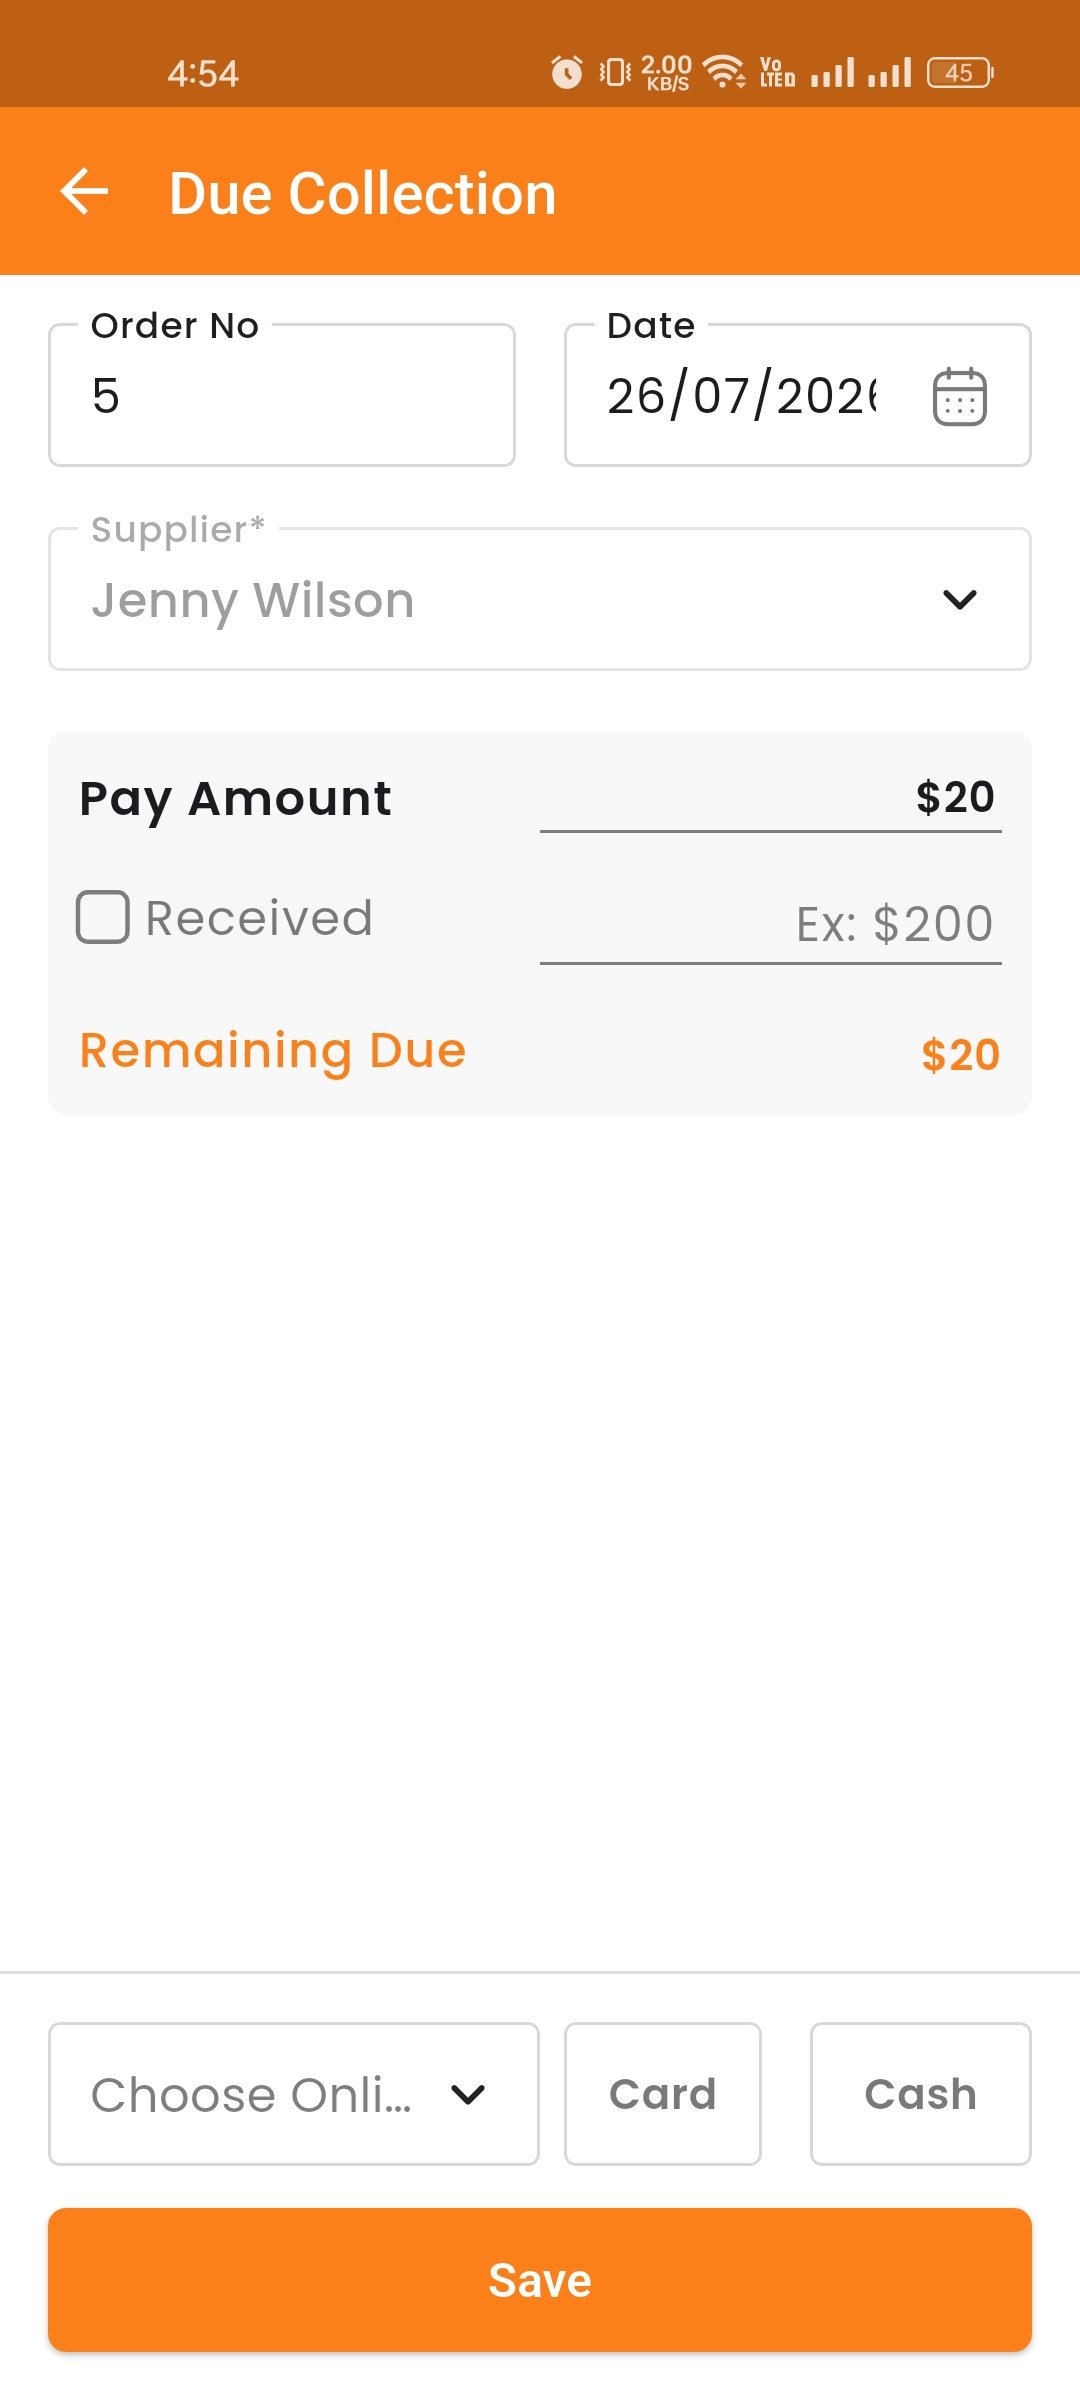
Items
The Items module allows you to manage all menu items. It contains several sub-tabs: Menus, Categories, Items List, Modifier Groups, and Item Modifiers.
Menus
Manage menu groups to organize your items. Add, edit, delete, and search menus.
Categories
Manage item categories. Add, edit, delete, and search categories. Organize items into logical groups for easy browsing.
Items List
Here, you can view the item list with filtering options. You can view details, edit, or delete items. Clicking on the variation number will show the item's variation name and price details.
Create Item
You can create an item by filling in fields such as name, menu, category, product type, etc. Choose product type as "Single" or "Variation" and provide the corresponding name and price. Upload multiple images and click "Publish" to save.
If the item has variations (e.g., Small, Medium, Large) or modifiers (e.g., extra cheese), you can configure those options before publishing.
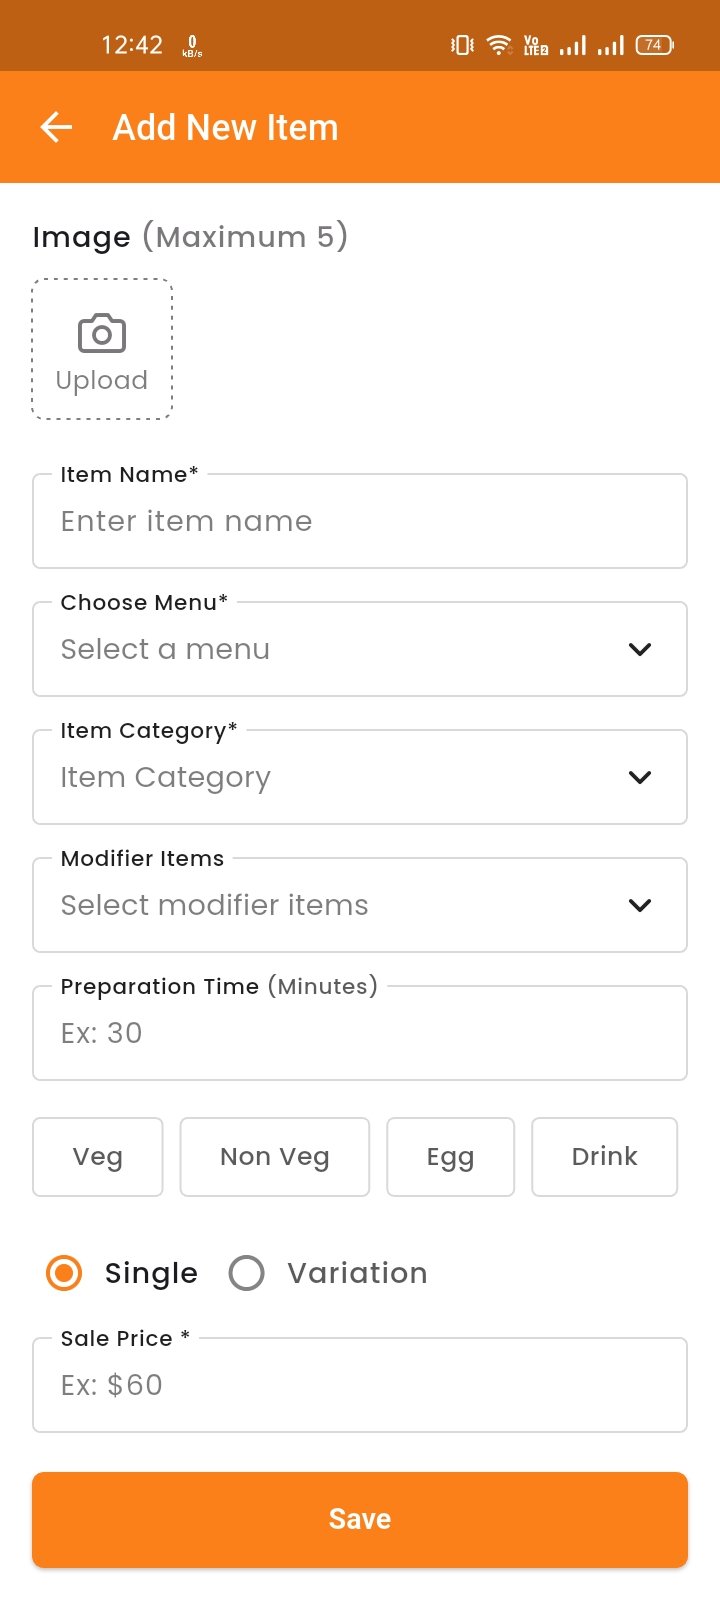
Modifier Groups
Create and manage modifier groups (e.g., Extra Toppings, Drink Sizes). Each group can have multiple modifier options with prices.
Item Modifiers
Assign modifier groups to specific items. Configure whether multiple selections are allowed and if modifiers are required.
Table
The Table module manages dining tables with live occupancy status. Each table card shows the table name, capacity, real-time status (Available, KOT, Occupied), number of ordered items, elapsed time, and current sale amount.
Available — The table is free and ready for guests.
KOT — A kitchen order ticket is active.
Occupied — The table has an active sale in progress.
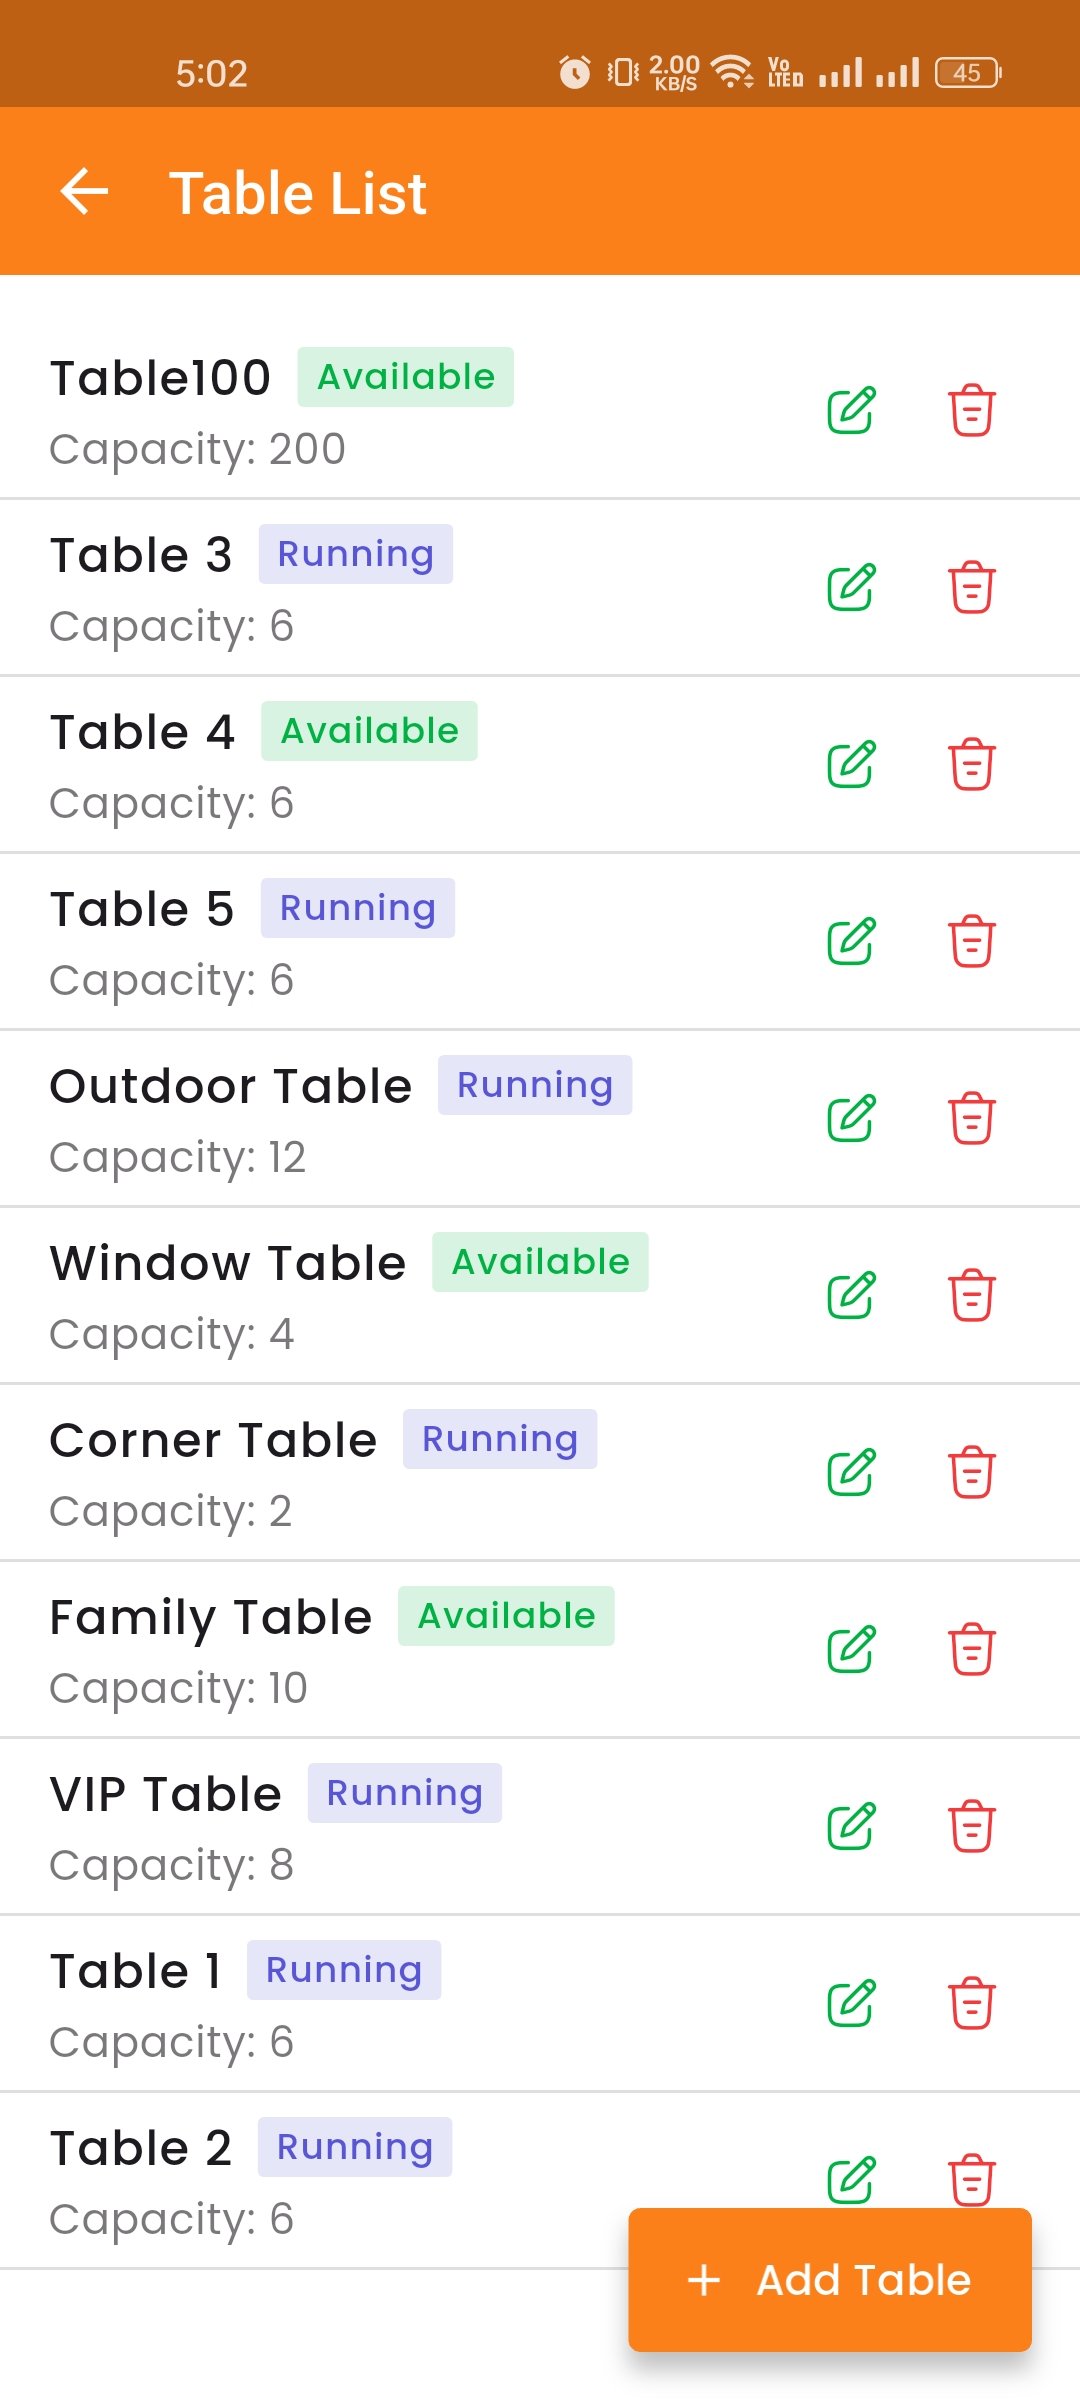
Add Table
Click "Add Table" to open a form. Enter the table name, capacity, and select an area, then click Save.
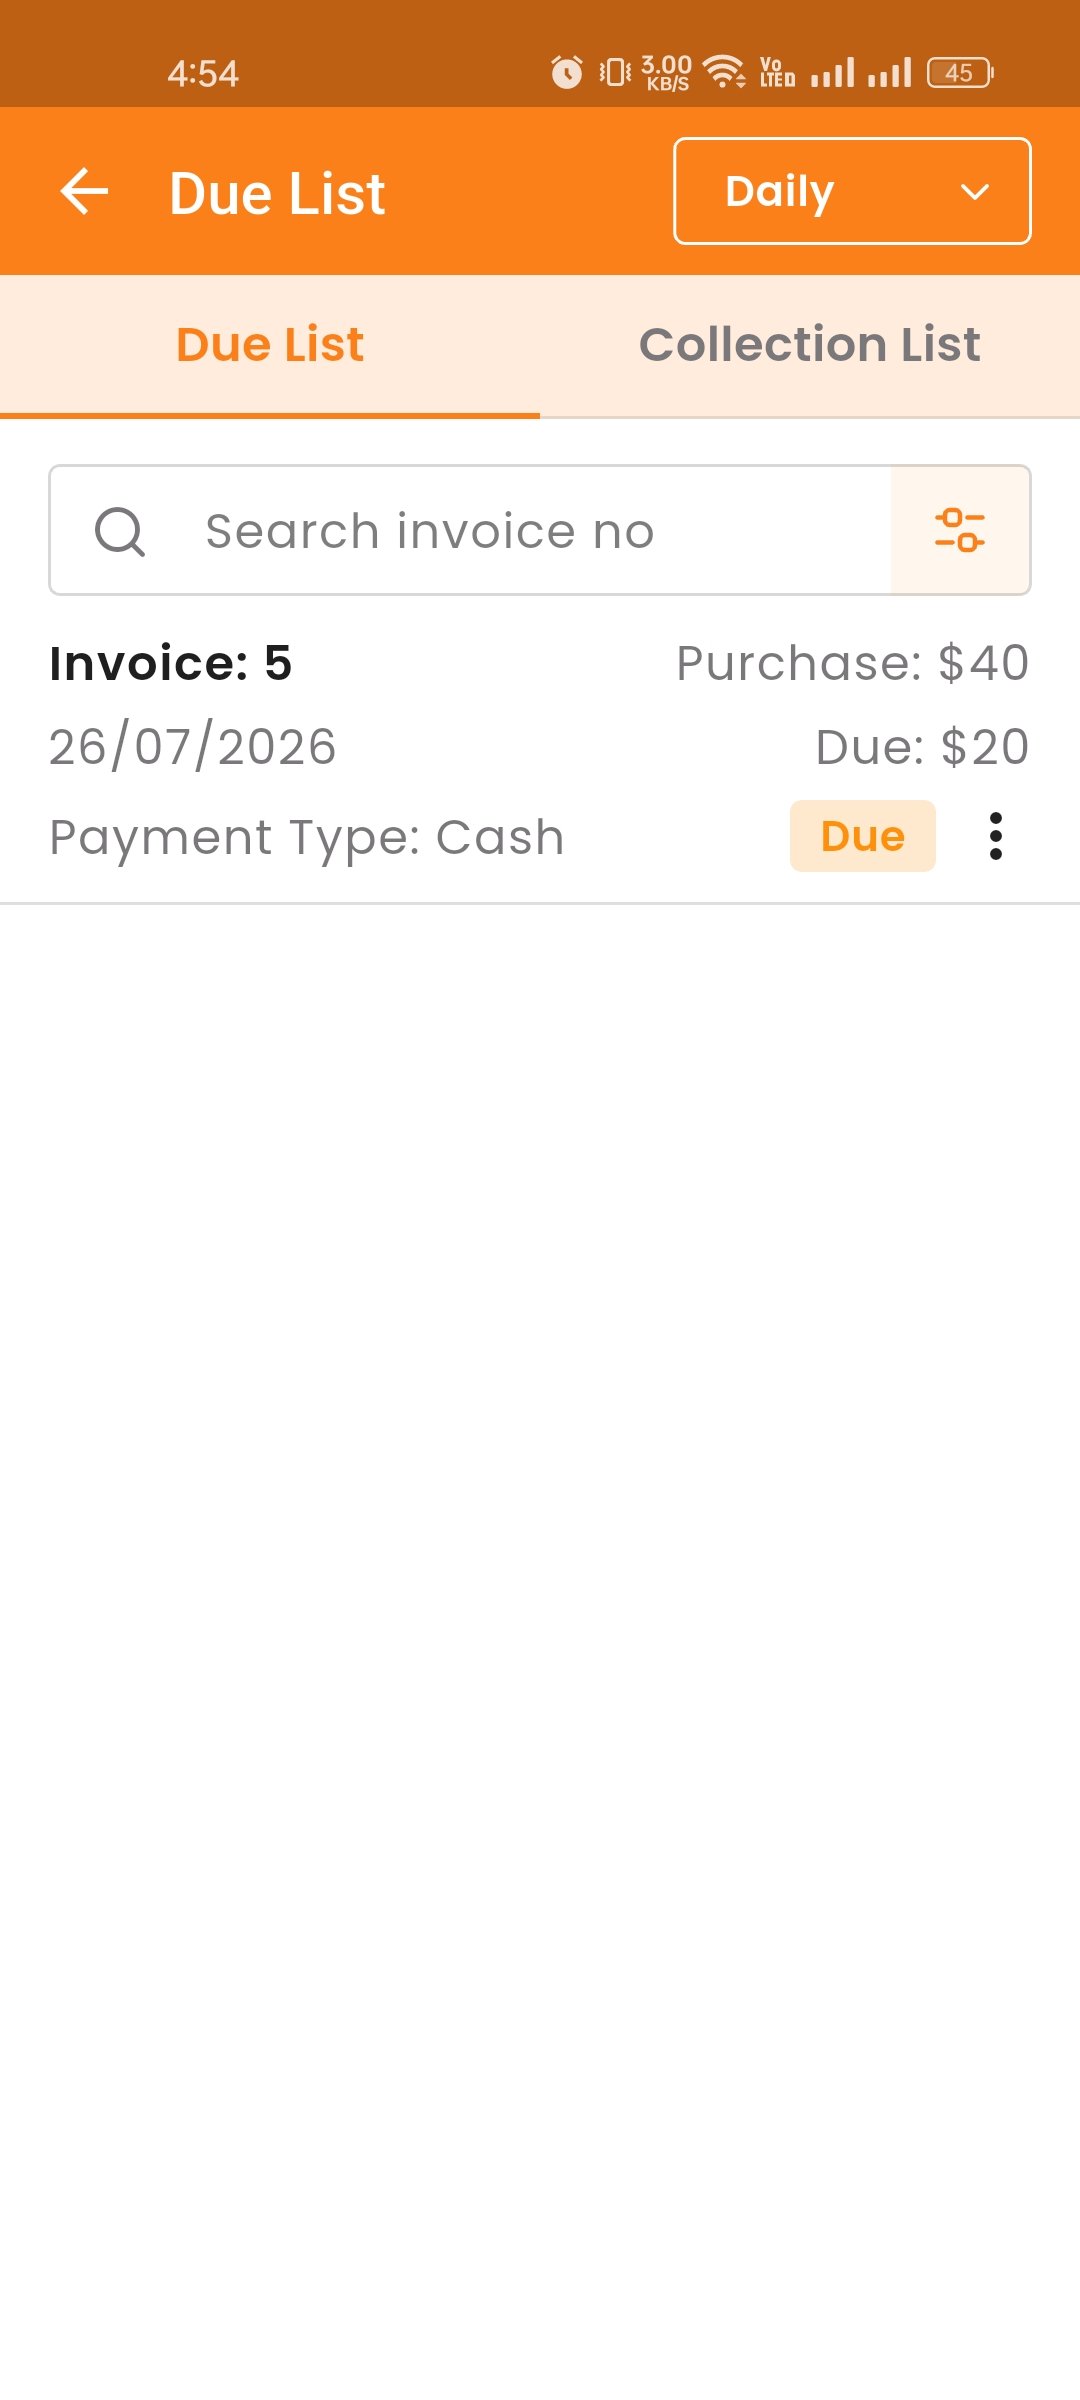
Area
Areas group tables into physical zones such as Rooftop, North Corner, or VIP Section. This helps manage large floor plans and organize table layouts.
Add Area — Click "Add Area" to open a modal. Enter the area name and click Save.
Edit Area — Click the pencil icon to update the area name.
Delete — Click the trash icon to remove an area permanently.
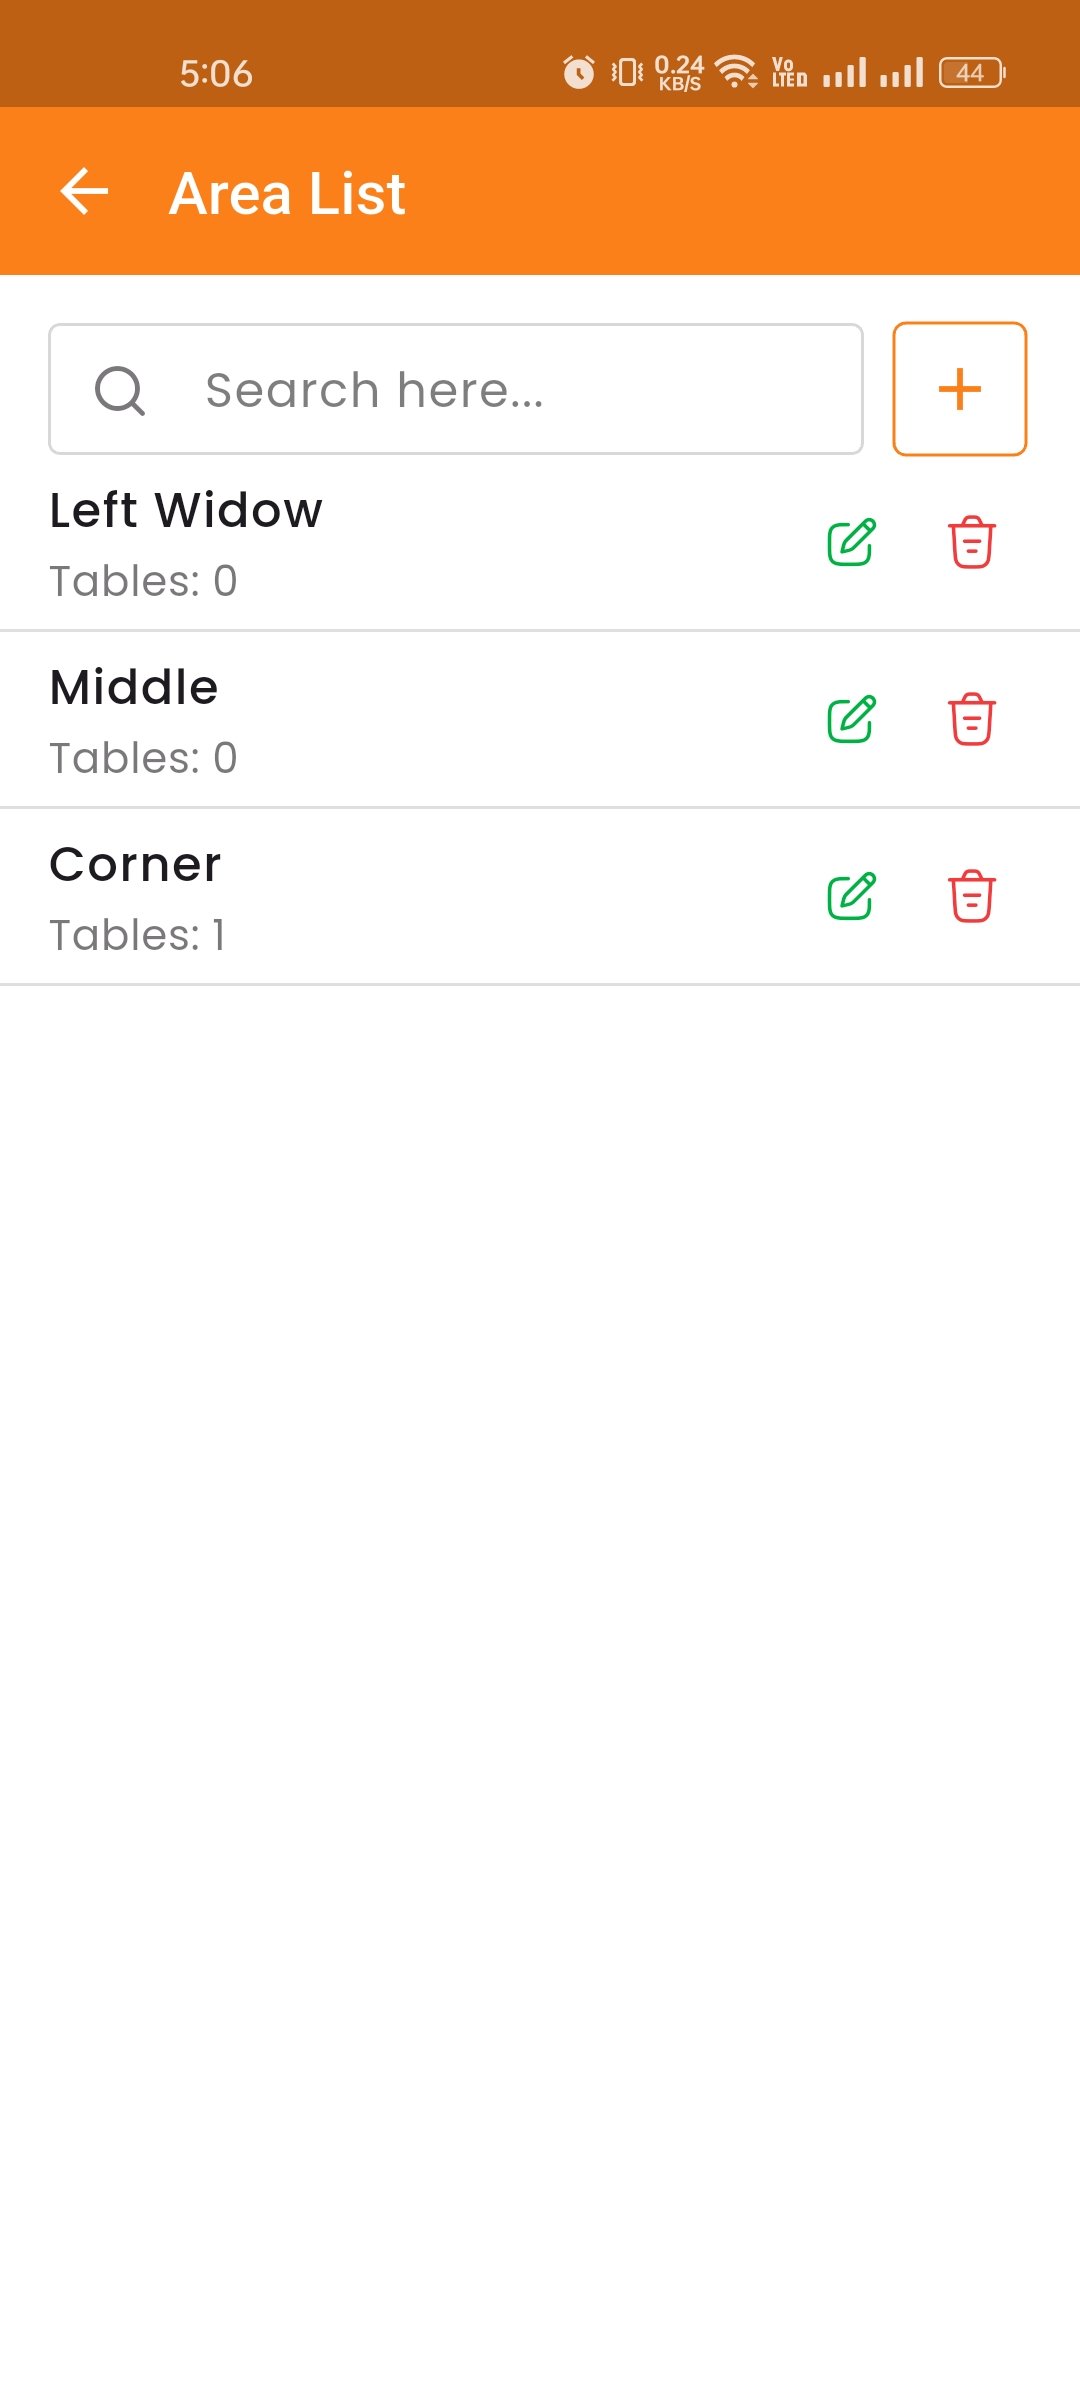
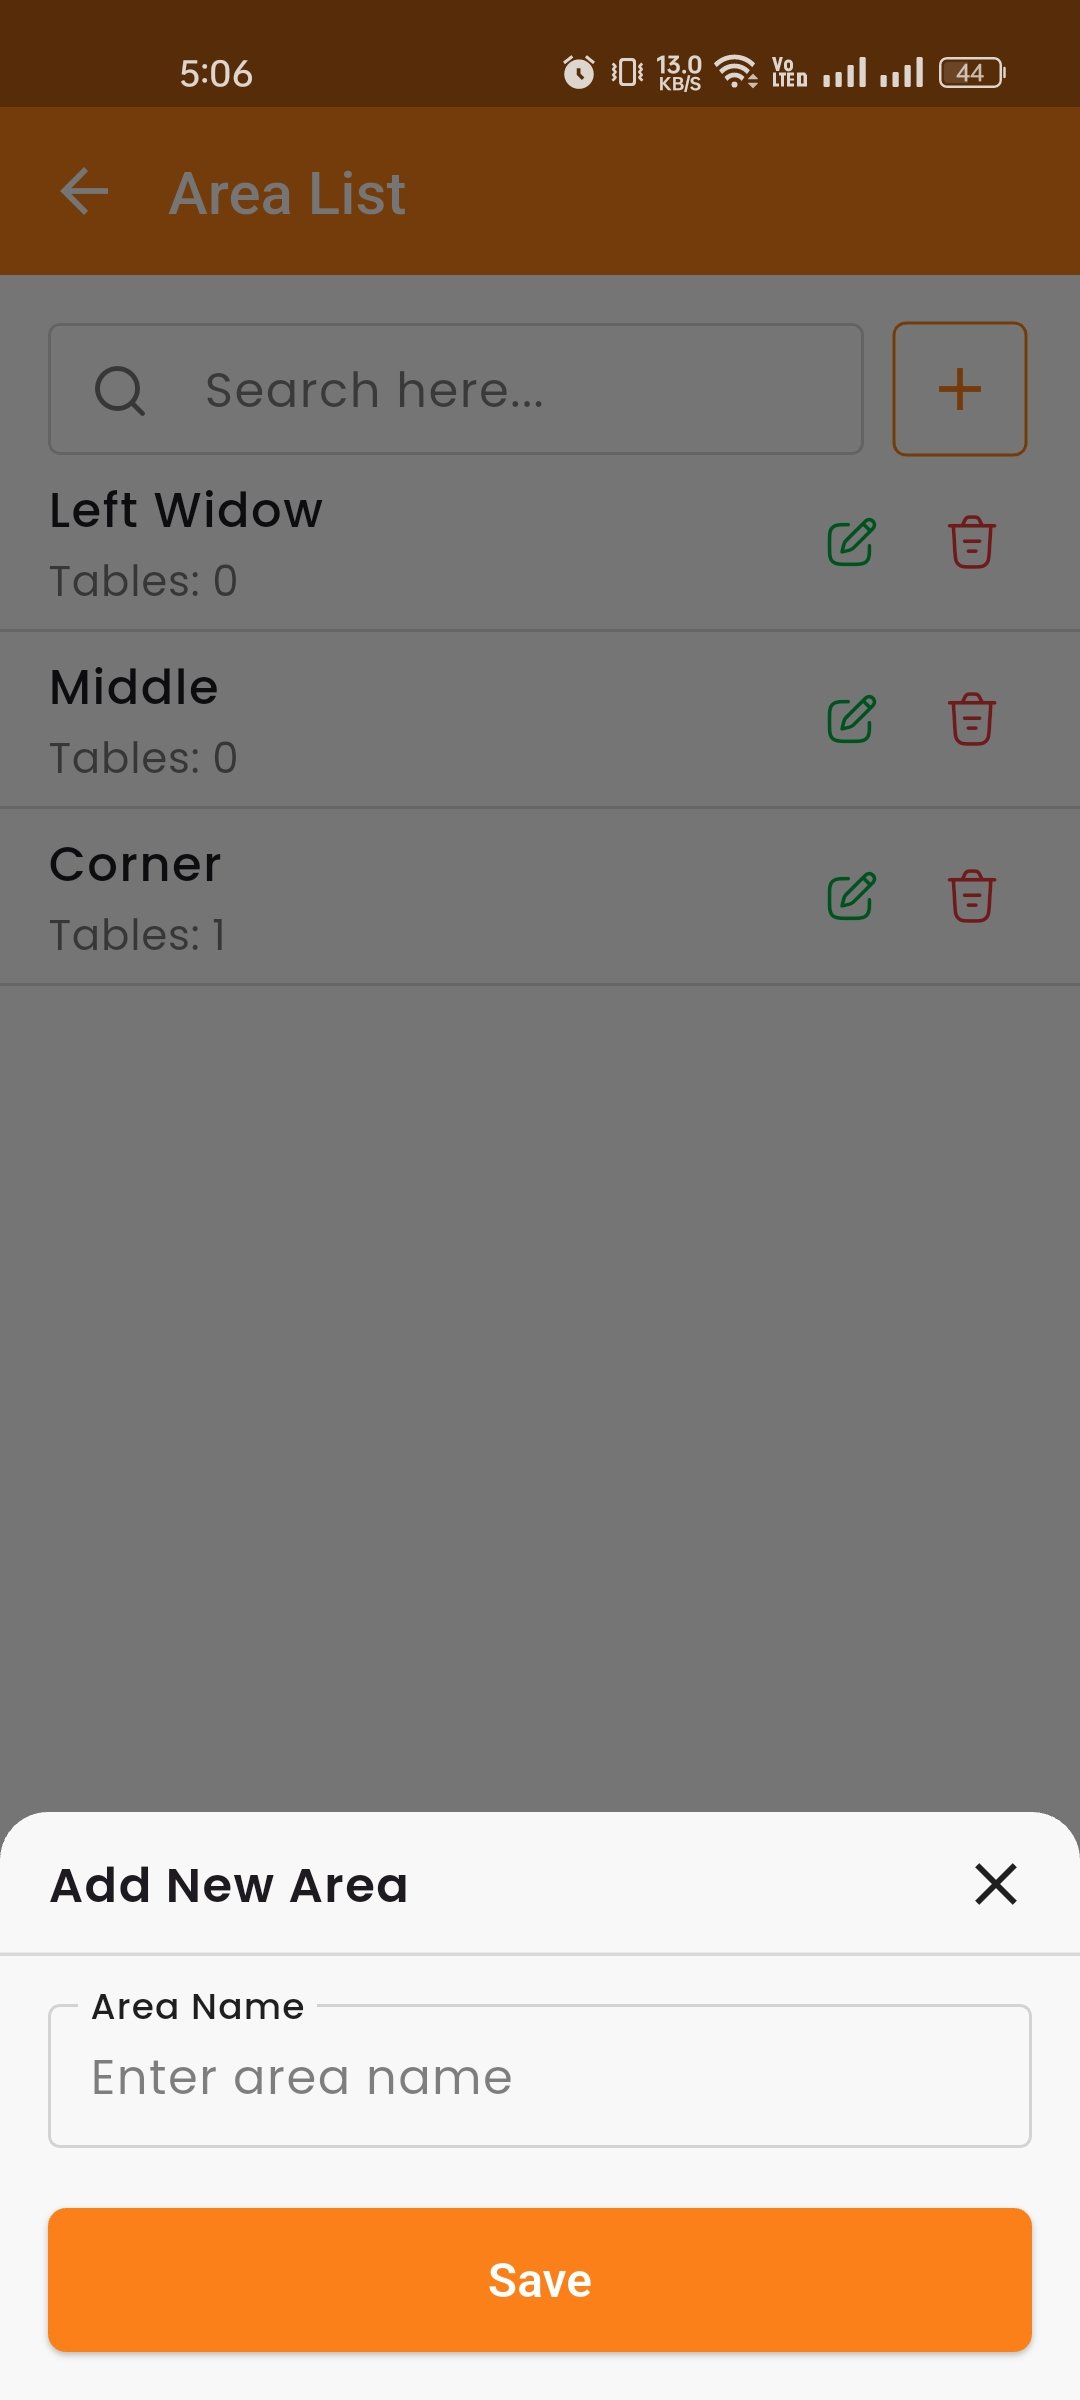
Staff List
Here, you can view the Staff list with a search filter. You have the option to edit, delete, or use the designation filter function.
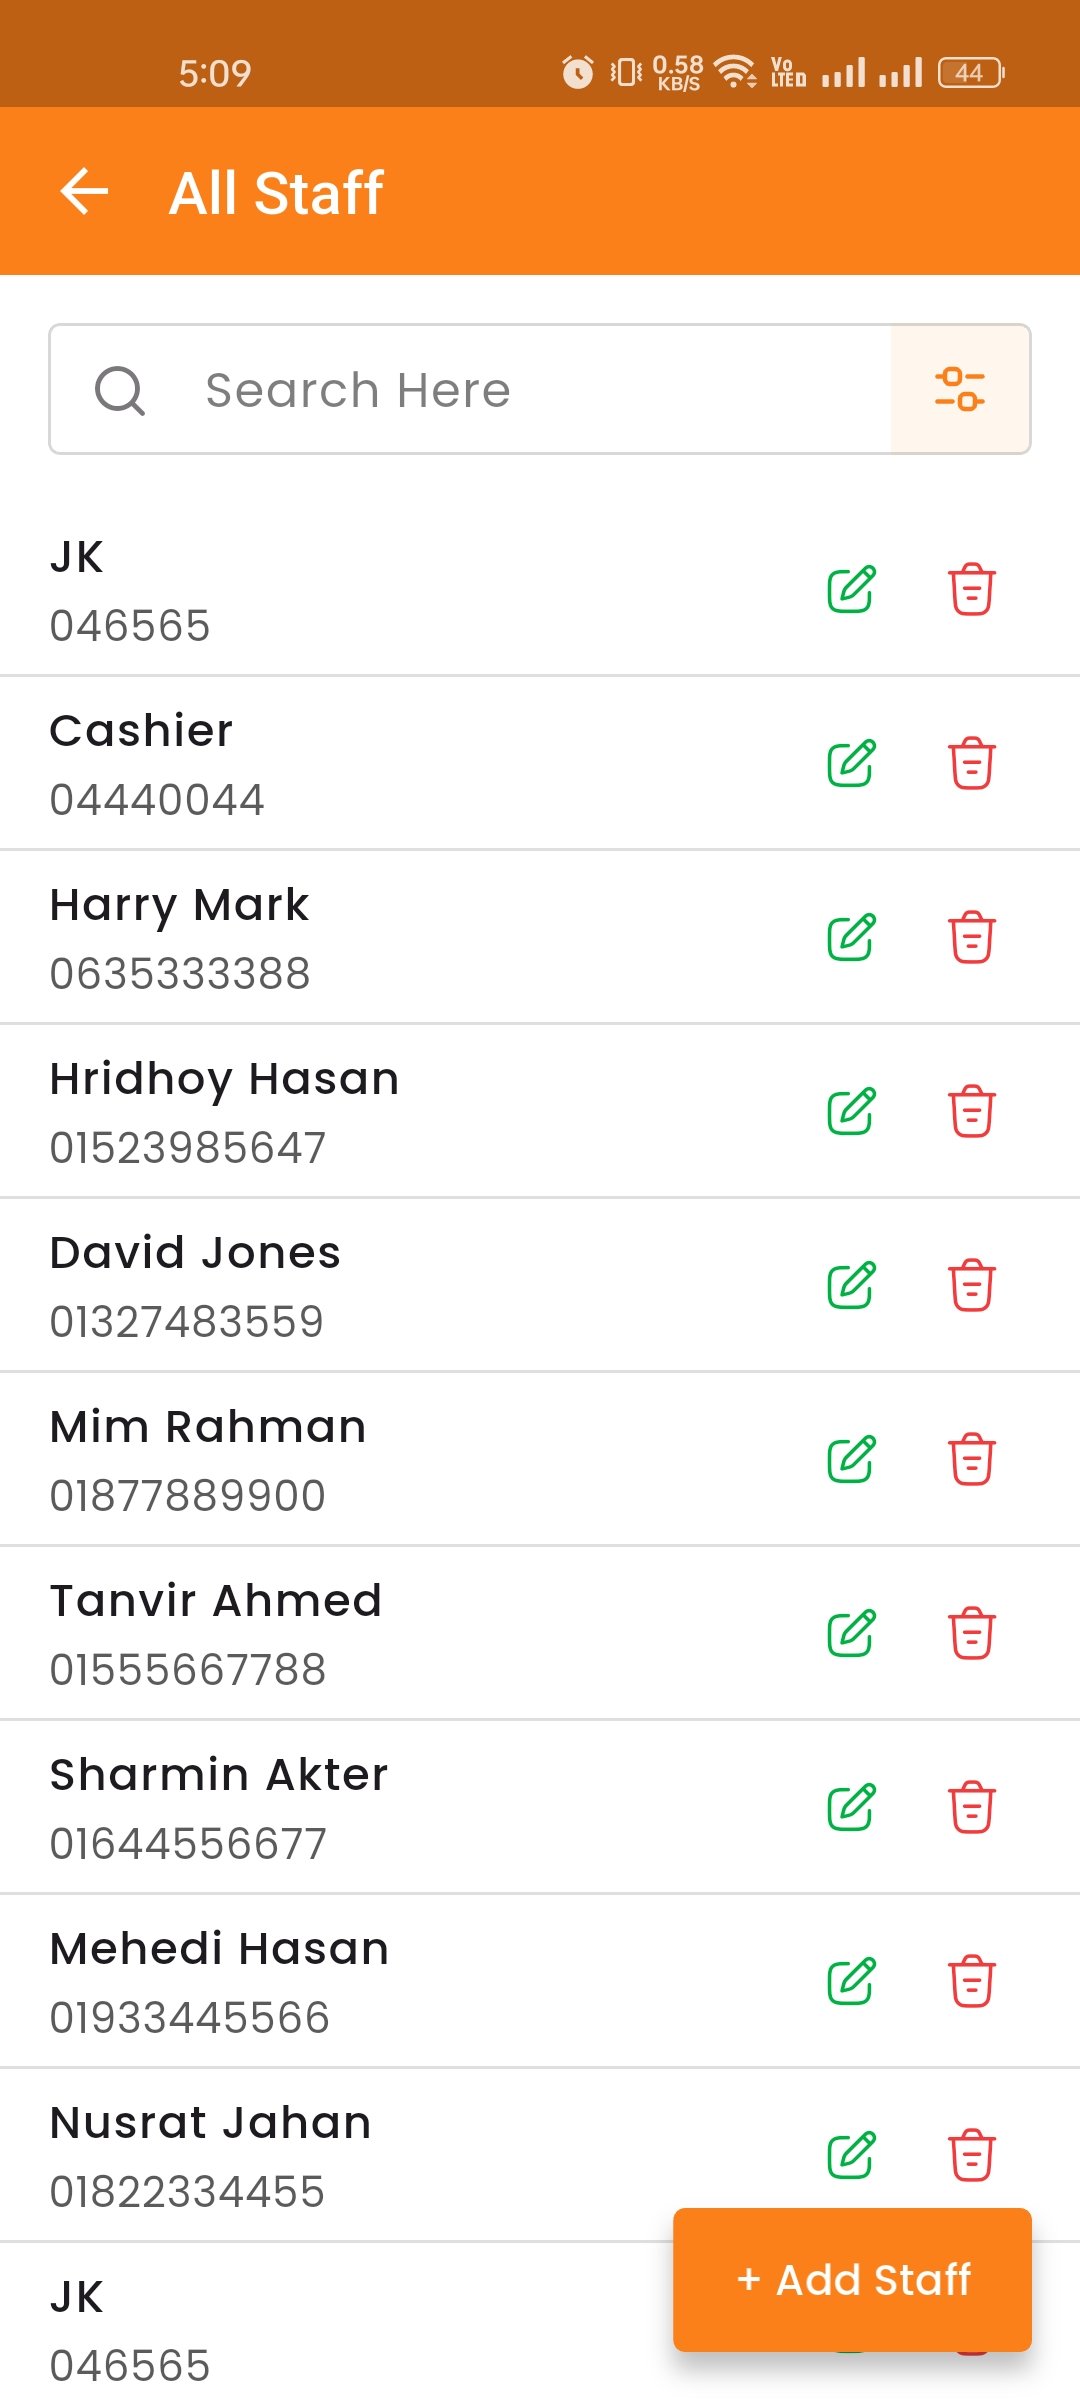
Create Staff
You can create staff by filling out the required input fields and then click the Save button to add a new staff member.
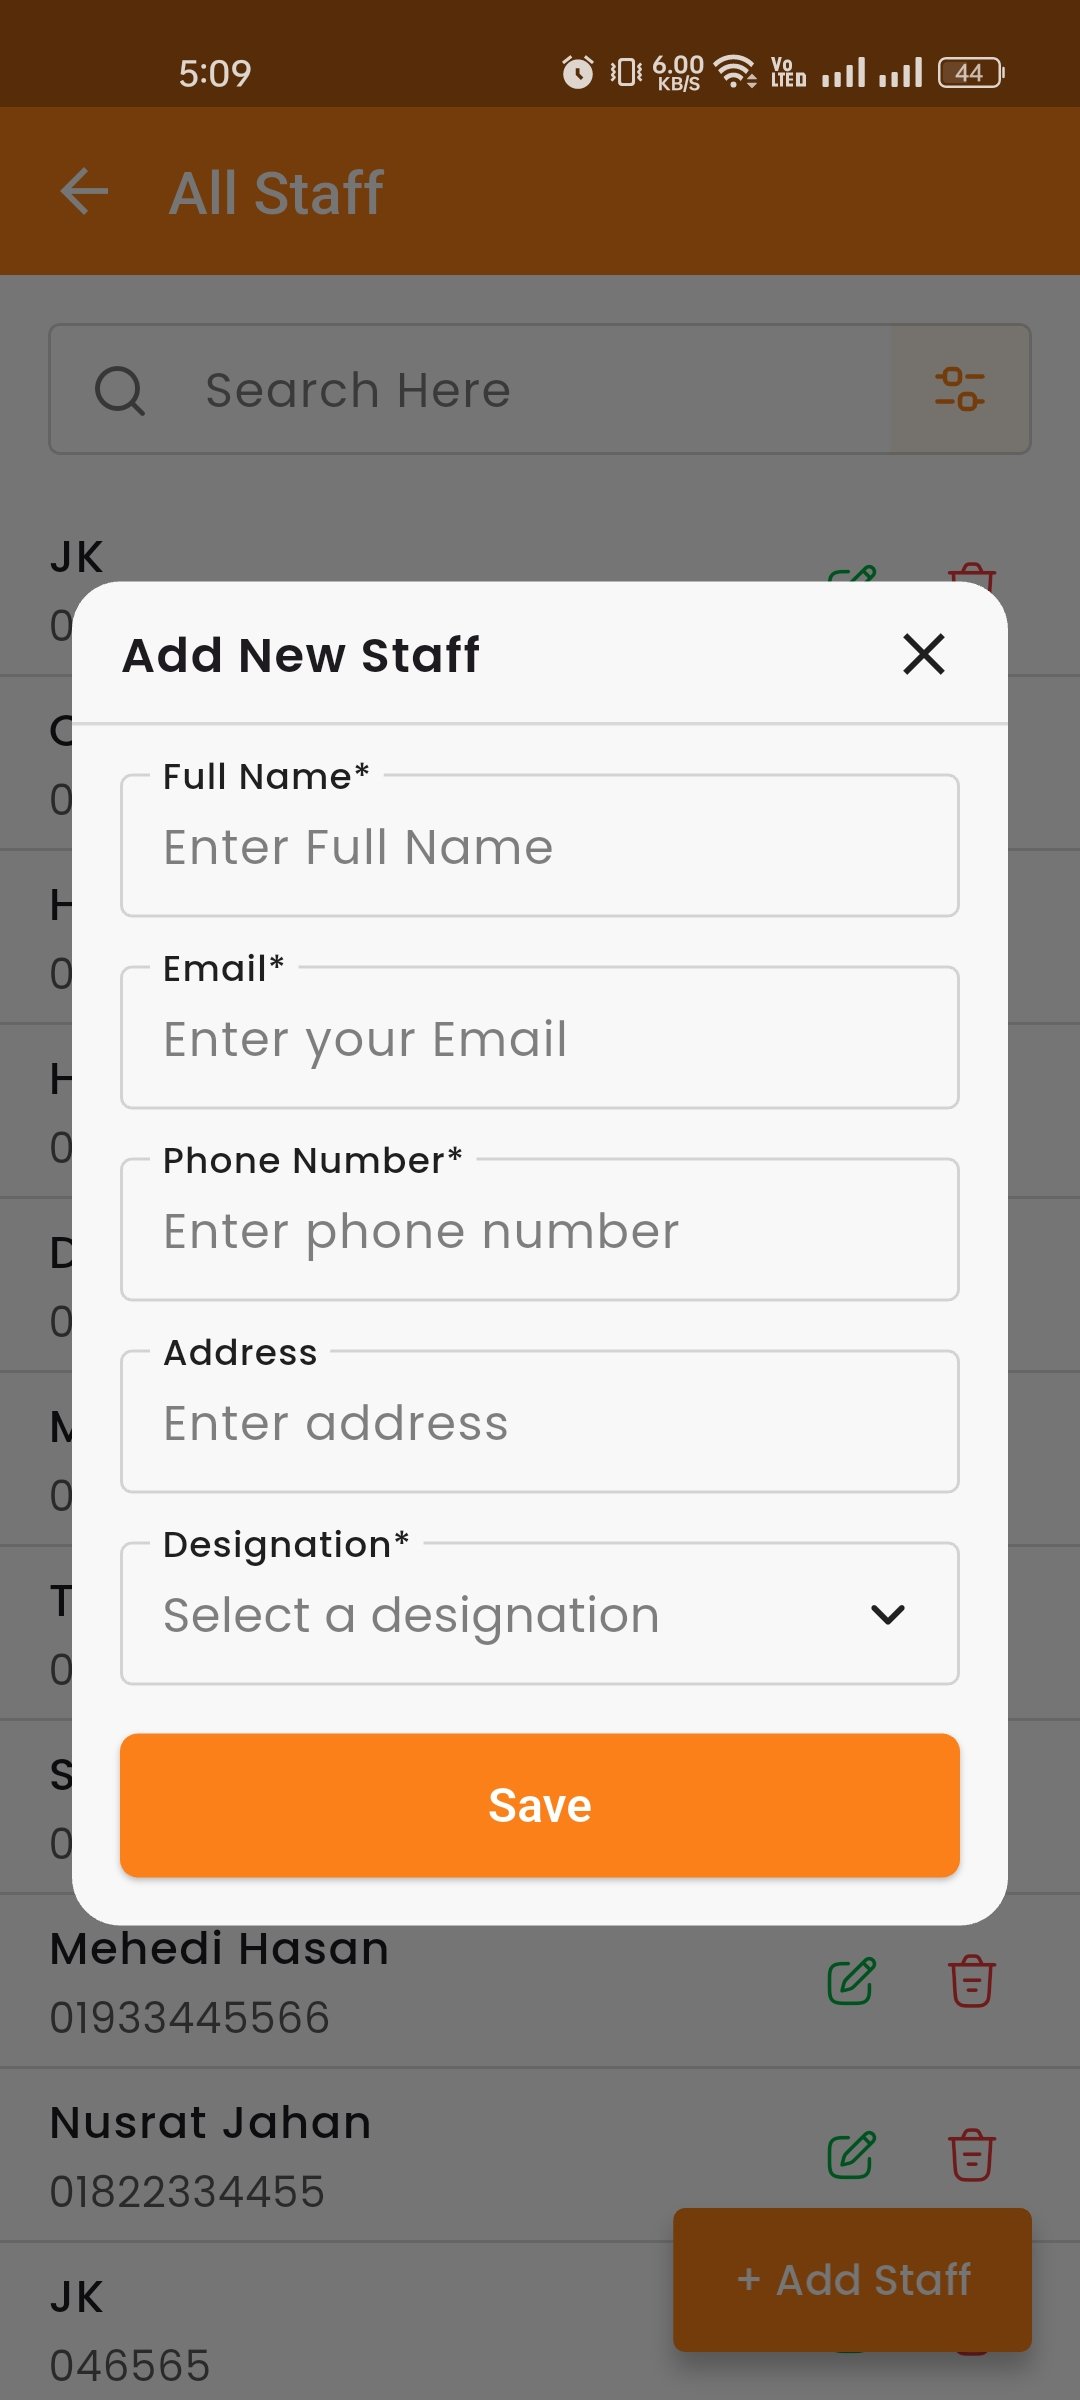
Money In List
View all cash inflows recorded in the system. You can filter by date range and view details of each transaction.
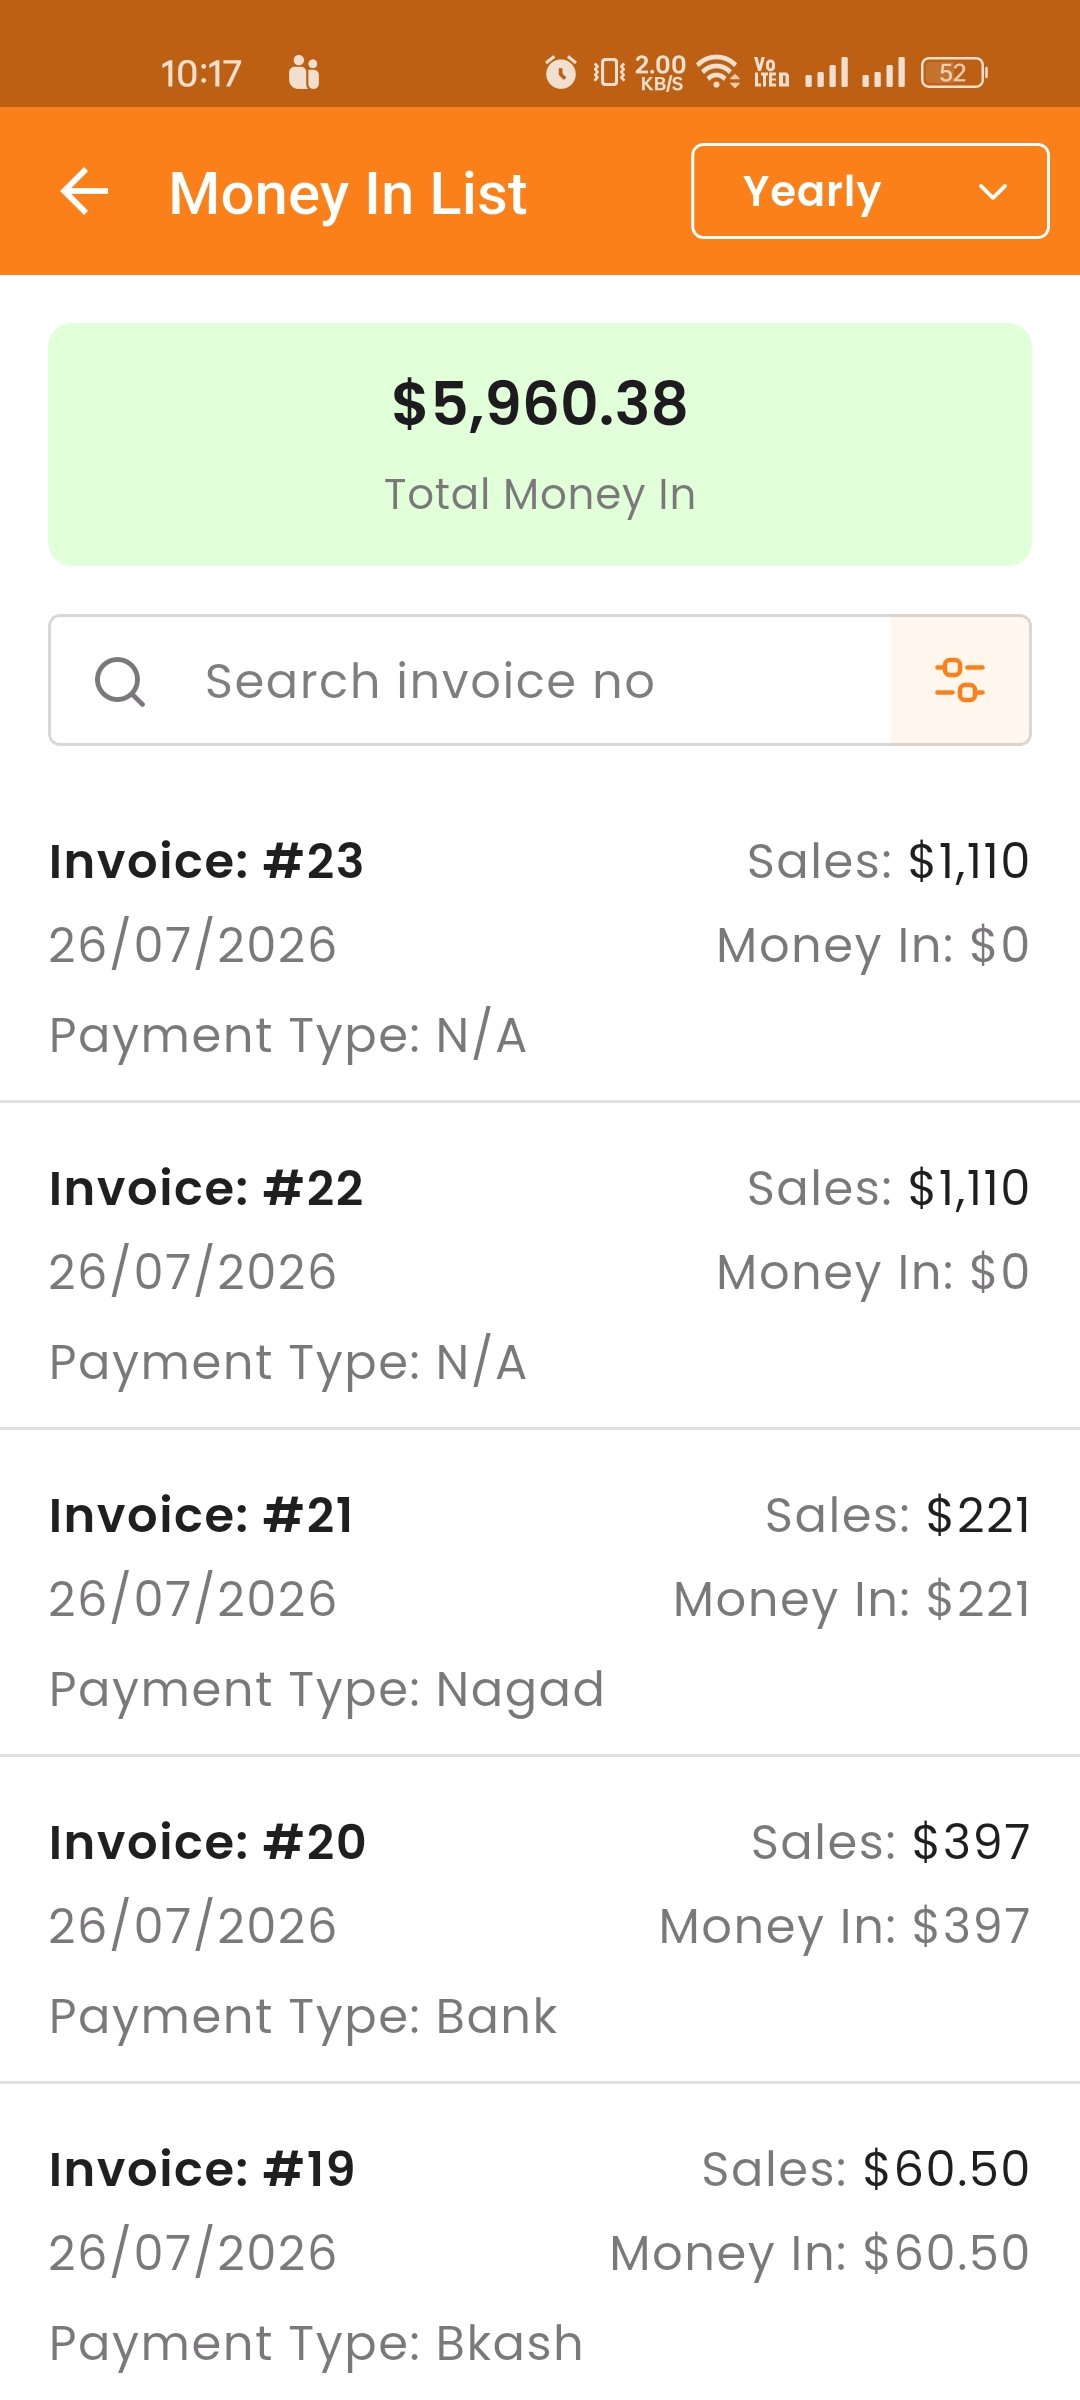
Money Out List
View all cash outflows recorded in the system. You can filter by date range and view details of each transaction.
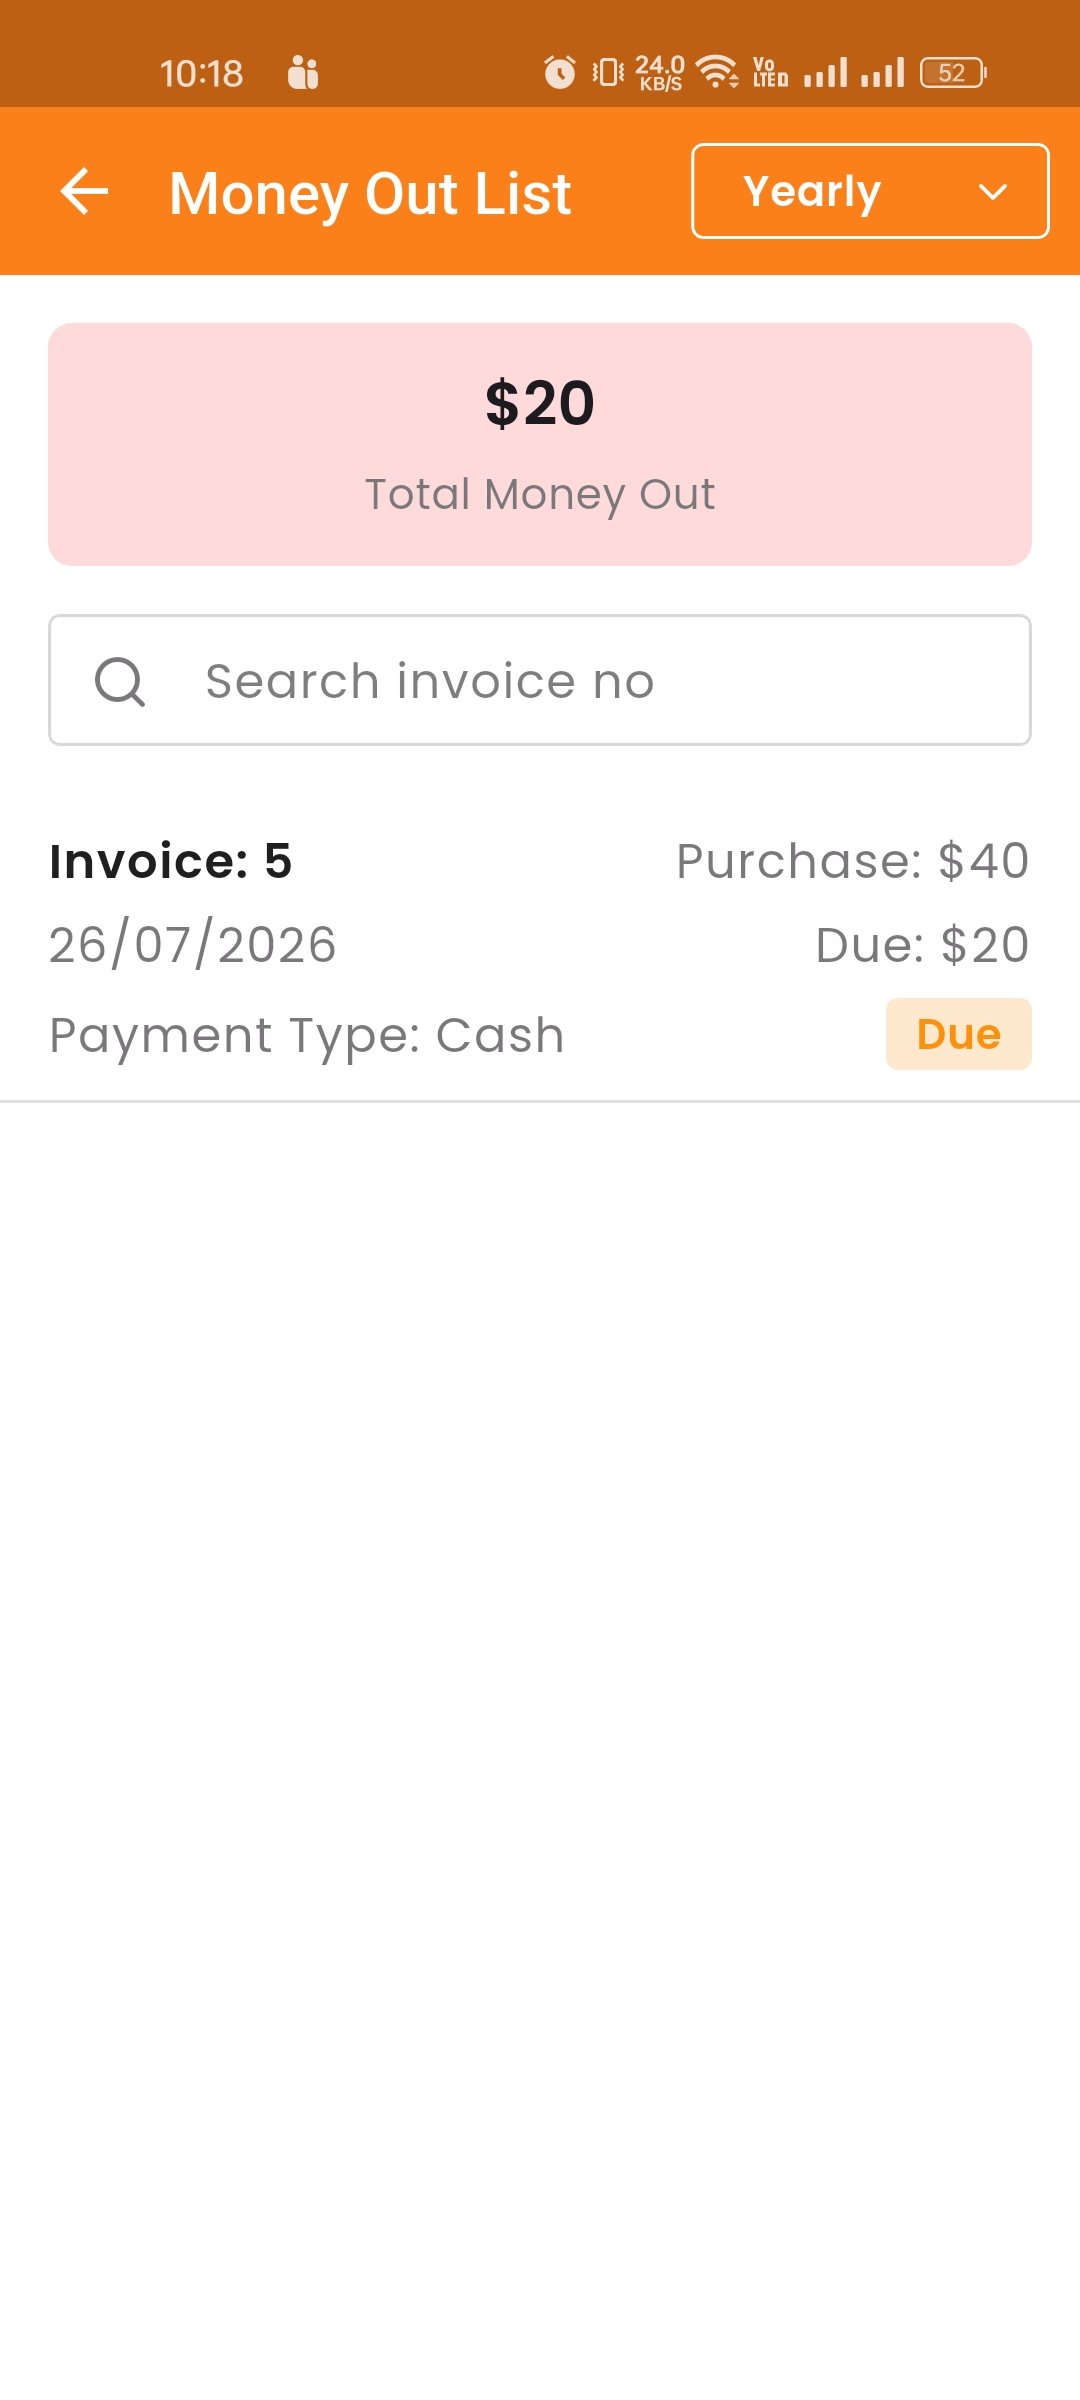
Transaction List
Here, you can view the Transaction list with a search filter and date range
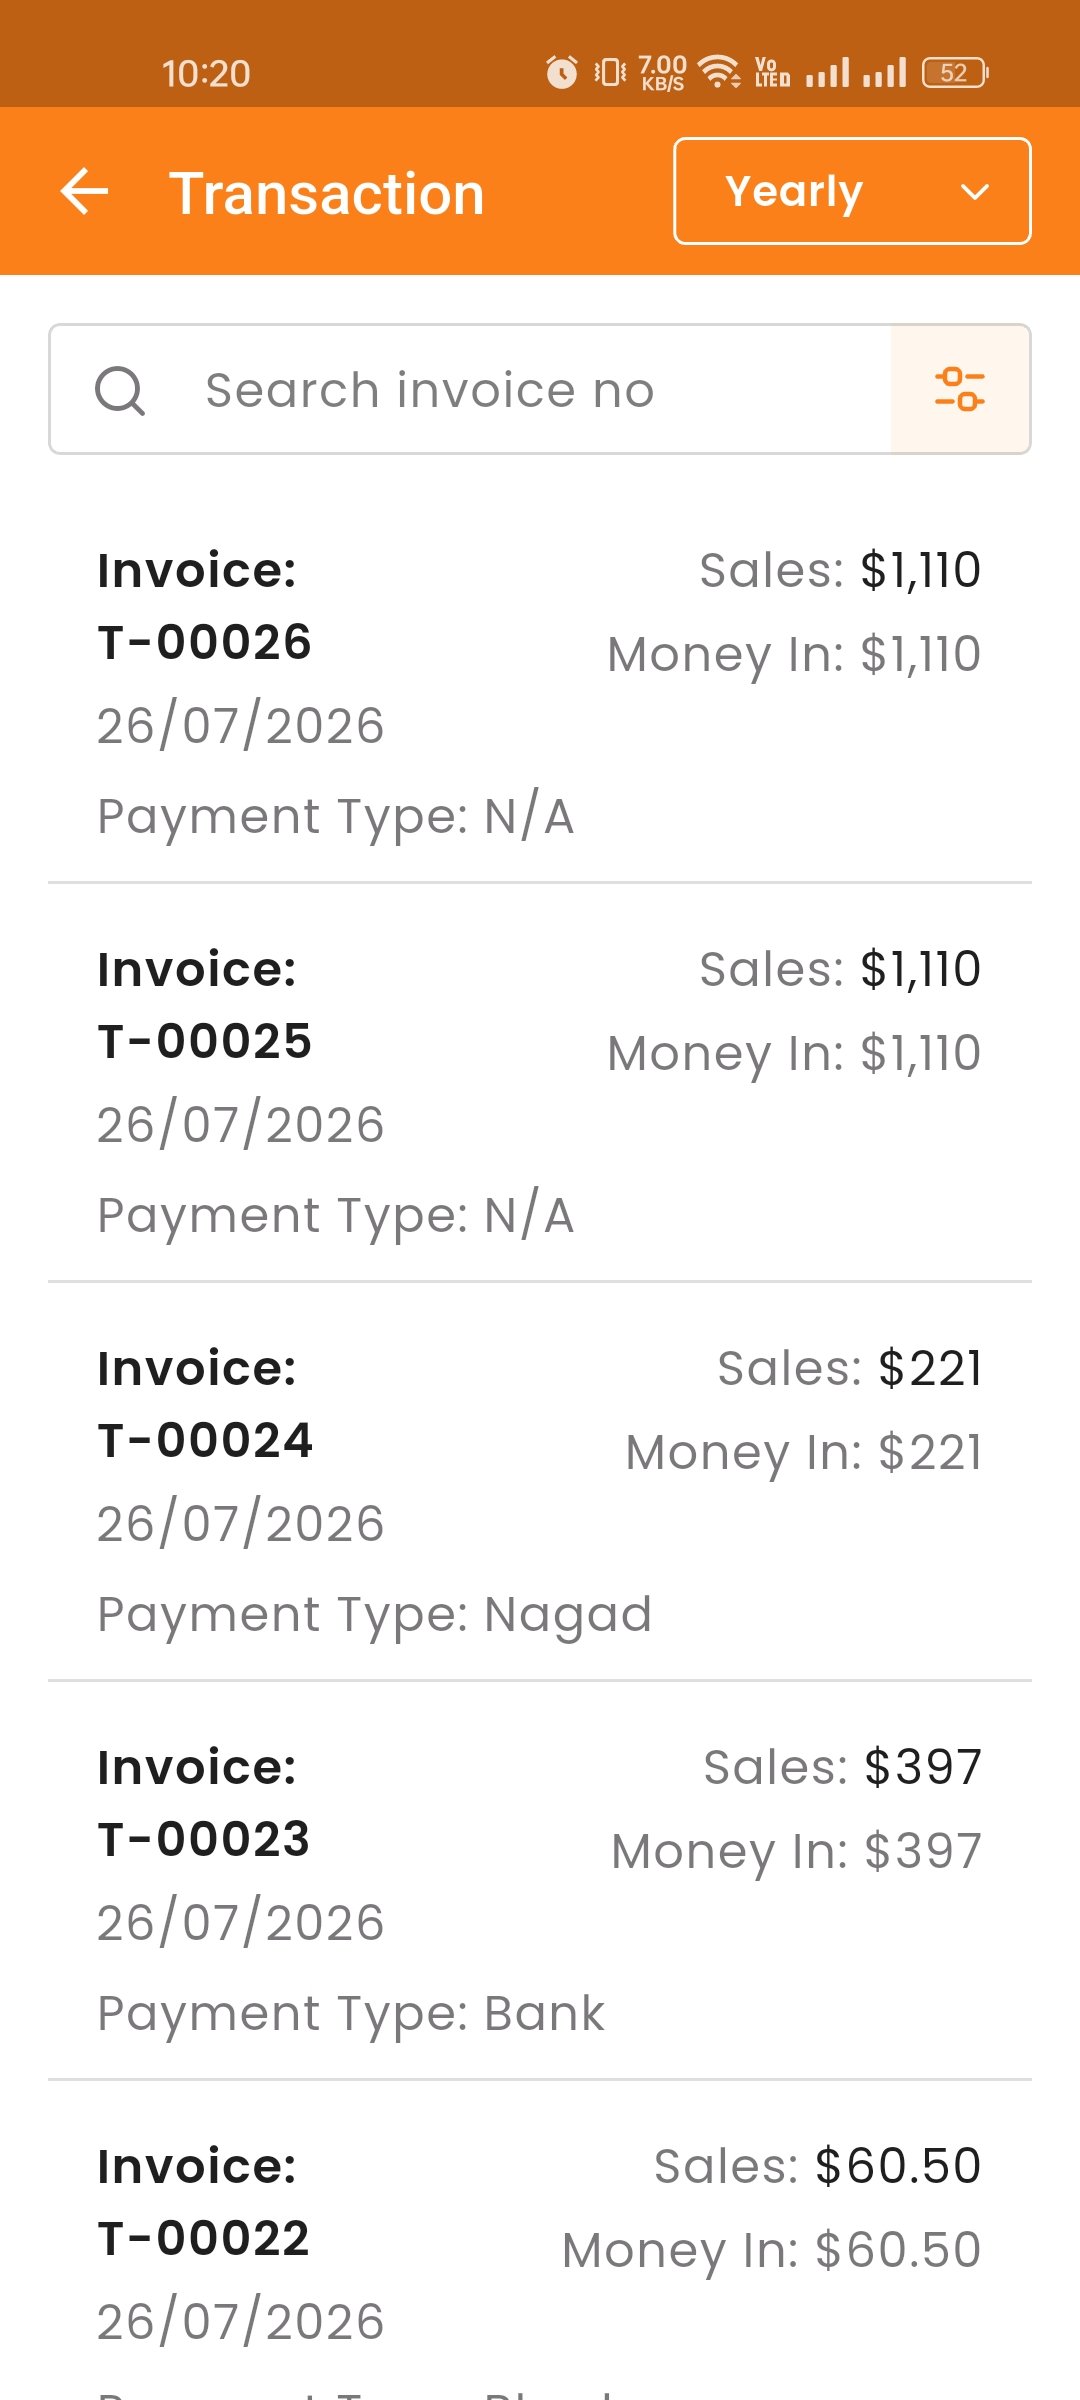
Income List
Here, you can view the Income list with a search filter. You have the option to edit, delete, or use the category filter.
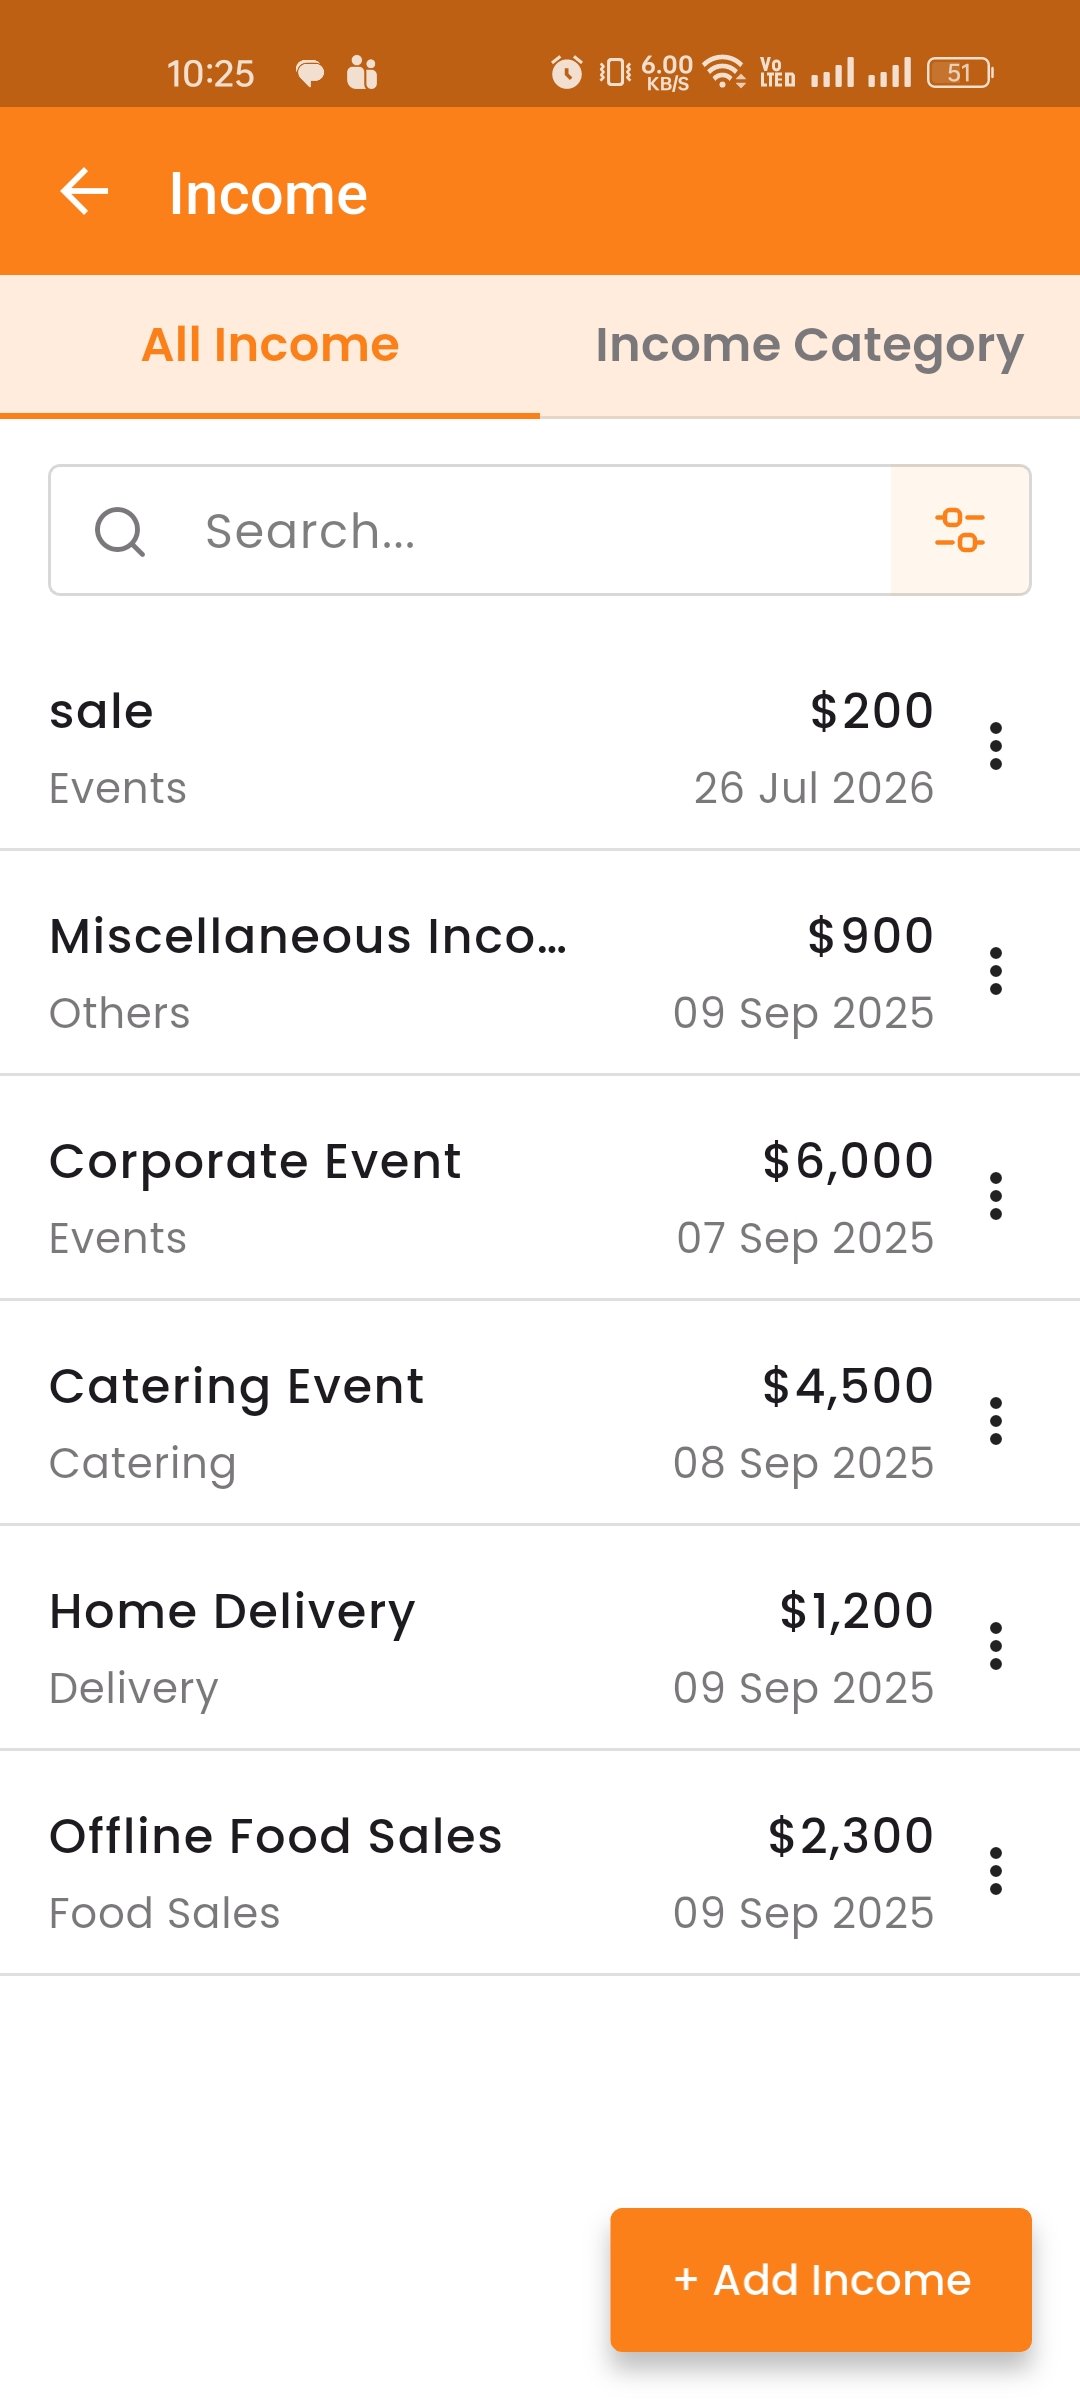
Create Income
You can create an income entry by filling out the required fields. You can also select category and payment type.
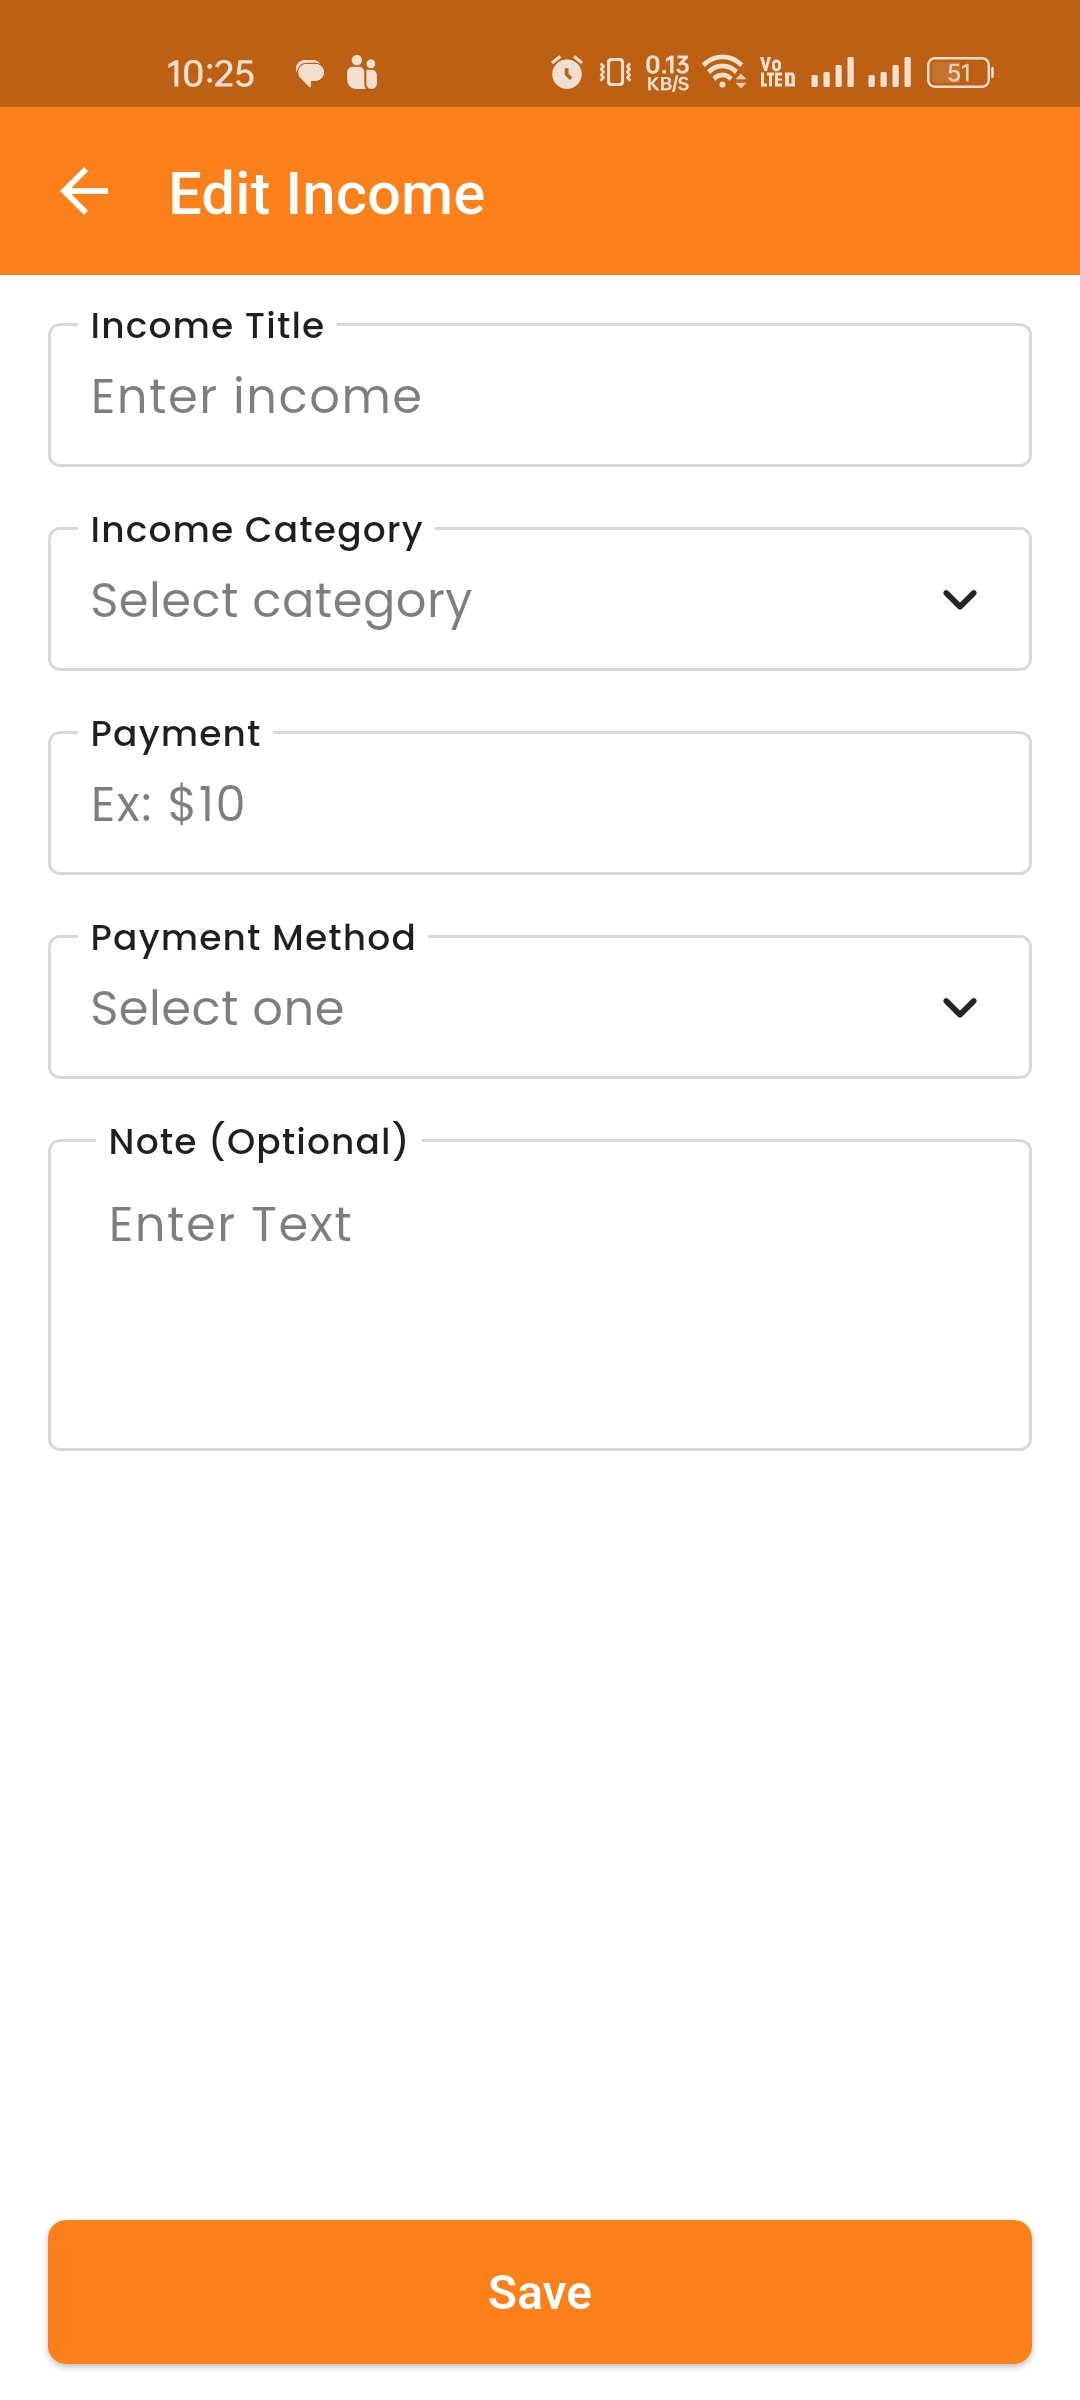
Income Category
Manage income categories. Add, edit, delete, and search categories to organize your income records.
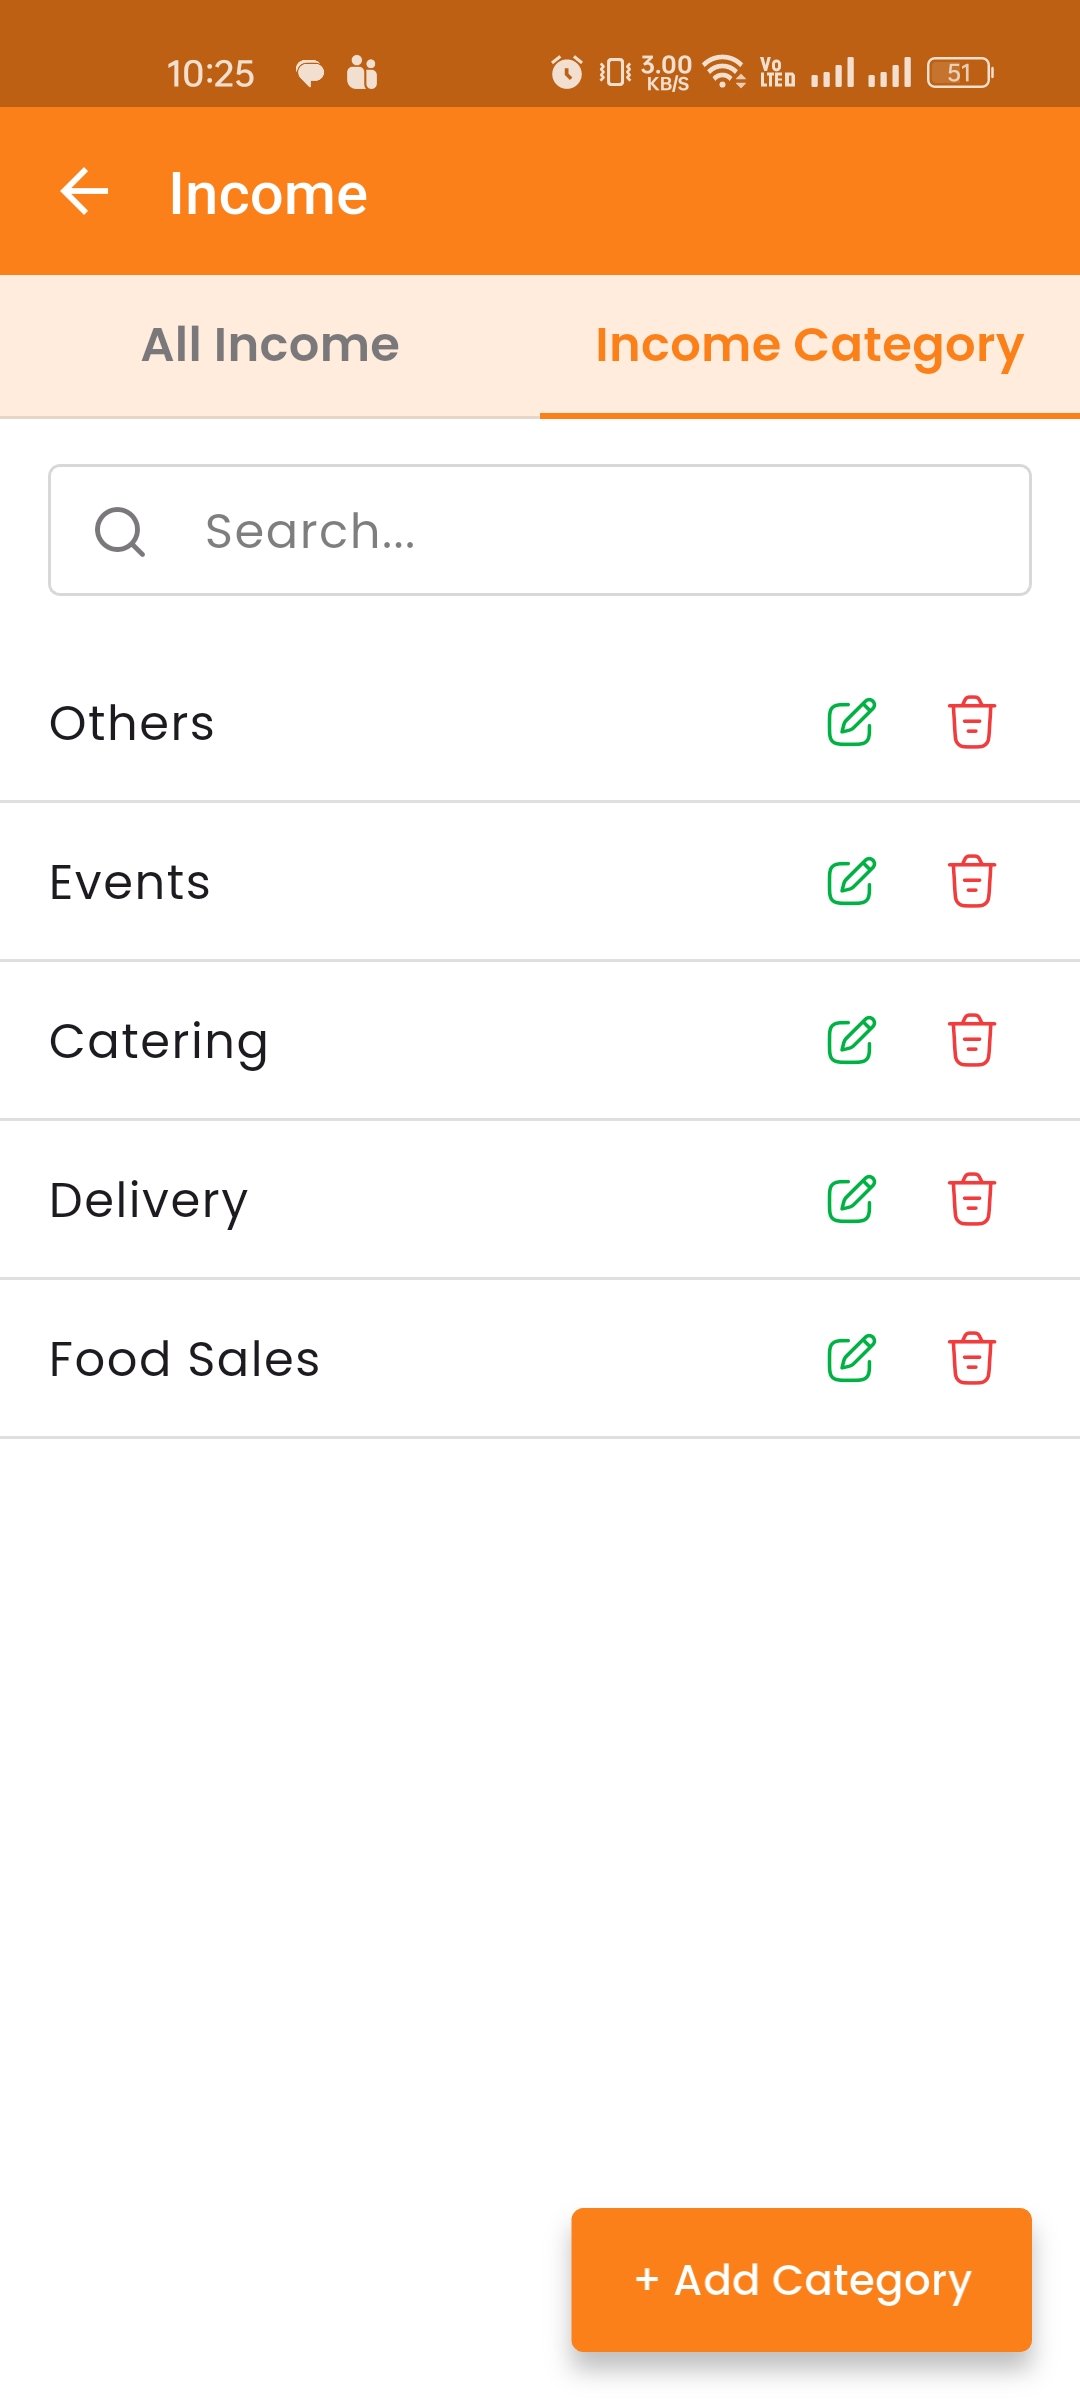
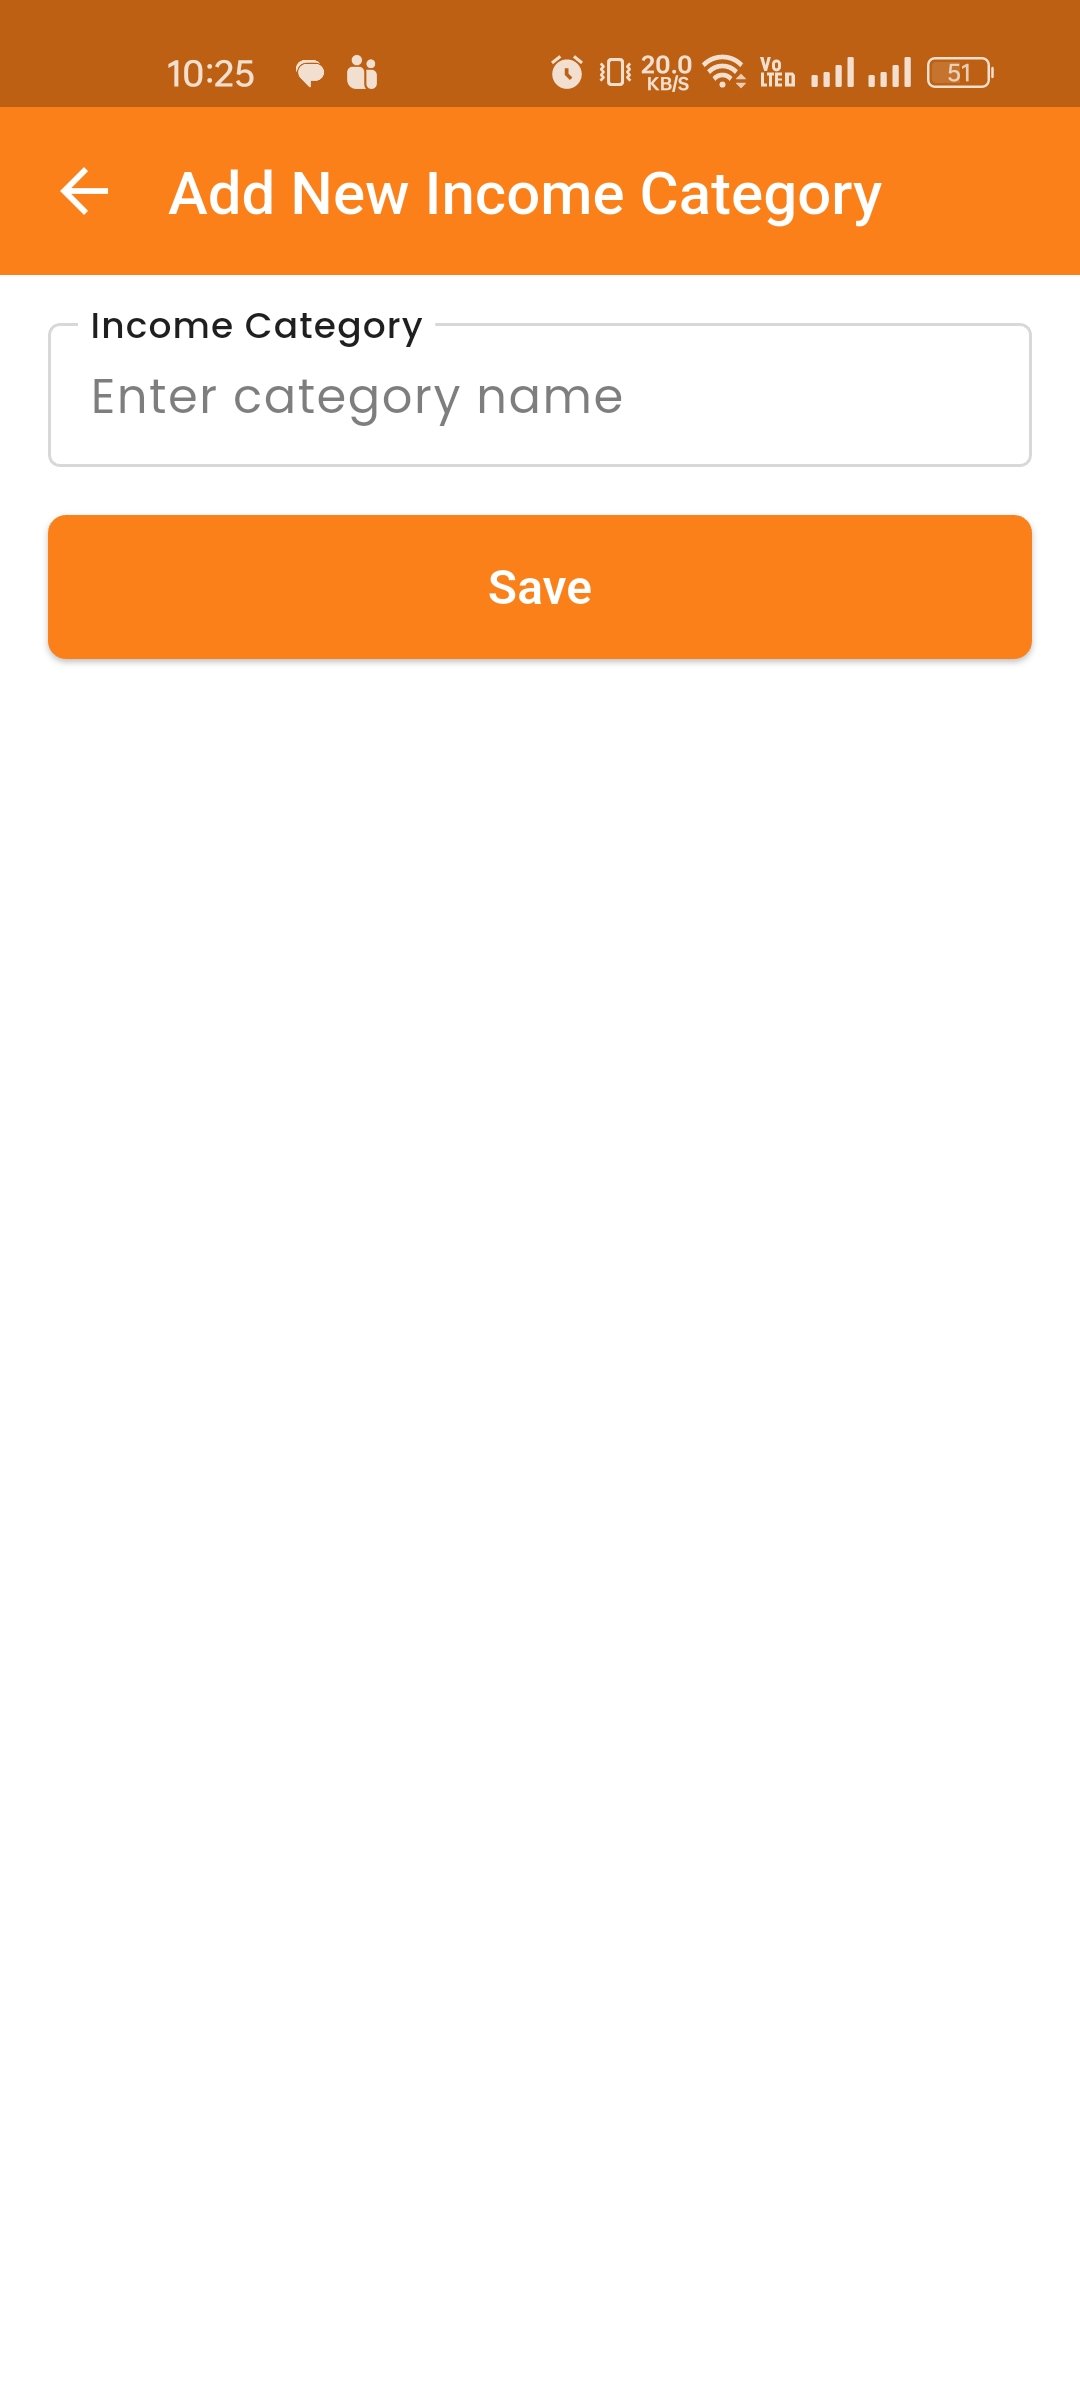
Expense List
Here, you can view the Expense list with a search filter. You have the option to edit, delete, or use the category filter.
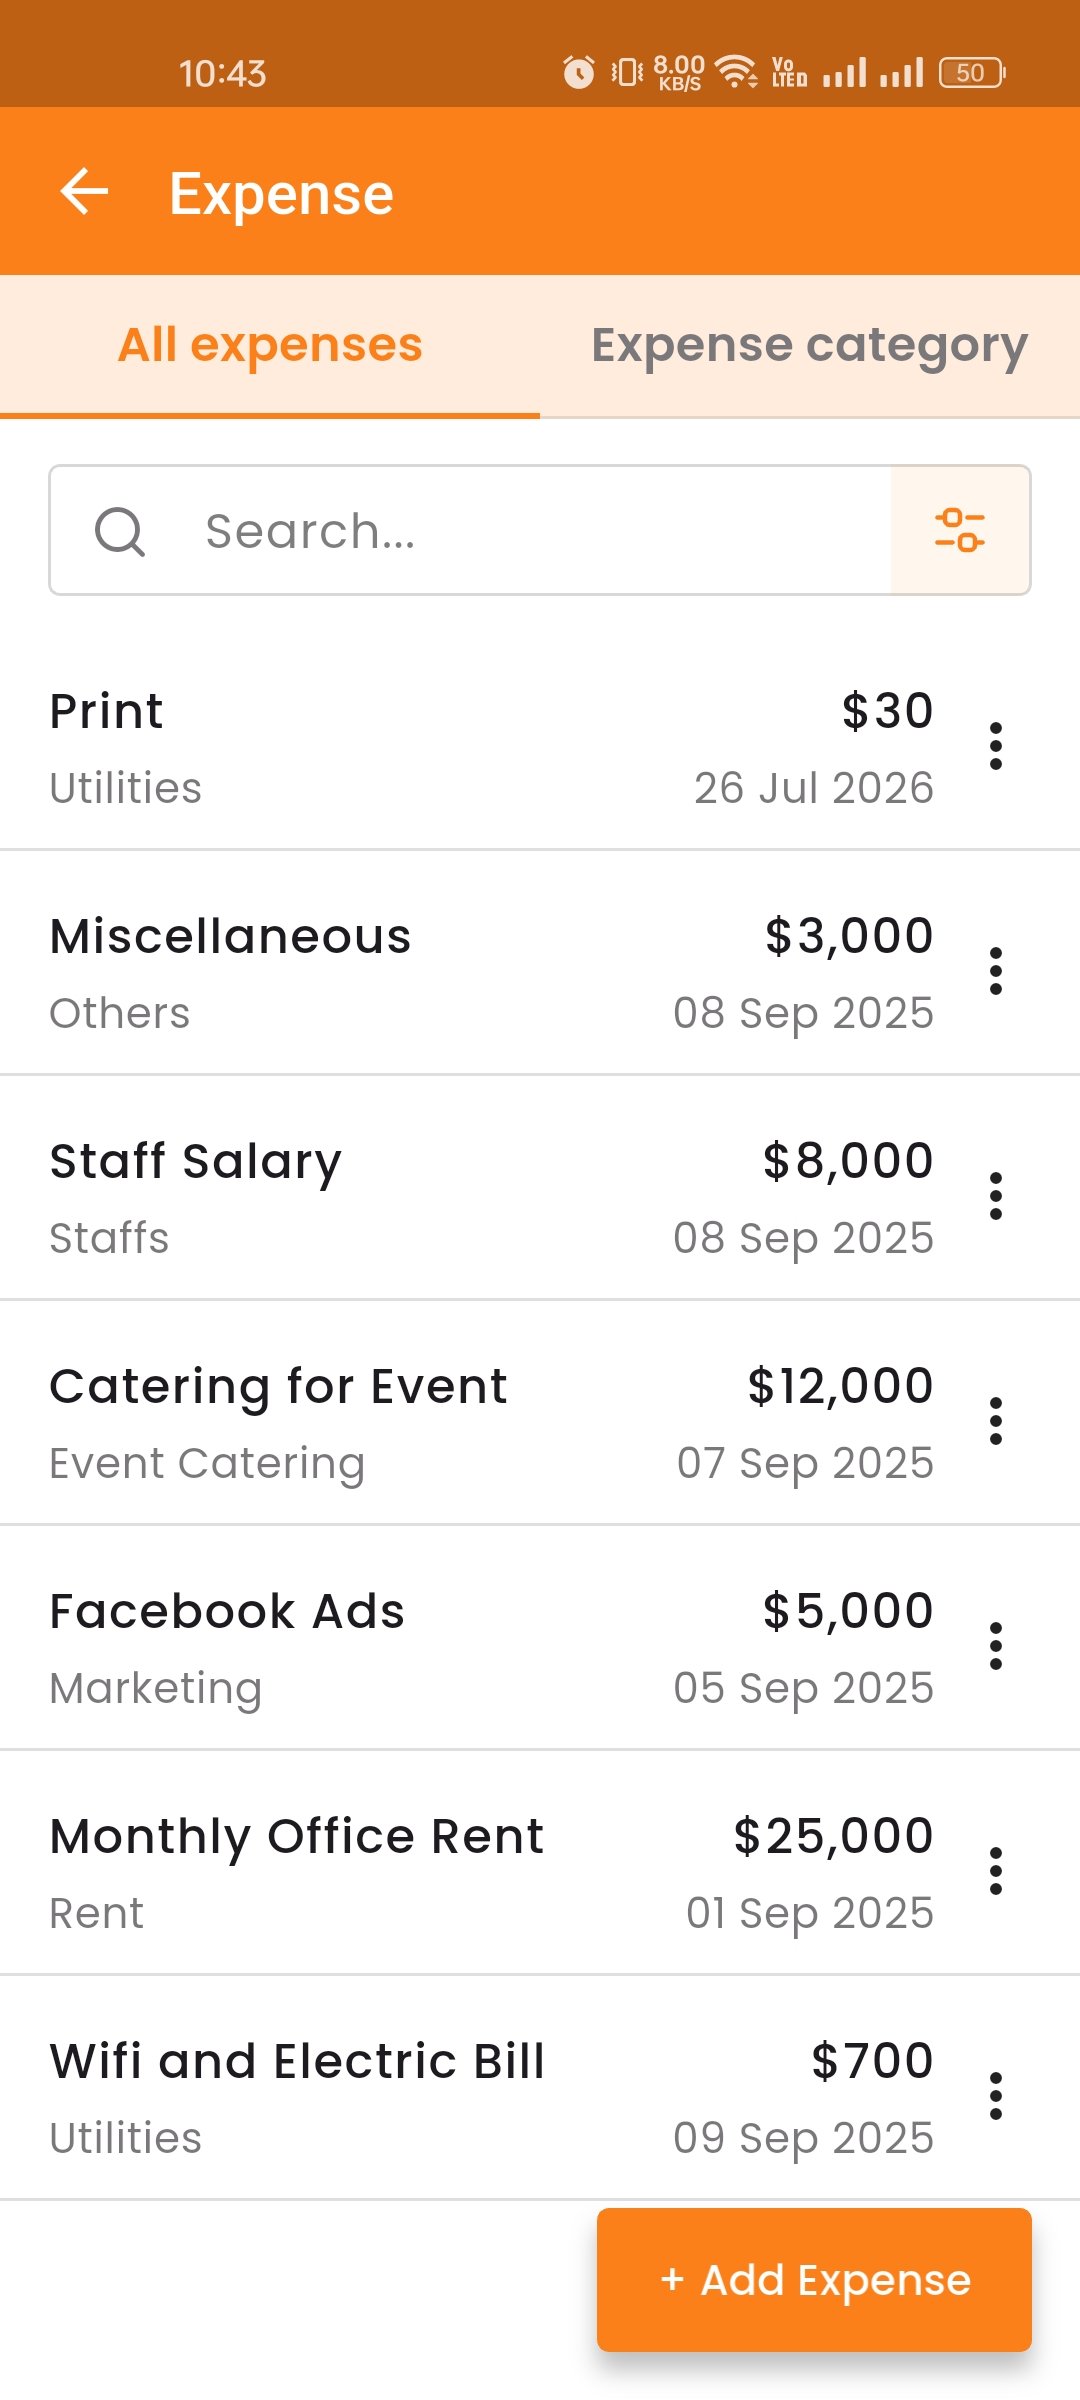
Create Expense
You can create an expense entry by filling out the required fields. You can also select category and payment type.
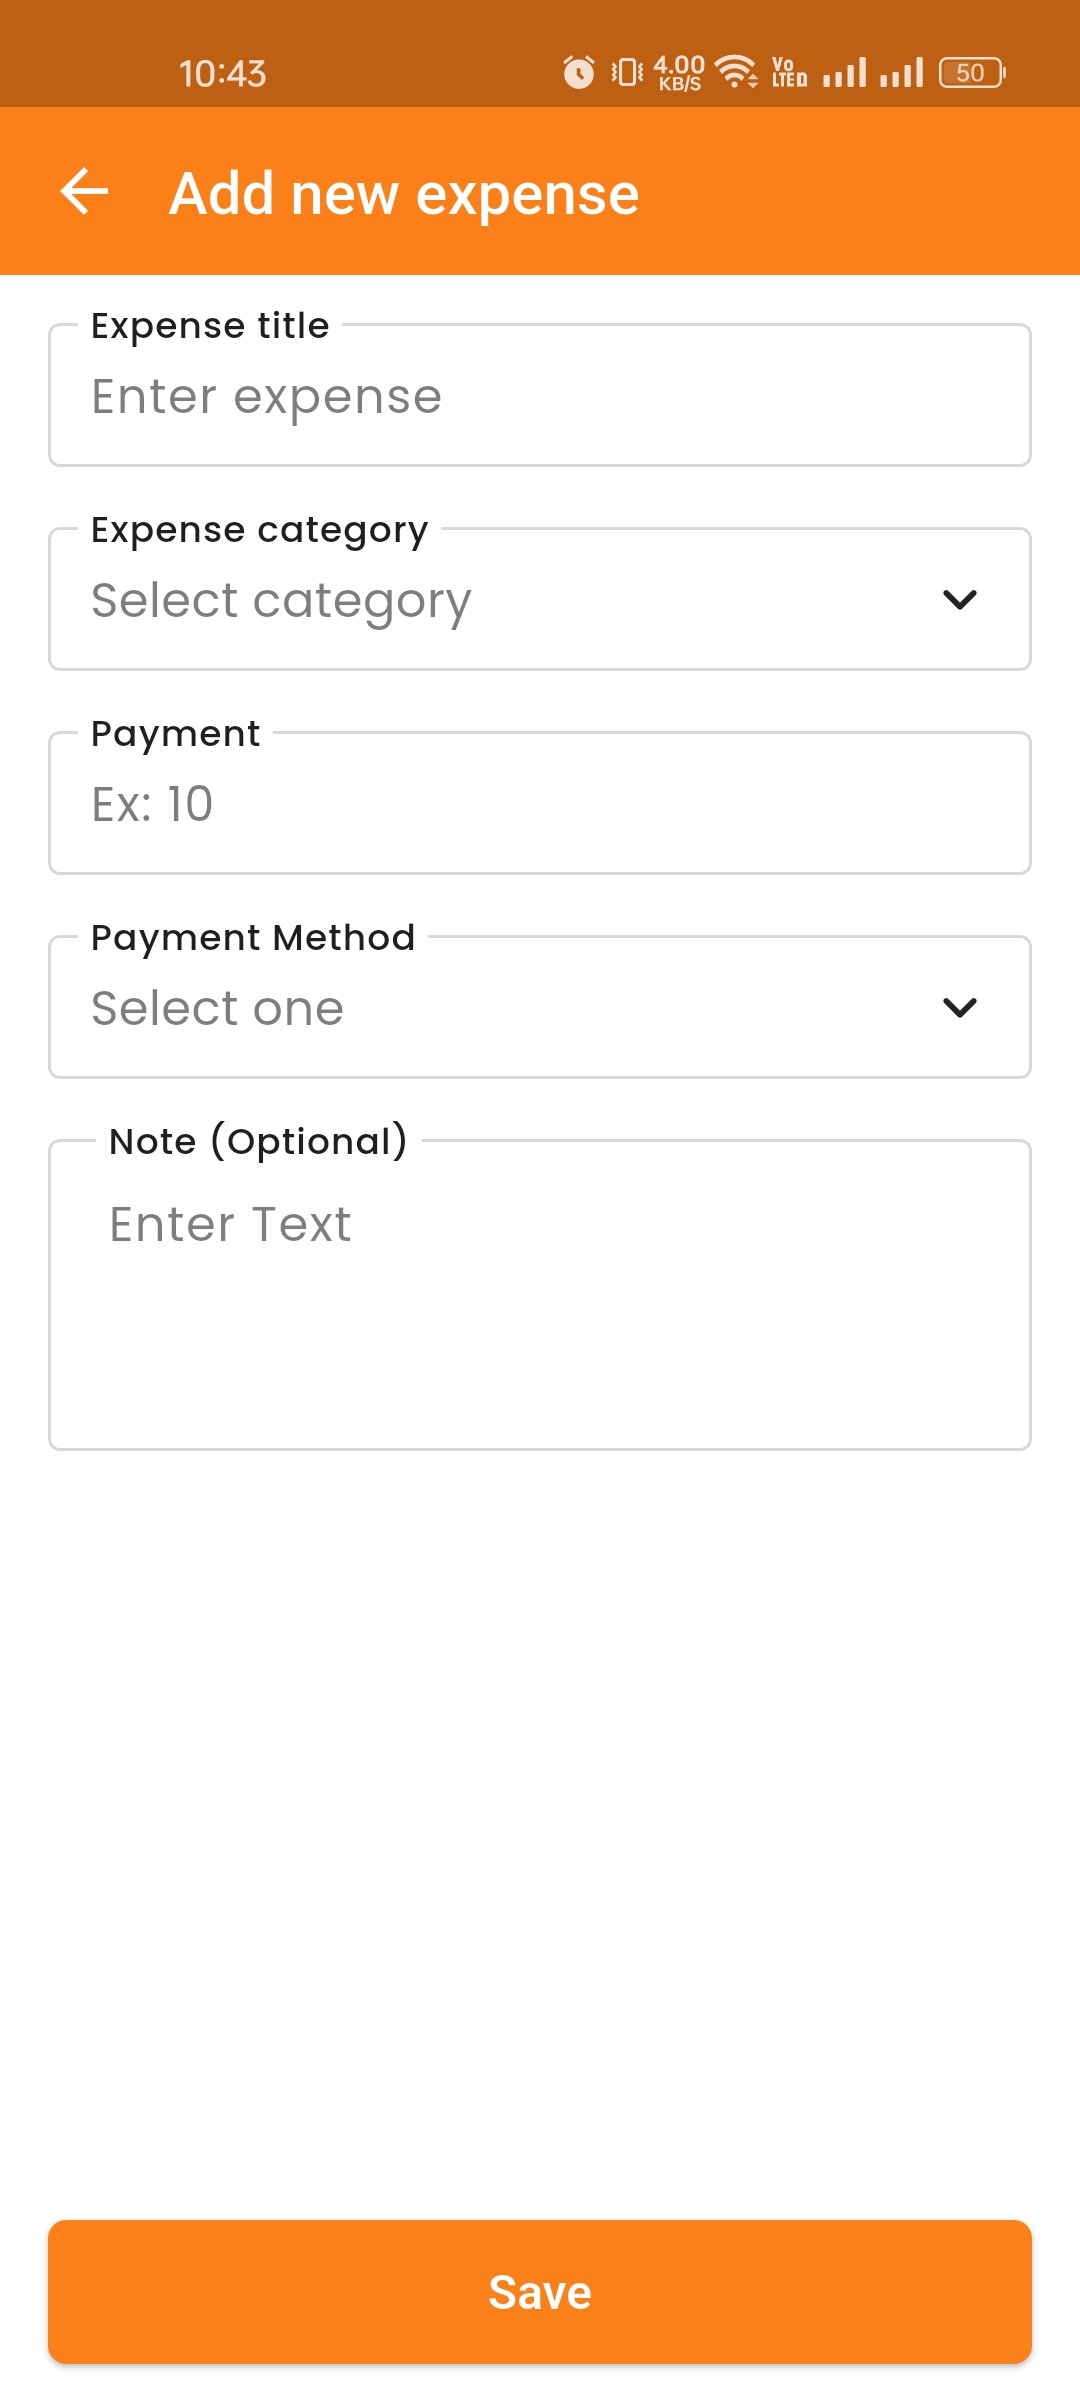
Expense Category
Manage expense categories. Add, edit, delete, and search categories to organize your expense records.
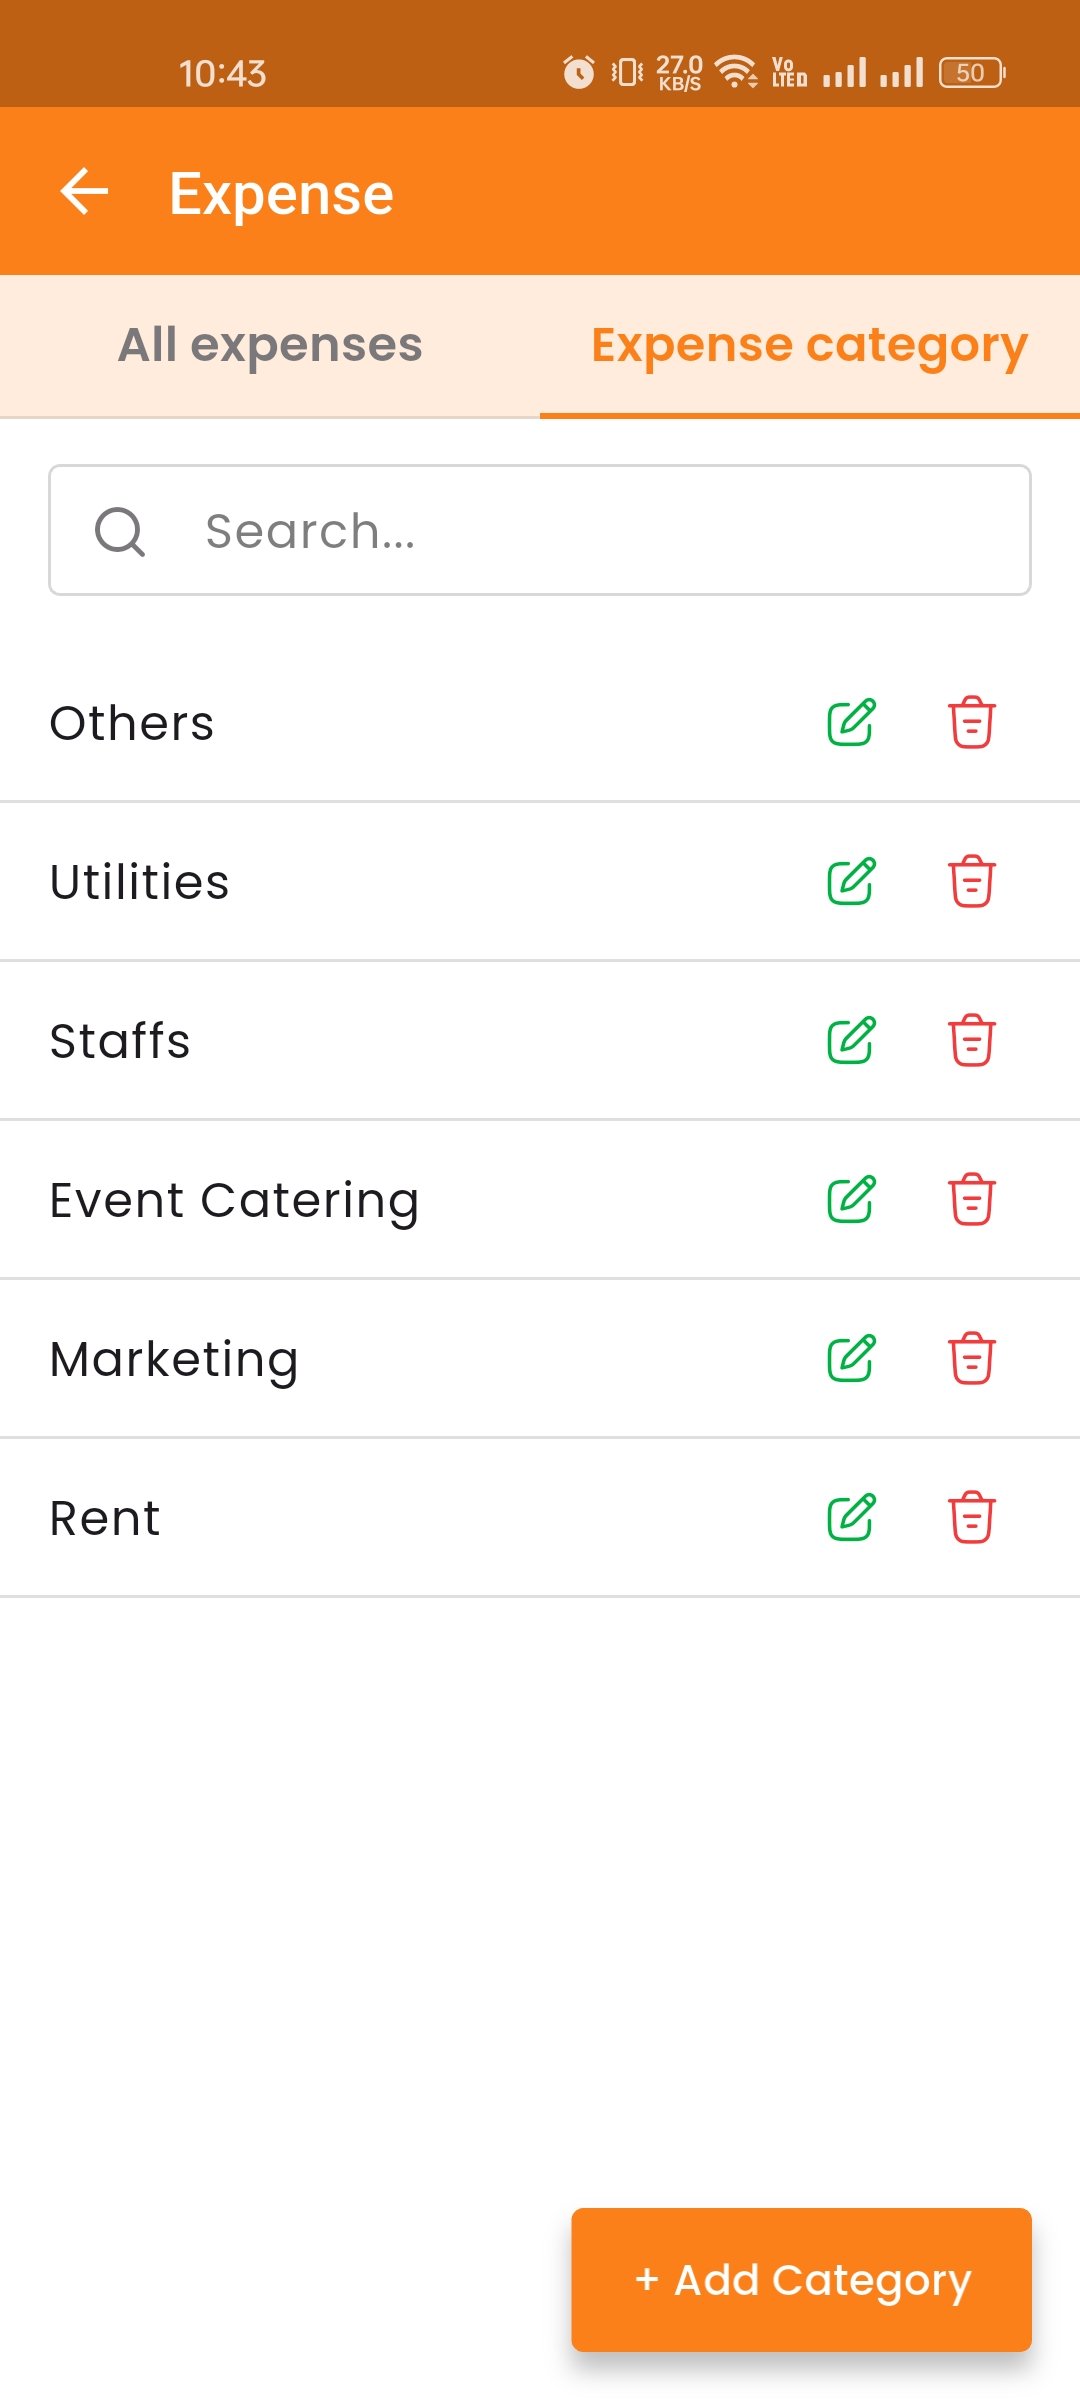
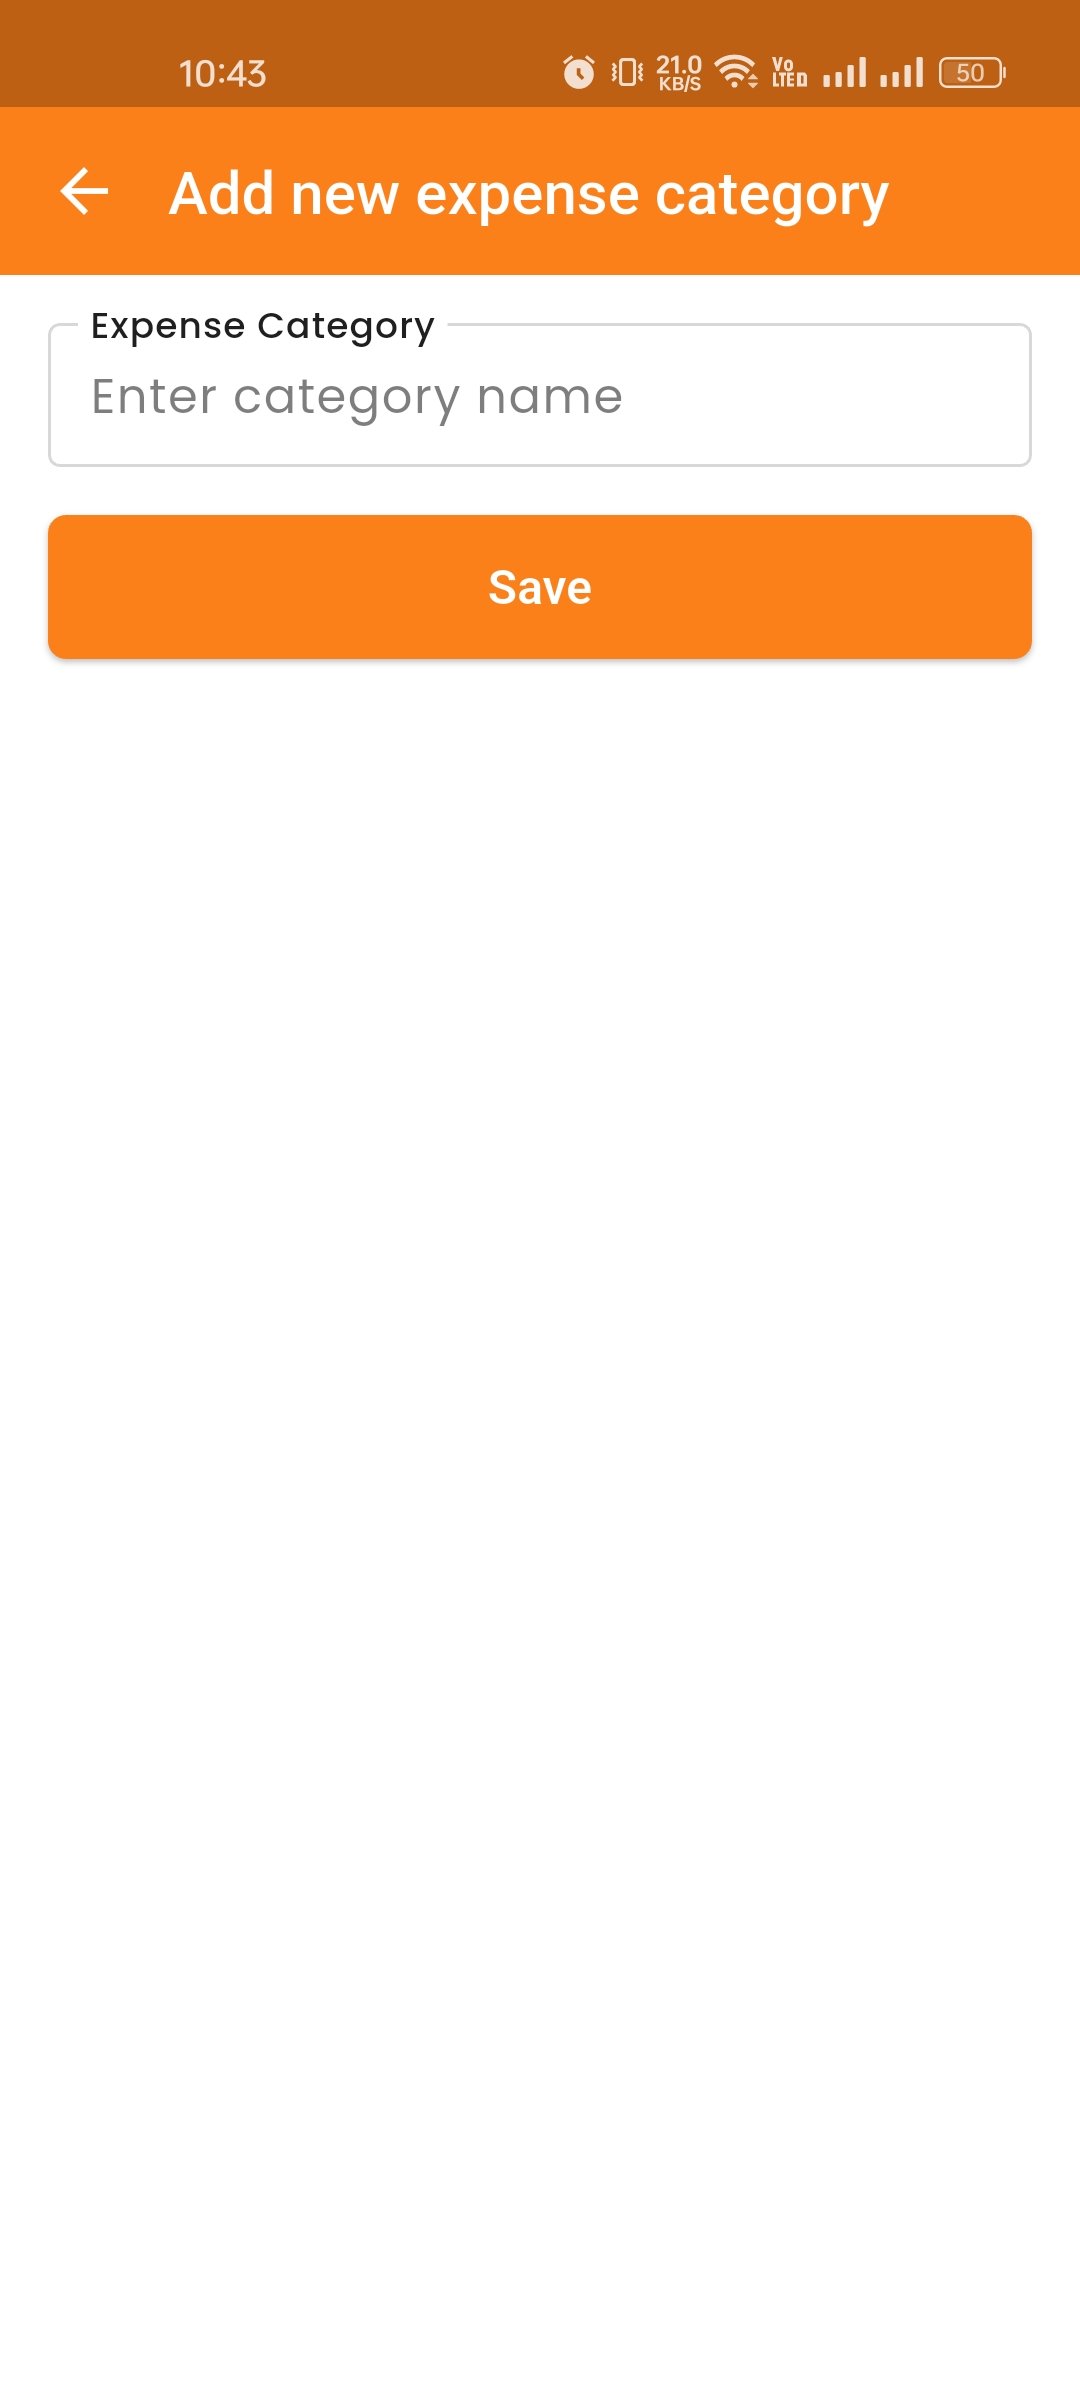
Coupon List
Here, you can view the Coupon list with three tabs: Upcoming, Available, and Expired.You have the option to create, edit, and delete coupons.
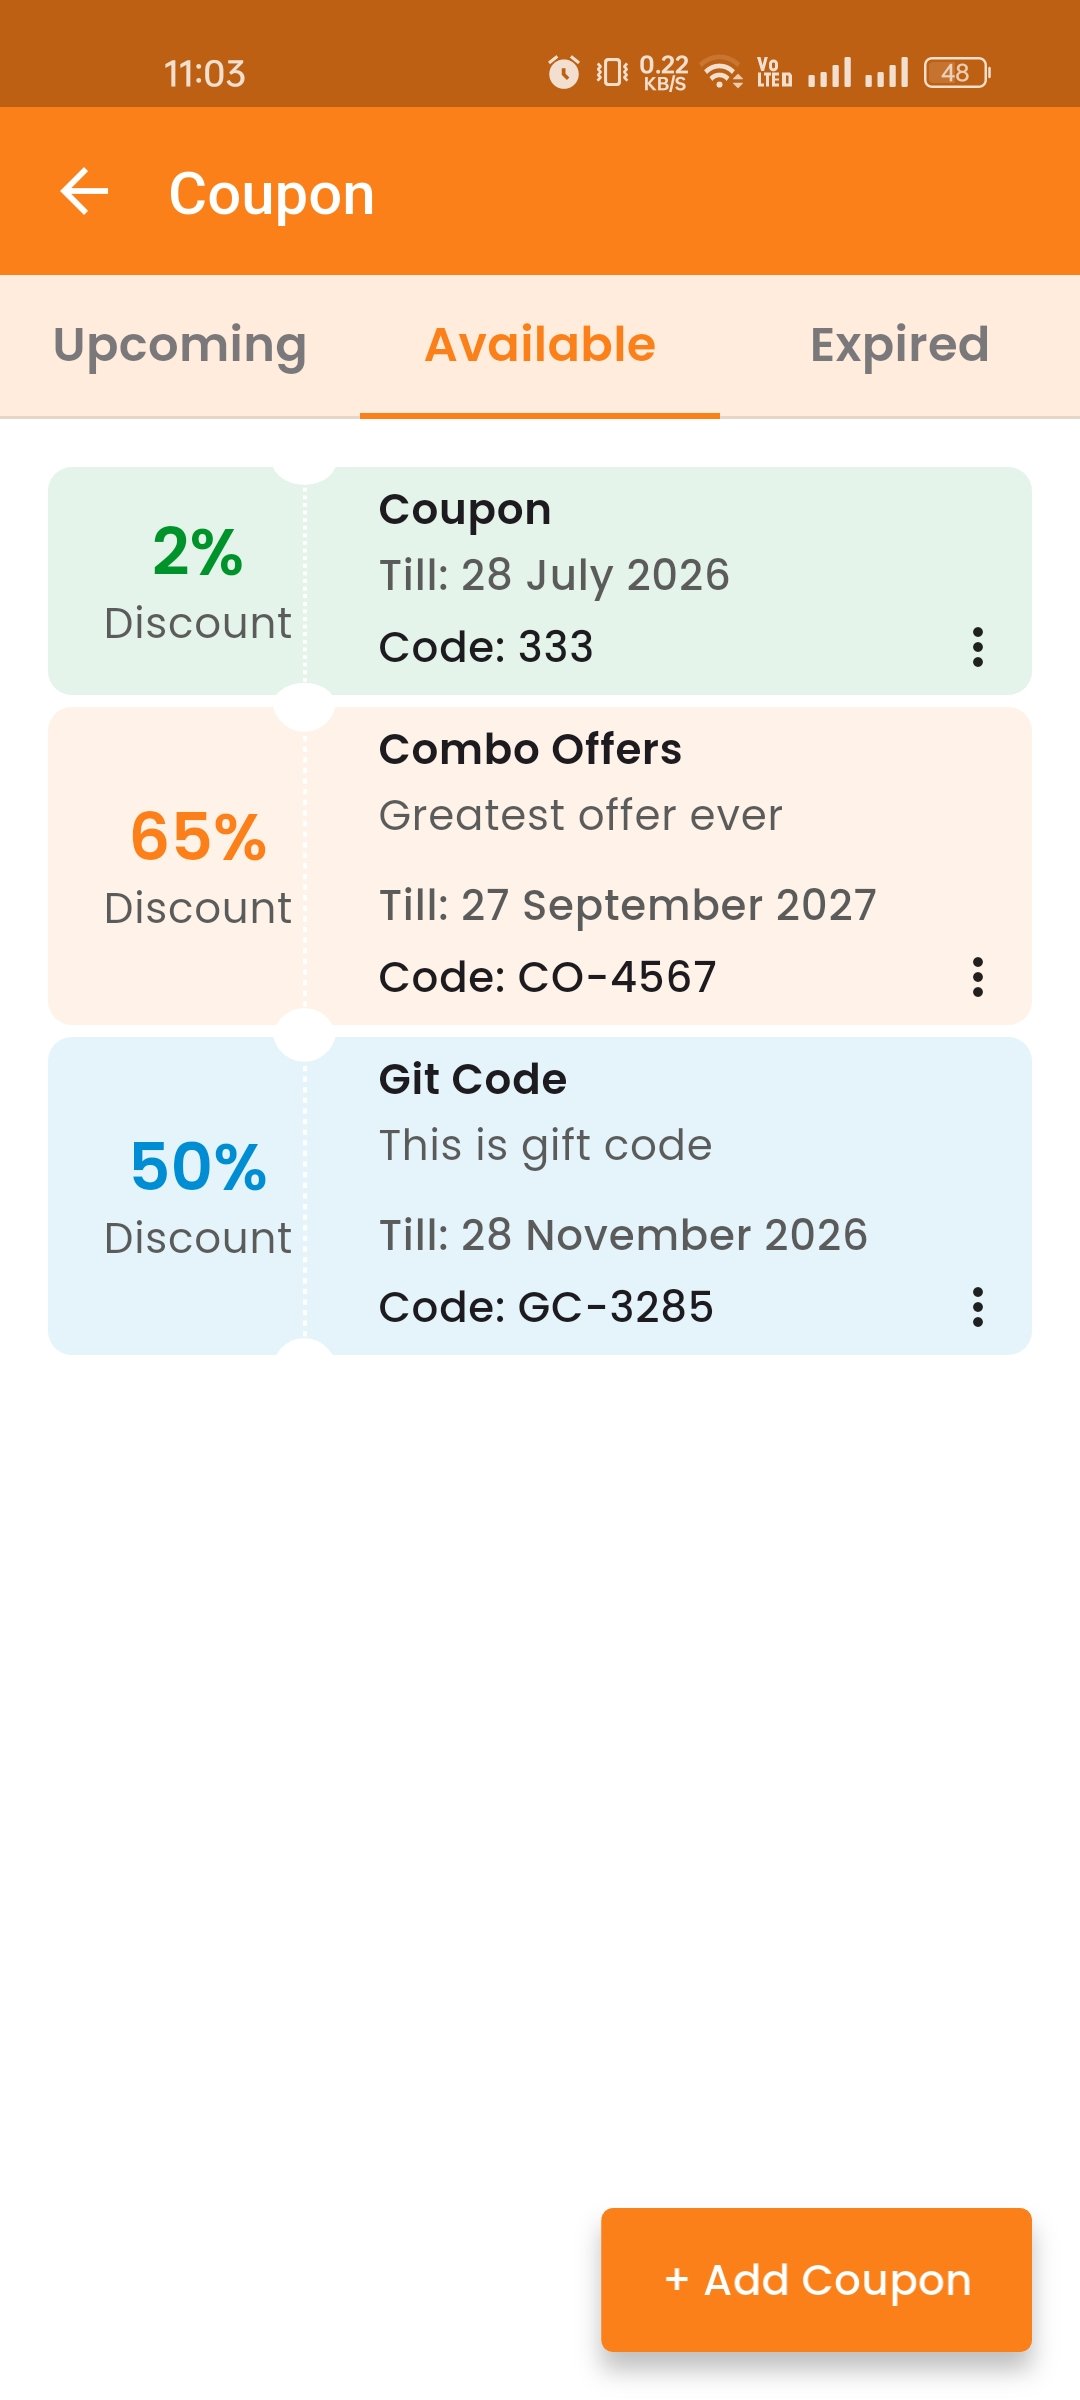
Create Coupon
You can create a coupon by filling out the required fields. You can also select discount type and discount value.
VAT Setting
Here, you can view VAT settings and VAT groups. Use the VAT On Sale toggle to activate any VAT during item sales. When one VAT is activated, all others are automatically deactivated.
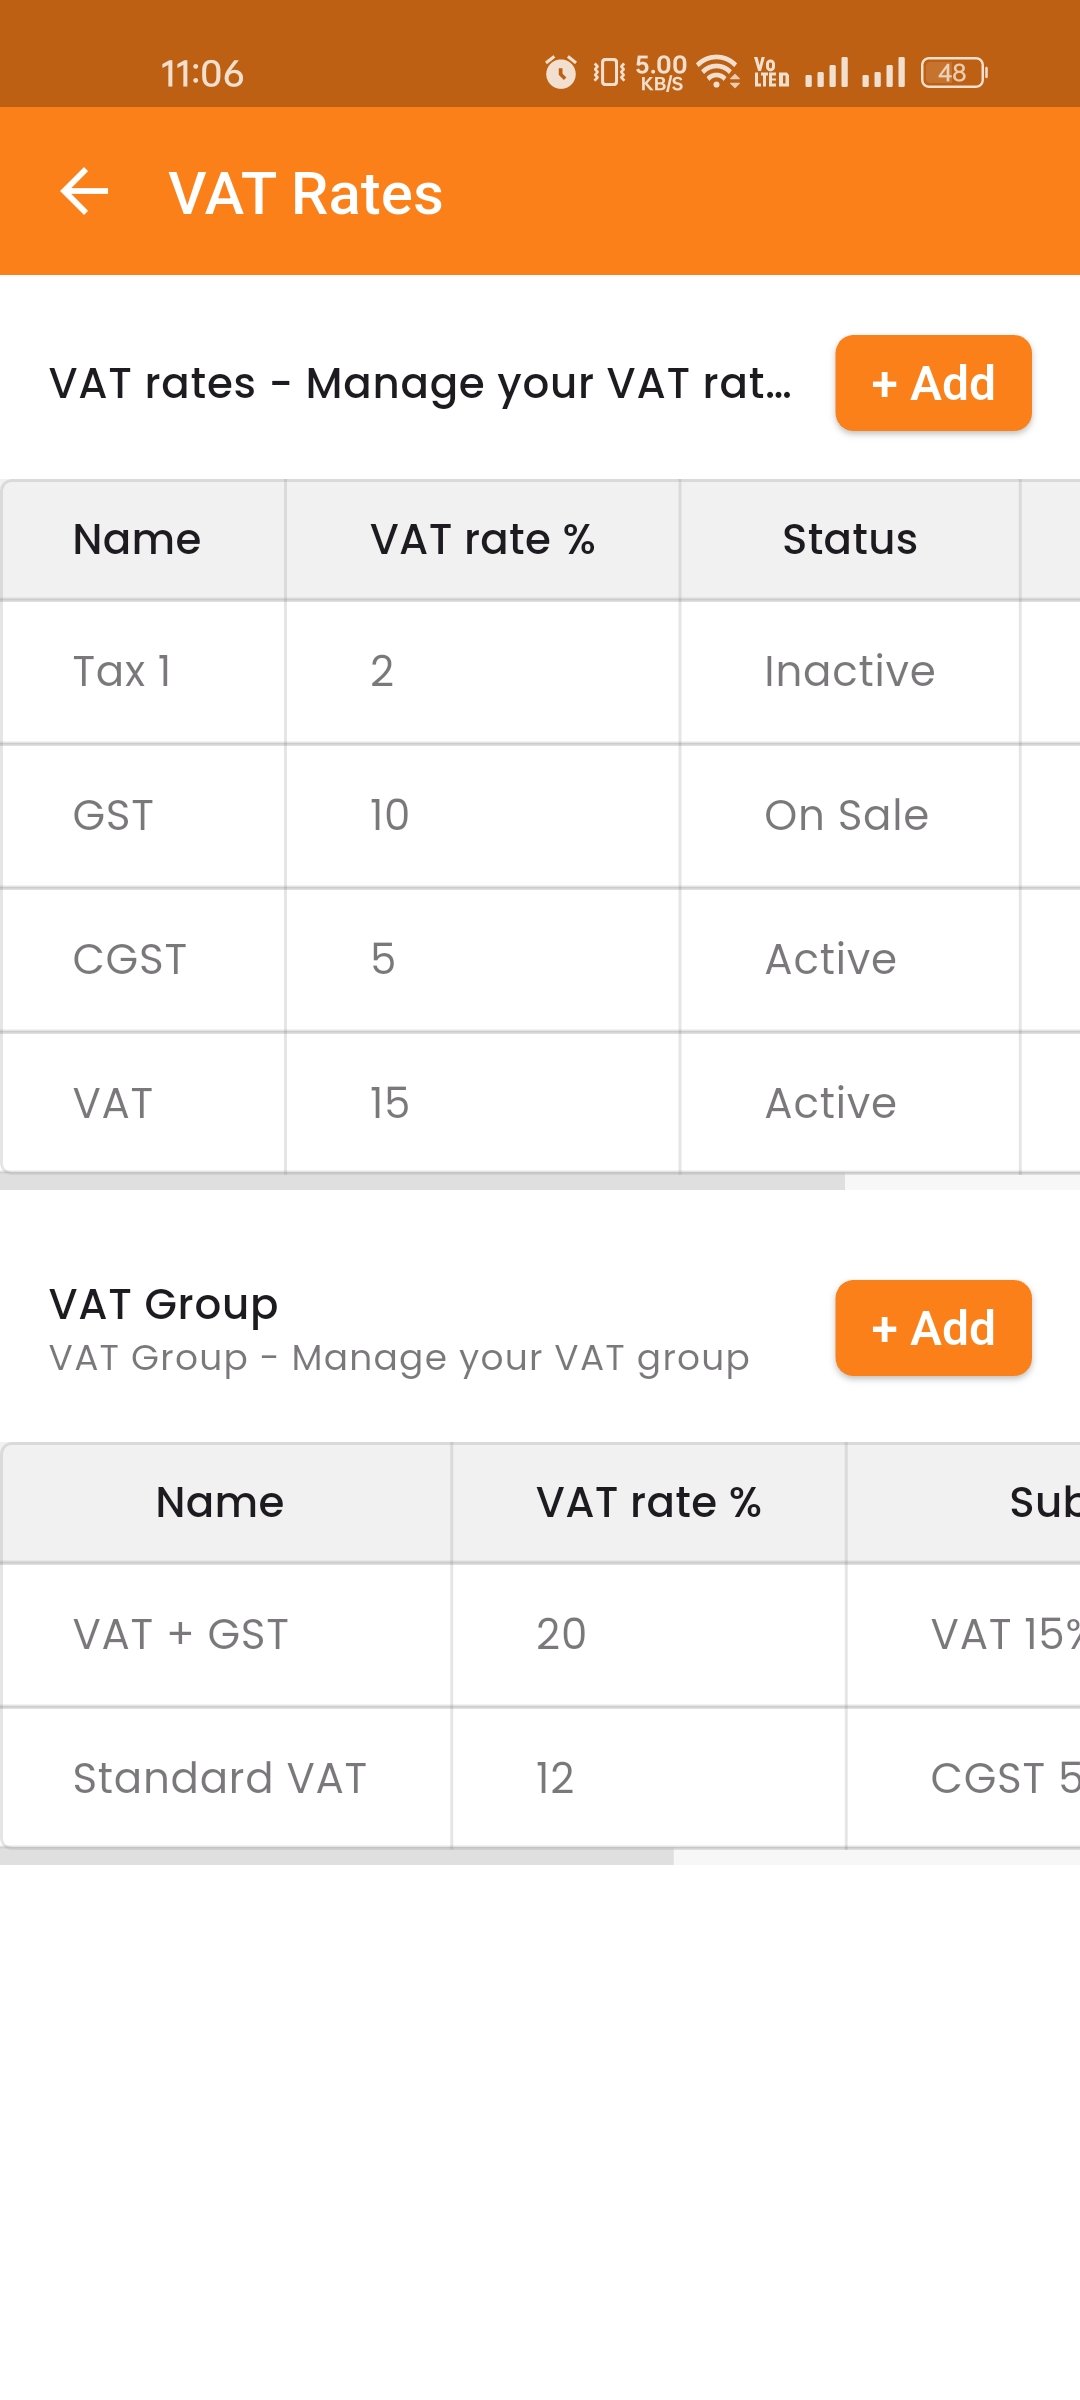
Create VAT & VAT Group
Add new VAT rates and create VAT groups to manage tax configurations for your business.
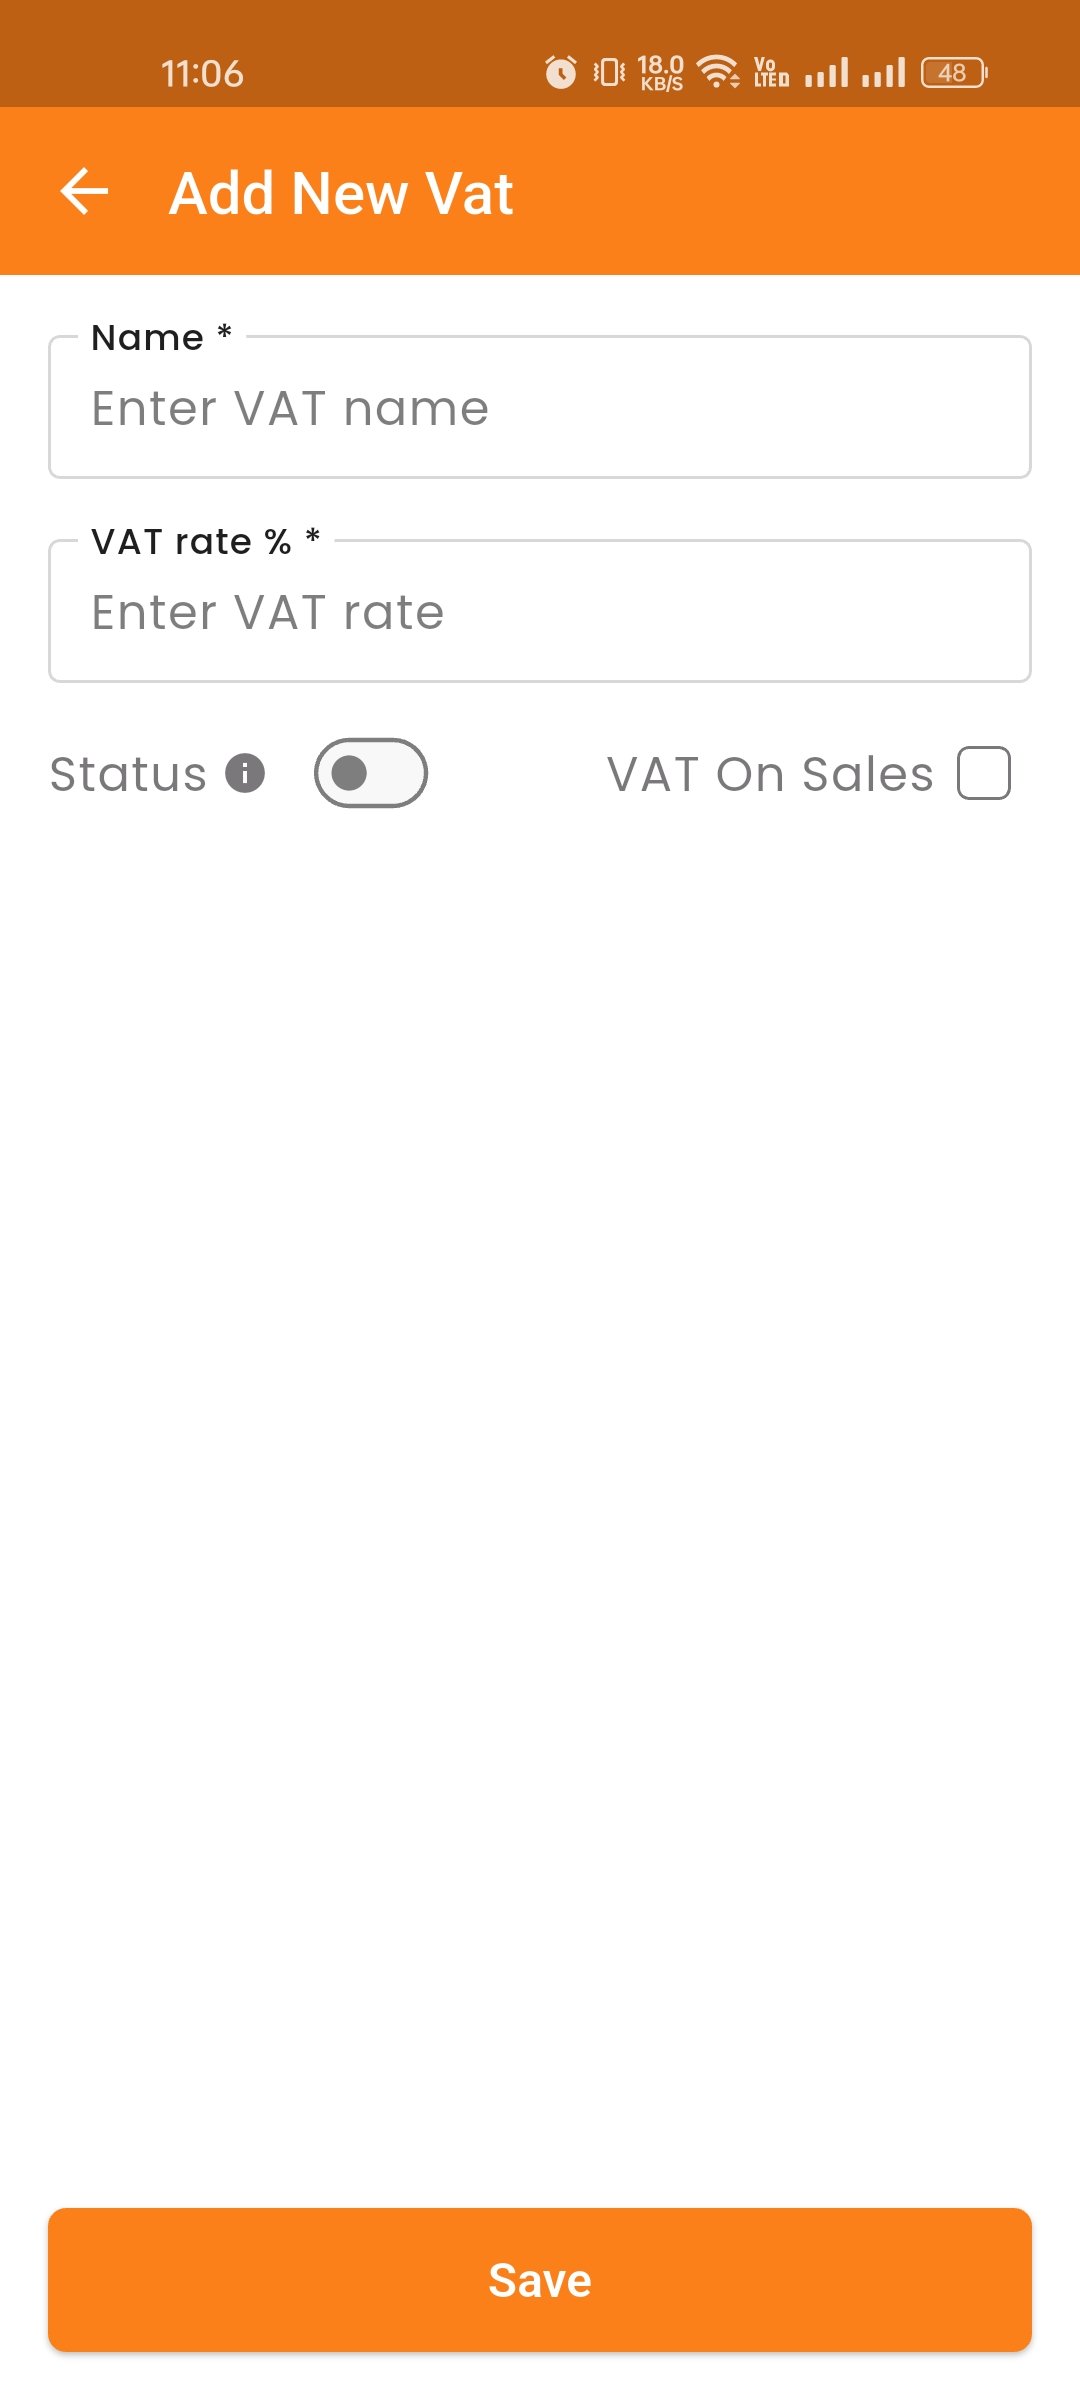
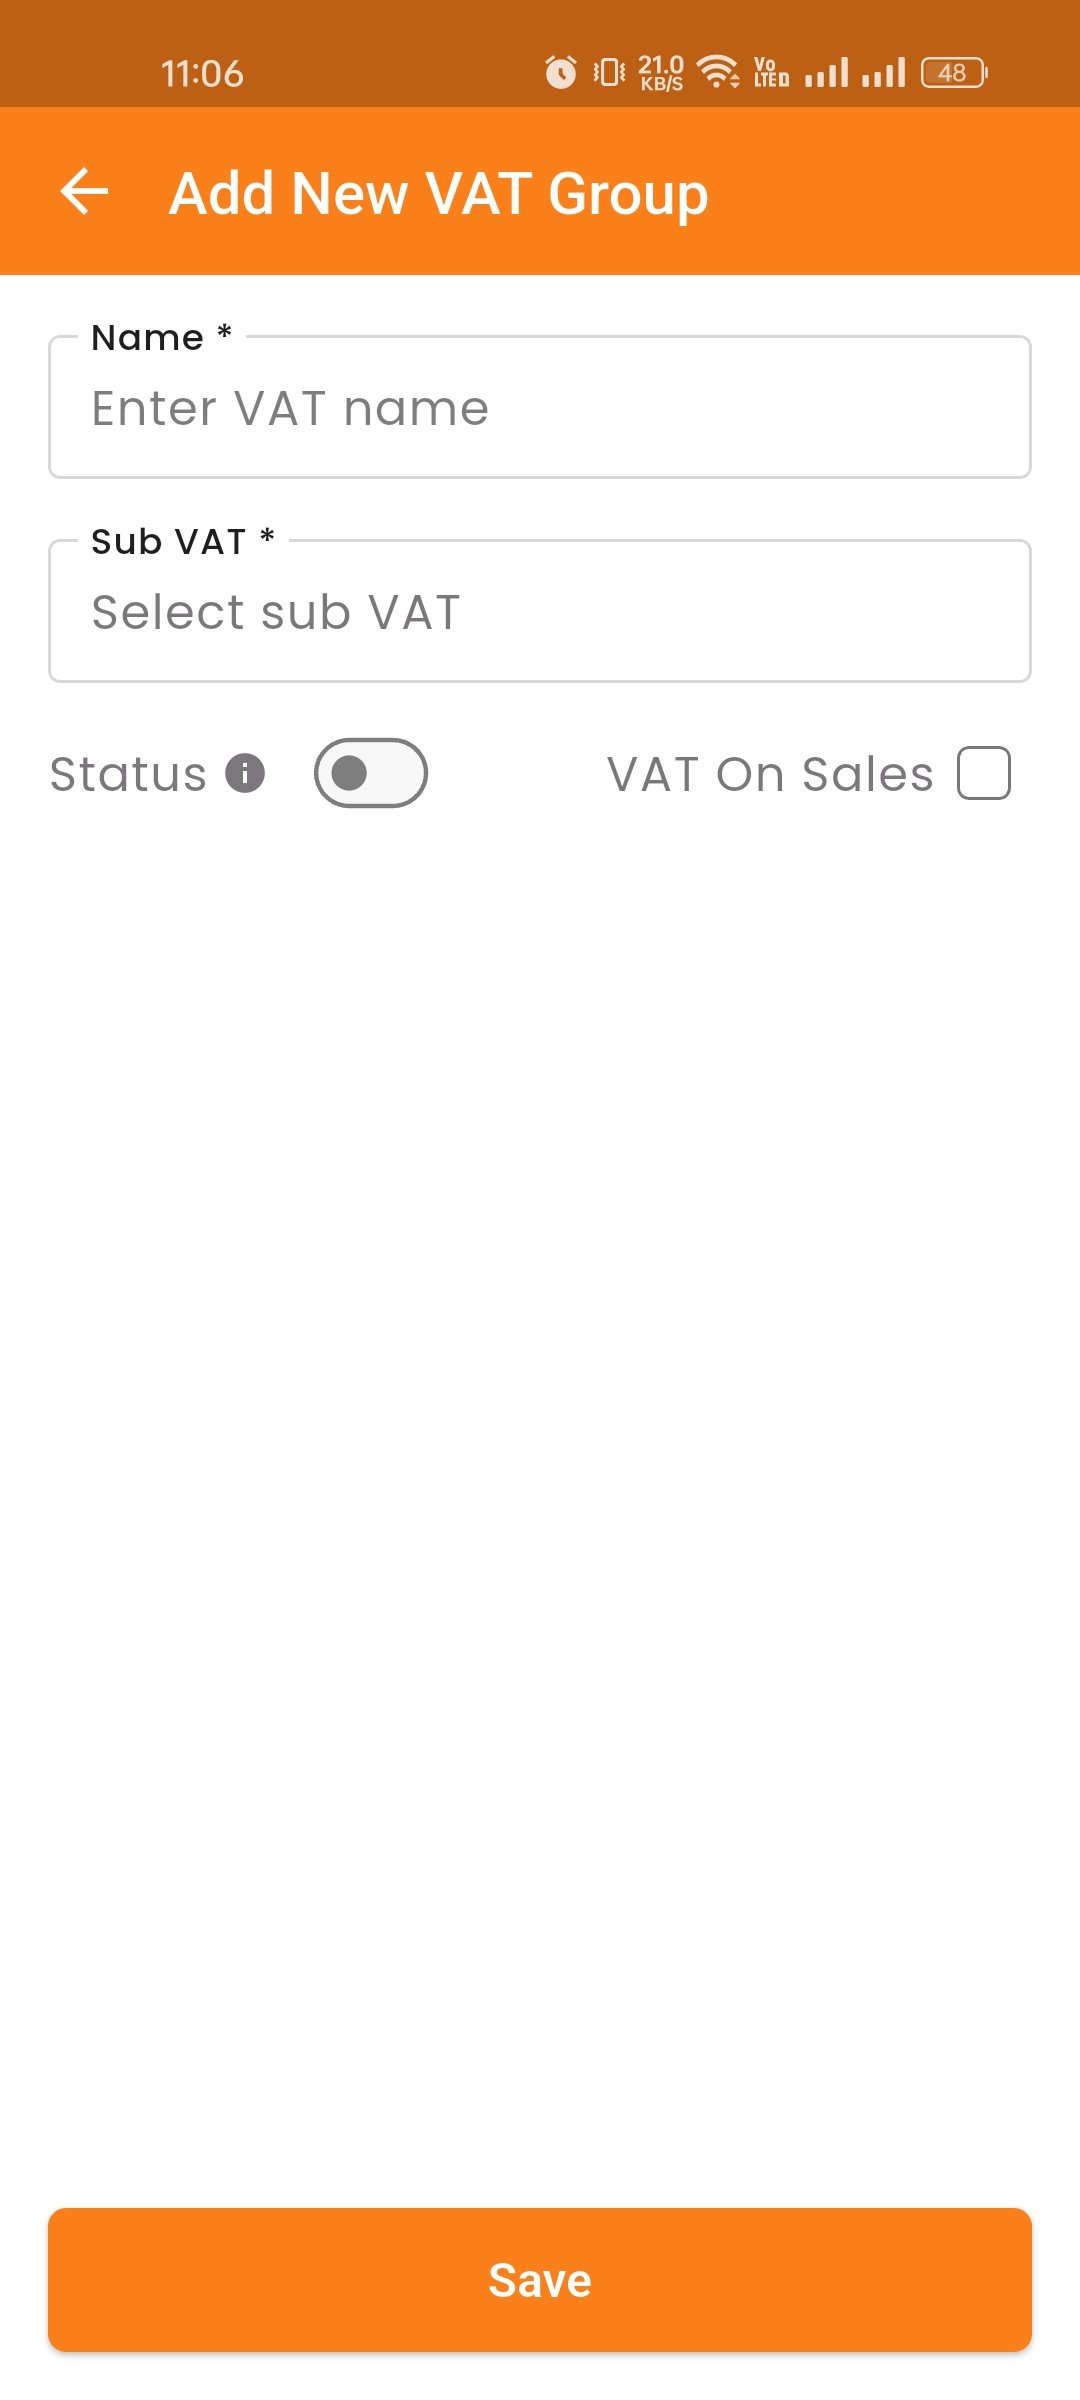
HRM
The HRM module provides comprehensive employee management features including departments, designations, shifts, attendance tracking, leave management, and payroll processing.
Department
Manage departments within your organization. Create, edit, and delete departments to structure your organizational hierarchy.
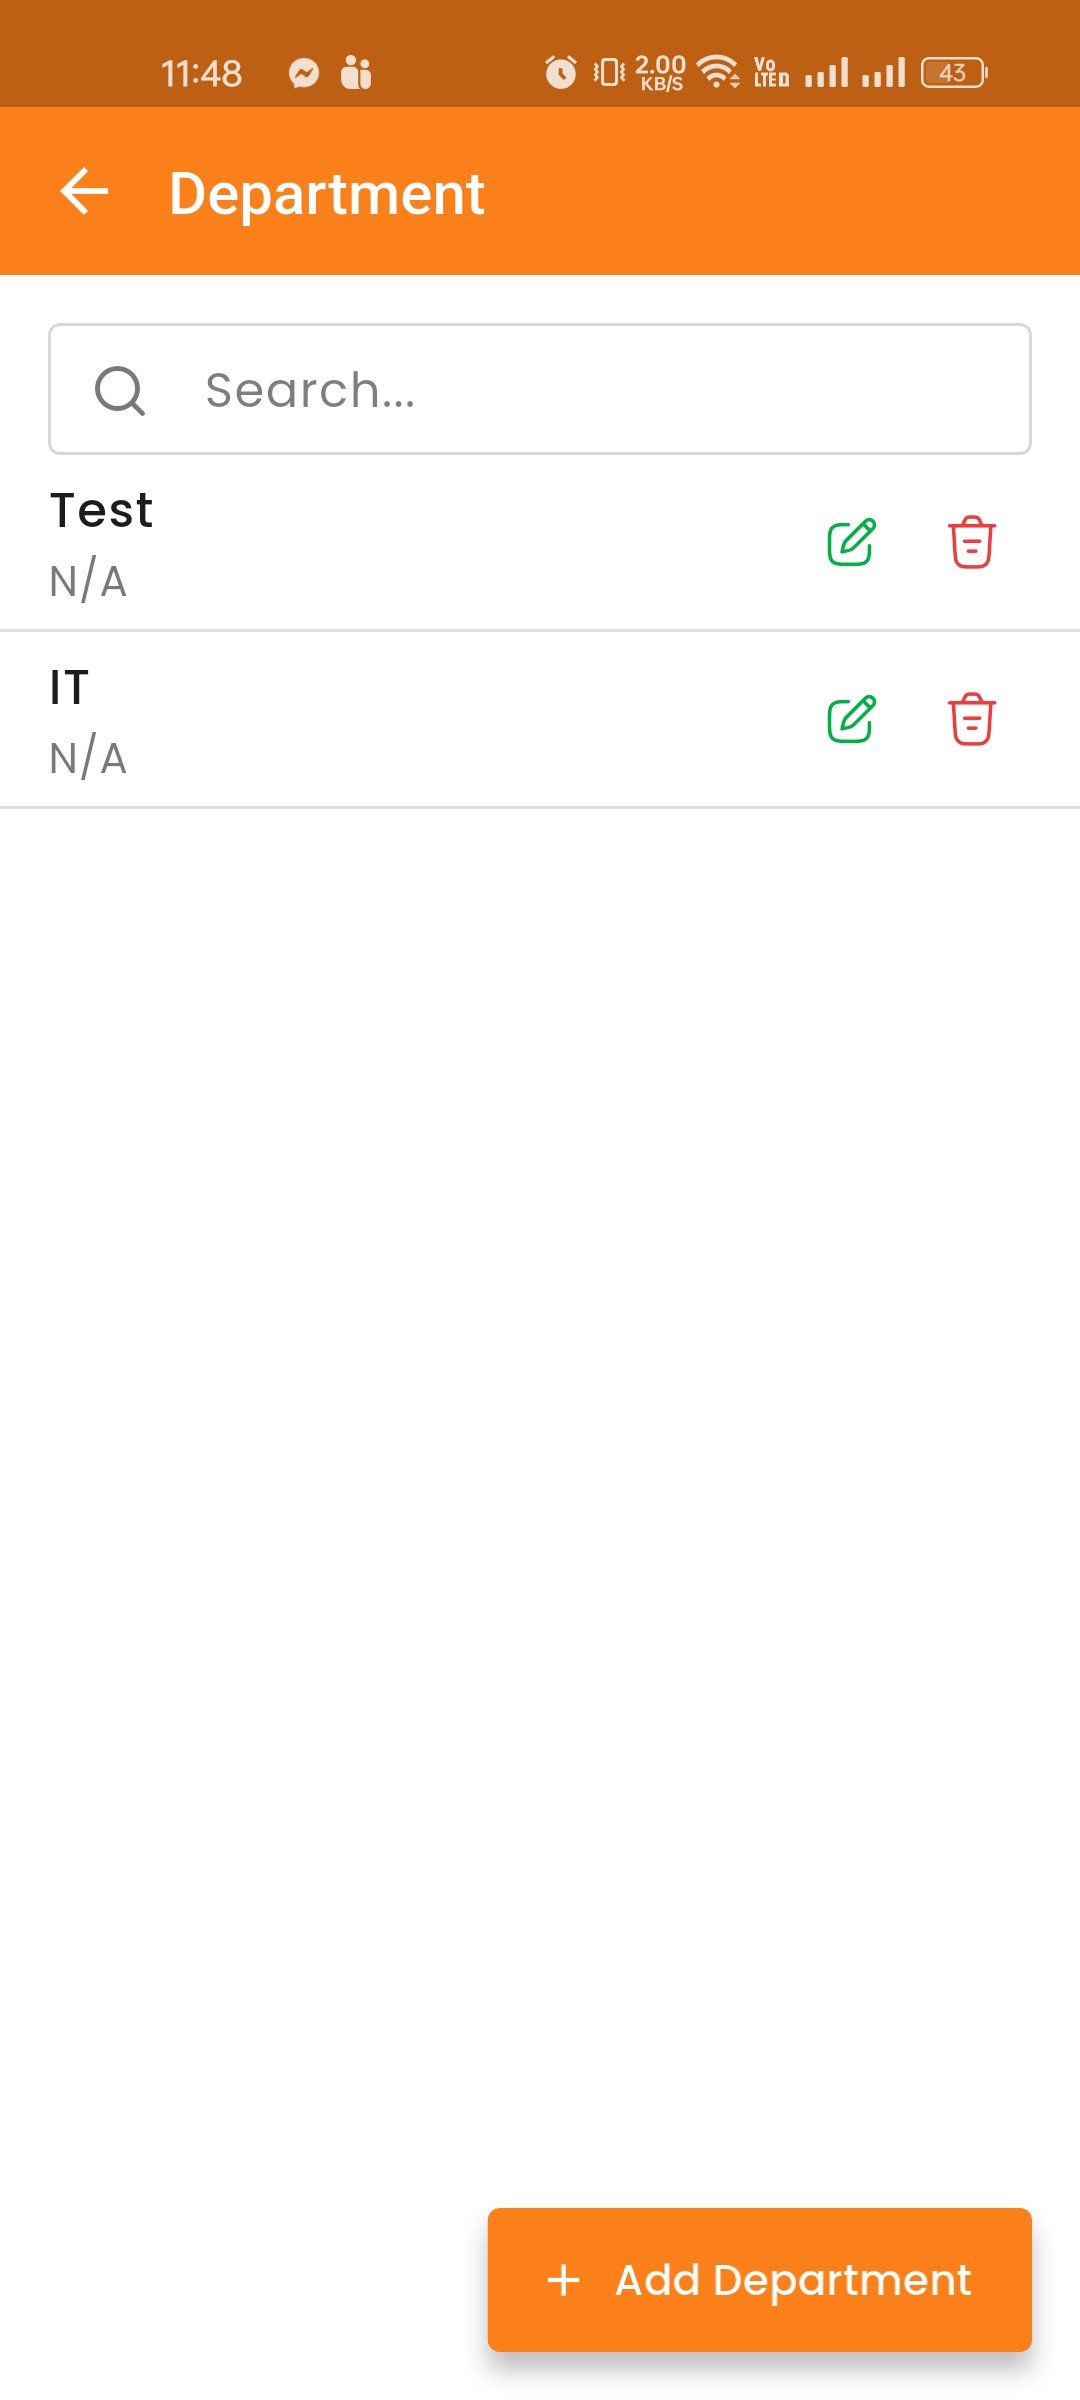
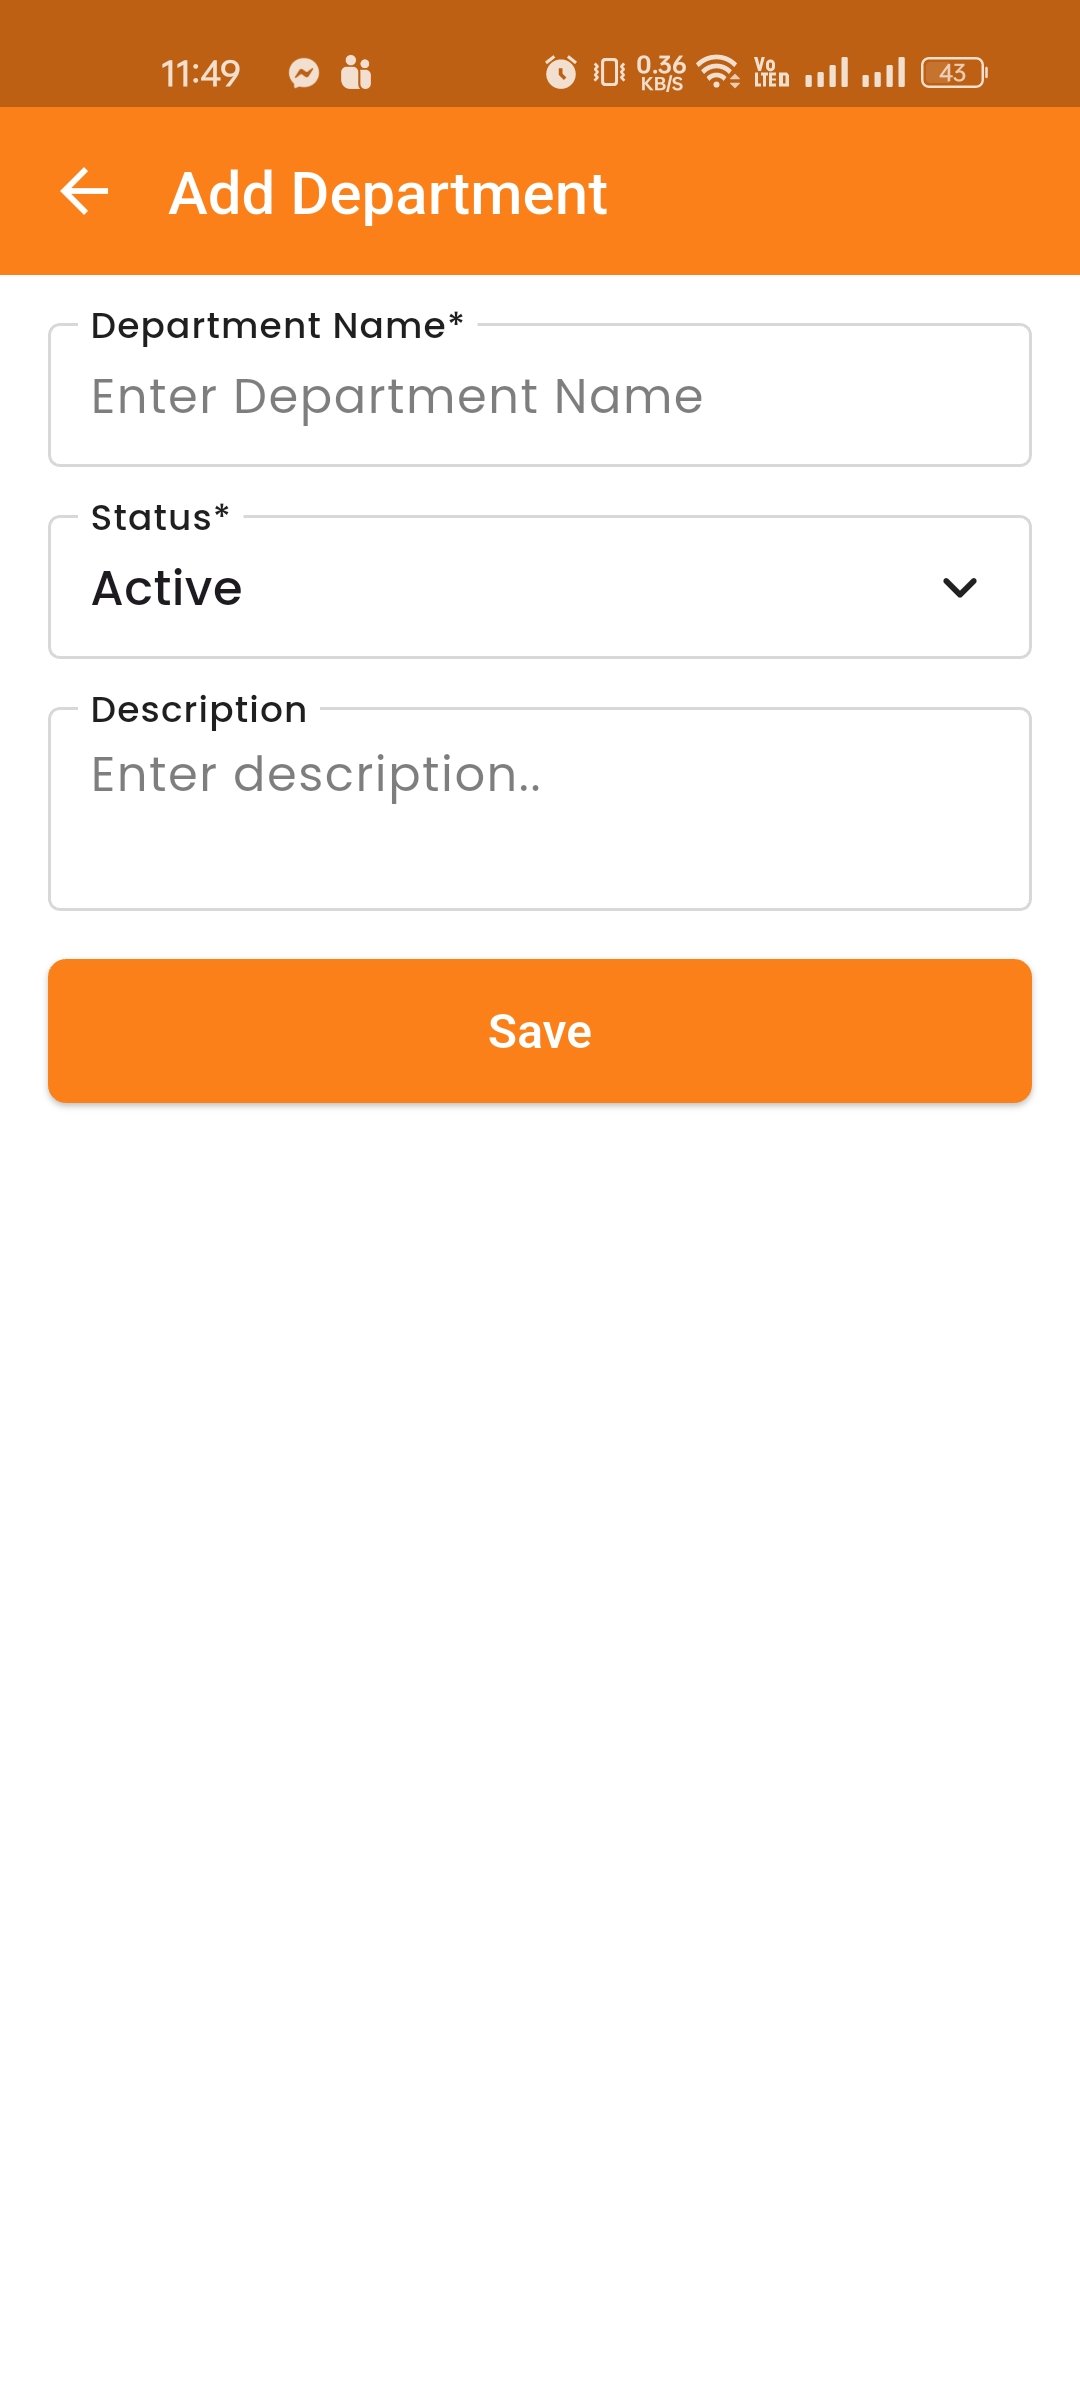
Designation
Define job designations/roles within each department. This helps in organizing the reporting structure and role-based access.
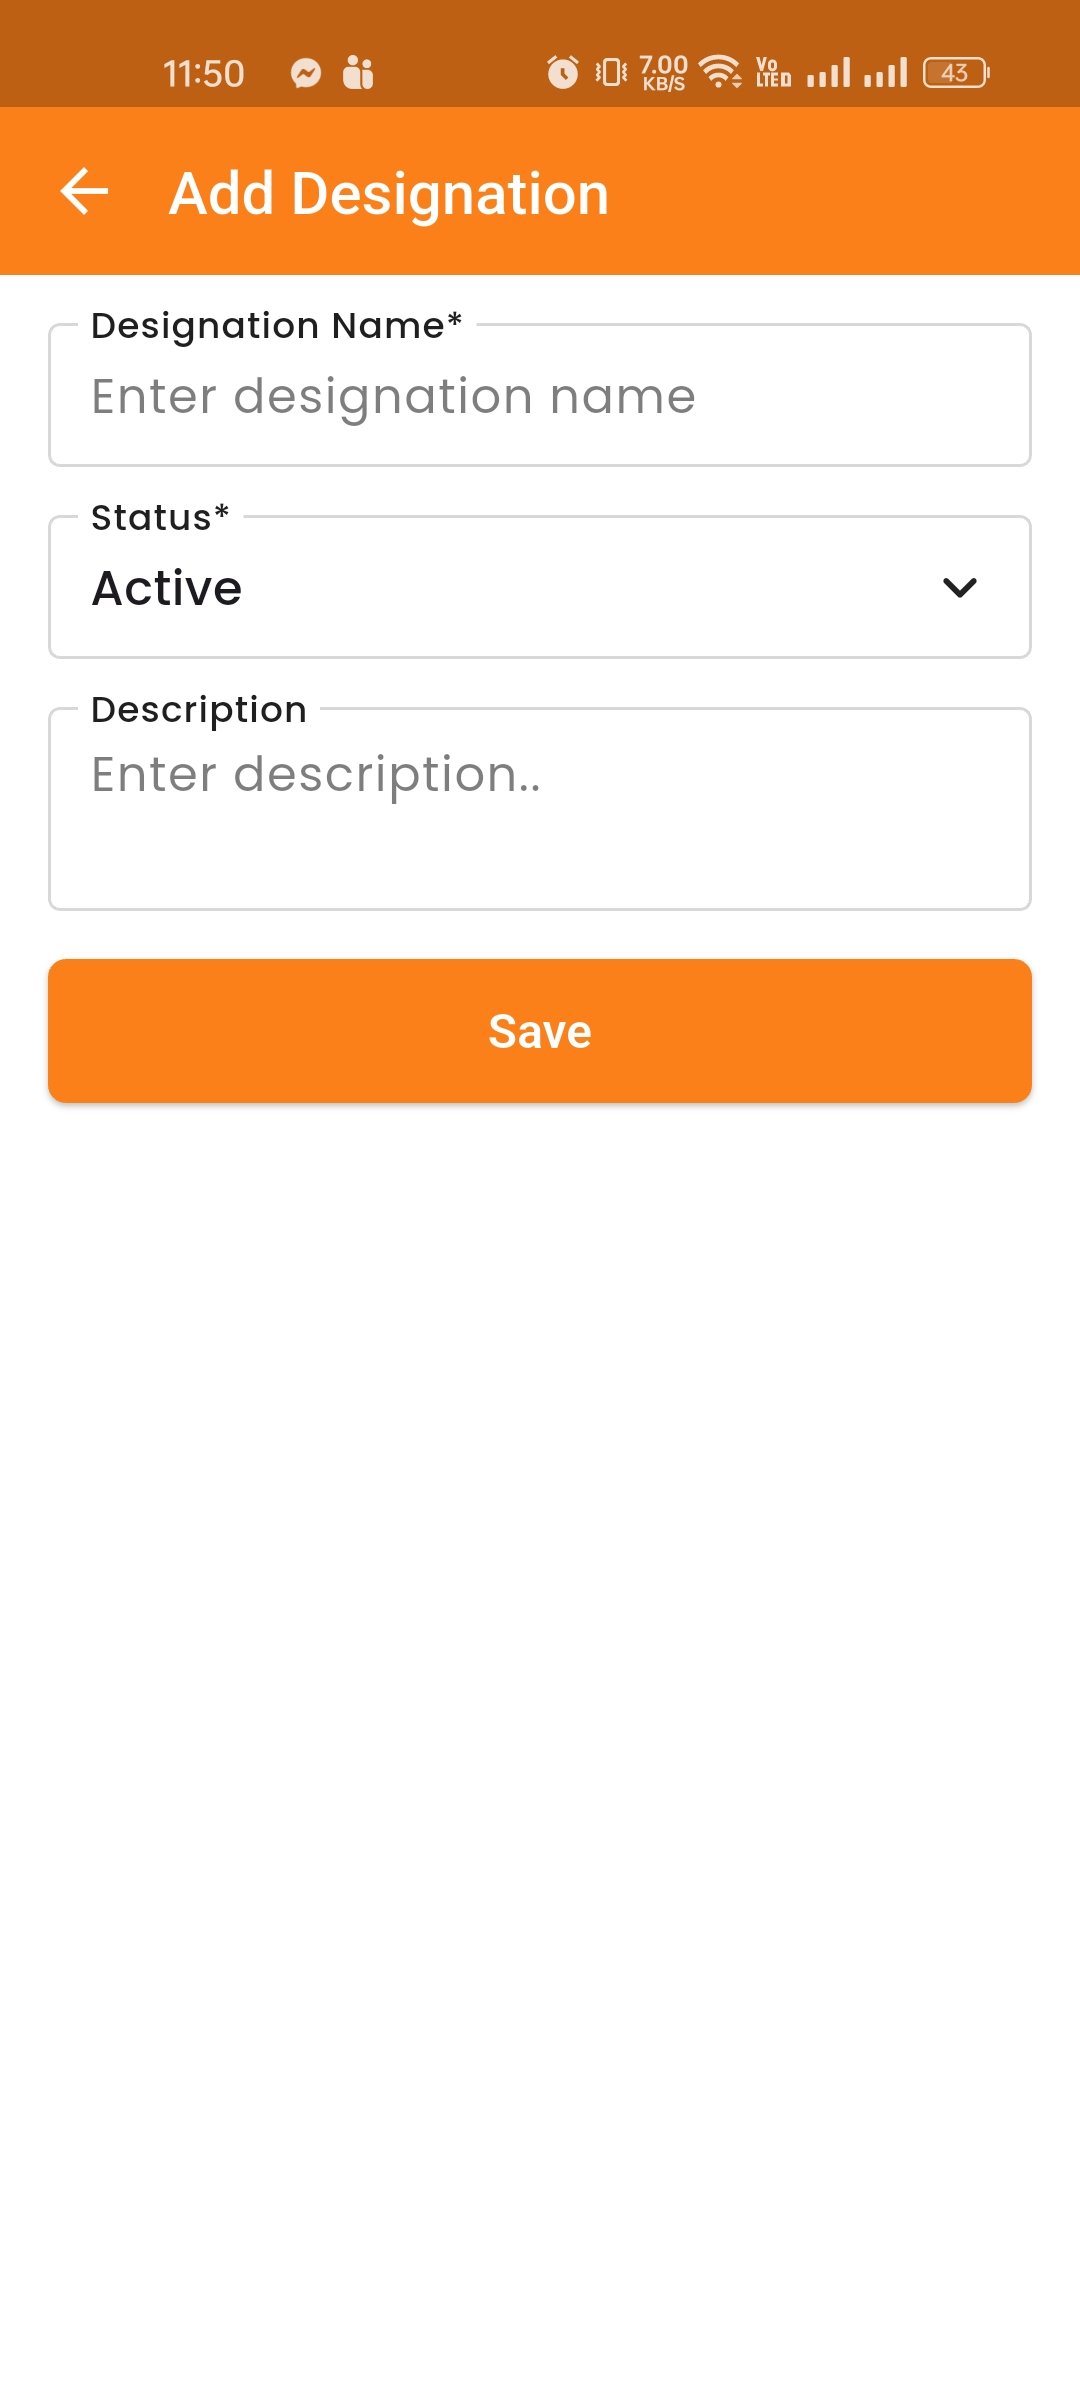
Shift Management
Create and manage work shifts with start and end times, break durations, and weekly off days.
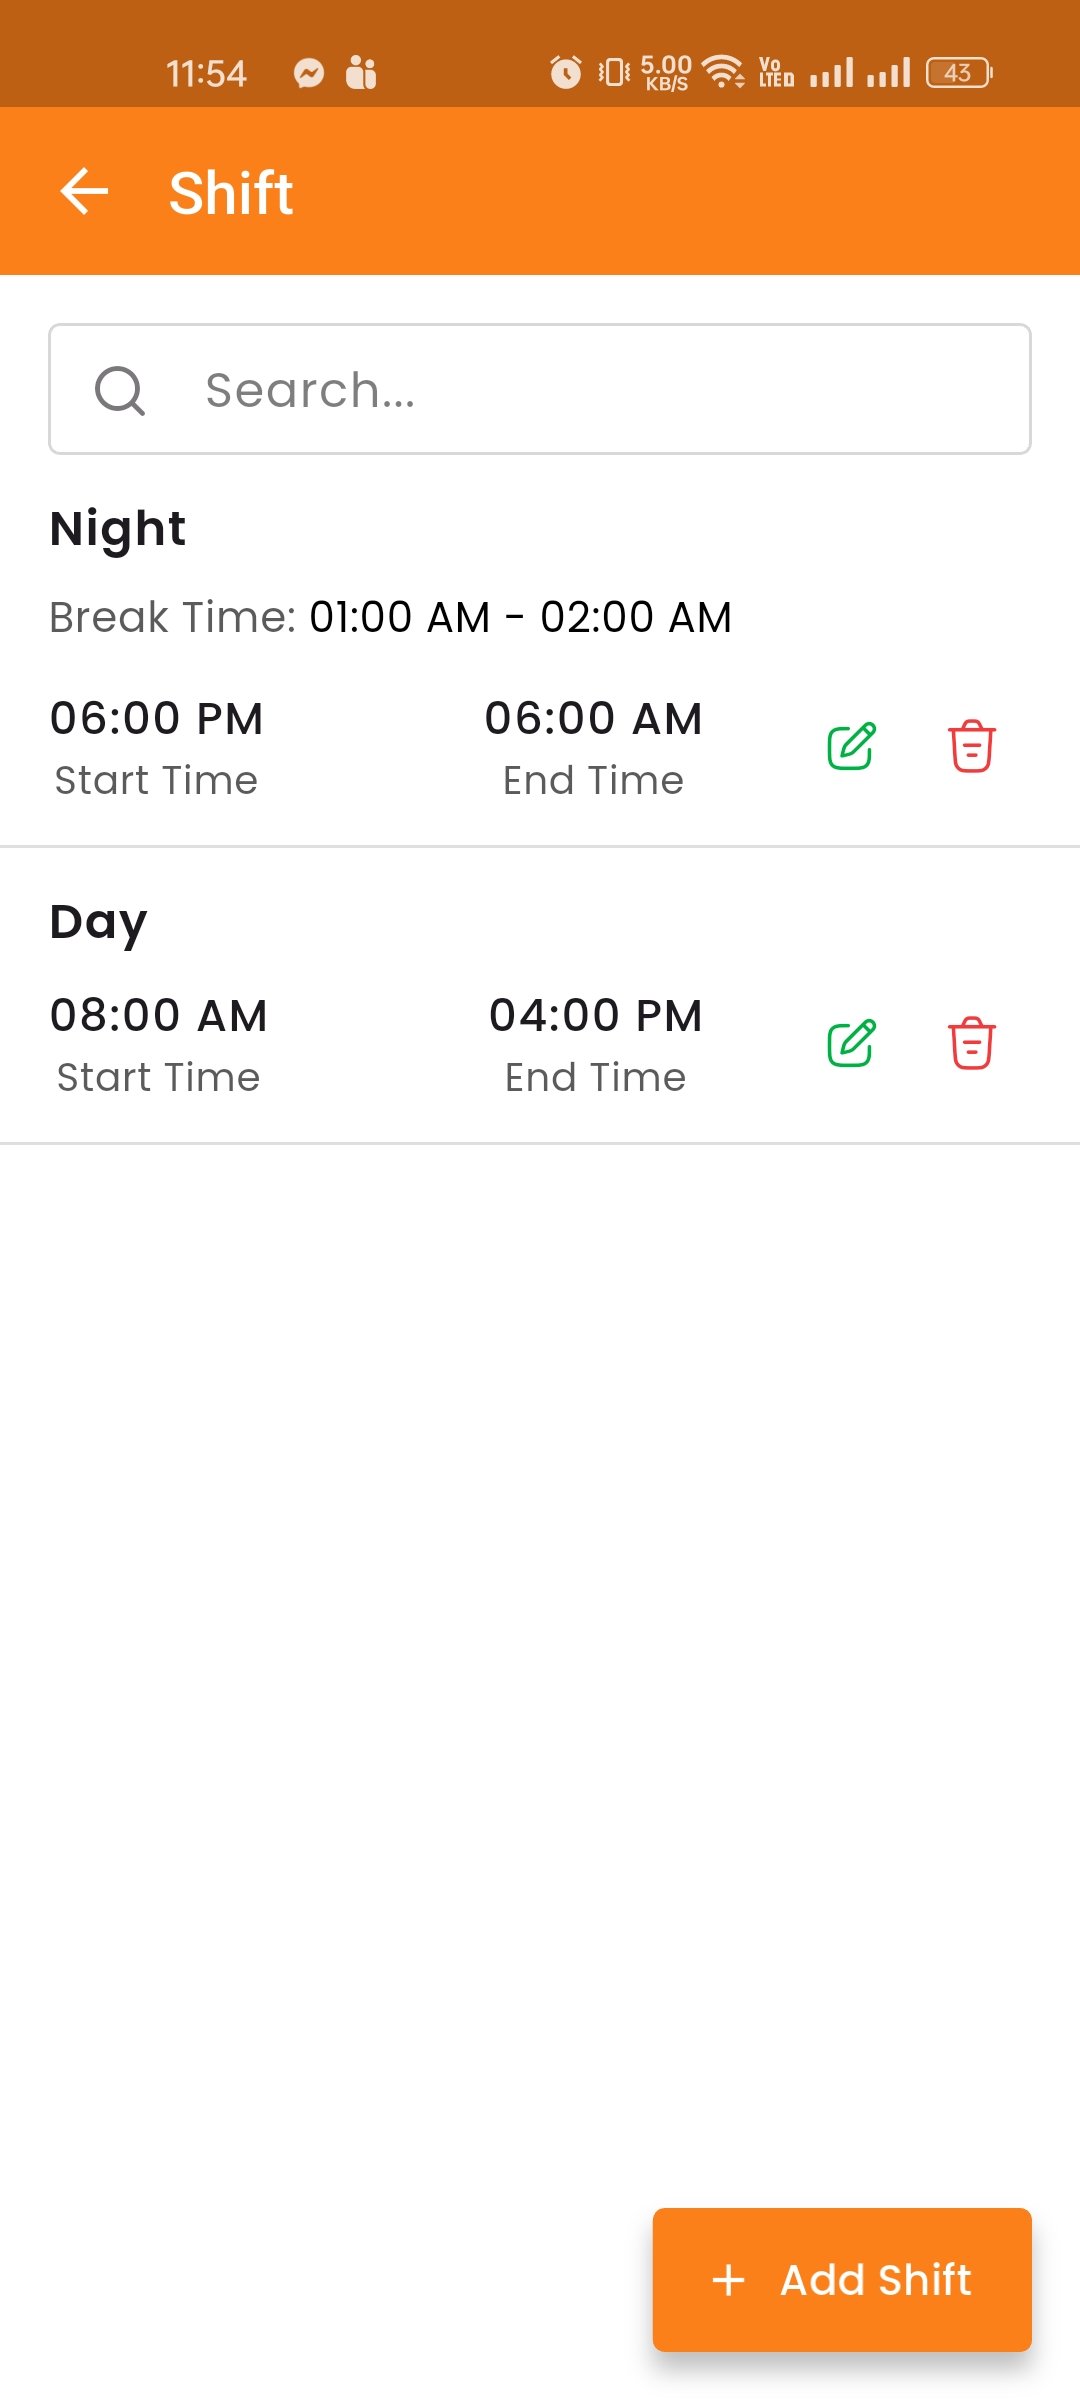
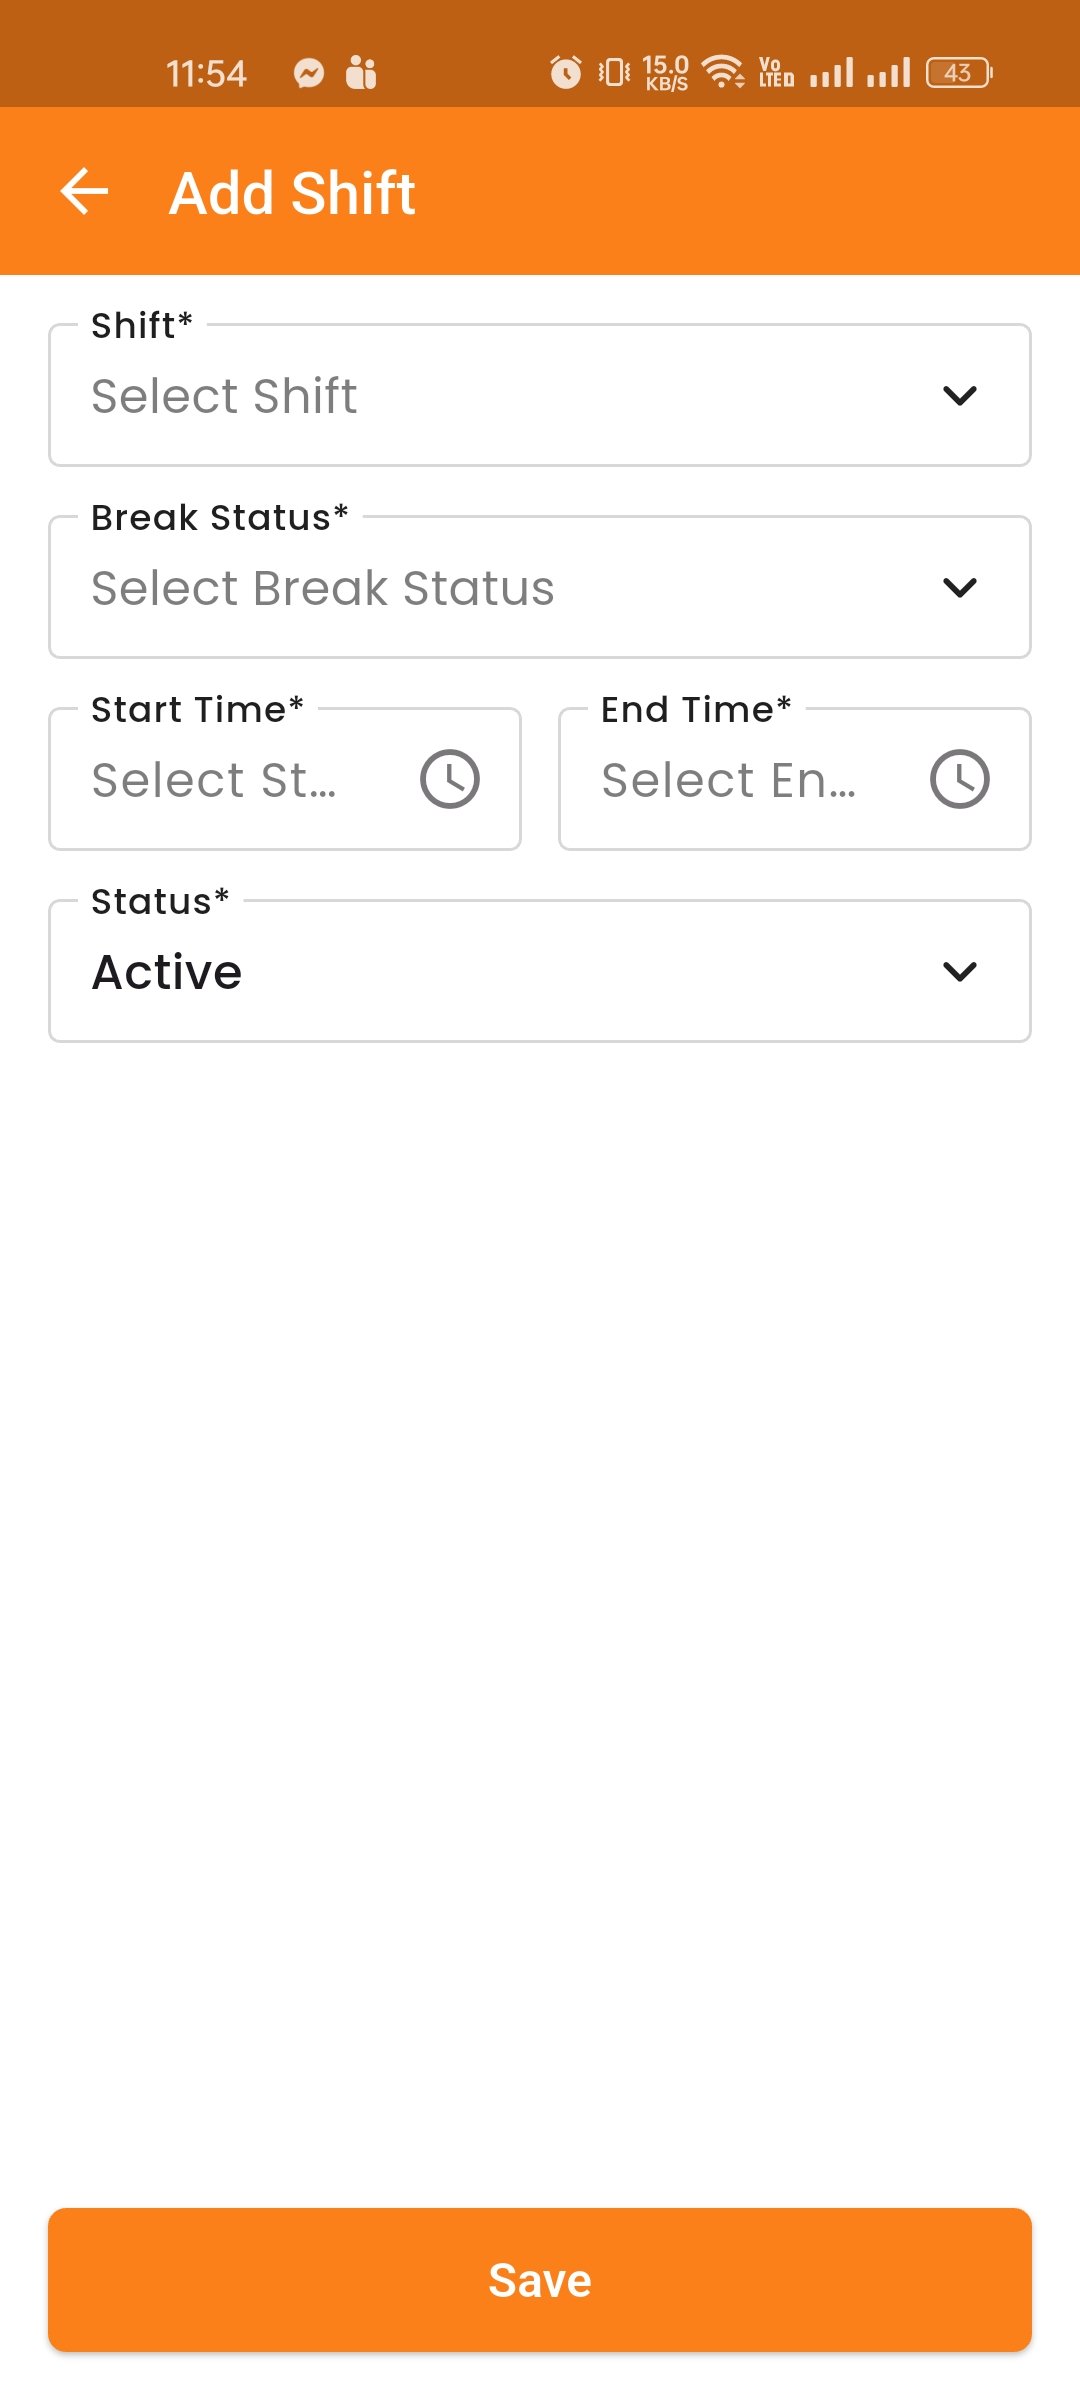
Employee List
View all employees with their details including employee ID, name, department, designation, shift, salary, and employment status.
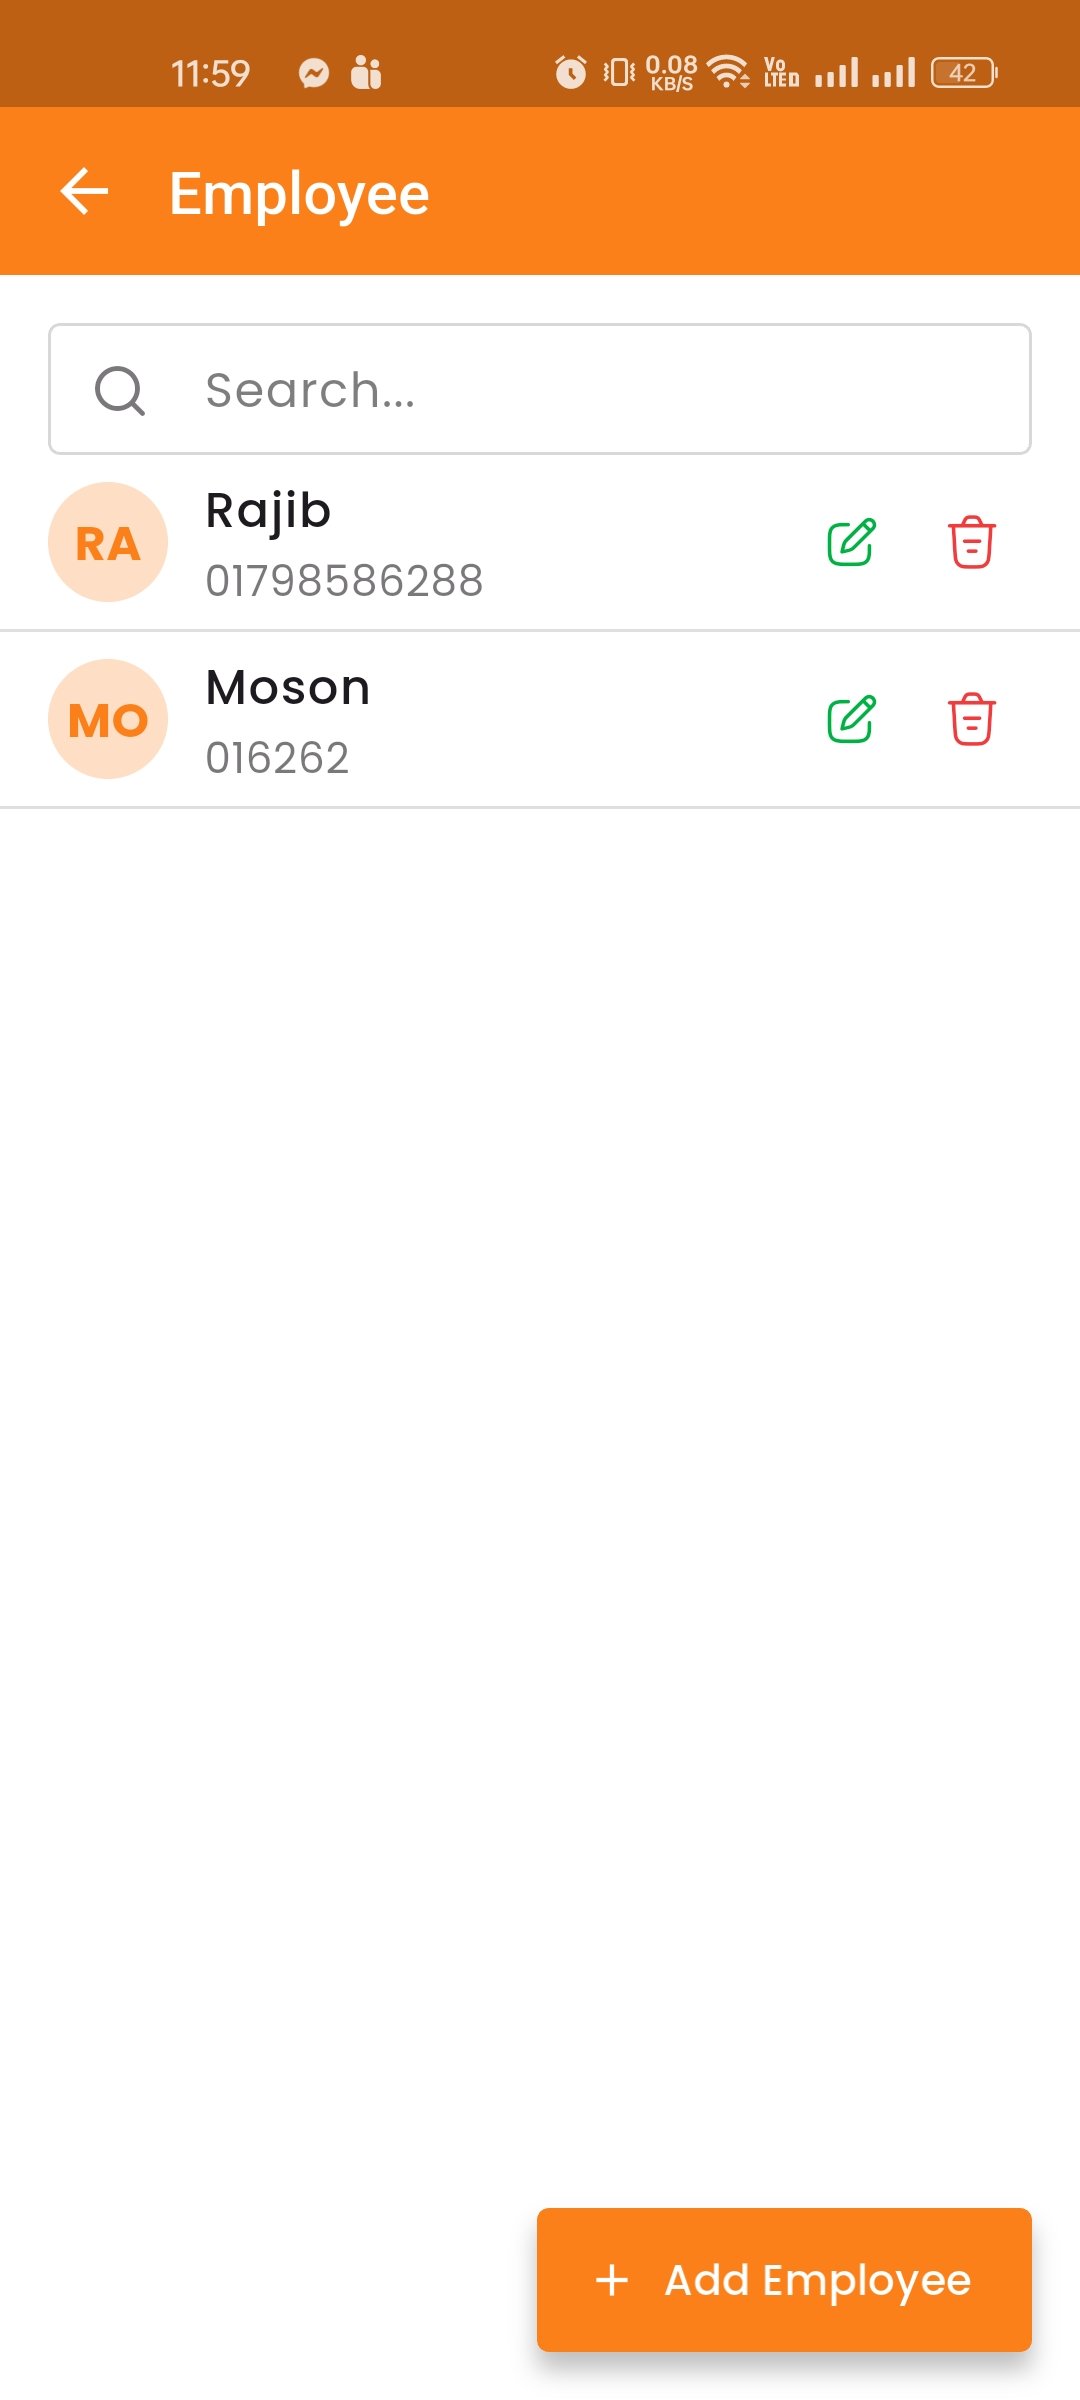
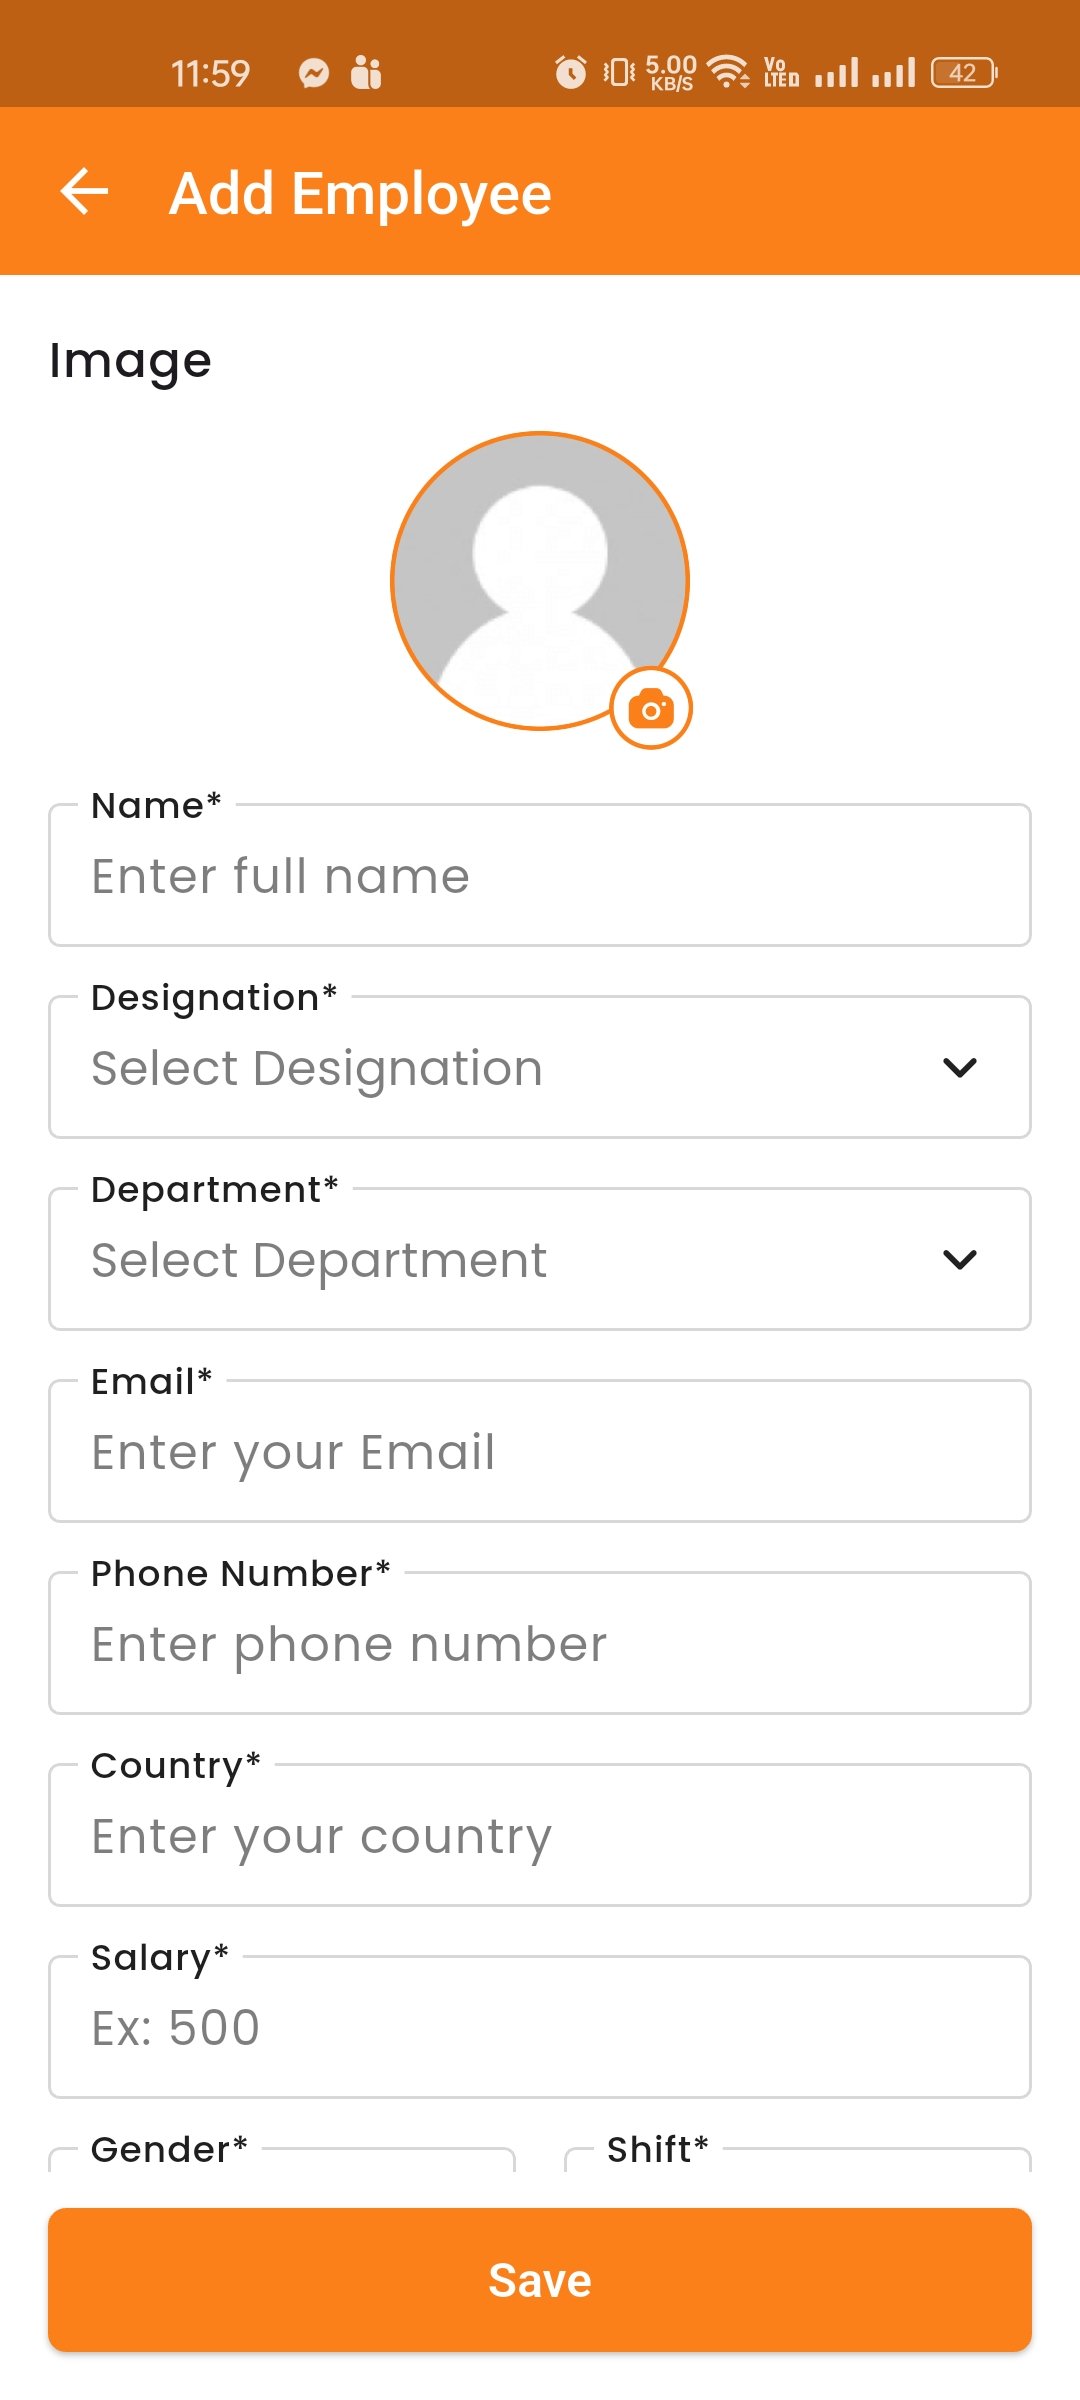
Leave Management
The Leave Management module includes leave types, leave requests, and holidays.
Leave Type
Manage leave types such as Sick Leave, Casual Leave, and Annual Leave. You can create, edit, delete, and filter leave types.
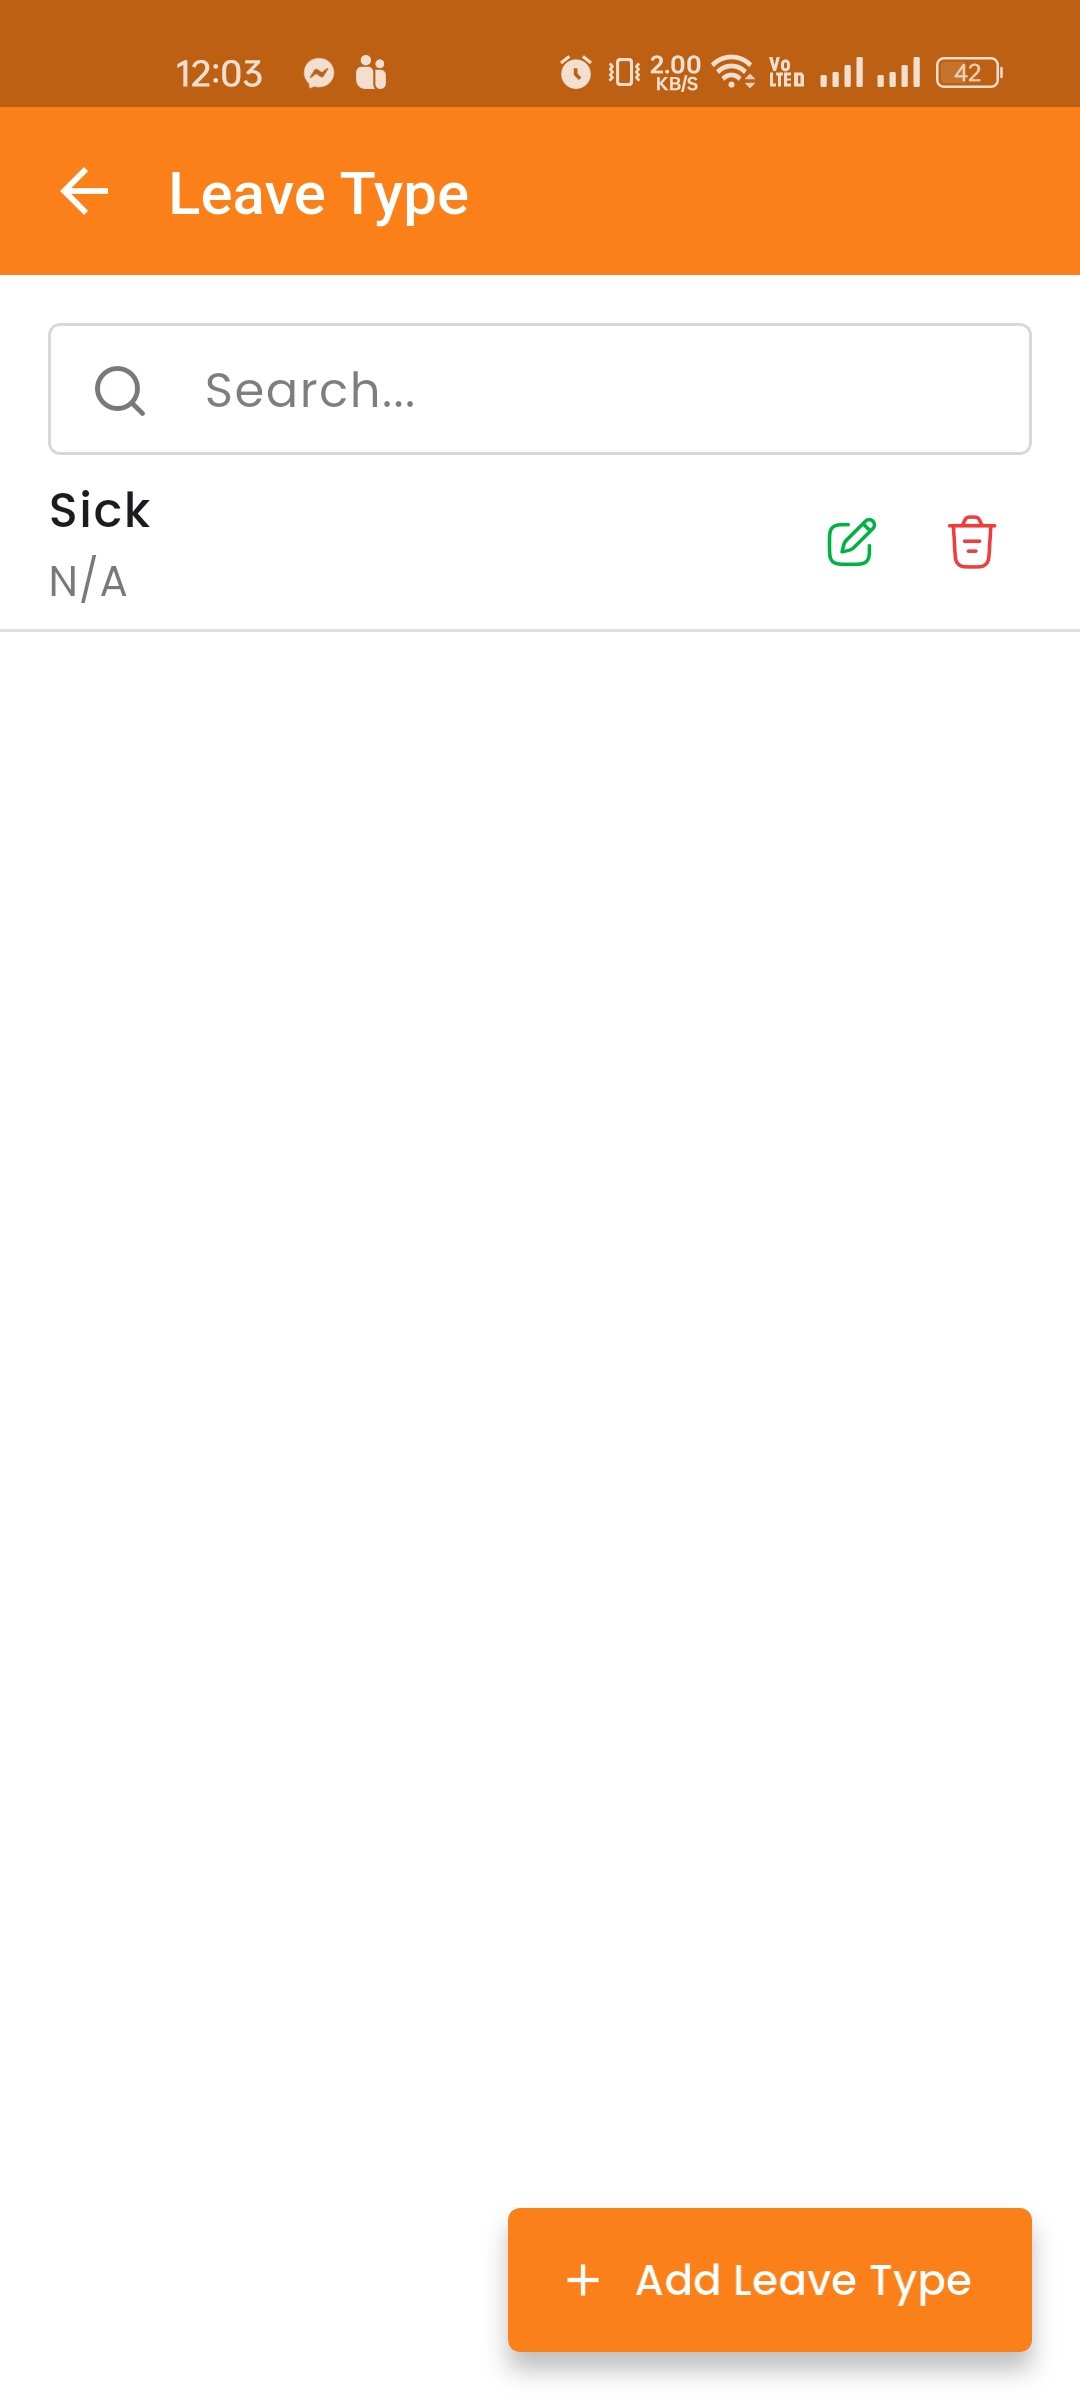
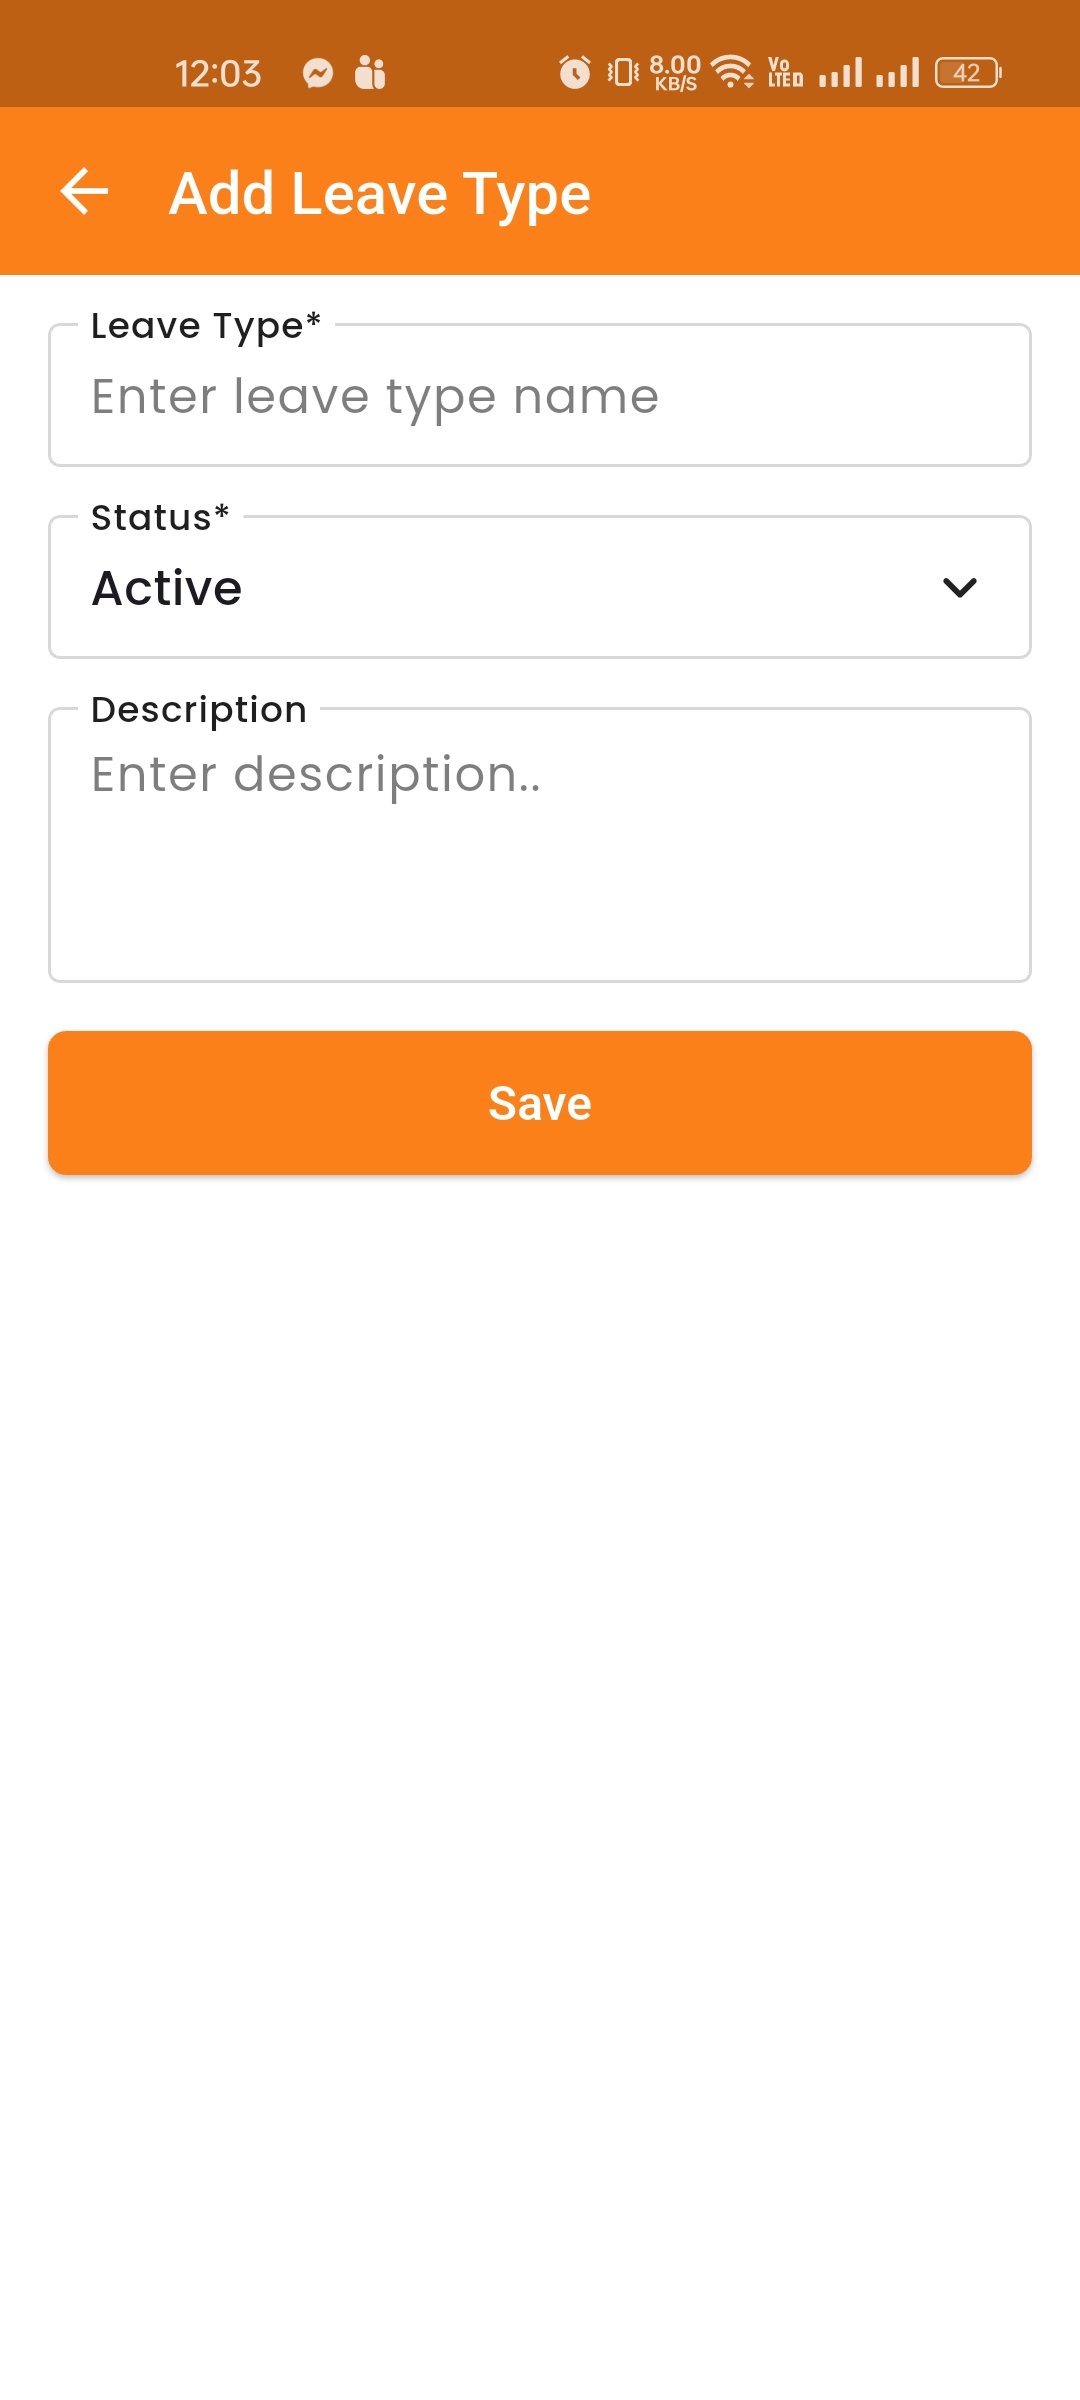
Leave
View and manage employee leave requests. You can create new leave requests, edit pending ones, delete, and filter by date or status.
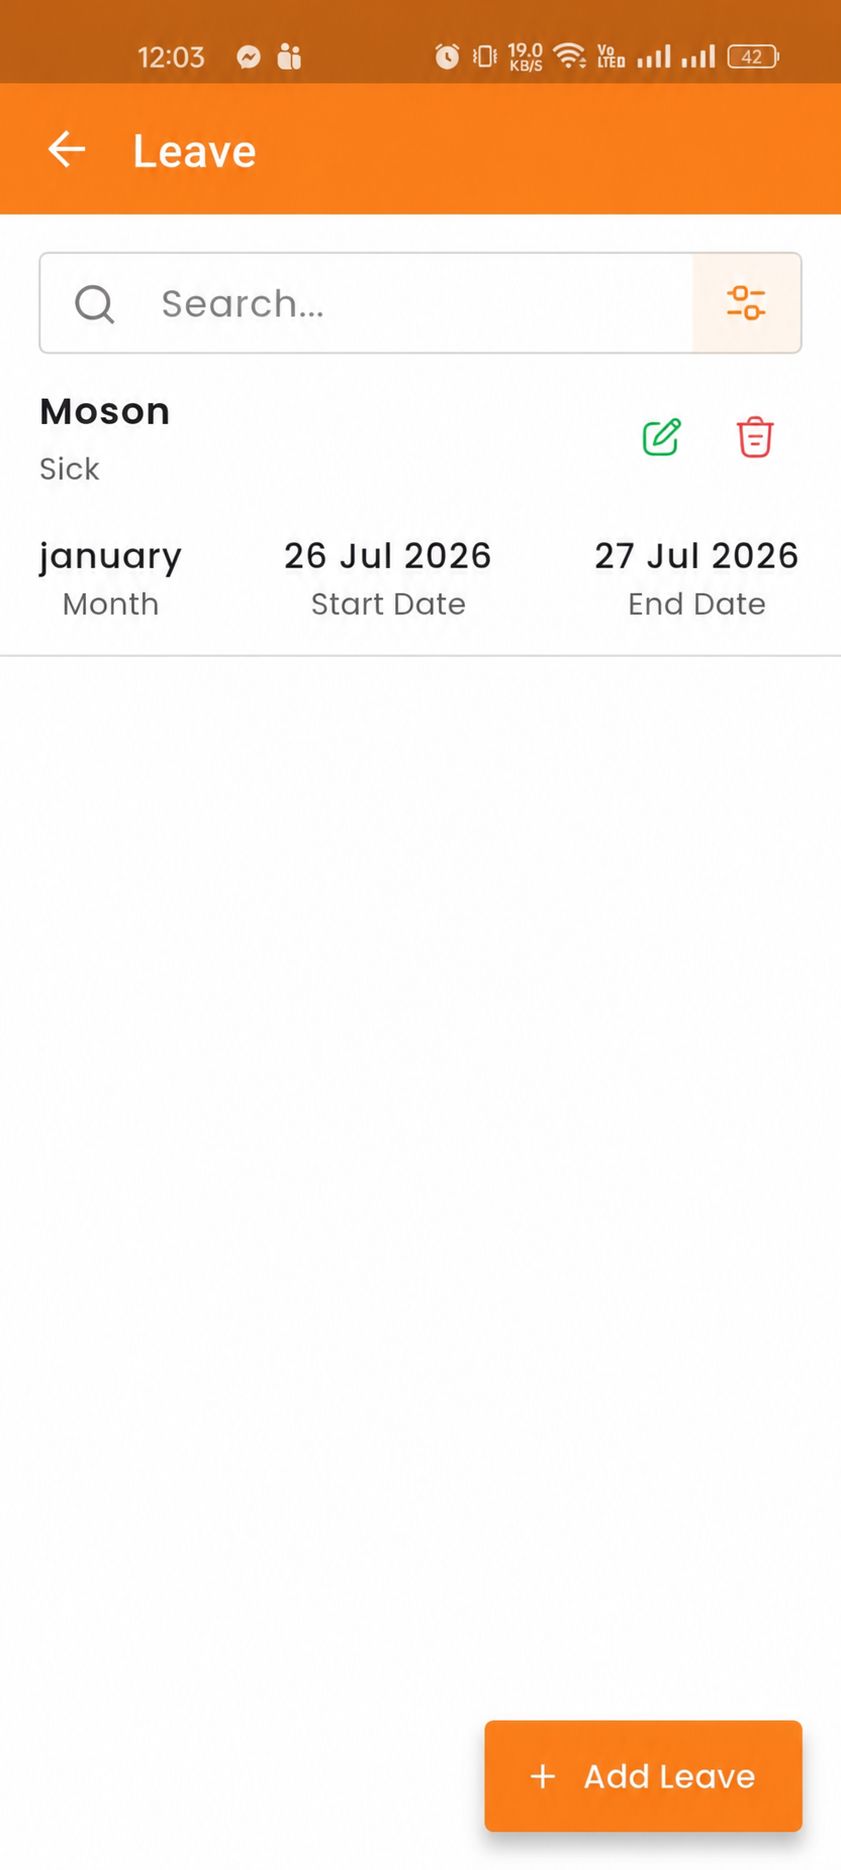
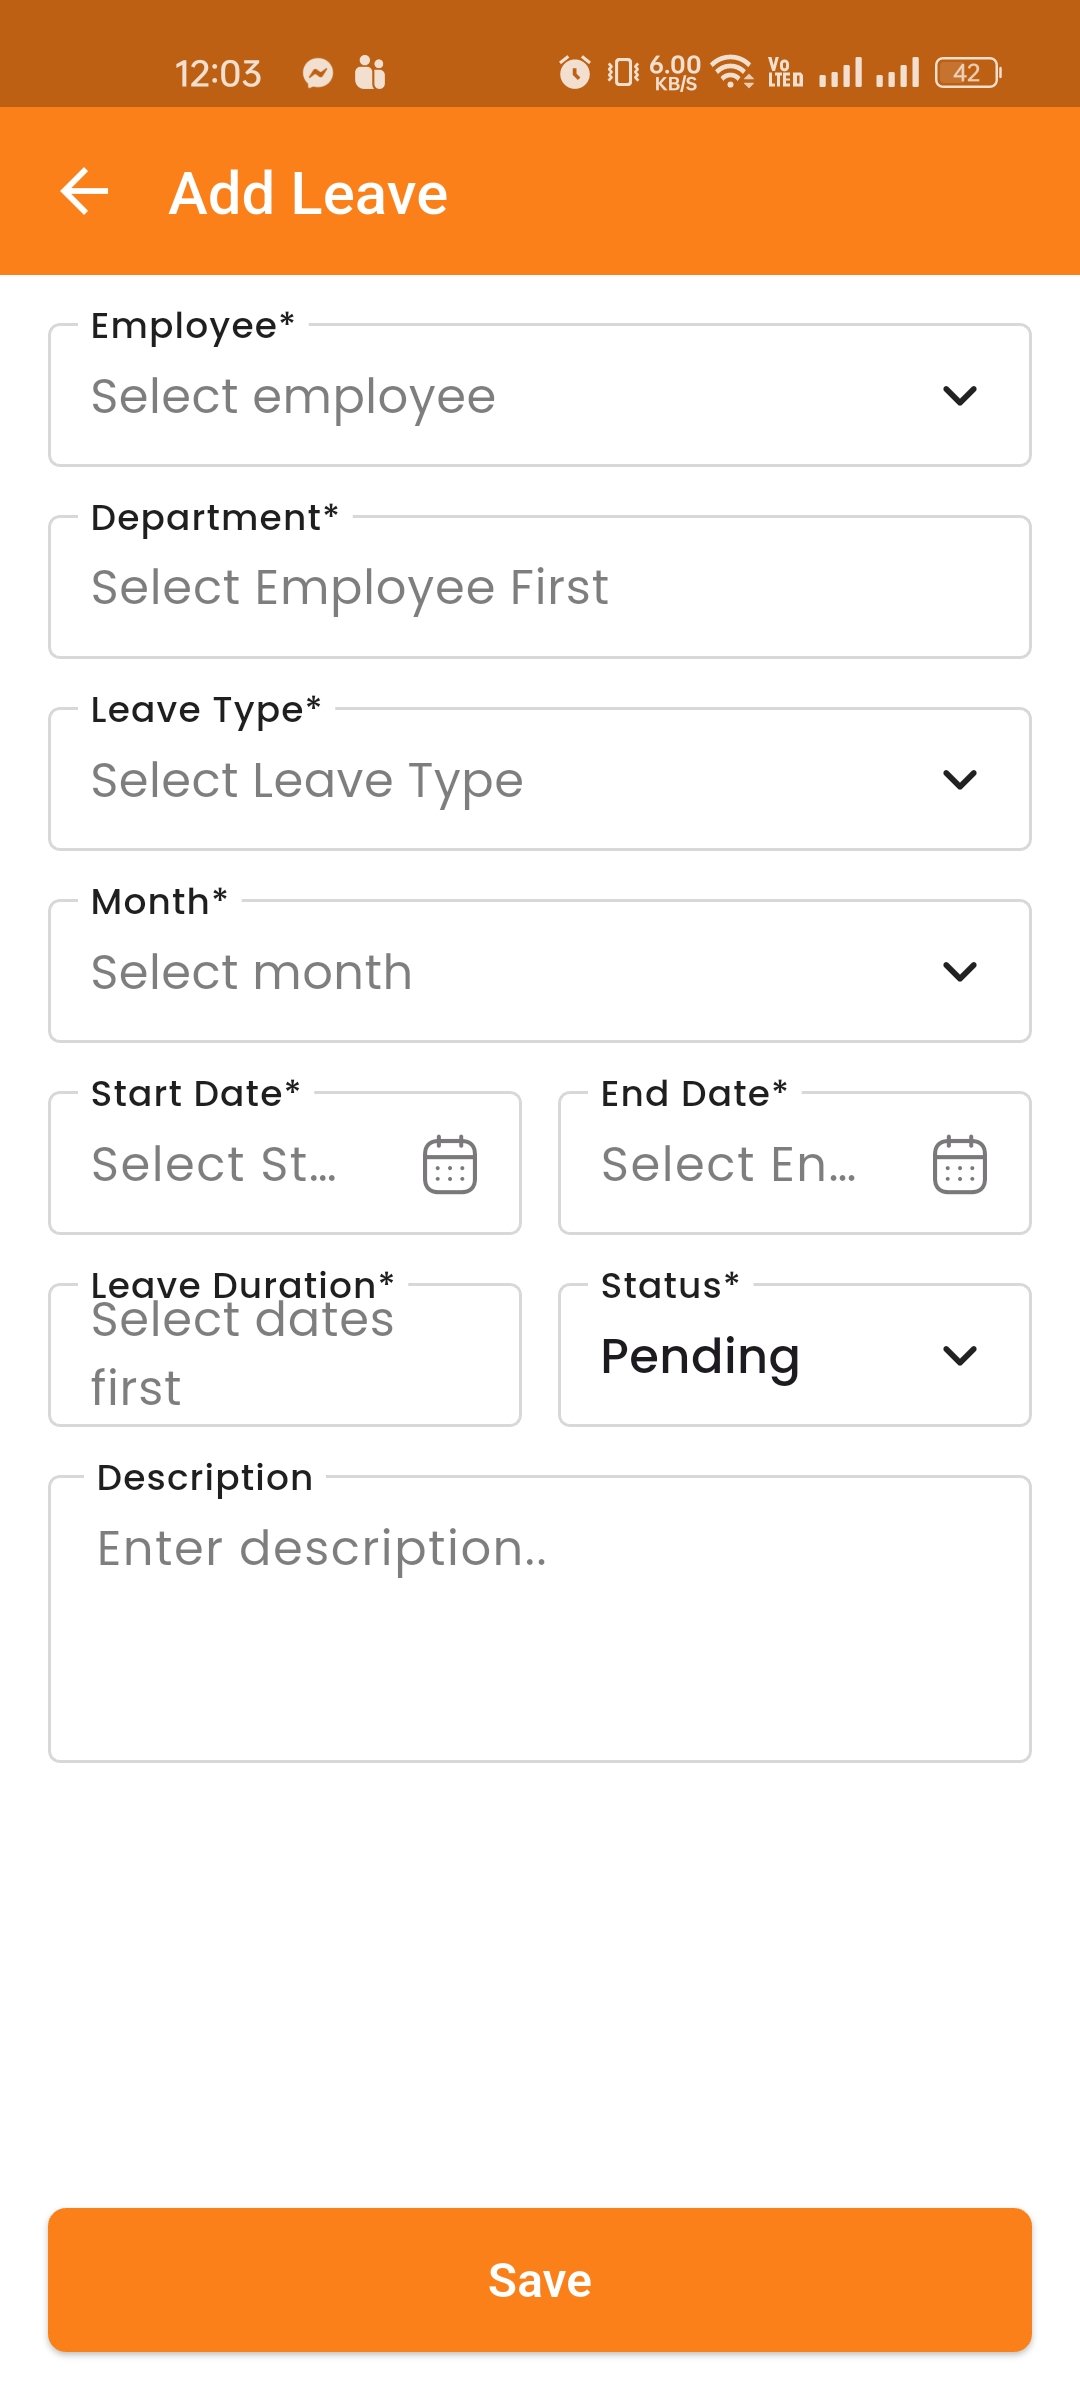
Holiday
Manage company holidays. You can create, edit, delete, and filter holidays by date or name.
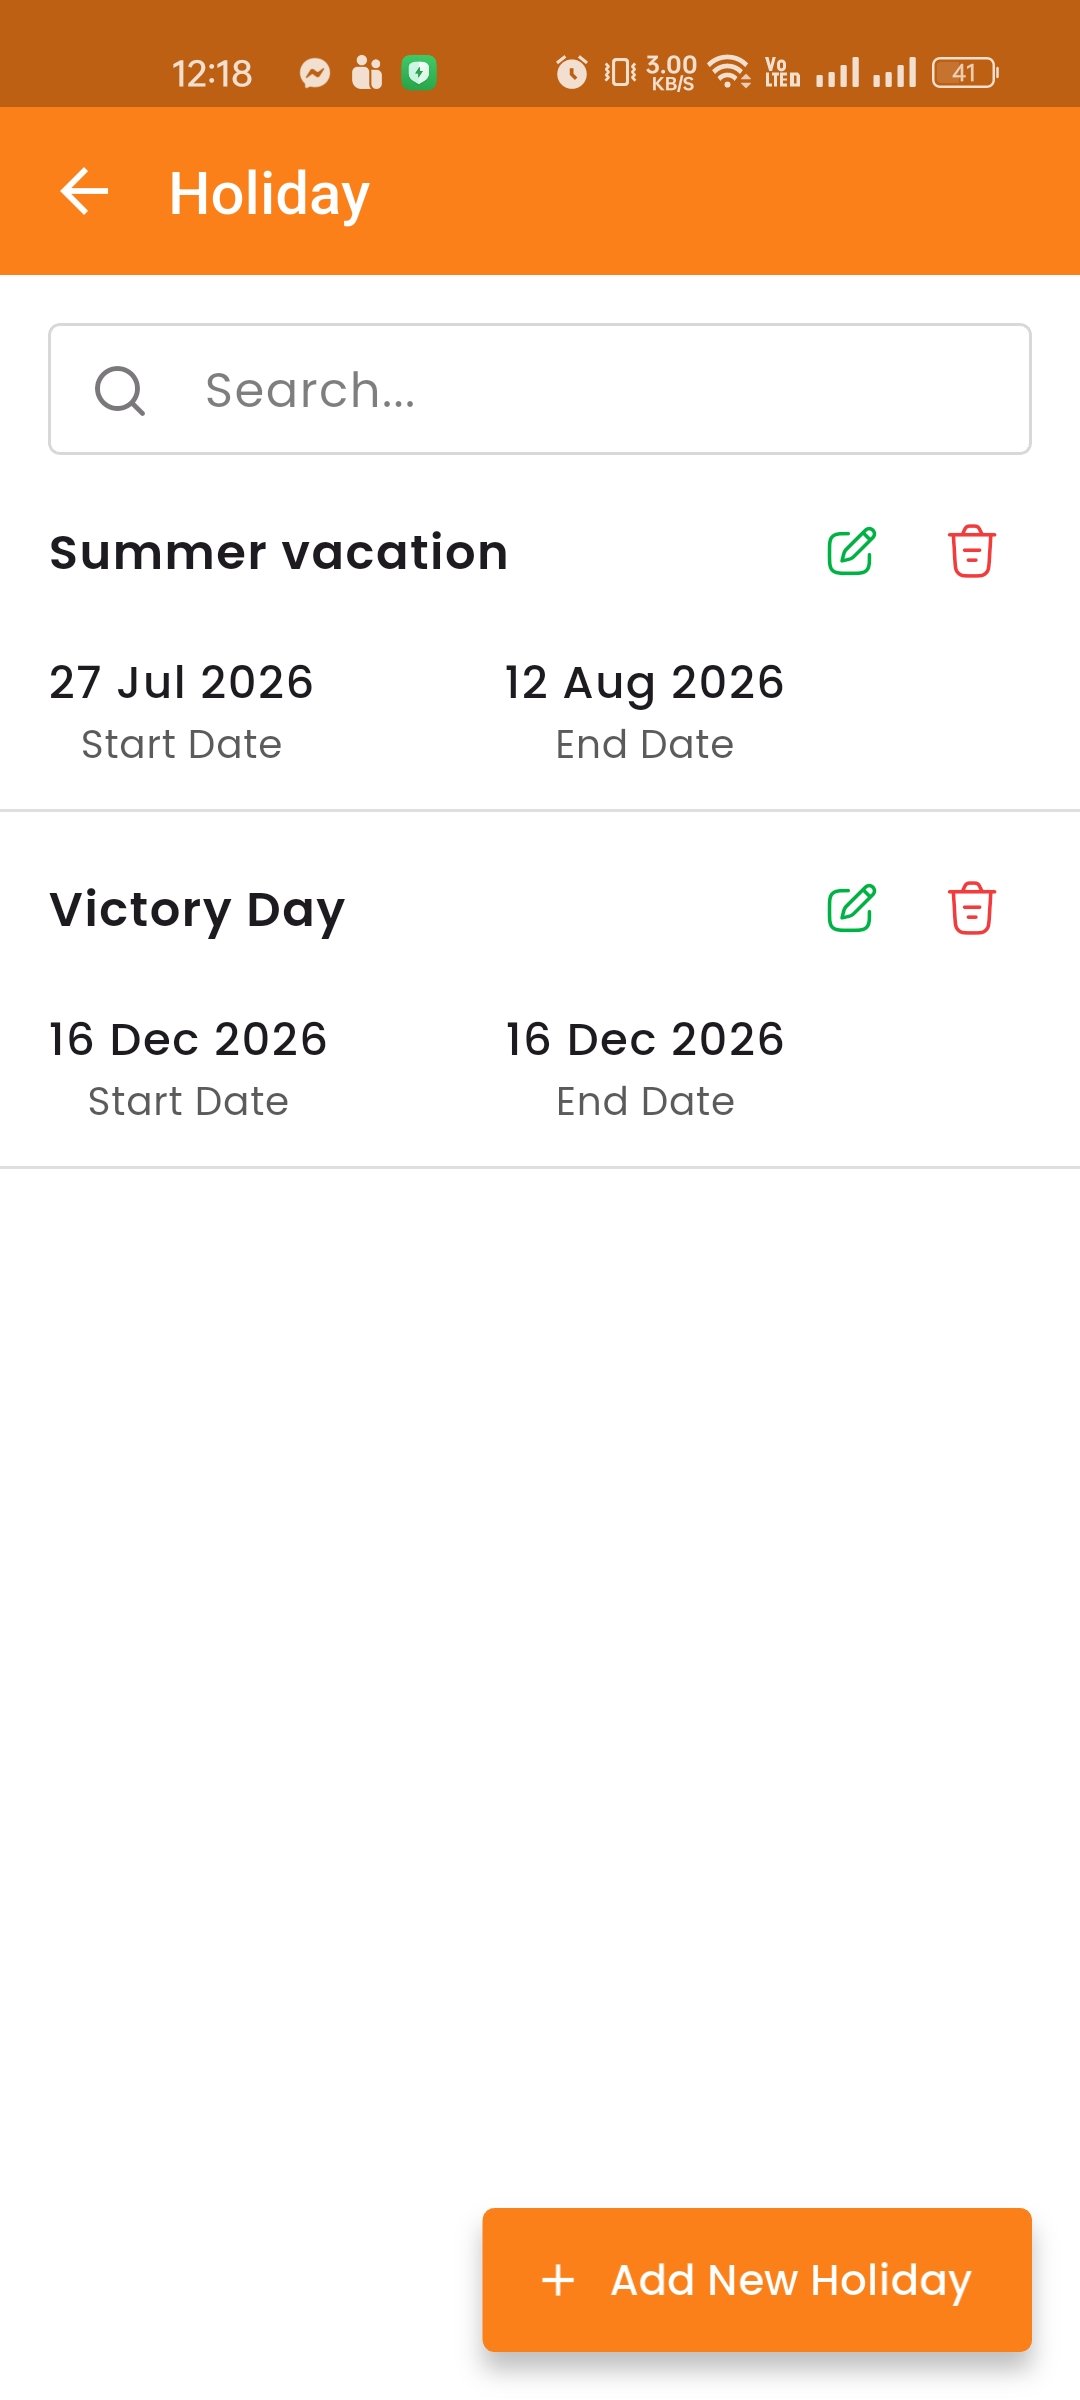
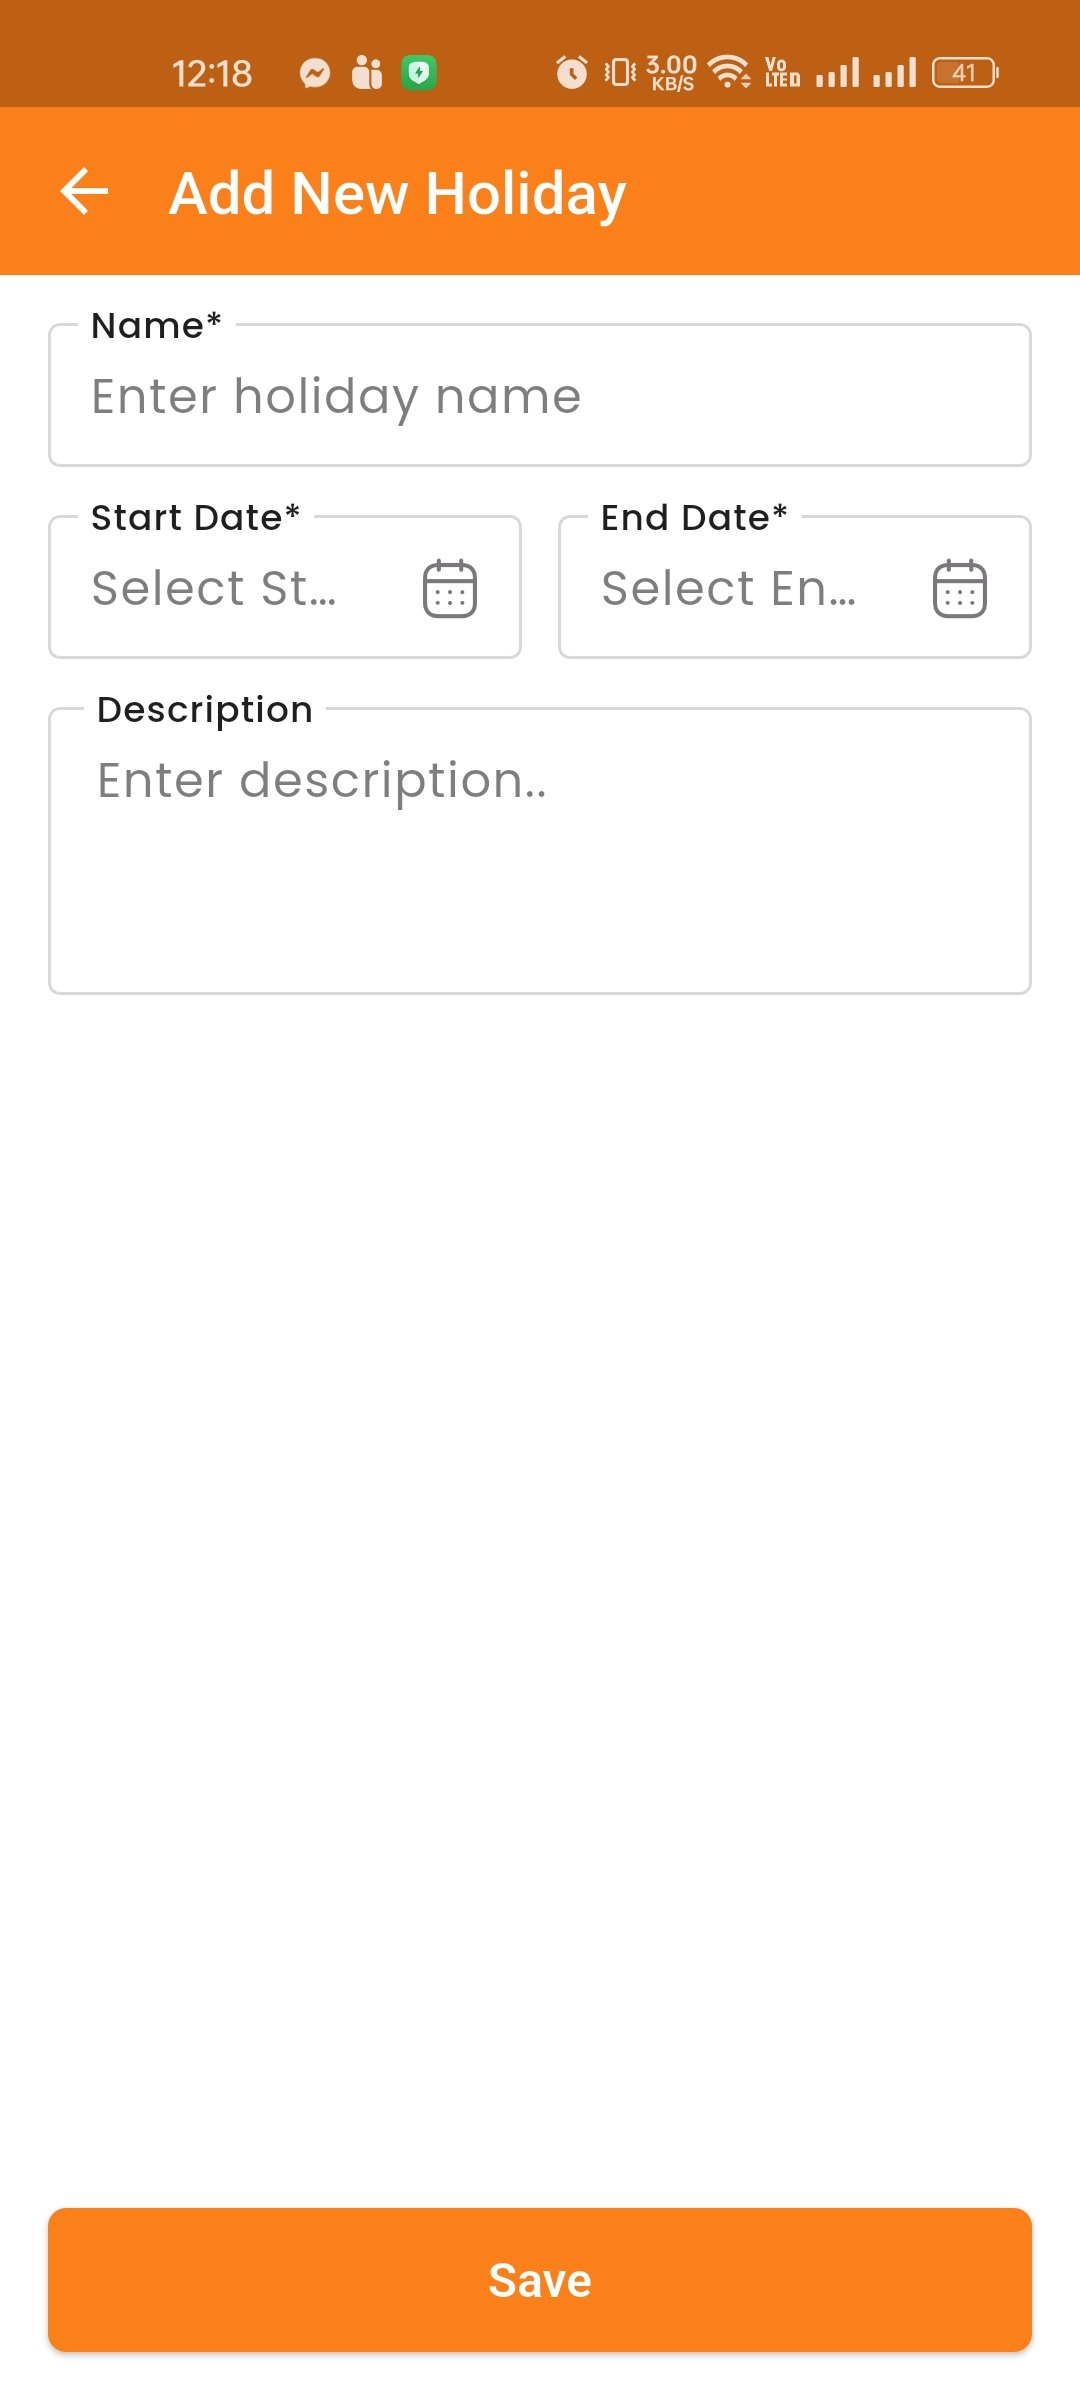
Attendance
Track employee attendance with check-in and check-out times. View attendance history and generate attendance reports.
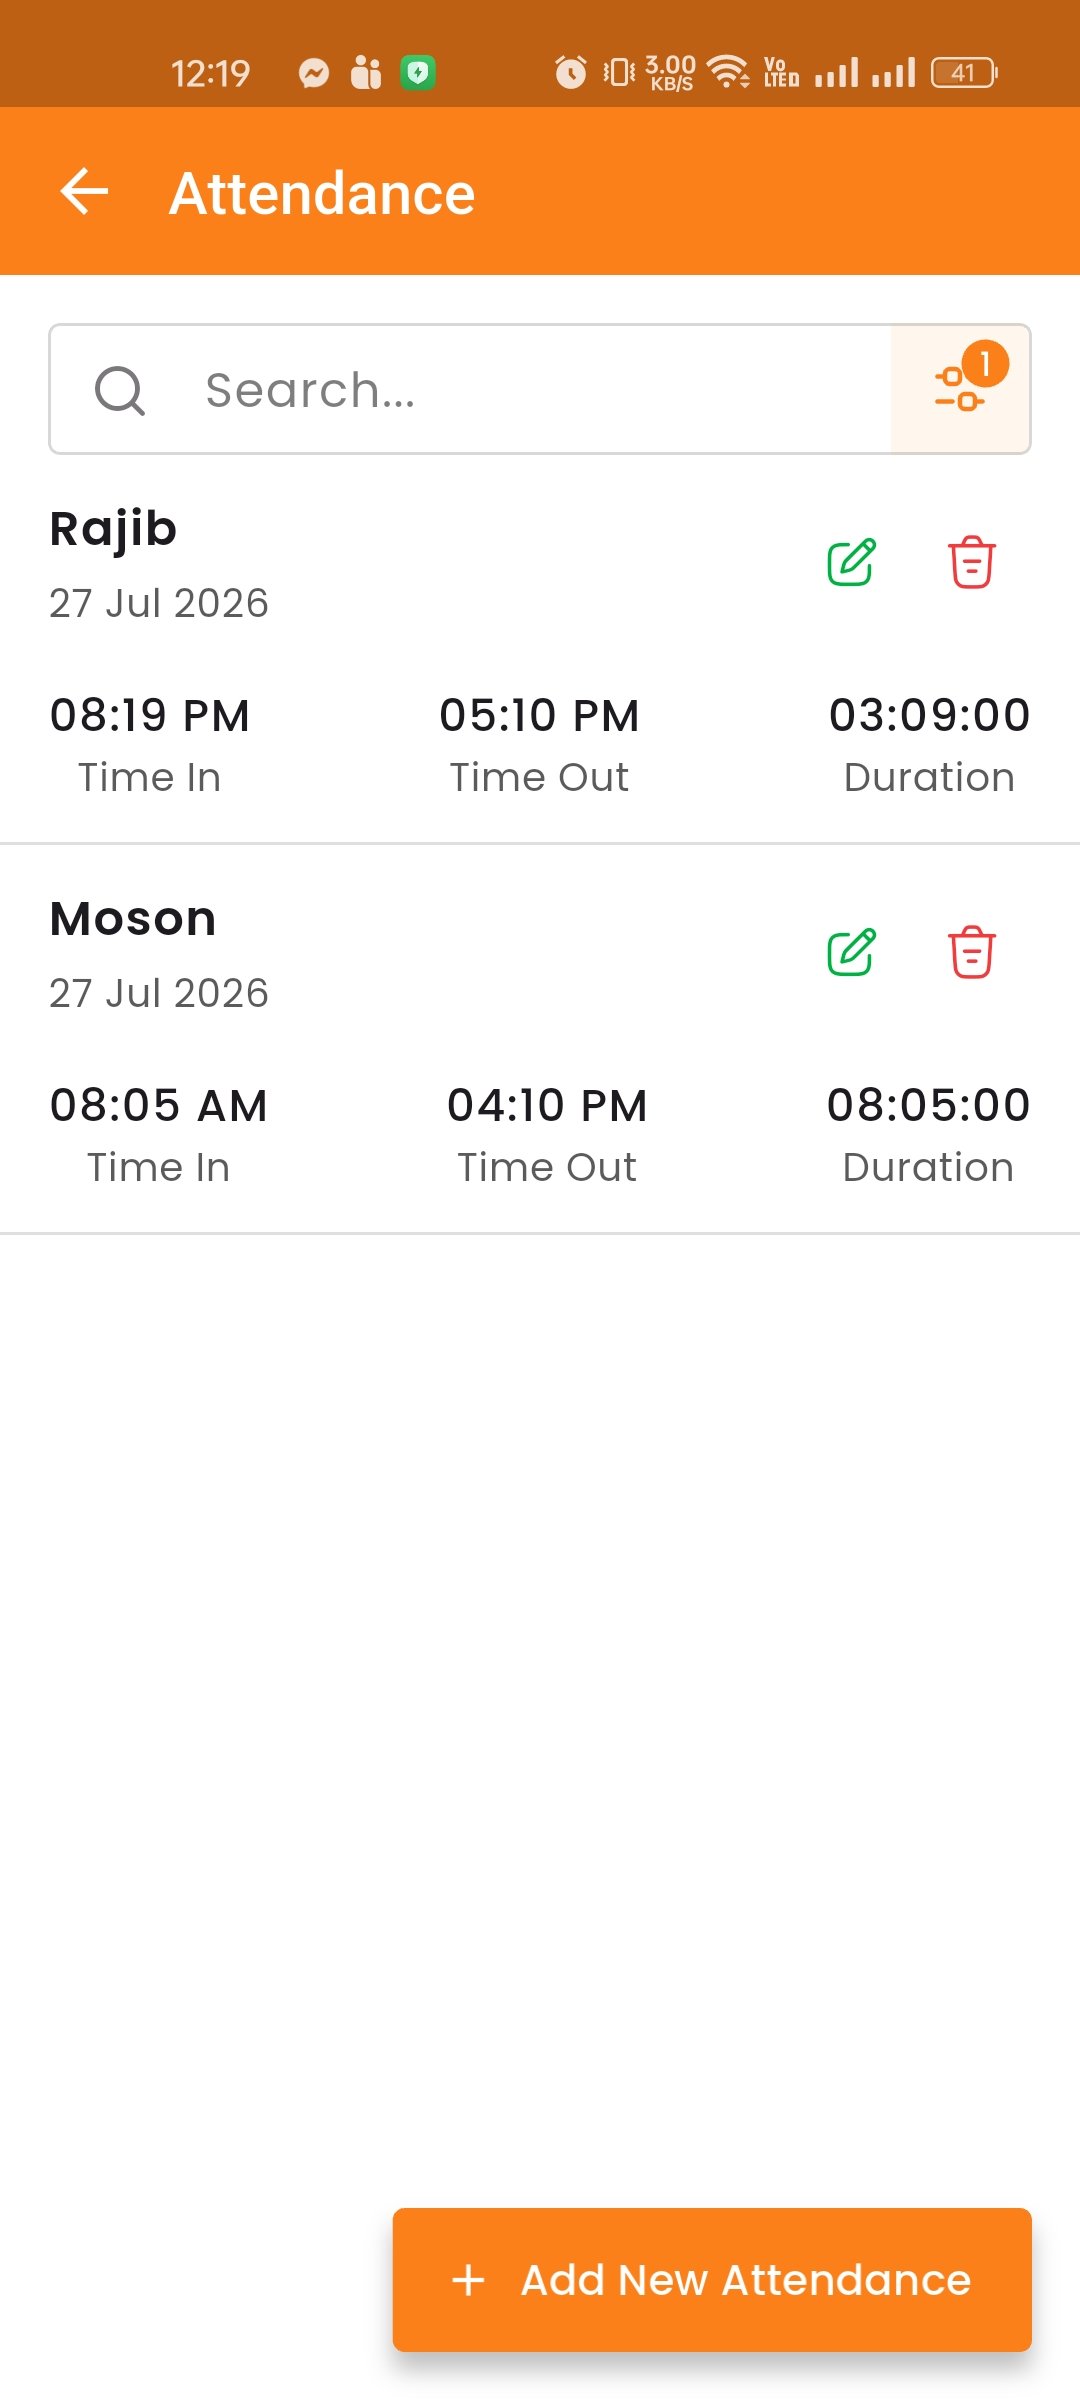
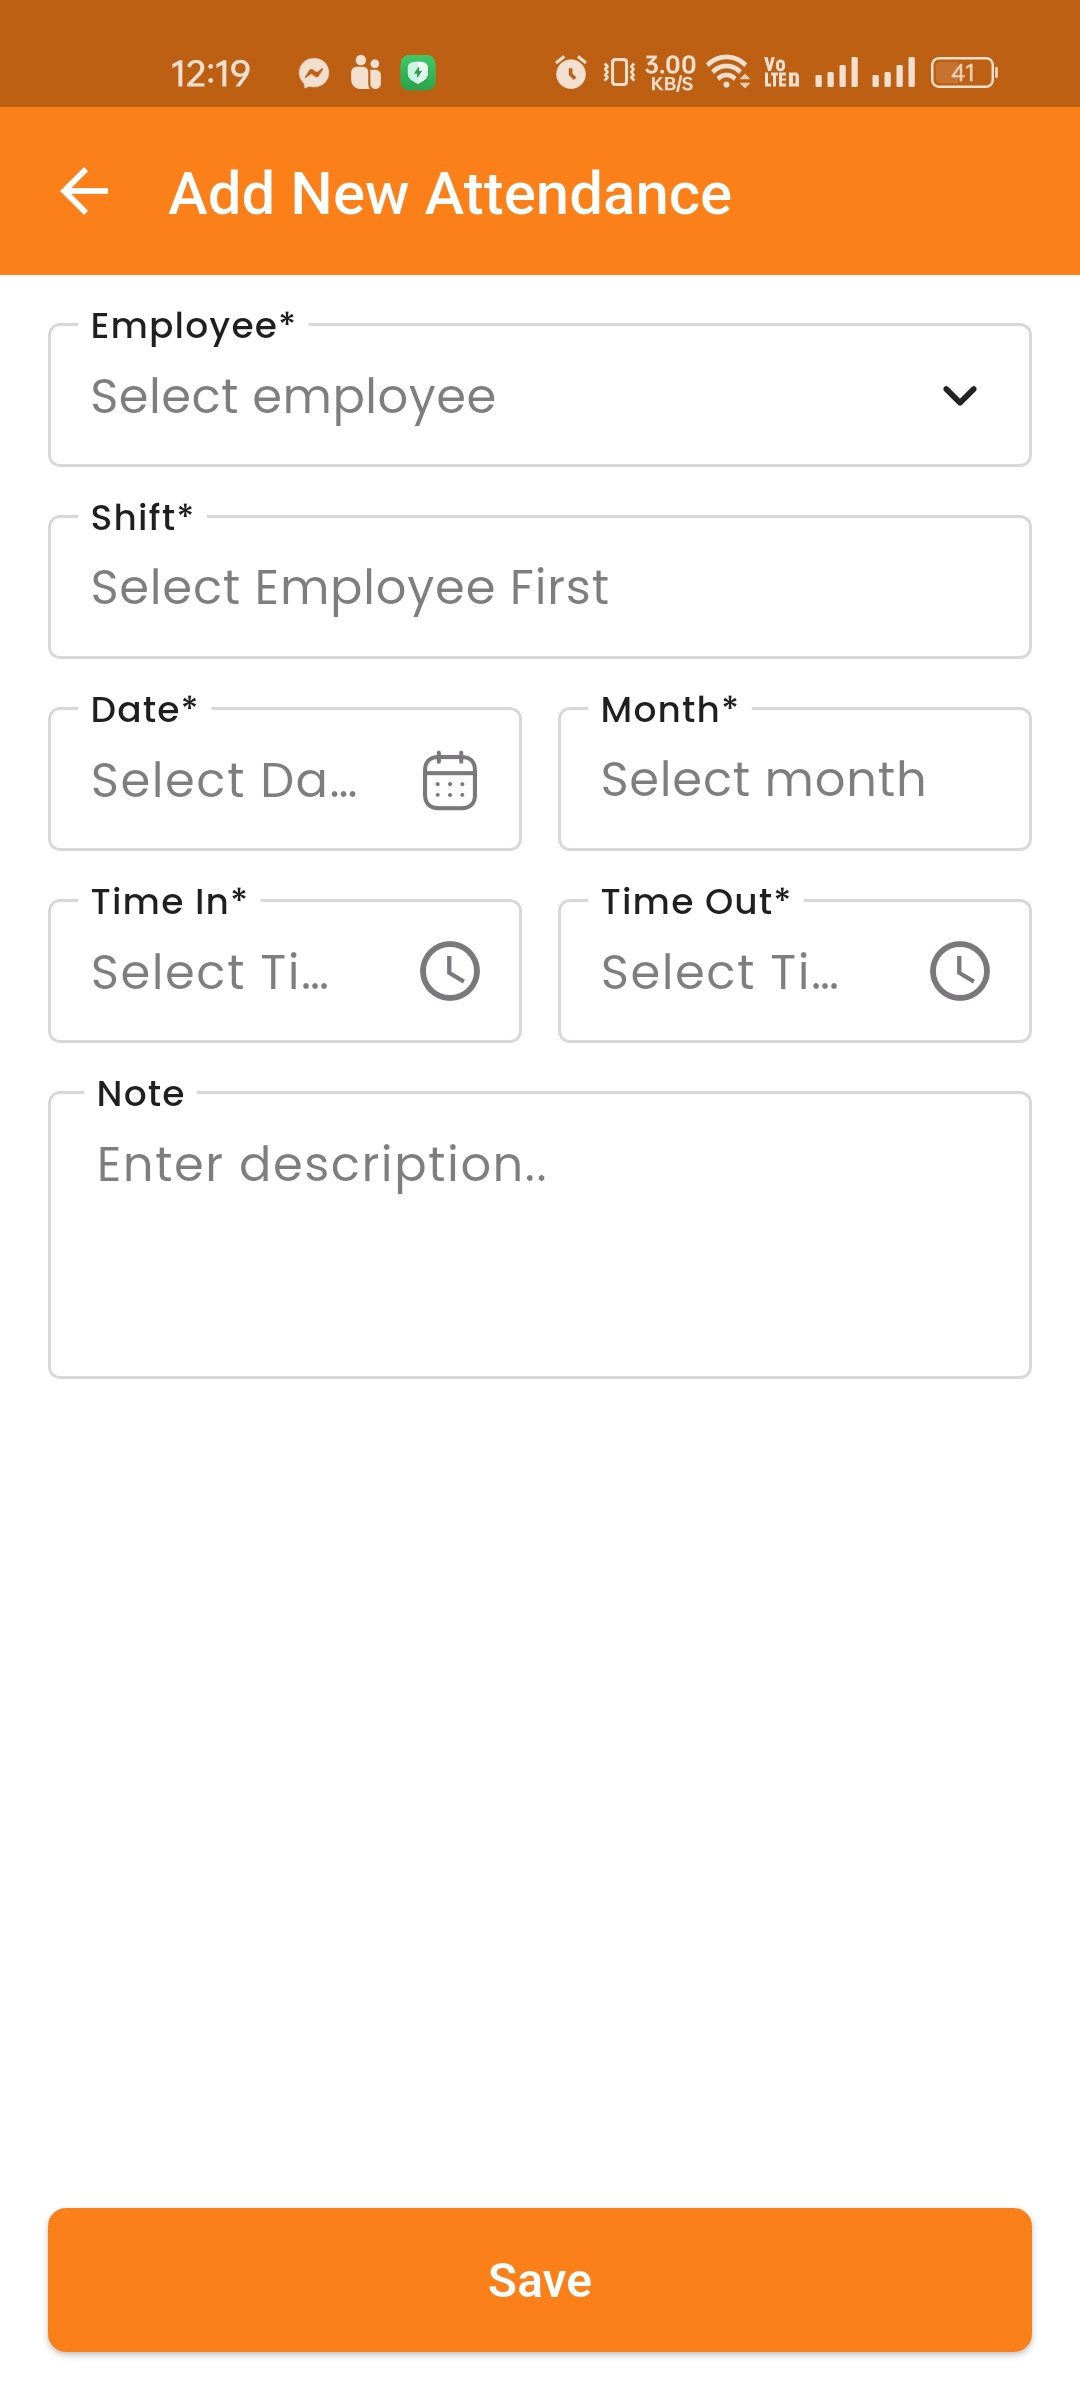
Payroll
Process employee salaries including basic pay, allowances, deductions, and bonuses. Generate payslips and payroll reports.
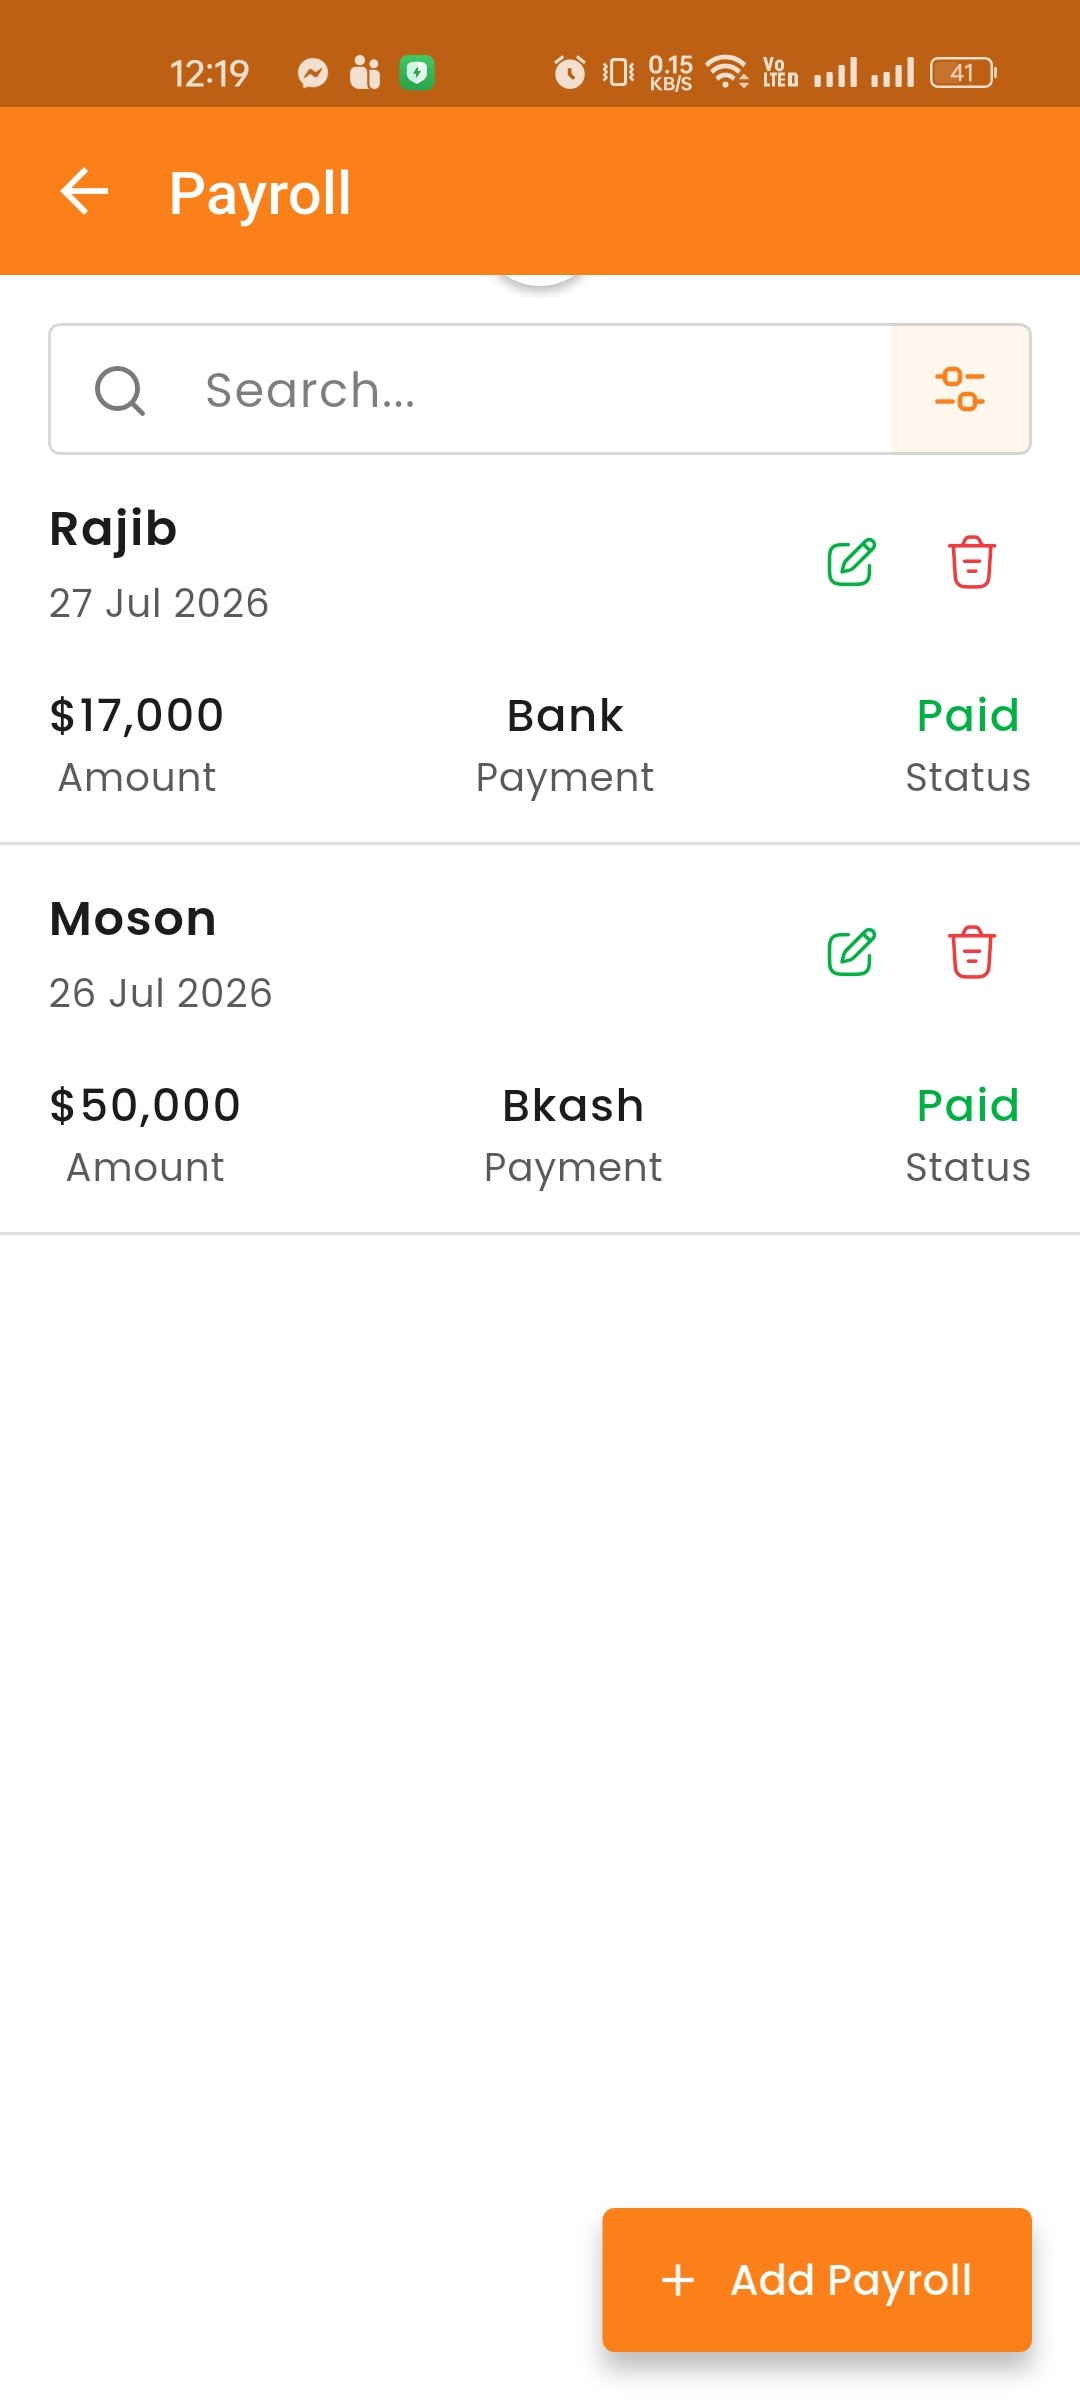
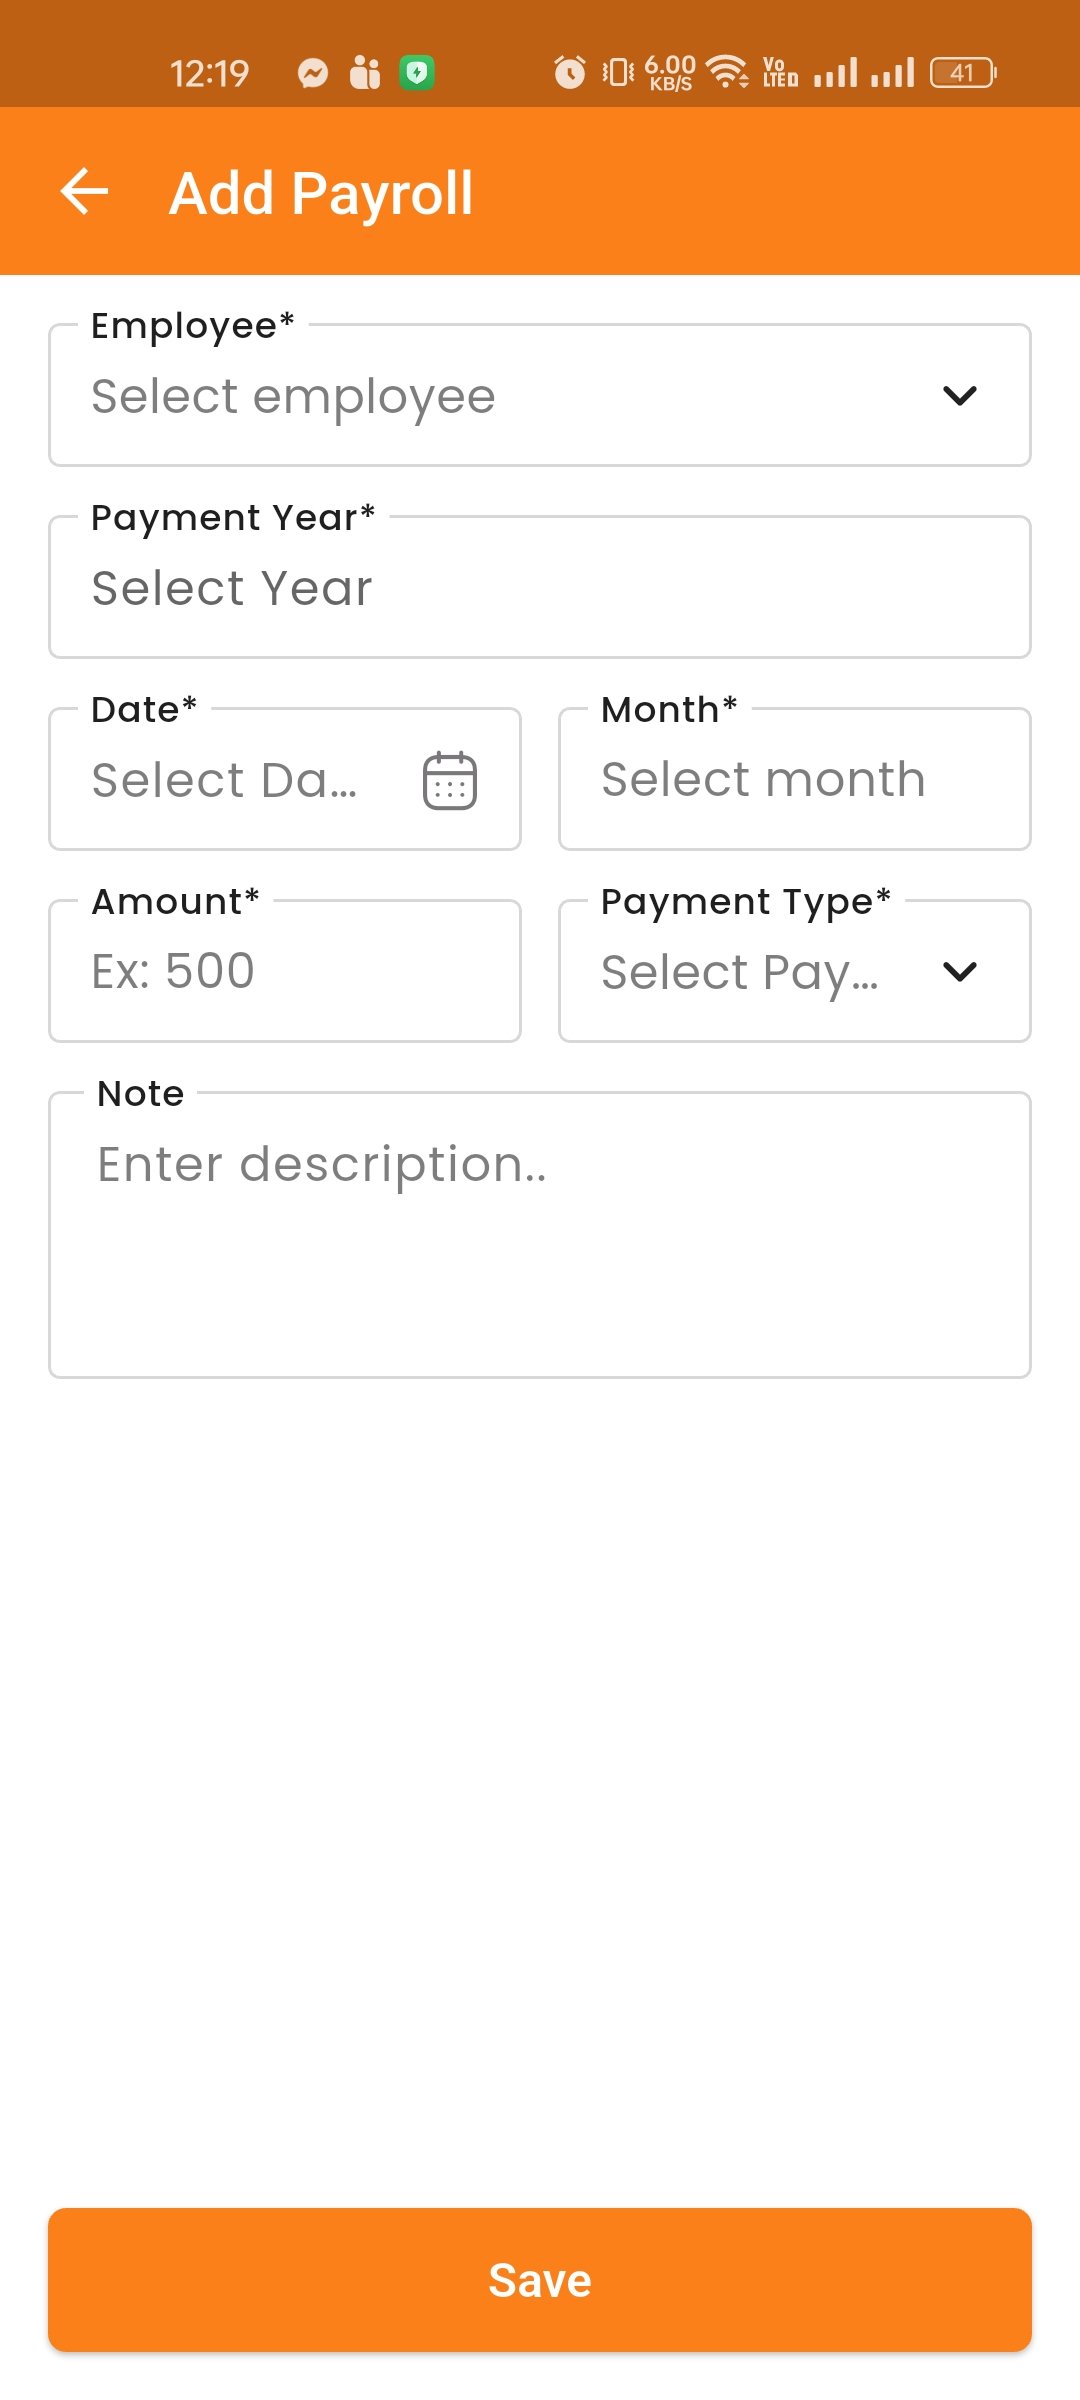
Reports
The Reports section provides detailed insights into employee activities. You can also download as PDF or print directly from each report.
Attendance Report — View employee attendance records with filters for date range and department.
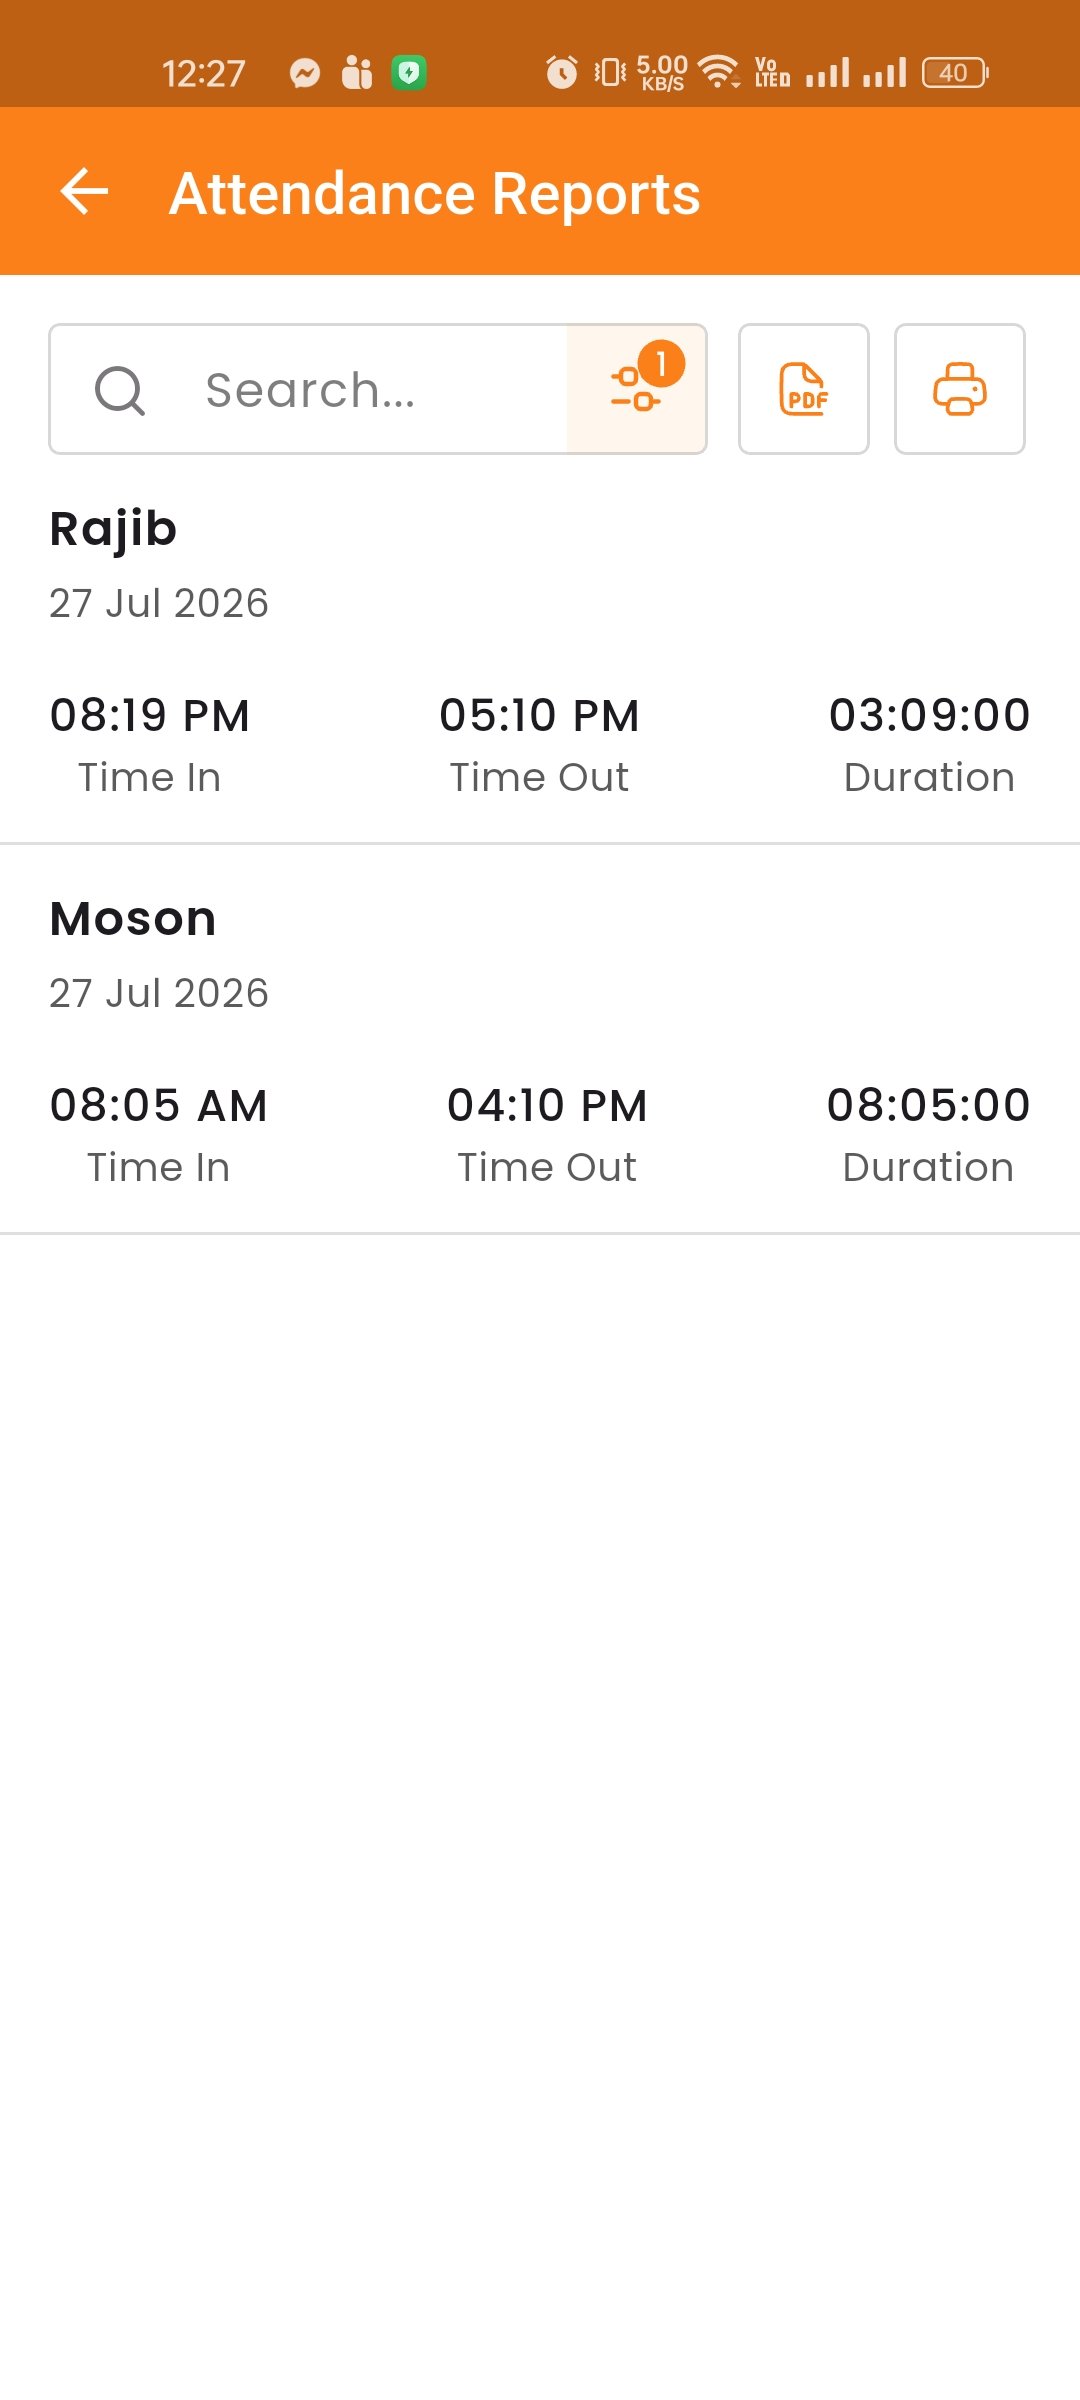
Payroll Report — View salary details, payslips, and payroll summaries.
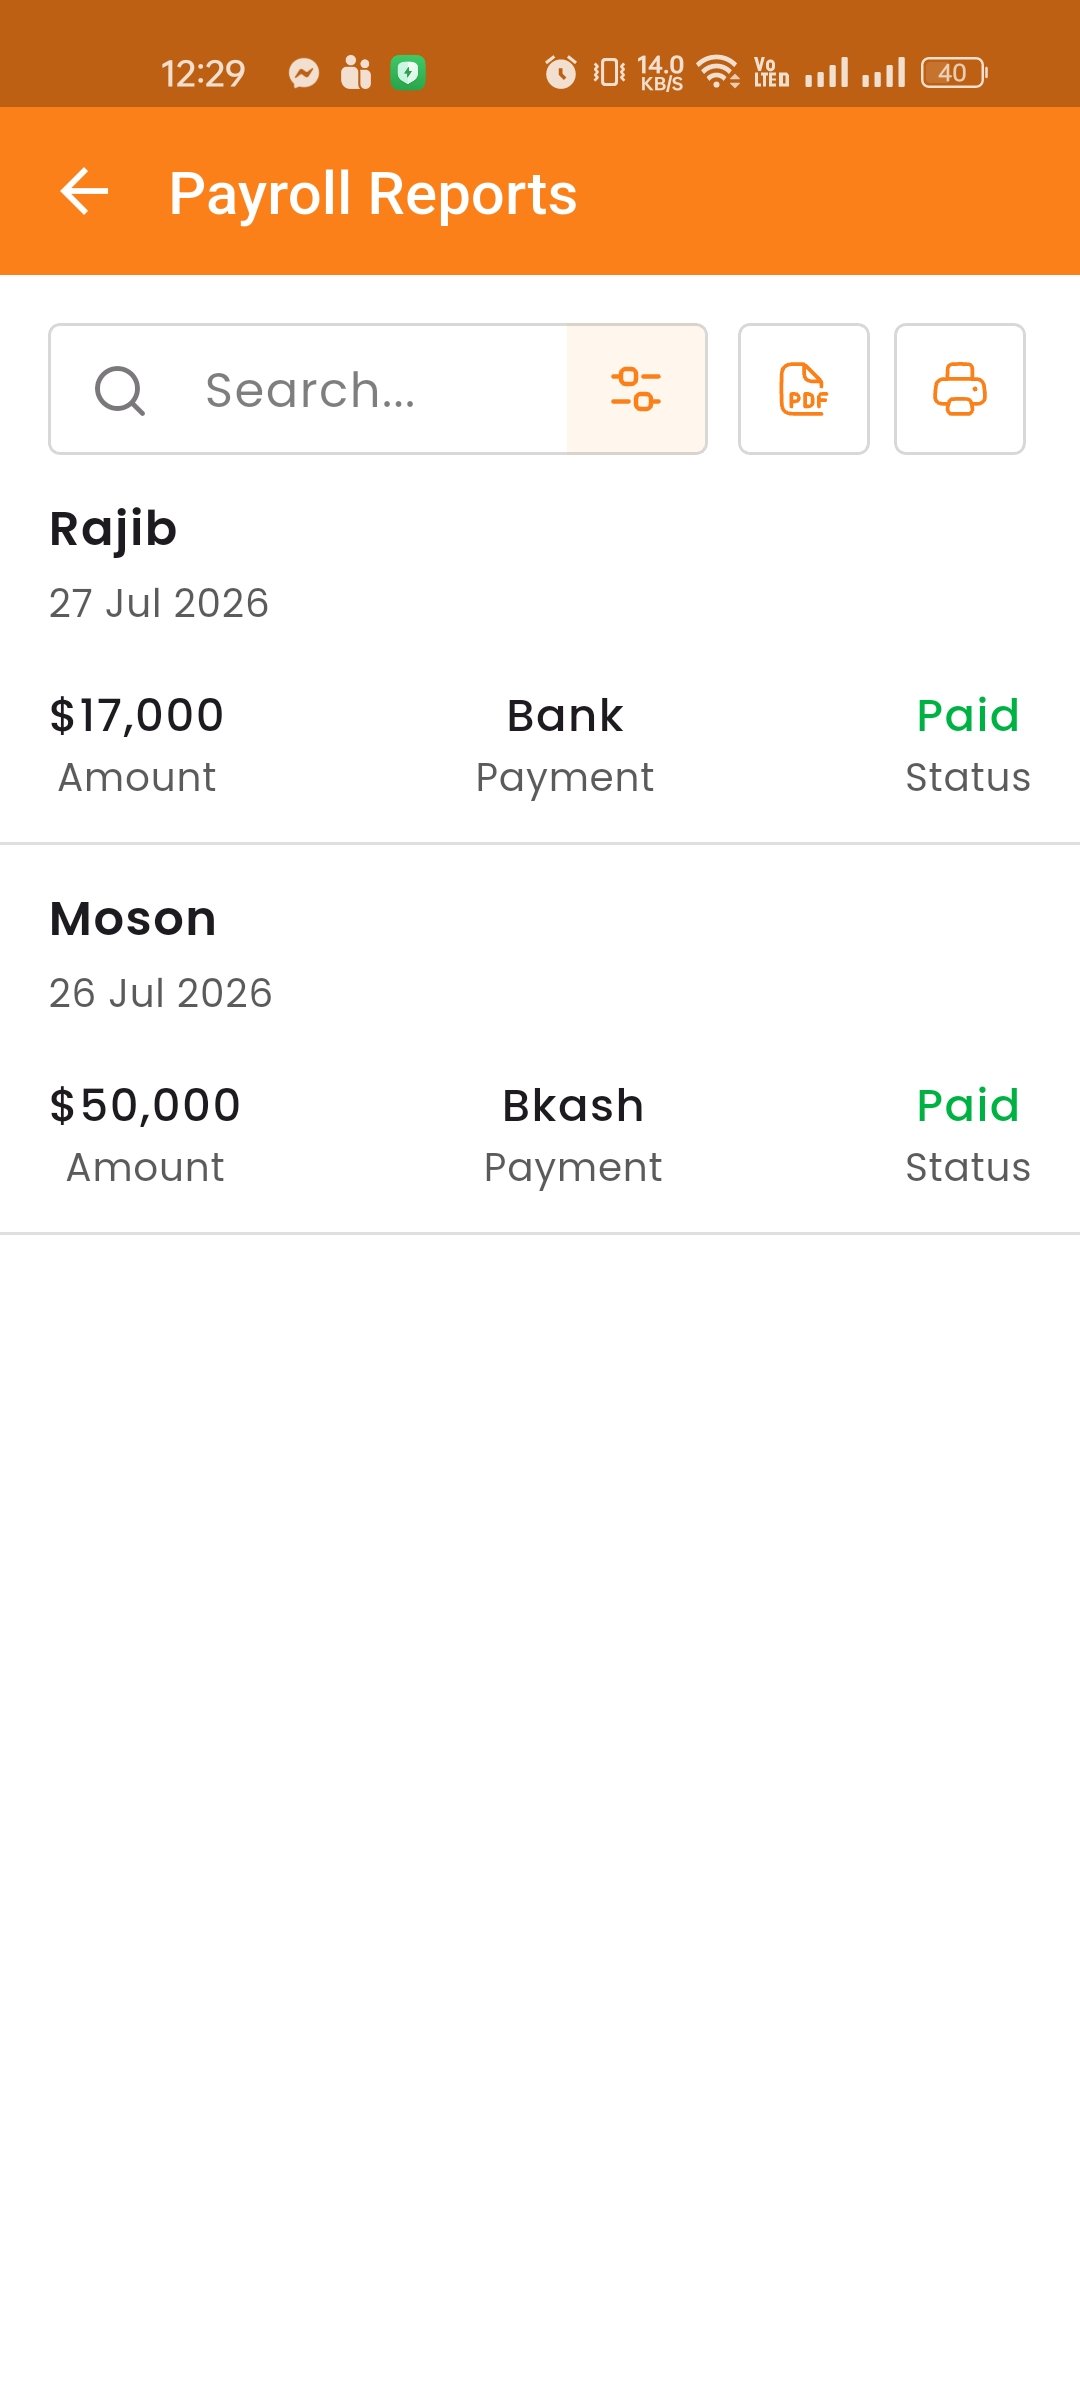
Leave Report — View employee leave history, balances, and approvals.
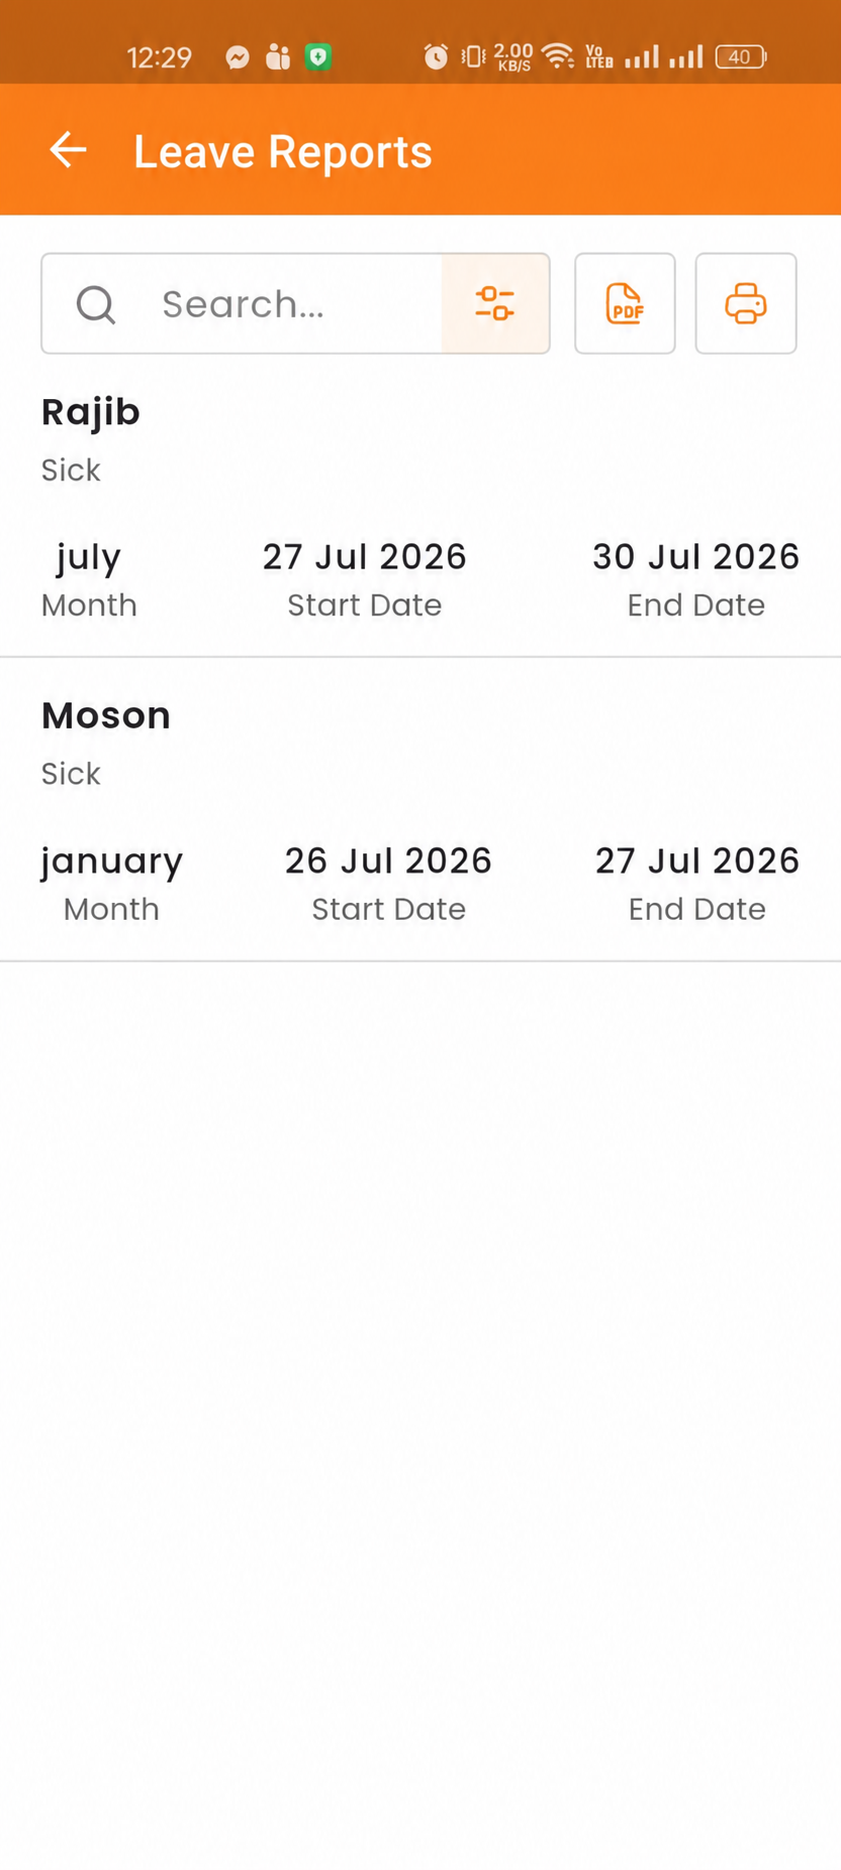
All Kitchens
The Kitchens module streamlines restaurant operations by separating food preparation into logical units (e.g., Non-Veg Kitchen, Veg Kitchen). This ensures that orders are routed to the correct staff.
View and manage all kitchens. You can toggle a kitchen to Active or Inactive status. Assign items to specific kitchens for proper order routing.
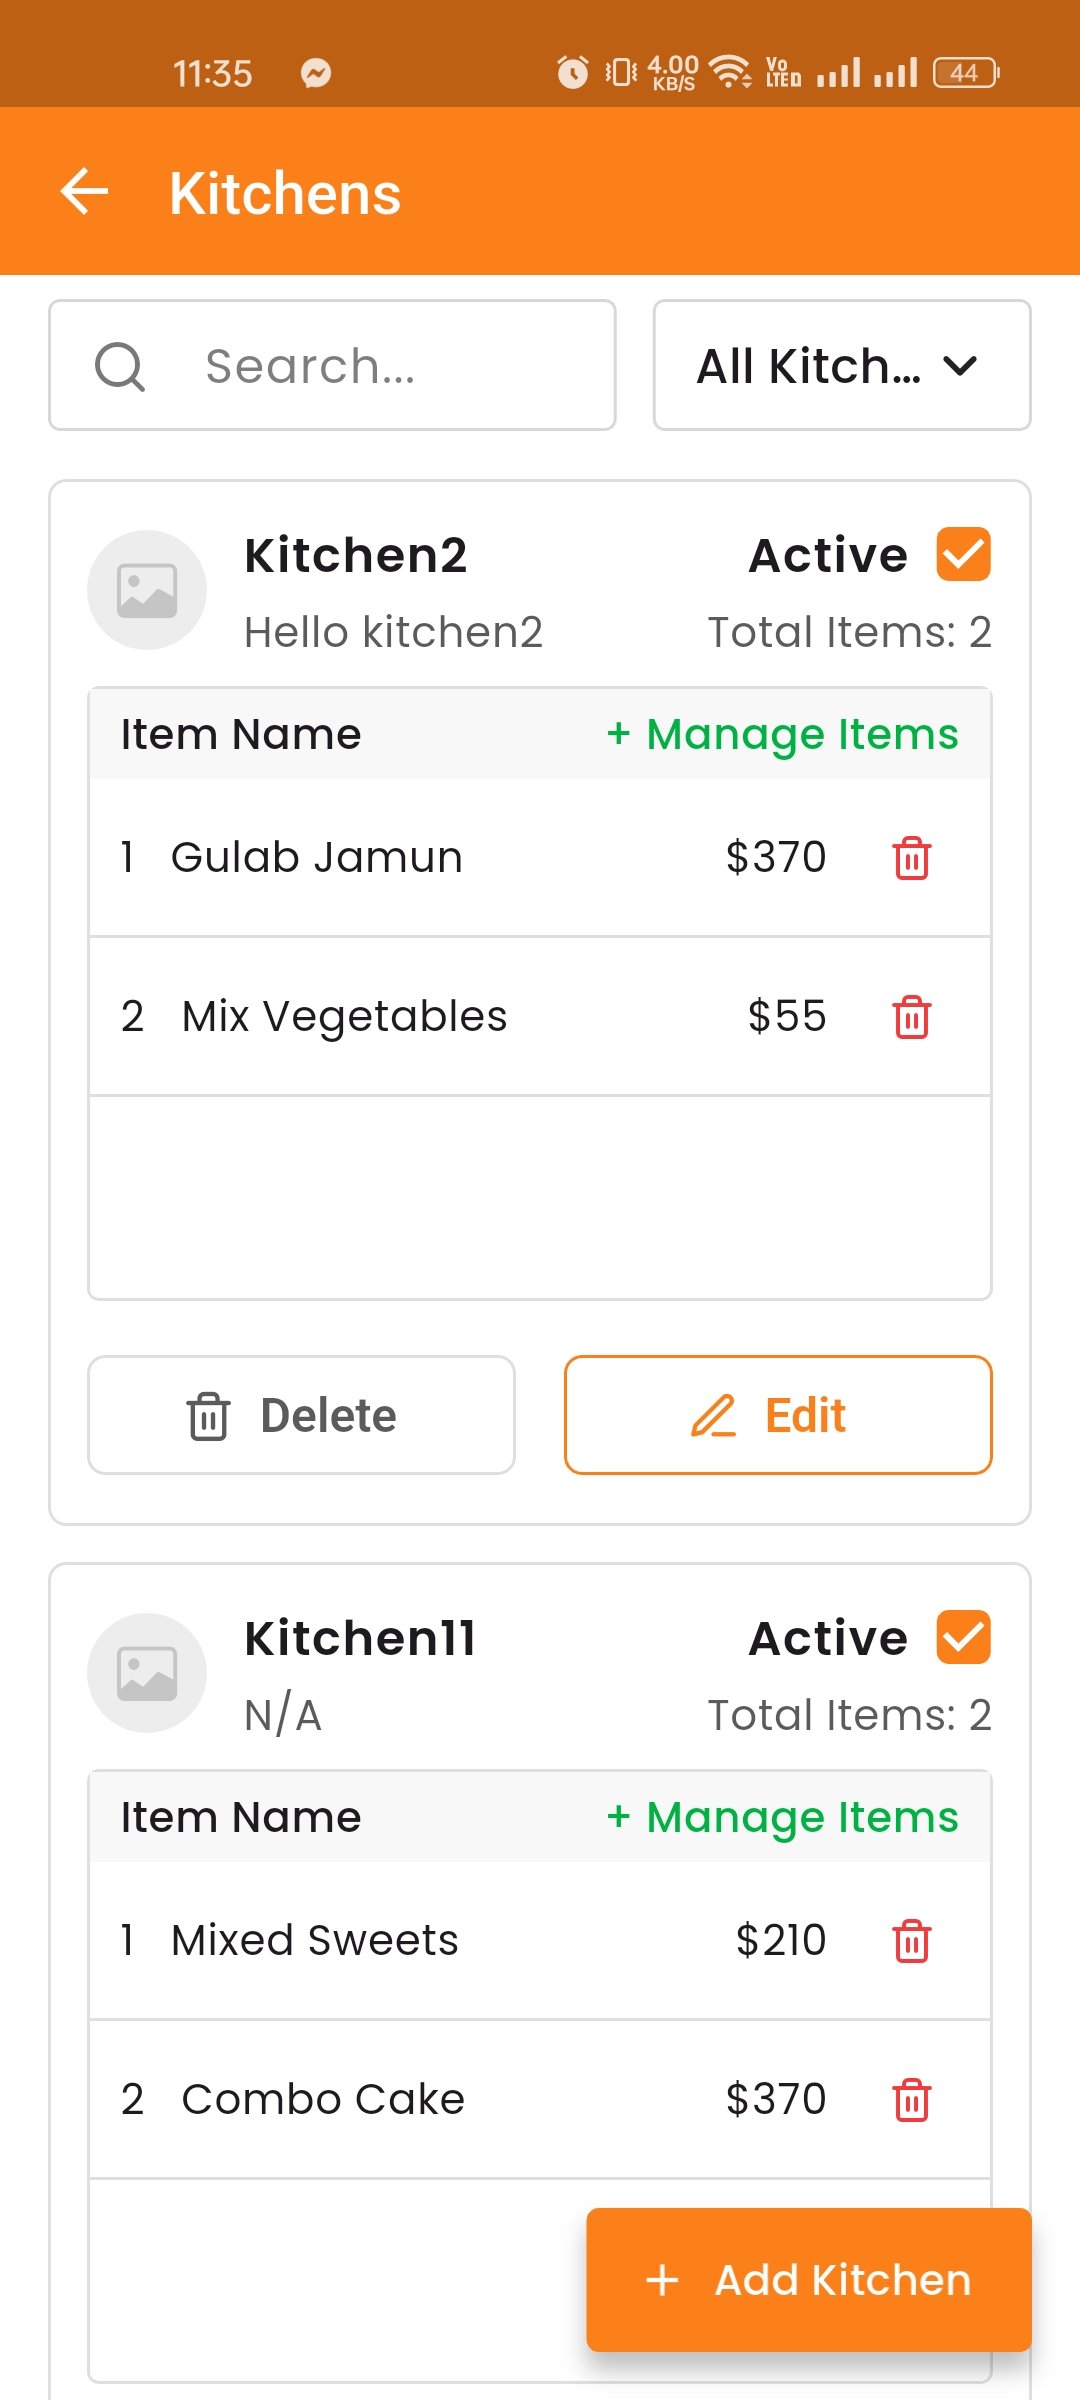
Create Kitchen
You can create a new kitchen by giving it a name (e.g., Non-Veg Kitchen, Veg Kitchen). After creating the kitchen, you can also assign items to it — select which menu items will be cooked in that specific kitchen. This ensures that when an order is placed, it gets routed to the correct kitchen automatically.
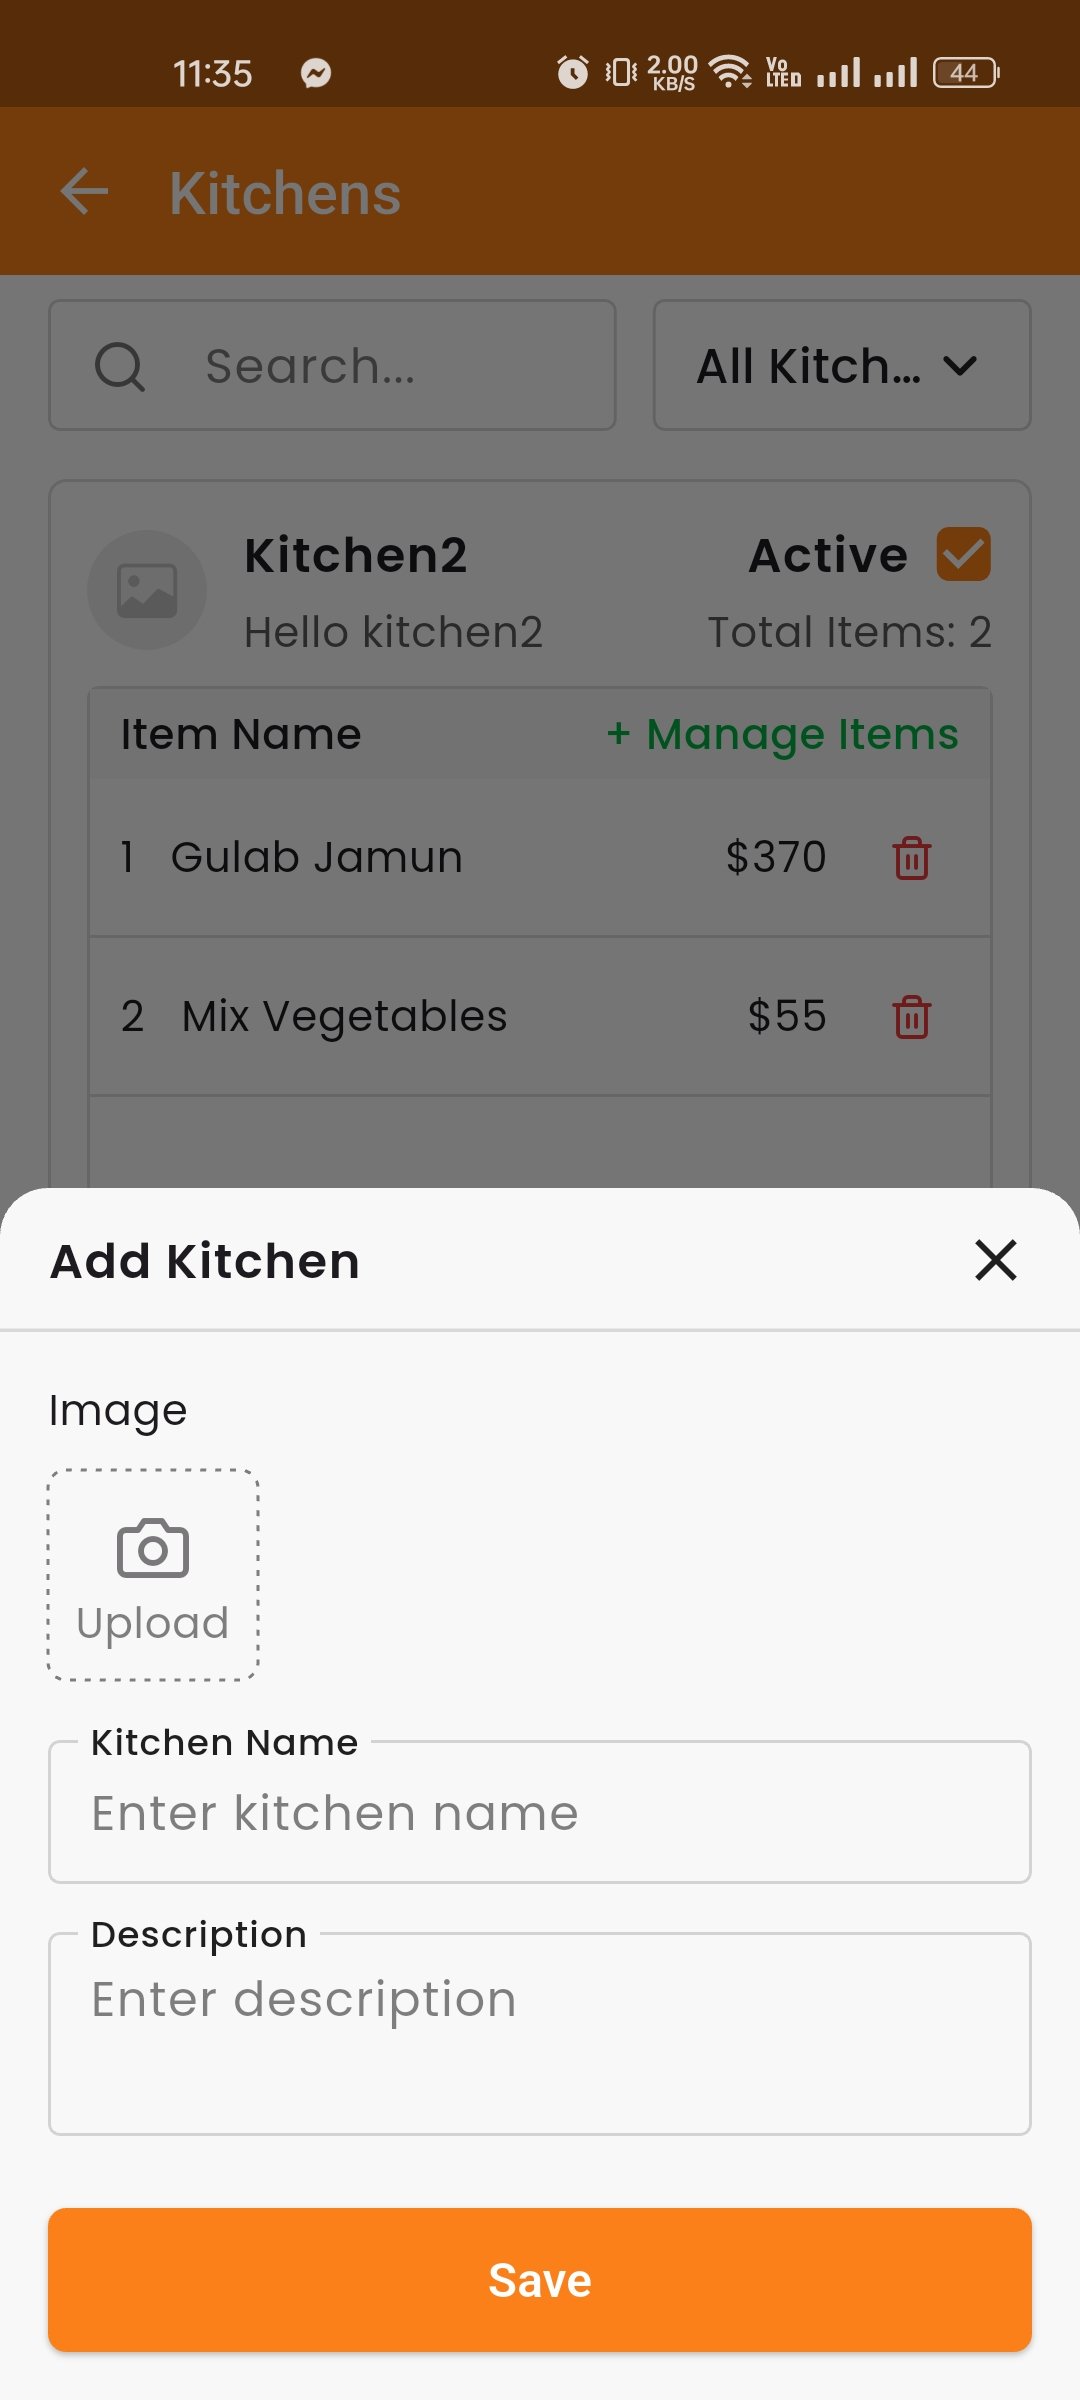
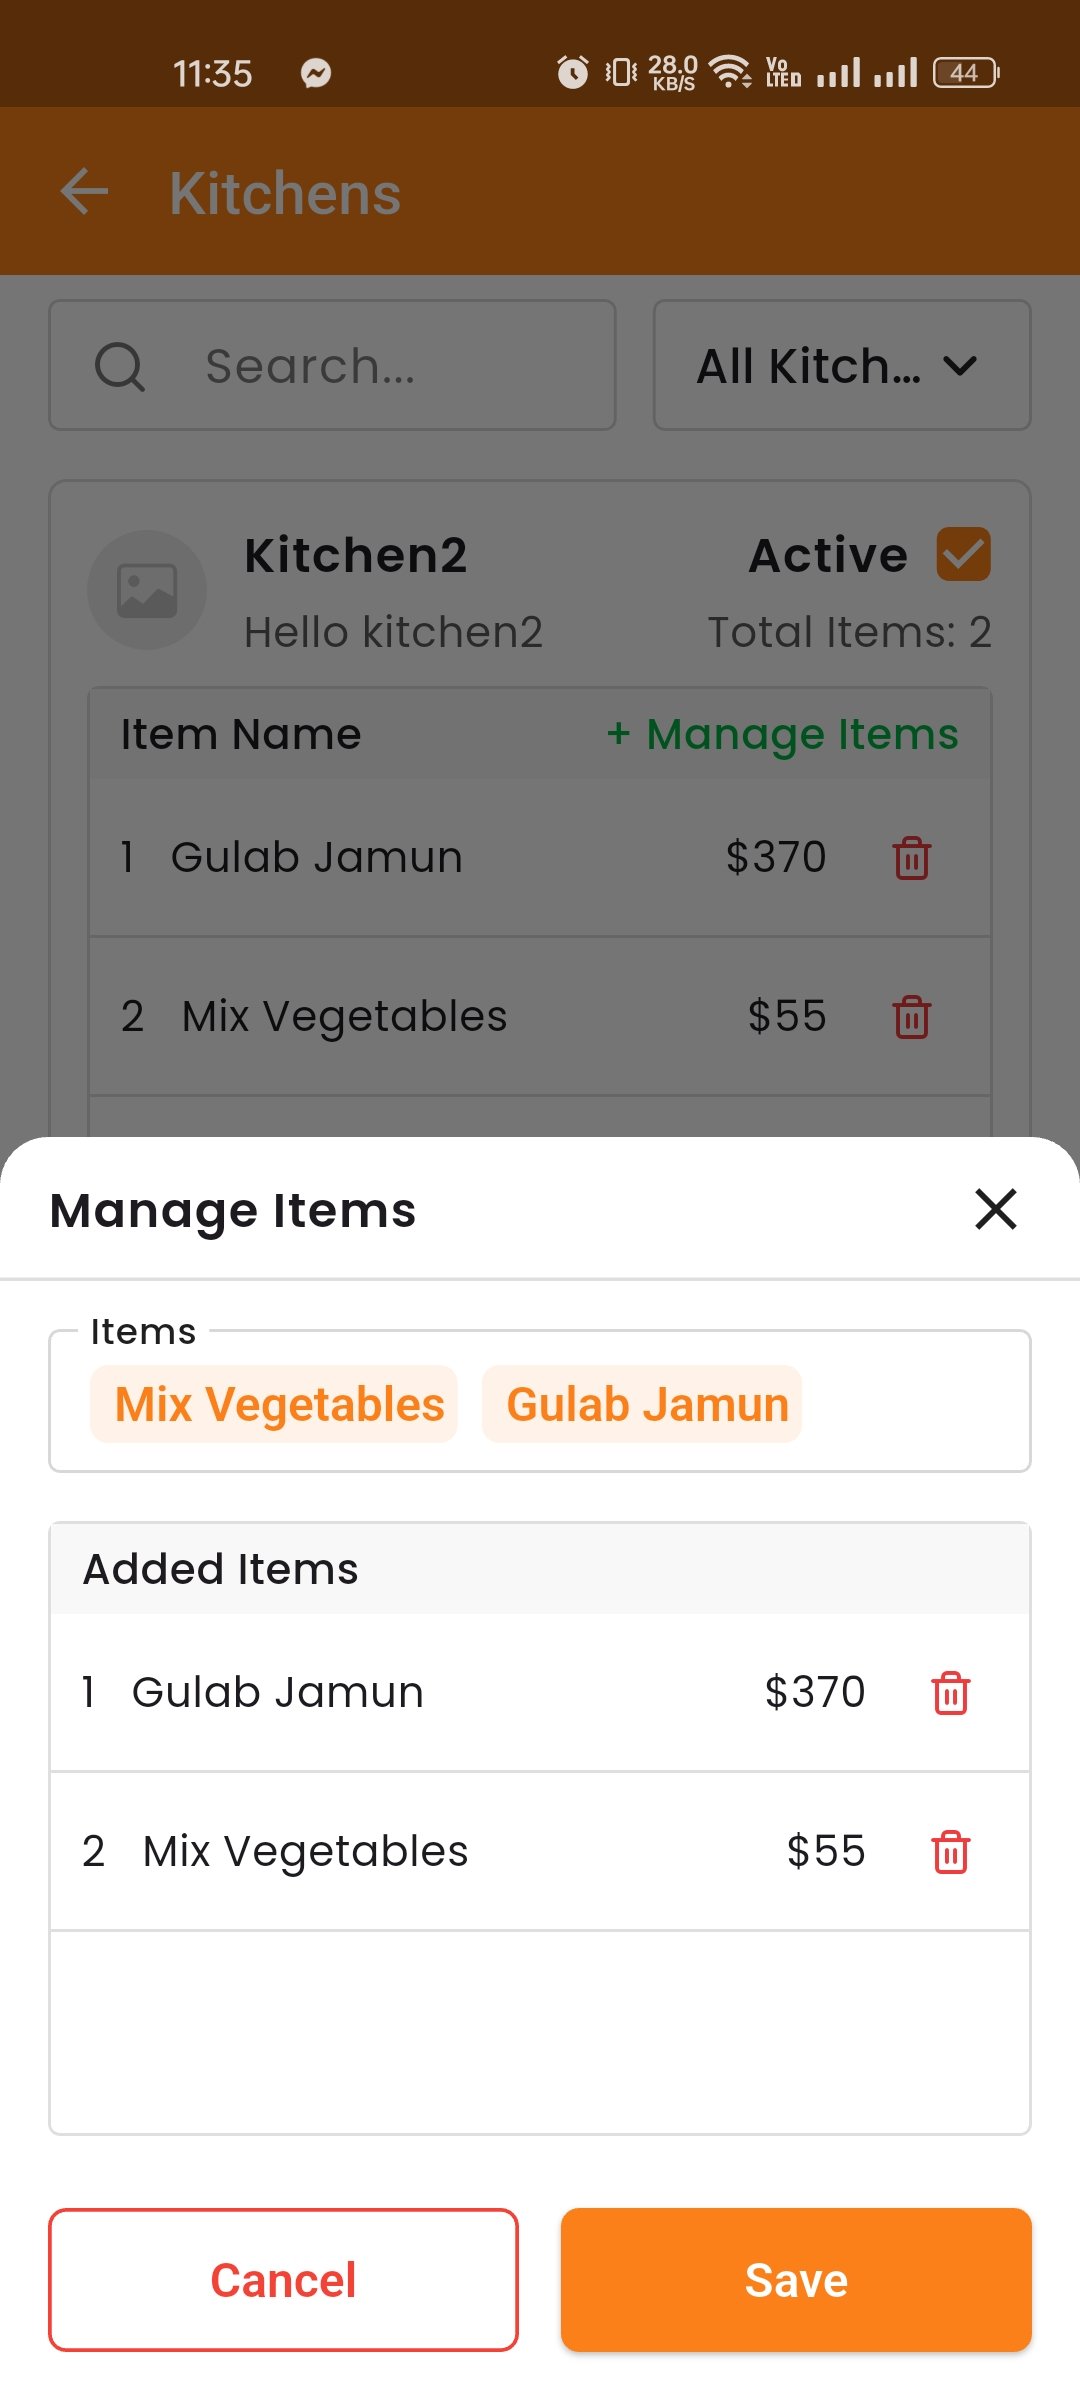
Notification
The Notification icon appears at the top of the app. Tap it to view all your notifications. You will receive different types of notifications such as when a new order is placed, when a user creates a new account, and other important updates.
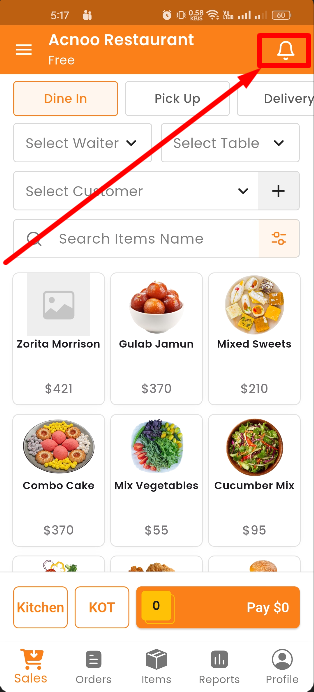
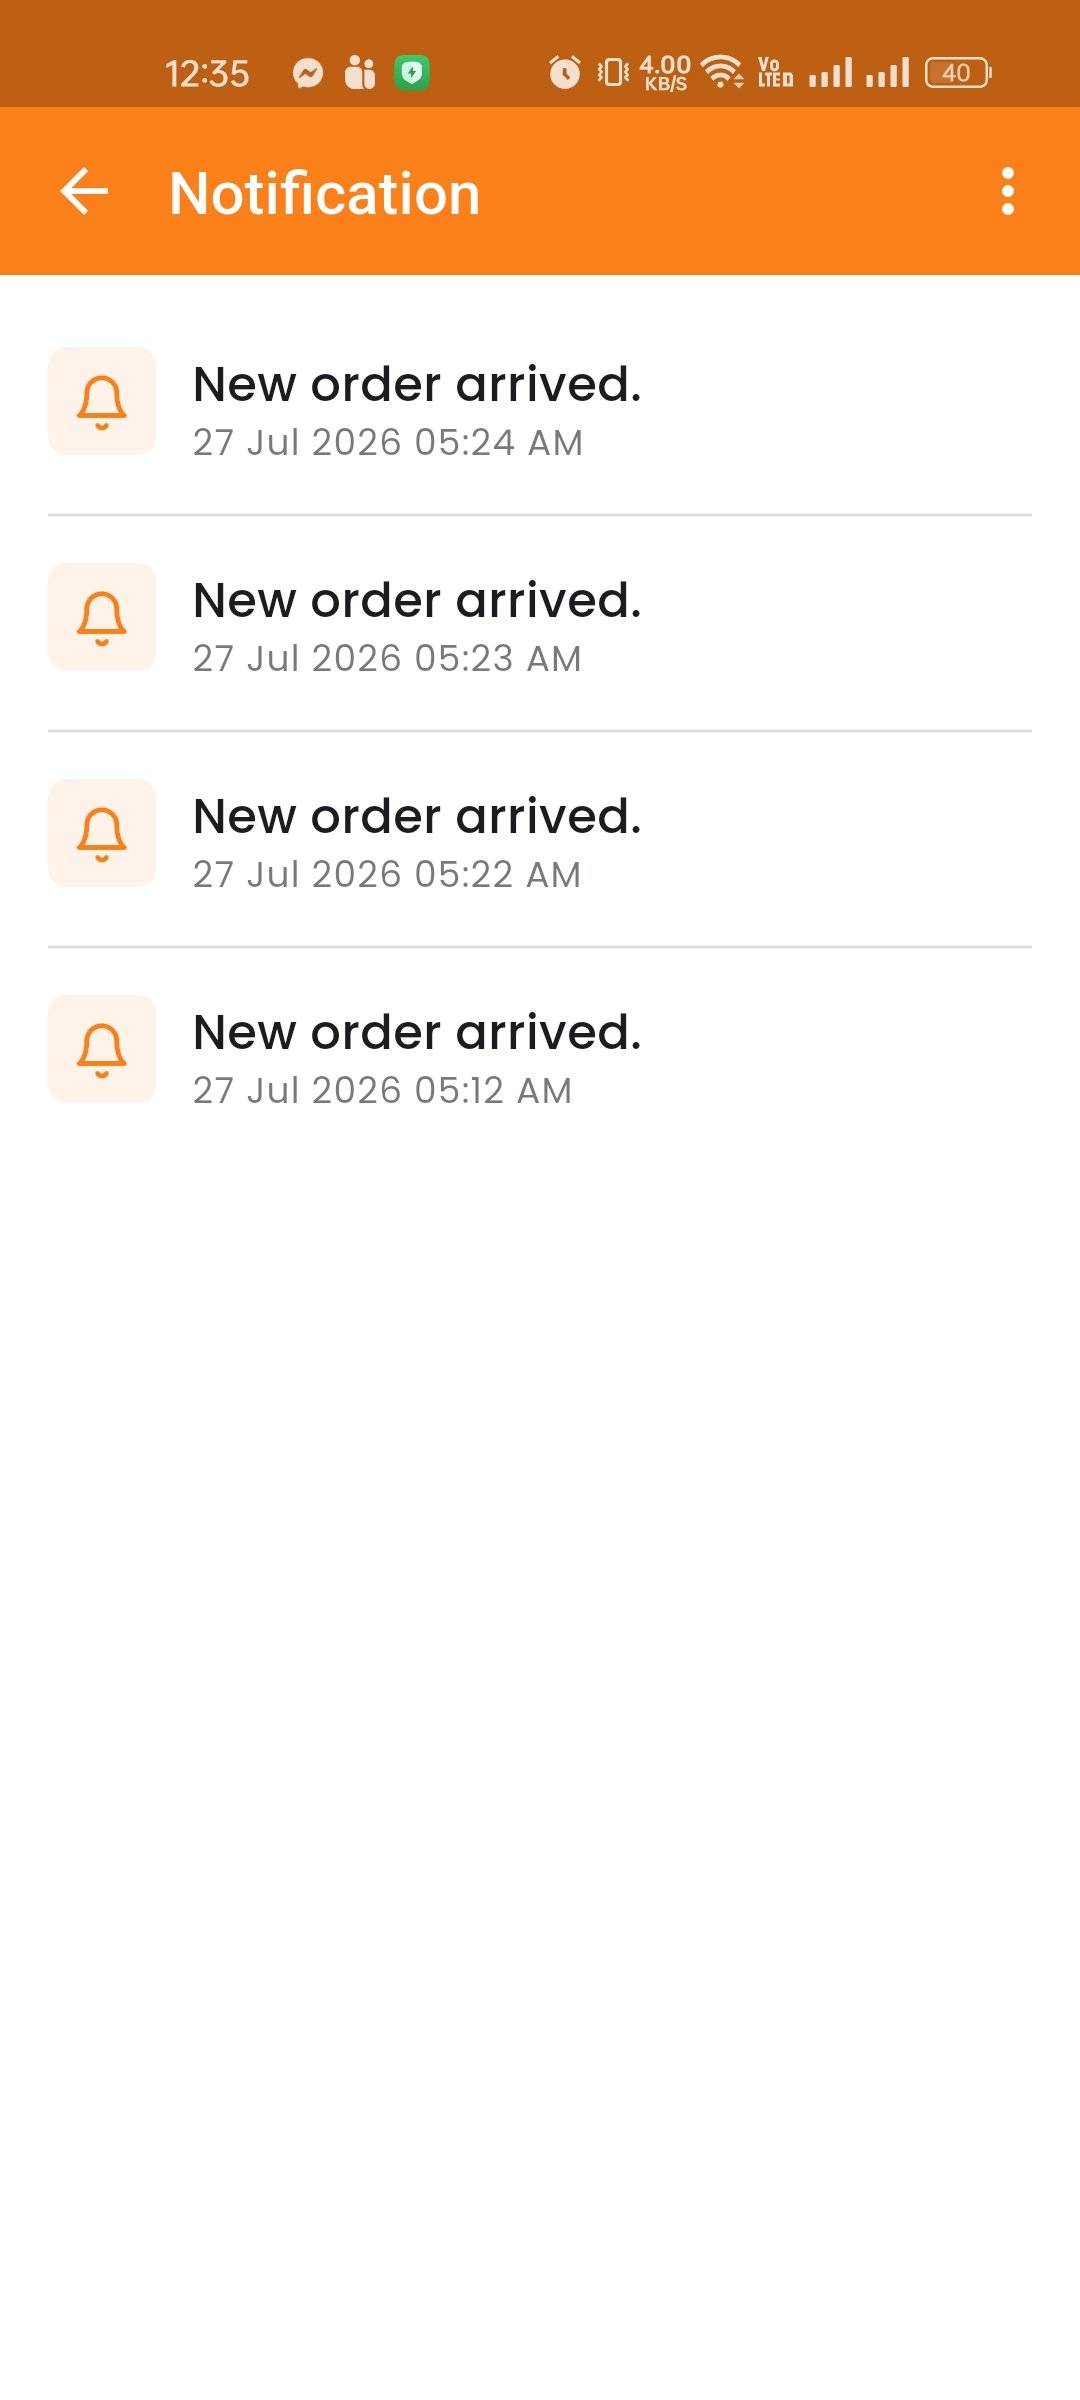
Getting Started
To log in to the App Kitchen Panel, open the mobile app and tap the Kitchen Panel demo button on the login screen. Enter your kitchen credentials (kitchen@acnoo.com / 123456). After successful login, you will see the dashboard with tabs based on your assigned permissions — such as Kitchens, Orders, and Reports.
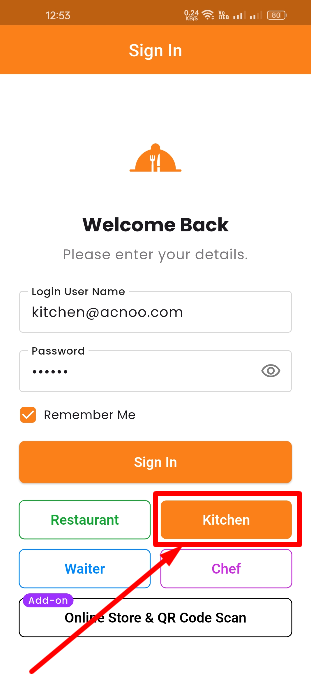
Role & Permissions
Shop owners can assign Role & Permissions from the Restaurant Panel under Staff Management > Roles & Permissions. The owner can create a kitchen staff role and grant access to Kitchens, Orders, and Reports as needed. Kitchen staff will only see the sections they have been granted access to. If no permissions are granted, they will not see anything.
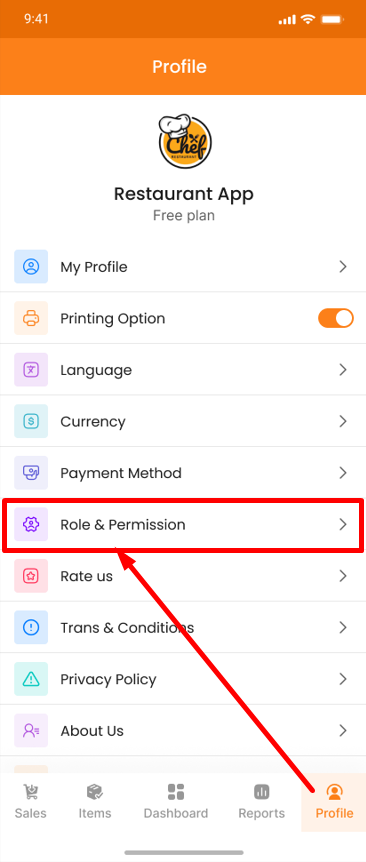
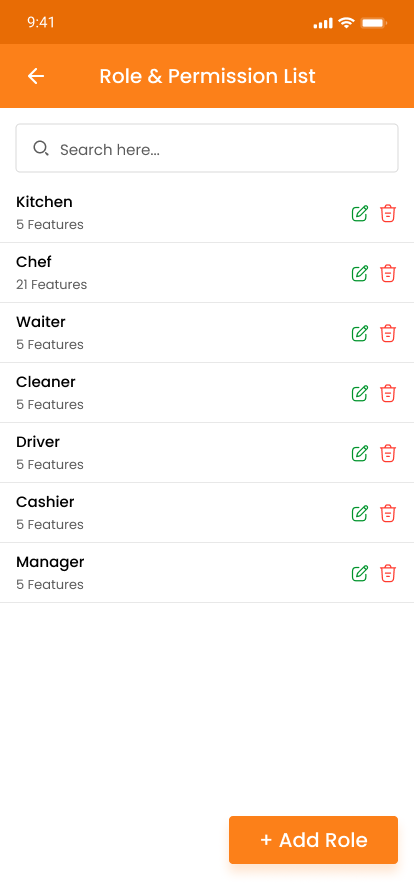
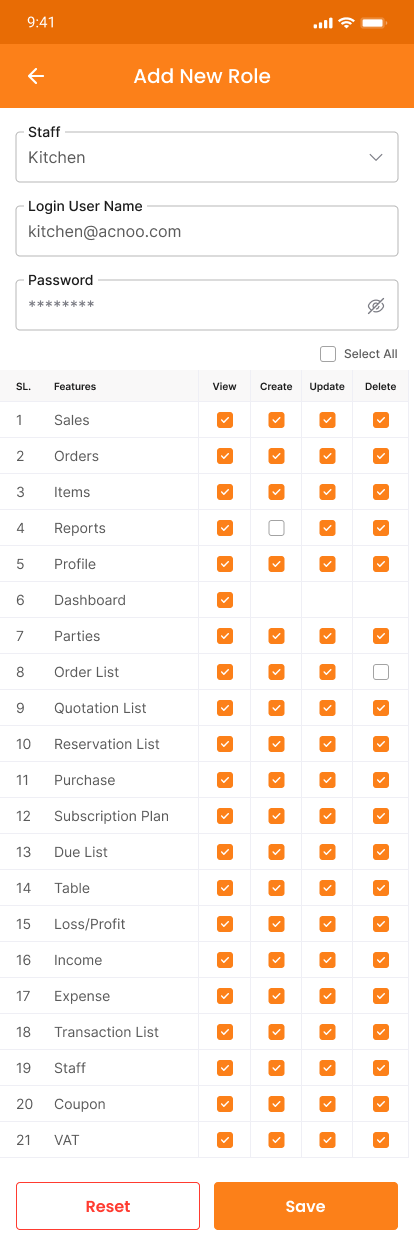
Overview
The App Kitchen Panel is a dedicated mobile interface for kitchen staff. Depending on the permissions granted by the shop owner, kitchen staff can access Kitchens (manage cooking stations and assign menu items), Orders (view and update KOT orders), and Reports (view order reports and analytics).
Kitchens
View the list of all kitchens. You can create new kitchens, edit existing ones, delete kitchens, and search by name. You can also assign items to each kitchen — select which menu items will be cooked in that specific kitchen.
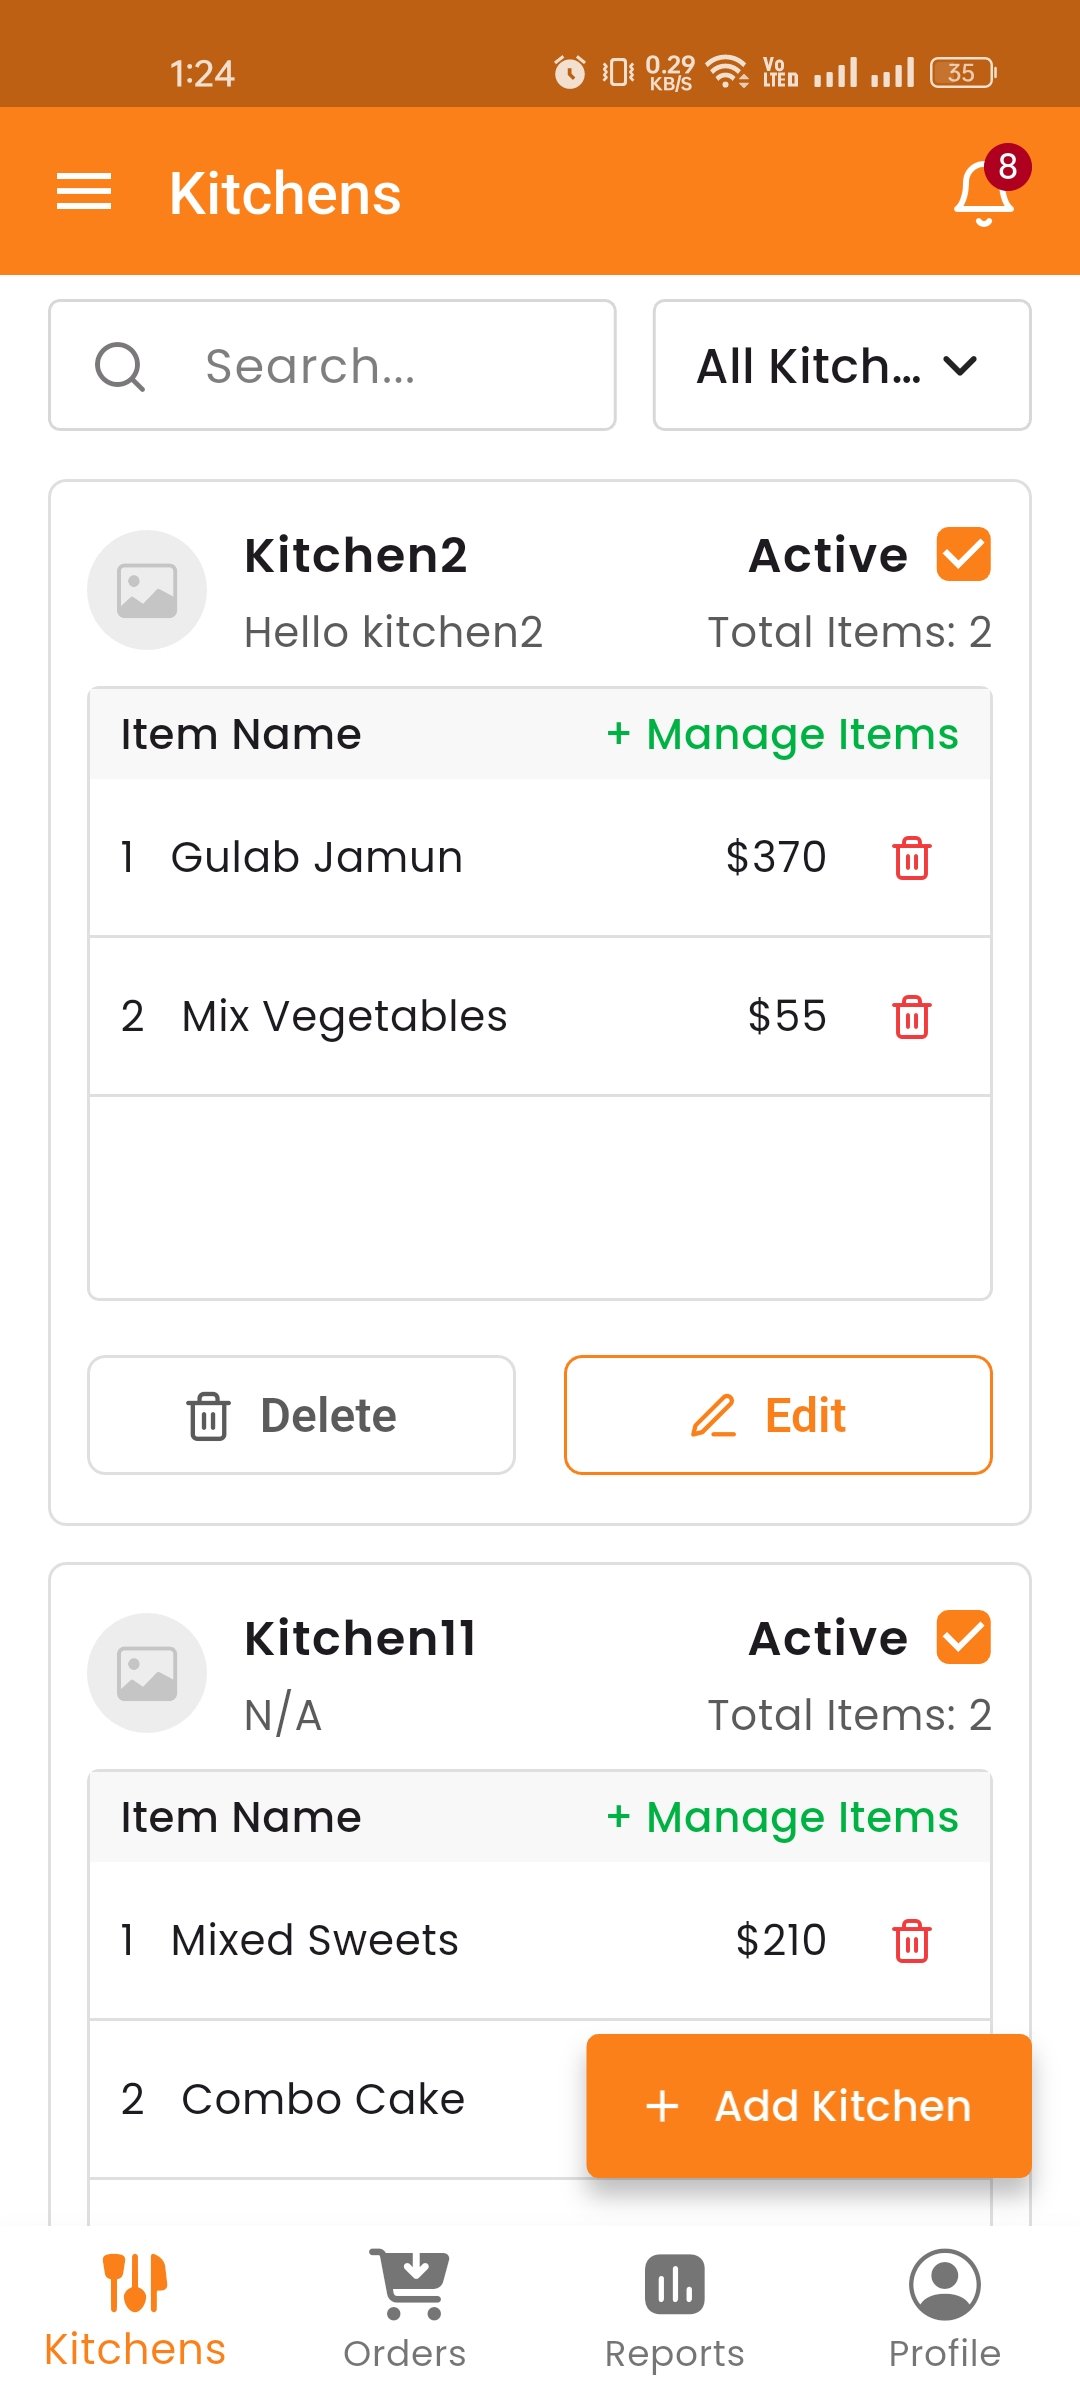
Getting Started
To log in to the App Chef Panel, open the mobile app and tap the Chef Panel demo button on the login screen. Enter your chef credentials (chef@acnoo.com / 123456). After successful login, you will see the dashboard with tabs based on your assigned permissions — such as Kitchens, Orders, and Reports.
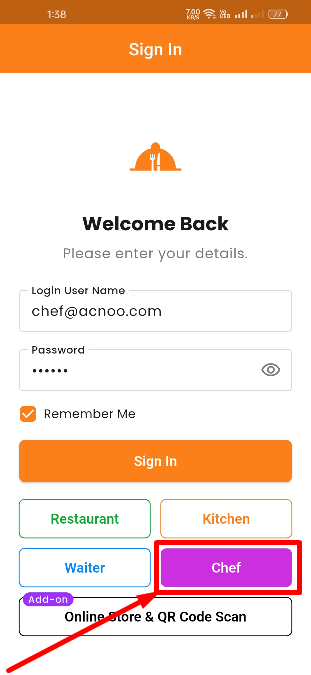
Role & Permissions
Shop owners can assign Role & Permissions from the Restaurant Panel under Staff Management > Roles & Permissions. The owner can create a chef role and grant access to Kitchens, Orders, and Reports as needed. Chefs will only see the sections they have been granted access to. If no permissions are granted, they will not see anything.
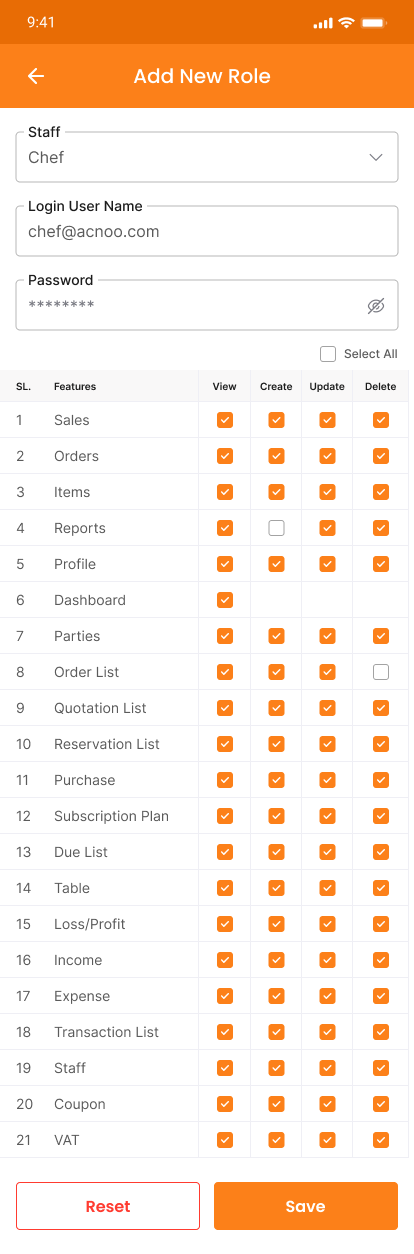
Overview
The App Chef Panel is a dedicated mobile interface for chefs. Depending on the permissions granted by the shop owner, chefs can access Kitchens (manage cooking stations), Orders (view and update KOT orders from Pending to Preparing, Food Ready, or Cancelled), and Reports (generate and filter order reports with PDF download/print options).
Orders
View all KOT (Kitchen Order Ticket) orders. You can update the order status as needed — from Pending to Preparing, Food Ready, or Cancelled. You can also see when cooking has started for each order. This helps chefs prioritize and manage the cooking queue effectively.
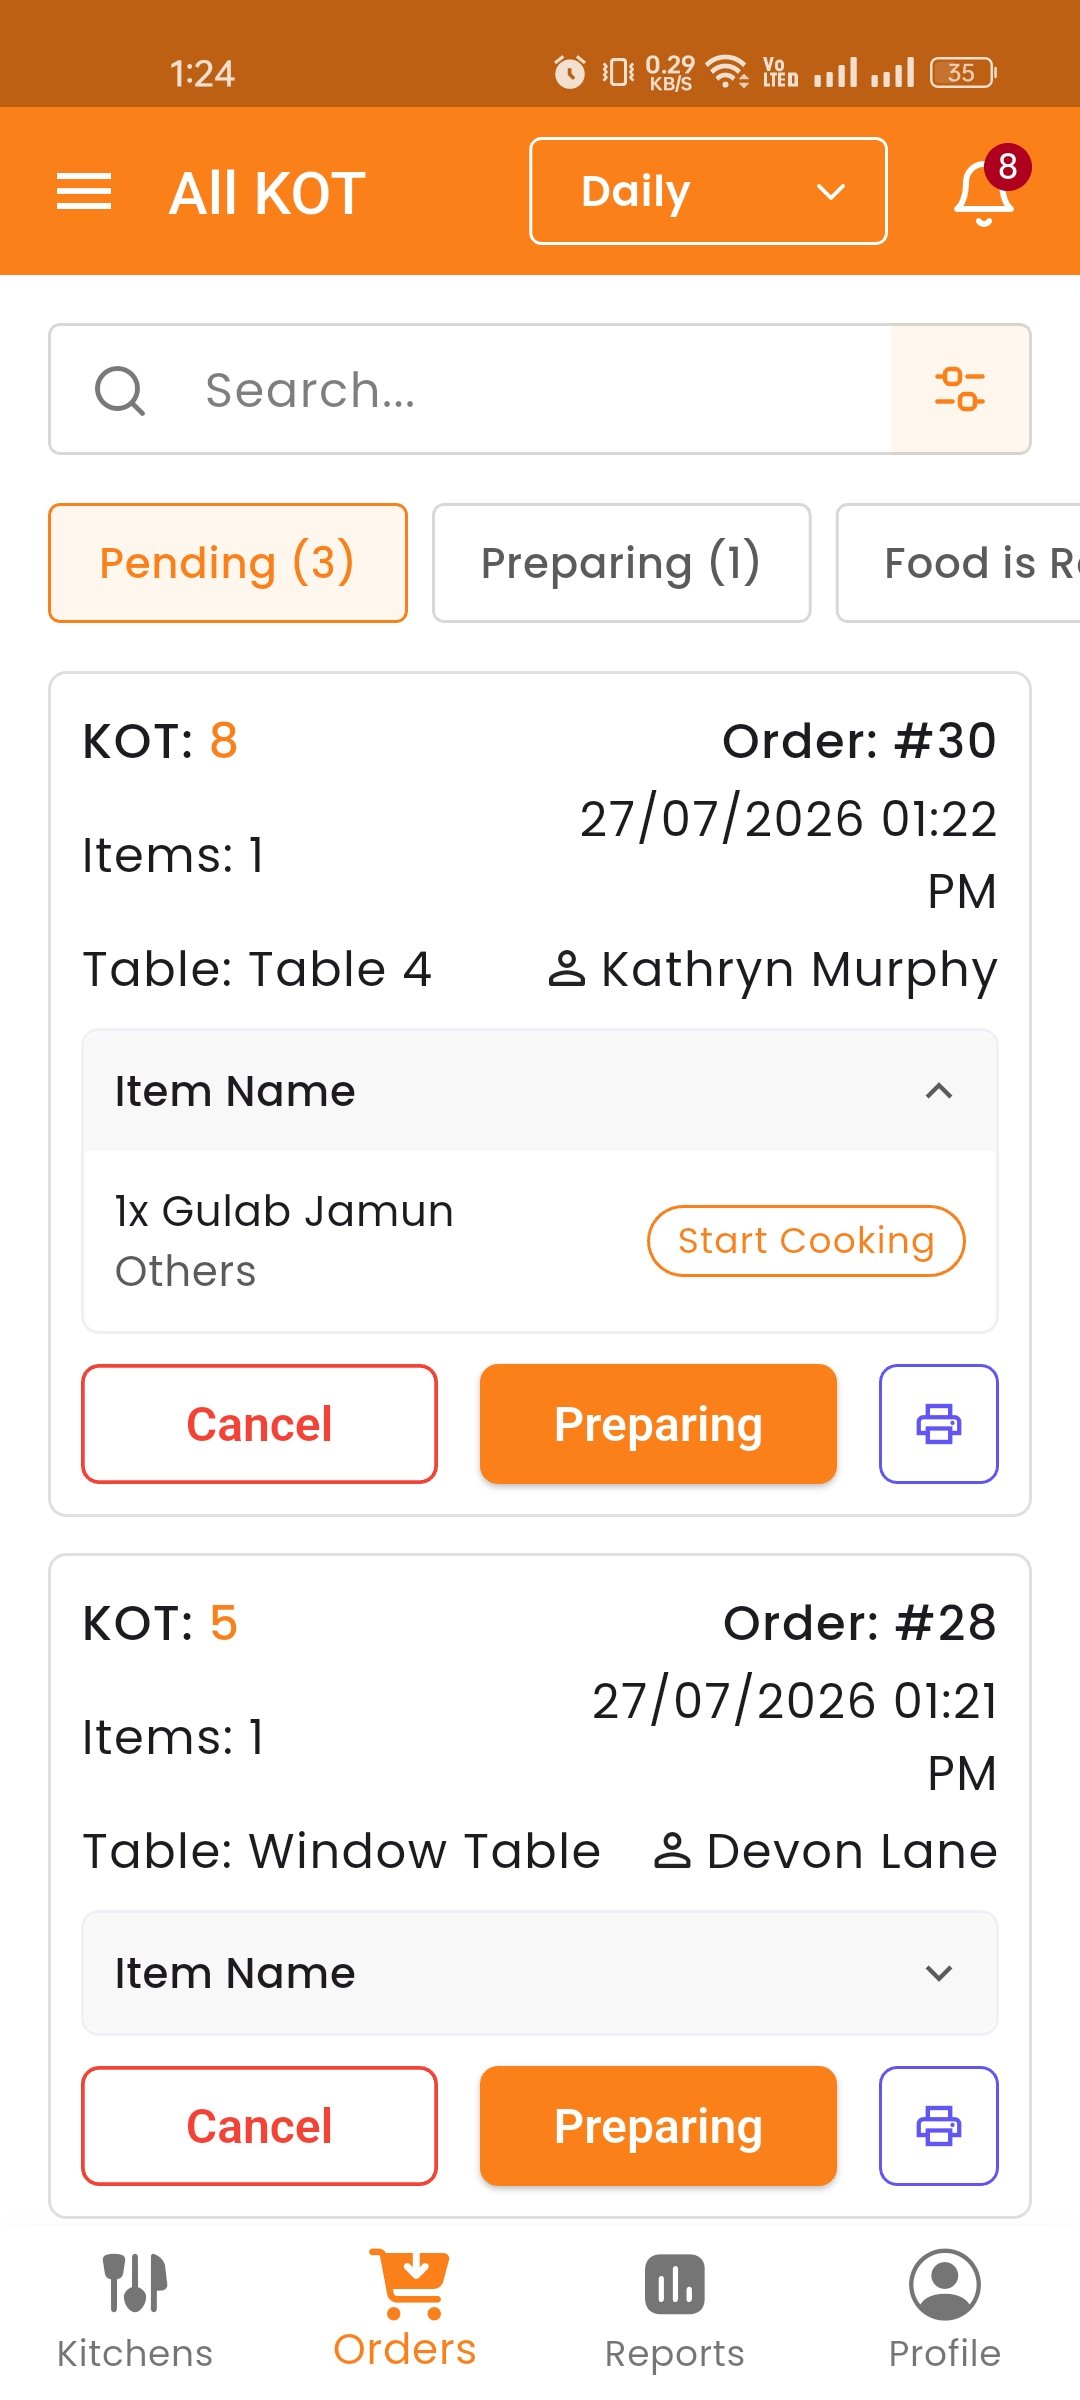
Reports
View KOT order reports with details on who ordered what, at which table, and which items were ordered. You can filter reports by food type and order status. You can also download as PDF or print directly from the reports. This helps chefs analyze order trends and optimize kitchen performance.
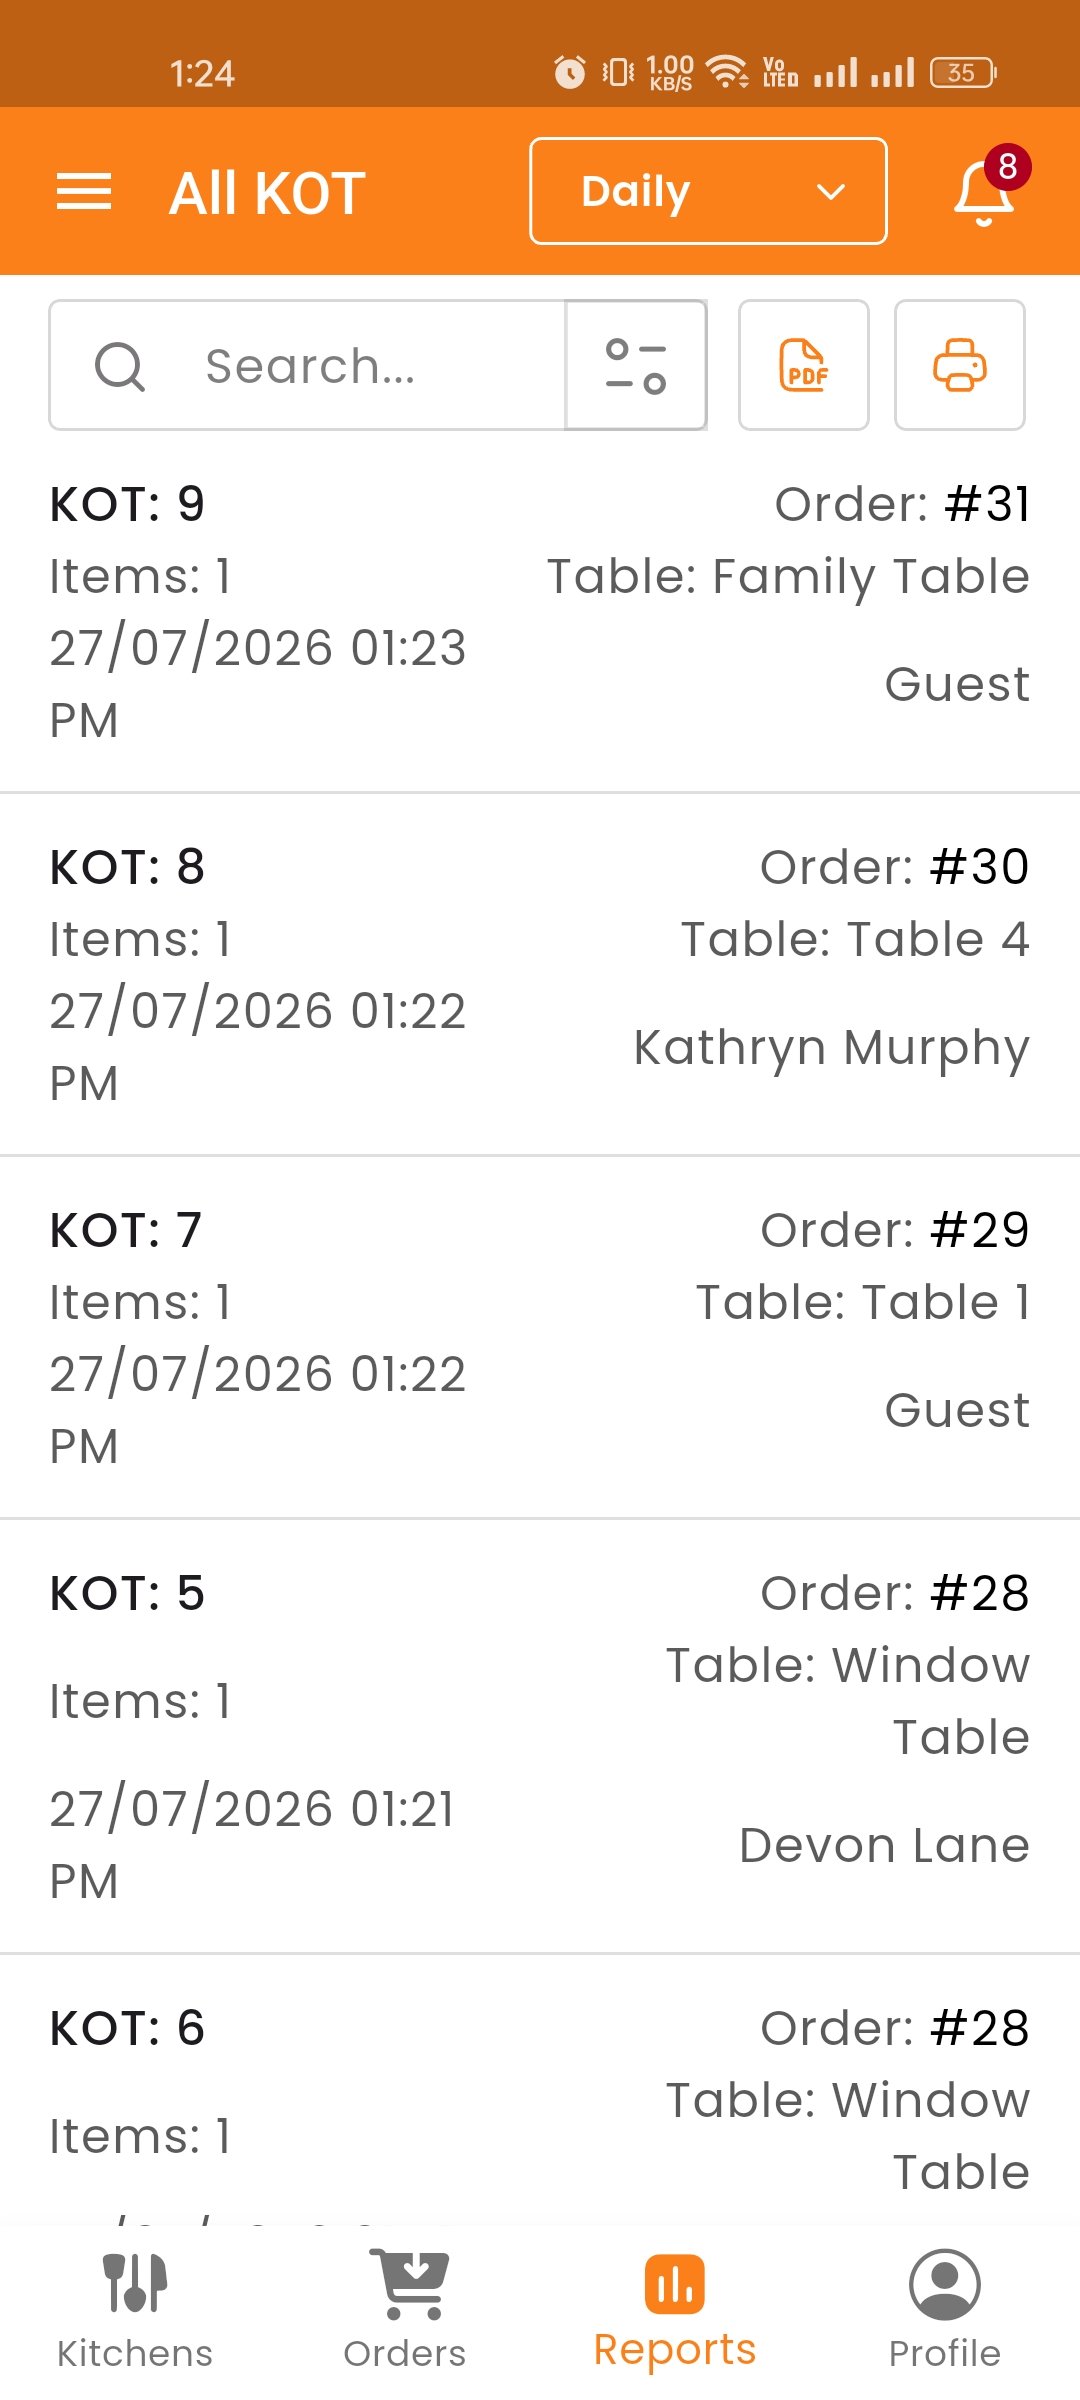
Getting Started
To log in to the App Waiter Panel, open the mobile app and tap the Waiter Panel demo button on the login screen. Enter your waiter credentials (e.g., waiter@acnoo.com / 123456). After successful login, you will have access to the features assigned to your role by the shop owner.
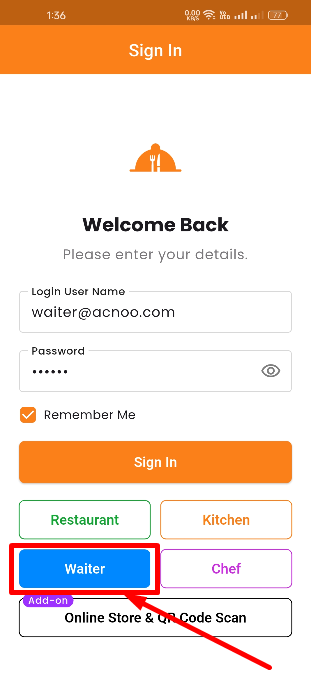
Role & Permissions
Shop owners can configure Role & Permissions from the Restaurant Panel under Staff Management > Roles & Permissions. Similar to the Kitchen & Chef Panel, the owner can create a waiter role and assign specific permissions such as order management, table status viewing, and customer request handling — while restricting access to administrative functions. Waiters will only see the sections they have been granted permission to access. If no permissions are granted, they will not see anything. This ensures waitstaff stay focused on serving customers without unnecessary distractions.
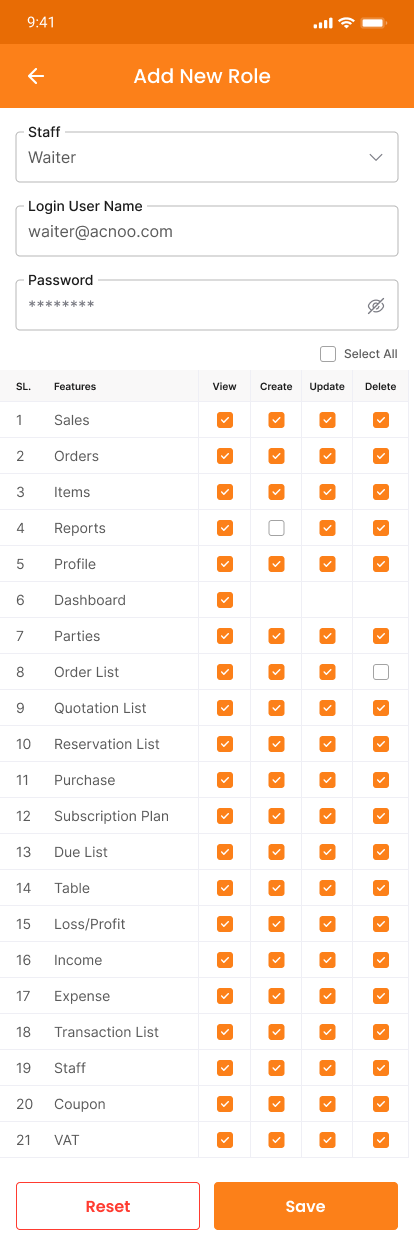
Overview
The App Waiter Panel is a streamlined mobile interface built for waitstaff to manage table-side operations efficiently. Through this panel, waiters can view assigned tables, place new orders directly from customer requests, check real-time order statuses, and communicate with the kitchen effortlessly. Key features include table management, order placement, KOT status tracking, and profile management — all optimized for fast-paced restaurant environments.
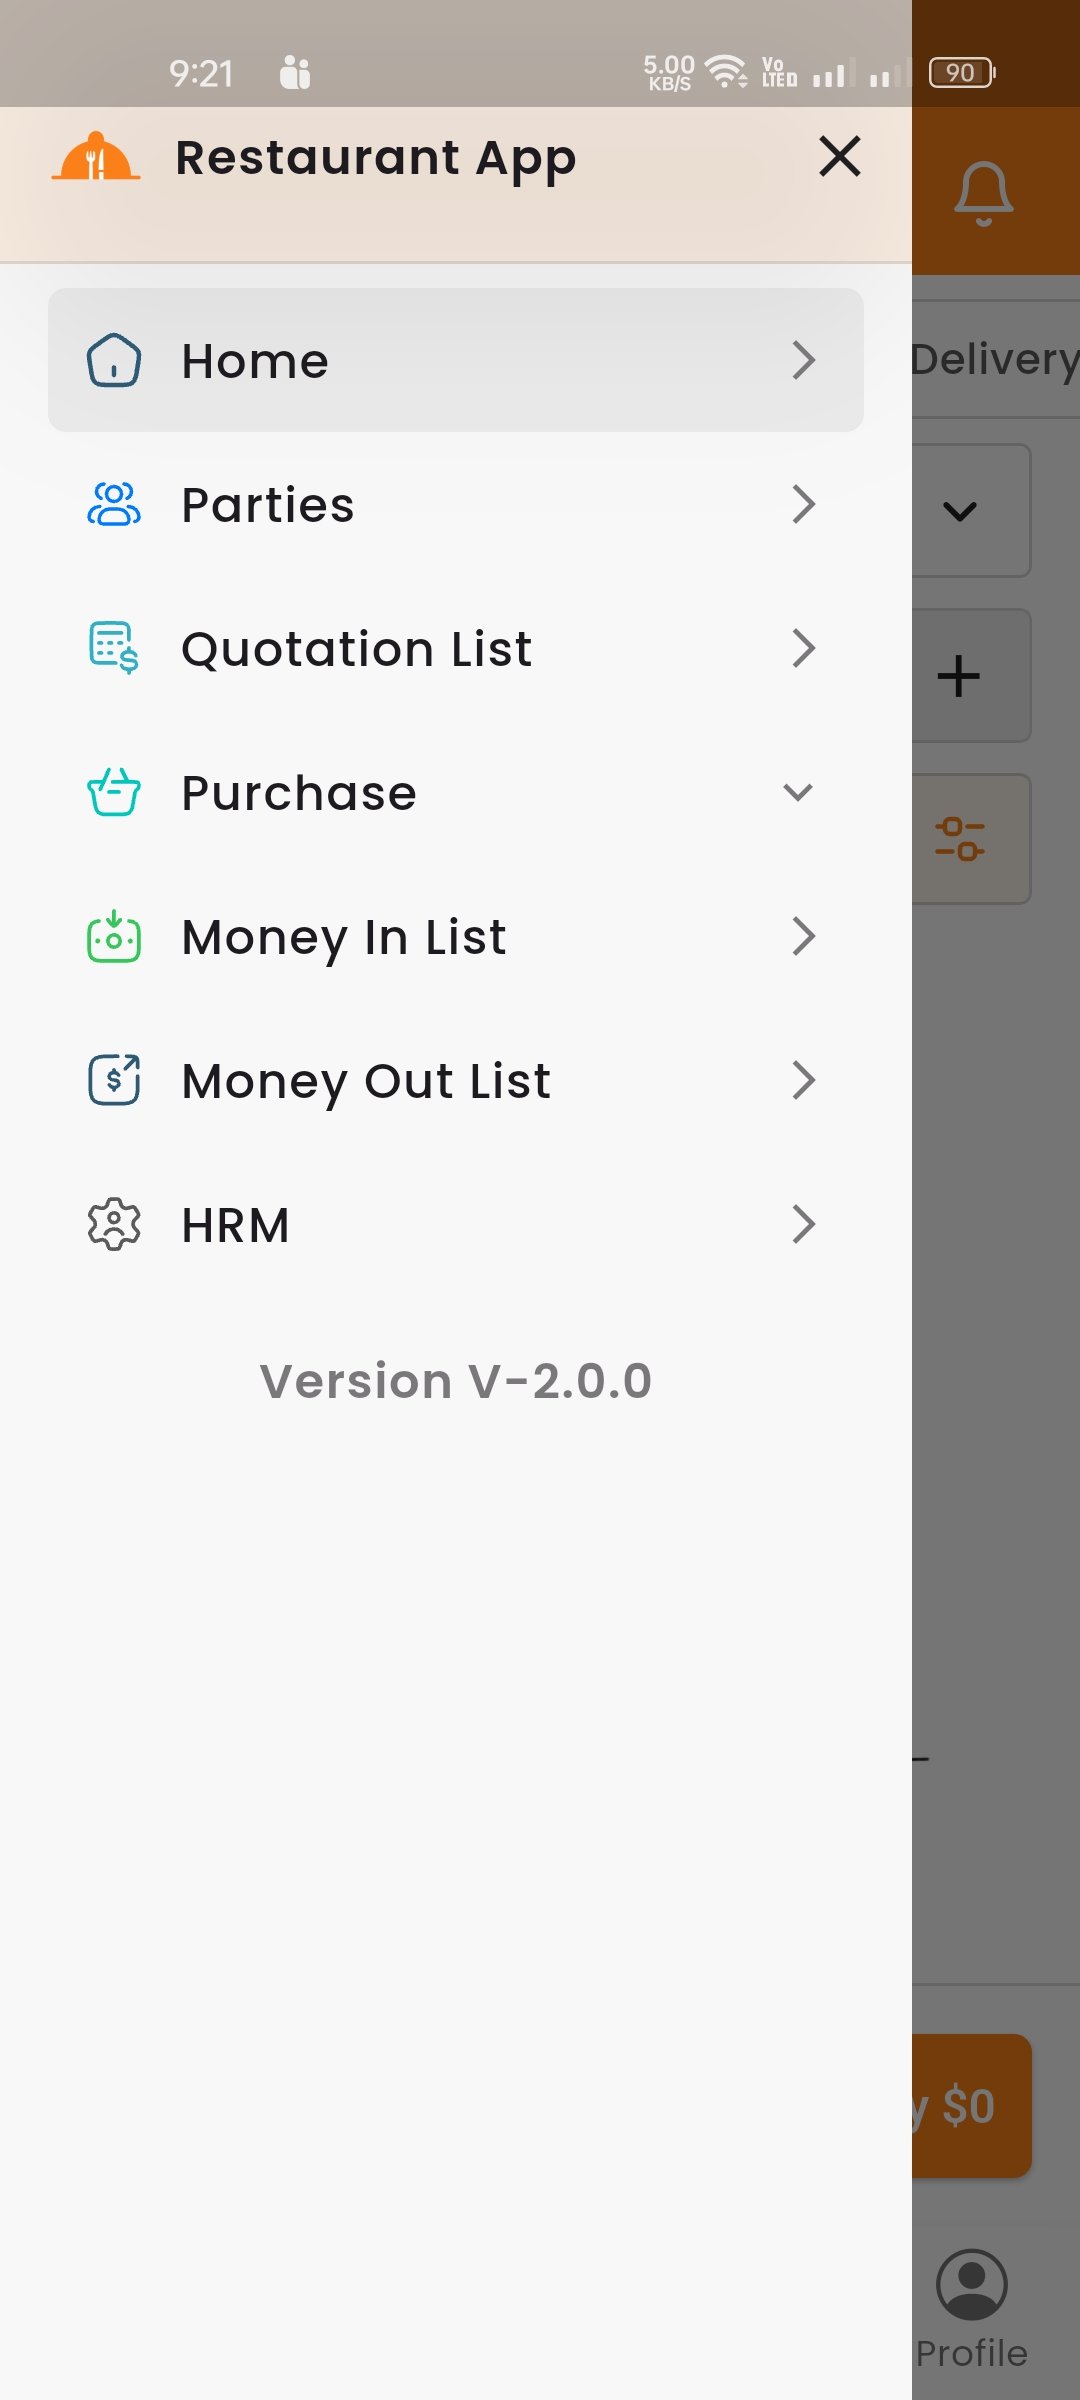
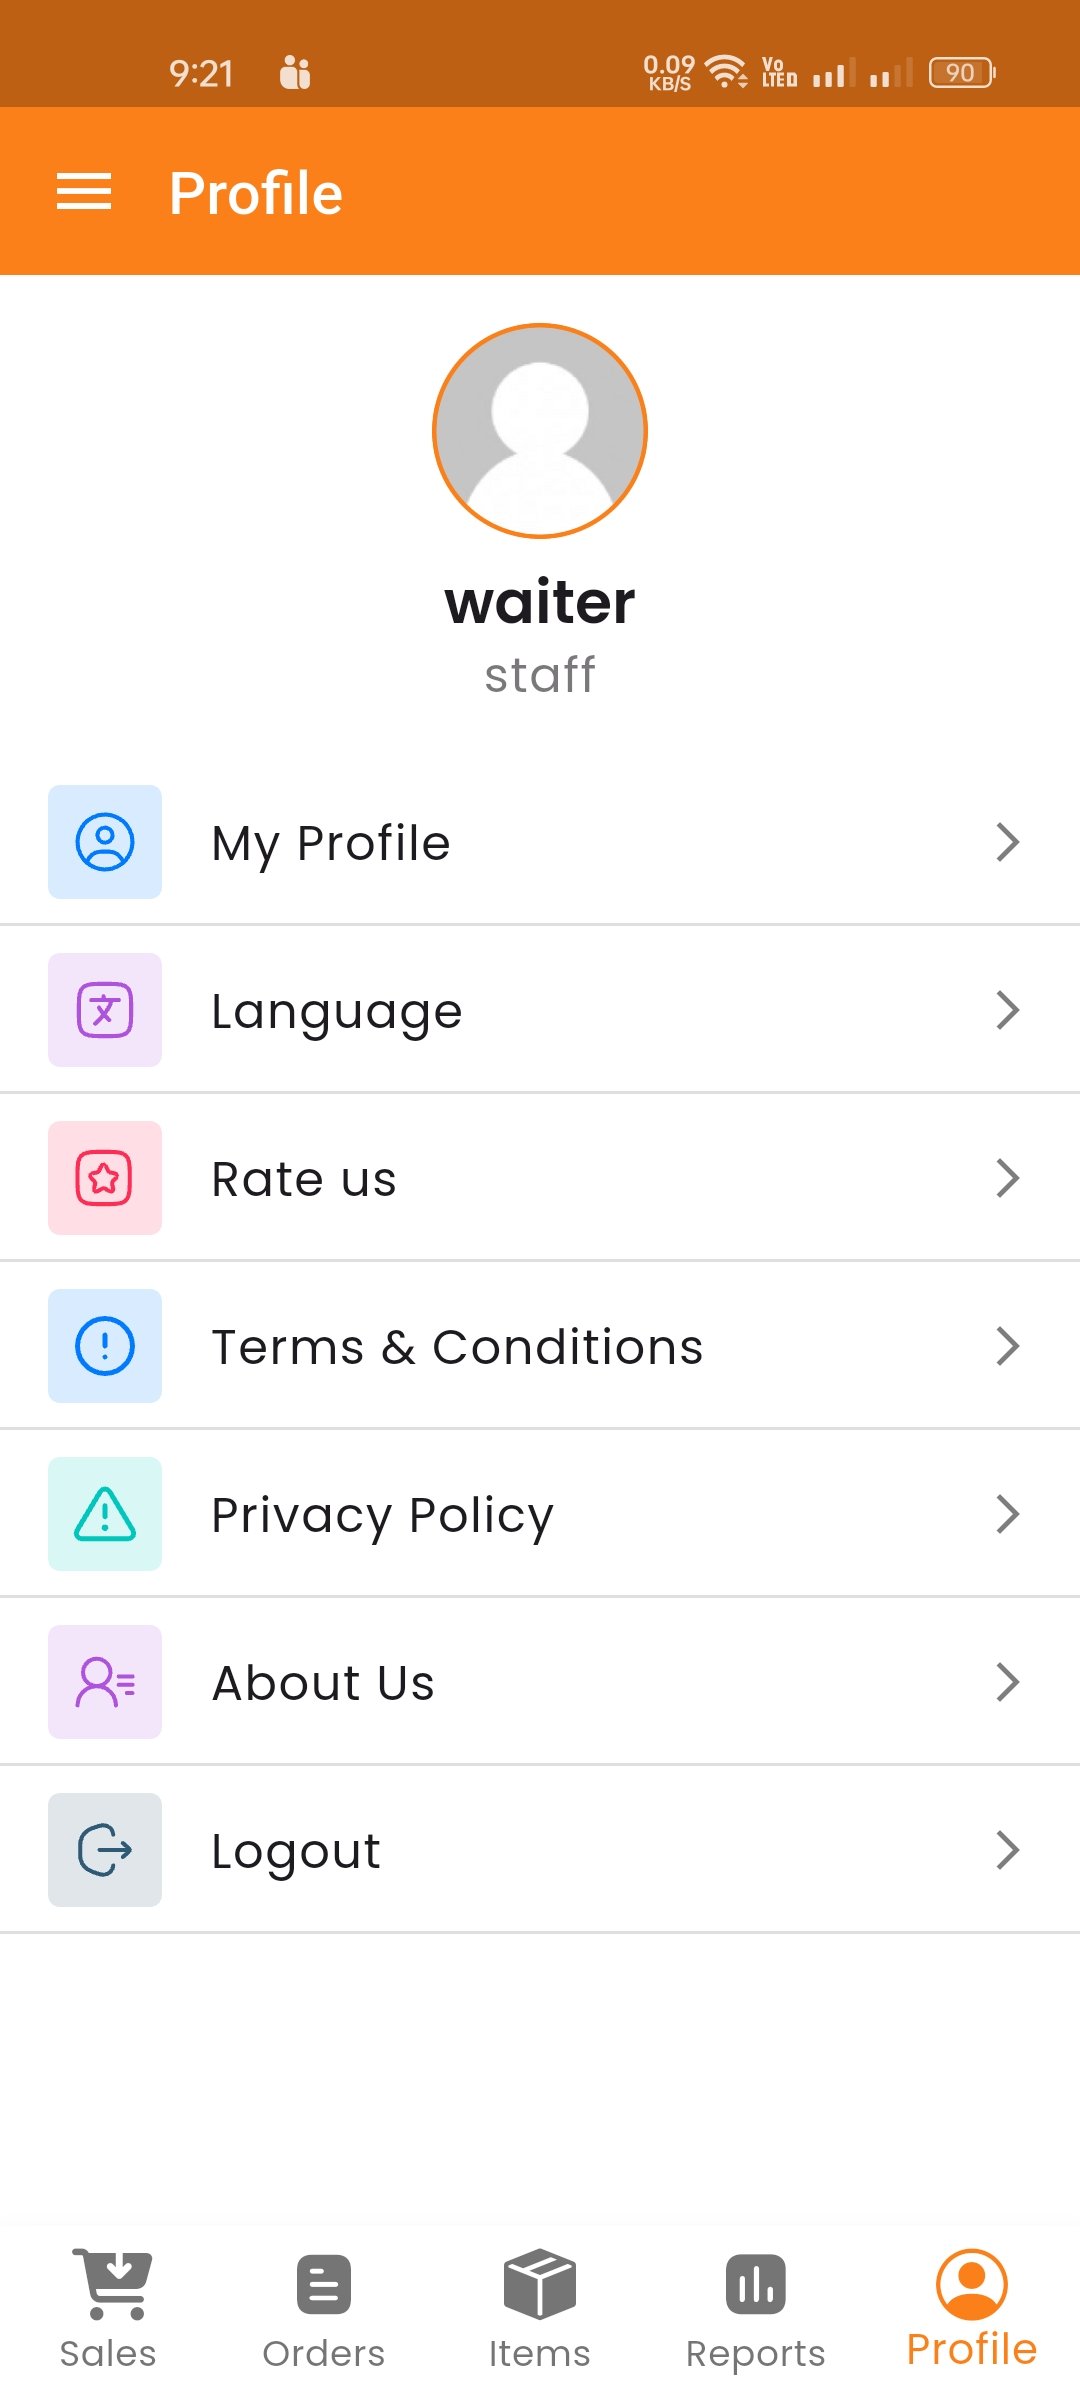
App Technical Guide: Introduction
Thank you for purchasing our Flutter app from CodeCanyon! We are thrilled to have you as a valued customer and are committed to providing you with exceptional support throughout your journey with our product. This technical guide is designed to help you easily modify and adapt the app to suit your specific needs. Whether you're changing the app name, updating the theme colors, or adding new languages, this document walks you through each step in a clear and structured manner.
If you encounter any issues while customizing the app or have questions about the documentation, please don't hesitate to reach out to our dedicated Support Team. We're here to assist you!
We appreciate your trust in our product and look forward to helping you create an amazing app tailored to your requirements.
Prerequisites
Before you begin customizing and running the app, ensure that your development environment is properly set up. Below are the prerequisites and steps to prepare your system.
System Requirements
To run and customize this Flutter app, your system must meet the following minimum requirements:
Software Requirements
Install the following software to set up your development environment:
- Flutter & Dart SDK - Version: Flutter 3.44.8 (or higher, if compatible). Download from the Flutter SDK Archive and follow the Official Flutter Installation Guide.
- IDE (Integrated Development Environment) - Recommended options include Android Studio and Visual Studio Code.
- Flutter and Dart Plugins - Install the Flutter and Dart plugins in your IDE. For Android Studio, go to File > Settings > Plugins, search for "Flutter," and install it. For VS Code, open the Extensions Marketplace, search for "Flutter," and install it.
- Android SDK - Ensure the Android SDK is installed and configured. Open SDK Manager in Android Studio, install the latest Command Line Tools and Build Tools, and enable USB Debugging on your physical device for testing.
Installation Checklist
Follow these steps to verify that your environment is ready:
- Install Flutter SDK - Download the Flutter SDK from the official website and extract it to your desired location (e.g.,
C:\flutteror~/flutter). Add the Flutterbindirectory to your system's PATH variable:- On Windows - Open Environment Variables and add the path to
flutter\binunder the Path variable. - On macOS/Linux - Add the following line to your shell configuration file (e.g.,
.bashrc,.zshrc):export PATH="$PATH:/path/to/flutter/bin"
- On Windows - Open Environment Variables and add the path to
- Verify Installation - Open a terminal or command prompt and run:
Address any issues reported by the tool (e.g., missing dependencies, unconfigured Android SDK).flutter doctor - Set Up Your IDE - Configure the Flutter and Dart SDK paths in your IDE. For Android Studio, go to File > Settings > Languages & Frameworks > Flutter. For VS Code, open the Command Palette (
Ctrl + Shift + P) and search for "Flutter: Select SDK". - Enable USB Debugging (For Physical Devices) - On your Android device, go to Settings > Developer Options and enable USB Debugging. If Developer Options is not visible, enable it by tapping Build Number 7 times in Settings > About Phone.
If you encounter any issues during setup, refer to the official Flutter documentation. For video tutorials, check out the playlist: How to Install and Setup Flutter for App Development.
Setting Up the Development Environment
Now that you know the prerequisites, follow these steps to set up your development environment.
Installing Flutter
- Download Flutter SDK - Download Flutter 3.44.8 from the official Flutter SDK Archive.
- Extract the Flutter SDK - Extract the downloaded file to your desired installation directory (e.g.,
C:\flutteror~/flutter). Avoid locations likeC:\Program Filesto prevent permission issues. - Add Flutter to Your PATH - Add the Flutter
bindirectory to your system's PATH variable. On macOS/Linux, add the following line to your shell configuration file (e.g.,.bashrc,.zshrc):export PATH="$PATH:/path/to/flutter/bin" - Verify Installation - Run the following command in your terminal:
Address any issues reported by the tool (e.g., missing dependencies, unconfigured Android SDK).flutter doctor
Configuring Android Studio
- Install Android Studio - Download and install Android Studio from the official website.
- Install Flutter and Dart Plugins - Go to File > Settings > Plugins, search for "Flutter", and install it. The Dart plugin will be installed automatically.
- Configure Flutter and Dart SDK Paths - Go to File > Settings > Languages & Frameworks > Flutter and set the path to your Flutter SDK (e.g.,
C:\flutteror~/flutter). The Dart SDK path should be automatically detected asflutter/bin/cache/dart-sdk. - Install Android SDK Tools - Open SDK Manager (Tools > SDK Manager), install the latest Command Line Tools and Build Tools. Uncheck Hide Obsolete Packages and install Android SDK Command Line Tool (Latest).
Verifying Setup
After completing the above steps, verify that everything is configured correctly:
- Run the following command in your terminal:
flutter doctor - Ensure there are no critical errors. For missing Android licenses, run:
flutter doctor --android-licenses - Set up an emulator or connect a physical device for testing.
For video tutorials, check out the playlist: How to Install and Setup Flutter for App Development.
Project Structure
Understanding the project structure is essential for navigating and customizing the app effectively. The project is organized into two main directories: /assets, which contains static assets like images, icons, JSON files, and shapes, and /lib, which contains the main source code of the app.
Directory Tree Overview
Below is a simplified tree structure of the project, focusing on the key directories and files:
lib/
├── app/                  # Core application logic, data models, repositories, and pages.
│   ├── core/             # Core utilities: helpers, static configs, styles, themes, and types.
│   ├── data/             # Data layer: models and repositories for API communication.
│   ├── middlewares/      # Middleware logic (e.g., authentication checks).
│   ├── pages/            # Screens/pages of the app, organized by feature (auth, common, user).
│   ├── routes/           # Routing configuration for navigation.
│   ├── services/         # Shared services (API client, global listeners, localization, etc.).
│   └── widgets/          # Reusable custom widgets used across the app.

assets/                   # Static assets like images, icons, JSON files, and shapes.
│   ├── app/              # App-specific assets (icons, splash screen, background images).
│   │   └── app_launcher/ # App launcher icon.
│   ├── icons/            # Icons used throughout the app (e.g., payment, navigation drawer).
│   ├── images/           # Images, including onboarding screen visuals.
│   ├── lottie/           # Lottie animation graphics.
│   └── shapes/           # Shape assets (placeholders, loading spinners, error messages).

lib/i18n/                 # Localization files for translations (e.g., en.i18n.json, fr.i18n.json).
lib/dev_tool/             # Development tools and scripts (e.g., customization scripts).
lib/main.dart             # Entry point of the Flutter application.
pubspec.yaml              # Configuration file for dependencies and assets.
customization.yaml        # Contains easy customization configuration (Detailed in step 5).
Overview of the Project Directory
The project is organized into two main directories:
- /assets - Contains static assets like images, icons, JSON files, and shapes.
- /lib - Contains the main source code of the app.
Each directory and file has a specific purpose, making it easier to locate and modify components as needed.
Key Folders and Their Purpose
/assets - This folder contains all static assets used in the app. Below are its subfolders and their purposes:
- /app - App-specific assets such as app icons, splash screens, and background images.
assets/app/app_launcher/app_launcher_icon.png- The app launcher icon.assets/app/app_icon.png- The auth screen & drawer header icon.assets/app/app_splash_icon.png- The splash screen logo.
- /icons - Icons used throughout the app.
assets/icons/drawer_icons/- Contains icons for the navigation drawer.assets/icons/payment_icons/- Contains icons for the payment screen.assets/icons/svg_icons/- Contains all other SVG icons used throughout the app.
- /images/onboard - Images used in the onboarding screens.
onboard_01.png,onboard_02.png,onboard_03.png.
- /lottie - Lottie animation graphics.
splash_drop_failed.json,splash_drop_success.json.
- /shapes - Shape assets like placeholders, no_internet, and error messages.
image_placeholder.png,no_internet.png.
/lib - This folder contains the app's source code, organized into subfolders for better modularity. Below are the key subfolders:
- /app/core - Core functionality of the app.
- /static/api_config - API configuration files.
_api_config.dartis the file used to configure the backend endpoints. - /static/app_config - App configuration files.
_app_config.dartis the file used to configure the app name, backend base URL, organization domain, package name, etc. - /theme - Global theme definitions.
_app_colors.dartdefines primary, secondary, and other colors;_app_theme.dartdefines the theme data. - /styles - Reusable styles for buttons, text fields, etc.
- /static/api_config - API configuration files.
- /app/data - Data models and repositories.
/models- Data models for API responses./repositories- Repositories for handling API calls.
- /app/pages - Screens and views of the app, organized by feature.
/auth- Authentication-related screens (e.g., login, signup)./common- Common screens (e.g., terms & conditions, privacy policy, etc.)./user- All other screens that can be accessed by the user after authentication (e.g., sale, purchase, dashboard, profile).
- /app/routes - App routing configuration.
app_routes.dart- Defines the app routes and their navigation with a route guard like_auth_middleware.dart.app_routes.gr.dart- Generated by theauto_route_generatorpackage when runningdart pub run build_runner build.
- /app/services - App-wide services (e.g., API client, localization, global listeners).
http_client/_http_client.dart- API client for making HTTP requests.locale_service/_locale_services.dart- Localization service for managing translations & app currency.global_overlay/_global_overlay.dart- Global overlay service for showing overlay messages (e.g., Auth State dialog, Internet Connection dialog).
- /app/widgets - Custom widgets used across the app.
_custom_pi_chart.dart- A reusable pie chart widget._item_card.dart- A reusable card widget for displaying items.
- /i18n - Localization files for translations.
en.i18n.json- English translations.es.i18n.json- Spanish translations.
Key Files and Their Purpose
Below are some of the most important files in the project:
_app_config.dart - Path: /lib/app/core/static/app_config/_app_config.dart. Purpose: Configure app-specific settings like app name and package name.
// App Name
static const String appName = 'Restaurant App';

// Organization Domain [This will be displayed in places for branding. (e.g., Footer of PDF, Thermal Invoices etc)]
static const String orgDomain = 'your-domain.com';

// [baseUrl] will be used to make API calls.
// [baseUrl] must be the backend's base url `WITHOUT ANY TRAILING SLASH(/)`
static const String baseUrl = 'https://your-domain.com';

// Purchase Code
static const String purchaseCode = 'YOUR_PURCHASE_CODE';
_api_config.dart - Path: /lib/app/core/static/api_config/_api_config.dart. Purpose: Configure the backend domain URL.
// Base URL
static const String baseURL = AppConfig.baseUrl;

// API URL
static final String apiURL = '$baseURL/api/v1';

// Image URL
static String? imageUrl(String? path) {
  if (path == null) return null;
  return "$baseURL/$path";
}
_app_colors.dart - Path: /lib/app/core/theme/_app_colors.dart. Purpose: Define global color themes.
const Color kPrimary = Color(0xFFYourHexCode);
const Color kSecondary = Color(0xFFYourHexCode);
Localization Files - Path: /lib/i18n/. Purpose: Manage translations for different languages.
{
  "helloWorld": "Hello, World!"
}
How to Navigate the Project
To locate files for customization:
- Use the folder names to identify screens, widgets, and configurations. For example, to modify the login screen, navigate to
/lib/app/pages/auth/sign_in. - Refer to the file names for specific functionalities. For example, to change the app theme, open
_app_colors.dartin/lib/app/core/theme.
Additional Notes
- The project is modular, making it easier to manage and customize.
- Always ensure that changes to critical files (e.g.,
_app_config.dartor_api_config.dart) are tested thoroughly. - If you're unsure about a file's purpose, refer to its folder name or consult the documentation.
Customizing the App
This section explains how to customize your app using the provided script and manual steps for specific customizations.
Recommended: Enable the RPS Package Globally
The RPS (Run Pub Script) package allows you to run Dart scripts globally without needing to specify the full path. To enable it:
-
Open a terminal and run the following command to activate the RPS package globally:
dart pub global activate rps -
After activation, you can run any Dart script in the project using the
rpscommand.
Example:rps customize
Note: Using the RPS package is highly recommended as it simplifies script execution and avoids path-related issues.
Troubleshooting: If you encounter permission issues while activating the RPS package, ensure your system allows global installations, or use sudo (on macOS/Linux) or run the terminal as an administrator (on Windows).
Using the Customization Script
The app includes a powerful customization script (lib/dev_tool/.customize.dart) that allows you to easily update key aspects of the app, such as the app name, package name, base URL, and app icon. Follow these steps to use the script:
Step 1: Prepare Your customization.yaml File - Locate the customization.yaml file in the root directory of the project and update the following fields:
app_name: "YourAppName"
package_name: "com.yourcompany.yourappname"
org_domain: "yourdomain.com"
base_url: "https://yourdomain.com"
Field Descriptions:
- app_name - The name of your app.
- package_name - The unique identifier for your app (e.g.,
com.yourcompany.yourappname). - org_domain - The domain name for your organization (displayed in places for branding, e.g., footer of PDFs, thermal invoices).
- base_url - The backend domain URL for API requests.
Step 2: Run the Script - Open a terminal in the root directory of the project and run:
rps customizeThis will apply all customizations (app name, package name, base URL, and app icon).
Step 3: Customize Specific Features (Optional Flags) - If you want to customize only specific features, use the following flags:
rps customize --baseUrl-only     # Change base URL only
rps customize --orgDomain-only   # Change organization domain only
rps customize --packageName-only # Change package name only
rps customize --appName-only     # Change app name only
rps customize --icon-only        # Change app icon only
Step 4: Verify Changes - After running the script, restart the app to see the updated app name, package name, and base URL. Ensure the app icon has been updated by checking the launcher.
Here's a quick overview of the customize script commands:
| Flag | Description |
|---|---|
--baseUrl-only | Changes only the base URL. |
--orgDomain-only | Changes only the organization domain. |
--packageName-only | Changes only the package name. |
--appName-only | Changes only the app name. |
--icon-only | Changes only the app icon. |
Manual Customizations
For additional customizations not covered by the script, follow the steps below:
Changing Onboarding Screen Content
Customizing the onboarding screens involves updating both images and text content:
- Replace Onboarding Images - Navigate to the
/assets/images/onboardfolder and replace the existing images (onboard_01.png,onboard_02.png,onboard_03.png) with your custom ones. Ensure the images are in.pngformat for better visual quality and have the same dimensions as the originals to prevent layout distortions. - Update Onboarding Text Content - Open the base language file (
en.i18n.json) in/lib/i18nand locate thepages.onboard.onboardDatasection. Modify thetitleanddescriptionfields for eachdataentry (data1,data2,data3) to reflect your desired content. For example:{ "pages": { "onboard": { "onboardData": { "data1": { "title": "Easy to use Acnoo Restaurant", "description": "Lorem ipsum dolor sit amet, consectetur adipiscing elit mauris." }, "data2": { "title": "Effortless Order Management", "description": "Streamline your restaurant's order-taking process with our intuitive POS system." }, "data3": { "title": "Excellent Analytics & Reporting", "description": "Our analytics dashboard provides real-time sales & purchase reports" } } } } } - Apply Localization Changes - After updating the JSON files, run the following command to apply the changes to the localization classes:
dart run slang_cli - Restart the App - Restart the app to see the updated onboarding images and text content.
Updating Themes
- Open
_app_colors.dartat/lib/app/core/theme/_app_colors.dartand modify the global colors:const Color kPrimary = Color(0xFFYourHexCode); const Color kSecondary = Color(0xFFYourHexCode); - Save the file and hot-reload to see the changes.
Note: Use hot reload to see immediate changes for most updates. However, for certain changes (e.g., app name, package name), a full restart is required.
Adding or Editing Translations
The app uses slang_flutter for localization, which simplifies managing translations across multiple languages. Translations are stored in .i18n.json files located in the /lib/i18n folder. Each language has its own file (e.g., en.i18n.json for English, es.i18n.json for Spanish). To add or edit translations, follow these steps:
Step 1: Add a New Language
Duplicate an existing .i18n.json file (e.g., en.i18n.json) and rename it to match the new language code (e.g., fr.i18n.json for French). Translate the strings in the new file:
{
  "helloWorld": "Bonjour tout le monde!"
}
Step 2: Edit Existing Translations
Open the corresponding .i18n.json file (e.g., es.i18n.json for Spanish). Modify the string values:
{
  "helloWorld": "¡Hola a todos!"
}
Step 3: Apply Localization Changes
Run the following command to update the localization classes:
dart run slang_cliStep 4: Hot-Reload the App
Hot-reload the app to apply the changes.
Step 1: Understanding the Localization Structure
The app accesses localized strings using the t object, which is generated automatically by slang_flutter. For example:
t.action.save // Accesses the "save" key under the "action" namespace.The structure of the .i18n.json files mirrors this access pattern. For example:
{
  "action": {
    "save": "Save",
    "cancel": "Cancel"
  }
}
Step 2: Adding a New Language
- Duplicate an existing
.i18n.jsonfile (e.g.,en.i18n.json) and rename it to match the new language code. For example, for French:fr.i18n.json, for German:de.i18n.json. - Translate the strings in the new file. For example:
{ "action": { "save": "Enregistrer", "cancel": "Annuler" } } - Save the file and run the following command to update the localization classes:
dart run slang_cli - Restart the app to apply the changes.
Step 3: Editing Existing Translations
- Open the corresponding
.i18n.jsonfile for the language you want to edit (e.g.,es.i18n.jsonfor Spanish). - Modify the string values while keeping the keys unchanged. For example:
{ "action": { "save": "Guardar", // Updated translation "cancel": "Cancelar" } } - Run the following command to update the localization classes:
dart run slang_cli - Hot-reload the app to see the changes.
Step 4: Deleting a Language
- Remove the
.i18n.jsonfile for the language you want to delete (e.g.,fr.i18n.jsonfor French). - Remove references to the language from the code. If any part of the app uses keys specific to the removed language (e.g.,
t.action.save), replace the reference with a static string or use the default language. Example:t.action.save // Replace with: "Save" - Run the following command to update the localization classes:
dart run slang_cli - Restart the app to apply the changes.
Troubleshooting: If translations do not appear after running dart run slang_cli, ensure the .i18n.json file is correctly formatted and all required keys are present.
Step 5: Common Issues
- Missing Translations - If a translation is missing for a specific language, the app will fall back to the default language (English). Ensure that all required keys are present in every
.i18n.jsonfile. - Key Errors - Always keep the keys consistent across all
.i18n.jsonfiles. Changing a key in one file without updating others will cause runtime errors. - Supported Locales - You can find the list of supported locales here: Flutter Localizations Library.
Changing the App Font
The app ships with the Poppins font family. You can swap it for a different font in three steps:
- Add Your Font Files - Create a folder for your font under
/fonts(e.g.,fonts/MyFont/) and place all font weights you need inside it (e.g.,MyFont-Regular.ttf,MyFont-Bold.ttf). - Register the Font in
pubspec.yaml- Replace the Poppins entries under thefonts:section with your family:
Then runfonts: - family: MyFont fonts: - asset: fonts/MyFont/MyFont-Regular.ttf weight: 400 - asset: fonts/MyFont/MyFont-Bold.ttf weight: 700flutter pub getto register the new font. - Apply the Font in the Theme - Open
/lib/app/core/theme/_app_theme.dartand change the family name in the_textThememethod, then hot-restart the app:// Before return baseTheme.apply(fontFamily: 'Poppins'); // After return baseTheme.apply(fontFamily: 'MyFont');
Note: If you keep the old font files in /fonts/Poppins, remove them from pubspec.yaml or delete the folder to reduce app size.
Customizing the Splash Screen
The splash screen has two layers: the Flutter splash screen (shown while the app loads) and the native launch screen (shown by the OS before Flutter starts).
Flutter Splash Screen
/lib/app/pages/auth/splash/splash_view.dart.assets/app/app_splash_icon.png (referenced as DAppImages.splashLogo in /lib/app/core/static/images/_app_images.dart).app_splash_icon.png with your own image, keeping the same file name._theme.colorScheme.primary, which is kPrimary in /lib/app/core/theme/_app_colors.dart. Change kPrimary to recolor the splash background.splash_view.dart.Native Android Launch Screen
launch_background.xml in /android/app/src/main/res/drawable/ and /android/app/src/main/res/drawable-v21/ (default background: white)./android/app/src/main/res/drawable/ and reference it inside the layer-list:<item>
<bitmap
android:gravity="center"
android:src="@drawable/launch_image" />
</item>/android/app/src/main/res/values/styles.xml (LaunchTheme). It points android:windowBackground at @drawable/launch_background.Replacing the App Logo Everywhere
The in-app logo assets/app/app_icon.png (referenced as DAppImages.appIcon) appears in several places:
/lib/app/widgets/navigation_drawer/_navigation_drawer.dart)/lib/app/pages/auth/sign_in/sign_in_view.dart)/lib/app/pages/auth/sign_up/sign_up_view.dart)/lib/app/pages/auth/onboard/onboard_view.dart)/lib/app/pages/common/congratulation/congratulation_view.dart)Replace assets/app/app_icon.png with your own logo, keeping the same file name (a transparent background works best), then run:
flutter clean && flutter pub get && flutter runChanging the Launcher Icon Background Color
On Android, the adaptive launcher icon shows a background color behind your icon image:
icons_launcher.yaml and update adaptive_background_color (default: #FC8019)./android/app/src/main/res/values/colors.xml and update ic_launcher_background (default: #FFFC8019) to match.rps customize --icon-onlyadaptive_background_image in icons_launcher.yaml to your image path.Advanced Theme Customization
_app_colors.dart defines the color palette, while /lib/app/core/theme/_app_theme.dart maps those colors onto the whole app UI. If you need a deeper reskin than just kPrimary/kSecondary, edit the theme definitions in _app_theme.dart:
| UI Element | Theme Property |
|---|---|
| App bar | appBarTheme |
| Elevated / Filled / Outlined buttons | elevatedButtonTheme, filledButtonTheme, outlinedButtonTheme |
| Text fields | inputDecorationTheme |
| Tabs | tabBarTheme |
| Dividers | dividerTheme |
| Checkboxes & radios | checkboxTheme, radioTheme |
| Floating action button | floatingActionButtonTheme |
| Dropdown menus | dropdownMenuTheme |
For example, to change the button corner radius from 6 to 12:
static final _elevatedButtonTheme = ElevatedButtonThemeData(
  style: ElevatedButton.styleFrom(
    // ...
    shape: RoundedRectangleBorder(borderRadius: BorderRadius.circular(12)),
    // ...
  ),
);
After editing, hot-reload (or hot-restart for theme-level changes) to see the result.
Troubleshooting
- If the script fails, ensure the
customization.yamlfile exists and is correctly formatted, all required dependencies are installed (flutter pub get), and you have the necessary permissions to modify files. - For errors related to package name changes, ensure the new package name follows the standard structure (e.g.,
com.yourcompany.yourappname).
Debugging and Troubleshooting
Debugging is an essential part of app development. It helps you identify and resolve issues that may arise during customization or runtime. This section will guide you through common problems, debugging tools, and steps to ensure your app runs smoothly.
Common Issues and Solutions
| Issue | Symptoms | Solution |
|---|---|---|
| Missing Dependencies | Errors like "Undefined class" or "Missing plugin". | Run flutter pub get. |
| Localization Errors | Missing translations or fallback to the default language. | Ensure all .i18n.json files have consistent keys and run dart run slang_cli. |
| API Connection Issues | The app fails to fetch data from the backend. | Verify the baseUrl in _app_config.dart and check network permissions. |
| Package Name Conflicts | Build errors related to duplicate package names. | Ensure the package_name in customization.yaml is unique. |
| Image/Asset Loading Failures | Broken images or missing assets. | Verify asset paths in pubspec.yaml and ensure files exist in the correct directories. |
Debugging Tools
Flutter provides built-in tools to help you debug your app effectively:
- Logging and Breakpoints - Use
print()ordebugPrint()statements to log messages in the console, and set breakpoints in your IDE (Android Studio or VS Code) to pause execution and inspect variables. - Hot Reload and Hot Restart - Hot Reload quickly applies changes for UI updates or minor code changes; Hot Restart restarts the app while preserving state for more significant changes.
- Flutter Inspector - Available in Android Studio and VS Code, it allows you to inspect the widget tree, view layouts, and debug UI issues.
Running the App on Mobile Devices
Testing on Emulators - Open Android Studio and launch an emulator, then run:
flutter emulators --launch <emulator_id>
flutter run
Testing on Physical Devices - Enable Developer Options and USB Debugging on your Android device (tap Build Number 7 times in Settings > About Phone to enable Developer Options), connect the device, and run:
flutter devices
flutter run
Preparing for Release
- Testing in Release Mode - Run the app in release mode to identify potential issues:
flutter run --release. - Identifying Performance Bottlenecks - Use the Flutter Inspector to analyze performance metrics, and optimize widgets, animations, and network calls for better performance.
- Final Checklist Before Release - Verify all customizations are applied, ensure no critical errors or warnings appear when running
flutter doctor, and test the app on multiple devices and screen sizes.
General Troubleshooting Tips
- Always check the terminal for error messages.
- Use
flutter cleanto clear cached files if issues persist. - Consult the official Flutter documentation or community forums for advanced problems.
Debugging and troubleshooting are crucial steps in ensuring your app functions as expected. If you encounter any unresolved issues, don't hesitate to reach out to our Support Team for assistance.
Firebase Setup for Push Notifications
This app uses Firebase Cloud Messaging (FCM) to handle push notifications. To get this feature working in your own version of the app, you will need to set up a Firebase project and connect it to the app. This guide provides two ways to do this: the CLI Method (Recommended), a faster and more automated approach using the command line, and the Manual Method, a step-by-step approach using the Firebase console.
Note: The android/app/google-services.json and lib/firebase_options.dart files shipped with this app contain placeholder values only. You must run flutterfire configure with your own Firebase project to generate real configuration files before push notifications will work.
Creating a Firebase Project
- Go to the Firebase Console - Open your web browser and navigate to the Firebase Console.
- Create a New Project - Click on "Add project", give your project a name (e.g., "My Restaurant App"), accept the Firebase terms, and click "Continue".
- Google Analytics (Optional) - You can choose to enable Google Analytics for your project. It's recommended but not required for push notifications to work. Click "Continue".
- Finalize - If you enabled Analytics, you'll be prompted to configure it, then click "Create project". Firebase will take a moment to provision your new project.
Adding Your Android App to Firebase
- Select Your Project - From the Firebase console, open the project you just created.
- Add an Android App - On the project overview page, click the Android icon (or "Add app" and then select Android).
- Register App - Enter the Android package name (this must exactly match the
package_namedefined in yourcustomization.yamlfile), an optional app nickname, and optionally a debug signing certificate SHA-1. - Download Config File - Click "Register app". Firebase will then provide a
google-services.jsonfile for you to download.
CLI Method (Recommended)
Step 1: Install CLIs - If you don't have them installed, open your terminal and run:
# Install the Firebase CLI (requires Node.js and npm to be installed)
npm install -g firebase-tools

# Install the FlutterFire CLI
dart pub global activate flutterfire_cli
Step 2: Log in to Firebase - Log in to your Firebase account, which will open a browser window for you to authenticate:
firebase loginStep 3: Configure Your App - Navigate to the root directory of your Flutter project and run:
flutterfire configureThe CLI will ask you to select the Firebase project you created and which platforms to configure (select Android), then automatically fetch the google-services.json file and place it in the android/app/ directory, and generate the lib/firebase_options.dart file with the correct configuration. After the command finishes, your app is connected to Firebase.
Manual Method
Step 1: Place the google-services.json File - Take the file you downloaded from the Firebase console and move it into the android/app/ directory of your Flutter project.
Step 2: Add Firebase to Android Gradle Files - Ensure two Gradle files are set up correctly. This project uses the modern Gradle plugin management system with Kotlin DSL. In android/settings.gradle.kts, ensure the Google services plugin is declared in the plugins block:
plugins {
    // ...
    id("com.google.gms.google-services") version "4.3.15" apply false // Or the latest version
    // ...
}
And in android/app/build.gradle.kts, ensure the plugin is applied at the top of the file within the plugins block:
plugins {
    id("com.android.application")
    id("com.google.gms.google-services")
    id("dev.flutter.flutter-gradle-plugin")
}
Step 3: Generate firebase_options.dart - The lib/firebase_options.dart file is required to initialize Firebase in your Flutter app. The easiest way to get this is still with the flutterfire_cli. If you choose not to use the CLI at all, you would have to manually create lib/firebase_options.dart and populate it with the configuration values from your google-services.json file. This is tedious and error-prone, which is why the CLI method is highly recommended even if you place the JSON file manually.
An example structure for lib/firebase_options.dart would be:
import 'package:firebase_core/firebase_core.dart' show FirebaseOptions;
import 'package:flutter/foundation.dart' show defaultTargetPlatform, kIsWeb, TargetPlatform;

class DefaultFirebaseOptions {
  static FirebaseOptions get currentPlatform {
    // ... (logic to switch platform)
    switch (defaultTargetPlatform) {
      case TargetPlatform.android:
        return android;
      case TargetPlatform.iOS:
        // You would add your iOS config here if you had one
        throw UnsupportedError('DefaultFirebaseOptions have not been configured for iOS');
      // ...
    }
  }

  static const FirebaseOptions android = FirebaseOptions(
    apiKey: 'YOUR_API_KEY_FROM_JSON',
    appId: 'YOUR_APP_ID_FROM_JSON',
    messagingSenderId: 'YOUR_SENDER_ID_FROM_JSON',
    projectId: 'YOUR_PROJECT_ID_FROM_JSON',
    storageBucket: 'YOUR_STORAGE_BUCKET_FROM_JSON',
  );
}
Final Step: Run the App
flutter runIf the app builds and runs without any Firebase-related errors, the setup is complete. Your app is now ready to receive push notifications.
Managing User Roles & Staff Designations
The app has two distinct concepts for user access: user roles (login-level identity) and staff designations (job function label). Understanding this separation is key to setting up your team correctly.
User Roles (Login Identity)
There are four login roles. Chef and Kitchen get a dedicated UI panel; all other staff log in as staff and access features based on assigned permissions.
| Role | Dedicated UI? | Description |
|---|---|---|
shopOwner | Main panel | Full access, no permission restrictions. Created via backend seeder. |
staff | Main panel | Permission-scoped access. All designations below (Waiter, Manager, etc.) use this role. |
chef | Chef/Kitchen Panel | Gets the ChefKitchen bottom-nav with Kitchen, Orders, Reports, and Profile tabs. |
kitchen | Chef/Kitchen Panel | Same panel as Chef - Kitchen, Orders, Reports, and Profile tabs. |
How to create a Chef or Kitchen user:
- Log in as Shop Owner.
- Navigate to Roles & Permissions.
- Tap Add New.
- Select the staff member and assign the role (
cheforkitchen) from the role dropdown. - Set the appropriate module permissions (e.g., kitchen access, KOT orders, reports).
- Save. The user can now log in and will be automatically redirected to the Chef/Kitchen panel.
Staff Designations (Job Function Labels)
Designations are simple labels attached to staff records. They do not change the login role - all designations below log in as the staff role and access features based on permissions assigned in Roles & Permissions.
| Designation | Used In |
|---|---|
| Waiter | Order forms (DineIn), quotations - waiter dropdown for order assignment. |
| Manager | General staff management. |
| Cleaner | Staff listing. |
How to create a Waiter staff member:
- Log in as Shop Owner.
- Navigate to Staff Management → Add Staff.
- Enter the staff details and select Waiter as the designation.
- Save. The staff member now appears in the waiter dropdown when creating dine-in orders or quotations.
- (Optional) To grant this staff member login access, go to Roles & Permissions, add a new entry, select this staff member, and assign the relevant module permissions.
How Permissions Work
Each feature module (Sales, Purchases, Kitchen, Inventory, Reports, etc.) has five permission actions:
| Action | Description |
|---|---|
| View | Can see/list records. |
| Create | Can create new records. |
| Update | Can edit records. |
| Delete | Can delete records. |
| View All Data | Can view all records (not just own). |
Permissions are assigned per staff member via the Roles & Permissions screen. Shop Owners have unrestricted access by default (no permission configuration needed).
Quick Reference: Who Gets Which UI
                      ┌─ shopOwner ──→ Main BottomNav (full access)
                      │
                      ├─ staff ──────→ Main BottomNav (permission-scoped)
                      │     │
                      │     ├── designation: waiter ──→ waiter dropdown in orders
                      │     ├── designation: manager ──→ no special UI
                      │     └── designation: cleaner ──→ no special UI
                      │
User login ───────────┤
                      ├─ chef ───────→ ChefKitchen BottomNav
                      │     │              ├── Kitchen List
                      │     │              ├── KOT Orders
                      │     │              ├── KOT Report
                      │     │              └── Profile
                      │
                      └─ kitchen ────→ ChefKitchen BottomNav (same panel as chef)
Common Questions
Q: Why don't Waiters get their own login panel?
A: Waiters are staff designations, not login roles. They log in as the staff role and get permission-scoped access to the main panel. The waiter designation is used to filter staff lists so they can be assigned to orders.
Q: How do I give a waiter access to create orders?
A: Go to Roles & Permissions, add the staff member, and enable Sales → Create. They'll then be able to create orders from the main panel.
Q: Can a chef also be a manager?
A: No. chef is a login role, not a designation. If someone needs both chef panel access and manager-level permissions, they should be created as a chef role user with additional module permissions assigned via Roles & Permissions.
Updating to a New Version
We regularly publish updates with new features and bug fixes. Because your customizations live in a small, known set of files, updating is safe: you replace the app source code with the latest version, then re-apply your customizations. After the update, you keep the exact same app look, branding, and configuration while getting everything new in the latest release.
What Gets Replaced vs. What You Keep
The project is split into app source code (replaced on every update) and your custom files (re-applied by you after the update).
App source code (replaced by updates):
lib/ source files, except the custom files listed belowandroid/ and ios/ platform projectspubspec.yaml and pubspec.lockassets/icons/, assets/lottie/, assets/shapes/icons_launcher.yamlYour custom files (re-applied after the update):
| File / Folder | What It Contains |
|---|---|
customization.yaml | Your app name, package name, org domain, and base URL. |
assets/app/ | In-app logo, splash icon, and launcher icon. |
assets/images/onboard/ | Your onboarding images. |
assets/fonts/ | Your custom fonts. |
lib/i18n/*.i18n.json | Your translations. |
lib/app/core/theme/_app_colors.dart | Your color palette. |
lib/app/core/theme/_app_theme.dart | Your theme customizations. |
android/app/google-services.json | Your Firebase configuration. |
lib/firebase_options.dart | Your Firebase configuration. |
Before You Update: Back up Your Custom Files
- Copy the entire project folder to a safe location (for example
my-restaurant-app-backup). This is the simplest and safest backup and guarantees nothing is lost. - If you prefer a smaller backup, copy only the custom files listed above. At minimum, make sure you have
customization.yaml, your icon/logo files, and your Firebase files (google-services.jsonandfirebase_options.dart).
Method 1: Replace and Re-Apply (Recommended)
This method works for everyone, with or without Git.
- Download the latest version - Download the latest source zip from your CodeCanyon downloads page and review the included changelog so you know which new features and fixes are coming, and whether any new translation keys or config options were added.
- Extract the new source into a fresh folder (for example
restaurant_app_v2.1). From now on, all work happens inside the new folder. Do not mix old and new source files. - Re-apply your customizations - Copy your backed-up custom files into the new project:
customization.yamlassets/app/(launcher icon, app icon, splash icon)assets/images/onboard/(only if you customized the onboarding images)assets/fonts/plus your font entries inpubspec.yamllib/i18n/*.i18n.jsonlib/app/core/theme/_app_colors.dartand_app_theme.dartandroid/app/google-services.jsonandlib/firebase_options.darticons_launcher.yaml(only if you modified it)
- Regenerate and run - execute the following commands:
flutter clean flutter pub get dart run slang_cli rps customize flutter run - Verify - Confirm your app name, package name, icon, colors, fonts, and translations are unchanged, test the new features and bug fixes listed in the changelog, and if you use Firebase push notifications, confirm the app still connects using your
google-services.jsonandfirebase_options.dart.
Important - Copy your customization.yaml before running rps customize (Step 4). The new source ships with placeholder values, and the script applies whatever is in customization.yaml.
Note on new config options - If the latest version added new fields to customization.yaml, keep your values for the existing fields and add the new fields with your chosen values.
Note on translations - If the latest version added new translation keys, your old .i18n.json files will be missing them. Missing keys fall back to English automatically, but to keep every language complete, add translations for the new keys (refer to the changelog or compare with the new en.i18n.json).
Note on theme files - If you only changed color values, copying your _app_colors.dart and _app_theme.dart over the new ones is fine. If the new version restructured these files, open the new versions and re-apply your values inside them instead of overwriting.
Method 2: Version-Controlled Update (Advanced, Git Users)
If you keep your project in Git, you can track both your customizations and the vendor updates:
- Commit your current state -
git init,git add -A,git commit -m "my customized version". - Bring in the new version - Extract the new version zip into a temporary folder, copy the new version's source files over your project (keeping your custom files), and review the incoming changes with
git diffbefore committing anything. - Re-apply and regenerate - Follow the re-apply and regeneration steps from Method 1.
- Commit the update -
git add -A,git commit -m "update to vX.Y".
Common Questions
Q: Will updating erase my customizations?
A: Only if you overwrite your custom files with the new versions. If you follow the backup and re-apply steps above, your app name, icons, colors, fonts, translations, and Firebase config are preserved.
Q: Do I need to re-run rps customize after updating?
A: Yes. It regenerates your app name, package name, org domain, base URL, and launcher icon from customization.yaml against the new source.
Q: What if the new version changed a file I customized?
A: For simple value changes (colors, strings, icons), copy your file over. For structural changes, re-apply your values inside the new version's file. The changelog included with the update usually notes important changes.
Q: Do I need to set up Firebase again?
A: No. Your google-services.json and firebase_options.dart carry over. Just make sure you copy them back after replacing the source, then run flutter run to confirm push notifications still work.
FAQ (Frequently Asked Questions)
Here are answers to the most common questions we receive about customizing and running the app.
1. How do I change the app name?
Answer: To change the app name, you can either use the customization script or manually update it:
- Using the Script: Update the
app_namefield in thecustomization.yamlfile and run:rps customize --appName-only - Manually: Open the
AndroidManifest.xmlfile located atandroid/app/src/main/AndroidManifest.xmland modify theandroid:labelattribute.
2. How do I update the app's package name?
Answer: The package name can be updated using the customization script or manually:
- Using the Script: Update the
package_namefield in thecustomization.yamlfile and run:rps customize --packageName-only - Manually: Replace all instances of the old package name with the new one:
- Navigate to
android/app/src/main/kotlin/com/acnoo/restaurant_app/MainActivity.kt. - Press
Ctrl + Shift + R(or equivalent shortcut) to replace the old package name with the new one across the entire project. - Ensure the new package name follows the structure (e.g.,
com.yourcompany.yourappname).
- Navigate to
3. How do I change the backend API URL?
Answer: You can update the backend API URL either manually or by using the customization script.
Option 1: Manually Update the baseUrl
- Open the
_app_config.dartfile located at/lib/app/core/static/app_config/_app_config.dart. - Modify the
baseUrlconstant:const String baseUrl = 'https://your-new-domain.com';
Option 2: Use the Customization Script
The app includes a powerful customization script that allows you to easily update the backend API URL along with other configurations. Follow these steps:
- Prepare Your
customization.yamlFile- Locate the
customization.yamlfile in the root directory of the project. - Open the file and update the
base_urlfield:base_url: "https://your-new-domain.com"
- Locate the
- Run the Script
- Open a terminal in the root directory of the project.
- Use the following command to run the script:
rps customize --baseUrl-only - This will update only the
baseUrlwithout affecting other configurations.
- Verify Changes
- Restart the app to ensure the new backend API URL is applied.
- Test the app to confirm it connects successfully to the updated domain.
Note: Make sure to replace https://your-new-domain.com with the correct URL of your backend API. And Remember NOT to put a slash (/) at the end of the URL.
4. What should I do if flutter doctor shows errors?
Answer: If flutter doctor reports issues:
- Address each error individually:
- For missing Android licenses, run:
flutter doctor --android-licenses - For missing dependencies, install the required tools (e.g., Android SDK Command Line Tools).
- For missing Android licenses, run:
- After resolving the issues, re-run
flutter doctorto verify that everything is configured correctly.
5. How do I add a new language for localization?
Answer: To add a new language:
- Duplicate an existing
.i18n.jsonfile (e.g.,en.i18n.json) and rename it to match the new language code (e.g.,fr.i18n.jsonfor French). - Translate the strings in the new file.
- Run the following command to update the localization classes:
dart run slang_cli - Restart the app to apply the changes.
6. Why are my translations not updating in the app?
Answer: If translations are not updating:
- Ensure all
.i18n.jsonfiles have consistent keys. - Run the following command to regenerate the localization classes:
dart run slang_cli - Hot-reload or restart the app to see the changes.
7. How do I replace the onboarding screen images?
Answer: To replace the onboarding screen images:
- Navigate to the
/assets/images/onboardfolder. - Replace the existing images (
onboard_01.png,onboard_02.png,onboard_03.png) with your custom ones. - Ensure the new images are in
.pngformat and have the same filenames. - Restart the app to see the updated images.
8. How do I change the app icon?
Answer: To change the app icon:
- Replace the existing icon files in the
/assets/appfolder (app_icon.png,app_launcher_icon.png). - Run the customization script:
rps customize --icon-only - Restart the app to see the updated icon.
9. What should I do if the app crashes after making changes?
Answer: If the app crashes:
- Check the terminal or console for error messages.
- Use
flutter cleanto clear cached files and then run:flutter pub get - Verify that all customizations (e.g., package name, API URL) are correctly applied.
- Test the app on a different device or emulator to rule out device-specific issues.
10. How do I build a release APK?
Answer: To build a release APK:
- Open a terminal and navigate to the project directory.
- Run the following command:
flutter build apk --release - Locate the APK in the
build/app/outputs/flutter-apk/directory.
11. Why is my app not connecting to the backend?
Answer: If the app fails to connect to the backend:
- Verify the
baseUrlin_app_config.dartis correct. - Ensure the backend server is running and accessible.
- Check network permissions in the
AndroidManifest.xmlfile:<uses-permission android:name="android.permission.INTERNET" />
12. How do I test the app on a physical device?
Answer: To test the app on a physical device:
- Enable Developer Options and USB Debugging on your Android device.
- Connect the device to your computer via USB.
- Run the following command to list connected devices:
flutter devices - Start the app on the device:
flutter run
13. What should I do if I encounter missing dependencies?
Answer: If you encounter missing dependencies:
- Run the following command to fetch dependencies:
flutter pub get - If the issue persists, delete the
pubspec.lockfile and runflutter pub getagain. - Ensure your Flutter SDK is up-to-date by running:
flutter upgrade
HELP & SUPPORT
Free support policy includes troubleshooting, technical assistance with the product only. It does not include any customization, additional features integration or concerns about third- party plugins compatibility. But, support is applied to plugin(s) we have developed and integrated ourselves. We appreciate your understanding!
If you need assistance and information on purchased product that is not covered in documentation, mail them on our support.
You can expect answer within 24-48 hours, usually as soon as possible in the order they were received.
Additionally, if any email has no response from the item owner for more than 7 days, that support email will be archived by default. However, if you need further assistance, you can mail us again.